
Oh, homemade caramel apples! Just thinking about them brings back such vivid memories of Grandma’s kitchen, you know? That cozy, sugary smell filling the air during fall, or even for a fun Halloween treat. There’s just something so magical about a perfectly glossy caramel apple, all swirled and coated, maybe with some chopped nuts or sprinkles. What I love most about THIS caramel apple recipe is that it’s actually doable at home, and we’re going to nail that gorgeous, sticky coating that stays put. Trust me, it’s way easier than you might think to get that professional look and taste right in your own kitchen!
- Why You'll Love This Homemade Caramel Apple Recipe
- Gather Your Ingredients for the Perfect Caramel Apple
- Essential Equipment for Making Caramel Apples
- Step-by-Step Guide to Making Caramel Apples
- Tips for How to Keep Caramel from Sliding Off Apples
- Creative Caramel Apple Toppings Ideas
- Storing Your Homemade Caramel Apples
- Frequently Asked Questions About Caramel Apples
- Estimated Nutritional Information
- Share Your Caramel Apple Creations!
Why You’ll Love This Homemade Caramel Apple Recipe
If you’re dreaming of those delightful fall carnival treats or want to bring some fair food at home magic to your kitchen, you are going to adore this recipe. Here’s the scoop on why it’s a winner:
- Foolproof Caramel: We’re talking a super reliable caramel that’s gorgeous and glossy, and most importantly, it actually sticks to the apple!
- Incredible Flavor: The perfect balance of sweet and buttery caramel is just divine with crisp apples.
- Totally Customizable: Load them up with nuts, sprinkles, or even chocolate drizzle – the possibilities are endless!
- So Much Fun to Make: It’s a fantastic activity for kids and adults alike. Pure kitchen joy!
Gather Your Ingredients for the Perfect Caramel Apple
Alright, let’s talk about what you need to make these absolutely dreamy homemade caramel apples! It’s really not complicated, and having everything ready makes the process so much smoother. For the best flavor and texture, I always reach for good, crisp apples. Gala, Fuji, or Honeycrisp are my go-to choices because they’re naturally sweet and have a nice firm bite that holds up perfectly against that gooey caramel.
You’ll need about six medium-sized apples, and make sure you have six sturdy wooden popsicle sticks or, even better, those special candy apple sticks. They really hold things together nicely! For the star of the show, the caramel itself, we’re using two cups of granulated sugar – just regular white sugar is perfect here. Then, about half a cup of light corn syrup, which is key for that smooth, non-crystallized texture. And the magic ingredient for creamy richness? One cup of heavy cream! Plus, a teaspoon of vanilla extract for that lovely background flavor and a pinch of salt to balance all that sweetness. Oh, and don’t forget your favorite toppings – chopped nuts, colorful sprinkles, or even mini chocolate chips are fantastic additions!
Essential Equipment for Making Caramel Apples
To make sure your caramel apple adventure goes off without a hitch, you’ll want a few trusty tools in your kitchen arsenal. First up is a heavy-bottomed saucepan – this is super important for even heating and preventing your caramel from scorching. You’ll also need a reliable candy thermometer; getting that temperature just right is key to perfect caramel. And don’t forget a baking sheet lined with parchment paper or a silicone baking mat. This is where your beautiful creations will cool down without sticking!
Step-by-Step Guide to Making Caramel Apples
Okay, deep breaths! Making these gorgeous caramel apples is totally doable. It’s all about following a few simple steps and trusting the process. Think of it like a little kitchen dance – we move with purpose!
Preparing the Apples for Dipping
First things first, let’s get those apples ready. If your apples feel a little waxy, don’t worry! That wax can make the caramel slip right off, and nobody wants that. The best way to tackle it is to give them a good scrub under hot water with a stiff brush. You can even dip them really quickly into boiling water – just a few seconds! – and then scrub. The most important thing is to make SURE they are bone dry before you even think about dipping them. Seriously, dry them thoroughly with a clean towel. Then, take your lollipop sticks and push them firmly into the stem end of each apple. You want them to go in deep enough so they don’t wiggle out!
Achieving the Perfect Caramel Consistency
Now for the magic sauce: the caramel! Grab a heavy-bottomed saucepan – this is your best friend for even cooking. Combine your sugar and corn syrup right in there. Give it a quick stir just to get the sugar wet. Now, here’s where we’re patient. Cook it over medium heat, stirring just until the sugar dissolves. Once it’s dissolved, STOP stirring! Let it come to a boil, and keep an eye on your candy thermometer. You’re aiming for 280°F (138°C). Once it hits that, carefully, and I mean *carefully*, pour in the heavy cream. It’s going to bubble up like crazy, so stand back a bit! Gently stir until it’s all smooth again. Keep cooking and stirring occasionally until your thermometer reads 245°F (118°C). That’s the soft-ball stage, and it’s perfect for that chewy, not-too-hard caramel apple coating. Take it off the heat and stir in that vanilla extract and salt. Let it cool for just a few minutes – you want it thick but still pourable.
Dipping and Decorating Your Caramel Apples
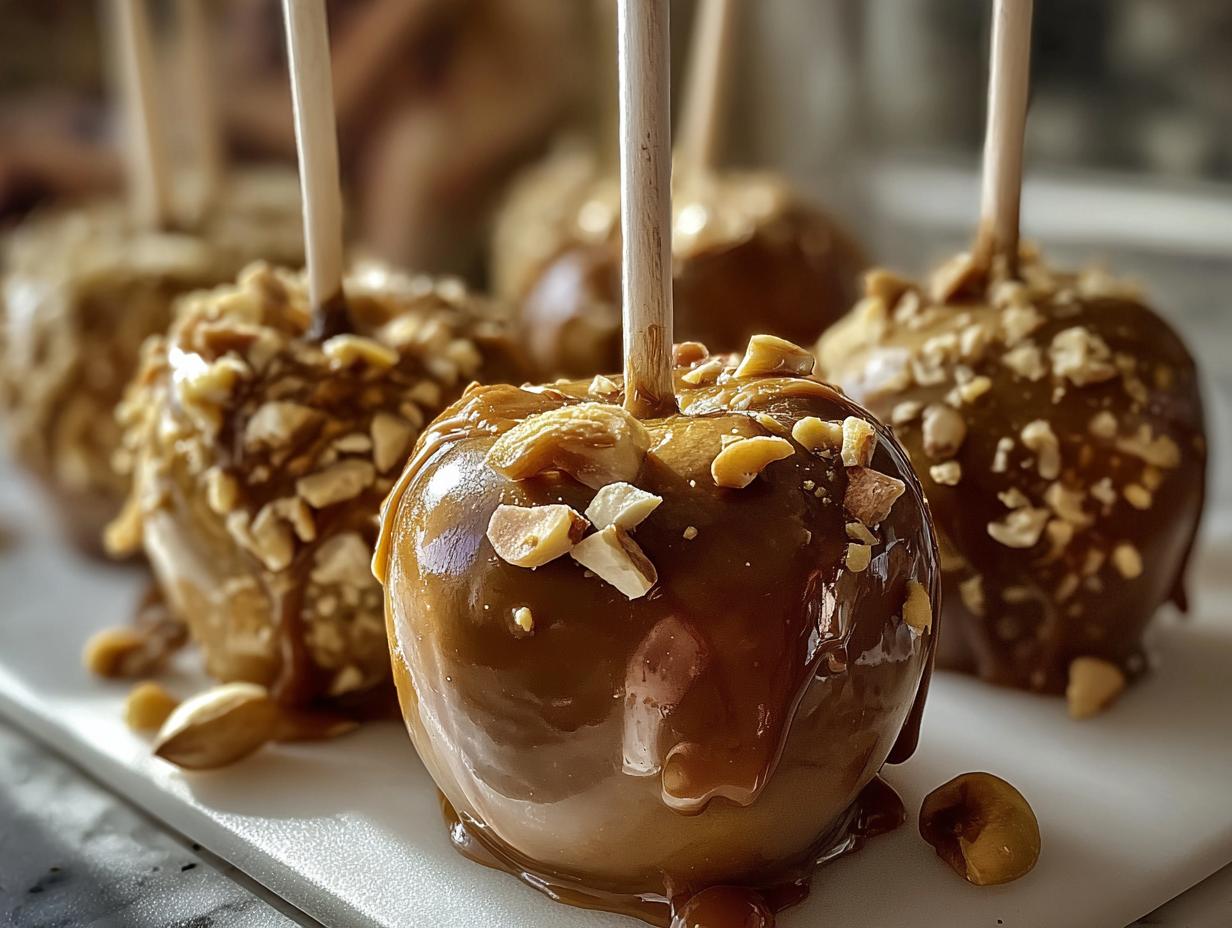
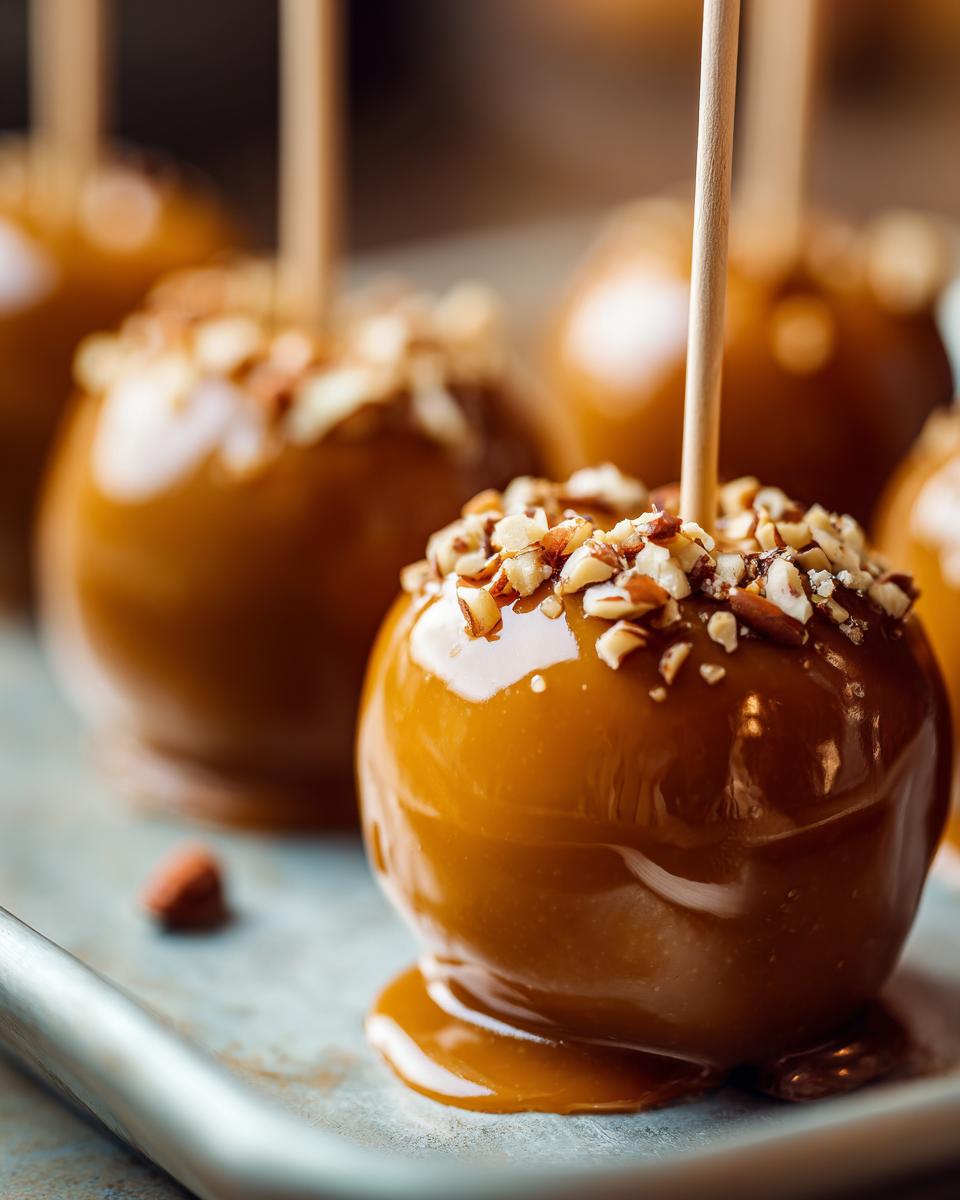
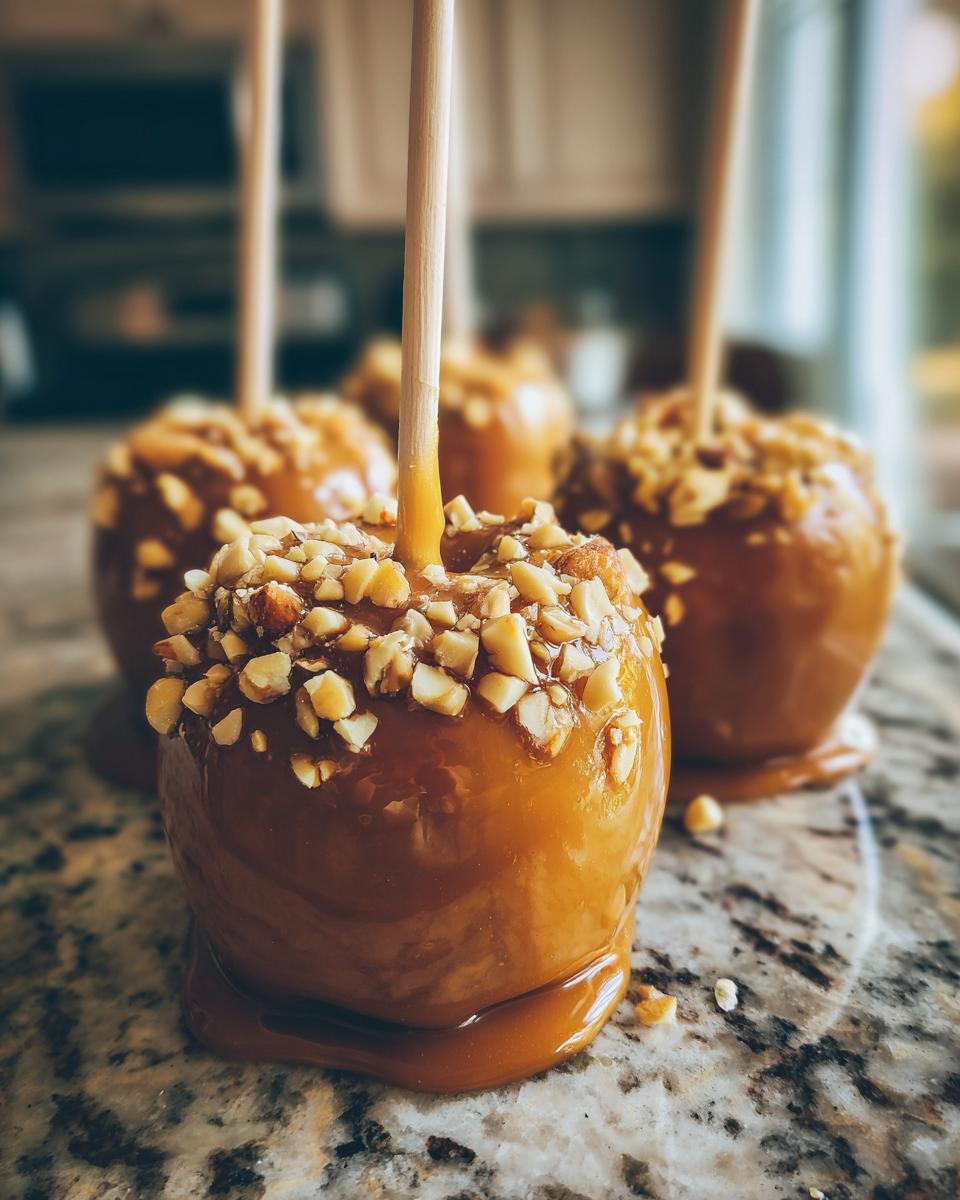
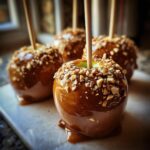
This is the fun part where your beautiful caramel apple really starts to take shape! Tilt your pan of slightly cooled caramel and dip each apple in, rolling it around to get a nice, even coating. Let any extra caramel drip back into the pan – you don’t want giant blobs. Place your perfectly coated apple onto that prepared baking sheet. Now, work quickly! Before the caramel sets, sprinkle on your favorite toppings. Whether it’s crunchy chopped nuts, fun sprinkles, or even a drizzle of melted chocolate – go wild! These toppings not only look amazing but add extra texture and flavor to your homemade caramel apples. Your imagination is the limit with these caramel apple toppings ideas.

Tips for How to Keep Caramel from Sliding Off Apples
Oh, the dreaded caramel slide! I’ve totally been there, and it’s so frustrating when you’ve worked hard on your beautiful caramel apples, only to have the coating start oozing off. The number one trick for how to keep caramel from sliding off apples is all about that prep work we talked about! Making sure those apples are super clean and, most importantly, completely dry is probably the biggest factor. It really helps the caramel grab onto the apple!
Another thing that helped me a TON, especially when I was first learning, was letting the caramel cool just the right amount. Not too hot, or it’s too runny and just slides. Not too cool, or it gets thick and clumpy. I found that letting it sit off the heat for about 5-7 minutes, until it’s thickened slightly but still easily pourable, is the sweet spot. It’s almost like thick honey consistency. It might sound simple, but getting that balance right makes all the difference in the world for a perfectly coated apple. You can even pop your baking sheet with the dipped apples in the fridge for just a few minutes to help things set up quickly if you’re in a hurry, though room temperature is usually best for the final firming. It’s sort of like how we try to get the perfect consistency for our homemade churros recipe – timing is everything!
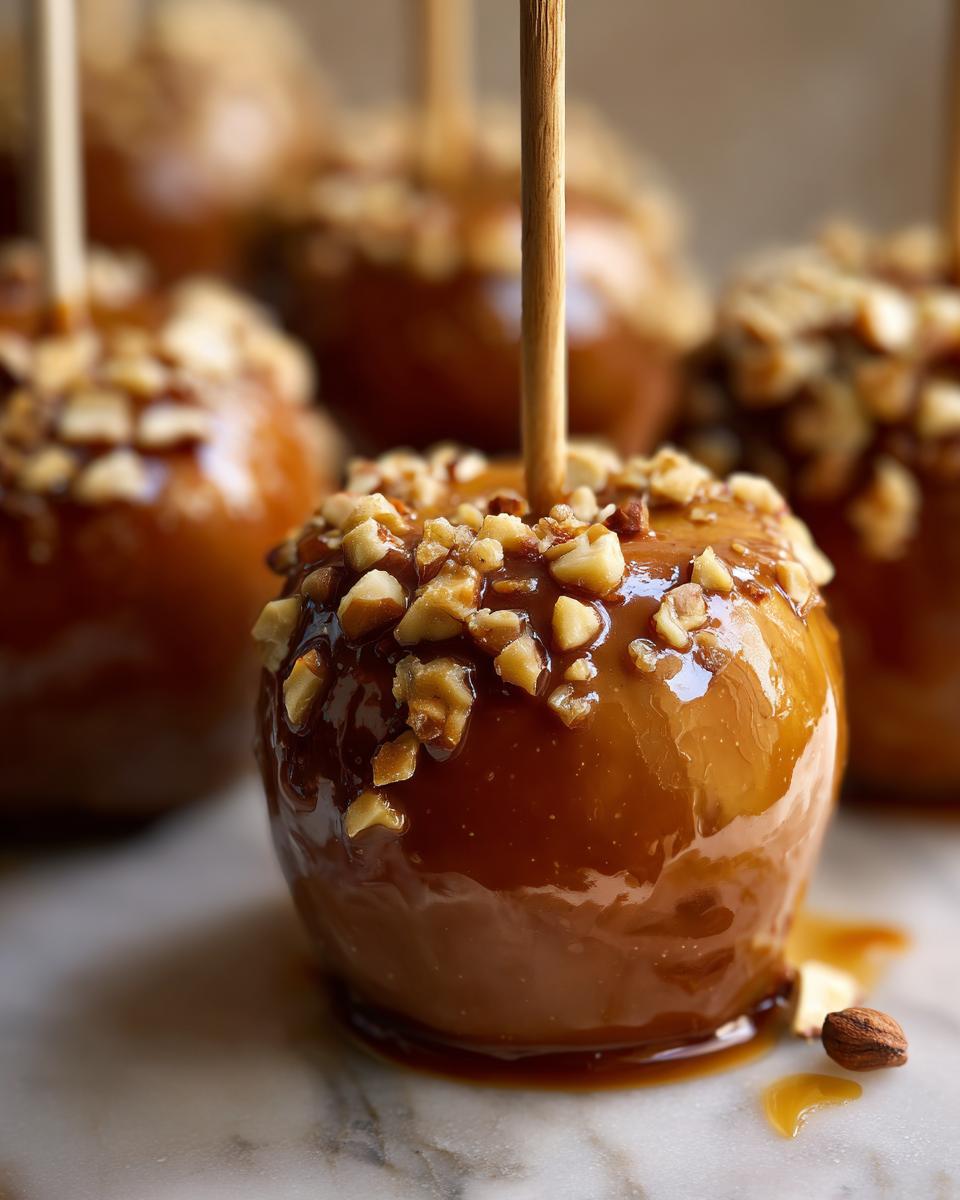
Creative Caramel Apple Toppings Ideas
Okay, so you’ve got your beautiful, glossy caramel apples all ready to go, but now comes the REALLY fun part – the toppings! Beyond just chopped nuts or colorful sprinkles, there are SO many ways to dress these up. They make for the most charming fall carnival treats or super cute Halloween party favors. Have you ever tried drizzling them with melted white chocolate or dark chocolate after the caramel sets a bit? It looks so fancy! For a real crowd-pleaser, think crushed pretzels for a sweet and salty combo, or even some shredded coconut. Mini M&Ms are always a hit, especially for kids! You can even get really creative and do a mix, like pairing chopped pecans with a swirl of white chocolate. It really elevates the whole experience and makes them feel extra special, almost like a fun dessert alternative you’d find from one of the {best meal delivery services}, but way more fun to make! Check out my chocolate chip banana bread for more ideas on fun flavor pairings!
Storing Your Homemade Caramel Apples
Alright, you’ve made these gorgeous caramel apples, and now you’re wondering how to keep them perfect, right? Storing them is actually pretty simple, but there’s one big no-no you really want to avoid. Definitely don’t put them in the refrigerator! I learned this the hard way – the cold makes the caramel get all sticky and weird, and it won’t be as crisp. What you want to do is find a cool, dry place on your counter or in a pantry. They’ll stay lovely for a day or two like that. These are sort of like my chocolate mug cake recipes in that they’re best enjoyed fresh, but following these caramel apple storage tips makes them last!
Frequently Asked Questions About Caramel Apples
Got a few caramel apple questions buzzing around? I totally get it! Making them can feel a little tricky sometimes, but once you know a few secrets, you’ll be a pro. Let’s dive into some common things people ask, including how to keep things from getting too hard or messy!
Why is my caramel apple candy hard?
Oh no, hard caramel! That usually happens if the sugar mixture cooks a few degrees too high. Always use a candy thermometer and try not to let it go past that 245°F (118°C) soft-ball stage. If it gets too hot, it can turn into rock candy! Make sure you’re stirring gently after adding the cream, too.
Can I make caramel apples ahead of time?
Yes, you totally can! They’re actually great to make a day in advance, especially for parties. Just make sure they cool completely at room temperature, and then store them in a cool, dry spot, away from any humidity. Remember, no fridge for these beauties! They’re almost as robust as my easy peach cobbler recipe when it comes to sitting out for a bit.
What’s the best way to package caramel apples for parties?
For parties, especially if you’re thinking Halloween party favors or a fun kids dessert station, personal packaging is key! Clear cellophane bags work like a charm. You can tie them off with a cute festive ribbon or twine. It keeps them fresh and makes them look super professional and tidy, so everyone gets their own perfect treat!
Estimated Nutritional Information
Just a heads-up, these numbers are estimates because everyone loves their caramel apples a little differently! This is based on one apple with just the basic caramel coating. If you add nuts, sprinkles, or extra chocolate drizzle, that will change things up a bit. So, think of it as a good ballpark figure – usually around 450 calories, a good chunk of sugar (about 70g), some fat (around 20g), and the rest of the good stuff like carbs and a little protein. Enjoy them!
Share Your Caramel Apple Creations!
Now it’s YOUR turn to shine! I really hope you give these homemade caramel apples a try. If you do, won’t you come back and leave a comment below? I’d just love to hear how they turned out for you, or if you tried any super fun topping combinations! If you snap a pic, make sure to tag us on social media – seeing your creations makes my whole day! You can also reach out directly through my contact page. Happy baking!
PrintHomemade Caramel Apples
Learn how to make glossy, homemade caramel apples with your favorite toppings. This recipe addresses common issues like caramel sliding and provides tips for preparing and storing your treats.
- Prep Time: 20 min
- Cook Time: 20 min
- Total Time: 40 min
- Yield: 6 servings 1x
- Category: Dessert
- Method: Stovetop
- Cuisine: American
- Diet: Vegetarian
Ingredients
- 6 medium apples (Gala, Fuji, or Honeycrisp recommended)
- 6 wooden popsicle sticks or candy apple sticks
- 2 cups granulated sugar
- 1/2 cup light corn syrup
- 1 cup heavy cream
- 1 teaspoon vanilla extract
- 1/4 teaspoon salt
- Optional toppings: chopped nuts, sprinkles, mini chocolate chips
Instructions
- Wash apples thoroughly. If apples are waxed, scrub them with a stiff brush under hot water or dip them briefly in boiling water to remove the wax. Dry apples completely.
- Insert a wooden stick firmly into the stem end of each apple.
- Line a baking sheet with parchment paper or a silicone baking mat.
- In a heavy-bottomed saucepan, combine sugar and corn syrup. Stir until sugar is moistened.
- Cook over medium heat, stirring until sugar dissolves. Stop stirring and bring the mixture to a boil.
- Cook without stirring until the mixture reaches 280°F (138°C) on a candy thermometer.
- Slowly and carefully pour in the heavy cream. The mixture will bubble up. Stir gently until smooth.
- Continue to cook, stirring occasionally, until the caramel reaches 245°F (118°C) or the soft-ball stage.
- Remove from heat. Stir in vanilla extract and salt.
- Let the caramel cool for a few minutes until slightly thickened but still pourable.
- Dip each apple into the caramel, tilting the pan to coat evenly. Allow excess caramel to drip off.
- Place dipped apples on the prepared baking sheet.
- Immediately add your desired toppings before the caramel sets.
- Let the caramel apples cool completely at room temperature until the caramel is firm.
Notes
- For a glossier finish, you can dip the apples a second time after the first layer has set slightly.
- If your caramel is too thick, you can gently reheat it over low heat. If it’s too thin, let it cool a bit longer.
- Store caramel apples in a cool, dry place. Avoid refrigeration, as it can make the caramel sticky.
- For parties, consider individual cellophane bags for packaging.
Nutrition
- Serving Size: 1 apple
- Calories: 450
- Sugar: 70g
- Sodium: 50mg
- Fat: 20g
- Saturated Fat: 12g
- Unsaturated Fat: 8g
- Trans Fat: 0g
- Carbohydrates: 75g
- Fiber: 3g
- Protein: 1g
- Cholesterol: 40mg