

Oh, friends, you just can’t beat that feeling when the air gets crisp and you know it’s time to bake something truly cozy. For me, nothing says ‘welcome home’ like the smell of spiced apples wafting from my oven. I think this is because my grandmother always had a beautiful, tender baked apple ready for me after school in the fall. It was always simple, but boy, did it taste like magic!
Forget overly complicated desserts; this recipe is about pure, comforting joy. We’re making the ultimate Stuffed Cinnamon Baked Apple, packed tight with a crunchy, buttery oat crumble that bakes right into the fruit. Trust me, once you try this—especially paired with a warm apple cider cocktail on the side—you’ll be making this all season long. It’s the recipe my heart goes back to every single time the temperatures drop!
- Why This Stuffed Baked Apple Recipe is Your New Favorite Cozy Autumn Dessert
- Gathering Ingredients for the Best Baked Apple Filling
- Step-by-Step Instructions: How to Bake Apples in Oven Perfectly
- Tips for Success Making Cinnamon Baked Apples
- Variations for Stuffed Baked Apples
- Storage and Reheating Instructions for Baked Apple
- Serving Suggestions: Pairing Your Baked Apple
- Frequently Asked Questions About Baked Apple Recipes
- Finding Your Next Favorite Fall Apple Recipes
- Finding Your Next Favorite Fall Apple Recipes
Why This Stuffed Baked Apple Recipe is Your New Favorite Cozy Autumn Dessert
This isn’t just another dessert, honestly. It’s pure nostalgia wrapped up in warm spices! We’re talking about the perfect marriage of textures here—that tender, fork-soft baked fruit against that perfectly crisp, browned oat topping. It hits every note you want in a Comfort Food Apple Dessert.
If you’re searching for the best Cozy Autumn Desserts, this is it. It’s simple enough for a weeknight but feels special enough for company. I just can’t get enough of how amazing my kitchen smells while these are in the oven. You absolutely need to check out my recipe for cinnamon oatmeal if you love those flavors!
Key Details for Your Perfect Baked Apple
Setting expectations upfront is just basic kindness, right? This way, you know exactly what you’re committing to. When you’re ready to bake, here are the numbers you need to know for these lovely whole baked apples:
- Prep Time: 15 glorious minutes
- Cook Time: A smooth 45 minutes in the oven
- Total Time: Just one hour to happiness!
- Yield: Perfect for 4 people (or 2 if you happen to be very hungry!)
Gathering Ingredients for the Best Baked Apple Filling
Okay, let’s talk shopping! The beauty of this baked apple recipe is that it uses simple staples, but the quality really shines through. I like to keep these ingredients stocked during the fall season so I can whip these up whenever the craving hits! Make sure you grab four nice, firm apples—Honeycrisp or Granny Smith are my go-tos because they hold their shape so well and don’t turn to mush.
We need the good stuff for that amazing filling, too. It’s just oats, brown sugar, flour, and those cozy spices. If you’re like me and you’ve recently looked into making things a little lighter, you can absolutely adjust this to make Healthy Baked Apples; maybe swap out half the brown sugar for pure maple syrup from my apple butter slow cooker recipe! Here is what you need:
- 4 large firm apples (Honeycrisp or Granny Smith work best!)
- 1/2 cup rolled oats
- 1/4 cup packed brown sugar
- 2 tablespoons all-purpose flour
- 1 teaspoon ground cinnamon
- 1/4 teaspoon ground nutmeg
- Pinch of salt
- 4 tablespoons cold unsalted butter, cut into small pieces
- 2 tablespoons water
- 1 tablespoon lemon juice (this is for the apples, not the filling!)
Ingredient Notes and Simple Substitutions
Choosing the right apple is honestly half the battle for a successful baked apple. You want something that’s firm enough to stand up to the oven heat without completely collapsing. Crunchy apples all the way!
Now, for the filling substitutions—feel free to get creative! If you want more crunch for your crumble, toss in a couple of tablespoons of chopped pecans or walnuts before mixing. They toast up so nicely! For the sweetener, pure maple syrup is a fantastic swap for the brown sugar here if you want hints of woodsy flavor. Honestly, this recipe is so forgiving, which is why I love sharing it.
Step-by-Step Instructions: How to Bake Apples in Oven Perfectly
This is where the magic happens! Don’t worry if you’ve never cored an apple before; it’s surprisingly easy once you get the hang of it. We’re aiming for tenderness, not mush, so paying attention to the little details in the beginning really pays off. If you love this kind of comforting baked treat, you have to check out my moist cinnamon apple cake recipe!
Preparing the Apples and Making the Oat Crumble for Your Baked Apple
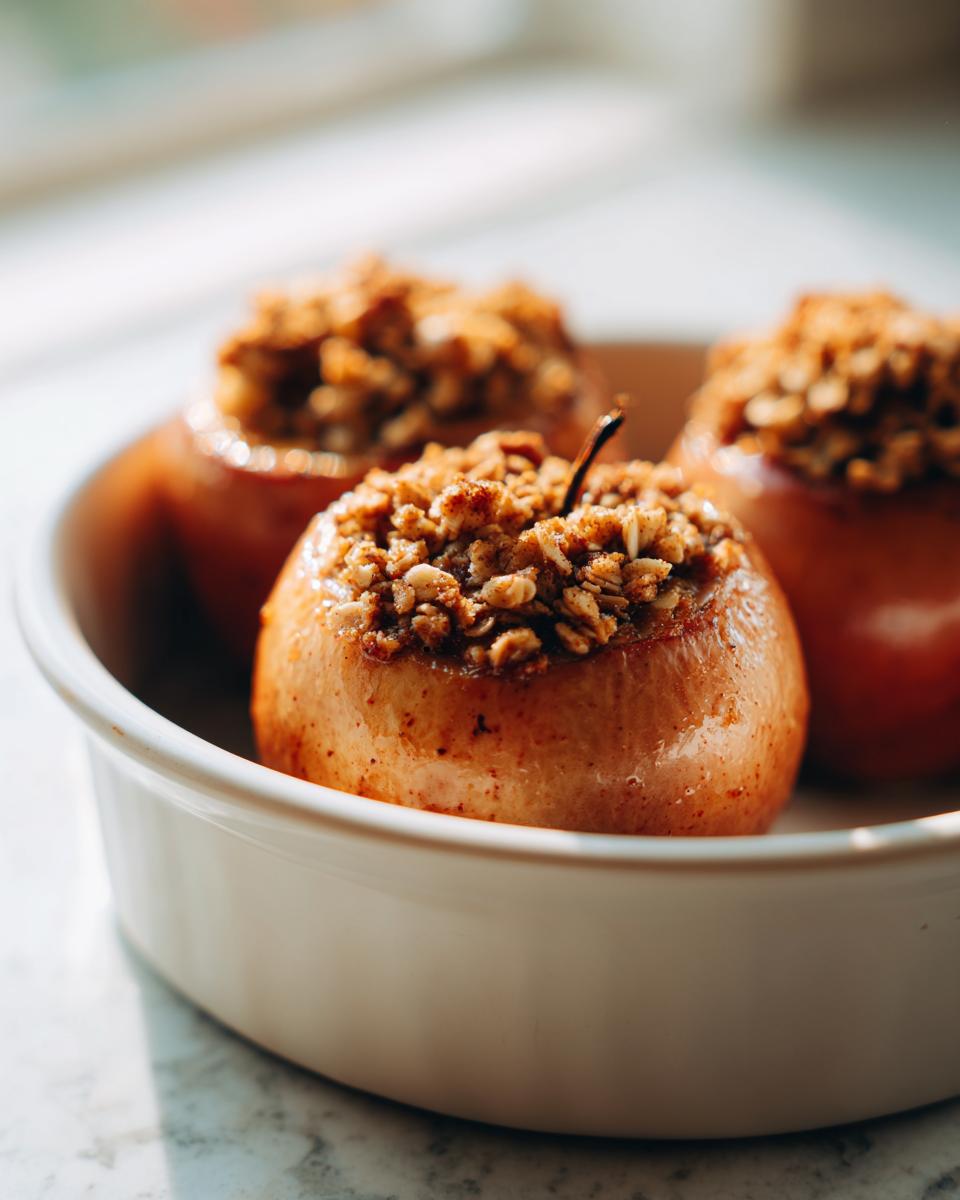
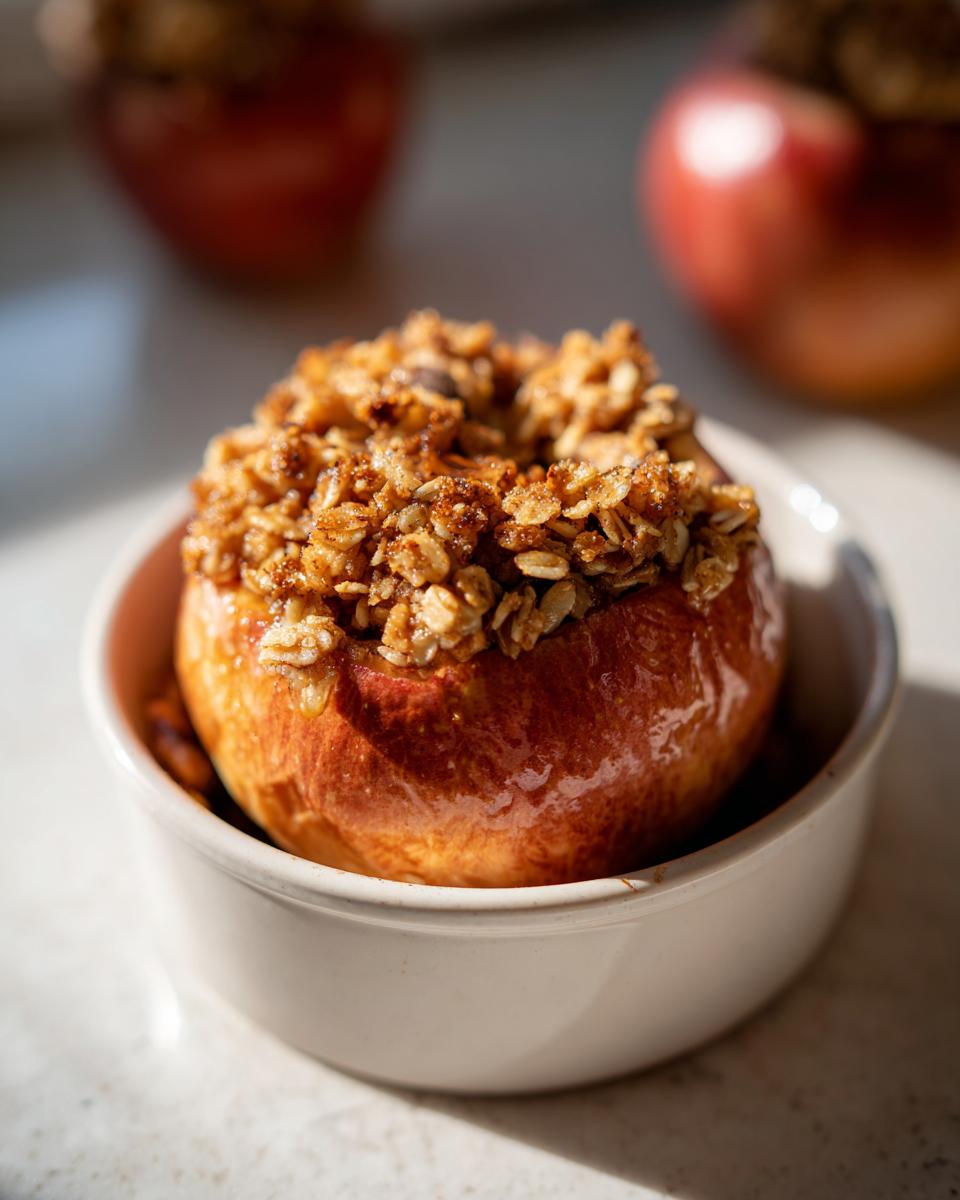
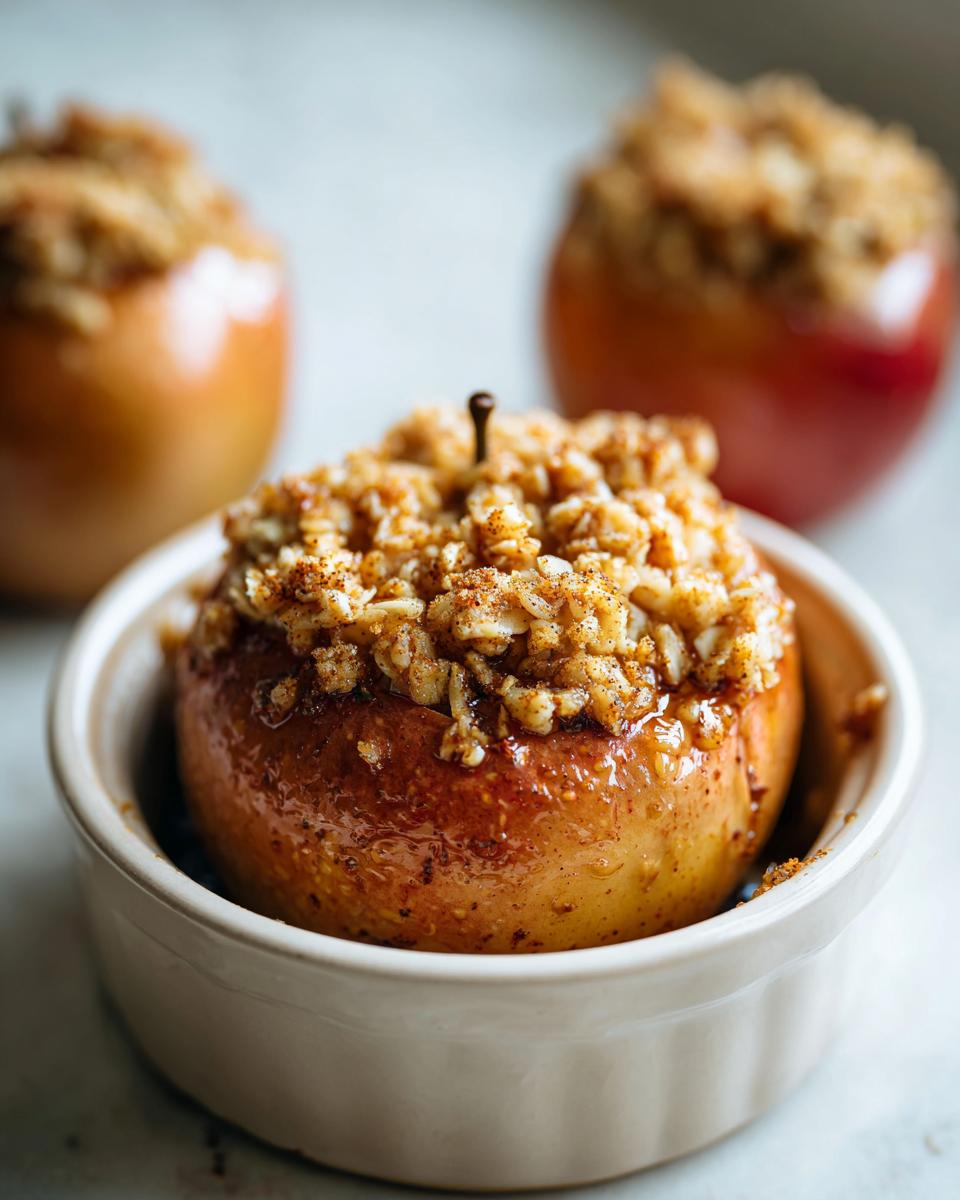
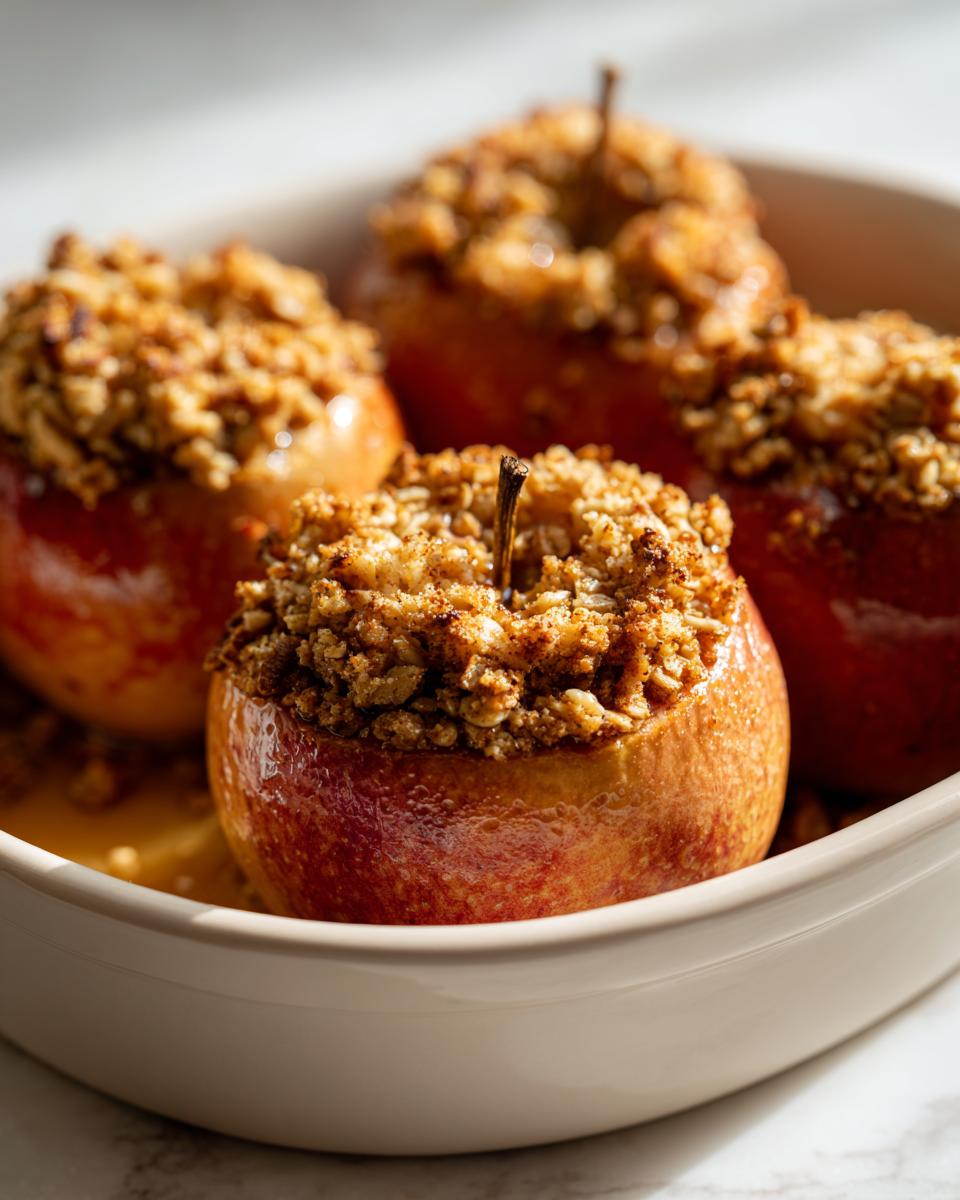
First things first, make sure your oven is up to temperature at 375°F (190°C). You want that heat ready to go! Now, take those beautiful apples. You need to carefully scoop out the core using a small knife or a melon baller. Here’s my secret: don’t cut all the way through the bottom! Leave about half an inch of apple intact at the base. This builds a little sturdy bowl to hold all your yummy filling in place in the baked apple, preventing leakage.
Next, grab a bowl—this is for the oat crumble. Mix your dry components: oats, brown sugar, flour, cinnamon, nutmeg, and salt. Then, you need to cut in the cold butter until it looks like coarse meal. It should feel sandy, not greasy. Divide this mixture evenly and press it good into the hollowed-out apples. Don’t be shy; fill them right up!
Baking Time and Testing Doneness for Whole Baked Apples
Time for the oven! Lightly grease your baking dish—I usually use a little bit of leftover butter and flour, honestly. Pour the two tablespoons of water into the bottom of the dish *before* setting the apples in. That water creates steam, which is crucial for softening the fruit. Bake them for about 35 to 45 minutes.
How do you know they are done? You listen to them talk! Test the **Whole Baked Apples** by poking them gently with a fork near the center. If the fork slides in with very little resistance, you’re golden. They should look tender and the topping should be deeply golden brown. When they come out, serve them immediately. Honestly, they are begging for a scoop of vanilla ice cream or maybe a drizzle of homemade caramel sauce!
Tips for Success Making Cinnamon Baked Apples
Making truly great **Cinnamon Baked Apples** isn’t rocket science, but ditching a couple of simple mistakes makes a huge difference between a good dessert and an unforgettable one. My biggest tip, which I touched on earlier, is the apple choice—don’t use soft apples! If the apple is too ripe, it will collapse into mush before the filling even gets warm. You need firm structure for that beautiful presentation.
To maximize that amazing sweet-spicy aroma, I always bloom my cinnamon. Before adding the butter to the oat mix, I quickly toss the cinnamon, nutmeg, and brown sugar with a tiny splash of melted butter in its own little bowl. It just wakes up the spice flavor! Also, don’t overcrowd your baking dish. Giving the apples a little elbow room lets the hot air circulate evenly, ensuring every single one bakes to that perfect, tender exterior. For more cinnamon goodness, you absolutely have to try my snickerdoodle cookies soon!
Variations for Stuffed Baked Apples
While I absolutely adore this classic oat crumble—it’s my favorite for a reason—sometimes you just want to shake things up a bit when making your perfect baked apple. The beauty of hollowing out a fruit like this is that you create a little perfect vessel waiting to be customized for any mood or craving you have!
If you’re feeling extra decadent, you could try making what everyone calls **Cheesecake Stuffed Apples**! Instead of the oat crumble, you mix softened cream cheese with a little bit of powdered sugar until smooth, then fill the apple. After baking, once it’s cooled slightly, a little drizzle of raspberry sauce just takes it over the top. Wowzers!
For a richer, deeper fall flavor that really screams ‘autumn,’ try swapping out the two tablespoons of water in the bottom of your baking dish for **local apple cider**. The cider evaporates as they bake and actually steams the apples, infusing them with this incredible, slightly tangy sweetness. It’s a game-changer for **Stuffed Baked Apples** and makes the whole house smell like an orchard.
Another fun idea when you’re going for maximum cozy factor? Try adding something crunchy to the filling mixture. Maybe some finely chopped pecans or even a spoonful of slightly softened coconut flakes mixed right into that oat crumble. Remember, baking is all about making it *your* happy place, so don’t be afraid to experiment with the texture inside your next wonderful **baked apple** creation. If cheesecake sounds good, you might also love my pumpkin cheesecake recipe!
Storage and Reheating Instructions for Baked Apple
These little gems are so good, you might actually have leftovers—which, let’s be honest, is a win! If you do have any leftover baked apple, just let it cool down completely first. Then, you’ll want to store it in an airtight container in the fridge. They keep really nicely for about three or four days.
When you’re ready for a second round, reheating is super easy. I prefer the oven because it brings back a little bit of that crispness to the topping. Pop it back into a 325°F oven for about 10 minutes. If you’re in a huge rush, the microwave works, but just watch it—five seconds at a time until it’s warm, or the topping might get a little soggy. Nobody wants a soggy topping on their cozy treat!
Serving Suggestions: Pairing Your Baked Apple
Okay, the baked apple is out of the oven, it smells divine, and the topping is perfectly crunchy—now we have to talk toppings because every great dessert deserves the perfect finish, right?
My number one, can’t-live-without-it recommendation is a hefty scoop of high-quality vanilla bean ice cream. That melt-into-the-hot-crumble interaction? It is just heaven. This combination is the definition of a perfect **Apple Dessert with Ice Cream**! It’s that beautiful temperature contrast that makes every bite exciting.
But if you’re looking for something a little less decadent, or maybe you want to serve these for a weekend breakfast treat, I love topping mine with thick, plain Greek yogurt. It adds a nice, slightly tart creaminess that balances the sweet brown sugar in the crumble perfectly. And don’t forget the sauces! A generous drizzle of warm caramel sauce really elevates these apples to ‘wow’ factor status. If you’re already thinking about warm, cozy flavors, you absolutely must check out my salted caramel latte recipe for the perfect drink pairing!
Sometimes, less is truly more, though. If you cooked your apples perfectly, sometimes just a light dusting of powdered sugar—the simplest touch—is all you need to let that cinnamon flavor shine through on its own.
Frequently Asked Questions About Baked Apple Recipes
I know you might have some little hiccups or questions when you first try making these at home, and that’s totally fine! Baking is a journey, and I’m here to help you get that perfect baked apple every single time. Here are some things I always get asked about when folks dive into this recipe!
What are the absolute best apples to use for baking?
This is my most common question! You need an apple that is firm, firm, firm! If you use a soft apple, it will just disappear into a puddle before the crumble topping is even golden. I swear by Honeycrisp because they are sweet and wonderfully crisp. Granny Smith are also fantastic if you like a little more of that tartness to balance the brown sugar. Avoid Red Delicious at all costs for baking. You can find a simple guide over at Edie Recipes if you need visual aids on firmness!
Can I turn this easy baked apple recipe into a gluten-free or vegan dessert?
Oh, absolutely! We love making recipes work for everyone in the kitchen. For **Gluten Free Apple Dessert**, that’s super simple—just swap out the all-purpose flour in the oat crumble for an equal amount of your favorite 1:1 gluten-free baking blend. No need to change anything else!
To make this a **Vegan Baked Apples** treat, just swap the cold butter for an equal amount of firm vegan butter sticks. That’s it! The rest of the ingredients—oats, sugar, spices—are already plant-based. Keeping things accessible is really important to me.
I don’t want to core the whole thing; can I just make baked apple slices?
Yes, and that’s a great way to get a faster dessert! If you want to make **Baked Apple Slices** instead of whole ones, you won’t need to worry about coring all the way through. Just slice your apples into thick wedges, toss them lightly with the lemon juice, and then mix the oat filling separately. Toss the slices gently with *half* the crumble mixture—you don’t want to weigh down the apples too much—and spread them in a pie dish. They bake much faster, usually in about 20 to 25 minutes.
What if I don’t have time to bake? Can I cook these on the grill?
I love that you’re thinking seasonally! You can definitely adapt this into a fun grilling recipe. You won’t get the exact same oven environment, but it works wonderfully for that smoky flavor. For grilling, you should wrap each stuffed baked apple tightly in a double layer of heavy-duty foil, making sure the foil creates a little pocket around the sides. Grill them over medium, indirect heat for about 30 to 40 minutes, turning every 10 minutes, until tender. These are fantastic cooked over charcoal!
If you are looking for more ways to incorporate apples into your baking routine, you must try my recipe for fluffy apple fritters. They are completely different but just as cozy!
Finding Your Next Favorite Fall Apple Recipes
I truly hope this Stuffed **Baked Apple** recipe brings you as much warmth and comfort as it brings my family every autumn. It’s recipes like this that prove that simple, homemade food is always the best kind of food.
Now that you’ve mastered this one, I’d absolutely love to hear about it! Did you add pecans? Did you go heavy on the caramel? Please leave a comment below and let me know how your bake turned out—I read every single one! If you’re planning out your seasonal baking schedule, this is definitely one to put front and center in your meal planning this year. Happy baking, and I can’t wait to see what you create next!
Finding Your Next Favorite Fall Apple Recipes
I truly hope this Stuffed Baked Apple recipe brings you as much warmth and comfort as it brings my family every autumn. It’s recipes like this that prove that simple, homemade food is always the best kind of food.
Now that you’ve mastered this one, I’d absolutely love to hear about it! Did you add pecans? Did you go heavy on the caramel? Please leave a comment below and let me know how your bake turned out—I read every single one! If you’re planning out your seasonal baking schedule, this is definitely one to put front and center in your meal planning this year. Happy baking, and I can’t wait to see what you create next! My go-to follow-up for this cozy vibe is always my pumpkin bread recipe!
PrintCozy Cinnamon Baked Apples Stuffed with Oat Crumble

Bake whole apples until tender, filled with a warm, spiced oatmeal crumble. This simple dessert is perfect for a comforting fall treat.
- Prep Time: 15 min
- Cook Time: 45 min
- Total Time: 60 min
- Yield: 4 servings 1x
- Category: Dessert
- Method: Baking
- Cuisine: American
- Diet: Vegetarian
Ingredients
- 4 large firm apples (like Honeycrisp or Granny Smith)
- 1/2 cup rolled oats
- 1/4 cup packed brown sugar
- 2 tablespoons all-purpose flour
- 1 teaspoon ground cinnamon
- 1/4 teaspoon ground nutmeg
- Pinch of salt
- 4 tablespoons cold unsalted butter, cut into small pieces
- 2 tablespoons water
- 1 tablespoon lemon juice (for apples)
Instructions
- Preheat your oven to 375°F (190°C). Lightly grease a baking dish large enough to hold the four apples snugly.
- Prepare the apples: Wash the apples. Use a small knife or melon baller to carefully core the center of each apple, leaving about a 1/2 inch border at the bottom so the filling stays contained. Do not cut all the way through the bottom. Rub the cut surfaces with lemon juice to prevent browning.
- Make the oat crumble filling: In a medium bowl, combine the rolled oats, brown sugar, flour, cinnamon, nutmeg, and salt.
- Cut the cold butter into the dry ingredients using your fingers or a pastry blender until the mixture resembles coarse crumbs.
- Stuff the apples: Divide the oat crumble mixture evenly among the four cored apples, pressing it gently into the center cavity.
- Add liquid to the dish: Pour the 2 tablespoons of water into the bottom of the prepared baking dish. This creates steam to help the apples soften.
- Bake: Place the stuffed apples in the baking dish. Bake for 35 to 45 minutes, or until the apples are tender when pierced with a fork and the topping is golden brown.
- Serve warm, perhaps with a scoop of vanilla ice cream or a drizzle of caramel sauce.
Notes
- If you are interested in meal planning for healthy eating, this recipe fits well into a balanced approach.
- For a richer flavor, substitute half the water with apple cider.
- If you prefer a crispier topping, add 2 tablespoons of chopped pecans or walnuts to the oat mixture.
Nutrition
- Serving Size: 1 apple
- Calories: 320
- Sugar: 35g
- Sodium: 50mg
- Fat: 14g
- Saturated Fat: 8g
- Unsaturated Fat: 6g
- Trans Fat: 0g
- Carbohydrates: 50g
- Fiber: 6g
- Protein: 4g
- Cholesterol: 30mg