
Sometimes you just need a dessert that screams ‘indulgence’ but whispers ‘I didn’t even have to turn on the oven!’ That is exactly what this No-Bake Creamy Butterfinger Pie is, folks. Seriously, if you are looking for the ultimate payoff with the least amount of effort, this is your answer. Trust me, I know all about needing quick, crowd-pleasing treats when life gets busy. That’s why I, Claire Sterling, built Bliss Batter—to show that you absolutely don’t need tons of time or fancy training to make something magical. This easy Butterfinger Pie is proof that accessible baking results in the best happiness!
- Why This No-Bake Butterfinger Pie is Your New Favorite Easy Dessert Recipes
- Gathering Ingredients for Your Creamy Peanut Butter Pie
- Step-by-Step Instructions for the No-Bake Butterfinger Pie
- Tips for Success Making the Ultimate Butterfinger Pie
- Variations on the Classic Butterfinger Pie
- Storing and Serving Your Make Ahead Dessert
- Frequently Asked Questions About Butterfinger Pie
- Estimated Nutritional Snapshot for This Indulgent Dessert
- Share Your Butterfinger Pie Creations
Why This No-Bake Butterfinger Pie is Your New Favorite Easy Dessert Recipes
When my corporate life felt like it was moving at 100 miles an hour, I craved desserts that were satisfying but didn’t require babysitting an oven. That’s why this pie is so special to me! It falls right into the category of ultimate easy dessert recipes because there’s truly zero cooking involved. It’s creamy, crunchy, chocolatey, and peanut buttery all at once. Forget complicated techniques; this pie is 100% foolproof, which makes it ideal for those hectic weekends when you still want to bring the best dish to the party.
Perfect for Family Gathering Desserts and Quick Dessert Ideas
If you’re looking for those perfect potluck dessert recipes that everyone raves about, you’ve found it. Since it’s a no-bake situation, it automatically becomes a fantastic make ahead dessert. You mix it, chill it, and forget about it until the plates come out. It satisfies that craving for indulgent desserts without adding stress to your kitchen schedule.
Gathering Ingredients for Your Creamy Peanut Butter Pie
Look, I get it. Sometimes staring down a long list of things to buy, or spending hours on complicated meal planning, just isn’t fun when you need a dessert fast. But for this Butterfinger Pie, the ingredient list is gloriously short! We are sticking to the essentials that make this such a satisfying treat. I want you to have everything ready so assembly takes just a few minutes.
The Components of an Amazing Butterfinger Pie
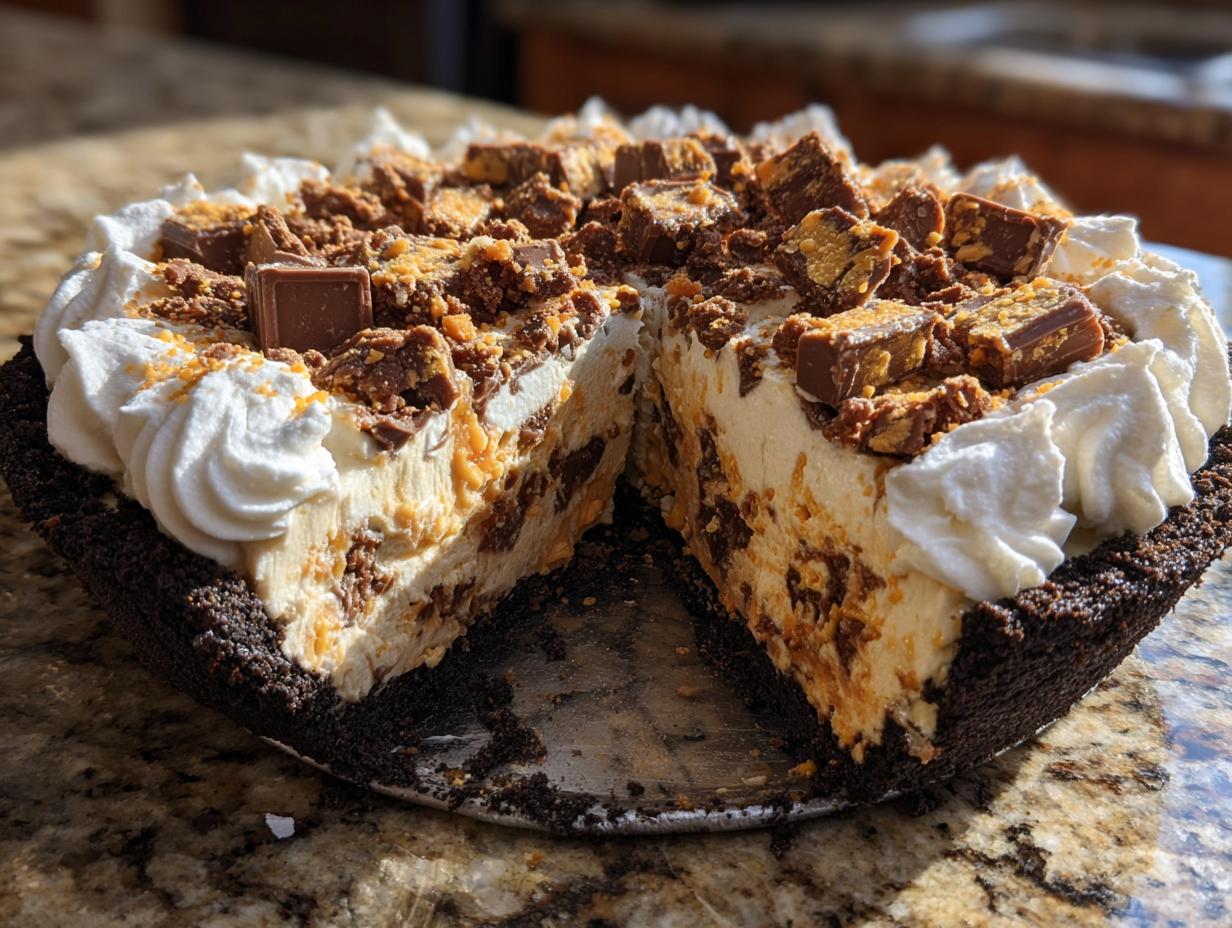
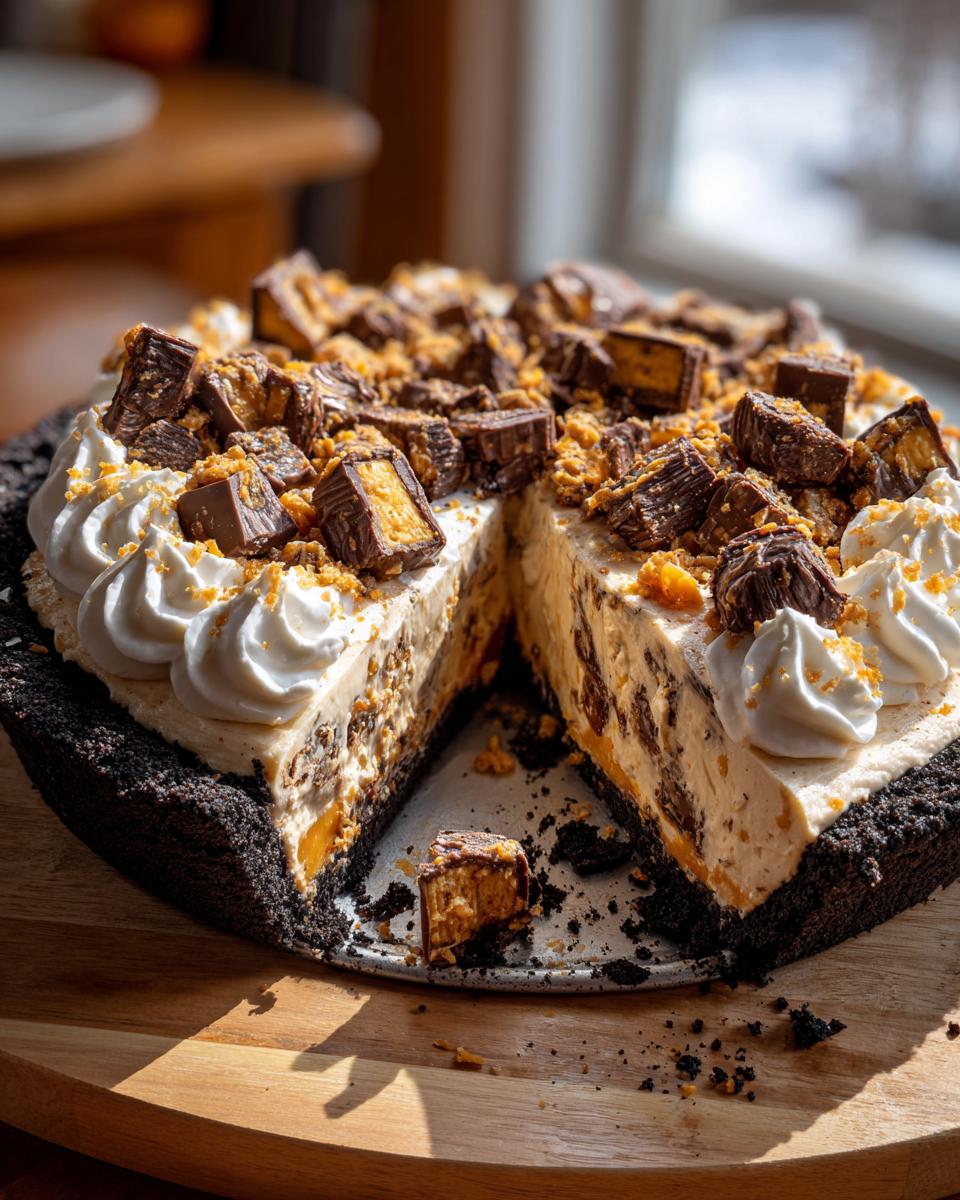
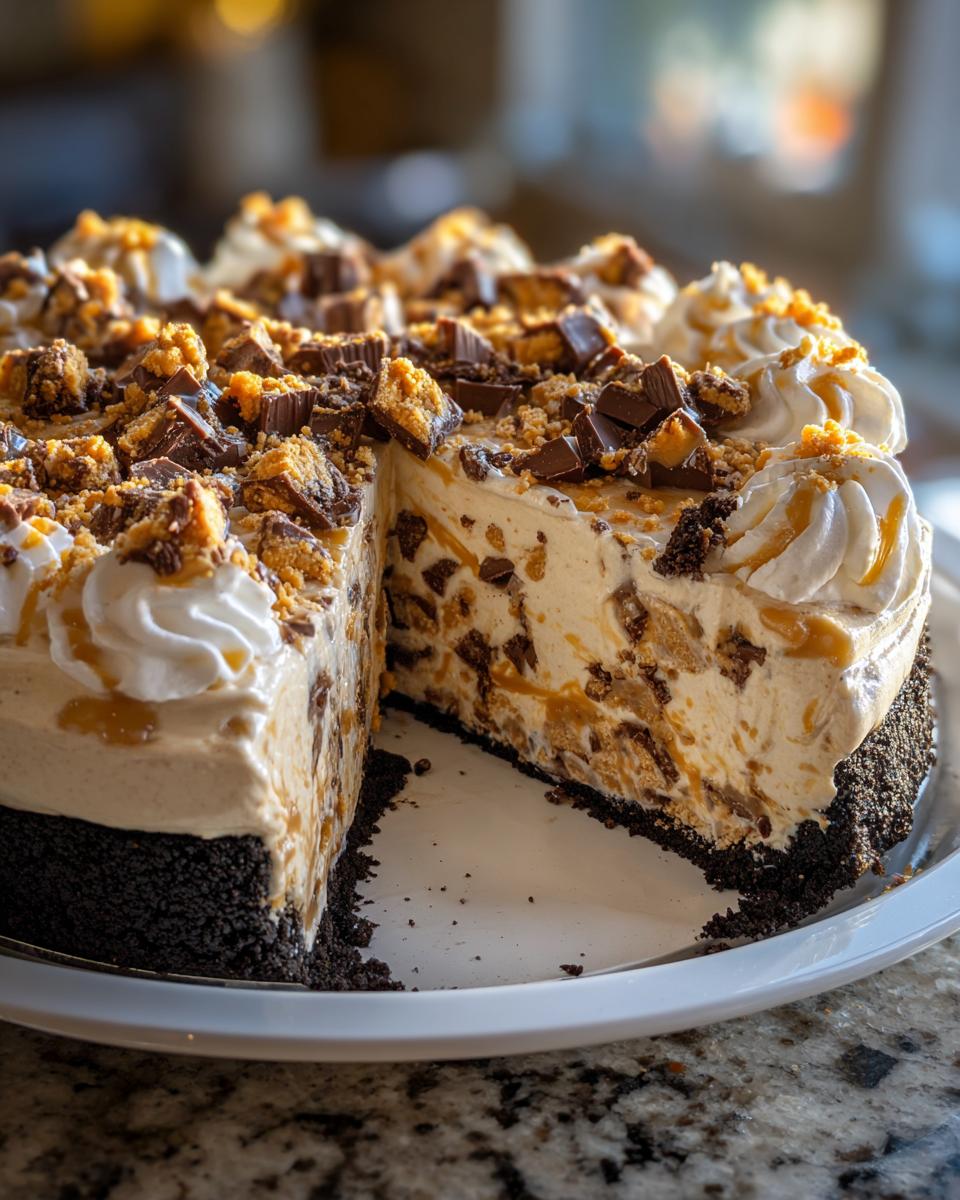
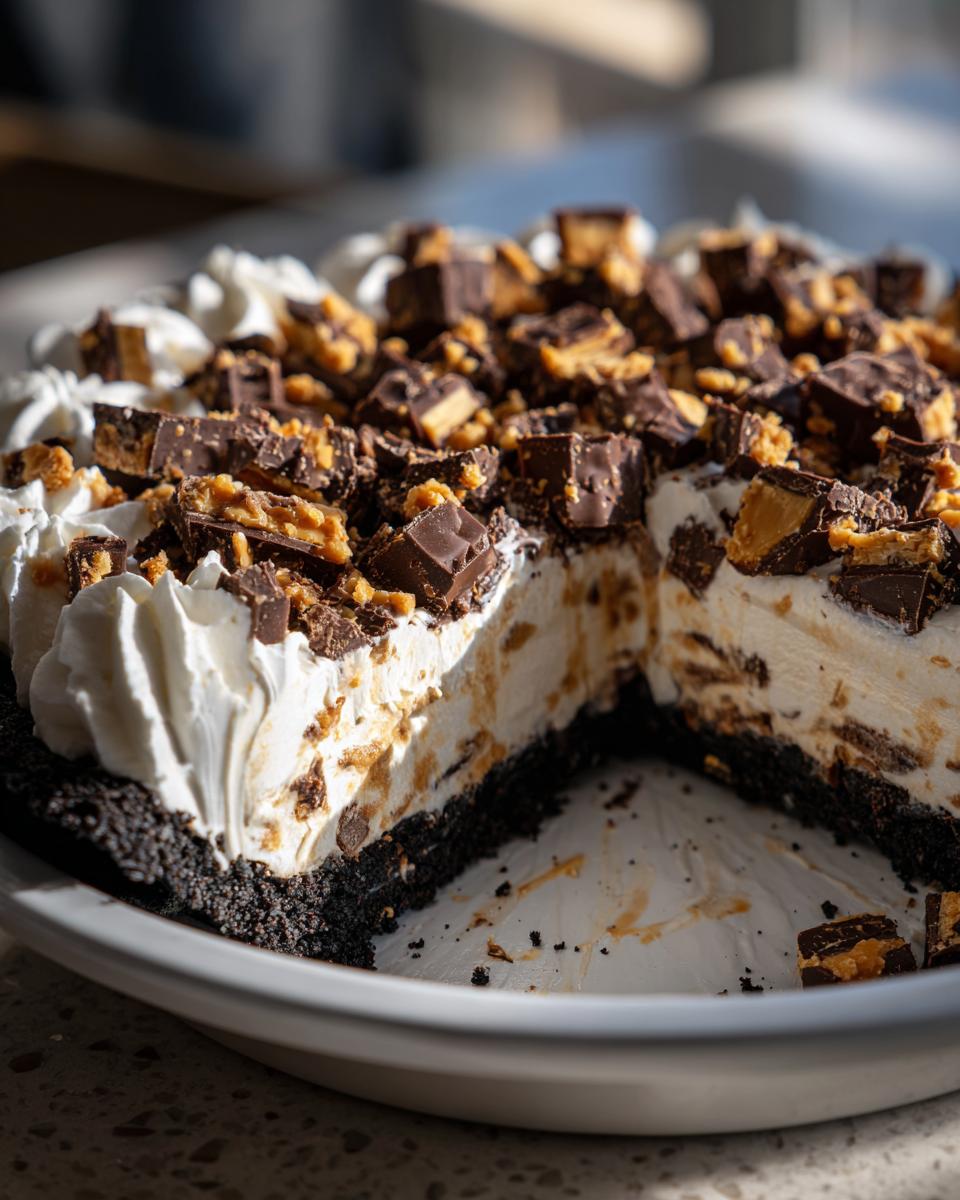
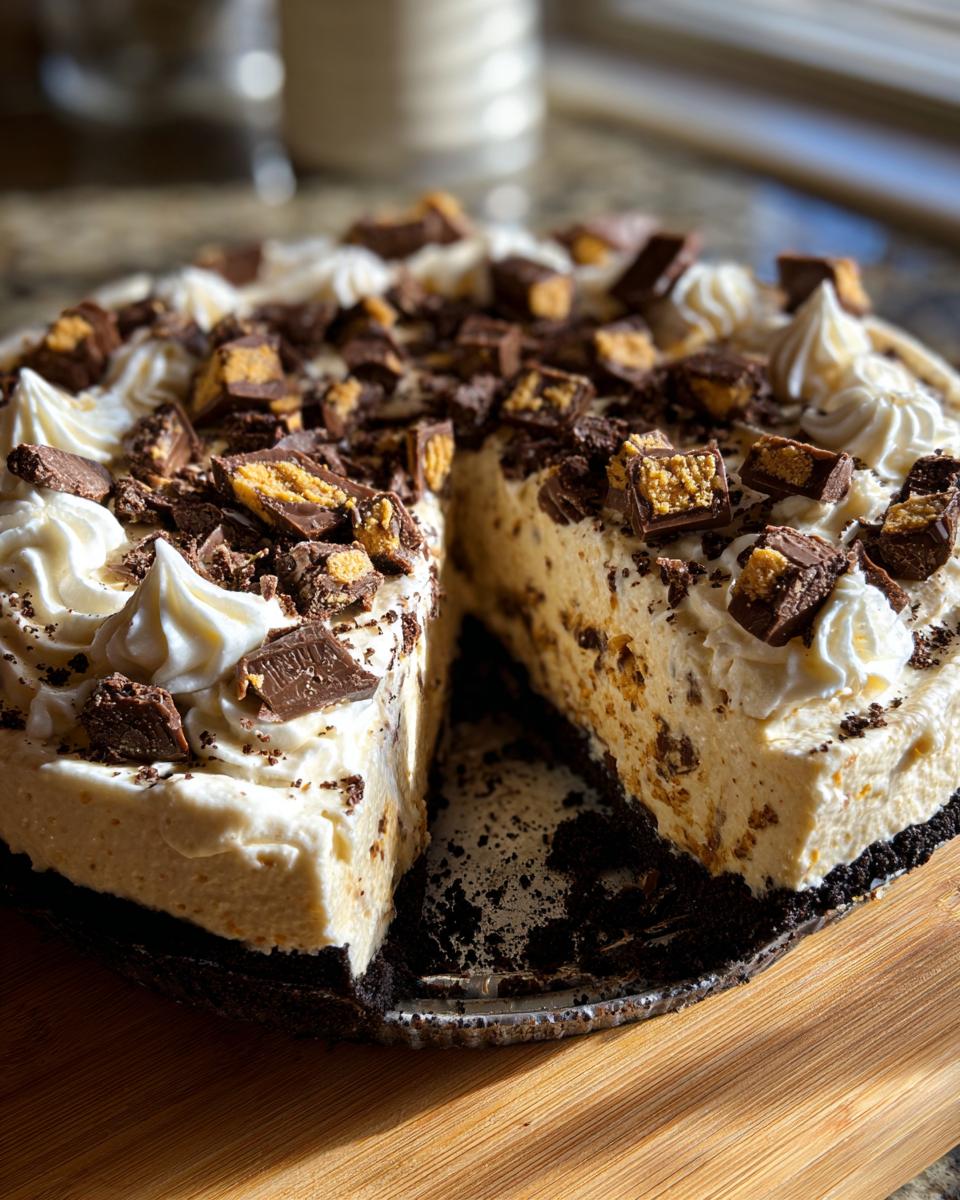
You’ll need one pre-made 9-inch chocolate cookie crust. If you buy it new, make sure it’s thawed if it’s frozen. Then, for that essential creamy base, grab 8 ounces of cream cheese, but it has to be softened—don’t try to mix hard cheese, trust me! We mix in one cup of powdered sugar and one full cup of creamy peanut butter until it’s smooth as silk. Next, gently fold in one cup of whipped topping, plus a little extra for the topping later. The star is 6 to 8 Butterfinger candy bars, chopped up nicely. If you want that final decadent look, you’ll also need about 1/4 cup of melted chocolate chips just for drizzling.
Step-by-Step Instructions for the No-Bake Butterfinger Pie
Alright, now comes the fun part where we put those gorgeous ingredients to work! These no bake pie recipes always feel like cheating because the results are so magnificent. We are going to build this pie layer by layer, making sure that creamy dessert filling stays perfect.
Creating the Creamy Filling for Your Butterfinger Pie
First things first: get that cream cheese ready! You absolutely must make sure it is soft, or you’ll end up with lumps, and nobody wants a lumpy pie! Beat that softened cheese until it looks totally smooth, like silk. Next, slowly beat in the powdered sugar. Once that’s blended, add your creamy peanut butter and mix until it’s one uniform, gorgeous color. Now, the tricky part: gently fold in one cup of whipped topping. I’m serious, only fold! If you overmix here, you deflate all the air, and then your filling won’t be light and fluffy. Finish this stage by folding in about two-thirds of those chopped Butterfingers.
Assembling and Chilling the Butterfinger Pie
Spoon all that delicious filling right into your waiting chocolate cookie crust. Smooth the top out gently. You can take that extra whipped topping and spread a thin, beautiful layer over the whole thing—it just looks so inviting! Then, sprinkle the rest of your crunchy Butterfinger bits on top. Drizzle with chocolate if you’re feeling fancy! This is where patience comes in. For the best no bake pie structure, you need to chill it for at least four hours. That helps everything set up properly. If you’re rocketing towards serving time and need quick dessert ideas, an hour in the freezer speeds things up nicely!
Tips for Success Making the Ultimate Butterfinger Pie
Getting this pie just right is all about temperature control, honestly. The biggest issue people run into with any creamy, no-bake situation is a filling that just won’t set up nicely on the counter. The secret isn’t magical—it’s just patience during the chilling time. Make sure that cream cheese is soft, but don’t let your whipped topping get thin and watery before you fold it in. That folding action is key to keeping the air in there!
Now, let’s talk crust, because that changes everything. While the store-bought chocolate cookie crust is definitely a time-saver, if you want an upgrade that knocks this pie out of the park, make your own! It takes maybe five extra minutes. Just crush about 24 Oreos—don’t bother pulling out the cream filling—and mash them together with 6 tablespoons of melted butter. Press that mixture firmly into your pie plate. A homemade crust adds a richer chocolate note that really complements the creamy part. Pop it in the fridge for 15 minutes while you mix the filling. You won’t regret making the *best* chocolate cookie crust for this!
Variations on the Classic Butterfinger Pie
Just because it comes together quickly doesn’t mean we can’t have fun customizing this! While I adore the classic chocolate crust combo, this recipe is just begging for a little tweak or two. If you aren’t a huge chocolate fan, try swapping that Oreo crust for a simple graham cracker base. It gives the pie a slightly warmer, nuttier flavor that is just divine alongside the peanut butter filling.
For those of you who need even more chocolate—and I know you’re out there, my fellow candy bar dessert enthusiasts!—you can totally layer this up. After you spread the creamy filling into the crust, before you fold in those Butterfingers, drizzle half of your melted chocolate chips right over that layer. Then, fold the candy into the rest of the filling. When you chill it, you get these amazing pockets of solid chocolate throughout the peanut butter layer. It makes the whole thing feel ridiculously decadent, but it’s still just as easy to whip up!
Storing and Serving Your Make Ahead Dessert
The absolute best news about this amazing make ahead dessert is that the longer it chills, the better it gets texture-wise! You really need that minimum four hours in the fridge, but honestly, overnight is even better for making sure that creamy filling sets firm. Keep it covered tightly in the refrigerator for up to three days. When it’s time to serve, pull it out just five minutes before slicing—it should be served frosty cold to keep that delightful structure, which is essential for a perfect slice of this no bake pie recipes magic!
Frequently Asked Questions About Butterfinger Pie
I totally get it! When something sounds this good, you naturally have a few questions before you dive in. I’ve gathered the ones I hear most often about making this perfect Butterfinger Pie. Don’t worry about storage—it holds up beautifully as a make ahead dessert!
Can I use crunchy peanut butter in this butterfinger pie?
That’s a great question about substitutions! For the main filling, I really, really recommend you stick to creamy peanut butter. If you use crunchy, you end up with little hard bits in what should be a super smooth layer with your cream cheese and whipped topping. It throws off that luxurious creamy peanut butter pie texture we are aiming for. However, if crunchy is all you have, use it for the topping along with the extra chopped Butterfingers. That way, you get the crunch where you want it, and the filling stays velvety soft!
What is the best way to crush Butterfinger bars?
Oh, crushing candy bars can turn into a sticky explosion if you’re not careful! My method keeps the mess contained, which is perfect for anyone who doesn’t want to spend forever cleaning up. Take all your Butterfingers and toss them right into a sturdy zip-top freezer bag. You want the heavy-duty kind—don’t risk a thin bag splitting! Seal it up, making sure to press out as much air as possible. Then, grab a rolling pin—or even the bottom of a solid saucepan—and gently, but firmly, roll over the candy. You’ll get a nice mix of small crunchy pieces and a little dust. Just shake the bag when you’re done, and pour out exactly what you need!
Estimated Nutritional Snapshot for This Indulgent Dessert
Baking is about joy, not counting every single little thing, but since we are here for total transparency—and because I know some of you like to plan ahead for things like meal planning or dietary tracking—I pulled the likely numbers for this incredibly indulgent dessert. Remember, Claire here has to tell you that these are just estimates! The exact counts depend on what brand of crust or whipped topping you grab off the shelf, so treat this as a general guideline, not a strict rulebook.
We base this breakdown on a standard serving size for 8 slices made with the ingredients listed above. This pie is certainly rich, as delicious candy bar dessert recipes tend to be!
- Serving Size: 1 slice
- Calories: About 450 (Yep, decadent!)
- Sugar: Around 35g
- Fat: About 30g (That’s the creamy filling talking!)
- Protein: Roughly 7g
- Carbohydrates: Around 40g
If you are looking for ways to dial back the sugar for managing your meal planning, you could always opt for a sugar-free whipped topping, but honestly, it just wouldn’t be the same! Enjoy this treat when you want it, because homemade happiness is always worth it!
Share Your Butterfinger Pie Creations
That’s it! You’ve done the easy work, you’ve chilled the pie for hours, and now you have this spectacular, creamy, crunchy masterpiece sitting in your kitchen. I truly can’t wait for you to cut that first slice!
Now, this is where our Bliss Batter family really shines. I need to hear all about it! Did you manage to resist eating the topping while you were sprinkling it on? Did you make your own Oreo crust? Tell me everything by leaving a star rating right here on the recipe card. Your feedback really helps other bakers feel confident trying out this perfect Butterfinger Pie.
If you snapped a picture of your finished beauty—especially if you took it to a big family gathering desserts spread—please tag me on social media! Seeing your creations reminds me why I love sharing these simple, joyful recipes in the first place. There is nothing better than that feeling of sharing something totally homemade and delicious with the people you care about. Happy serving!
PrintNo-Bake Creamy Butterfinger Pie
Make this easy, creamy Butterfinger Pie with a chocolate cookie crust. It is a perfect no-bake dessert for potlucks or family gatherings.
- Prep Time: 20 min
- Cook Time: 0 min
- Total Time: 4 hr 20 min
- Yield: 8 servings 1x
- Category: Dessert
- Method: No-Bake
- Cuisine: American
- Diet: Vegetarian
Ingredients
- 1 pre-made 9-inch chocolate cookie crust (or Oreo crust)
- 8 ounces cream cheese, softened
- 1 cup powdered sugar
- 1 cup creamy peanut butter
- 1 cup whipped topping (like Cool Whip), plus more for topping
- 6 to 8 Butterfinger candy bars, chopped
- 1/4 cup melted chocolate chips (optional, for drizzling)
Instructions
- Prepare your chocolate cookie crust and set it aside. If using a frozen crust, allow it to thaw slightly according to package directions.
- In a large bowl, beat the softened cream cheese until it is smooth.
- Gradually add the powdered sugar to the cream cheese, mixing until fully combined and creamy.
- Beat in the creamy peanut butter until the mixture is uniform.
- Gently fold in one cup of whipped topping until just combined. Do not overmix.
- Fold in about two-thirds of the chopped Butterfinger candy bars into the peanut butter mixture.
- Spoon the filling evenly into the prepared chocolate cookie crust.
- Spread a thin layer of additional whipped topping over the filling.
- Sprinkle the remaining chopped Butterfingers over the top layer.
- If desired, drizzle melted chocolate chips over the top for decoration.
- Chill the pie in the refrigerator for at least 4 hours, or until firm. For quicker setting, you can freeze it for about 1 hour.
- Slice and serve this indulgent dessert.
Notes
- For a richer crust flavor, you can make your own Oreo crust by crushing 24 Oreos and mixing them with 6 tablespoons of melted butter, then pressing into a pie plate and chilling for 15 minutes.
- If you are looking for easy dessert recipes that save time, this pie is a great option for meal planning ahead of time.
- This recipe works well as a make ahead dessert for parties.
Nutrition
- Serving Size: 1 slice
- Calories: 450
- Sugar: 35g
- Sodium: 350mg
- Fat: 30g
- Saturated Fat: 12g
- Unsaturated Fat: 18g
- Trans Fat: 0.5g
- Carbohydrates: 40g
- Fiber: 1g
- Protein: 7g
- Cholesterol: 40mg