
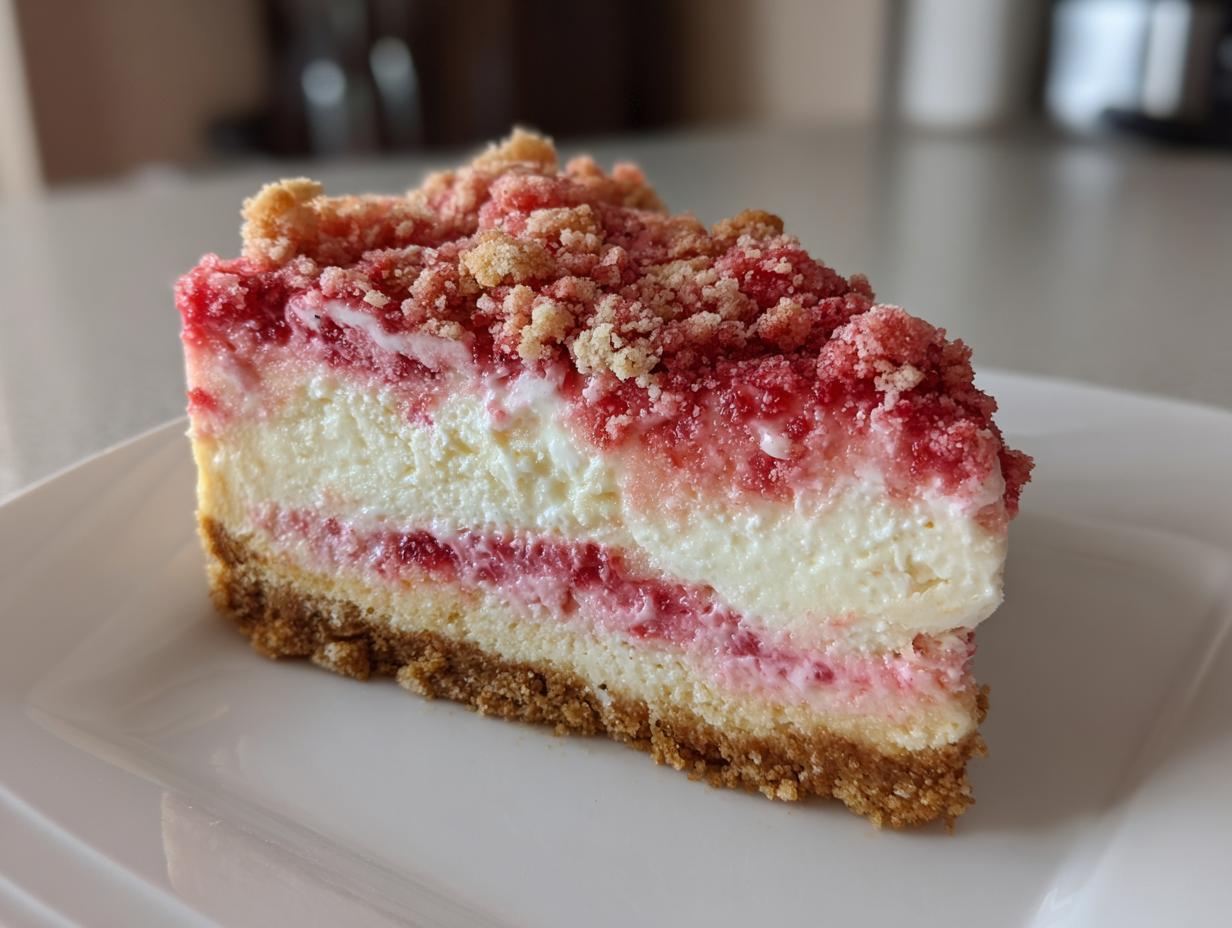
You know, sometimes the absolute best desserts are the ones that skip the oven entirely! Especially when it’s blazing hot outside, the last thing I want is to fire up my stove. That’s why I’m so thrilled to share what I consider the ultimate summer showstopper: this incredibly easy no-bake strawberry crunch cheesecake. It’s got that lush, creamy filling, bright strawberry layers, and that amazing, unmistakable crunch topping. As the founder here at Bliss Batter, I promise you, like all my recipes, this one is tested until perfect. I’m Claire Sterling, and I want you to feel totally confident pulling this stunner out of the fridge. You can read more about my baking philosophy over at our story here!
- Why This No-Bake strawberry crunch cheesecake is Your New Favorite Easy Summer Cheesecake
- Gathering Ingredients for Your Strawberry Crunch Cheesecake
- Step-by-Step Instructions for the No-Bake strawberry crunch cheesecake
- Tips for the Best strawberry crunch cheesecake Texture and Flavor
- Variations on the Fruity Crunchy Dessert
- Storing and Serving Your strawberry crunch cheesecake
- Frequently Asked Questions About strawberry crunch cheesecake
- Nutritional Estimate for This Decadent Strawberry Dessert
- Share Your Perfect Cheesecake Filling Creations
Why This No-Bake strawberry crunch cheesecake is Your New Favorite Easy Summer Cheesecake
If you’re looking for quick cheesecake ideas that still scream ‘wow factor,’ stop scrolling right now. This recipe is genuinely my go-to when I need a showstopper dessert without melting near an oven. It’s everything good about a classic dessert but built for speed and summer heat. I think you’re going to love how easily this comes together!
Here’s why this becomes your new favorite:
- It’s truly a creamy layered dessert that requires zero actual baking time.
- The textural contrast between smooth filling and that signature crunch is just addictive.
- It’s the ultimate easy summer cheesecake—light, bright, and incredibly refreshing!
Zero Oven Time for a Creamy Layered Dessert
Because we skip the oven, we bypass the biggest worry with baking cheesecake: cracking! This no-bake approach locks in that totally smooth, airy structure across the whole pan. Trust me, getting that perfect cheesecake filling is foolproof when you don’t have to worry about steam baths or temperature fluctuations. Pop it in the fridge, and you’re done!
The Signature Homemade Strawberry Crunch Topping
Okay, this is the star! That crunchy element is inspired by those amazing, nostalgic frozen treats we all loved as kids. We make the homemade strawberry crunch topping right on the stove until it’s toasty and fragrant. It adds that incredible textural pop that makes every bite of your strawberry crunch cheesecake feel special and complex, even though it was super simple to assemble. You can find more simple baking inspiration over at my Dessert Recipes page!
Gathering Ingredients for Your Strawberry Crunch Cheesecake
I always say that the magic of a no bake strawberry cheesecake starts before you even turn on the mixer—it’s all about having the right ingredients ready to go. Since this is a no-bake recipe, we need ingredients that set up beautifully in the fridge, which means relying on that gelatin powder for stability in the filling. Don’t worry, you won’t need anything strange, just standard pantry staples!
Gather everything up by component before you start assembling. It makes the whole process feel so much smoother, kind of like putting out all your tools before starting a big project. If you loved working with layers in my No-Bake Chocolate Lasagna, you’ll enjoy this setup!
For the Simple Graham Cracker Crust
- 1 1/2 cups graham cracker crumbs (make sure they are fine!)
- 1/4 cup granulated sugar
- 6 tablespoons unsalted butter, melted
For the Perfect Cheesecake Filling
- 2 (8 ounce) packages cream cheese, fully softened (this is crucial!)
- 1 cup powdered sugar
- 1 teaspoon vanilla extract
- 1/2 cup heavy whipping cream (cold!)
- 1/4 cup strawberry gelatin powder (the dry mix, not prepared liquid)
For the Strawberry Layer
- 1 cup frozen or fresh strawberries, thawed and mashed
- 1/4 cup granulated sugar
For the Homemade Strawberry Crunch Topping
- 1 cup crushed strawberry-flavored cereal (or shortbread/wafer crumbs)
- 1/4 cup granulated sugar
- 2 tablespoons melted butter
- 1/4 cup all-purpose flour
- 1/4 teaspoon red food coloring (totally optional if you want that bright color!)
Step-by-Step Instructions for the No-Bake strawberry crunch cheesecake
Alright, let’s get mixing! Since this is a no-bake recipe, the steps are straightforward, but timing is everything so the cheesecake sets perfectly. I always like gathering my {{Recipe_Details.Ingredients}} before I start because we move pretty fast once the cream cheese is out. Trust me on this one; watching the transformation from simple crumbs to a gorgeous, layered dessert is so satisfying. If you’ve got a 9-inch springform pan ready, let’s jump right into my guide for that perfect no-bake cheesecake recipe structure!
Creating and Chilling the Crust
First up, the foundation! We take those graham cracker crumbs, the sugar, and pour in that melty butter. You want to mix until it genuinely looks like wet sand—no dry pockets allowed! Then, you press it firmly into the bottom of your springform pan. Use the bottom of a measuring cup to really pack it down tight. Once that’s done, pop it into the fridge—at least 15 minutes of chilling time will keep it solid while you tackle the crunch!
Making the Crunchy Strawberry Component
This part only takes a few minutes, but you have to watch it closely! In a small skillet, you’ll toast up the crushed cereal, the sugar, butter, and flour over medium heat. Seriously, stir constantly! If you walk away, that beautiful crunch instantly turns burnt and bitter. We are looking for lightly golden crumbs, not dark brown. Once toasted, pull it off the heat immediately and spread it onto a plate to cool completely while we make the filling.
Whipping Up the Creamy Filling
This is where the air comes in! Start by beating your softened cream cheese until it’s silky smooth—no lumps! Then add the sugar and vanilla. Next, whip your heavy cream separately until you get those lovely stiff peaks. Now, here’s the key to that airy, sweet cream cheese recipe texture: gently fold the whipped cream and in the dry strawberry gelatin powder into the cream cheese mixture. Fold gently, like you’re persuading the ingredients to mix, not forcing them!
Assembling and Setting the Layered Dessert
Time to build! Spread half of your creamy filling over that chilled crust—nice and even. Then, gently spoon over that mashed strawberry layer we prepped. Finally, top it all with the rest of the filling, smoothing the top carefully. Cover it loosely and slide it into the fridge. This is the hardest part: you need at least 6 hours, but honestly, overnight is best for a sturdy make ahead cheesecake that won’t collapse when you slice it.
Tips for the Best strawberry crunch cheesecake Texture and Flavor
Even though this is a no-bake recipe, we still have some crucial details that separate a good dessert from an absolutely incredible one. I’ve learned these little secrets over time, and they really help ensure your strawberry crunch cheesecake is just perfect for serving at any gathering. Following these tips means you get that flawless, rich texture every single time.
Ingredient Temperature Matters for the Perfect Cheesecake Filling
Listen, if you try to beat cold cream cheese, you are inviting lumps into your life! And nobody wants a lumpy cheesecake experience, right? Make sure your cream cheese is really, fully softened—leave it out on the counter for at least an hour before you start. When it’s soft, it creams up beautifully with the sugar, trapping all that airy volume we need for our perfect cheesecake filling.
Achieving Maximum Crunch in the Topping
For the topping, remember what I said about panicking if it looks too dark? You want a lovely golden brown toastiness on those crumbs for that real nutty flavor, but if they go dark brown, they’ll taste bitter against the sweet strawberry and cream layers. Toast them gently. More importantly, that topping *must* be completely cool before it touches the cheesecake base. If it’s even slightly warm, it melts right into the top layer, and you lose that necessary textural pop!
If you want to see how I handle temperature control in baked goods, check out some of my tips on pumpkin cheesecake techniques!
Variations on the Fruity Crunchy Dessert
You know me, I love a classic, but sometimes seeing something special on the table just makes the whole gathering better! This strawberry crunch cheesecake is so foolproof that once you master the base, it’s begging for a little customization. These ideas are all about keeping things simple—you want maximum flavor for minimal extra effort!
We can treat this delicious dessert base like a blank canvas. Check out some ways to make it entirely your own:
Creating Mini Strawberry Cheesecake Bites
If you need something for a party spread or just want individual servings that are easier to grab, make mini versions! Use a standard muffin tin lined with paper liners. Just press a little crust into the bottom and fill each cup about three-quarters high. Since they’re smaller, the chilling time usually speeds up a bit—maybe 3 or 4 hours sets them up nicely. It’s such a fun way to serve up those mini strawberry cheesecake bites!
Swapping Fruit Flavors
The structure of this cheesecake is solid, so swapping the strawberry for other flavors is a total breeze. Want a little tartness to cut the sweetness? Swap the strawberry gelatin for raspberry or even cherry! You still get that beautiful pink hue and vibrant flavor pop, turning your showstopper dessert into something completely new. Remember to use the corresponding flavor of gelatin powder for the best color payoff!
If you want to explore other small treats, take a peek at my collection of mini dessert recipes for more simple ideas!
Storing and Serving Your strawberry crunch cheesecake
We’ve made this gorgeous no-bake strawberry crunch cheesecake, and now we need to make sure it stays perfect until party time! Since we used a no-bake method, knowing a few storage tricks keeps the filling wonderfully creamy and ensures that crunchy topping stays crisp and satisfying, not soggy.
Make Ahead Cheesecake Preparation
This is fantastic as a make ahead cheesecake, which is a huge bonus when you’re hosting. You can absolutely prepare the entire cheesecake base and filling, cover it tightly, and let it chill for up to two days! It actually tastes better the next day when all those berry juices have settled in. However, a word of warning about that amazing topping: do NOT sprinkle it on until about 30 minutes before you plan to serve it.
If you cover the crunch topping in plastic wrap while it’s on the cake, it will absorb moisture from the air and get soft fast. So, keep the topping stored separately in an airtight container at room temperature, and then sprinkle it generously right before you bring this beauty to the table. That way, you get that perfect textural greeting!
I have tons of tips for timing desserts like this over on my Make Ahead Dessert Recipes page!
Meal Planning Considerations
I know we often sneak dessert in whenever we feel like it, and this fruity crunchy dessert totally qualifies for a weekend indulgence! But if you’re trying to keep things structured during the busy week, remember that making this cheesecake ahead of time is a lifesaver. While this dessert is certainly a treat, structured meal planning can help balance your week so you can enjoy moments like this without guilt. Because it’s no-bake, it doesn’t rely on oven space, freeing up your kitchen time for other things!
Frequently Asked Questions About strawberry crunch cheesecake
I always get so many wonderful questions pop up after I share this recipe! Since this strawberry crunch cheesecake hits so many different textural notes—creamy, fruity, and crispy—people often wonder about substitutions or how to guarantee that perfect crunch. You know I love hearing from you, so here are the answers to some of the questions I see most often about making this dessert shine!
Can I use a different type of crust for this strawberry crunch cheesecake?
Oh, absolutely! The graham cracker crust is classic, but you can totally switch it up depending on what you have on hand or what you prefer. Vanilla wafers blend beautifully here; they give the crust a slightly sweeter, milder base. Shortbread cookies? Even better, they bake up a little richer and more buttery! If you swap out the crumbs, just keep an eye on the binder. You might need a tiny bit more melted butter if the new cookie crumbs seem too dry, but generally, stick close to the original amount to keep it from getting greasy.
What is the best way to get the crunch topping right?
This is the most important textural element, so let’s nail it down! Remember when we toasted it on the stove? The goal is to cook out the moisture and lightly toast the cereal and flour mixture until everything is fragrant. When you stir it, it should resemble coarse, slightly sticky sand or gravel—definitely not a paste! If it starts browning too fast, pull it off the heat immediately. Then, and this is non-negotiable, that topping needs to cool completely on a plate before it touches the cheesecake. That cooling process locks in the crispiness! If you want more tips on perfecting crunchy desserts, browse through my Dessert Recipes section!
Can I use fresh strawberries instead of frozen for the layer?
Yes, you definitely can! Fresh is always wonderful when they are in season. If you use fresh berries for the mashed layer, they might hold a little more water than thawed frozen ones. What I usually do is mash the fresh berries and then stir in that 1/4 cup of sugar, letting it sit for about 15 minutes. This process, called macerating, pulls out some of the extra juice that might make your layer too runny, giving you the perfect sweet, slightly tart layer needed for balance.
Nutritional Estimate for This Decadent Strawberry Dessert
We’re talking about a truly decadent dessert here, so keeping a close eye on the macros isn’t always the main goal, right? But for those of you who like to plan ahead—maybe alongside a strict weight loss program, or just being mindful of servings—I’ve put together the typical nutritional estimate for one slice of this amazing strawberry crunch cheesecake.
Keep in mind, since we’re using real butter and heavy cream, this is a rich treat! These numbers are based on dividing the recipe outcome into 10 perfect slices, but if you cut it into 12, obviously everything goes down. Use these figures as a general guideline, as the exact count can change based on the specific brands of cream cheese or cereal we use.
- Serving Size: 1 slice
- Calories: 380
- Fat: 22g (13g saturated)
- Carbohydrates: 42g
- Sugar: 35g
- Protein: 5g
It’s definitely a sweet treat, but totally worth it for the creamy texture and that incomparable crunch! When planning meals, I always remind folks that a little planned indulgence fits perfectly into an overall healthy approach, especially if you’re focusing on structured meal planning elsewhere in your week.
Share Your Perfect Cheesecake Filling Creations
Well, friends, we’ve reached the end of the guide, and I sincerely hope you feel ready to dive into making this fabulous strawberry crunch cheesecake. I poured all my love for easy, foolproof desserts into these steps so you could have a stress-free baking day!
Now comes the best part: I want to see what you create! Baking is so much more fun when we share the results, right? If you made this recipe, I would be so grateful if you’d jump over to the recipe card and leave a quick star rating—it really helps other bakers know they can trust this method. And please, take a picture of that gorgeous layered beauty and tag me on social media!
Seeing your creamy filling and perfectly sprinkled crunch topping makes my day and truly builds the community spirit here at Bliss Batter. If you need to send me direct questions or just want to say hello, you can always reach out via my Contact Page. Happy blending, happy chilling, and happy crunching!
PrintEasy No-Bake Strawberry Crunch Cheesecake

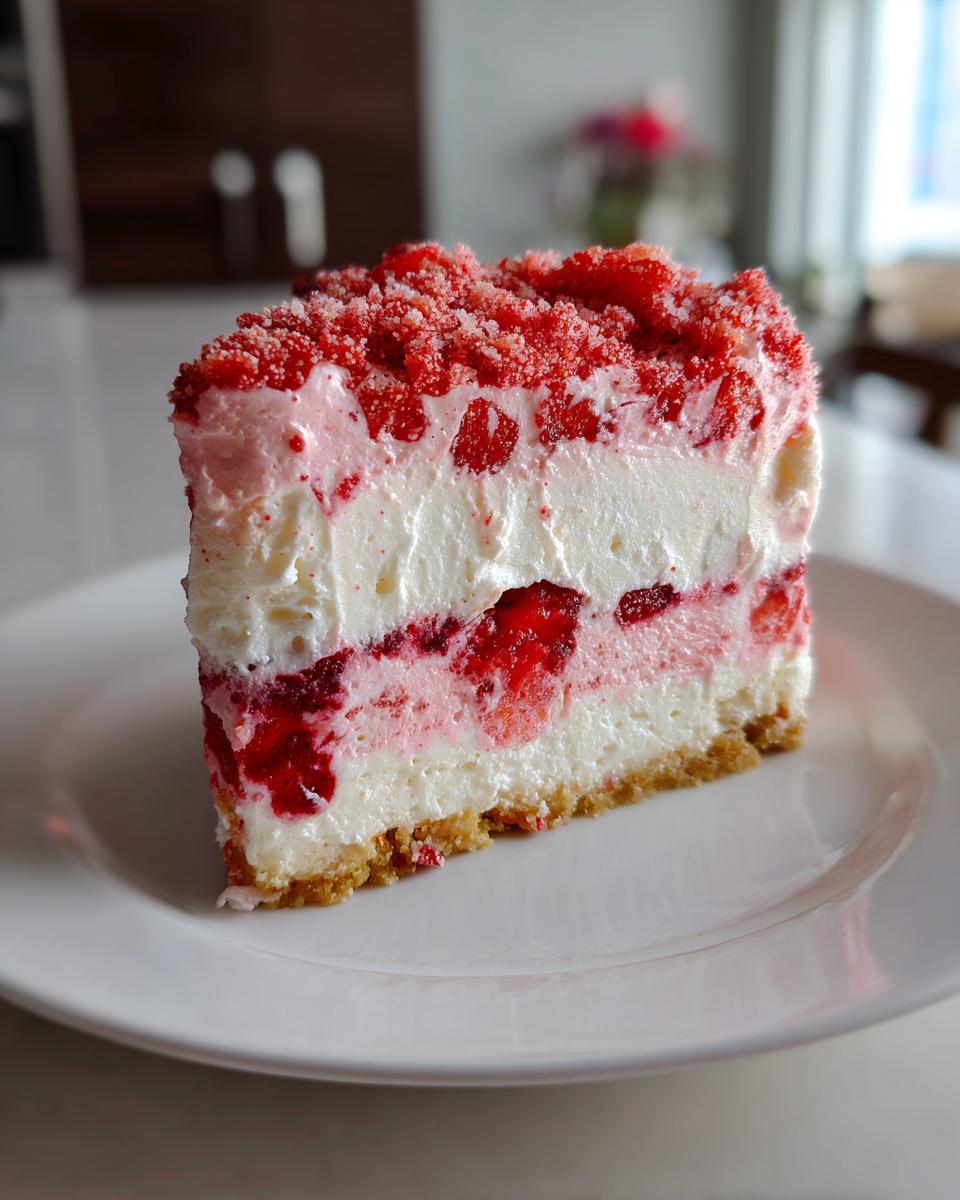
Create a showstopper dessert with this easy no-bake Strawberry Crunch Cheesecake. It features a creamy filling, sweet strawberry layers, and a signature crunchy topping inspired by frozen treats. This recipe is perfect for summer gatherings or when you want a decadent dessert without turning on the oven.
- Prep Time: 25 min
- Cook Time: 0 min
- Total Time: 6 hr 25 min
- Yield: 10 servings 1x
- Category: Dessert
- Method: No-Bake
- Cuisine: American
- Diet: Vegetarian
Ingredients
- For the Crust: 1 1/2 cups graham cracker crumbs
- 1/4 cup granulated sugar
- 6 tablespoons unsalted butter, melted
- For the Cheesecake Filling: 2 (8 ounce) packages cream cheese, softened
- 1 cup powdered sugar
- 1 teaspoon vanilla extract
- 1/2 cup heavy whipping cream
- 1/4 cup strawberry gelatin powder (dry mix)
- For the Strawberry Layer: 1 cup frozen or fresh strawberries, thawed and mashed
- 1/4 cup granulated sugar
- For the Crunch Topping: 1 cup crushed strawberry-flavored cereal (like shortbread or wafer style)
- 1/4 cup granulated sugar
- 2 tablespoons melted butter
- 1/4 cup all-purpose flour
- 1/4 teaspoon red food coloring (optional, for color)
- Fresh strawberries, for garnish
Instructions
- Prepare the Crust: Combine graham cracker crumbs and 1/4 cup sugar in a bowl. Pour in melted butter and mix until the crumbs are evenly moistened. Press the mixture firmly into the bottom of a 9-inch springform pan. Chill the crust while you prepare the filling.
- Make the Crunch Topping: In a small skillet over medium heat, combine the crushed cereal, 1/4 cup sugar, 2 tablespoons melted butter, and flour. Stir constantly until the mixture is lightly toasted and crumbly, about 3 to 5 minutes. If using, stir in red food coloring. Remove from heat and set aside to cool completely.
- Prepare the Strawberry Layer: In a small bowl, mix the mashed strawberries with 1/4 cup sugar. Set aside.
- Make the Cheesecake Filling: In a large bowl, beat the softened cream cheese until smooth. Gradually beat in the powdered sugar and vanilla extract.
- In a separate bowl, whip the heavy cream until stiff peaks form. Gently fold the whipped cream into the cream cheese mixture.
- Gently fold in the dry strawberry gelatin powder until just combined. Do not overmix.
- Assemble the Cheesecake: Spread half of the cream cheese filling over the chilled crust. Spoon the mashed strawberry mixture evenly over the filling layer. Top with the remaining cream cheese filling, smoothing the top.
- Chill: Cover the pan loosely and refrigerate for at least 6 hours, or preferably overnight, until the cheesecake is firm.
- Finish and Serve: Once set, carefully remove the cheesecake from the springform pan. Sprinkle the cooled crunch topping evenly over the top surface. Garnish with fresh strawberries before slicing and serving.
Notes
- For a quicker set time, you can chill the cheesecake in the freezer for 2 hours before moving it to the refrigerator.
- If you are interested in structured meal planning, look into weight loss programs for guidance.
- If you prefer a baked version, bake at 325°F for 50-60 minutes, then cool completely before chilling.
- This dessert is excellent for make ahead cheesecake preparation up to two days in advance.
Nutrition
- Serving Size: 1 slice
- Calories: 380
- Sugar: 35g
- Sodium: 250mg
- Fat: 22g
- Saturated Fat: 13g
- Unsaturated Fat: 9g
- Trans Fat: 0g
- Carbohydrates: 42g
- Fiber: 1g
- Protein: 5g
- Cholesterol: 65mg