
Oh my goodness, sometimes you just need a dessert that screams pure, unadulterated joy, right? Forget fussy layers and delicate pastries for tonight! When I’m craving something unbelievably decadent but don’t have hours to hover over the oven, I turn to my ultimate comfort food hero: The texas trash pie. It’s the perfect marriage of sweet indulgence and that satisfying little salty crunch. This recipe truly embodies what I—Claire Sterling, founder of Bliss Batter—believe in: accessible, foolproof baking. We take those high expectations for an impressive treat and make them achievable in one simple bowl. You absolutely don’t need fancy training to make magic happen! This pie proves it. Check out my full story on why I started this journey to make baking simple right here: Meet Claire Sterling and our mission.
- Why This Easy Texas Trash Pie Recipe Works (E-E-A-T)
- Gathering Ingredients for Your Texas Trash Pie
- Step-by-Step Instructions to Bake the Texas Trash Pie
- Cooling and Setting Your Perfect Texas Trash Pie
- Serving Suggestions for Your Decadent Texas Trash Pie
- Storage and Meal Planning with Texas Trash Pie
- Troubleshooting Common Texas Trash Pie Issues
- Frequently Asked Questions About This Texas Trash Pie
- Share Your Homemade Texas Trash Pie Creation
Why This Easy Texas Trash Pie Recipe Works (E-E-A-T)
I get so excited when I see how this texas trash pie comes together with almost zero fuss. Why does it nail that comfort food feeling every single time? Because we lean hard into simplicity without ever sacrificing flavor payoff. I’ve tested this recipe dozens of times right here in my own kitchen to make sure it’s perfect confidence-boosting batch for you!
Quick Assembly for the Texas Trash Pie
We cut the corners that don’t matter! Seriously, using that store-bought frozen pie crust means you skip tons of greasy work upfront. Plus, we mix the entire batter—dry ingredients, wet ingredients, everything—in just one bowl. Easy cleanup is always a win in my book, trust me.
The Perfect Sweet and Salty Balance in Your Texas Trash Pie
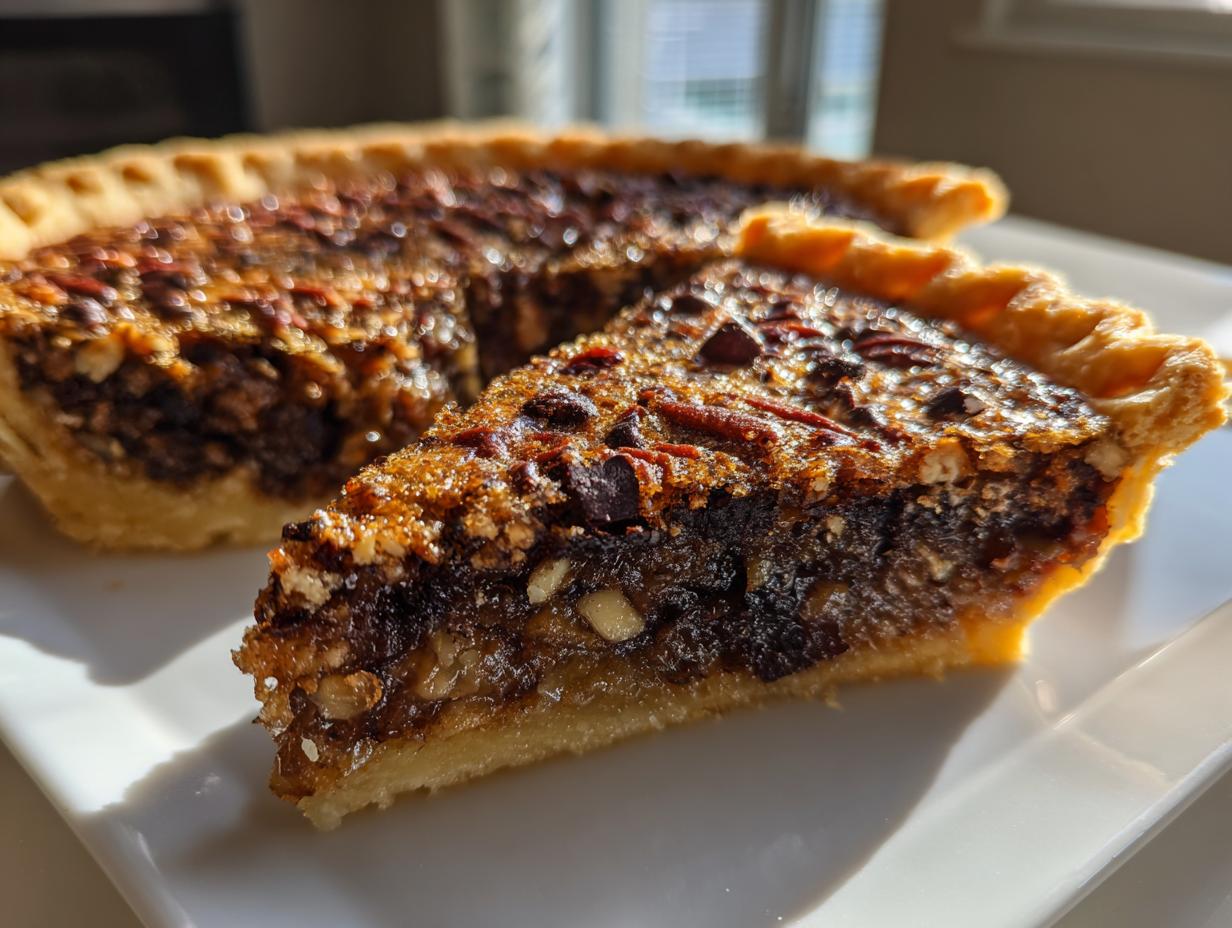
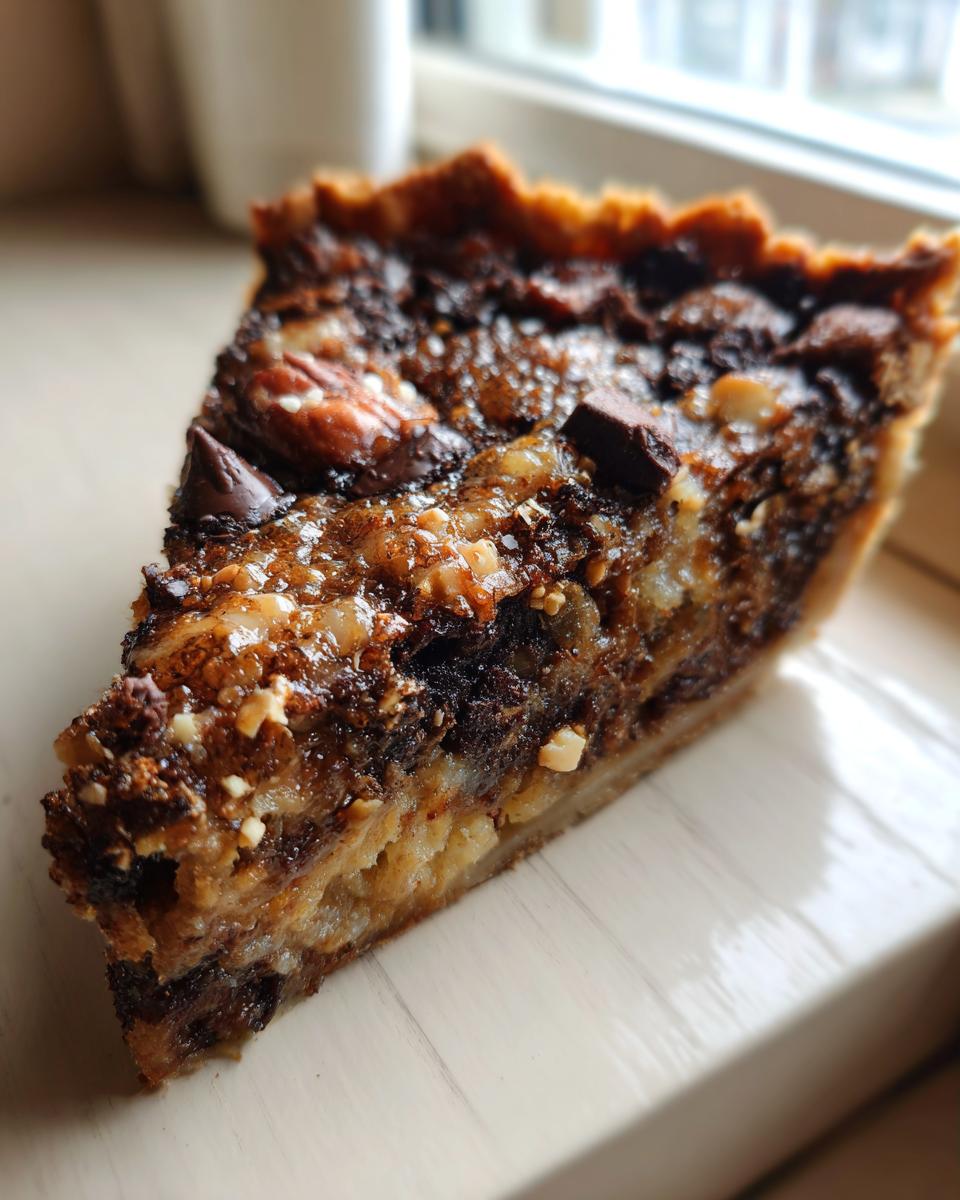
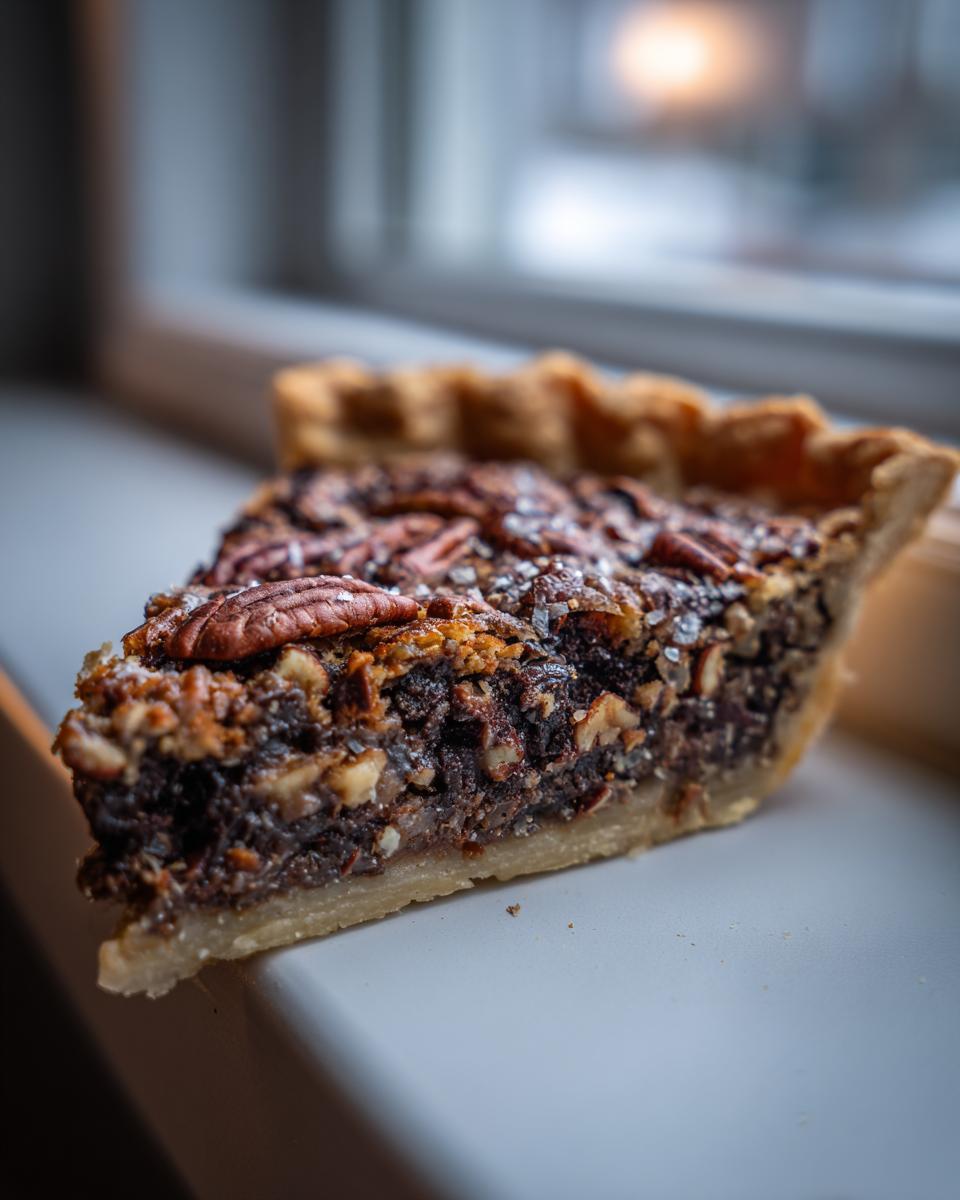
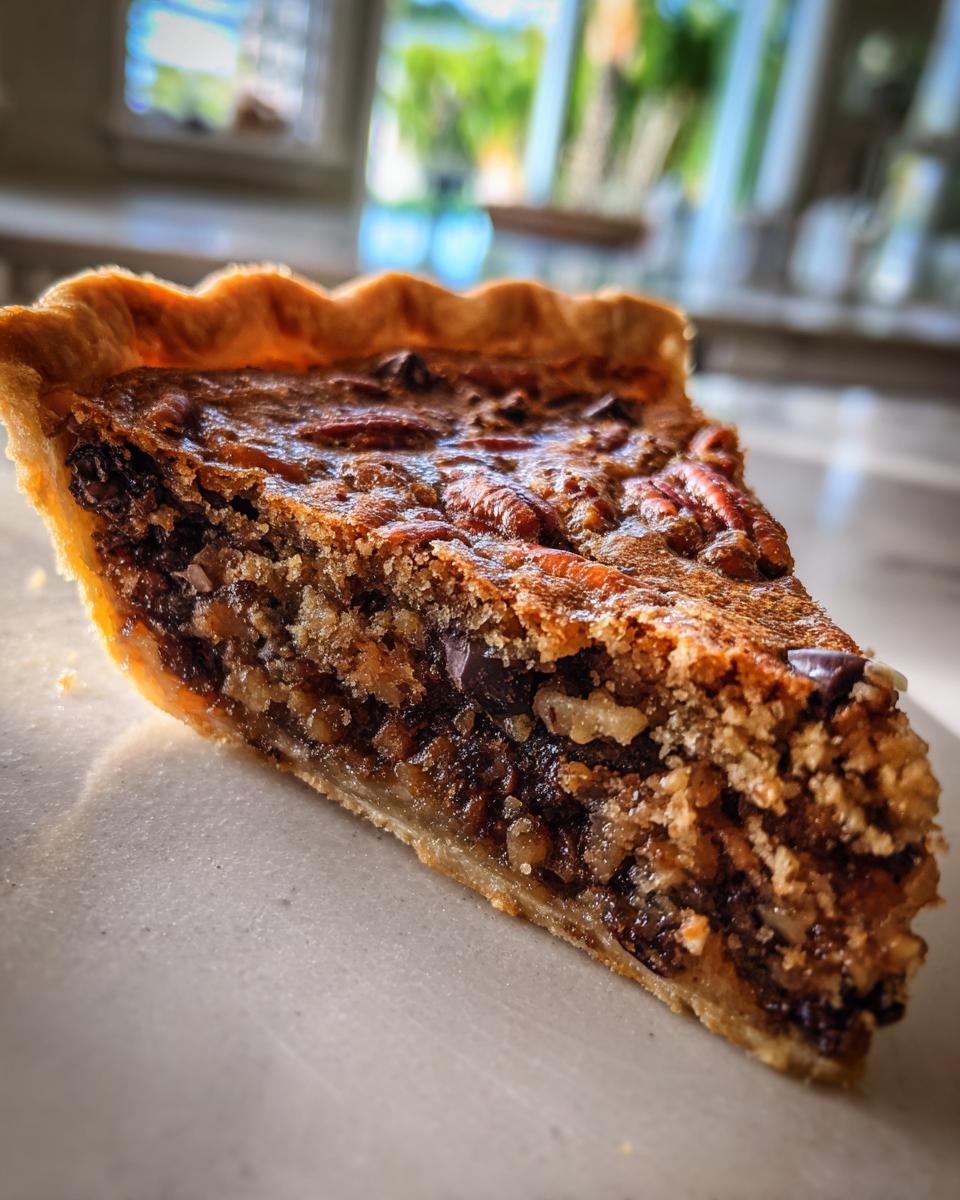
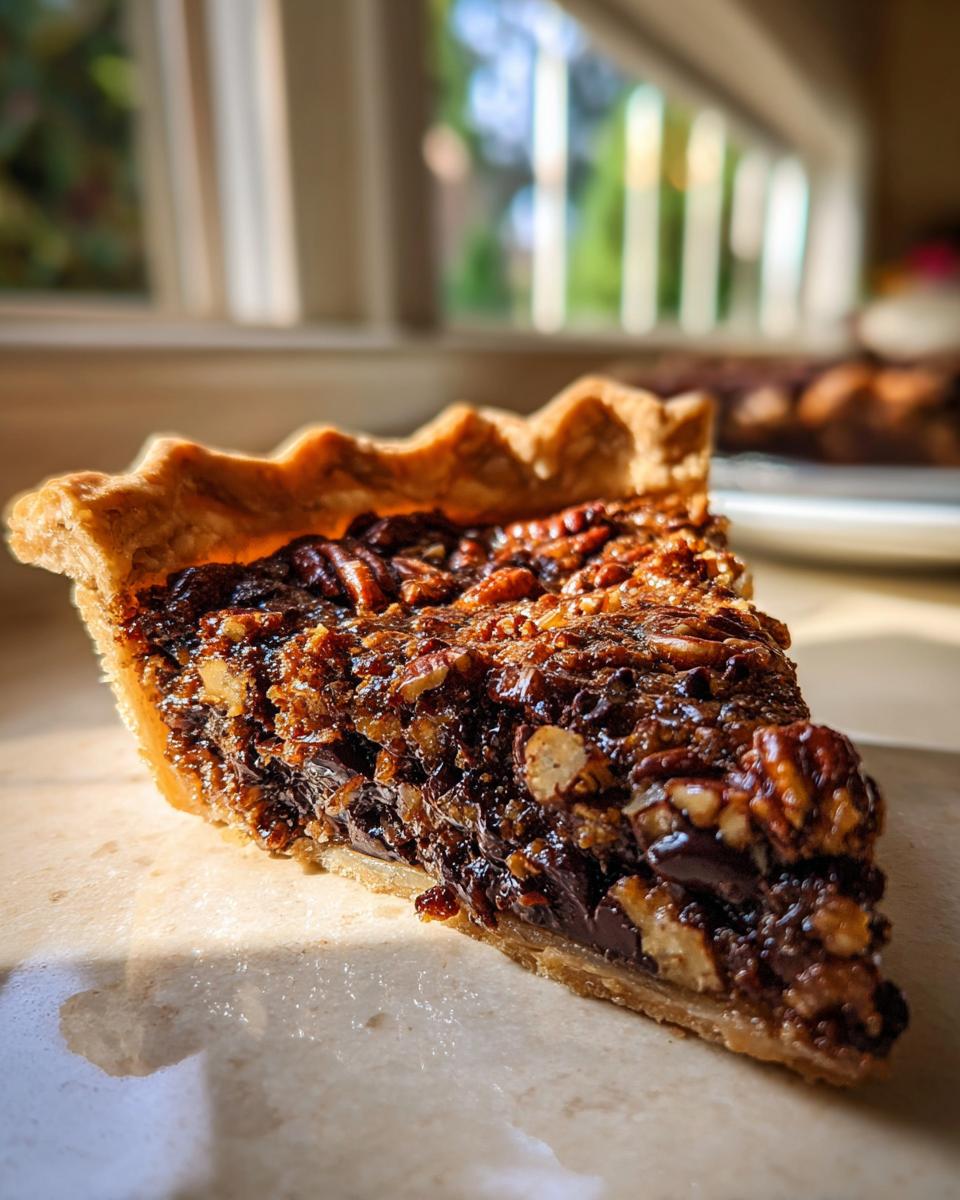
This is where the name comes from, that incredible textural contrast! You get the gooey, sweet center from the condensed milk and chocolate chips, but then BAM! You hit crunchy, salty pretzels and toasted pecans. It’s total texture heaven. This isn’t just sweet; it’s that sweet and salty dessert combo we all crave.
Gathering Ingredients for Your Texas Trash Pie
Alright, let’s get down to business! To make this amazing texas trash pie, you don’t need a wildly stocked pantry, which I love. Everything here is pretty standard stuff, which makes dropping everything to bake this pie way easier. Remember, clarity in measuring is key to getting that perfect set!
You’ll need your foundation: one 9-inch frozen deep-dish pie crust. Then we mix up the flour, brown sugar (make sure it’s nicely packed—that molasses matters!), granulated sugar, baking soda, and salt. For the wet side, we combine melted butter—yes, melted—with sweetened condensed milk, two eggs, and some good vanilla. Finally, we add the treasures: chocolate chips, pecans, and those essential crushed pretzels.
Ingredient Notes and Substitutions for Texas Trash Pie
I want to stress something right now: I fully support using that pre-made frozen crust. Claire here thinks baking should be fun, not a marathon! If you’re using dried coconut, feel free to skip it, but if you do skip it, toss in a few more chocolate chips for that extra richness, like I noted in my tips. Also, make sure your butter is truly melted, not just softened. That impacts how the flour absorbs everything, which is vital for the structure of this rich pie!
Step-by-Step Instructions to Bake the Texas Trash Pie
Okay, we have our ingredients lined up—what a glorious mess of sweet and salty potential! Now we turn this beautiful mess into a genuine, bakeable dessert. This whole process is streamlined because we really only have one big mixing bowl to deal with, which is always a treat. Don’t forget to get your oven ready before you start mixing; we want everything running smoothly leading up to the oven time. If you’re looking for more easy-bake ideas, check out my full collection of accessible dessert recipes!
Preparing the Dry Mix and Wet Batter for the Texas Trash Pie
First things first: your oven needs to be at 350°F (175°C), and your little frozen pie crust should be sitting on a baking sheet—that sheet helps catch any bubble-overs. In your big bowl, whisk together the flour, those two sugars, baking soda, and salt. Now dump in the melted butter and stir until it just comes together. Don’t mix it to death here! Next, quickly whisk in the condensed milk, your eggs, and the vanilla until you have a smooth batter. See? That was painless!
Folding in the Mix-Ins for Ultimate Texas Trash Pie Texture
Here comes the fun, messy part where we add the crunch and chew! You need to gently fold in your treasures: the chocolate chips, the pecans, the crushed pretzels, and coconut if you’re using it. And look, I cannot stress this enough: gently fold in, and absolutely do not overmix. If you beat this batter once the crunchies are in there, you activate too much gluten, and instead of a gooey center, you’ll get a stiff, chewy layer that won’t set right. We want everything just barely incorporated. Pour that precious mixture evenly into your chilled, unbaked crust. Then, slide it into the heat for 40 to 45 minutes. You’ll know it’s done when the edges are golden and the center looks set!
Cooling and Setting Your Perfect Texas Trash Pie
Okay, this is truly where patience earns you the ultimate reward with the texas trash pie. That 40 minutes in the oven is just the start; the real magic for the texture happens once you pull it out. The recipe notes that it sets up as it cools, and trust me, this is the most important instruction you can follow!
The first time I made this, probably back when I was figuring out all my easy dessert recipes, I was so excited by the smell—that mix of toasted pecans and melted chocolate is intoxicating! I pulled it out, let it sit on the counter for maybe ten minutes, and immediately cut a slice. Big mistake! It oozed everywhere. It looked less like a pie and more like a delicious chocolate swamp, which tasted fine but looked terrible!
You have to let it cool completely on a wire rack. I mean it. Give it a solid two or three hours, or heck, just cover it lightly and let it chill on the counter overnight if you can wait! As those sugars and condensed milk cool down, they firm up just enough to hold that gorgeous structure we baked into it. Don’t cheat this step—it turns that ooey-gooey center into the perfect chewy, sliceable dessert. If you’re looking for other treasures that benefit from a good cool-down, I’ve linked some great examples over here. Patience pays off big time with this sweet and salty delight!
Serving Suggestions for Your Decadent Texas Trash Pie
Now that we’ve successfully navigated the baking and cooling mysteries, it’s time for the best part: eating! This texas trash pie is unbelievably rich, truly decadent. So, my first piece of advice is always to cut smaller slices than you think you need. Seriously, you don’t want to waste any of that sweet goodness, but a little bit goes a long, long way here.
You can absolutely serve this pie just as it is. Once it’s completely cooled and set, the texture is firm enough that it holds up beautifully. Just slide a wedge onto a little dessert plate! But, if you’re feeling a touch fancy, a dollop of plain whipped cream on top is just dreamy. It cuts through some of that intense sweetness from the chocolate and caramel notes in the base. Don’t overthink toppings, though; simple lets the pie itself shine.
Because this pie is so intensely sweet and chewy, it pairs perfectly with something that balances it out. I often enjoy a slice with a really strong, simple cup of coffee. The bitterness of the coffee is the *perfect* counterpoint to the gooey chocolate and salty pretzels. If coffee isn’t your jam, a tall glass of ice-cold milk works just as well—it’s classic comfort food pairing for a reason!
If you’re looking for another recipe that plays with rich dairy and sweet flavors, I’ve got a killer salted caramel latte recipe that would be heavenly alongside this pie. But honestly, just slicing it and savoring that sweet-salty explosion is pure bliss!
Storage and Meal Planning with Texas Trash Pie
One of the best things about this texas trash pie—besides the fact that it tastes like winning the state fair—is how well it keeps! This isn’t one of those delicate, must-be-eaten-in-five-minutes desserts. Because it’s so sturdy and rich, it’s actually fantastic for planning ahead, which is something I think about a lot now that I’m focused on simplifying life.
If you’re trying to stick to a general meal planning routine during the week, you can throw this together on Sunday and still have slices ready for dessert Tuesday night. That’s real convenience! When storing it, make sure it’s completely cooled down first, naturally. Then, just cover the pie dish tightly with plastic wrap or foil. I usually keep it right on my counter at room temperature, covered, for up to three days. It stays beautifully gooey.
If the weather is really warm where you are, or if you made a massive batch and need it to last longer, pop it in the fridge! It will firm up even more when chilled, which some people actually prefer. If you do refrigerate it, just pull it out about 30 minutes before you plan to serve it so it can soften up just a tad. I’ve even warmed a small slice up slightly in the microwave for about 10 seconds when I want that fresh-out-of-the-oven meltiness again, but honestly, room temperature is usually perfect for serving.
It just makes dessert prep so much less stressful knowing you have this amazing, crowd-pleasing treat ready to go for potlucks or busy weeknights. If you’re looking for other easy comfort foods that are great for leftovers, I found a neat list of quick recipes over here you might like!
Troubleshooting Common Texas Trash Pie Issues
Even with what I hope are super clear directions, sometimes our bakes just don’t cooperate, right? Don’t panic! That’s totally normal, and trust me, I’ve bumped into every problem possible while testing these things dozens of times. The texas trash pie is usually pretty forgiving, but a couple of things can throw off that perfect gooey-yet-set texture. Let’s troubleshoot!
If you pull your pie out, let it cool for hours, and the very center is still too soft—like pudding soft, not chewy soft—that usually means it just needed a few more minutes in the oven. I know it’s hard to wait, but 40 to 45 minutes is the sweet spot. If your center is gooey in a good way, great! If it’s completely liquid, pop it back in for five-minute increments until the edges look firm and the middle doesn’t shimmy too much when you gently nudge the pan.
Did you end up with a soggy bottom? Ugh, the worst! That usually happens because the cold pie crust is sitting directly on a bare metal rack or perhaps the oven temperature wasn’t quite right. This is why I always make sure you put that frozen crust on a baking sheet first. The sheet helps insulate the bottom just enough so the heat cooks the filling evenly without turning the crust into a steamed mess. Do not skip the baking sheet trick!
Lastly, if you notice all your lovely chocolate chips and pecans decided to take a trip to the top layer and leave the bottom batter empty, you probably overmixed after adding them. Remember my big warning about gentle folding? When you stir those mix-ins too vigorously, the heavy stuff sinks right to the bottom before the structure of the batter even gets a chance to set up in the oven heat. Next time, fold those pretzels and chips in with just a few easy turns of your spatula. It’s all about restraint!
Frequently Asked Questions About This Texas Trash Pie
Since this texas trash pie is such a wild combination of goodies, I know questions pop up! We want everyone who tries this easy pie recipe to have success. Here are a few things folks ask me most often. If you’re looking for something a little lighter to serve alongside, maybe check out some of my ideas for appetizers and party snacks!
Can I make this a no-bake texas trash pie?
That’s a great question, because there are tons of great no-bake desserts out there! But for this specific recipe, the answer is a firm no, you really need to bake it. See, while we have so many wonderful mix-ins like pecans and chocolate chips, the base batter relies on eggs and condensed milk to form a thick, chewy structure when the heat sets them. If you skip baking, you’ll end up with a big bowl of sweet, crunchy toppings swimming in liquid milk, not a sliceable pie! We need that oven time to transform the goo into that perfect, gooey, yet stable center.
What is the best way to crush pretzels for the texas trash pie?
You want them crushed, sure, but you don’t want dust, and you certainly don’t want massive chunks mixed right next to tiny crumbs, because that makes the texture uneven when you slice it. My favorite hack for getting uniform crunch is the zip-top bag method. Take your pretzels, put them in a sturdy, gallon-sized zip-top bag, squeeze out as much air as you can, and seal it. Then, grab a rolling pin—or even the bottom of a heavy mug—and just gently roll them flat. Move the pin back and forth until you see mostly pea-sized pieces. It’s quick, keeps the mess contained, and gives you the best texture for this chocolate pecan pie hybrid. Don’t use a food processor unless you want flour!
How does this recipe compare to keto meal plan options?
Let me be completely honest with you: this texas trash pie is pure comfort heaven, which means it’s packed with sugar, flour, and fats. It is definitely *not* designed for strict low-carb eating or anything related to keto meal plan needs. If you’ve been diligently following a strict meal planning system or are focused on weight loss programs, save this pie! This is your reward pie—the one you make when you’ve earned a truly indulgent, satisfying treat after sticking to your healthy routine all week long. It’s the perfect indulgence!
Share Your Homemade Texas Trash Pie Creation
And that’s it, my friends! You’ve baked yourself a slice of Texas heaven. I truly hope you love this texas trash pie just as much as my whole family does. Now that you’ve successfully navigated the sweet, salty, gooey goodness, I really want to hear all about it!
Did you sneak a piece before it was totally set? (I won’t tell!) Did you swap any of the mix-ins? Please, don’t keep your triumphs—or your funny little mishaps—to yourself. The best part of baking around here is building up our community! Head down to the comments section and leave a star rating for the recipe.
If you snap a picture of your beautiful, sliceable creation—especially if you topped it with that whipped cream dollop—please tag me on social media! I absolutely adore seeing what you create in your home kitchens. If you have any lingering questions or ideas for future recipes you want me to tackle next, you can always reach out to me directly on the contact page. Happy baking, and enjoy that piece of pie!
PrintEasy Texas Trash Pie Recipe

Make this simple, no-bake Texas Trash Pie, a decadent dessert blending sweet and salty flavors with chocolate, pecans, and pretzels.
- Prep Time: 15 min
- Cook Time: 45 min
- Total Time: 60 min
- Yield: 8 servings 1x
- Category: Dessert
- Method: Baking
- Cuisine: American
- Diet: Vegetarian
Ingredients
- 1 (9 inch) frozen deep-dish pie crust
- 1 cup all-purpose flour
- 1 cup light brown sugar, packed
- 1 cup granulated sugar
- 1 teaspoon baking soda
- 1/2 teaspoon salt
- 1 cup (2 sticks) unsalted butter, melted
- 1 cup sweetened condensed milk
- 2 large eggs, lightly beaten
- 1 teaspoon vanilla extract
- 1 cup semi-sweet chocolate chips
- 1 cup chopped pecans
- 1 cup crushed pretzels
- 1 cup shredded coconut (optional)
Instructions
- Preheat your oven to 350°F (175°C). Place the frozen pie crust on a baking sheet.
- In a large bowl, whisk together the flour, brown sugar, granulated sugar, baking soda, and salt.
- Pour in the melted butter and mix until just combined.
- Stir in the sweetened condensed milk, eggs, and vanilla extract until the batter is smooth.
- Gently fold in the chocolate chips, pecans, crushed pretzels, and coconut, if you are using it. Do not overmix.
- Pour the mixture evenly into the unbaked frozen pie crust.
- Bake for 40 to 45 minutes, or until the center is set and the edges are golden brown.
- Let the pie cool completely on a wire rack before slicing. This pie sets up as it cools.
- Serve slices plain or with a dollop of whipped cream.
Notes
- This recipe is very rich; consider serving smaller slices.
- If you skip the coconut, you might want to add a few more chocolate chips for richness.
- For an easy start, use a store-bought frozen pie crust.
- This pie is great for meal planning because it holds up well for several days.
Nutrition
- Serving Size: 1 slice
- Calories: 450
- Sugar: 45
- Sodium: 300
- Fat: 28
- Saturated Fat: 12
- Unsaturated Fat: 10
- Trans Fat: 0.5
- Carbohydrates: 48
- Fiber: 2
- Protein: 6
- Cholesterol: 55