
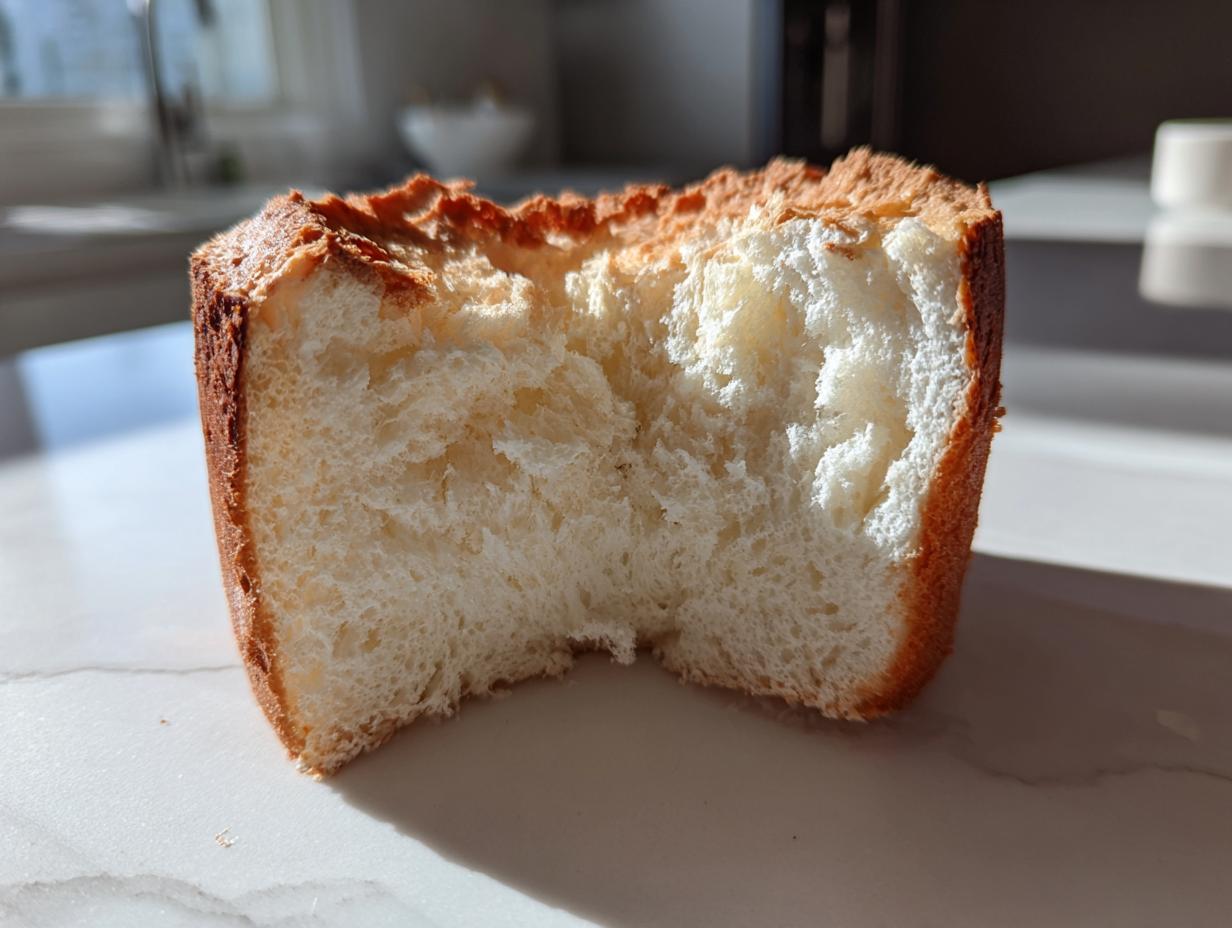
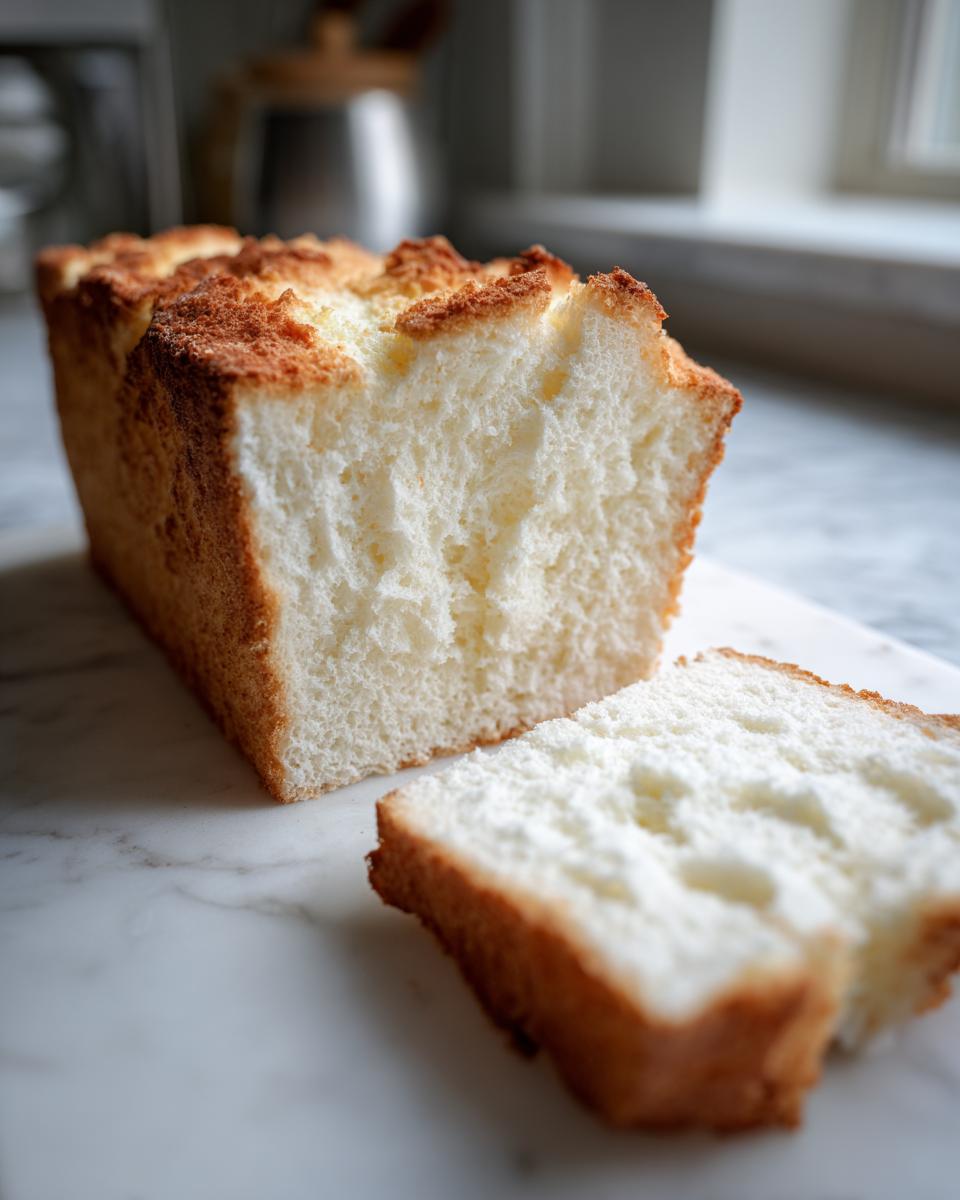
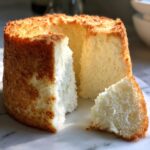
Oh, my friends, let’s talk texture! If you’ve ever sliced into a cake only to have it deflate into a sticky puddle, I understand your pain. But fear not, because today we are conquering the ultimate light bake: the angel food cake. This recipe is my absolute favorite because it proves you can create something truly spectacular—something unbelievably light and airy—using just simple ingredients. When you achieve that perfect, cloud-like crumb on your very first try, it’s pure kitchen magic! I’m Claire from Bliss Batter, and nothing makes me happier than showing you how accessible those showstopping desserts really are. If you want to know more about our mission to bring joy back to baking, check out my story over at Bliss Batter. Let’s get baking!
- Why This Classic Angel Food Cake Recipe Works Every Time
- Ingredients for the Best Homemade Angel Food Cake from Scratch
- Step-by-Step Instructions for Perfect Angel Food Cake
- Tips for Success: Achieving the Lightest Angel Food Cake Ever
- Storing Your Angel Food Cake and Serving Suggestions
- Angel Food Cake Variations and Flavor Twists
- Frequently Asked Questions About Making Angel Food Cake
- Nutritional Snapshot of This Fat Free Dessert Recipe
- Share Your Heavenly Light Cake Creations
Why This Classic Angel Food Cake Recipe Works Every Time
People often think making a truly stunning classic angel food cake recipe means complicated steps, but I promise you, the magic is in the details, not in adding extra steps. This particular method guarantees that floaty, cloud-like texture that makes this cake such a fantastic fat free dessert recipe. It’s all about respecting the egg whites! We aren’t using any butter or oil here, so the structure relies completely on the air we whip into those whites. If you follow these core techniques, you are setting yourself up for success. I learned early on that skipping corners here leads to sadness later, so slow down when we get to whipping. For more insight into achieving that ultimate fluffiness, take a peek at what others have found successful when baking this classic cake!
The Secret to a Heavenly Light Cake: Egg Whites
You absolutely must start with room-temperature egg whites—this is non-negotiable for a heavenly light cake! Cold whites just won’t whip up to their full potential. When you beat them, we are literally building the structure of the entire cake using millions of tiny air bubbles. You need to beat them until those stiff, glossy peaks form; they should look like shiny mountains that hold their shape when you lift the whisk attachment. If they look soft or floppy, that cake is going to sink, trust me on this one.
Mastering the Fold: Keeping Air in Your Angel Food Cake
Here is where most people lose the cake! Once those beautiful egg whites are ready, you can’t just dump the flour mixture in and stir wildly. That just knocks all that precious air right out. We use the folding technique. It means cutting down the middle with your spatula and gently sweeping up the side of the bowl, turning the mixture over itself. You repeat this *slowly* until the flour just disappears. You want just combined, not incorporated until it’s smooth like pancake batter. Gentle hands make for airy results!
Ingredients for the Best Homemade Angel Food Cake from Scratch
Okay, gathering supplies is where we start building that beautiful, fluffy texture! I love that this turns out to be a fantastic no butter cake recipe, meaning we rely entirely on those egg whites for richness. You might notice the sugar is split—that’s intentional and important for the whipping process! Make sure all your egg whites are at room temperature so they can get maximum volume later. I always suggest checking out recipes like the one showing off the delicious 8-ingredient version for simplicity, though we need a few extracts for our flavor profile.
- 1 ½ cups egg whites (about 10 to 12 large eggs), room temperature
- 1 ½ teaspoons cream of tartar
- 1 teaspoon vanilla extract
- ½ teaspoon almond extract
- ¼ teaspoon salt
- 1 cup granulated sugar, divided
- ¾ cup cake flour, sifted
- ½ cup granulated sugar, sifted again
Step-by-Step Instructions for Perfect Angel Food Cake
Alright, now we put the theory into practice! Making this angel food cake involves moving quickly but gently. Remember, air is our main ingredient, so we need to treat it kindly. We are not doing any fancy creaming here, thankfully! It’s all about creating that beautiful meringue and then folding in our dry components without flattening everything we just worked so hard to build up. You can find loads of other wonderful dessert recipes, but this method really pays off!
Preparing the Meringue Base for Your Angel Food Cake
First things first: grab your 10-inch tube pan. This is crucial! Do not grease it at all, and don’t even think about putting parchment paper in the bottom. We need the batter to cling to those sides as it rises. Preheat your oven to 350°F (175°C). Now for the real test: your mixer bowl and whisk attachment must be surgically clean. I mean squeaky! Any hint of grease or egg yolk, and those egg whites just won’t whip up properly—that’s the secret to resisting collapse later. Pop in your room-temperature egg whites, cream of tartar, vanilla, almond extract, and salt. Start beating on medium speed until you see soft, gentle peaks begin to form.
Incorporating Sugar and Flour into the Fluffy White Cake Batter
Once we have those soft peaks, it’s time for the sugar! Remember that cup of sugar? Add it slowly, about two tablespoons at a time, while the mixer is still running. After all the sugar is in, crank the speed up to high until you have stiff, glossy peaks—your meringue should be looking bright white and firm. Now switch to a spatula. In a separate bowl, you whisked your flour and that tiny bit of extra sugar together. Seriously, sift this mixture over the meringue in about four additions. Gently fold it in each time, using that down-and-under motion. Keep folding until you just can’t see any white streaks left. You’re building a truly fluffy white cake here, so be delicate!
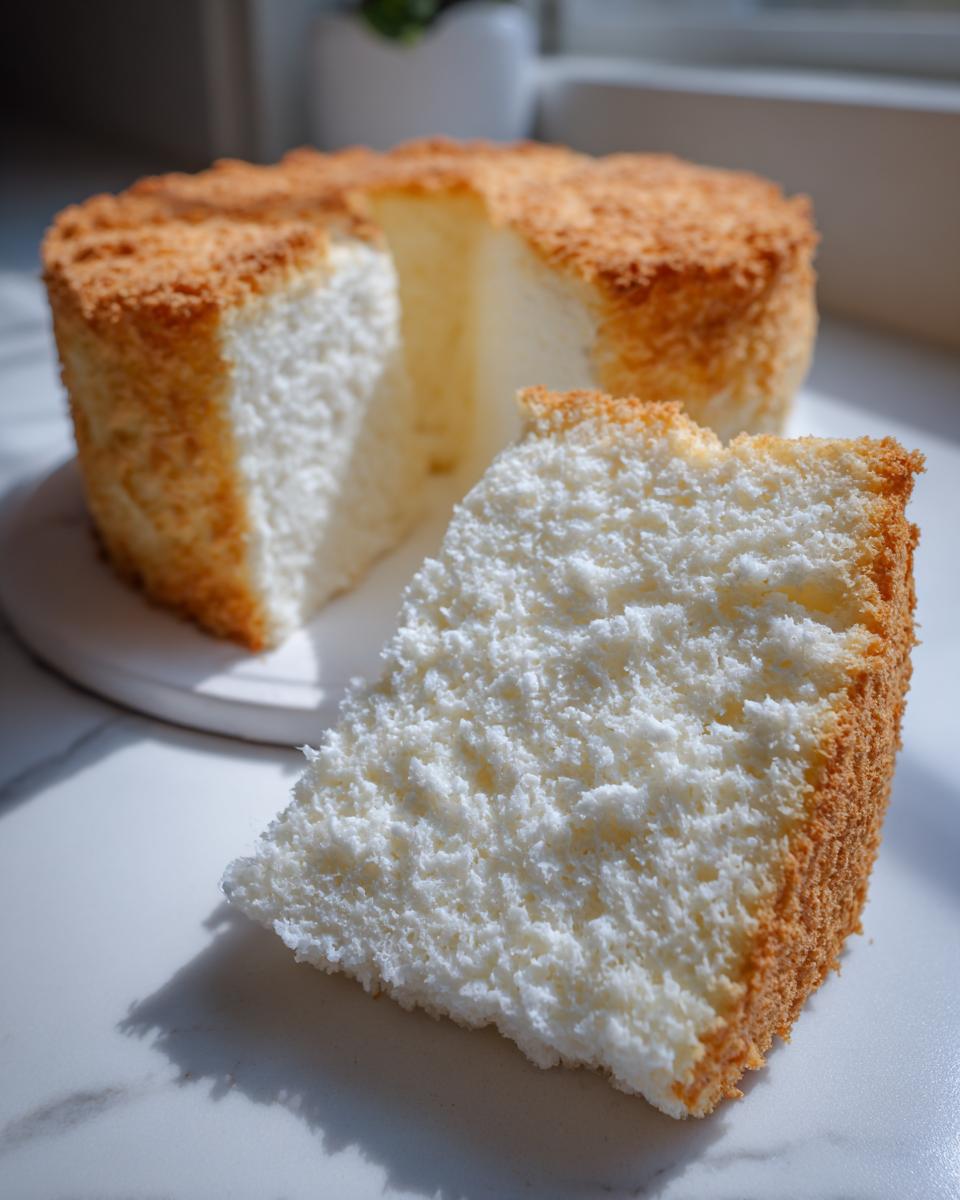
Baking and Crucial Cooling Steps for Your Angel Food Cake
Gently spoon your beautiful batter into the ungreased tube pan. I like to run a knife or a thin offset spatula through the top a couple of times just to break up any giant air bubbles that might be hiding. Bake for about 35 to 40 minutes, or until the top is golden and you can gently press it and it springs right back—that’s how you know you nailed the how to make angel food cake in tube pan technique! But here’s the most important part: the second it comes out of the oven, you must flip that pan upside down. If your pan doesn’t have little feet, balance the hole over the neck of a sturdy glass bottle. The cake must cool completely upside down—at least 90 minutes! This lets gravity stretch the delicate foam just enough so it won’t completely collapse on itself when you try to slice it later.
Tips for Success: Achieving the Lightest Angel Food Cake Ever
Don’t let the simplicity fool you—this cake demands focus! Getting that signature towering height and airy crumb means paying attention to a few key details that really result in the best angel food cake ever. Because we rely so heavily on the integrity of the egg whites, preparation is everything. Don’t stress, though; I’ve worked out all the potential hiccups so you can bake with confidence!
- The Pan Rule: Seriously, do not grease the tube pan! The batter needs those rough sides to grab onto as it climbs upward in the heat; if it’s slick, it can’t climb and it will deflate.
- Sifting is Your Friend: We sift the cake flour and the remaining sugar twice. Yes, twice! This breaks up any clumps and ensures the flour integrates seamlessly without weighing down the meringue.
- Temperature Check: If your egg whites are cold, pull them out an hour before you plan to bake. The warmer they are, the faster and higher—meaning more volume—they will whip up.
- Cooling is Non-Negotiable: I know it sounds crazy to leave a cake hanging upside down for two hours, but if you flip it right side up before it’s completely cool, the gravity will pull that delicate structure down into a dense, sad disk.
If you want to see some of my other fantastic go-to recipes, check out my easy baking ideas!
Storing Your Angel Food Cake and Serving Suggestions
Once your beautiful cake is fully cooled and you’ve managed to release it from the pan—high five!—storage is super easy. Since this is a naturally fat free dessert recipe, it actually keeps quite well! Just cover it loosely with plastic wrap or place it under a cake dome at room temperature. Honestly, it’s best eaten the day it’s baked, but it stays delightfully soft for about two days. We never refrigerate it because cold air dries out the texture too quickly!
This cake truly shines when kept simple, which makes it perfect for whipping up during those lovely hot days suitable for summer dessert recipes. My favorite way to serve it is just sliced thick with mounds of fresh, softly sweetened berries—strawberries or raspberries are amazing. If you want a little extra indulgence without weighing it down, a super thin drizzle of homemade lemon glaze works wonderfully, or you could even use a simple whipped cream. Speaking of drinks, if you need a refreshing pairing, I’ve got a great apple cider cocktail recipe that goes beautifully with it!
Angel Food Cake Variations and Flavor Twists
While the classic, pure white angel food cake is just divine, sometimes I love to add just a *little something* extra, especially when using it for a party or celebration!
Citrus is a fantastic addition. When folding in your flour mixture, toss in the zest of one lemon or one orange along with the dry ingredients. It brightens the whole cake up—it’s truly wonderful! If you are feeling bold and want something really show-stopping, you can gently fold in a few drops of pink food coloring right at the very end for a beautiful, pale blush cake. Folks often ask me about those pretty pink versions, and you can see a lovely inspiration for that right here! You can even try swapping out the almond extract for peppermint in the wintertime. It’s still light, but it feels totally new!
Frequently Asked Questions About Making Angel Food Cake
I get so many questions after people bake this recipe for the first time! It’s a delicate cake, so some worries are totally normal. Did your cake weep or sink a bit? Don’t worry, we’ve all been there. I want every single person who tries this to get that perfect slice. If you’re looking for something cozy to enjoy alongside your slice, I have a wonderful salted caramel latte recipe that pairs perfectly!
Can I use carton egg whites for this angel food cake recipe?
You technically can, but I really, really advise against it for this recipe. Carton egg whites usually have stabilizers added, and those stabilizers can actually prevent your egg whites from whipping up into the high, stiff peaks we absolutely need. Fresh eggs give you the most volume and the fluffiest texture required for a true angel food cake recipe!
What is the best way to cut this light and airy cake recipe?
This is key for slicing! Because this cake is so incredibly delicate, you can’t just saw through it with a dinner knife. You need a long, thin, sharp serrated knife—the kind you use for bread works great! Cut gently, using just the length of the blade and letting the teeth do the work. This keeps the integrity of your beautiful, light and airy cake recipe intact.
Nutritional Snapshot of This Fat Free Dessert Recipe
One of the coolest things about using only egg whites and sugar is what you leave *out*—namely, all that fat! This is truly an incredible fat free dessert recipe you can serve without guilt. For an average slice, you’re looking at roughly 150 calories and 0 grams of fat. Keep in mind these numbers are just estimates based on my specific ingredient amounts; your mileage might vary slightly depending on how precisely you measure the sugar!
Share Your Heavenly Light Cake Creations
I truly cannot wait to hear if you made this perfect, delicate angel food cake! Baking connects us, so please come back and leave a rating—it helps other bakers know this recipe is worth trying in their kitchen. If you snapped a picture of your towering creation, tag us on social media! If you have any final questions, feel free to reach out through my Contact Page. Happy baking, everyone!
PrintThe Best Homemade Angel Food Cake: Light and Airy from Scratch
Create a truly light and airy Angel Food Cake using this classic recipe. You will learn the simple steps to whip egg whites perfectly for a heavenly, fat-free dessert.
- Prep Time: 25 min
- Cook Time: 40 min
- Total Time: 2 hours 45 min
- Yield: 10 servings 1x
- Category: Dessert
- Method: Baking
- Cuisine: American
- Diet: Low Fat
Ingredients
- 1 ½ cups egg whites (about 10 to 12 large eggs), room temperature
- 1 ½ teaspoons cream of tartar
- 1 teaspoon vanilla extract
- ½ teaspoon almond extract
- ¼ teaspoon salt
- 1 cup granulated sugar, divided
- ¾ cup cake flour, sifted
- ½ cup granulated sugar, sifted again
Instructions
- Preheat your oven to 350°F (175°C). Do not grease your 10-inch tube pan (one with removable feet is best).
- In the clean, dry bowl of a stand mixer fitted with the whisk attachment, combine the egg whites, cream of tartar, vanilla extract, almond extract, and salt.
- Beat the egg whites on medium speed until soft peaks form.
- Gradually add the first 1 cup of granulated sugar, about 2 tablespoons at a time, while beating constantly. Increase the speed to high and beat until stiff, glossy peaks form. The meringue should hold its shape firmly.
- In a separate bowl, whisk together the cake flour and the remaining ½ cup of sifted sugar.
- Sift about one-quarter of the flour/sugar mixture over the meringue. Gently fold it in using a large rubber spatula until just combined.
- Repeat this process in three more additions, folding very gently after each addition to keep the air in the batter. Do not overmix.
- Gently spoon the batter into the ungreased tube pan. Run a knife through the batter to break up any large air pockets.
- Bake for 35 to 40 minutes, or until the top is golden brown and springs back lightly when touched.
- Immediately invert the pan onto its feet (or over the neck of a bottle if your pan does not have feet). Let the cake cool completely upside down, which takes about 1.5 to 2 hours. This step is crucial for the cake’s texture.
- Once completely cool, run a thin knife around the edges and the center tube to release the cake. Serve plain or with fresh fruit.
Notes
- Make sure your mixing bowl and whisk attachment are completely free of any grease or egg yolk, as fat prevents the egg whites from whipping properly.
- Use cake flour for the lightest texture; do not substitute with all-purpose flour unless you remove 2 tablespoons of flour and replace it with 2 tablespoons of cornstarch for every cup of flour used.
- Cooling the cake upside down prevents the delicate structure from collapsing.
Nutrition
- Serving Size: 1 slice
- Calories: 150
- Sugar: 30
- Sodium: 50
- Fat: 0
- Saturated Fat: 0
- Unsaturated Fat: 0
- Trans Fat: 0
- Carbohydrates: 35
- Fiber: 0
- Protein: 4
- Cholesterol: 0