
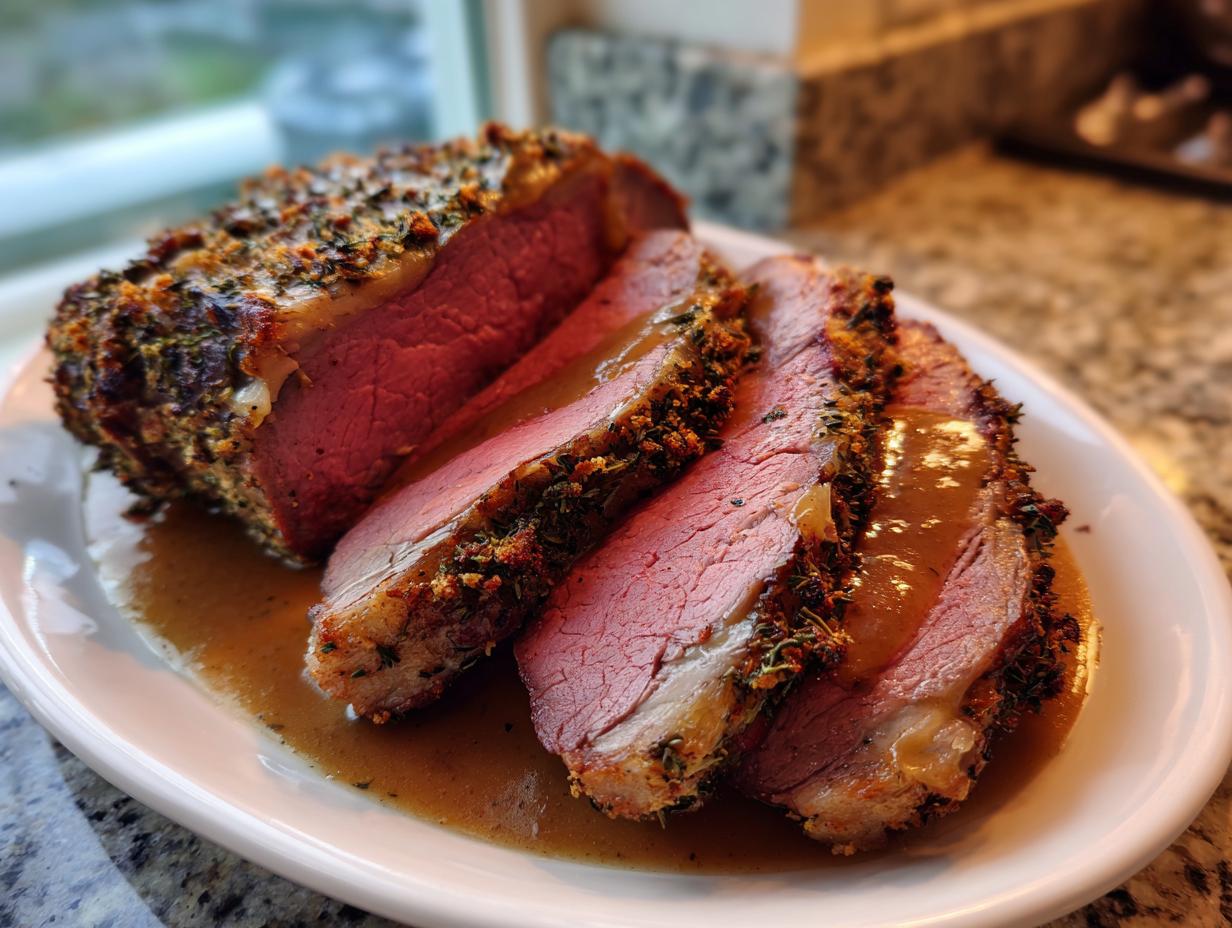
There’s nothing quite like pulling a magnificent roast from the oven, the aroma of herbs filling your entire house. If you’re looking to create that show-stopping centerpiece for your next celebration, stop scrolling right now! I’m Claire, and while I used to plan corporate galas, I found my true precision applying meticulous timing to baking and roasting. That experience means I absolutely hate waste, especially when it comes to an expensive cut like a **rib roast**. That’s why I developed this recipe for a Foolproof Herb-Crusted Prime Rib Roast. We’re taking all the guesswork out so you get that juicy, tender result every single time. You can trust this method! For more about how I apply that planning precision to my recipes, check out my About page.
- Why This Herb-Crusted rib roast Recipe Guarantees Success
- Ingredients for Your Standing rib roast Guide
- Essential Equipment for Cooking the Perfect rib roast
- Step-by-Step Instructions for Oven Roasted rib roast
- Crafting a Simple Pan Gravy for Your rib roast
- Tips for How to Cook Tender roast Beef Every Time
- Serving Suggestions for Your Holiday roast Centerpiece
- Storing and Reheating Your Leftover rib roast
- Frequently Asked Questions About Making a rib roast
Why This Herb-Crusted rib roast Recipe Guarantees Success
I totally get it—roasting a big, beautiful rib roast can feel terrifying! It’s an investment, and the thought of ruining it by overcooking or undercooking keeps so many home cooks away from this amazing centerpiece. But trust me, this method takes the fear out of the equation. This is truly a Foolproof Prime Rib recipe because we aren’t relying on guessing games. If you want more tips for simplifying weeknight meals while you build your confidence, check out my section on easy weeknight dinners!
Here’s why you can step into the kitchen confidently with this guide to Juicy Roast Cooking Tips:
- It follows a controlled process that maximizes flavor while tenderizing the meat.
- We use the meat thermometer religiously—it’s your best friend here!
- It results in that gorgeous, savory outer layer every time.
Achieving the Perfect Medium Rare roast
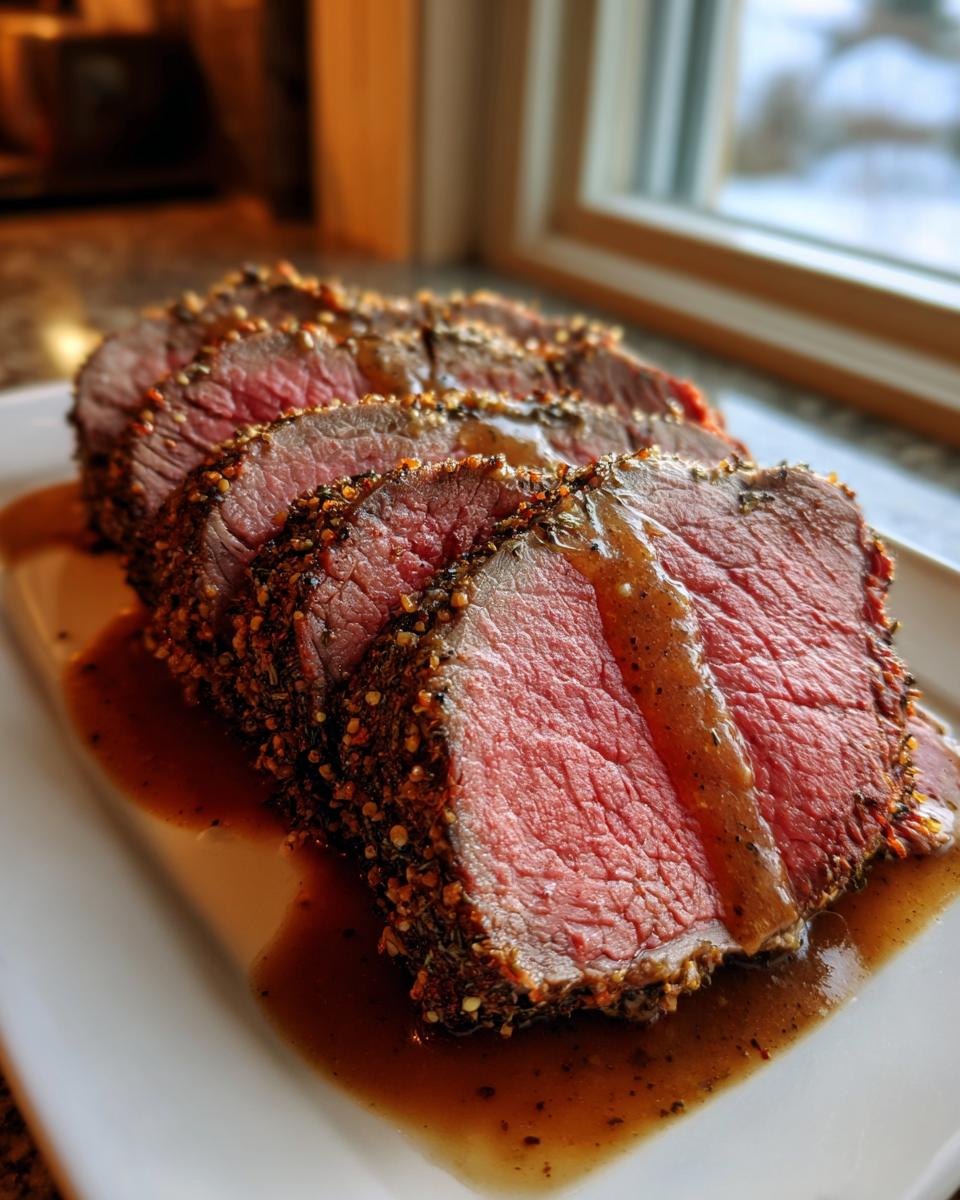
The secret sauce, so to speak, is the two-stage heat approach. We start scorching hot, which instantly sets up that beautiful exterior crust we crave. Then, we immediately drop the heat way down low to let the inside gently come up to temperature. This technique ensures the roast cooks evenly from edge to edge, finally giving you that gorgeous, rosy color without that dreaded grey band.
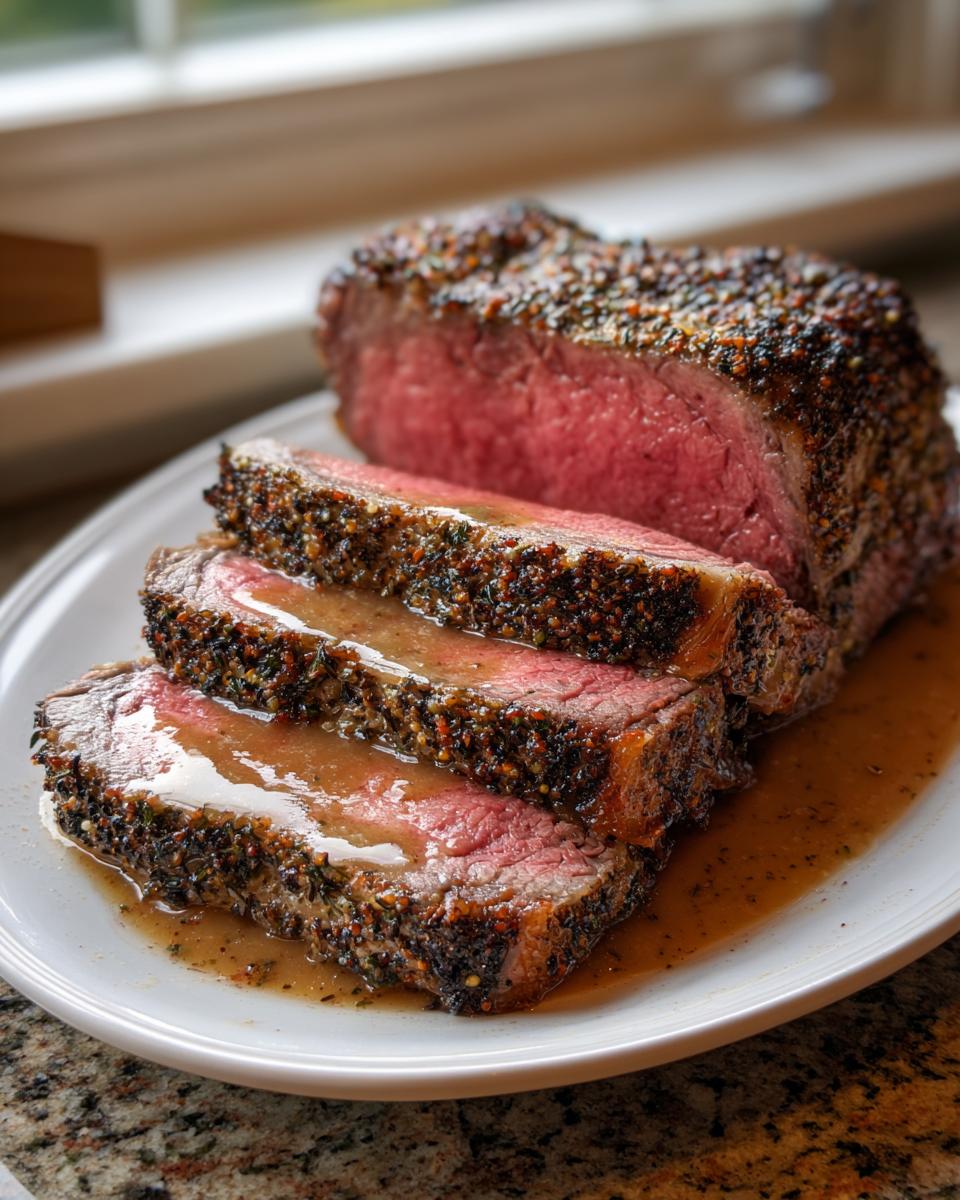
Flavorful Herb Crusted rib roast Finish
Oh, the crust! This is where the magic truly happens. We massage a glorious mixture of softened butter and intense herbs—thyme, rosemary, and garlic—all over the meat before it ever sees the oven. As it roasts, this melts down and crisps up right against the beef. It creates the most amazing, savory Herb Crusted Roast that just begs to be scraped clean with a spoon.
Ingredients for Your Standing rib roast Guide
Whenever I approach a recipe involving an expensive piece of meat, I double-check my measurements! Precision is absolutely everything when you are dealing with a centerpiece like this. I put together the full list of what you’ll need below. Remember, for the herb butter, make sure that butter is truly softened—not melted—so it spreads beautifully over the entire surface of your beautiful **rib roast**. If you want an in-depth look at getting that ultimate crust, I walk through the final preparation steps for achieving that perfect finish right here on my glorious crust guide!
- 1 (4 to 5 pound) standing rib roast (Prime Rib Roast), 2 or 3 ribs
- 3 tablespoons kosher salt
- 2 tablespoons freshly ground black pepper
- 1 tablespoon dried thyme
- 1 tablespoon dried rosemary
- 1 tablespoon garlic powder
- 4 cloves garlic, minced
- 1/2 cup unsalted butter, softened
- 1 tablespoon olive oil
- 1 cup beef broth (for gravy)
- 1 tablespoon all-purpose flour (for gravy)
Essential Equipment for Cooking the Perfect rib roast
Okay, before you even think about pulling that gorgeous hunk of beef out of the packaging, let’s have a quick chat about equipment. I learned the hard way when I was planning a huge corporate Christmas dinner that having the wrong tools makes everything feel messy and panicked. For this **rib roast** recipe, cutting corners on your gear just isn’t worth it, especially since this is such an impressive cut!
You don’t need a million gadgets, but these three things are non-negotiable if you want that guaranteed perfect roast, so grab them now:
- A sturdy roasting pan. Yep, just stand it up in the pan. I skip the rack here so I get all those wonderful drippings saved up for the gravy later. Don’t worry, if you keep the heat managed correctly, the bottom won’t burn!
- A reliable meat thermometer. Seriously, I beg you. Forget the little pop-up timers they stick in store-bought roasts. This is how we achieve that even, edge-to-edge medium rare. You need a digital one that reads fast.
- Aluminum foil. This is for the resting stage! Do not skip the resting; the foil gently tents the meat to keep all that beautiful moisture locked in while the internal temperature stabilizes.
Having these items ready means the entire cooking process is calm, even enjoyable. You’re prepped for success!
Step-by-Step Instructions for Oven Roasted rib roast
Now that the meat is prepped and we know our final temperature goal, it’s time to roast! Remember, I’m channeling my old event-planning precision here, so pay attention to the timing because that’s what makes this **Oven Roasted Rib Roast** so incredibly reliable. Don’t feel rushed; the key to this whole process is actually having patience at the start and the end! For a look at how I approach slow cooking for other dishes, you can peek at my recipe for pot roast here.
Preparation: Tempering and Seasoning the rib roast
First things first: that **rib roast** needs to relax! Pull it out of that chilly fridge at least two to three hours before you plan to cook it. This is called tempering, and it stops the outside from burning while the inside is still cold. Pat it completely dry—moisture is the enemy of a good crust, so use a boatload of paper towels till it feels dry to the touch. Now, rub it down with the olive oil, followed by a generous coating of salt and pepper. Finally, take that gorgeous herb butter and massage every single surface of that **rib roast** until it’s fully coated. It should look beautifully seasoned and ready for its close-up!
The Two-Stage Cooking Method for rib roast
Crank that oven up to a screaming hot 450°F (232°C). Place your roast fat-side up in the pan and let it sear for exactly 15 minutes. This sets the crust. Right after that, drop the heat down to 325°F (163°C)—no peeking! Now, this is where the meat thermometer earns its keep. You’re roasting until that thermometer reads 125°F (52°C) in the thickest spot. This controlled process is the secret to our **Foolproof Prime Rib** result; it guarantees that perfectly rosy interior.
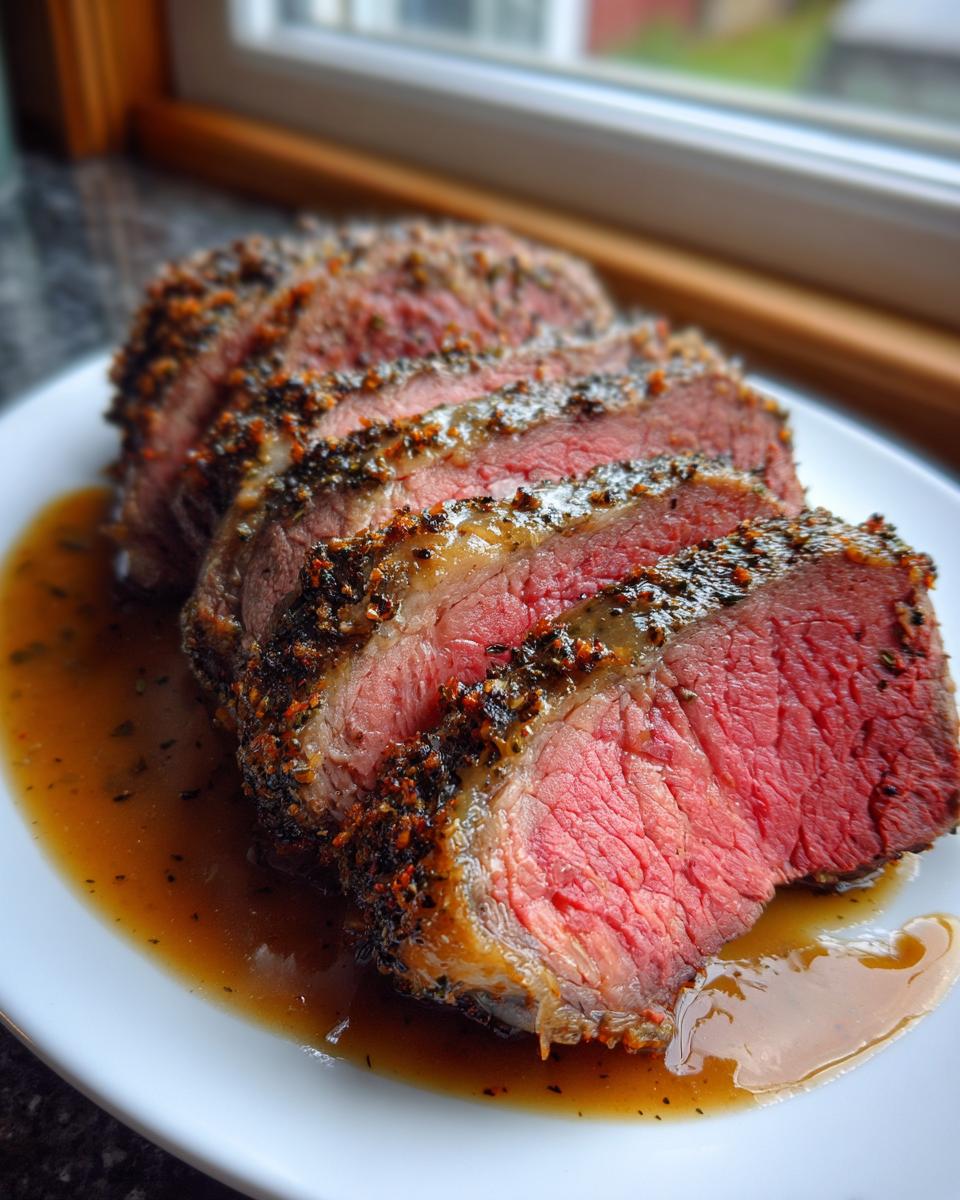
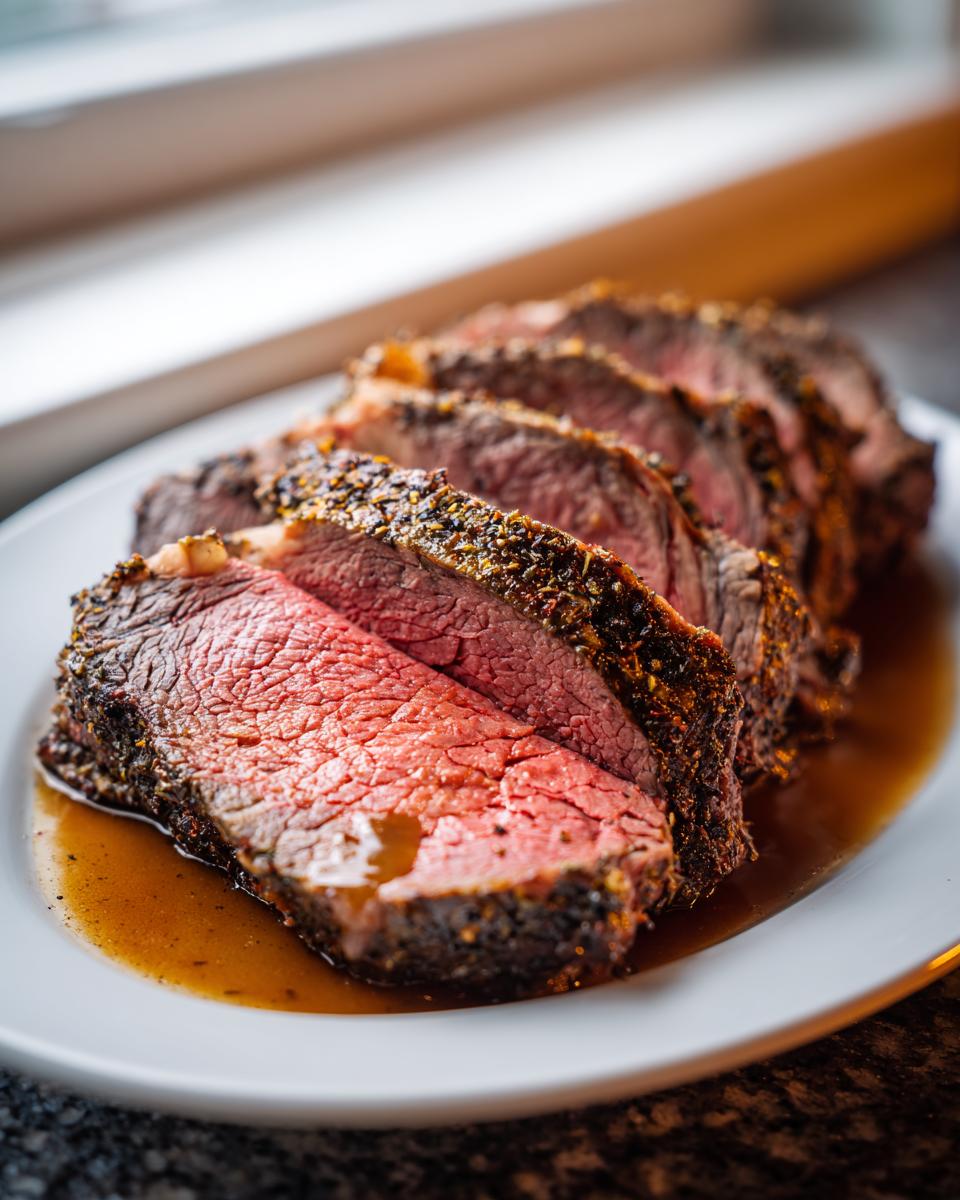
Resting and Carving the Celebration Roast
When you hit that 125°F mark, pull the roast out immediately! Tent it loosely with foil—don’t wrap it tight, just loosely cover it—and set a timer for a minimum of 20 minutes. Seriously, walk away! During this rest, the internal temperature keeps climbing (that’s called carryover cooking) up to about 130°F to 135°F, and the juices redistribute. If you skip this, every bit of that hard work runs right onto your cutting board! Once rested, use a sharp knife to carve right between those big bones. Serve up slices of this stunning **Celebration Roast**!
Crafting a Simple Pan Gravy for Your rib roast
Okay, we’ve got this gorgeous, perfectly rested **rib roast**, but we are not done yet! We made sure to keep those glorious drippings in the roasting pan—that gooey, browned goodness is pure liquid gold and the absolute best base for any gravy. Skipping this step would be a true crime against beef, right? This simple pan gravy is everything you need to tie the whole meal together without any fussy extra steps. For my ultimate guide on getting smooth gravies every single time, even when using drippings, you can check out my tips for homemade gravy here.
When the roast is resting, just put that roasting pan right onto a burner over medium heat. You need to scrape up all those little browned bits stuck to the bottom—that’s where the deep flavor lives! Pour off almost all the fat, but leave about two tablespoons behind with those tasty fond bits. Whisk in your flour right into that fat and let it cook for just a minute; we’re making a quick roux there to thicken things up.
Next, slowly pour in that cup of beef broth while whisking constantly—I mean constantly, so you don’t end up with lumps! Let it simmer gently until it thickens just slightly. It won’t get quite as thick as something made with a cornstarch slurry, but honestly, that’s what makes it perfect for a rich **rib roast**. Taste it at the end, add a pinch more salt or pepper if you think it needs it, and serve it steaming hot right alongside those juicy slices. It’s practically mandatory!
Tips for How to Cook Tender roast Beef Every Time
You’ve got the centerpiece resting, but since this is such a stunning, often expensive cut of meat, I want to send you off with a few final nuggets of advice. These aren’t really steps in the recipe, but more like little secrets I’ve picked up over the years planning big events where meat presentation was everything. Following these will ensure you get that melt-in-your-mouth experience every time you tackle your **rib roast**.
If you’re looking for other ways to make tough cuts famously tender, I have a whole section devoted to that magic when it comes to slow-cooked meats. You should definitely browse my braised short ribs recipe for inspiration!
Crisping up the crust after the rest
When your roast comes out of that long rest, the exterior might look a little soft, and that beautiful crust you worked so hard on can cool down. If you like that ultra-crispy, almost crackly exterior, here’s a trick: Put the roast back under the broiler for just two or maybe three minutes when it comes out of the resting foil. But listen to me: Do not walk away! Broilers are intense, and you are just aiming to warm that crust back up and make it crisp. If you see any dark spots starting to burn, pull it immediately. It’s all about that visual appeal for a showstopper like this!
The thermometer is not optional, my friends
I preach this for every roast I make: Relying on time per pound is risky business. Every oven is different, every roast dimensions are different, and beef density varies! That wonderful piece of equipment I asked you to grab earlier—the reliable meat thermometer—is the single most important tool for a successful **roast beef**. If you pull it out at 125°F, you will nail that perfect medium-rare. If you leave it in because the timer says it *should* be done, you’ll probably end up with dry edges. Trust the temperature, not the clock!
Handling the bones—the butcher’s secret
If you bought a bone-in roast (which I highly recommend for better flavor and insulation!), you might notice the bones look like they are glued on oddly. The best butchers will separate the bones from the roast, trim them clean, and then tie them right back onto the roast using kitchen twine. This is genius because it lets the meat cook evenly but keeps the presentation spectacular when you bring it to the table. When it’s time to carve (after that long rest!), you just snip the twine, slide the bones right off, and then carve the roast itself. It makes slicing so much easier than fighting around hard bone structure!
Serving Suggestions for Your Holiday roast Centerpiece
Okay, so you’ve just pulled off a culinary miracle! Your glorious, herb-encrusted **rib roast** is resting beautifully, and soon you’ll be carving slices of perfectly cooked beef. But what goes *next* to that amazing meat? Don’t let plain old steamed broccoli ruin the presentation! A show-stopping main course deserves equally wonderful side dishes, doesn’t it?
This kind of rich, celebratory meat needs sides that are comforting, creamy, or robust enough to stand up to that deep, savory beef flavor. Since I spend so much time perfecting the centerpiece, I like to keep the accompaniments straightforward but utterly delicious. For something you absolutely must try alongside this roast, I have a recipe for the creamiest mashed potatoes you’ll ever eat—they are practically mandatory for soaking up those precious pan drippings.
- The Creamy Dream: You absolutely need rich, buttery mashed potatoes. I always make sure mine have a touch of cream cheese in them for extra stability and incredible flavor—they act like a sponge for the pan gravy! You can find my go-to recipe for these foolproof creamy mashed potatoes here.
- Root Vegetable Glory: A good roasting pan holds more than just the meat, even if I skip the rack! Toss some hearty root vegetables like carrots, parsnips, or chunks of sweet potato in olive oil, salt, pepper, and maybe a tiny drizzle of maple syrup. They roast right there in the oven, soaking up all the beef drippings from the bottom of your pan. Talk about flavor fusion!
- Something Bright: To cut through the richness of all that beef and butter, you need a little green pop. I usually go for simple roasted asparagus or green beans tossed with some lemon zest right at the end. It adds color and a needed acidic lift to balance the plate.
When you assemble everything on the plate—a mound of creamy potatoes, a few slices of that tender roast, a drizzle of that homemade gravy, and a bright side vegetable—it just looks like a painting. It’s culinary symmetry, and it makes the whole meal feel special!
Storing and Reheating Your Leftover rib roast
Oh, the glorious aftermath! If you managed to have any of this incredible **rib roast** left over—which, let’s be honest, is usually a minor miracle in my house—we need to treat those leftovers with the respect they deserve. You worked so hard for that perfect medium-rare, and we absolutely cannot, under any circumstances, dry it out in the microwave! Reheating substantial pieces of beef like this needs a gentle hand, just like when I’m making soup and need to make sure the noodles don’t turn to mush. For inspiration on how to turn leftovers into something brand new, which is my favorite way to tackle day-two dishes, you can check out my leftover soup recipes right here.
Best Way to Store Slices vs. Chunks of rib roast
How you store it depends on how you plan to eat it next! If you know you’re going to serve it sliced the next day—maybe for a quick lunch sandwich on good bread—then go ahead and slice what you need first, but only what you need! Thin slices dry out faster. Package those slices tightly in plastic wrap, then slide them into an airtight container or a freezer bag. If you have larger, thick pieces or even bone-in sections left, wrapping those tightly in plastic wrap followed by a layer of foil keeps the air out and locks in the moisture, which is essential for keeping this **rib roast** tender.
Make sure you pour any leftover pan gravy into a separate, small container. You don’t want the gravy mixed in with the meat before storing, because the meat will get soggy after a day or two in the fridge. The good news is that gravy freezes beautifully, too!
The Gentle Reheat: Keeping That Tender roast Flavor
This is the most critical part. We are going low and slow to gently coax the temperature back up without cooking the meat further past that beautiful medium-rare. Forget the microwave unless you’re reheating just a tiny, thin slice and plan to eat it immediately! The best method for reheating larger portions is using a very low oven, keeping the meat submerged (or at least partially submerged) in some liquid.
Spread your leftover slices or chunks in a baking dish. Pour just enough of that saved pan gravy, or even decent quality beef broth, over the meat so it covers the bottom of the dish and comes about halfway up the sides of the meat. Cover that dish tightly with foil—again, really seal it well. Pop it into an oven that’s set to a very low temperature, around 250°F (120°C). Give it maybe 15–20 minutes, checking the temperature just to make sure it’s warm, not hot. You want that internal temperature to only creep up about 10 to 15 degrees so it’s pleasantly warm but still retains that perfect, soft texture.
Reheating the Gravy
The gravy is incredibly simple. Just reheat it gently on the stovetop over low heat, whisking frequently so it doesn’t form a skin or scorch on the bottom. If it seems too thick after chilling, add a splash of water or broth until it reaches that perfect pourable consistency again. Serving your reheated **tender roast** with warm, luscious gravy is the key to making leftovers taste almost as good as the fresh roast!
Frequently Asked Questions About Making a rib roast
It’s totally okay if you still have questions swirling around! Cooking a large, important piece of beef like a **rib roast** shouldn’t feel like a mystery. I’ve gathered the questions I get asked most often by friends who are attempting this for the first time. We covered the timing, but let’s nail down the terminology and those last-minute worries. If you want to see how I approach cooking other large cuts for a crowd, I have some great tips on my roast chicken guide!
What is the difference between Prime Rib and Standing Rib roast?
Honestly, this is the number one confusion I hear! If you are buying a bone-in primal cut from the rib section of the steer, you are almost always looking at the exact same thing—it’s the same luscious part of the animal. The terms **Standing Rib Roast** and **Prime Rib Roast** are used interchangeably by butchers! The only time things get slightly different is when the USDA grading comes into play. “Prime” is the top quality grade, but you can have a standing rib roast that is graded Select or Choice. If you can get Prime, go for it, but this recipe works beautifully on any high-quality standing **rib roast** you find!
Can I cook this rib roast from frozen?
Oh, please say no! I know sometimes the grocery store gives you a beautiful frozen behemoth, but for this specific technique, you absolutely cannot roast it straight from frozen. If you try that, you are guaranteeing yourself a huge grey band on the outside because the heat won’t penetrate evenly. The outside will dry out trying to thaw the middle. The key to our **Perfect Medium Rare Roast** success is that tempering time—we need that meat sitting out for 2 to 3 hours so it warms up evenly before it hits that high heat blast. Please plan ahead!
What internal temperature equals a Perfect Medium Rare Roast?
This is the easiest question to answer because it relies 100% on my absolute favorite piece of kitchen equipment: the reliable meat thermometer! For the **Perfect Medium Rare Roast**, you must pull that **rib roast** out of the oven when the thermometer inserted into the thickest part reads exactly 125°F (52°C). Once you tent it with foil and let it rest for those crucial 20 minutes, the internal temperature will continue to climb a bit due to carryover cooking—we expect it to settle right around 130°F to 135°F. That range is pure perfection. If you wait until 135°F while it’s still in the oven, it will be medium when you serve it, and we just can’t risk that!
PrintFoolproof Herb-Crusted Prime Rib Roast with Simple Pan Gravy

Create a show-stopping centerpiece with this easy-to-follow recipe for a juicy, tender standing rib roast. We use a simple herb butter rub and a two-stage oven method to guarantee a perfect medium-rare result with a savory, crispy crust.
- Prep Time: 20 min
- Cook Time: 1 hr 45 min
- Total Time: 2 hr 30 min
- Yield: 6 servings 1x
- Category: Main Course
- Method: Oven Roasting
- Cuisine: American
- Diet: Low Fat
Ingredients
- 1 (4 to 5 pound) standing rib roast (Prime Rib Roast), 2 or 3 ribs
- 3 tablespoons kosher salt
- 2 tablespoons freshly ground black pepper
- 1 tablespoon dried thyme
- 1 tablespoon dried rosemary
- 1 tablespoon garlic powder
- 4 cloves garlic, minced
- 1/2 cup unsalted butter, softened
- 1 tablespoon olive oil
- 1 cup beef broth (for gravy)
- 1 tablespoon all-purpose flour (for gravy)
Instructions
- Remove the rib roast from the refrigerator 2 to 3 hours before cooking. Pat the entire surface dry with paper towels.
- Prepare the herb butter rub: In a small bowl, combine the softened butter, minced garlic, thyme, rosemary, and garlic powder. Mix until you have a uniform paste.
- Season the roast: Rub the entire surface of the roast evenly with olive oil. Then, generously coat the roast with the kosher salt and black pepper.
- Spread the herb butter mixture over the roast, pressing it gently into the meat.
- Preheat your oven to 450°F (232°C). Place the roast, fat-side up, in a roasting pan. Do not use a rack if you want the drippings for gravy.
- Sear the roast: Place the roast in the hot oven and cook at 450°F (232°C) for 15 minutes.
- Reduce the oven temperature to 325°F (163°C). Continue roasting until the internal temperature reaches 125°F (52°C) for medium-rare. Use a meat thermometer inserted into the thickest part of the meat, avoiding bone. This usually takes about 13 to 15 minutes per pound after the initial sear.
- Remove the roast from the oven when it reaches 125°F (52°C). Tent it loosely with foil and let it rest for at least 20 minutes before carving. The internal temperature will rise to about 130°F to 135°F (54°C to 57°C).
- Make the pan gravy: Place the roasting pan on the stovetop over medium heat. Scrape up any browned bits from the bottom of the pan. Pour off most of the excess fat, leaving about 2 tablespoons of drippings.
- Whisk in the flour and cook for 1 minute. Slowly whisk in the beef broth until smooth. Bring to a simmer and cook until the gravy thickens slightly. Season with salt and pepper to taste.
- Carve the roast between the bones and serve immediately with the pan gravy.
Notes
- For a crispier crust, you can place the roast under the broiler for the last 2-3 minutes after resting, watching it closely to prevent burning.
- Use a reliable meat thermometer; this is the secret to a perfect medium-rare roast beef.
- If you prefer a bone-in roast, ask your butcher to tie the bones back onto the roast after trimming.
Nutrition
- Serving Size: 6 oz cooked meat
- Calories: 450
- Sugar: 0
- Sodium: 550
- Fat: 30
- Saturated Fat: 14
- Unsaturated Fat: 16
- Trans Fat: 0
- Carbohydrates: 0
- Fiber: 0
- Protein: 42
- Cholesterol: 140