
Oh, you know me—I used to trade my weekends for spreadsheets, planning big corporate events where everything had to be perfect and polished. But honestly? My true happiness always came from slowing down in my own kitchen. That’s where I found peace, usually with a mixer humming away, creating something real and delicious from scratch. That feeling of pure, simple bliss is exactly what I want to share with you today! If you want to serve a dessert that looks like it came straight out of a top Spanish bakery but takes surprisingly little effort, then we need to talk about the **Basque cheesecake**.
This isn’t some fussy, multi-layered monster. The Basque is the ultimate easy, impressive bake! It’s naturally rustic, completely crustless, and all it asks of you is good quality cream cheese and high heat. I promise you, mastering this gorgeous, burnt beauty is totally within reach. After all, if I can trade my spreadsheets for this creamy indulgence, you absolutely can! You can read a little more about my journey over on my About Me page, but for now, let’s get that oven hot!
- Why This Basque Cheesecake Recipe Delivers Creamy Perfection
- Gathering Your Simple Ingredient Dessert Supplies
- Essential Equipment for This Basque Cheesecake Recipe
- How to Prepare Your Basque Cheesecake (Baking Tutorial Cheesecake)
- Variation: Loaf Pan Cheesecake Recipe for Easy Serving
- Tips for Success: Creating a Rustic Baked Dessert Masterpiece
- Storage and Reheating Instructions for Your Basque Cheesecake
- Frequently Asked Questions about the Burnt Basque Cheesecake Recipe
- Share Your Basque Cheesecake Creations!
Why This Basque Cheesecake Recipe Delivers Creamy Perfection
Trust me when I say this recipe is a game-changer because it skips all the usual cheesecake drama! We aren’t messing around with delicate graham cracker bases or fussy water baths. This is pure, rustic dessert magic. That’s why I love sharing this technique with folks looking for easy cheesecake alternatives.
- No Crust Needed: It’s naturally crustless!
- No Water Bath Required: We handle the moisture with high heat, not steam.
- Minimal Mixing: Keeps that interior smooth and airy.
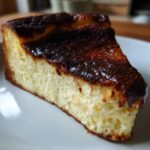
Achieving the Signature Caramelized Top Dessert
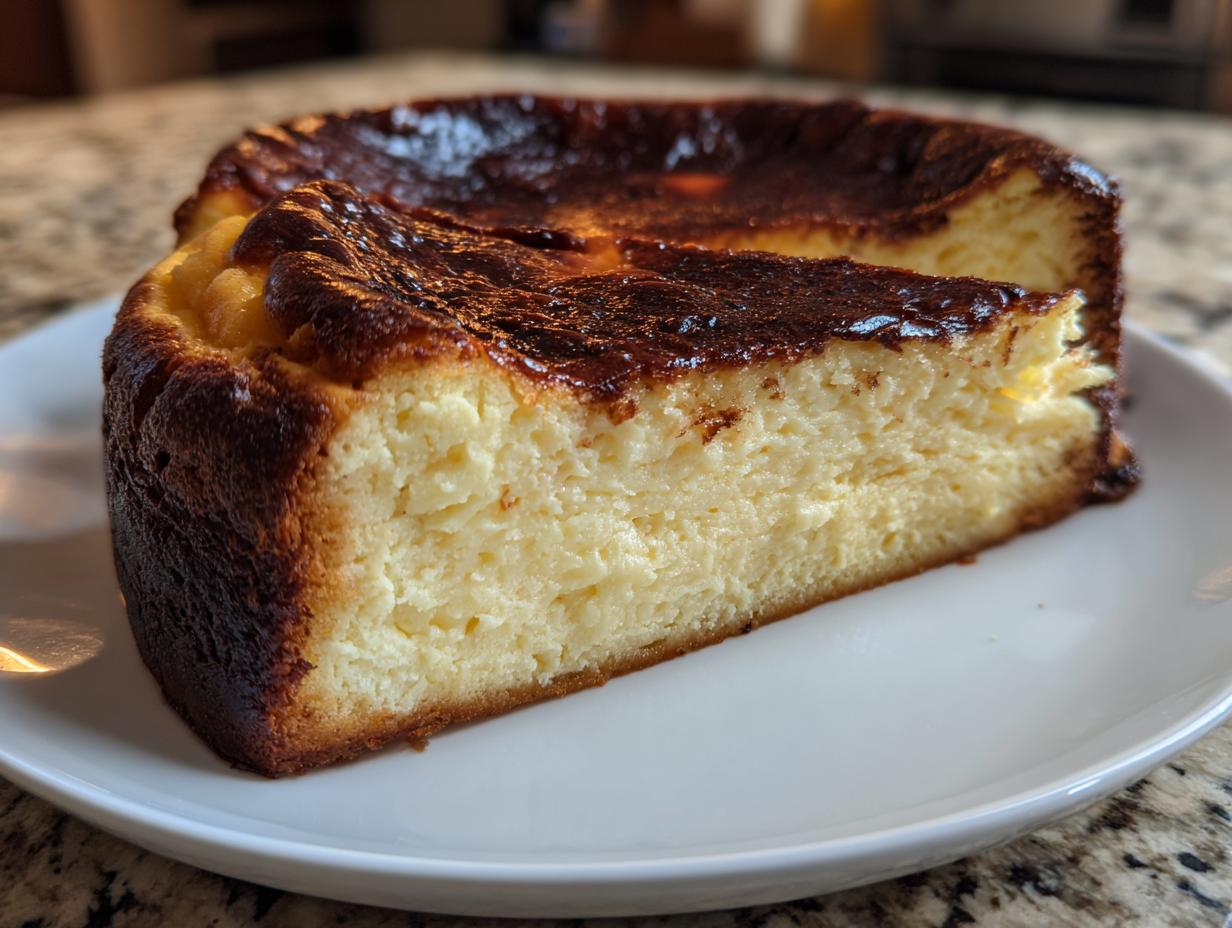
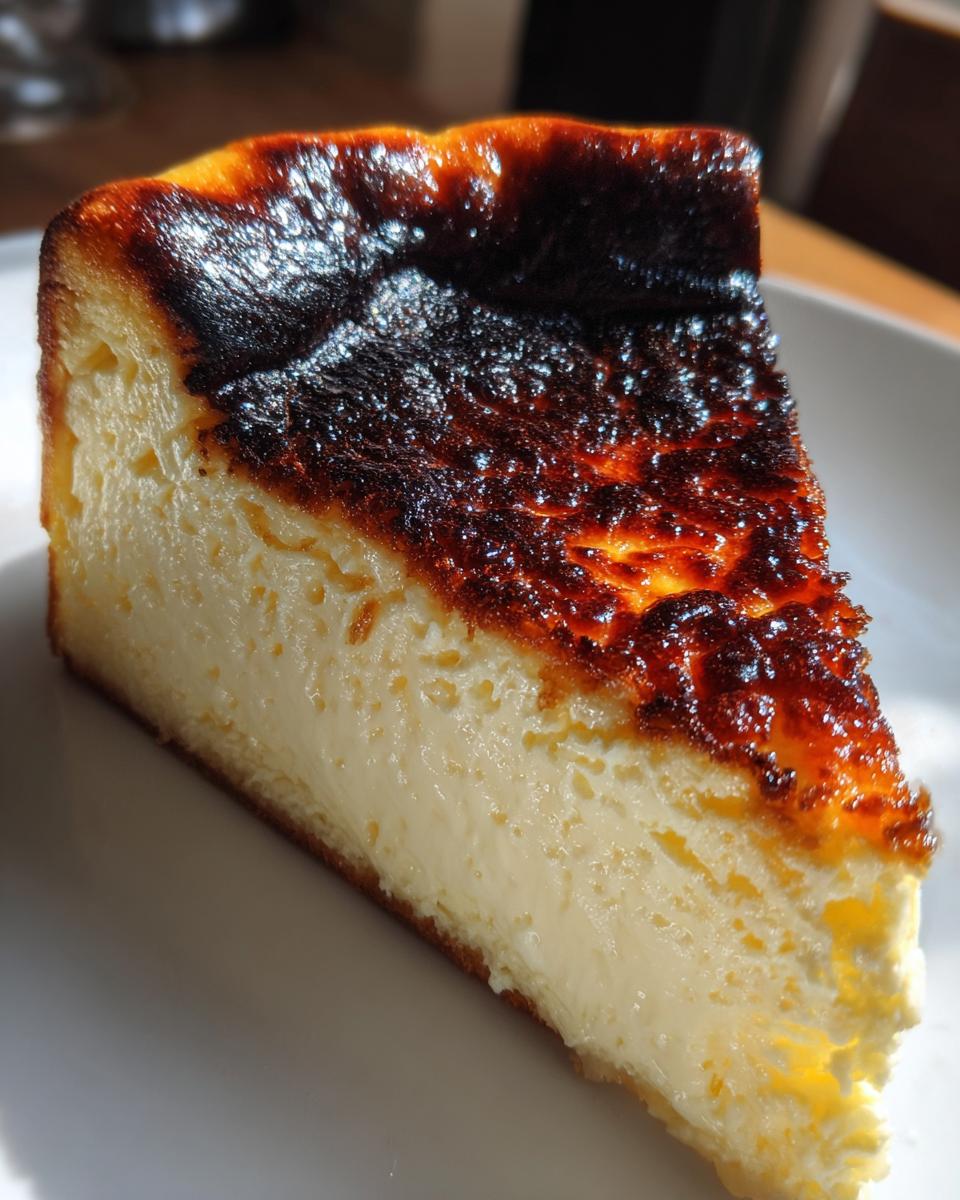
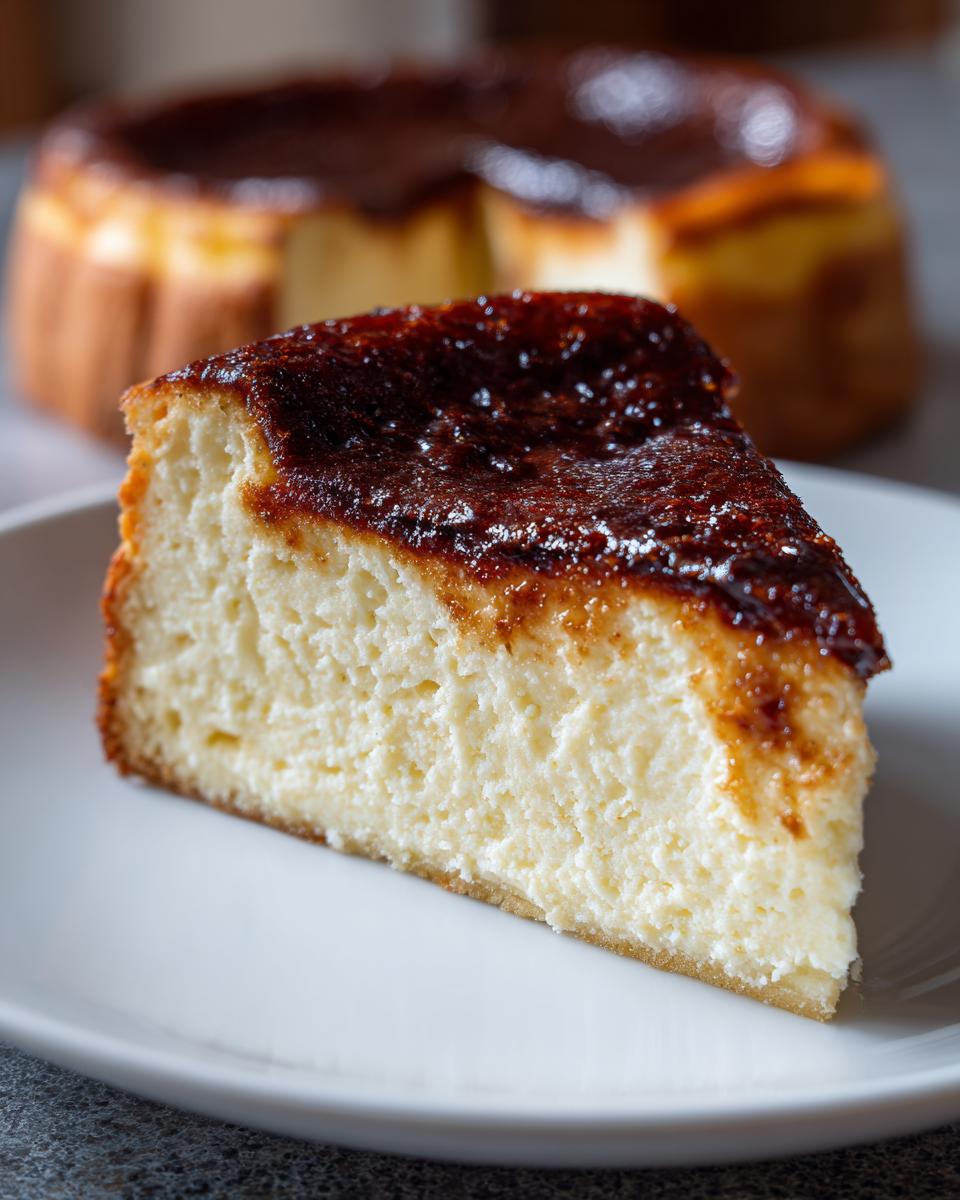
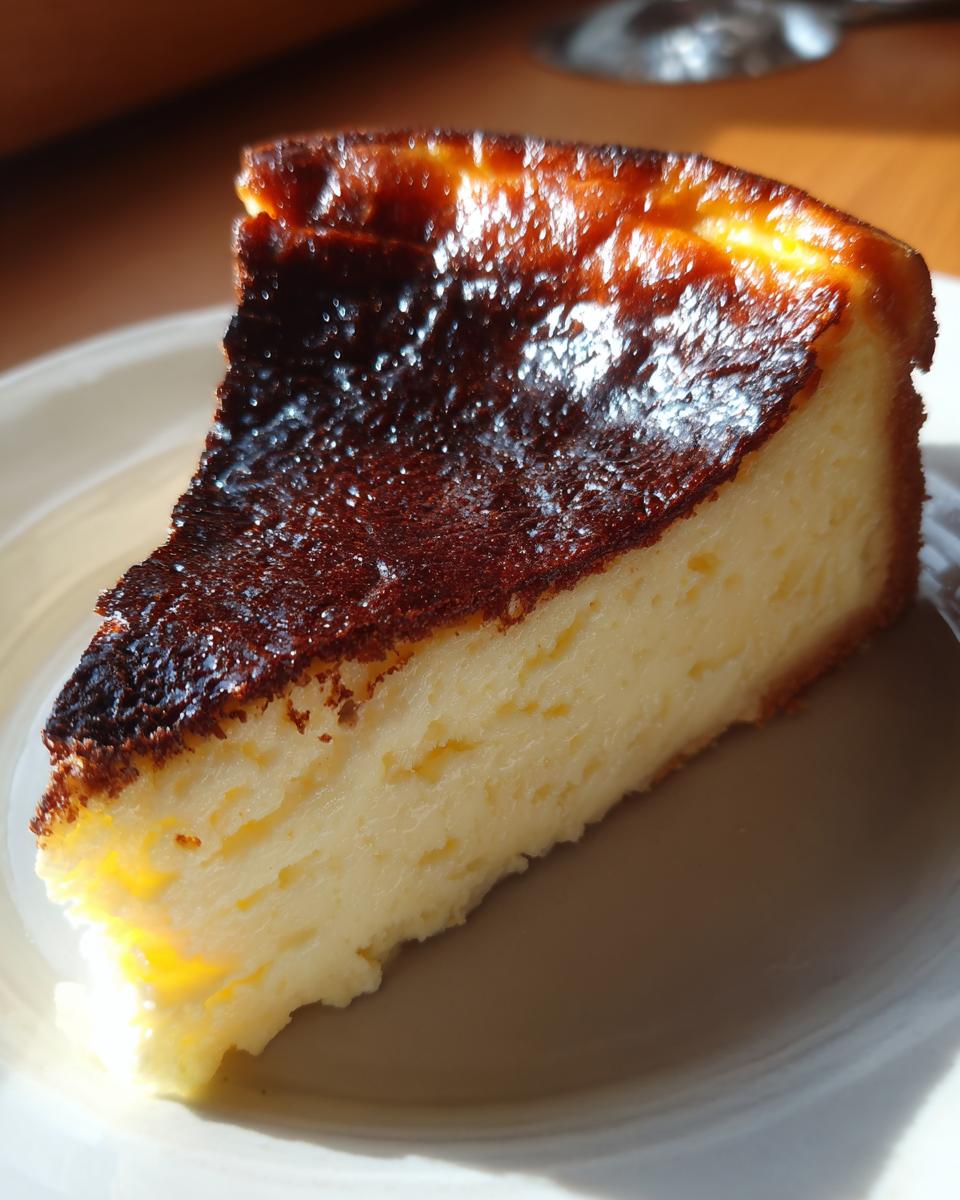
That dark, almost black, exterior everyone talks about? It’s not a mistake—it’s the goal! We achieve that incredible **caramelized top dessert** look by blasting the cake with high heat right at the start. It looks dramatic, but honestly, it’s the easiest part! The high heat creates a wonderfully bitter-sweet contrast to the sweet interior. You just have to embrace the rustic wrinkling of the parchment paper; that’s part of the charm!
The Secret to Basque Cheesecake Texture Secrets
When people ask about **Basque cheesecake texture secrets**, I always point back to what you *don’t* do. Overmixing is the enemy of that dreamy center. We want a dense, mousse-like interior—true **creamy cheesecake perfection**. Keeping strictly to room temperature ingredients ensures everything incorporates smoothly, minimizing lumps. A barely mixed batter means you get that glorious, jiggly center we all crave in a **Basque cheesecake**.
Gathering Your Simple Ingredient Dessert Supplies
One of the best parts about making a **Basque cheesecake** is that it requires shockingly few things! We aren’t opening up the spice cabinet for seven different extracts here. It’s all about letting a few high-quality, simple items really shine through. Having everything ready before you start mixing really cuts down on stress, and I always use a piece of this checklist when I prep my station!
Here are the essentials you’ll need for this stunning, rustic bake:
- 900g full-fat cream cheese (yes, that much!), softened beautifully
- 1 1/4 cups granulated sugar
- 6 large eggs, very important—they need to be at room temperature
- 2 cups heavy cream
- 1 teaspoon vanilla extract
- 1/4 teaspoon salt
- 1/4 cup all-purpose flour
Ingredient Notes and Substitutions for Your Basque Cheesecake
Since this is a **crustless cheesecake easy** bake, we don’t need butter or anything for the base, which saves a whole step! Now, about those critical dairy components for your **Basque cheesecake**: please, please use full-fat cream cheese. The low-fat versions just don’t give us the required richness or stability for that mousse texture. Also, those 6 eggs absolutely must be at room temperature; cold eggs mixed into warm cream cheese cause lumps, and we are avoiding lumps at all costs to keep this super smooth!
Essential Equipment for This Basque Cheesecake Recipe
You really don’t need much fancy gear for this **Basque cheesecake**, which is another reason I love it so much! Think simple, classic tools. Having everything ready beforehand makes the quick mixing process go smoothly. You’ll want a sturdy electric mixer—handheld or stand mixer works—to get that cream cheese perfectly smooth.
Here’s the must-have list:
- A 9-inch springform pan. This helps us get it out later.
- Plenty of parchment paper. Like, way more than you think you need! It needs to be crinkled and high on the sides.
- A big bowl and a quality rubber spatula for folding.
How to Prepare Your Basque Cheesecake (Baking Tutorial Cheesecake)
Alright, show time! This is where we turn that glorious batter into the most stunning, rustic dessert you’ve ever made at home. Seriously, the smell alone when the crust starts to brown is enough to make you swoon. We need to pay attention to two main things here: how we treat the batter during mixing, and how patiently we cool it down afterward. It’s not hard, but these steps are what keep this from just being a regular cheesecake and turn it into true **Basque cheesecake** excellence! If you need a visual refresh on general baking timing, I’ve got a quick guide here.
Mixing the Batter: Avoiding Over-aeration in Your Basque Cheesecake
Remember how we talked about keeping things creamy? It starts right here! First, we beat that softened cream cheese until it’s absolutely spotless—no tiny white lumps allowed. Then, the sugar goes in until it’s fluffy. The trick comes with the eggs; add them one at a time, and only mix until they disappear. Don’t let the mixer run wild here! Once the flour comes in, put the mixer away. Grab your spatula and gently fold that flour in until you see no more streaks. This careful folding is the secret behind those incredible **cheesecake texture secrets** for your **Basque cheesecake**.
Baking and Cooling: Mastering the Wobbly Center for Creamy Cheesecake Perfection
Time to bake! We hit that oven hard—400°F (200°C) is the temperature we need for that signature dark top. Bake it for about 50 to 60 minutes. When it’s done, the edges should look firm, but the middle should have a major wobble, almost like soft gelatin. Don’t panic; that’s exactly right! After it comes out, you must let it cool untouched on the rack for a couple of hours at room temperature. Then, cover it and chill it for at least six hours, but overnight is best for unlocking that true **creamy cheesecake perfection**.
Variation: Loaf Pan Cheesecake Recipe for Easy Serving
Not everyone needs a giant, show-stopping round cake, right? Sometimes you want something that slices up beautifully for snacks or just for a smaller gathering. That’s why I included notes for a **loaf pan cheesecake recipe**! It takes all the wonder of a **Basque cheesecake** and makes it super manageable. You still need that parchment paper lining—make sure it hangs over the edges a bit so you can lift the whole thing out easily when it’s done.
Since the loaf pan is deeper than a standard round pan, the heat takes a little longer to reach the very middle. You might need to bump that baking time up by about 10 to 15 minutes, so keep a close eye on that beautiful, browning top! It’s such a great way to get a **rustic baked dessert** without committing to the full-size version. If you like baking with loaf pans, check out my recipe for pumpkin bread—same principle of lining it well!
Tips for Success: Creating a Rustic Baked Dessert Masterpiece
The magic of the **rustic baked dessert** comes down to a couple of small, intentional moments after it leaves the oven. My first tip, which I learned the hard way, is about serving temperature. You absolutely must let this chill completely, and then, for the best experience, let it sit on the counter for about an hour before serving. Room temperature is where that silky, creamy texture truly unlocks!

Secondly, don’t stress about a perfectly smooth top. The collapses and the dark spots are badges of honor on a Basque! If you happen to try the loaf pan variation I mentioned, just remember that surface area changes mean baking time changes, so start checking it early. For great slow-cooked flavors that pair well with a rich dessert like this, check out my recipe for apple butter!
Storage and Reheating Instructions for Your Basque Cheesecake
This is one of my favorite **make ahead dessert recipes** because it actually tastes better the next day! You must chill your **Basque cheesecake** for at least six to eight hours, but overnight is truly the sweet spot for maximum creaminess. Once chilled, keep it covered tightly in the fridge. When you’re ready to serve, take it out about an hour before slicing. Letting it warm up just slightly brings that interior back to that glorious, melt-in-your-mouth texture we worked so hard to achieve! I always recommend checking out more ideas for make ahead dessert recipes for holiday planning!
Frequently Asked Questions about the Burnt Basque Cheesecake Recipe
I get so many messages after people make this recipe, which just tells me how many of you are ditching the complicated desserts for something truly satisfying! Most questions revolve around that beautiful top and getting that signature texture just right for your **Basque cheesecake**. Remember, perfection here means embracing the rustic imperfections! For more cheesecake inspiration, you might love my pumpkin cheesecake recipe, too.
Can I use a different size pan for this Basque Cheesecake?
You totally can, but you have to adjust your expectations! If you opt for a smaller pan, the batter will be thicker, meaning it needs longer baking time to set the center, and it might get denser. Using a larger pan makes the cake thinner, so it bakes faster and might not wobble as much. Keep that oven thermometer handy!
Why is my Crustless Cheesecake Easy recipe cracking?
If you see cracks, don’t panic—it’s actually totally normal for this **crustless cheesecake easy** style! Overbaking is the usual culprit for big cracks, as it dries the outside too fast. Also, if you rush it from the 400°F oven straight into the cold air, the temperature shock can cause minor separation. A slightly jiggly center when you pull it out is the key!
Share Your Basque Cheesecake Creations!
I absolutely live for seeing your bakes! When you take one of my foolproof recipes and make it your own, whether you’ve nailed that perfect burnt top or you ended up with a super cute **Bay Area cheesecake** (I love those little variations!), it just makes my whole week. Please snap a photo of your finished **Basque cheesecake** and tag me on social media—you know I always look for them!
If you followed all the steps and ended up with that incredible, **gourmet dessert at home**, please leave a comment below rating your experience. Your feedback helps other bakers feel confident stepping into the kitchen. I’m always here answering questions, so if anything stumps you, don’t hesitate to reach out via the Contact page!
PrintThe Ultimate Easy, Creamy Burnt Basque Cheesecake
Create a stunning, rustic Basque Cheesecake with a perfectly caramelized top and an irresistibly creamy, custardy interior. This foolproof recipe requires minimal ingredients and no water bath, making it an impressive dessert for any occasion.
- Prep Time: 15 min
- Cook Time: 60 min
- Total Time: 7 hours 15 min
- Yield: 10 servings 1x
- Category: Dessert
- Method: Baking
- Cuisine: Spanish
- Diet: Vegetarian
Ingredients
- 900g cream cheese, softened to room temperature
- 1 1/4 cups granulated sugar
- 6 large eggs, room temperature
- 2 cups heavy cream
- 1 teaspoon vanilla extract
- 1/4 teaspoon salt
- 1/4 cup all-purpose flour
Instructions
- Preheat your oven to 400°F (200°C). Line a 9-inch springform pan with two large sheets of parchment paper, pressing them into the pan so the paper extends high up the sides. The paper should be wrinkled and rustic; this is part of the look.
- In a large bowl, use an electric mixer to beat the softened cream cheese until it is completely smooth, with no lumps remaining. Scrape down the sides of the bowl often.
- Gradually add the sugar and beat until the mixture is light and creamy.
- Add the eggs one at a time, beating well after each addition until just combined. Do not overmix once the eggs are added.
- Slowly mix in the heavy cream, vanilla extract, and salt until the batter is smooth.
- Sift the flour over the batter and gently fold it in using a spatula until just incorporated. Do not mix vigorously.
- Pour the batter into the prepared springform pan.
- Bake for 50 to 60 minutes. The top should be deeply caramelized, almost black in spots, and the edges should look set. The center should still have a significant wobble, like soft gelatin.
- Remove the cheesecake from the oven and let it cool completely on a wire rack at room temperature for about 2 hours. The center will continue to set as it cools.
- Once cool, cover the pan loosely with plastic wrap and chill in the refrigerator for at least 6 hours, or preferably overnight, for the best creamy texture.
- Before serving, carefully remove the cheesecake from the pan and peel away the parchment paper. Serve at room temperature for the creamiest result.
Notes
- For the best results, use full-fat cream cheese and ensure all dairy ingredients are at true room temperature to prevent lumps.
- If you prefer a smaller, easier-to-serve dessert, use a standard loaf pan lined with parchment paper and reduce the baking time by about 10-15 minutes.
- Serving this cheesecake at room temperature enhances its signature mousse-like texture.
Nutrition
- Serving Size: 1 slice
- Calories: 450
- Sugar: 35g
- Sodium: 250mg
- Fat: 35g
- Saturated Fat: 22g
- Unsaturated Fat: 13g
- Trans Fat: 0.5g
- Carbohydrates: 28g
- Fiber: 0g
- Protein: 8g
- Cholesterol: 180mg