
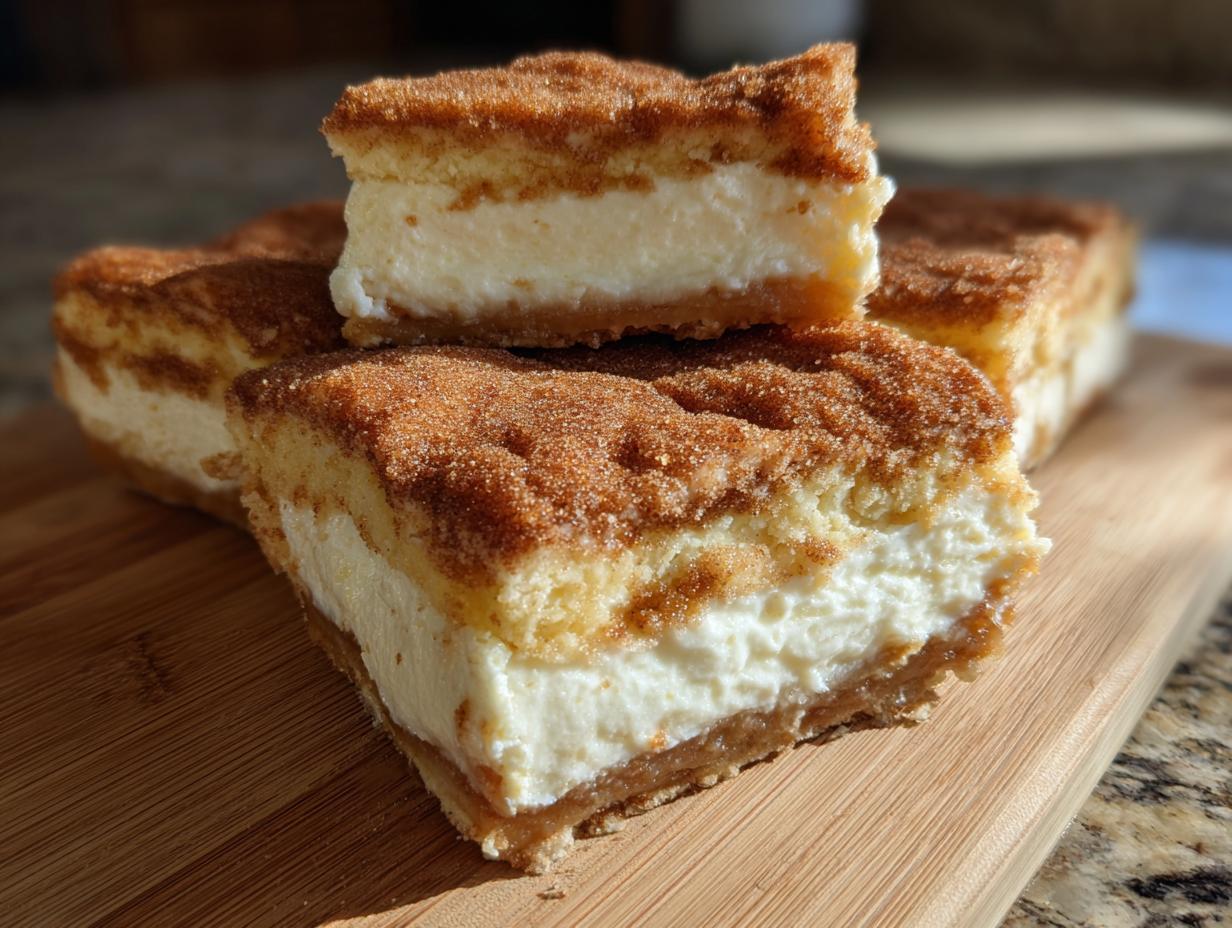
Oh, my heart is just singing when I think about desserts that wrap you up like a warm blanket. You know what I mean—those treats that blur the line between comfort food and celebration food? Well, buckle up, because today we are diving into what I truly believe is the best sopapilla cheesecake you will ever have the pleasure of baking. It’s this dreamy combination of flaky pastry, like you just pulled them hot from the fryer, mixed with the silkiest, creamiest cheesecake filling imaginable. Seriously, it tastes like a churro and a classic **sweet cream cheese bar** had a glorious baby!
When I first started Bliss Batter, my whole mission was to take those seemingly complicated desserts and make them totally accessible. This recipe is the perfect example of that! Using a wonderful **crescent roll dessert** shortcut, you get incredible texture without any fuss. Get ready to whip up a little happiness for your next gathering; these bars are truly foolproof and just pure joy. Check out all my favorite dessert recipes if you love this kind of quick magic!
- Why This Sopapilla Cheesecake Recipe is Your Next Favorite Dessert
- Gathering Ingredients for Your Sopapilla Cheesecake Bars Recipe
- Step-by-Step Instructions for the Sopapilla Cheesecake
- Tips for the Best Sopapilla Cheesecake Every Time
- Serving Suggestions for This Mexican Inspired Dessert
- Storage and Making Ahead Your Sopapilla Cheesecake
- Frequently Asked Questions About Sopapilla Cheesecake Bars Recipe
- Baking Times and Yield for This Simple Layered Dessert
- Nutritional Estimates for Your Sopapilla Cheesecake
Why This Sopapilla Cheesecake Recipe is Your Next Favorite Dessert
I adore this dessert because it hits every high note you want in a simple bake. It’s quick, it’s stunning when you slice into it, and honestly, the texture is just addictive. It’s proof that you don’t need hours in the kitchen to create something show-stopping. Trust me, this will become your go-to for just about everything! You’ll want to try our cinnamon monkey bread next if you love this flavor profile!
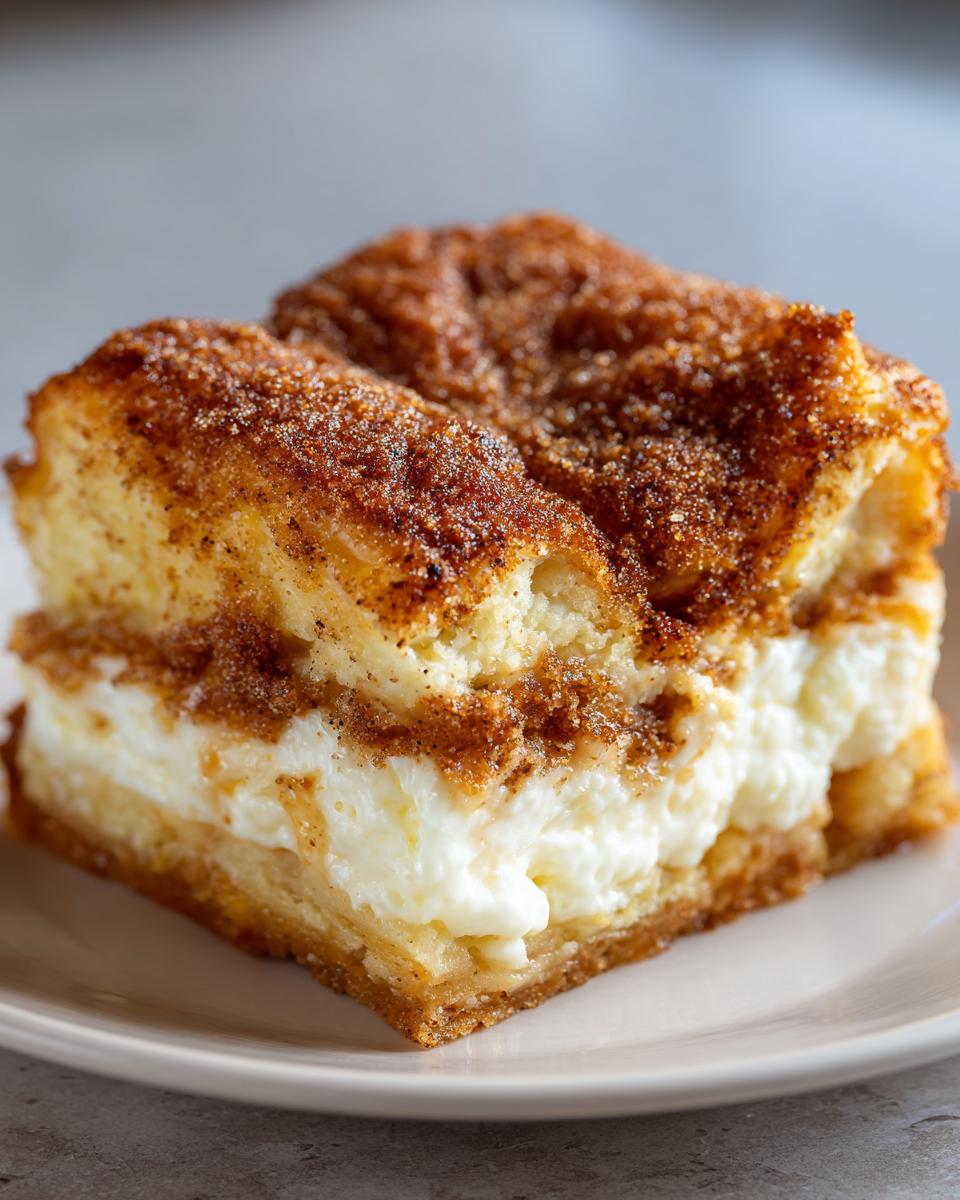
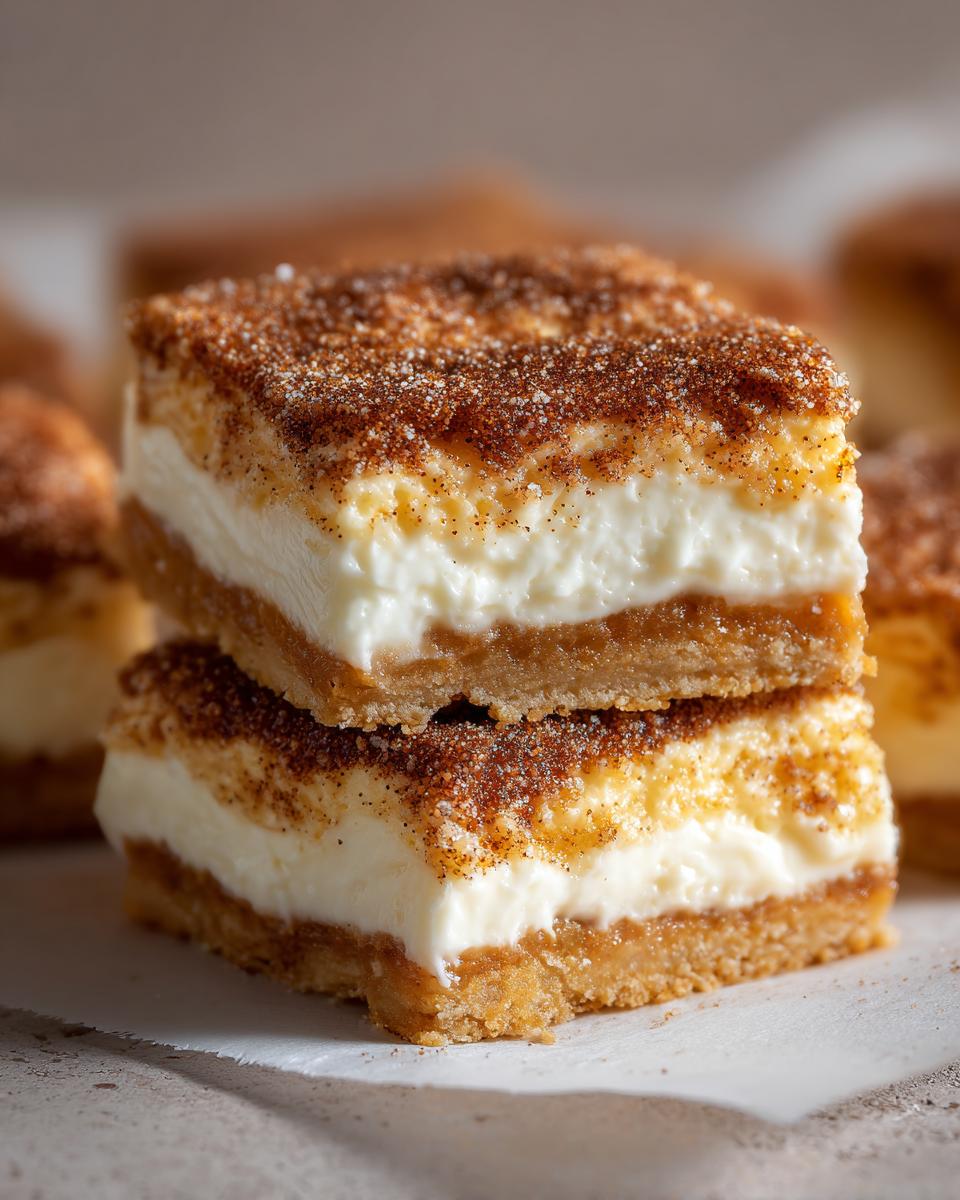
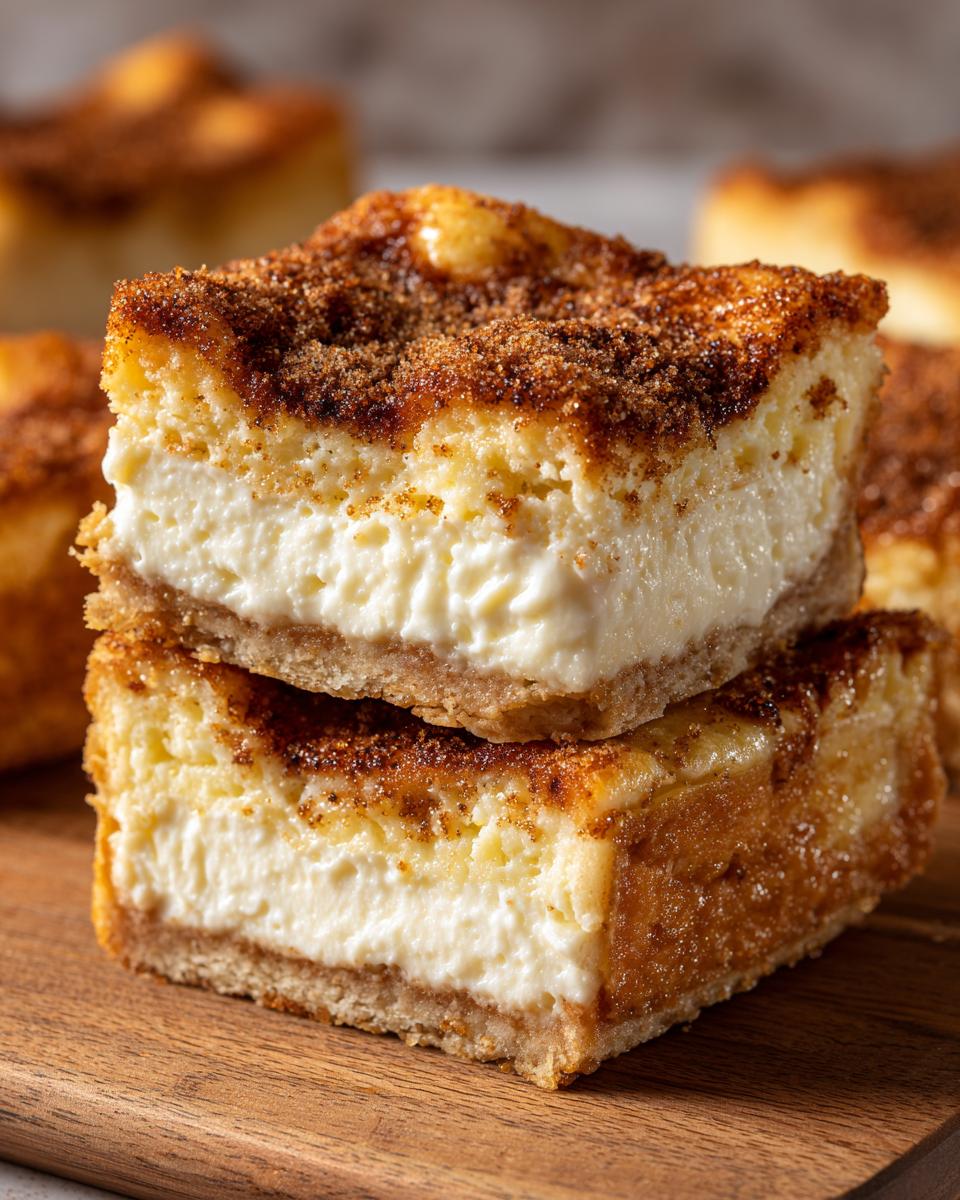
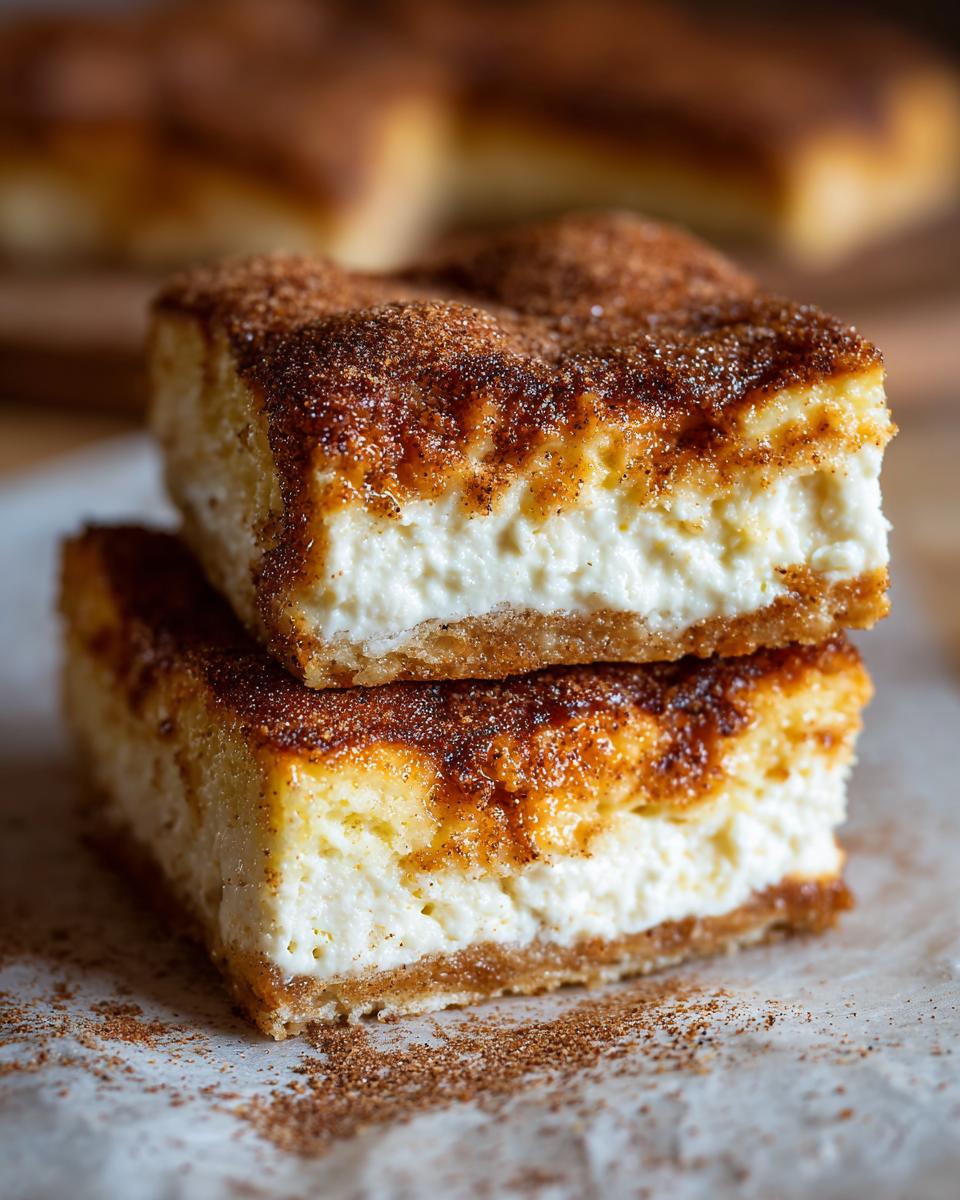
- It delivers that incredible **creamy cheesecake dessert** center you crave.
- You get that gorgeous, contrasting crunch from the **flaky pastry dessert** layers.
- It pairs the irresistible flavor of a churro with a familiar, buttery treat—truly a **buttery cinnamon dessert** dream!
Quick Assembly Using Crescent Roll Dessert Shortcuts
The biggest win here is the speed! I use store-bought crescent rolls, and I am not ashamed! It cuts the prep time down to about fifteen minutes, making this the ultimate easy sopapilla cheesecake when you need something impressive fast.
The Perfect Cinnamon Sugar Topping Texture
That crunchy, sparkly top layer? That’s where the magic happens! It melts slightly into the warm cheesecake filling as it bakes, creating a gorgeous contrast. Because it’s so simple to assemble ahead of time, it’s the absolute best when you need potluck desserts easy solutions!
Gathering Ingredients for Your Sopapilla Cheesecake Bars Recipe
Okay, one thing I always stress in baking is having everything *ready* before you start mixing. It sounds simple, but when you’re working with that quick-setting cream cheese filling, being prepared means success! These required components are straightforward, but paying attention to the state of the ingredients—like making sure that cream cheese is perfectly soft—is key to that melt-in-your-mouth texture. You can check out my favorite tips for making perfect buttermilk biscuits while you wait for your butter and cheese to warm up!
For the Flaky Dough Layers
The foundation of this amazing dessert comes straight from the cold case! We’re relying on that beautiful, buttery flakiness that only refrigerated dough gives us for this classic crescent roll dessert.
- 2 (8 ounce) packages refrigerated crescent roll dough
For the Creamy Cheesecake Filling
This is the heart of our sopapilla cheesecake! Make sure your cream cheese is truly soft, not cold straight from the fridge; if it is, your mixer will struggle and you’ll end up with lumps. We want pure velvet here!
- 1 (8 ounce) package cream cheese, softened
- 1 cup granulated sugar
- 1 large egg
- 1 teaspoon vanilla extract
For the Buttery Cinnamon Sugar Topping
This topping caramelizes beautifully in the oven, giving us that wonderful crunch reminiscent of a fresh churro! Don’t skimp on brushing every corner with that melted butter before sprinkling on this sweet mix.
- 1/2 cup (1 stick) unsalted butter, melted
- 3/4 cup granulated sugar
- 2 teaspoons ground cinnamon
Step-by-Step Instructions for the Sopapilla Cheesecake
This is where the magic of layering comes together! Don’t be intimidated by the steps; we are just building a delicious, gooey tower. Since this is a fairly quick bake, you’ll want to have your oven warmed up and your dish ready to go right away. It all comes together surprisingly fast, which is why this makes such a wonderful comfort food dessert!
Prep and Bottom Dough Layer
First things first: crank that oven up to 350 degrees F. Take your 9×13 inch baking dish and make sure you grease it well—we don’t want any sticking! Unroll one whole package of the crescent dough. Just like you’re making a giant cookie crust, press this dough firmly and evenly across the very bottom of that dish. Make sure you get all the way into the corners!
Creating the Smooth Sweet Cream Cheese Bar Filling
Now for the creamy center! In a bowl, whip that softened cream cheese with the one cup of sugar, the egg, and the vanilla. You must beat this until it is utterly smooth and creamy—no lumps allowed! Once it looks like silk, gently spoon this filling right over that bottom layer of crescent dough. Spread it out slowly so you don’t tear the dough underneath, keeping it even across the entire surface.
Topping the Easy Sopapilla Cheesecake
Time for the lid! Unroll that second package of crescent dough and carefully lay it right over your cheese filling. If you see any gaps, just gently pinch the seams of the dough together to seal up that creamy goodness. Next, melt your butter and brush it lovingly over the top layer. Sprinkle that pre-mixed cinnamon and sugar mix all over the buttered top. This step guarantees that gorgeous, crunchy finish!
Baking and Cooling the Sopapilla Cheesecake Bars Recipe
Pop this beauty into the preheated oven. You’ll bake it for about 30 to 35 minutes. You are looking for the top to turn a beautiful, deep golden brown, and the filling should look set when you gently wiggle the pan. Once it’s out, you absolutely must let it cool slightly—maybe 15 or 20 minutes—before slicing it into your squares. Seriously, patience pays off for the cleanest cuts on this **sopapilla cheesecake bars recipe**!
Tips for the Best Sopapilla Cheesecake Every Time
Okay, you’ve got the structure down, but if you want this dessert to go from great to absolutely unforgettable—like ‘where did you buy this incredible thing?’ great—you need these little nudges. These tips are all about enhancing that melt-in-your-mouth experience and boosting that gorgeous cinnamon flavor profile. I’ve found that the smallest tweaks make the biggest difference in how happy people are when they take that first bite! For chewy cookies that are just as comforting, check out my oatmeal raisin recipe!
Achieving a Churro Cheesecake Flavor Boost
You want that authentic street-food vibe? Don’t hold back once it comes out of the oven! While it’s still warm—not scorching hot, but definitely warm—drizzle just a little bit of honey right over the cinnamon-sugar topping. It soaks in just enough to give you that sticky, sweet coating you find on a fresh churro. It really elevates this into a fantastic churro cheesecake experience.
Ingredient Adjustments for a Richer Buttery Cinnamon Dessert
If you want to play around with the topping consistency and flavor, I have a great little modification you can try. Instead of using all melted butter on top, try swapping out a quarter cup of that butter for honey mixed with a touch of vanilla extract—about one teaspoon. That combination gives you an even richer, more complex flavor in that buttery cinnamon dessert crust.
Serving Suggestions for This Mexican Inspired Dessert
How you serve this **sopapilla cheesecake** really changes the whole vibe! Because it’s fantastic when served warm, it’s a showstopper for any winter gathering. It’s definitely one of my favorite holiday dessert recipes because it smells so festive.
When slicing, keep them as thick bars for the best look. A dollop of cold vanilla ice cream or maybe just a swirl of homemade whipped cream cuts through that richness perfectly. If you want another spicy-sweet treat for the table, you absolutely have to try my chai spice cookies on the side!
Storage and Making Ahead Your Sopapilla Cheesecake
I get asked all the time if these can be made before the party, and honestly, yes! Making this **creamy cheesecake dessert** ahead of time is one of its greatest features as a make ahead dessert. You can assemble the entire bar right up to the point of baking, cover it really well with plastic wrap, and pop it in the fridge for up to 24 hours. The dough stays nice and cold, ready to go when you are!
If you have leftovers—and good luck with that, because these fly off the plate!—you want to store them in an airtight container in the refrigerator. Because of that rich cream cheese filling, they really hold up well in the cold. I actually think they are delicious straight out of the fridge!
If you prefer that warm, gooey texture we talked so much about, just let a slice sit on the counter for about 20 minutes to take the chill off. Or, if you’re in a hurry, microwave a single bar for about 10 to 15 seconds. That little bit of heat softens the center right up again. Remember, for more great recipes you can prep ahead, check out my full collection of make ahead dessert ideas!
Frequently Asked Questions About Sopapilla Cheesecake Bars Recipe
It’s so common to have questions when baking something new, especially when you want it to turn out perfectly! I’ve gathered the ones I hear most often about turning these simple ingredients into the best cheesecake bars. You deserve success on your first try, and these little answers should help make sure your experience making this wonderful Tex Mex dessert is totally smooth sailing!
Can I use puff pastry instead of crescent rolls for this creamy cheesecake dessert?
That’s such a good question about pastry alternatives! While you absolutely *could* use puff pastry, you’ll get a totally different result. Crescent roll dough is designed to puff up slightly and give you that soft, layered flakiness that complements the heavy, creamy filling. Puff pastry tends to get very airy and shatters more sharply. For this specific recipe, I really stick to the crescent rolls because they give you that classic, dense-yet-flaky structure that our **creamy cheesecake dessert** relies on.
How do I prevent the top layer of my sopapilla cheesecake from burning?
This always happens if your oven runs hot, or if the top layer browns before the center is fully set! My best tip is to check it around the 25-minute mark. If the cinnamon-sugar topping is getting too dark, just pull out a sheet of foil and loosely tent it over the top of the dish. This shields the cinnamon from direct heat while letting the filling continue to bake safely through the middle. Lowering your oven rack slightly, if it’s too close to the top element, also helps a lot!
Is this simple layered dessert better served warm or cold?
Oh man, this is the great debate! If you like it gooey, serve it warm, maybe 15 minutes after it comes out of the oven, perhaps with a scoop of vanilla ice cream. If you want those cleaner, perfect squares—the ones that really show off those beautiful layers—let it cool down completely to room temperature. If you chill these overnight, they slice beautifully, but I always let them sit out for 30 minutes before serving cold so the filling softens up just a tiny bit. For more make-ahead ideas, check out my favorite pumpkin cheesecake recipe!
Baking Times and Yield for This Simple Layered Dessert
When it comes to creating something this delicious, knowing the exact commitment is important, right? I want you to feel totally confident stepping into the kitchen, so here are the quick facts for this simple layered dessert. As you can see over on my sweet potato pie post, I believe in being totally transparent about time investment!
This **sopapilla cheesecake** is honestly one of the fastest treats you can make, which is why it’s such a lifesaver for last-minute needs. You spend almost no time prepping, and then the oven does the heavy lifting!
- Prep Time: 15 min
- Cook Time: 35 min
- Total Time: 50 min
- Yield: 16 bars (which means 16 happy people!)
Nutritional Estimates for Your Sopapilla Cheesecake
Now, I know some of you wonderful bakers are interested in the numbers behind the deliciousness, so I wanted to share the rough estimates for this incredible sopapilla cheesecake. Since we are working with crescent rolls, sugar, and cream cheese, it’s definitely a treat meant for special occasions—or maybe just a Tuesday if you ask me! Remember, these numbers are just guides; they’re based on the ingredients listed and the 16-bar yield, so your exact count might vary based on how thickly you spread that filling!
We all make wonderful things in the kitchen, and sometimes we just need to indulge a little, right? If you’re looking for other treats with detailed number breakdowns, you can always peek at my sweet potato pie heritage dessert post. Enjoy every bite!
- Serving Size: 1 bar
- Calories: 280
- Sugar: 22g
- Fat: 16g (8g Saturated)
- Carbohydrates: 31g
- Protein: 4g
Disclaimer: Please remember these are just close estimates based on standard ingredient measurements. For precise tracking, I always recommend using a dedicated nutrition calculator based on the specific brands you use!
PrintEasy Sopapilla Cheesecake Bars with Golden Cinnamon Sugar

Create these simple Sopapilla Cheesecake Bars for a dessert that tastes like a blend of churros and creamy cheesecake. This recipe uses flaky crescent roll dough for a quick, crowd-pleasing treat perfect for any gathering.
- Prep Time: 15 min
- Cook Time: 35 min
- Total Time: 50 min
- Yield: 16 bars 1x
- Category: Dessert
- Method: Baking
- Cuisine: Tex-Mex Inspired
- Diet: Vegetarian
Ingredients
- 2 (8 ounce) packages refrigerated crescent roll dough
- 1 (8 ounce) package cream cheese, softened
- 1 cup granulated sugar
- 1 large egg
- 1 teaspoon vanilla extract
- 1/2 cup (1 stick) unsalted butter, melted
- 3/4 cup granulated sugar
- 2 teaspoons ground cinnamon
Instructions
- Preheat your oven to 350 degrees F. Lightly grease a 9×13 inch baking dish.
- Unroll one package of crescent roll dough and press it evenly into the bottom of the prepared baking dish.
- In a medium bowl, beat the softened cream cheese, 1 cup of sugar, egg, and vanilla extract until the mixture is smooth and creamy.
- Spread the cream cheese mixture evenly over the bottom layer of crescent roll dough.
- Unroll the second package of crescent roll dough and carefully place it over the cream cheese layer. Gently pinch the seams together if necessary.
- In a small bowl, mix the remaining 3/4 cup of sugar and 2 teaspoons of cinnamon together.
- Brush the melted butter evenly over the top layer of dough. Sprinkle the cinnamon-sugar mixture over the buttered top.
- Bake for 30 to 35 minutes, or until the top is golden brown and the filling is set.
- Let the bars cool slightly before slicing into squares. Serve warm or at room temperature.
Notes
- For an extra churro flavor, drizzle a little honey over the bars after they cool slightly.
- You can make this dessert ahead of time; cover and chill the assembled, unbaked bars for up to 24 hours before baking.
- If you prefer a richer topping, substitute 1/4 cup of the melted butter with 1/4 cup of honey mixed with 1 teaspoon of vanilla.
Nutrition
- Serving Size: 1 bar
- Calories: 280
- Sugar: 22
- Sodium: 180
- Fat: 16
- Saturated Fat: 8
- Unsaturated Fat: 8
- Trans Fat: 0
- Carbohydrates: 31
- Fiber: 1
- Protein: 4
- Cholesterol: 35