

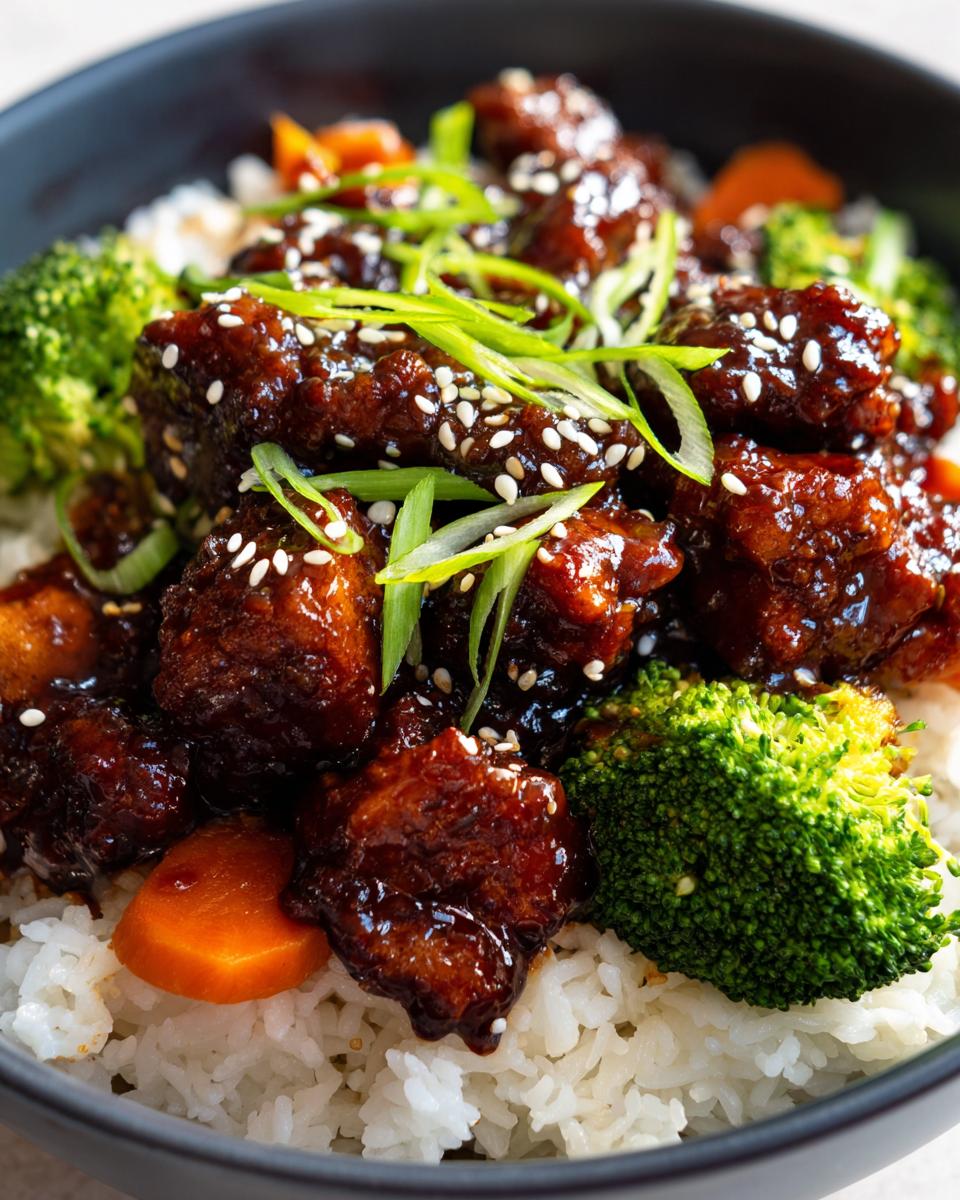
Oh, I know that feeling when the takeout craving hits, but you just want that warm, comforting feeling of a home-cooked meal without all the fuss, right? That’s exactly how this sticky chicken rice bowl was born in my kitchen! It delivers that incredible, restaurant-worthy sweetness and savory depth that makes your mouth water, but honestly, it’s faster than waiting on delivery. We’re cutting through the complicated stuff because making something delicious should bring you pure bliss, not stress. My focus here is on the foolproof method for that gorgeous, thick, sweet soy glaze. Get ready for your new favorite easy weeknight dinners solution!
- Why This Sticky Chicken Rice Bowl Recipe Delivers Bliss
- Gathering Ingredients for Your Sticky Chicken Rice Bowl
- How to Make Sticky Chicken: Mastering the Glaze
- Step-by-Step Instructions for Your Sticky Chicken Rice Bowl
- Tips for Success When Making a Sticky Chicken Rice Bowl
- Serving Suggestions for Your Sweet and Savory Chicken Bowl
- Storage and Reheating Instructions for Leftover Sticky Chicken
- Frequently Asked Questions About This Sticky Asian Chicken Recipe
- Estimated Nutritional Data for One Serving of Sticky Chicken Rice Bowl
Why This Sticky Chicken Rice Bowl Recipe Delivers Bliss
If you’re looking for an easy Chicken Rice Bowl Recipe that actually tastes like you spent hours on it, you’ve found it! This recipe is all about maximizing flavor with minimal effort—perfect for a quick weeknight chicken meal.
- It’s fast: We are talking about having dinner on the table faster than that delivery app can confirm your order.
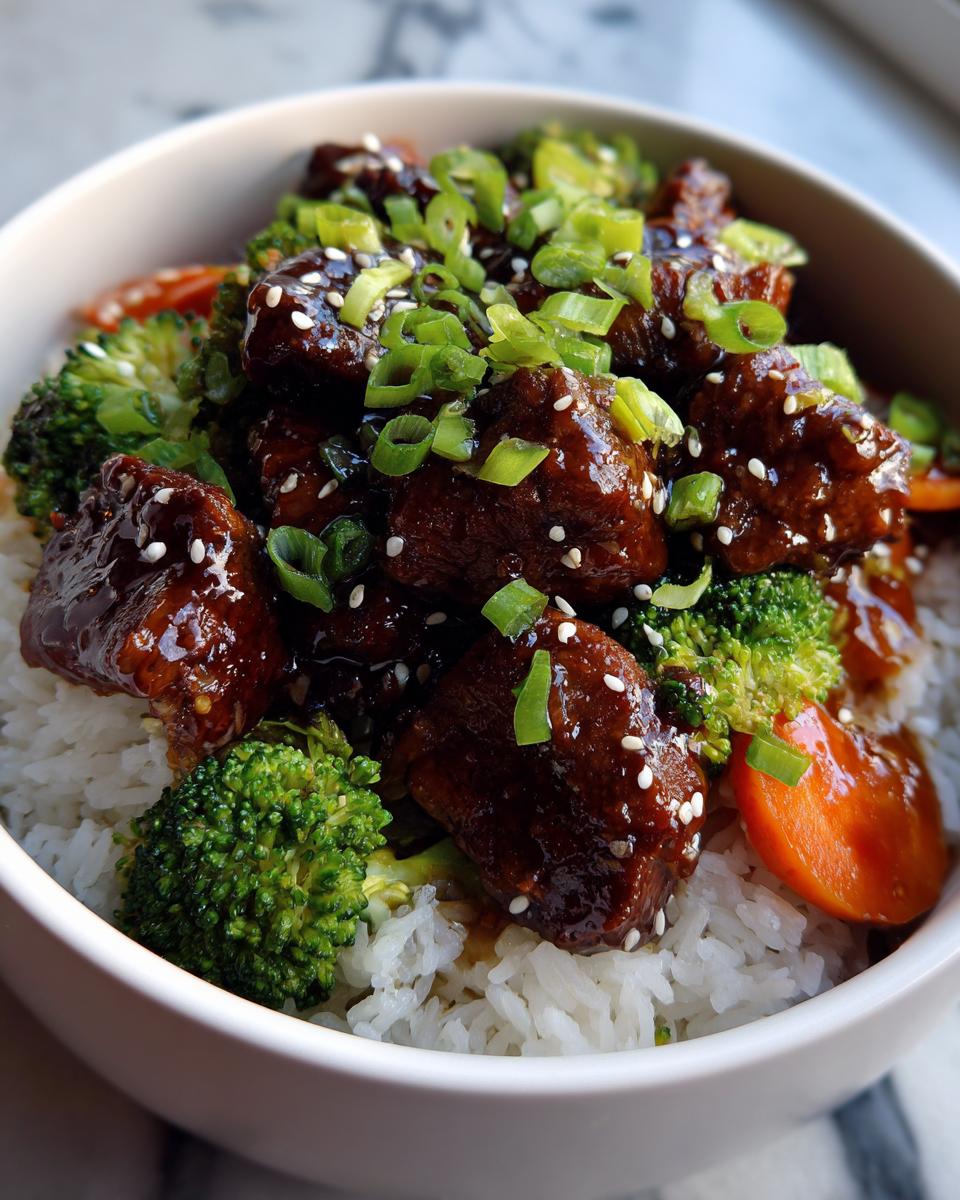
- It’s balanced: The chicken is perfectly cooked and coated, sitting beautifully over fluffy rice and crisp veggies.
- It’s comforting: Nothing beats that sweet, savory flavor combination for a truly satisfying dinner.
Flavor Profile: Asian Glazed Chicken Dinner
The star here is definitely the glaze. It hits that perfect sweet-and-savory spot we all crave in an Asian Glazed Chicken Dinner. You get richness from the honey and soy, cut perfectly by the bright tang of the vinegar and the warmth of fresh ginger. It’s utterly addictive!
Simple Preparation for a One Bowl Chicken Dinner
I designed this to be a one bowl chicken dinner winner. Everything happens mostly in one skillet, which means cleanup is a breeze—huge win on a busy night! You get that beautiful texture on the chicken without needing to pan-fry separately or use a thousand pots.
Gathering Ingredients for Your Sticky Chicken Rice Bowl
Okay, let’s chat about what you need to grab before we dive into the cooking! When I test recipes, I need every ingredient listed clearly so there are zero surprises when it’s time to mix. It’s key to getting that perfect finish, especially since we are aiming for that lovely, thick coating. If you want to know more about my baking philosophy and why I focus on easy-to-follow steps, you can check out more about me here.
Here is the lineup for four servings:
- 1.5 lbs boneless, skinless chicken thighs, cut into 1-inch pieces
- 1 tablespoon vegetable oil
- 1 cup long-grain white rice
- 2 cups water (for rice)
- 1/4 cup soy sauce
- 1/4 cup honey
- 2 tablespoons rice vinegar
- 1 tablespoon grated fresh ginger
- 2 cloves garlic, minced
- 1 teaspoon sesame oil
- 1/2 teaspoon ground black pepper
- 1 cup broccoli florets
- 1 large carrot, sliced thinly
- 2 green onions, sliced (for garnish)
- 1 teaspoon sesame seeds (for garnish)
See? Lots of pantry staples! That beautiful mix of dark soy sauce and honey is our magic foundation for the sweet and savory combo.
Ingredient Notes and Gluten Free Sticky Chicken Option
Just a quick note because I always want everyone to be able to enjoy my recipes! If you or someone you’re serving needs to avoid gluten, customizing this is a breeze. For a completely Gluten Free Sticky Chicken Option, just swap out the regular soy sauce for tamari. Tamari is usually brewed without wheat, and honestly, it adds a really deep, rich flavor to our soy glaze base, so you won’t feel like you’re missing anything at all. Don’t forget to check your label just to be sure!
How to Make Sticky Chicken: Mastering the Glaze
This is where the magic truly happens! Making truly sticky chicken isn’t just about throwing sauce on at the end; it’s about building layers of flavor and getting that gorgeous, caramelized coating. We start by whisking together the soy sauce, honey, vinegar, ginger, minced garlic—oh, that smell!—sesame oil, and pepper. Trust me, that balance is what makes this a truly memorable sweet soy glaze chicken dinner.
Now, here’s the trick I learned from recipe testing: you must set a portion of that beautiful mixture aside before it touches the raw chicken. I keep about half of the glaze mixture totally separate.
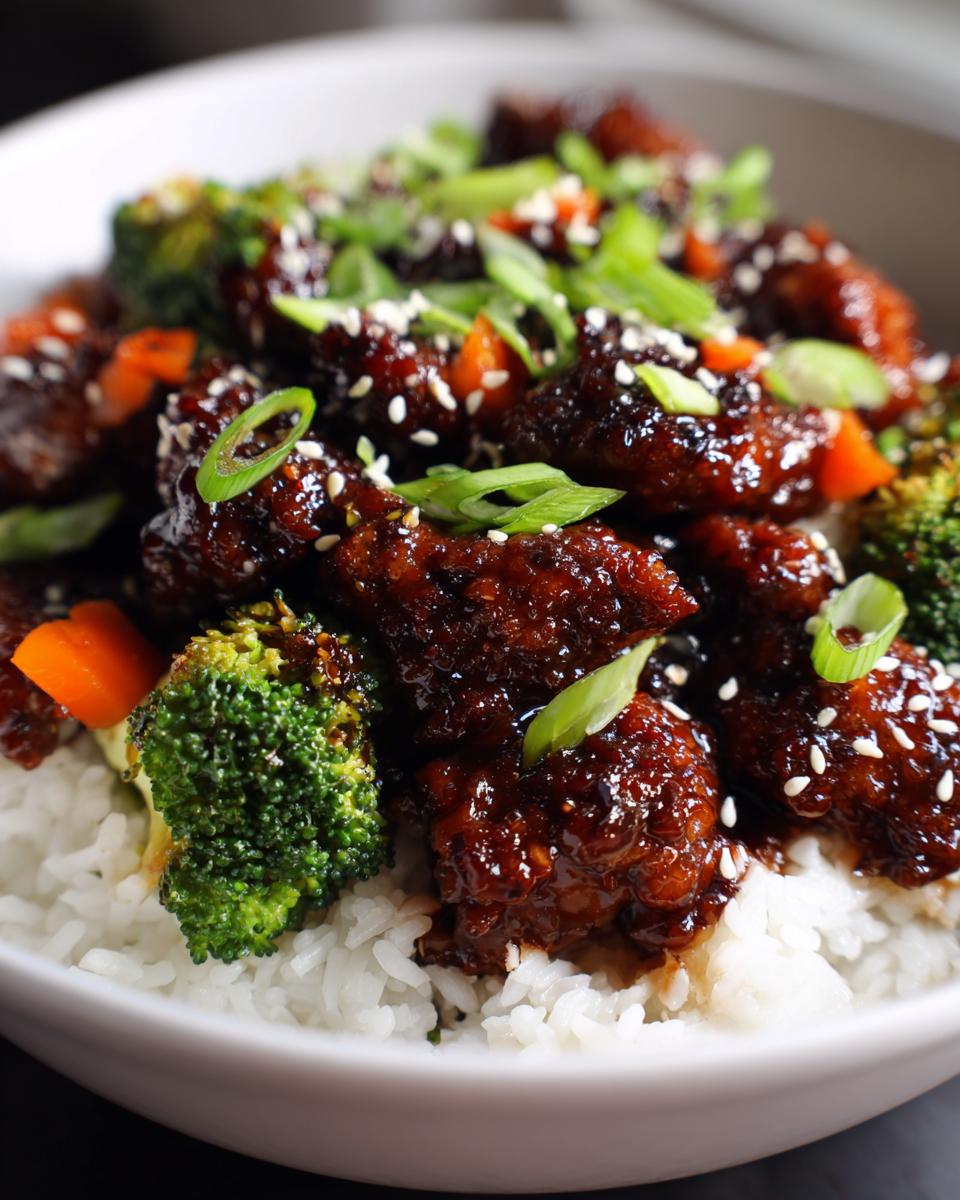
Achieving the Perfect Sweet Soy Glaze Chicken Coating
Once the chicken is browned up in the skillet—make sure it’s nice and golden brown—we pour that first half of the glaze right over the top. You need to use medium-high heat here and keep stirring. The honey and soy sauce will bubble and begin reducing almost immediately. Stirring ensures the sauce gets thick enough to really cling to every piece of chicken. When it’s coating beautifully, pull the chicken out. We are using that second half of the uncooked glaze later to flavor the veggies, which means fantastic flavor overlap!
If you find your sauce just isn’t getting as thick as you’d like when you finish the chicken, don’t panic! You can always use the cornstarch trick from my notes. Just mix 1 teaspoon of cornstarch with 1 tablespoon of cold water—we call this a slurry—and whisk it into your vegetables and the reserved glaze mixture in Step 6. It thickens up in seconds, giving you that perfect glossy finish every single time. You can check out this simple trick for thickening sauces in my guide to easy homemade garlic butter recipe, as the principle is exactly the same!
Step-by-Step Instructions for Your Sticky Chicken Rice Bowl
This is it—the moment we put it all together! Remember when I said this whole Glazed Chicken and Rice Dinner comes together in under an hour? It’s because we multitask like pros. We’re going to get that rice started first so it’s perfectly rested by the time the chicken is glazed and ready. You can find a few more quick dinner ideas over here at my notes on chicken teriyaki recipe easy skillet dinner!
Perfecting the Rice Base
We start with the rice, which is crucial for a great bowl. You absolutely must rinse your long-grain white rice until that water runs perfectly clear—this might take a few changes, but it stops the final product from being gummy. Once rinsed, combine the 1 cup of rice with 2 full cups of water in a saucepan. Bring it up to a rolling boil over medium-high heat. As soon as it’s boiling, immediately drop that heat way down to low, cover it tightly, and let it simmer for exactly 15 minutes. The most important part? Once the time is up, kill the heat entirely, but leave the lid on for a full 10 minutes to steam. Fluff it gently with a fork before serving.
Cooking Vegetables for Your Glazed Chicken and Rice Dinner
While the rice is resting or cooking, let’s get that chicken cooked and glazed (you did that in the previous section, right?). Once you remove the saucy chicken and set it aside, toss those broccoli florets and thinly sliced carrots right into the same skillet—don’t wash it! That little bit of leftover glaze film is flavor gold. Cook the vegetables over medium-high heat for about 3 to 5 minutes; you want them tender-crisp, not mushy!
Now, take the remaining half of the reserved glaze mixture and pour it right over the veggies. Let that bubble for just one minute until it looks glossy and reduces slightly. Scoop that fluffy rice into your four bowls. Top it generously with the sticky chicken pieces and all those flavorful, saucy vegetables. Drizzle any extra sauce right off the top of the skillet. We’re almost done!
Tips for Success When Making a Sticky Chicken Rice Bowl
Even though this is designed to be super easy, I always want to give you my best advice so you get that perfect result every single time! I’ve included a few tricks from my testing notes that really make a difference in this make ahead chicken bowl recipe. Knowing these little secrets builds confidence, and that’s what it’s all about!
First off, if you are swamped during the week, this is your friend. You can absolutely prepare the chicken and the full glaze mixture ahead of time! Just keep them separate in airtight containers in the fridge for up to two days. Reheat them gently before you assemble the bowls.
Remember that part about achieving the perfect thickness? If you want that super thick sauce—maybe you’re serving this on a very hot day and need the glaze to cling tight through the heat—go ahead and use that cornstarch slurry trick I mentioned earlier. Just mix 1 teaspoon of cornstarch with 1 tablespoon of nice, cold water until smooth, and whisk it into the final sauce with the vegetables. It sets up instantly!
Also, a quick note for my friends who need to watch their gluten intake: Tamari is your secret weapon here for a deeper flavor profile. It substitutes beautifully for regular soy sauce anytime you need a gluten free sticky chicken option.
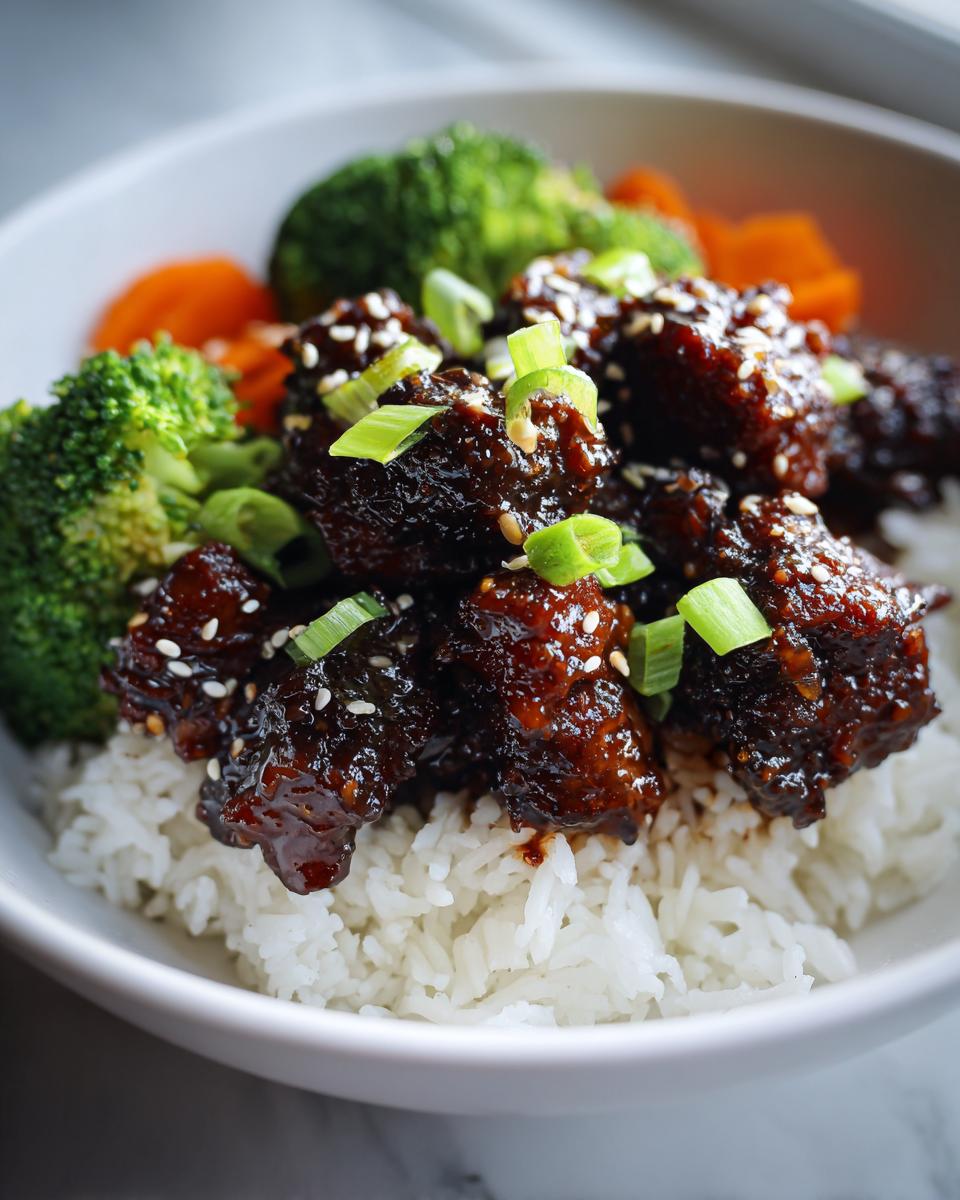
Serving Suggestions for Your Sweet and Savory Chicken Bowl
Okay, we have our sticky chicken, our fluffy rice, and our tender-crisp veggies—but we need that final, beautiful flourish to make it look as amazing as it tastes! Don’t just push the ingredients together; an absolutely gorgeous presentation is part of the joy of making this perfect Sweet and Savory Chicken Bowl.
The recipe calls for garnishes, and you should totally use them! Sprinkle those sliced green onions and sesame seeds right over the top. That pop of green and those tiny toasted seeds make everything feel fresh. If you want to elevate this even further, try topping each bowl with a perfectly fried egg—runny yolk that mixes into the sticky sauce? Yes, please!
For a fantastic textural contrast, I love tossing a few quick-pickled carrots or cucumbers on the side. A little tang cuts through the sweetness perfectly. If you want to mix up a simple tangy dressing for any extra greens you add, check out my ideas for easy homemade salad dressing!
Storage and Reheating Instructions for Leftover Sticky Chicken
One of the best things about this sticky chicken rice bowl is that it cooks up enough for lunch the next day! Since we are aiming for that perfect sticky texture, how you store and reheat it matters a lot. I always recommend storing the components separately if you can manage it! That means keeping the rice, the glazed chicken, and the vegetables in their own containers.
When you put the chicken away, try not to leave it sitting in a big puddle of excess sauce right away. Yes, it looks yummy when it’s first assembled, but if it sits submerged, the glaze texture can get a little weird overnight. Store the cooled chicken and veggies together, maybe with just a tiny bit of the final pan sauce, and keep the rice separate.
For reheating—this is critical—use the microwave sparingly! Microwaving the chicken directly can sometimes cause that lovely glaze to tighten up too much or even burn slightly. I prefer to reheat the chicken and veggies in a small skillet over medium heat with just a tablespoon of water or a tiny splash of broth. This steam keeps the chicken tender while reheating the glaze gently. It only takes a couple of minutes.
If you need a super fast meal, you can certainly reheat everything together briefly, but just watch it closely. Remember, this wonderful Asian Glazed Chicken Dinner is also great for meal prep, so putting in this extra minute of care during storage means you get perfectly tender leftovers that taste almost as good as the first night!
Frequently Asked Questions About This Sticky Asian Chicken Recipe
Can I switch to chicken breast instead of thighs for this recipe?
That is a fantastic question! You absolutely can swap in chicken breast if that’s what you prefer, especially if you’re making a Simple Chicken Bowl Idea for lunch the next day. However, chicken thighs (which I used) are more forgiving; they have a little more fat, which helps them stay juicy even when we are cooking them down with that thick glaze. If you use breast meat, make sure to cut it into slightly smaller, uniform pieces and watch the cooking time in the skillet closely. You don’t want to overcook it once that glaze goes in, or it will dry out fast. We are aiming for that mouth-watering texture, after all!
How can I make this Sweet Soy Glaze Chicken spicier?
If you like things with a little more kick, I have a couple of super easy ways to turn this into a spicier treat! The simplest method is to whisk in a teaspoon of Sriracha or chili garlic sauce right into the glaze mixture when you are combining the soy sauce, honey, and ginger. If you want a deeper, smokier heat, toss in a pinch of red pepper flakes along with the black pepper in Step 2. It won’t change the overall sweetness too much, but it adds a wonderful warmth that makes this a great step up from a basic Easy Chicken Rice Bowl Recipe.
Do I really need to use long-grain rice, or can I use sweet sticky rice?
This is a common point of confusion when people see the word “sticky”! For this Glazed Chicken and Rice Dinner, I actually specify long-grain white rice—the kind you usually cook on the stovetop until it’s fluffy. We want the rice to be a neutral, fluffy base that soaks up the extra glaze from the chicken and veggies. If you use actual glutinous (sweet sticky rice), the texture gets very thick and heavy, which might overpower the light, vibrant flavor of this particular glaze. Stick to the long-grain rice we detailed in the instructions for the best textural balance!
Can this recipe be doubled easily for batch cooking?
Yes, this is a fantastic Make Ahead Chicken Bowl candidate! You can easily double the entire recipe for the chicken and the glaze mixture. When you double the batch, you’ll likely need a much larger skillet or wok to ensure everything browns properly and doesn’t steam instead of sear. For the vegetables, I recommend cooking them in two separate batches. This ensures you get that perfect tender-crisp texture instead of ending up with a pan full of soft, steamed broccoli. For questions about scaling or specific ingredient substitutions, please reach out via our contact page!
Estimated Nutritional Data for One Serving of Sticky Chicken Rice Bowl
I always love sharing a little bit of the hard data behind the deliciousness! While every single ingredient you use might vary slightly—maybe your honey is thicker than mine, or you use a little more oil—these numbers give you a great baseline for what you are eating. Think of this as a helpful guide for your family friendly chicken rice meal.
This breakdown is based on dividing the total recipe ingredients into four equal portions, as detailed in the instructions for your Glazed Chicken and Rice Dinner:
- Serving Size: 1 bowl
- Calories: 550
- Protein: 40g
- Carbohydrates: 65g
- Sugar: 18g
- Fat: 15g (of which 3g is saturated fat)
- Cholesterol: 120mg
- Sodium: 850mg
- Fiber: 3g
Just a friendly note here: Because we are using soy sauce, the sodium count is a bit higher, which is typical for a Sweet Soy Glaze Chicken recipe like this. If you are monitoring your sodium intake closely, remember that using low-sodium soy sauce or tamari will bring that number down!
This data is estimated based on the ingredients listed in the recipe card and is provided purely for informational purposes. For the most accurate tracking, especially if you are adjusting ingredients or proportions, you’ll want to calculate it using the specific items in your pantry. We link to our full privacy policy here if you want to review how we use data!
PrintEasy Sticky Chicken Rice Bowl Recipe
Make a sweet and savory glazed chicken and rice dinner that tastes like takeout but is simple to prepare at home.
- Prep Time: 15 min
- Cook Time: 25 min
- Total Time: 40 min
- Yield: 4 servings 1x
- Category: Dinner
- Method: Stovetop
- Cuisine: Asian-Fusion
- Diet: Low Lactose
Ingredients
- 1.5 lbs boneless, skinless chicken thighs, cut into 1-inch pieces
- 1 tablespoon vegetable oil
- 1 cup long-grain white rice
- 2 cups water (for rice)
- 1/4 cup soy sauce
- 1/4 cup honey
- 2 tablespoons rice vinegar
- 1 tablespoon grated fresh ginger
- 2 cloves garlic, minced
- 1 teaspoon sesame oil
- 1/2 teaspoon ground black pepper
- 1 cup broccoli florets
- 1 large carrot, sliced thinly
- 2 green onions, sliced (for garnish)
- 1 teaspoon sesame seeds (for garnish)
Instructions
- Cook the rice: Rinse the rice until the water runs clear. Combine rice and 2 cups of water in a saucepan. Bring to a boil, then reduce heat to low, cover, and simmer for 15 minutes. Remove from heat and let stand, covered, for 10 minutes. Fluff with a fork.
- Prepare the glaze: In a small bowl, whisk together the soy sauce, honey, rice vinegar, ginger, garlic, sesame oil, and black pepper. Set aside half of the glaze mixture for later use.
- Cook the chicken: Heat the vegetable oil in a large skillet or wok over medium-high heat. Add the chicken pieces and cook until browned on all sides, about 5-7 minutes.
- Glaze the chicken: Pour half of the reserved glaze mixture over the chicken in the skillet. Cook, stirring constantly, until the sauce thickens and coats the chicken well, about 3-4 minutes. Remove the chicken from the skillet and set aside.
- Cook vegetables: Add the broccoli florets and sliced carrots to the same skillet. Cook for 3-5 minutes until tender-crisp.
- Finish the sauce: Pour the remaining half of the reserved glaze mixture into the skillet with the vegetables. Cook for 1 minute until slightly reduced.
- Assemble the bowls: Divide the cooked rice among serving bowls. Top the rice with the glazed chicken pieces and the cooked vegetables. Drizzle any remaining sauce from the skillet over the top.
- Garnish: Sprinkle with sliced green onions and sesame seeds before serving your quick weeknight chicken meal.
Notes
- For a gluten-free sticky chicken option, substitute tamari for the soy sauce.
- You can prepare the chicken and sauce ahead of time and store them in the refrigerator for up to two days. Reheat before serving.
- If you prefer a thicker glaze, add 1 teaspoon of cornstarch mixed with 1 tablespoon of cold water to the sauce in step 4 and cook until thickened.
Nutrition
- Serving Size: 1 bowl
- Calories: 550
- Sugar: 18
- Sodium: 850
- Fat: 15
- Saturated Fat: 3
- Unsaturated Fat: 12
- Trans Fat: 0
- Carbohydrates: 65
- Fiber: 3
- Protein: 40
- Cholesterol: 120