
Oh, I absolutely love when baking feels like magic but takes zero actual magic words or complicated steps! That’s the heart of what we do here at Bliss Batter—proving that you can create something truly wonderful, even on a hectic Tuesday night. If you’ve ever looked at a beautiful loaf of homemade bread and thought, “That’s hours of work and I need a starter kit,” I have good news for you! This recipe is the answer to all your speed-baking prayers.
We’re tackling the **best beer bread** recipe today, and trust me, this isn’t just any quick bread. This is the ultimate **easy beer bread recipe** because it requires absolutely no yeast and zero rising time. You mix it, you pour it, you bake it, and 55 minutes later, you have a warm, slightly tangy, incredibly fluffy loaf fresh from your own oven. It embodies my mission: joyfully accessible baking for everyone, especially if you’re just starting out with **beginner bread making**. This is such a perfect companion for nights when you need a quick side dish bread!
This incredible little loaf relies purely on the carbonation in the beer and a little help from baking powder to get that amazing lift. It’s the fastest way to get a satisfying, rustic, **savory quick bread** on the table. Seriously, you’ll be shocked how simple this **3 ingredient bread** iteration can be.
- Why This is the Best Beer Bread Recipe You Will Ever Make
- Gathering Ingredients for Your Simple Beer Bread
- Step-by-Step Instructions for Perfect Beer Bread
- Tips for Making the Ultimate Beer Bread
- Variations on Classic Beer Bread: Buttery, Honey, and Savory Options
- Serving Suggestions for Your Quick Side Dish Bread
- Storage and Reheating for Homemade Beer Bread
- Frequently Asked Questions About Making Beer Bread
- Share Your Blissful Beer Bread Creations
Why This is the Best Beer Bread Recipe You Will Ever Make
Look, in my life managing events, waiting around wasn’t an option, and I apply that same philosophy in my Bliss Batter creations! That’s why this **easy beer bread recipe** is my go-to when I need that fresh-baked bread smell fast.
This isn’t some fussy recipe requiring a kitchen scale or hours of kneading. Here’s why this version wins every time for a quick fix:
- It’s truly a **quick bread no yeast** recipe—the beer does all the heavy lifting!
- Prep time is unbelievably short, sometimes under five minutes.
- It uses only staple pantry items; it’s practically a **3 ingredient bread** marvel before you add the butter.
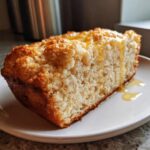
- The result? A uniquely soft and fluffy interior, wrapped in that beautiful, slightly crisp crust you dream about.
If you fell in love with quick baking after trying something like my pumpkin beer bread, you’ll adore this traditional loaf. It’s homemade bread without the hassle!
Gathering Ingredients for Your Simple Beer Bread
This is where the magic starts, though it feels more like assembling a grocery list than baking! The beauty of this **simple beer bread** is that it truly meets the low-ingredient requirement many of us look for in a **fast homemade bread**. We aren’t using yeast, we aren’t even using a boxed baking mix! You only need five core elements, plus that gorgeous melted butter to finish the top.
When I developed this, I stuck to the absolute basics to make sure this **homemade bread minimal ingredients** challenge was achievable for everyone. It’s all about getting those ratios right so the beer can properly lift the flour.
Dry Ingredients for Classic Beer Bread
For the dry elements, we want everything nice and dispersed before we introduce any liquid. This is key for even rising across the entire loaf!
- 3 cups all-purpose flour
- 1 tablespoon baking powder
- 1 tablespoon white sugar (Yes, a tiny bit of sugar helps with browning and flavor!)
- 1 teaspoon salt
Make sure you whisk these really well in a big bowl. I mean it! I can’t stress enough that you need to whisk the baking powder thoroughly into the flour until you can’t see any clumps. Otherwise, you might end up with one corner that rises beautifully and another that stays surprisingly flat. Oops!
Wet Ingredients and Butter Topping for Your Beer Bread
These are the ingredients that bring everything to life and give our **classic beer bread** its signature soft texture.
- 1 (12 ounce) bottle of beer, room temperature
- 4 tablespoons unsalted butter, melted
Now, let’s talk beer temperature for just a second—this is where some people run into trouble with getting that **no rise bread recipe** to actually rise! If you use beer straight from the fridge, it chills the flour mixture and hinders that reaction between the beer’s carbonation and the baking powder. Don’t worry; you don’t need to heat it up, just let that bottle sit on the counter for about an hour before you start. Room temperature beer is your best friend here!
Step-by-Step Instructions for Perfect Beer Bread
Alright, let’s get baking! Cooking should be fun, not stressful, and these steps are specifically designed for **beginner bread making**. Following this straightforward path guarantees you a delicious result, even if this is your first time trying a **homemade bread minimal ingredients** recipe like this. Seriously, if you can stir, you can master this **simple beer bread**.
Preheat and Pan Preparation
First things first, get that oven warm and ready to go! Preheat your oven right to 375 degrees Fahrenheit. While that’s heating up, grab a standard 9-inch by 5-inch loaf pan. You’ll want to grease it really well and then dust it with a little flour just to make doubly sure your beautiful bread doesn’t stick. A little preventative care goes a long way!
Mixing the Beer Bread Batter
Remember how we whisked those dry ingredients earlier? Now it’s time for the main event. Gently pour that whole bottle of room-temperature beer right into your bowl of dry things. Now, this is majorly important, so listen up: use a spoon and stir only until the ingredients are *just* combined. I mean it—stop stirring when you still see a few streaks of flour and a few lumps in the batter!
If you keep mixing until it’s perfectly smooth like pancake batter, you’ll deflate all the good gas bubbles that the beer created. Trust me, I learned this the hard way! A lumpy batter for **beer bread** means a fluffy interior. We want tender, not tough!
Baking and Cooling Your Fast Homemade Bread
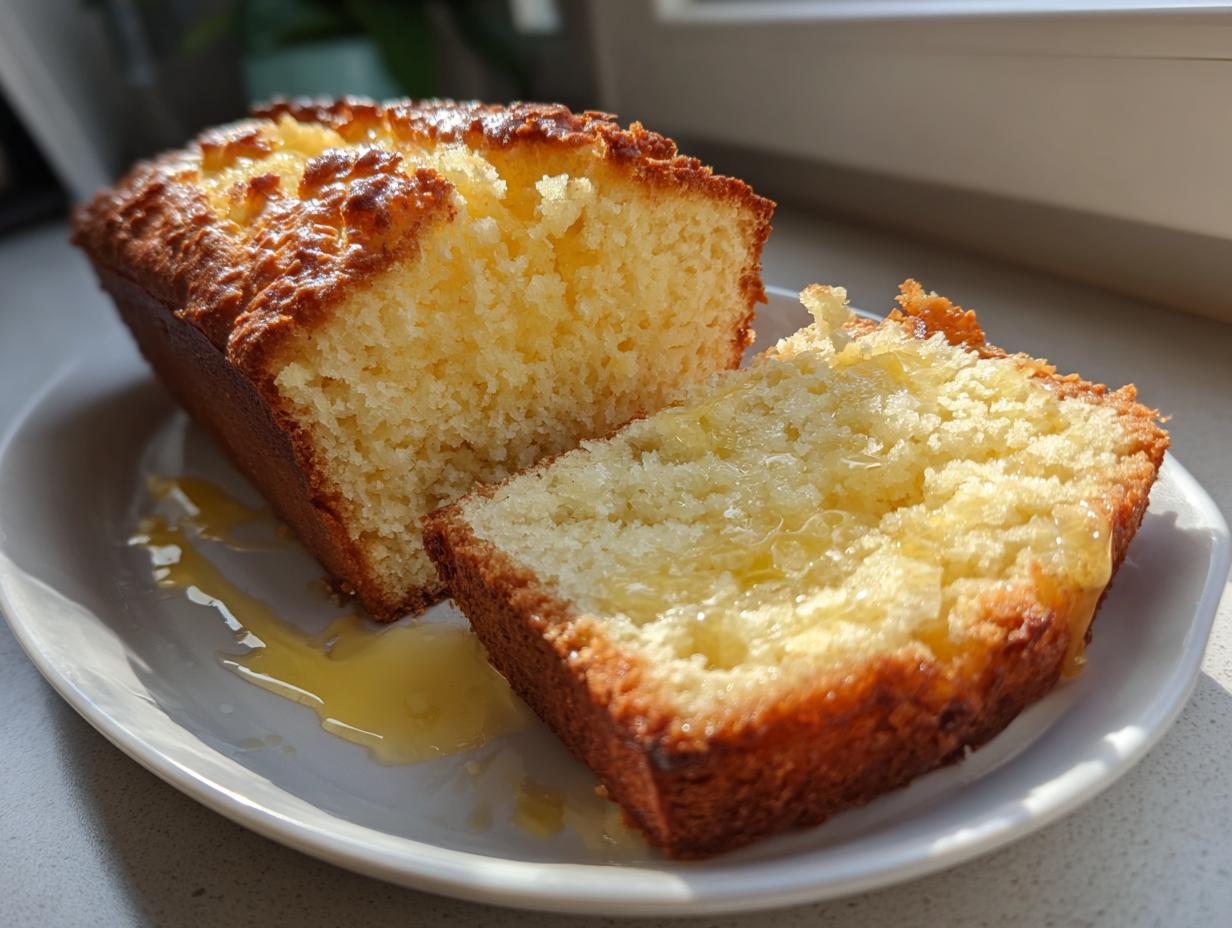
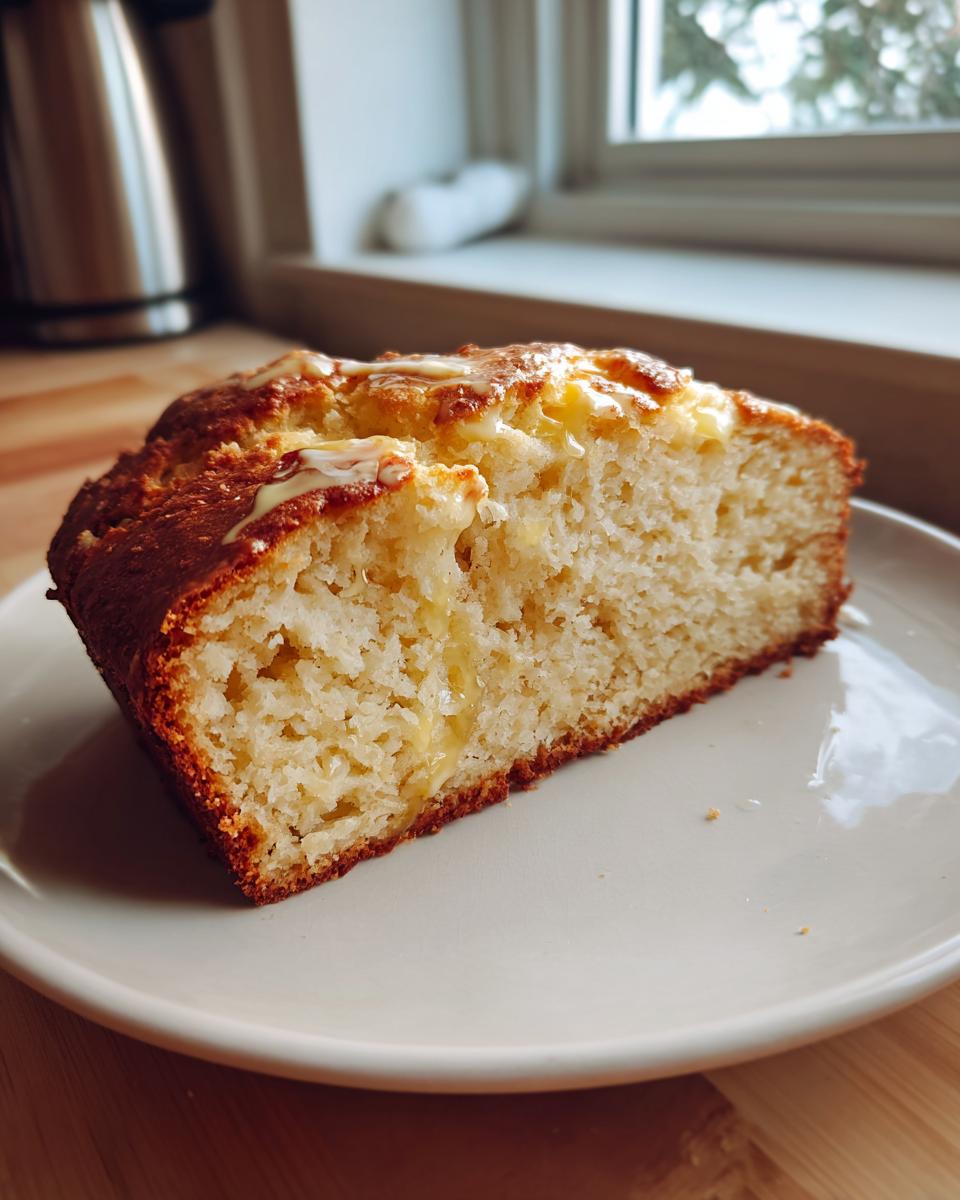
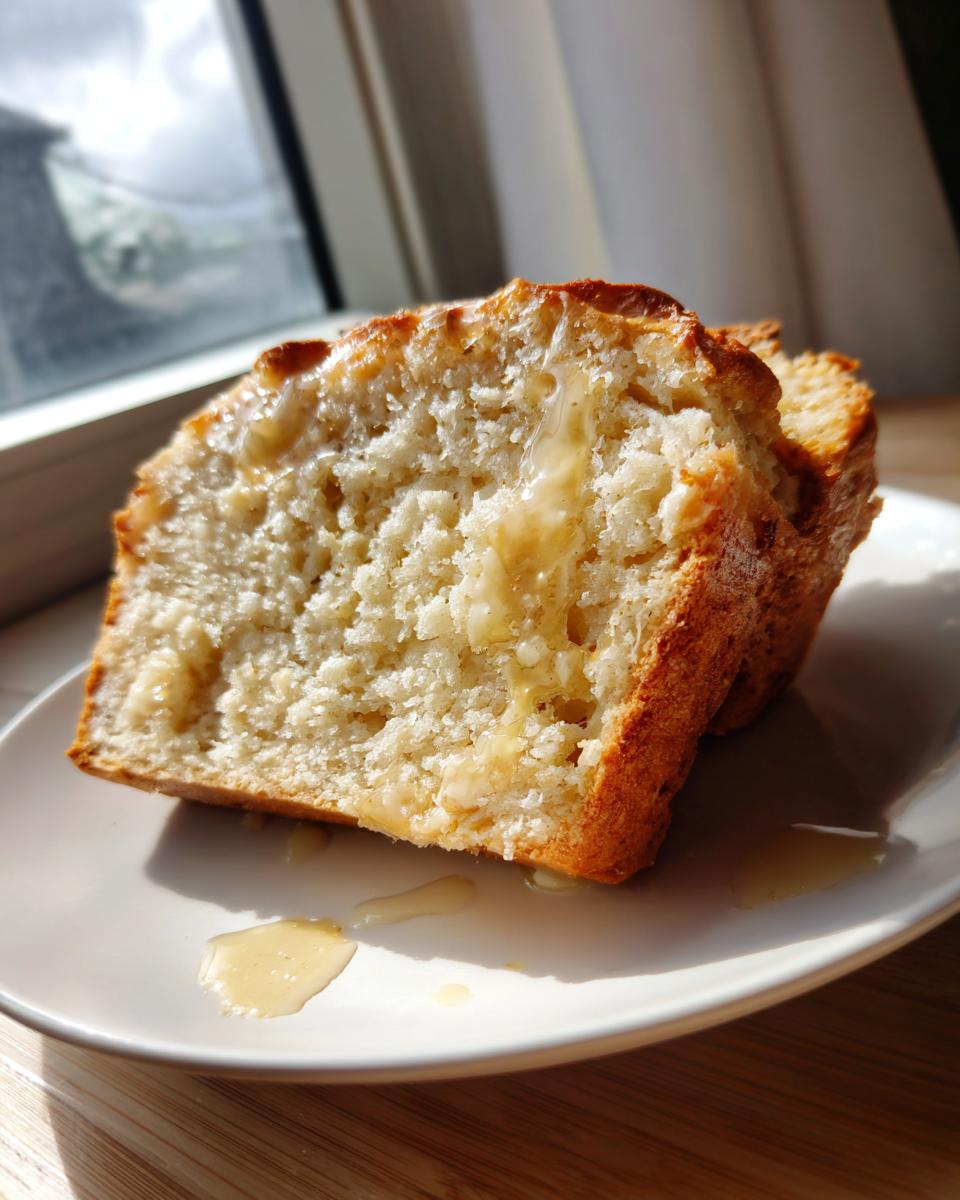
Once you’ve resisted the urge to overmix, pour that glorious, slightly shaggy batter right into your prepared pan. Take your 4 tablespoons of melted butter and drizzle it evenly all over the top surface of the batter. This creates that amazing, slightly crisp, buttery crust we all love.
Slide it into the hot oven and plan to bake it for about 45 to 55 minutes. You’re done when the top looks perfectly golden brown and a toothpick inserted right into the center comes out clean—that means no wet batter clinging to it. Don’t rush the cooling, though! Let it sit in the hot pan for a good 10 minutes before carefully turning it out onto a wire rack to finish cooling down. If you try to pull it out too soon, it might just crumble on you!
For more great tips on mixing and creating perfect quick breads, check out my guide for buttermilk biscuits recipe!

Tips for Making the Ultimate Beer Bread
Even though this is a wonderfully simple recipe, just a couple of tiny tweaks can take your **classic beer bread** from great to absolutely unforgettable. Remember that note about the beer temperature? That’s non-negotiable! Using room temperature beer ensures we get the best possible reaction with the baking powder, giving you that satisfying rise you expect from a **no rise bread recipe**. Cold beer just acts like a little brake on the whole process.
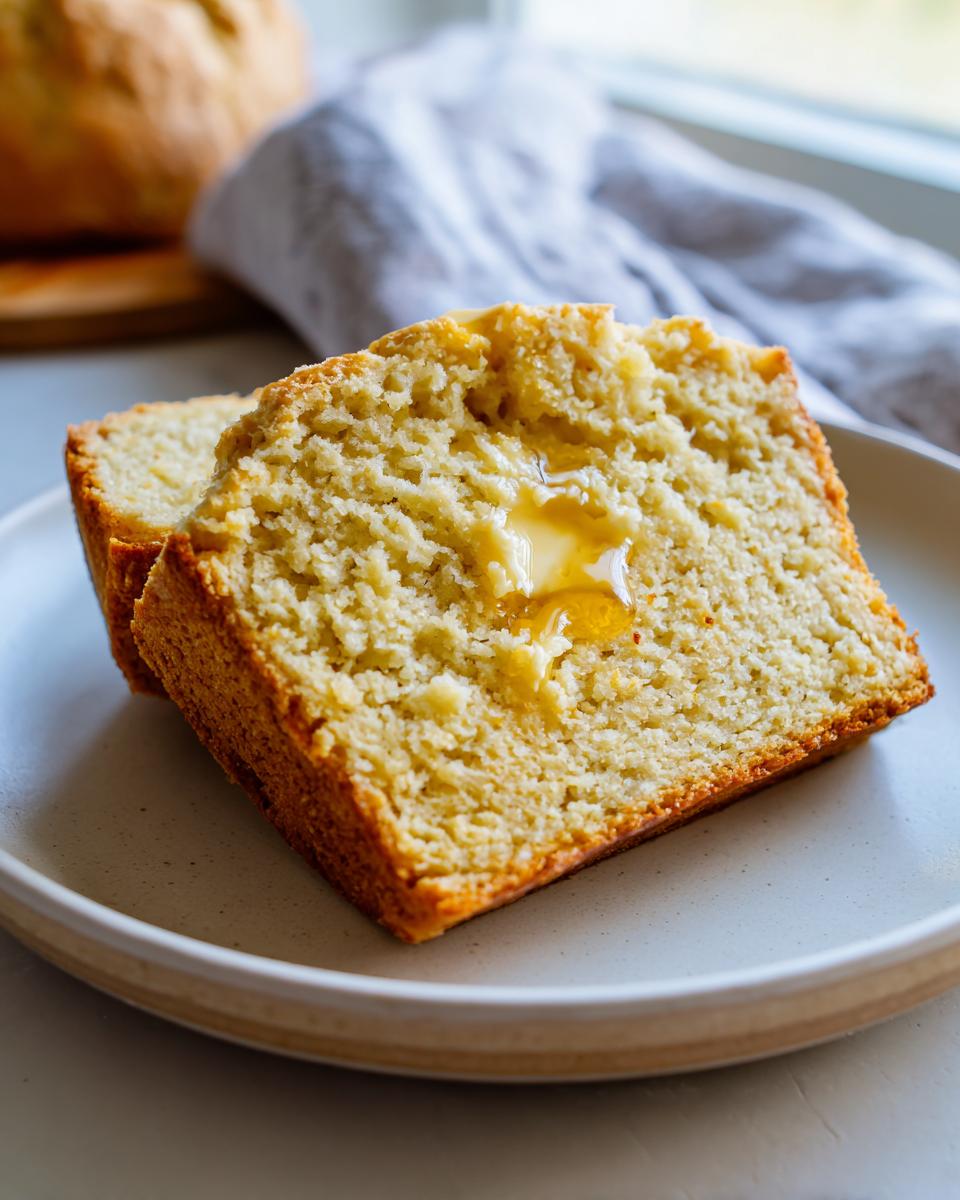
Also, don’t be afraid to play around with the flavor! If you’re looking for some fun **cheesy beer bread ideas**, I highly recommend boosting the savory profile. Before you pour in the beer, toss in about a cup of shredded sharp cheddar cheese and maybe a teaspoon of garlic powder right in with your dry ingredients. It transforms this loaf into something amazing perfect for dipping in my skillet cornbread recipe.
It’s these little insider tips that I’ve gathered over the years that really make the difference when baking for loved ones!
Variations on Classic Beer Bread: Buttery, Honey, and Savory Options
I absolutely love that this recipe is already naturally a **buttery beer bread** because of that melted butter drizzle we put right on top before baking. That little step is everything! It melts down into the crust and gives you those irresistible golden, slightly salty edges that you just scrape off the sides of the pan first, right? Be honest, we all do that!
But if you want to riff on basics, this recipe is your canvas. If you’re looking for something a touch sweeter—maybe you want a bread that pairs well with your morning coffee instead of chili—you’ve got to try a **honey beer bread** variation next time. It’s super simple: just swap out that tablespoon of white sugar for a tablespoon of good quality honey when you mix your dry ingredients. The honey adds a deeper, floral sweetness that works beautifully with the malt flavor from the beer.
Now, back to my favorite savory additions! If you followed my tip earlier about cheddar, you already know how fantastic that is. Adding a cup of sharp cheddar and some garlic powder really turns this into something akin to a bakery favorite. Honestly, if you’re feeling adventurous, check out what the folks over at Snazzy Recipes do with herbs; sometimes a little dried rosemary mixed right into the batter makes it feel instantly gourmet.
If you’ve ever made my apple butter recipe, you know I love adding a little fruit essence, but for this one, savory wins out most days! Just remember that whatever you add, mix it in gently when you stir in the beer. This simple base is so forgiving, which is why it’s a staple here at Bliss Batter!
Serving Suggestions for Your Quick Side Dish Bread
Okay, so you’ve pulled this gorgeous, warm loaf out of the oven, and now you’re staring at it—what do you serve it with? That’s the best part about having a fantastic, no-fuss **quick side dish bread** on hand! Because beer bread has that slightly crisp crust and that lovely, soft interior, it’s incredibly sturdy and perfect for soaking up liquids.
This is more than just toast; this is dinner material! My immediate thought is always pairing it with something hearty and soupy. This bread is practically begging to be dipped into a heavy bowl of chili. Seriously, forget corn chips; tear off a big hunk of this stuff and use it to sop up every bit of smoky goodness at the bottom of the bowl. If you’re making a big batch of classic tomato soup recipe, this is the side dish that officially elevates the meal from simple comfort food to a full-blown cozy experience.
It’s also amazing sliced thick and topped with just a little melted butter and garlic powder, transforming it into the best kind of cheesy bread alternative for serving alongside pasta dishes or stews. It’s so versatile because it’s not overly sweet. You could easily brush a slice with some olive oil before baking if you wanted a more savory edge instead of the sweet butter topping we used!
Storage and Reheating for Homemade Beer Bread
You are *not* going to want to save this bread, trust me! It’s best eaten warm, straight out of the oven, maybe slathered with enough butter that it melts immediately. But life happens, and sometimes we have leftovers, right? Luckily, this **beer bread** is pretty resilient because it stays moist without eggs. It’s much better than your average artisan loaf when it comes to leftovers!
For storage, the key is keeping the air out. Once the loaf is completely cooled—and I mean totally, 100% cool, otherwise you’ll steam it into sogginess—wrap it up tightly. I usually use plastic wrap first, and then I’ll place that whole bundle into an airtight zip-top bag or a container with a tight lid. Keep it on the counter at room temperature. It should stay perfectly delicious for three to four days.
Do *not* put it in the fridge! Cold air tends to dry out quick breads really fast, and we worked so hard to keep this moist! You want to maintain that soft, tender crumb.
Refreshing Leftover Slices
If you’ve had it on the counter for a couple of days and it’s starting to firm up just a little bit, don’t worry at all. There are two amazing ways to bring it right back to life!
- The Toaster Method: Just slice off what you need and pop it into the toaster on a medium setting. It crisps up beautifully and makes an excellent vehicle for cream cheese or even savory toppings.
- A Quick Reheat: If you want that “just baked” cozy feeling back, wrap a slice or two tightly in foil and pop it into a 300°F oven for about 5 to 8 minutes. It warms right through beautifully.
This bread reheats so well that it makes planning easy! You can whip up a loaf on Sunday, and it’s still perfect for a quick afternoon snack or for making an epic grilled cheese sandwich recipe later in the week. No waste here at Bliss Batter!
Frequently Asked Questions About Making Beer Bread
I get so many wonderful questions in the comments about this recipe—it’s an absolute joy to see how many of you are trying this **simple beer bread**! Because it’s such a hands-off bake, people often wonder about substitutions, but honestly, this recipe is so reliable for providing that perfect **no rise bread recipe** payoff.
Here are the most common things I hear from bakers about making the best loaf!
Can I use non-alcoholic beer for this beer bread recipe?
Oh gosh, yes, you absolutely can! This is one of my favorite things to clarify because people get worried about the alcohol content, especially if kids are eating it. The alcohol doesn’t actually do much of the heavy lifting here; what you need is the *carbonation*!
The bubbles—that wonderful fizz in the beer—are what react with the baking powder to create those lovely lift and air pockets in your crumb. So whether you use a full-strength lager or a non-alcoholic option, as long as it’s fizzy and at room temperature, you’re going to be just fine. It works exactly the same way for a delicious, soft result!
What kind of beer works best for beer bread?
This is where you can really customize the depth of flavor in your loaf. If you use a very light lager or a pale ale, the beer flavor itself will be very subtle, letting the flour and butter really shine through. This results in a very neutral, wonderful bread that’s perfect for dipping in my apple cider cocktail recipes!
If you want a richer, slightly darker flavor—think a little more malty and complex—you can use something like a brown ale or a sturdy amber. Just remember what I keep saying: whichever beer you choose, please make sure it’s room temperature so you don’t chill your batter and inhibit that beautiful rise we are counting on!
Why is my homemade bread minimal ingredients recipe dense?
If your loaf turned out dense or heavy, don’t panic! This is the most common issue with any quick bread, and it almost always boils down to two things. First, did you use cold beer? Cold beer can slow down the leavening reaction dramatically, giving you less lift.
The second, and most likely reason, is overmixing. I warned you earlier, but I’ll warn you again because it’s so important for this **homemade bread minimal ingredients** recipe: do not overmix! Once you add the beer, you just stir a few times until nearly everything is incorporated. Visible lumps and flour streaks are your friends here! Overmixing develops the gluten in the flour too much, tightening up that structure and giving you something closer to a hockey puck than a fluffy loaf!
Share Your Blissful Beer Bread Creations
Now that you’ve created your own warm, amazing loaf of **beer bread**, I really want to hear all about it! That’s the fun of sharing recipes; we get to see how everyone brings their own sunshine into the kitchen. Did you stick with the classic, buttery finish, or did you go wild with some of those **cheesy beer bread ideas** we talked about?
Baking is always better when it’s a conversation, so please, if you loved the ease and speed of this **quick bread no yeast** recipe, leave a rating for me right below the instructions! Five stars lets me know I’ve delivered on that promise of effortless, delicious baking here at Bliss Batter. If you tried adding herbs or swapped out the beer type, tell us your secret!
I encourage you to jump into the comments below. What meal did this serve alongside? Did you use a specific lager? I sometimes love making a small batch just to go with a cozy drink, like my salted caramel latte recipe on a chilly afternoon. I always pop over to see what everyone is making, and I love seeing your successes!
If you need another incredibly simple bake to try next week, you absolutely have to check out the original inspiration that showed how easy baking can be over at Striped Spatula. Happy baking, and I can’t wait to read your notes!
PrintEasy Homemade Beer Bread Recipe (No Yeast Required)
Bake a soft, fluffy loaf of homemade beer bread quickly. This simple recipe uses minimal ingredients and requires no yeast or rising time, making it perfect for beginners.
- Prep Time: 5 min
- Cook Time: 50 min
- Total Time: 55 min
- Yield: 8 servings 1x
- Category: Bread
- Method: Baking
- Cuisine: American
- Diet: Vegetarian
Ingredients
- 3 cups all-purpose flour
- 1 tablespoon baking powder
- 1 tablespoon white sugar
- 1 teaspoon salt
- 1 (12 ounce) bottle of beer, room temperature
- 4 tablespoons unsalted butter, melted
Instructions
- Preheat your oven to 375 degrees Fahrenheit. Grease and flour a standard 9×5 inch loaf pan.
- In a large bowl, whisk together the flour, baking powder, sugar, and salt until they are well combined. This step helps distribute the leavening agent evenly.
- Pour the entire bottle of beer into the dry ingredients. Stir the mixture gently with a spoon just until the ingredients are combined. Do not overmix; a few lumps are fine.
- Pour the batter into your prepared loaf pan.
- Drizzle the melted butter evenly over the top of the batter.
- Bake for 45 to 55 minutes, or until the top is golden brown and a toothpick inserted into the center comes out clean.
- Let the bread cool in the pan for 10 minutes before carefully removing it to a wire rack to cool completely.
Notes
- Use a room temperature beer for the best rise; cold beer can inhibit the chemical reaction with the baking powder.
- For a savory twist, add 1 cup of shredded sharp cheddar cheese and 1 teaspoon of garlic powder to the dry ingredients.
- This bread pairs wonderfully with hearty soups or chili as a quick side dish.
Nutrition
- Serving Size: 1 slice
- Calories: 220
- Sugar: 3
- Sodium: 350
- Fat: 5
- Saturated Fat: 3
- Unsaturated Fat: 2
- Trans Fat: 0
- Carbohydrates: 40
- Fiber: 1
- Protein: 5
- Cholesterol: 10