
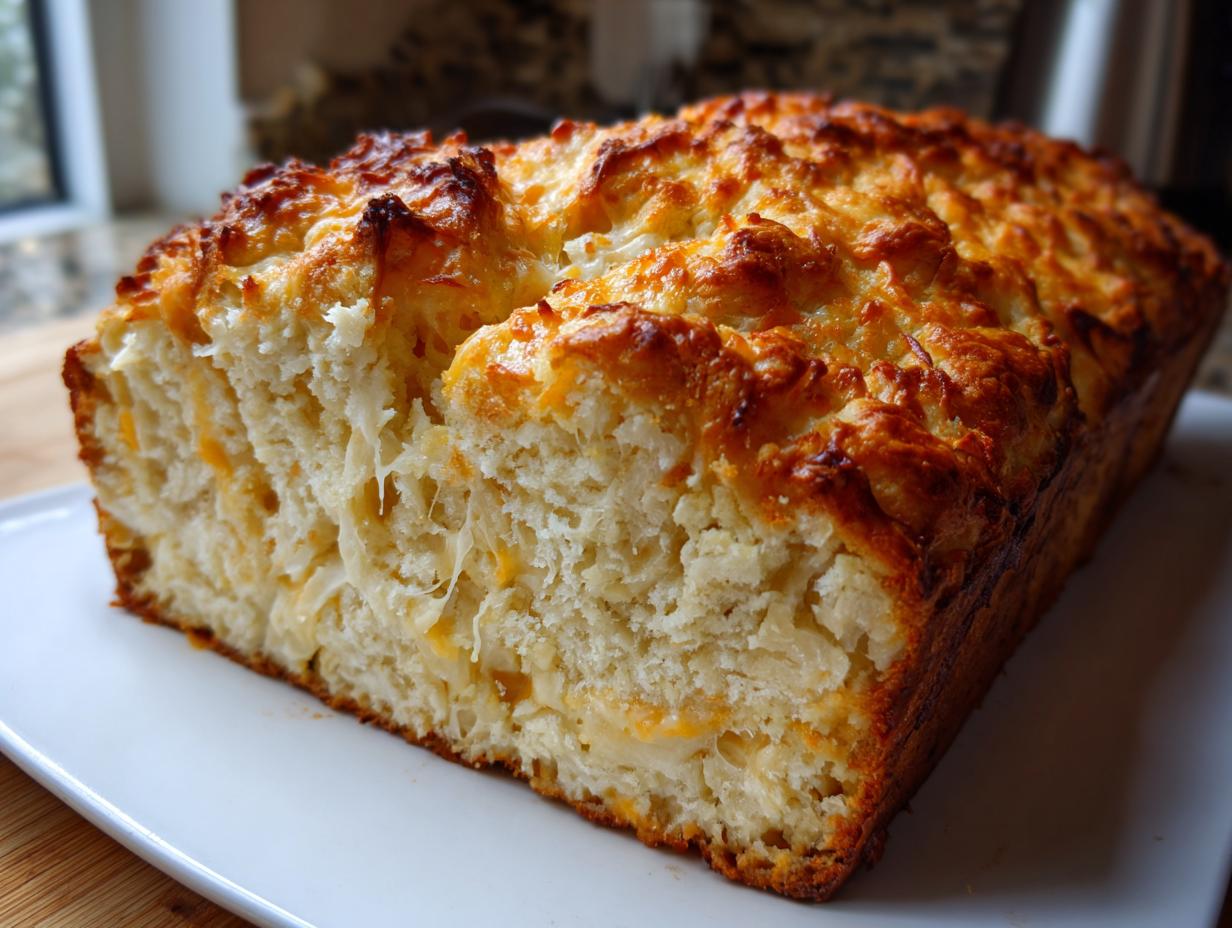
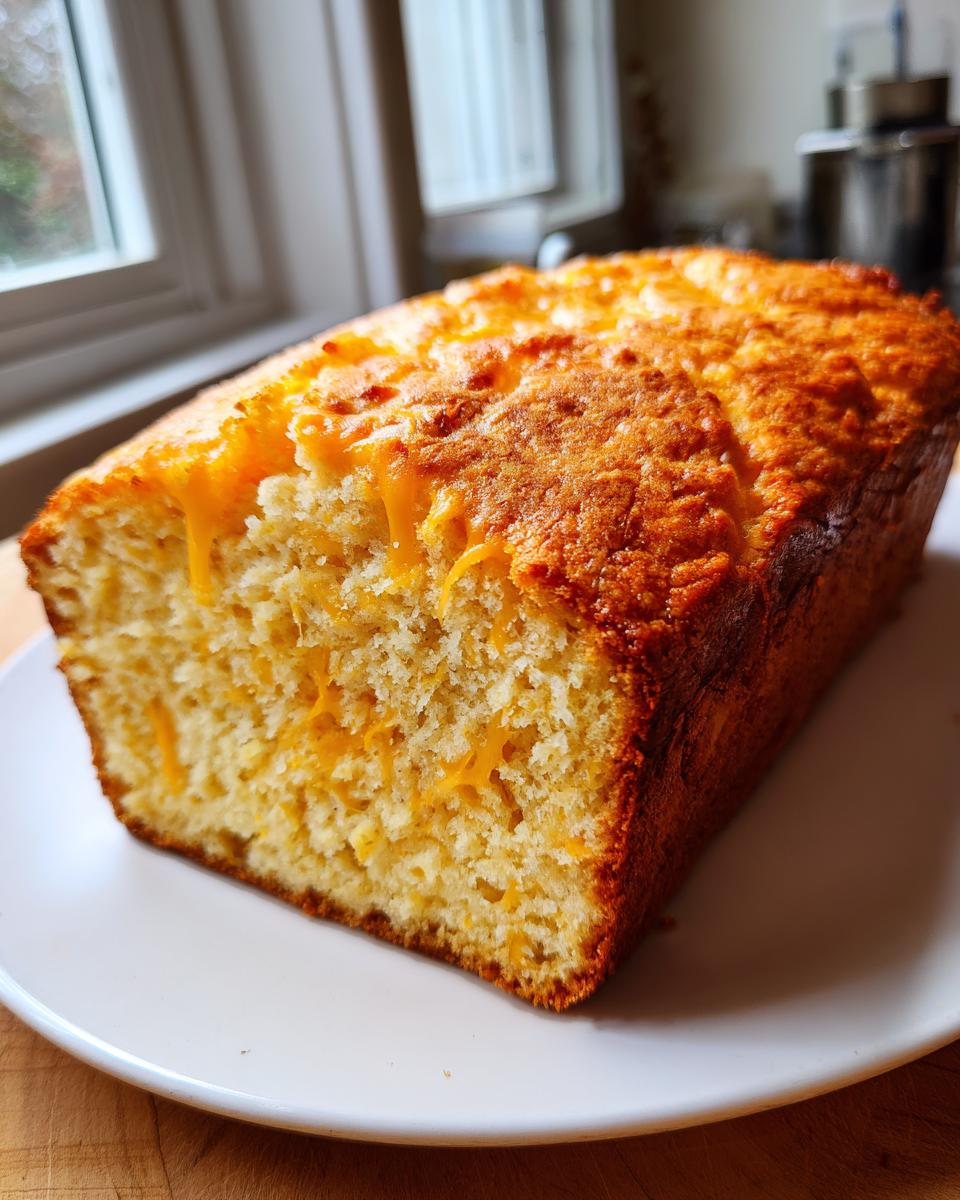
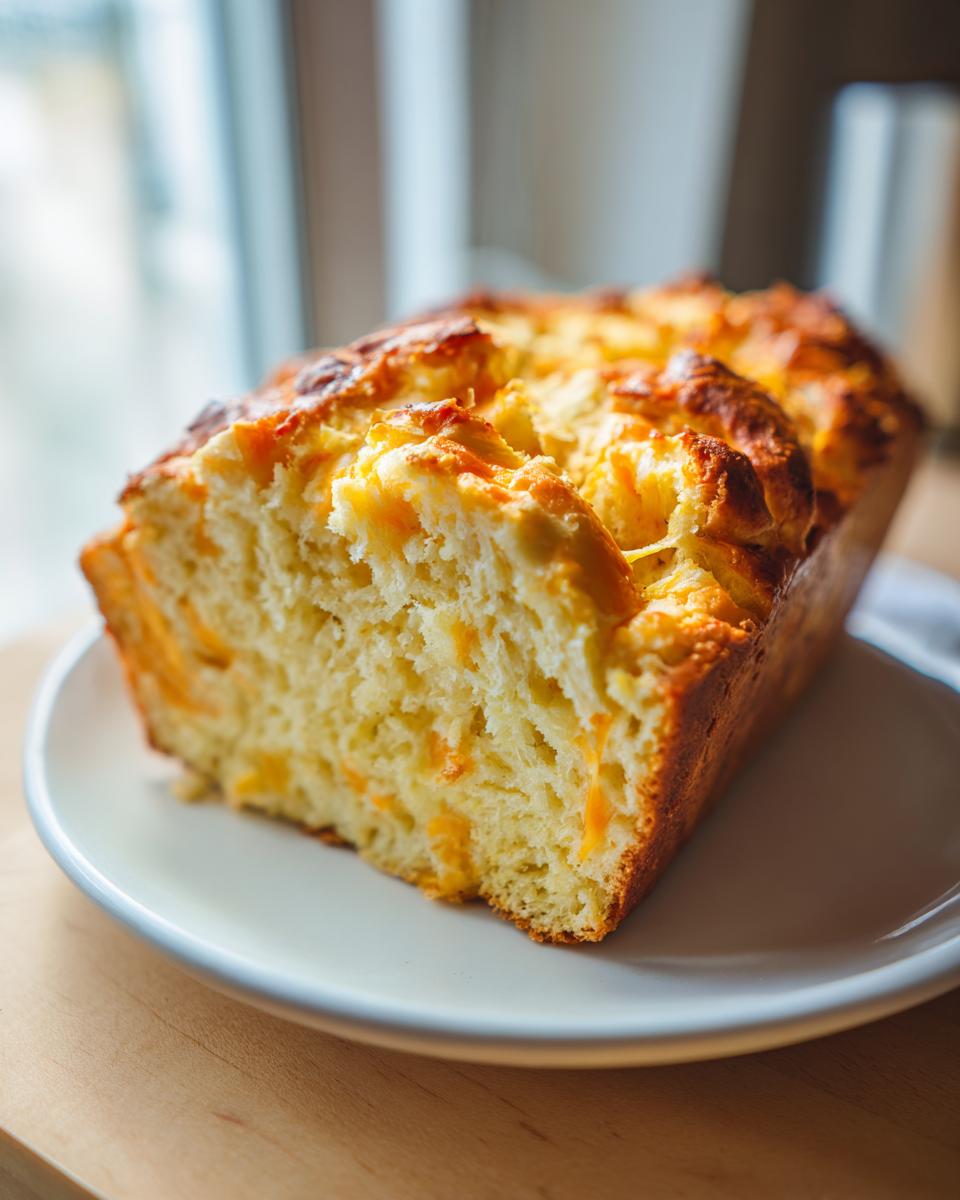
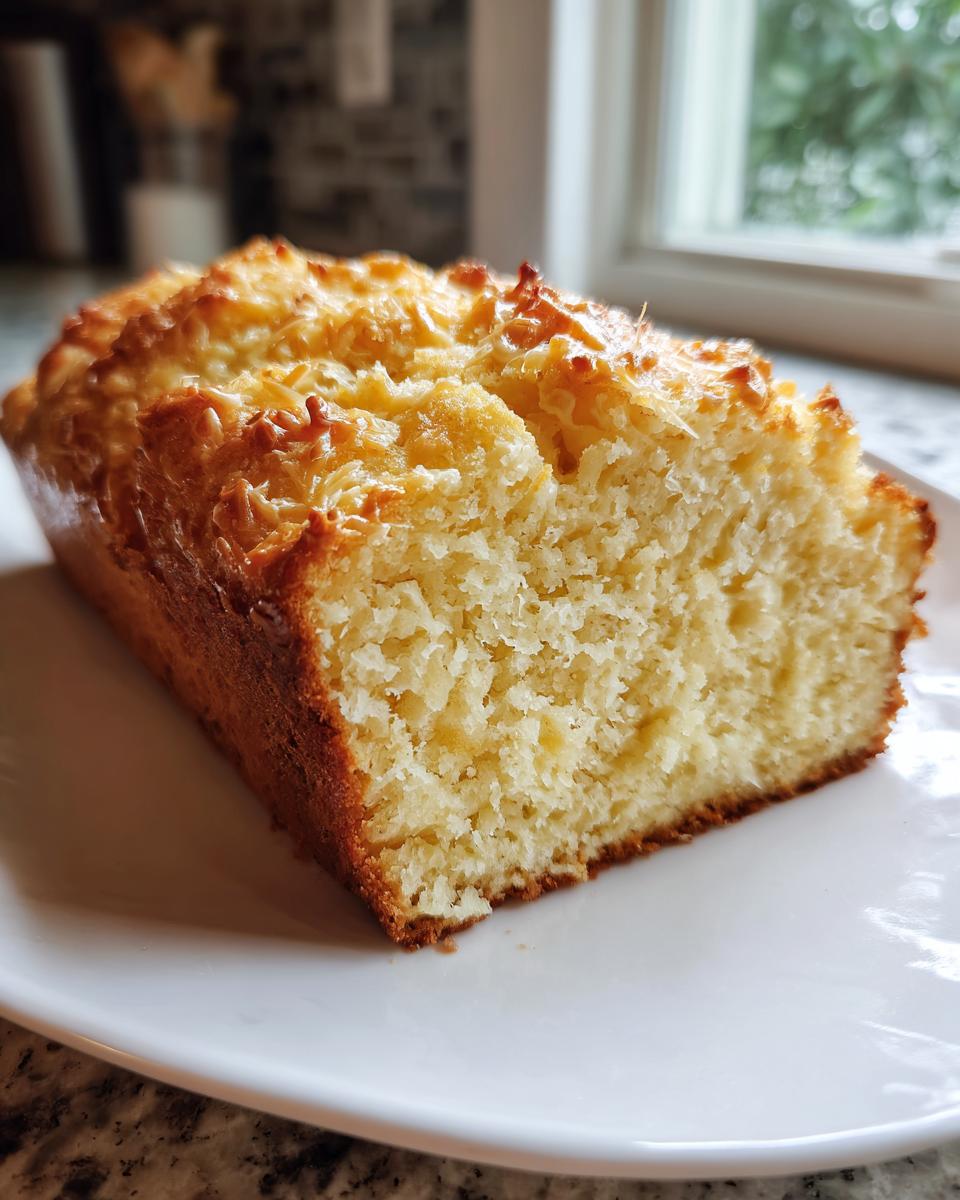
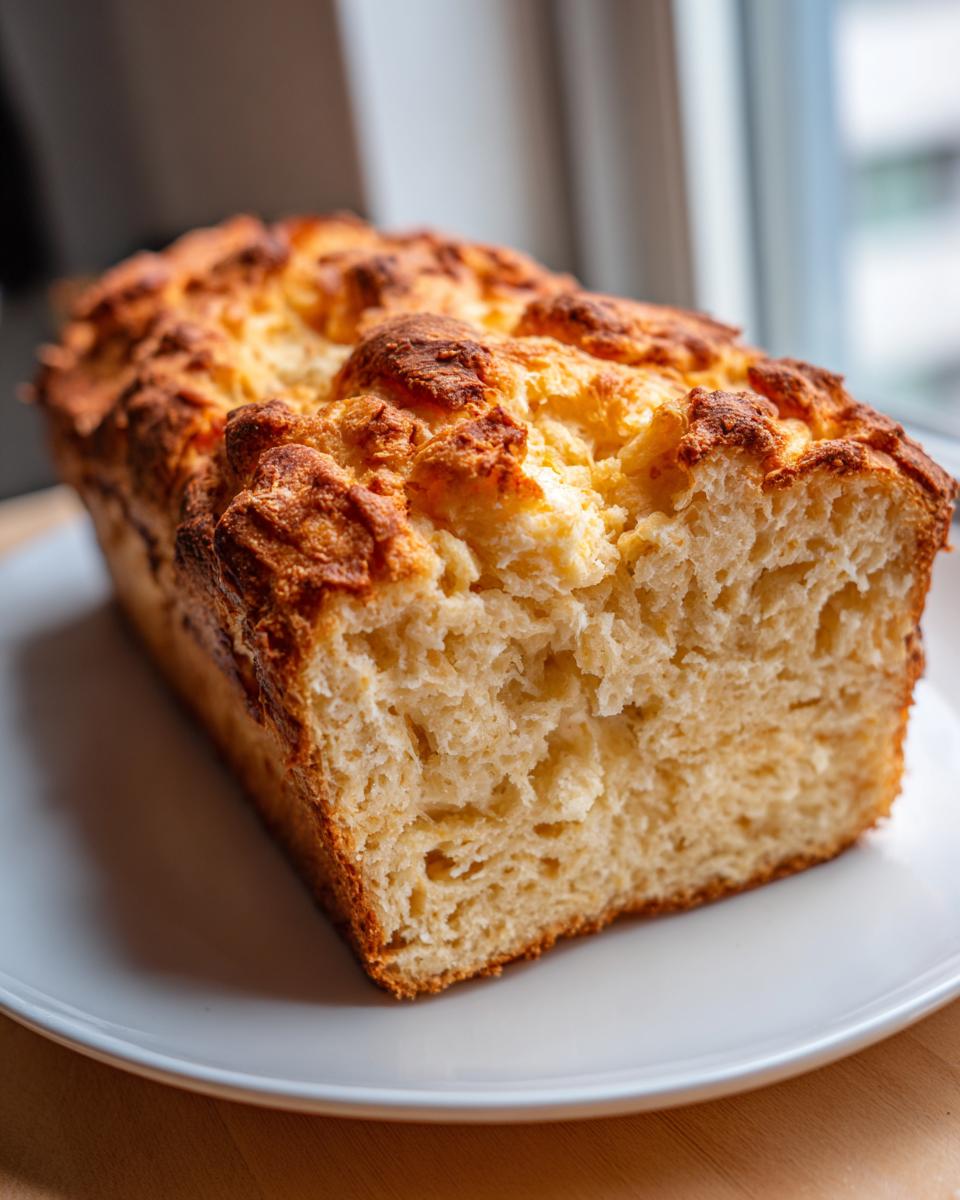
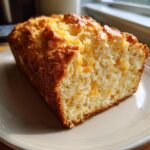
When I think about the ultimate comfort food baking, it always involves something warm, savory, and incredibly easy. That’s exactly what led me to perfect this recipe for the cheese beer bread. There’s just something magical about folding shredded sharp cheddar into a rich, bubbly batter and knowing you don’t have to wait hours for yeast to do its thing. This is the ultimate cheesy quick bread—it comes together faster than picking up takeout! I spent weeks testing different beer-to-flour ratios right here in my kitchen to make sure this loaf turned out golden, tender, and deeply satisfying every single time. If you love hearty loaves, make sure to check out my recipe for pumpkin beer bread too! It truly represents that pure, simple bliss I aim for here at Bliss Batter.
- Why This Cheese Beer Bread is Your New Go-To Savory Quick Bread
- Selecting the Best Beer for Your Cheese Beer Bread
- Ingredients for The Ultimate Homemade Cheesy Bread
- Step-by-Step Instructions for Perfect Cheese Beer Bread
- Tips for Success When Making This Beer Baking Recipe
- Serving Suggestions for Your Comfort Food Dipping Bread
- Storage and Reheating Instructions for Leftover Cheese Beer Bread
- Frequently Asked Questions About This Cheesy Quick Bread
- Nutritional Snapshot of This Simple Cheese Bread
Why This Cheese Beer Bread is Your New Go-To Savory Quick Bread
Honestly, I think everyone needs a fantastic easy beer bread recipe tucked away for those days when you need something homemade fast. This loaf is the answer to that craving! Forget worrying about proofing times; we rely on baking powder here, which simplifies everything immensely. It’s quickly become my favorite savory quick bread.
- No yeast required—we’re talking 10 minutes from bowl to oven!
- It’s incredibly forgiving; a few lumps won’t hurt a thing.
- The beer and butter work together to create a rich, satisfying crumb.
- It’s perfect for serving warm alongside your favorite chili or soup, so be sure to check out my skillet cornbread idea for pairing inspiration!
Quick Prep Time for Perfect Cheese Beer Bread
Can you believe the prep time is only 10 minutes? That’s right—ten minutes! You can literally decide you want homemade cheesy bread while dinner is warming up and still serve it fresh from the oven before the night is over. That speed is why this cheese beer bread is perfect for weeknights or when unexpected company drops by!
Soft and Chewy Texture Achieved Easily
You might think a quick bread made without yeast would turn out tough, but I promise you, that’s not the case here. The magic is in the liquid ratios. The way the beer hydrates the flour, combined with that rich melted butter poured right on top, creates a wonderfully soft and chewy beer bread. It stays moist, too, making it ideal for dipping!
Selecting the Best Beer for Your Cheese Beer Bread
One of the biggest questions I get when people try this recipe is, “What kind of beer should I use?” I totally get it; choosing the right liquid foundation is key to getting that perfect crumb structure in your cheese beer bread. This is where we talk about the best beer for bread making!
My testing proved that the flavor of the beer really comes through, so the rule here is simple: use a beer you actually enjoy drinking. For this recipe, I specifically recommend sticking to lighter, crisper styles. Think a standard lager or a slightly brighter, hop-forward pale ale. These beer styles provide enough lift and flavor without weighing the dough down.
Now, why avoid the dark stuff for this one? While I adore a good stout—and you should absolutely check out my beer-battered fish recipe if you haven’t!—stouts and porters tend to be too heavy and dark for this particular loaf. They can make the final product overly dense and can muddy the bright cheddar notes we are trying to achieve. Trust me, a crisp lager lets the sharp cheddar shine through perfectly in this loaf!
Ingredients for The Ultimate Homemade Cheesy Bread
Okay, here is everything you need to whip up this phenomenal loaf. Since this is a quick bread and we aren’t relying on yeast development, the measurements really do count, so try to be precise! You’ll see we use simple pantry staples plus cheese and that crucial beer. For pairing ideas later, don’t forget to peek at my beer cheese soup recipe!
- 3 cups all-purpose flour
- 1 tablespoon baking powder
- 1 teaspoon salt
- 1/4 cup granulated sugar
- 1 cup sharp cheddar cheese, fresh shredded
- 1 (12 ounce) bottle of room temperature beer (lager or pale ale)
- 1/2 cup (1 stick) unsalted butter, needs to be melted
Ingredient Notes and Sharp Cheddar Beer Bread Swaps
When it comes to the cheese, please, please shred it yourself if you can! Pre-shredded cheese has anti-caking agents that stop it from melting smoothly into the batter, and nobody wants a stringy, oily clump of cheese, right? For the best flavor punch—which is what makes this truly a sharp cheddar beer bread—stick with sharp cheddar.
But hey, I know substitutions happen! If you wanted to mix it up, Monterey Jack melts beautifully and gives you that great pull. Or, try a combination of Monterey Jack and Pepper Jack for a little kick. Just make sure you are using about 1 cup total of cheese, and it’s really important that it’s firm cheese that grates nicely, not something soft like mozzarella.
Step-by-Step Instructions for Perfect Cheese Beer Bread
Following these steps ensures you get that beautiful, slightly crusty exterior and soft, cheesy interior every time you make this cheese beer bread. Don’t rush the prep, but don’t dally either—it’s quick bread, after all! Before you even grab a bowl, make sure your oven is ready for action; heat management is the first step to success.
- First things first, preheat your oven to 375 degrees Fahrenheit. Take a standard 9×5 inch loaf pan and give it a good grease and flour treatment. I like to use a bit of the melted butter for greasing, followed by a dusting of flour, just to ensure absolutely nothing sticks!
- In your biggest mixing bowl, grab a whisk and combine all the dry stuff: the flour, the baking powder, the salt, and that little bit of sugar. Whisking them together really helps the baking powder spread out evenly where it can do its job.
- Now, toss in all that beautiful, shredded sharp cheddar cheese. Give it a gentle stir with a wooden spoon or spatula to make sure the cheese is coated in flour. This coating prevents the cheese from sinking straight to the bottom of the pan during baking.
- Here comes the beer! Pour the entire 12-ounce bottle of room temperature beer right into the dry ingredients. Stir *just* until the mixture comes together. I mean it—stop stirring when you still see a few wispy lumps of flour. Seriously, don’t overmix, or you’ll end up with a tough loaf, and we want tender here!
- Scoop about half of your melted butter right into that batter and mix it in quickly for just a couple of turns.
- Transfer the entire batter into your prepared loaf pan. It will look thick and maybe a little lumpy, which is exactly right for this kind of bake!
- This is my favorite finishing touch for that golden top—pour the remaining melted butter evenly over the top of the batter in the pan. Don’t stir it in; let it sit right there on the surface. It melts down as the bread bakes, creating a perfectly rich crust.
- Slide it into the preheated oven and bake for 50 to 60 minutes. How do you know when it’s done? Start checking around the 50-minute mark by inserting a wooden skewer right into the center. If it comes out clean, or with just a few moist crumbs attached, you’re done!
- Let the bread cool in the pan for about 10 minutes, no more, no less. Then, carefully turn it out onto a wire rack to finish cooling completely.
Mixing the Cheese Beer Bread Batter Correctly
I can’t stress this enough: when you introduce that beer, your stirring needs to be minimal! As fellow bakers, we know that vigorous mixing develops gluten, and developing gluten in a quick bread guarantees a tough, borderline rubbery texture. We want a tender crumb that gives way easily when you bite into it. Think of it like folding sugar into whipped cream—you are just incorporating, never beating. Stop mixing as soon as you see the wet and dry ingredients look acquainted. A few streaks of flour are totally okay and actually preferred for the best final texture in your cheese beer bread.
Baking Time and Testing Doneness for Your Cheese Beer Bread
We are aiming for a nice, sturdy bake at 375 degrees Fahrenheit, usually taking between 50 and 60 minutes. Since we are aiming for that perfect internal temperature that signifies cooked dough but not dry crumbs, the skewer test is your best friend beside the visual. You’re looking for that skewer to come out clean or maybe have just one or two tiny, moist crumbs clinging to it.
If you pull it out and the center is still wet, give it 5 more minutes and check again. This ensures your loaf of cheese beer bread is cooked all the way through without drying out the edges. If you’d like more tips on adapting this method for different types of baking, take a peek at my full guide on baking with beer!
Tips for Success When Making This Beer Baking Recipe
I’ve found that even the simplest beer baking recipes can go from good to absolutely spectacular with just a couple of little secrets tucked up your sleeve. Since I’ve tweaked this recipe so many times, I want to share the bits that make all the difference in achieving that perfect, savory loaf.
First, let’s talk temperature. When you use beer in baking, especially quick breads, having it at room temperature is genuinely helpful. Super cold beer can shock the baking powder, which means your bread might not rise as evenly or quickly as it should before the crust sets. If you remember to pull your beer out of the fridge about 30 minutes before you mix, you’ll notice a lift that is just slightly better and more consistent. It’s a small step, but it contributes to that beautiful rise we are looking for!
Another thing that makes this loaf special is how we treat the cheese. Make sure that sharp cheddar is evenly distributed when you mix it into the dry ingredients. If you dump it in after you add the beer, you risk having pockets of unmixed cheese that melt funny. We want that flavor distributed happily throughout the loaf!
If you want to bring in a little garden freshness, this is the perfect base for herbs. For an amazing variation, try adding about 1 teaspoon of dried chives or dried thyme right in with your flour and baking powder mixture. The subtle herby flavor plays so well against the sharp cheddar, turning this simple bread almost into a gourmet side dish. It’s a fantastic way to customize your experience when you’re making these beer baking recipes. If you are interested in learning more about using beer in other recipes, I have a full deep dive on my baking with beer guide!
Serving Suggestions for Your Comfort Food Dipping Bread
Now that you have this incredible loaf of cheese beer bread cooling on the rack, the real fun begins: eating it! This savory quick bread is truly versatile, though I think its favorite role in life is being the ultimate dipping companion. It’s hearty enough to stand up to big, flavorful bowls of stew and soup.
When I bake this on a chilly evening, I always make sure I have a simmering pot of my favorite classic chili on the stove. Tearing off a warm, cheesy piece of this bread to scoop up every last bit of the chili is just pure happiness—it’s the definition of comfort food dipping bread that nobody can resist.
It’s equally fantastic alongside something milder, like my ultra-creamy classic tomato soup recipe. That slightly yeasty, cheesy flavor mixes so perfectly with tangy tomato, it’s seriously restaurant-quality comfort food right at home. Serve it warm, maybe with just a light smear of extra butter (though it hardly needs it!), and watch it disappear.
If you are just having it as an appetizer before a big meal, a thick slice, toasted lightly, is amazing with a little dab of cream cheese or even a smear of spicy brown mustard. Honestly, the possibilities for this cheese beer bread are endless!
Storage and Reheating Instructions for Leftover Cheese Beer Bread
While I fully expect this loaf to vanish the day it comes out of the oven—because, honestly, who can stop eating cheese beer bread when it’s fresh?—life happens, and sometimes you have leftovers. Don’t worry! This simple cheese bread freezes and reheats beautifully if you keep it stored correctly.
For short-term storage, say for a couple of days, wrap the cooled loaf tightly in plastic wrap first, and then tuck that into an airtight container or a zip-top freezer bag. Keeping air away from it is the secret to maintaining that soft texture we worked so hard for!
How to Reheat Your Homemade Cheesy Bread
Reheating is all about choosing the right tool for the job. If you try to reheat a slice of this savory quick bread in the microwave, you’ll find it gets okay for about 10 seconds, but then it can turn a bit tough later. If you want that wonderful, slightly crisp crust back, the oven is your best friend.
If you have a whole half loaf left, wrap it loosely in foil and pop it into a 300-degree oven for about 10 to 15 minutes until it’s warmed all the way through. If you’re just reheating a slice or two, you can skip the foil but lower the time to about 5 to 7 minutes at the same temperature. This gentle heat warms the cheese back up without dehydrating the crumb. It comes out tasting almost as good as the first slice!
If you ever get the urge to try other simple, satisfying bakes while you’re waiting for leftovers to warm up, have a look at my collection of appetizer bread recipes. Happy baking!
Frequently Asked Questions About This Cheesy Quick Bread
I always love hearing from bakers who are trying out this recipe for the first time! It’s only natural to have a few little questions, especially when dealing with quick breads or substituting ingredients. I’ve pulled together the questions I see the most often about this wonderful loaf. If you’ve been wondering about variations like turning this into beer cheese muffins, you’ve come to the right spot!
Can I make beer cheese muffins instead of cheese beer bread?
Oh, absolutely you can! That’s one of the best things about using a quick bread style recipe like this one. If you want smaller, individual servings—perfect for appetizers or an on-the-go breakfast—just use a standard 12-cup muffin tin that you’ve greased well. You’ll simply divide the batter among the cups, filling them about two-thirds full.
Since the bake time is much shorter for smaller portions, keep an eye on them after about 20 minutes. They should be beautifully golden and springy to the touch in about 25 minutes total. It’s a fantastic way to enjoy the flavor profile of our cheese beer bread in a little package!
What is the best way to store my homemade cheesy bread?
The goal for storage is to lock in that marvelous moisture we worked so hard to achieve. Once the loaf is completely cool—and I mean stone cold, do not wrap it warm!—wrap it very tightly in plastic wrap. Then, place that wrapped loaf inside an airtight container or a heavy-duty zip-top freezer bag. Stored this way on your counter at room temperature, it should stay perfectly soft for about three days.
Speaking of freshness, if you see anyone trying to tell you that you need yeast for a good loaf, just point them toward this recipe! It proves that fantastic, savory baking can absolutely happen with beer bread without yeast. If you’re looking for other great appetizer ideas, you might enjoy my recipe for fried mac and cheese bites!
Why did my bread sink a little in the middle?
This usually happens for one of two baking reasons, and it’s a common issue with any quick bread! The first is that the oven temperature might run a little low, meaning the outside set before the middle had enough heat to fully rise. If this happens, try bumping your oven up by 10 degrees next time. The second reason is often overmixing the batter, which means you’ve developed too much gluten and those air bubbles collapsed under their own weight during the bake. Remember, for this cheese beer bread, we stop stirring as soon as the dry patches disappear!
What if I don’t have butter? Can I substitute oil?
While butter truly gives this loaf its rich flavor and helps develop that nice, crusty top when you pour the remaining half on top, you can make a substitution in a pinch. You could use a mild vegetable oil, like canola or sunflower, in a 1:1 ratio for the melted butter. However, remember that the solid fat of the butter impacts the final texture subtly. When you substitute oil, the bread will be slightly softer overall but will lack that wonderful richness and slightly craggy crust that the butter provides. Always use the best ingredients you have for the best results!
Nutritional Snapshot of This Simple Cheese Bread
I always like to include a little peek at the estimated nutrition involved when we bake something delicious. Remember, since we are working with real ingredients like sharp cheddar and butter, this is a rich, satisfying loaf! This information is based on dividing the loaf into 10 generous slices, so if you cut bigger pieces for dipping (and who hasn’t?), your numbers will shift slightly.
Please keep in mind that these figures are just an estimate based on the ingredients listed in the recipe. The exact values can change based on the specific brand of beer or type of cheese you use. But overall, you can see that this cheese beer bread is hearty and flavorful!
- Serving Size: 1 slice
- Calories: 250
- Fat: 13g (Aiming for that rich flavor means we embrace the butter!)
- Saturated Fat: 8g
- Carbohydrates: 28g
- Sugar: 4g (Mostly from the beer and a touch of added sugar!)
- Protein: 7g
- Fiber: 1g
- Cholesterol: 35mg
It’s perfect served warm alongside a big, filling bowl of soup or as a main component for an appetizer spread. If you’re looking for more bread ideas that satisfy that craving for something homemade and savory, you really must explore my full list of appetizer bread recipes. Enjoy knowing exactly what’s in every single bite!
PrintThe Ultimate Cheesy Beer Bread (Quick & Easy Yeast-Free)
Make this simple, savory, and soft cheesy beer bread without yeast. It is a perfect appetizer bread recipe for game day or dipping into chili.
- Prep Time: 10 min
- Cook Time: 60 min
- Total Time: 70 min
- Yield: 1 loaf (about 10 servings) 1x
- Category: Baking
- Method: Baking
- Cuisine: American
- Diet: Vegetarian
Ingredients
- 3 cups all-purpose flour
- 1 tablespoon baking powder
- 1 teaspoon salt
- 1/4 cup granulated sugar
- 1 cup sharp cheddar cheese, shredded
- 1 (12 ounce) bottle of beer (lager or pale ale recommended)
- 1/2 cup (1 stick) unsalted butter, melted
Instructions
- Preheat your oven to 375 degrees Fahrenheit. Grease and flour a standard 9×5 inch loaf pan.
- In a large bowl, whisk together the flour, baking powder, salt, and sugar.
- Stir in the shredded sharp cheddar cheese until it is evenly distributed throughout the dry ingredients.
- Pour the entire bottle of beer into the dry mixture. Stir just until combined. Do not overmix; a few lumps are fine.
- Pour half of the melted butter into the batter and mix briefly.
- Transfer the batter into the prepared loaf pan.
- Pour the remaining melted butter evenly over the top of the batter in the pan.
- Bake for 50 to 60 minutes, or until a wooden skewer inserted into the center comes out clean.
- Let the bread cool in the pan for 10 minutes before turning it out onto a wire rack to cool completely.
Notes
- For the best flavor, use a beer you enjoy drinking, such as a crisp lager or a slightly hoppy pale ale. Avoid dark stouts as they can make the bread too dense.
- If you want a slightly herb flavor, add 1 teaspoon of dried chives or dried thyme to the dry ingredients.
- This bread is excellent served warm with butter or as a comfort food dipping bread alongside soup.
Nutrition
- Serving Size: 1 slice
- Calories: 250
- Sugar: 4
- Sodium: 350
- Fat: 13
- Saturated Fat: 8
- Unsaturated Fat: 5
- Trans Fat: 0
- Carbohydrates: 28
- Fiber: 1
- Protein: 7
- Cholesterol: 35