

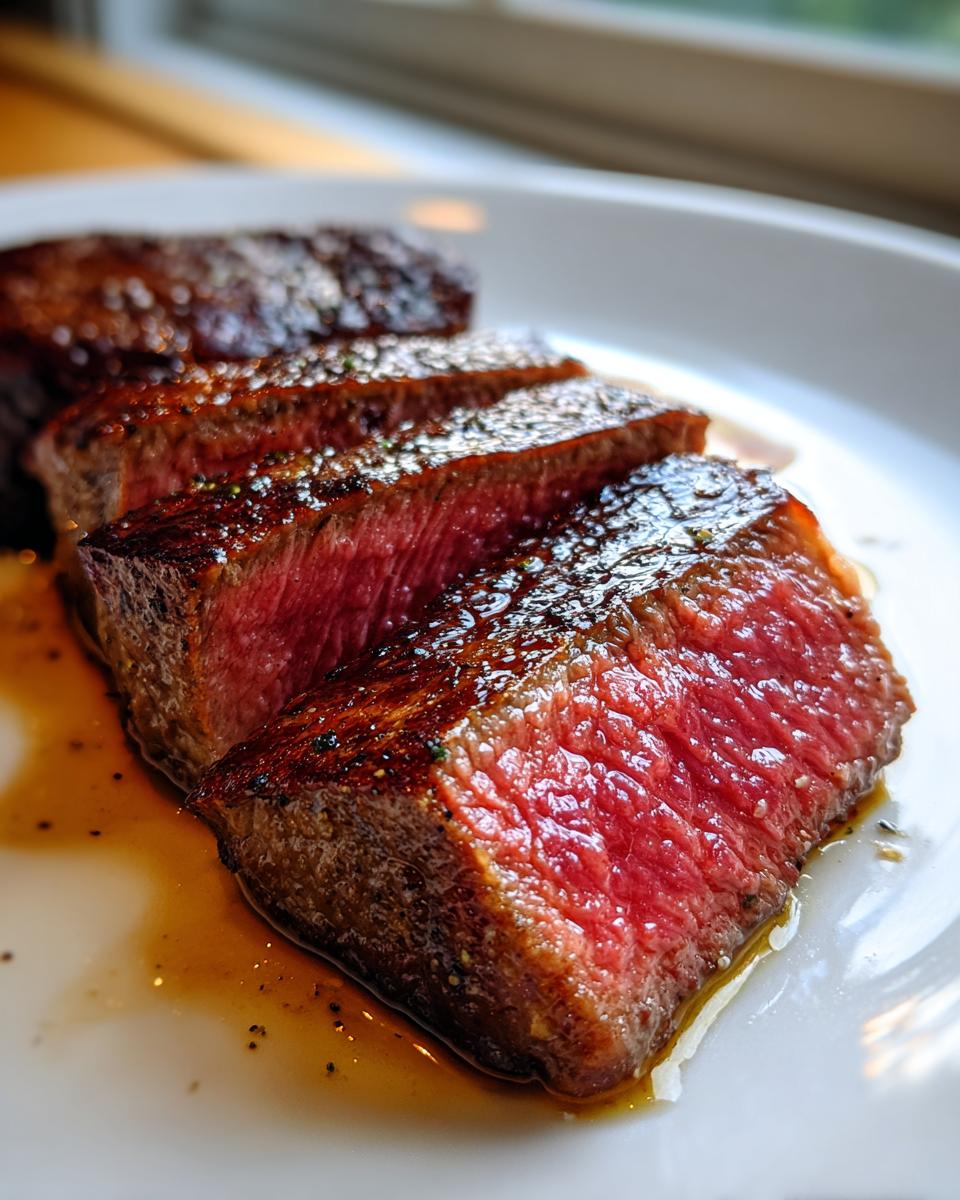
Oh, friends, let’s talk about steak. I know, I know, Bliss Batter is usually all about the sweet treats, but hear me out! Just like I refuse to settle for dry cookies, I absolutely refuse to put up with tough, chewy beef. Achieving that legendary, velvety texture—that true melt-in-your-mouth steak experience—used to feel like something only fancy steakhouses knew the secret to.
Well, I spent months experimenting, and I cracked the code for home cooks! Forget scorching your steak over screaming-hot flames and praying for the best. We are going to use the reverse sear method. Trust me, this technique gently coaxes the center to perfection before we lay down that gorgeous, crispy crust. It’s not just easier; it guarantees you get that soft, unbelievably juicy bite every single time. I want you to have that happy, I-made-this-myself moment when you cut into your incredibly tender dinner!
If you want to see my baking journey and why I approach every recipe, even beef, with this level of detail, you can read all about my history right here: my story starts in my grandmother’s kitchen.
- Why This Reverse Sear Method Creates Melt-in-Your-Mouth Steak
- Ingredients Needed for Your Melt-in-Your-Mouth Steak
- Step-by-Step Guide to Achieving Melt-in-Your-Mouth Steak
- Tips for Foolproof Tender Steak Every Time
- Alternative Methods for Melt-in-Your-Mouth Steak
- Serving Suggestions for Restaurant Style Steak at Home
- Storage and Reheating Instructions for Leftover Melt-in-Your-Mouth Steak
- Frequently Asked Questions About Tender Steak
- Share Your Amazing Melt-in-Your-Mouth Steak Results
Why This Reverse Sear Method Creates Melt-in-Your-Mouth Steak
Traditional searing blasts the outside of the steak with huge heat right away, forcing the outer layers to cook fast while you wait for the inside to warm up. By the time the middle is pink, those outer edges are drier than old parchment paper! That’s the enemy of a melt-in-your-mouth steak.
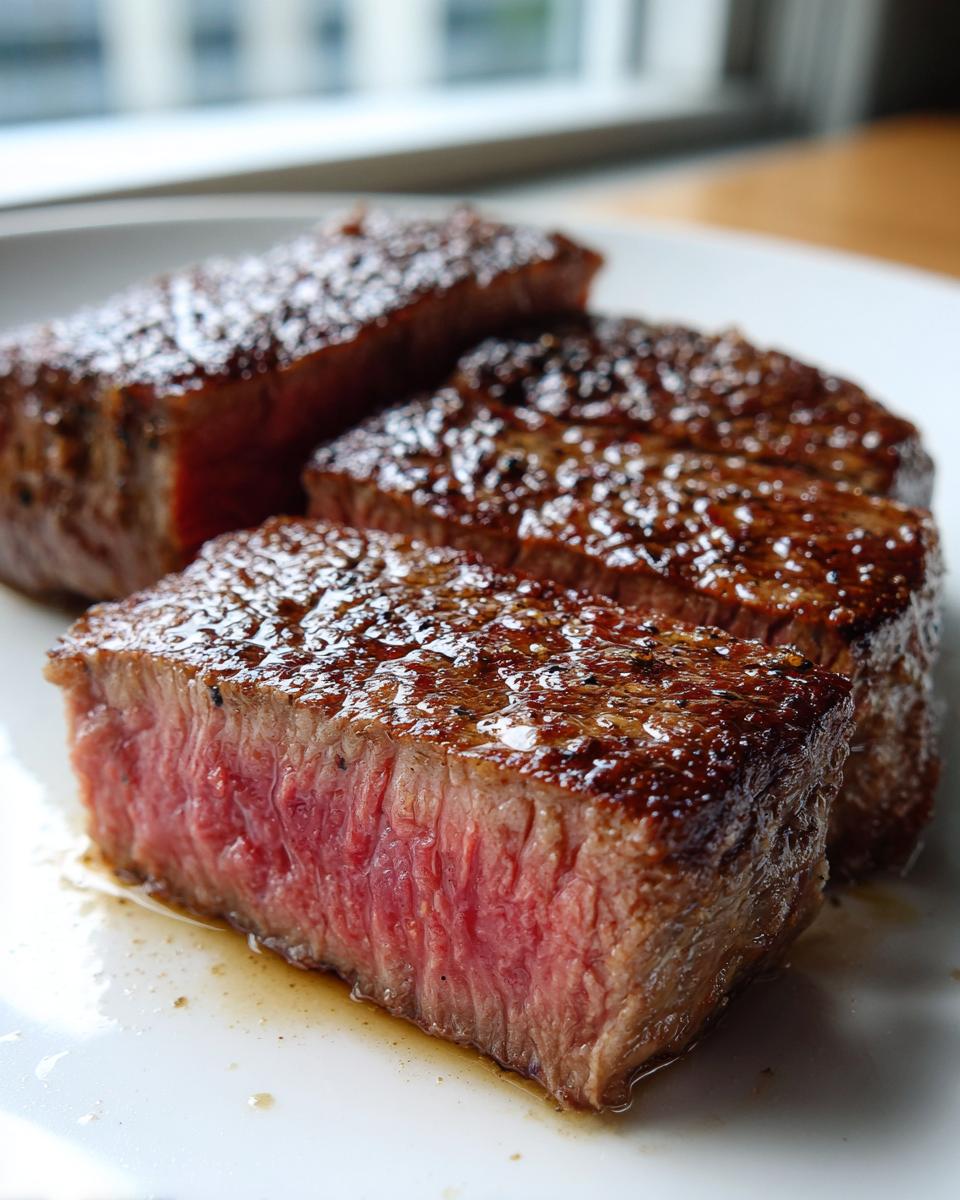
The reverse sear flips the script. We use the oven set at a super low temperature—250 degrees is perfect—to gently bring the entire steak up to temperature. Think of it like slowly waking up your meat instead of startling it! This slow, even heating keeps the muscle fibers relaxed and full of all their lovely natural juices. When you finally sear it quickly at the end, you’re just building that gorgeous, deeply flavorful crust without actually overcooking the interior. That’s why this is one of the absolute best juicy steak methods out there!
Selecting the Best Steak Cuts for Tenderness
Not all cuts are created equal when you’re aiming for that velvety feeling, which is why knowing the best steak cuts for tenderness is important. Cuts that naturally have good marbling—those little streaks of white fat woven throughout the muscle—are your best friends here. As that fat renders slowly in the low oven, it bastes the meat from the inside out. This is where you’ll get the ultimate melt-in-your-mouth steak quality.
I always reach for a thick-cut Ribeye for this method because of the glorious fat content. A prime New York Strip is also fantastic. If you can splurge, the Tenderloin (Filet Mignon) is naturally the most tender cut available, though it doesn’t have quite as much flavor as a well-marbled Ribeye.
Ingredients Needed for Your Melt-in-Your-Mouth Steak
Now that we know *why* this works, let’s talk about stacking the deck in our favor with the right building blocks. Precision matters here, especially with steak! For the best results, you want cuts that are at least an inch and a half thick. Thinner steaks will cook through too fast on the low oven setting, which defeats the whole purpose of keeping it tender.
Here is what you’ll need to pull off this restaurant-worthy magic:
- 2 (1.5-inch thick) Ribeye or New York Strip steaks
- 1 tablespoon coarse kosher salt (please, don’t use the fine table salt here!)
- 1 teaspoon black pepper
- 1 tablespoon olive oil
- 2 tablespoons unsalted butter
- 2 cloves garlic, smashed (just hit them with the side of your knife—no need to chop!)
- 2 sprigs fresh thyme
That’s it! See how simple the ingredients are? When you use a great cut of beef and the right technique, you don’t need a complicated marinade hiding things. We’re letting that beautiful beef shine!
Step-by-Step Guide to Achieving Melt-in-Your-Mouth Steak
If you’ve followed along so far, you know the secret to that tender texture is patience, not high heat! This reverse sear steak tutorial breaks down the process into three simple phases. Once you master the timing here, you’ll never look back. It’s all about precision, which is how we guarantee you achieve perfect steak doneness without gray edges.
The Crucial Dry Brining Phase
This might seem boring, but Step 1 is absolutely critical for that final golden crust. You need to season your steaks heavily with coarse kosher salt and pepper on all sides. Then, put them uncovered on a wire rack in the fridge! I know, it feels wrong to put good meat in the cold box for so long, but this step actually dries the surface of the steak. That dry outer layer acts like instant insulation when it hits the hot pan later, leading to incredible browning rather than steaming. This preparation is key to that overall melt-in-your-mouth steak feeling.
Low and Slow Cooking for Maximum Tenderness
Once those beauties are seasoned and ready, fire up the oven to a cozy 250 degrees Fahrenheit. Pop the steaks in on that rack and let them bake slowly. You are aiming for an internal temperature of 115°F if you want a perfect medium-rare. Seriously, grab a meat thermometer—it’s your best friend here! Pulling them out right at that mark ensures the muscle fibers don’t seize up and get tough. It’s the only way to guarantee that unbelievably soft texture for your melt-in-your-mouth steak.
The High-Heat Sear and Butter Baste
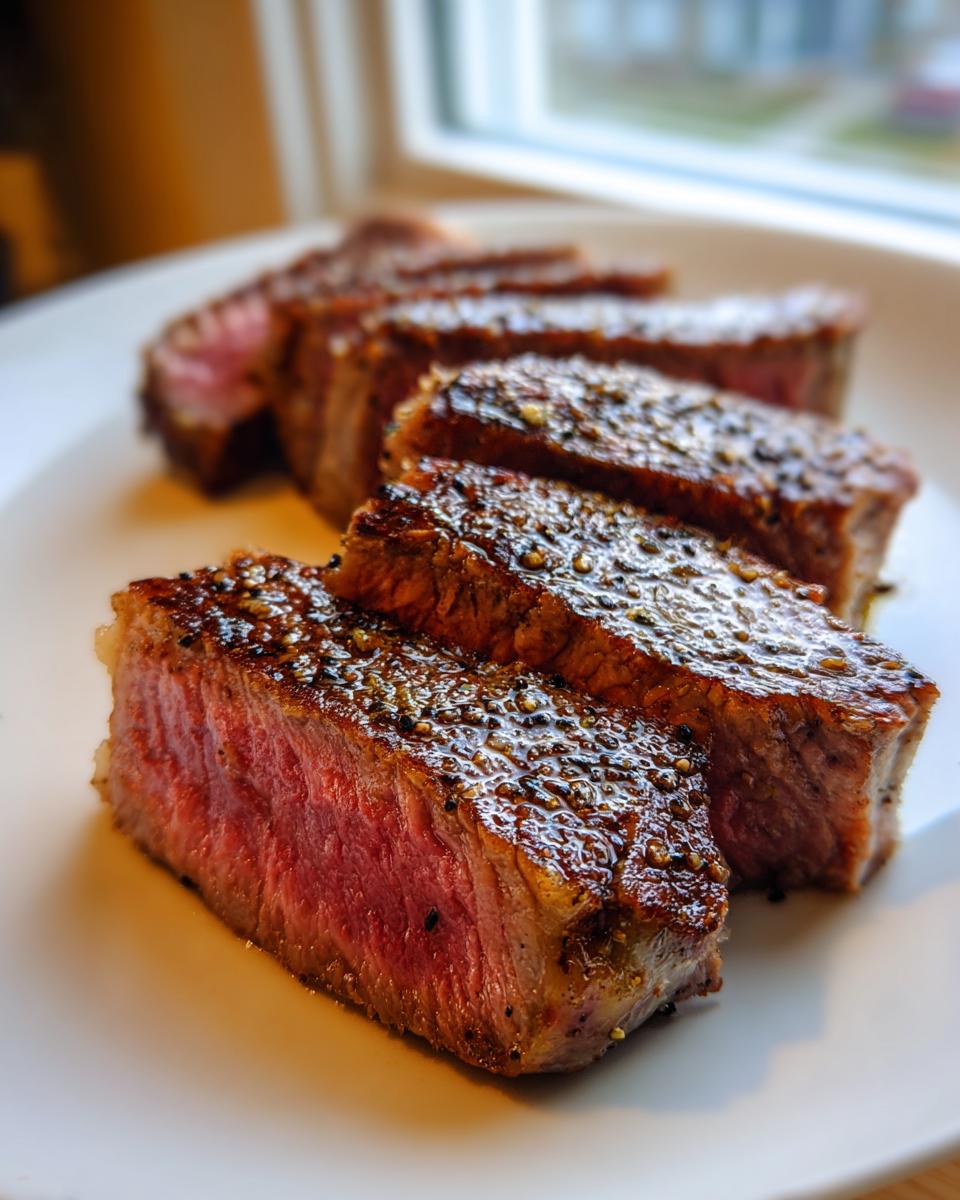
After a short rest, it’s time for the fireworks! Get a cast-iron skillet blazing hot—I mean smoking hot! Toss in your olive oil. Sear the steaks for just about 60–90 seconds per side to get that deep brown crust, and then immediately drop the heat. Now, add in your butter, garlic, and thyme. Tilt the pan and use a spoon to continuously splash that aromatic, melted fat over the top of the beef for about 30 seconds. This quick step adds fantastic depth of flavor and finishes the job, giving you that amazing, buttery steak flavor without compromising the tenderness we worked so hard to build in the oven. Remember to finish strong with a final 10-minute rest!
This whole process, from chill time to the final sear, is part of my guide to easy weeknight dinners that feel fancy!
Tips for Foolproof Tender Steak Every Time
Look, I know baking is all about precision, but cooking a perfect steak is the same dance! If you want truly foolproof tender steak, you have to respect the meat. My number one tip, bar none, is the thermometer. Don’t guess! Overcooking steak by even five degrees can take it from soft to stiff. Watch that temperature like it’s the last chocolate chip cookie on the plate.
Second, don’t skip the rest period. Ten minutes on the cutting board after you take it out of that skillet feels like forever when you’re hungry, but it’s essential. That rest lets the juices redistribute back into the fibers. If you cut it too soon, all that moisture floods out, and you’re left with a drier bite. Follow those simple steps, and these velvety steak cooking tips will treat you well every time!
Alternative Methods for Melt-in-Your-Mouth Steak
While the reverse sear is my go-to for a foolproof, tender steak at home, I know sometimes you’re looking for different tools or ingredients to help you out. Don’t you worry! There are other fantastic ways to coax that unbelievable, soft texture out of your beef, all leading back to that gorgeous melt-in-your-mouth steak feeling.
If you love slow-cooking experiments, you might want to check out how I get my short ribs incredibly tender; that slow, gentle heat application is the same principle we applied to the steak! You can see that technique here: my braised short ribs recipe uses low, slow moisture to achieve pure fork tenderness.
Sous Vide Steak for Maximum Tenderness
If you want the *most* scientifically perfect result, you’ve got to look at sous vide cooking. This method involves vacuum-sealing your seasoned steak and immersing it in a temperature-controlled water bath. Because the water can never get hotter than your exact target temperature (say, 130°F), the entire steak cooks perfectly edge-to-edge. There is zero risk of that gray band of overcooked meat! It is the ultimate technique for sous vide steak for maximum tenderness, resulting in a texture that is frankly unreal.
Steak Marinades for Soft Texture
Sometimes you’re working with a slightly tougher cut, or maybe you just want a huge pop of flavor up front. That’s where a good marinade comes in handy! The goal of effective steak marinades for soft texture is to use enzymes or acids to gently break down the tough connective tissues on the surface of the meat. Think citrus juice, certain vinegars, or even ingredients like kiwi or pineapple, which contain tenderizing enzymes. You don’t want to leave your steak bathing for days, or it gets mushy—just a few hours is usually all it takes to start enhancing that final melt-in-your-mouth steak result!
Serving Suggestions for Restaurant Style Steak at Home
Okay, you’ve nailed the reverse sear. Your steaks are resting perfectly, smelling incredible, and you’re about to carve into the tenderest beef you’ve ever made. High five! But wait—a star deserves a great supporting cast. The beauty of achieving that true restaurant style steak at home is making the whole plate feel special, not just the main event.
Since this steak is so rich and buttery, you need sides that offer contrast while soaking up all those delicious beef juices. My personal favorite choice is something creamy to balance the crisp exterior of the steak. You absolutely have to try my recipe for creamy, garlicky mashed potatoes—they are the perfect vehicle for all those pan drippings!
If you want something green to cut through that richness, you can’t go wrong with roasted vegetables. Roasting brings out the natural sweetness in things like asparagus or Brussels sprouts. I love tossing mine with some good olive oil, salt, and pepper. These roasted Brussels sprouts have just the right amount of char to stand up to the deeply seared crust on your steak.
Remember, taking the time to get that interior texture right is half the battle. Once you have the most tender steak imaginable, finishing the plating with a simple, well-executed side dish moves the experience from ‘good dinner’ to ‘wow, I can’t believe I made this’!
Storage and Reheating Instructions for Leftover Melt-in-Your-Mouth Steak
Oh, you have leftovers? That’s the best kind of problem to have! A truly great reverse-seared steak holds up surprisingly well, but you have to treat it right so you don’t destroy that beautiful texture you worked so hard for. We need to guard that melt-in-your-mouth quality, even on day two!
For storage, keep it simple. Once the steak is completely cool—don’t put warm steak in the fridge, please!—wrap it tightly. I usually wrap the slices individually in plastic wrap first to keep the air out, and then tuck them into a zip-top bag. If you’ve kept it refrigerated and airtight, it should be perfectly fine for about three to four days. Any longer and the moisture starts to really change, and we want to avoid that!
When it comes time to reheat, the biggest rule is: ABSOLUTELY NO MICROWAVE! Unless you enjoy chewing on leather, toss that idea out the window. Microwaves heat unevenly and blast the moisture right out of the meat, erasing all that tenderness we accomplished.
My favorite way to revive this melt-in-your-mouth steak is in a warm oven, just like we cooked it slow the first time, but much faster this time. Preheat your oven to a very gentle 300 degrees Fahrenheit. Place your slices in a small, oven-safe dish. I like to pour just a tablespoon or two of beef broth or water into the bottom of the dish—just enough to create a little steam jacket around the meat without submerging it. Cover the dish tightly with foil to trap that steam.
Heat gently until the steak is warmed through, usually only about 10 to 15 minutes depending on how thick the slices are. This low, steamy environment reintroduces a tiny bit of moisture and warms the meat slowly enough that the fibers don’t seize up. You’ll find it is almost as tender as the first time you ate it. It’s cheating, but it works like a charm!
Frequently Asked Questions About Tender Steak
Whenever I share one of my perfected recipes, the questions always start rolling in, and that’s just wonderful! It means you’re paying attention, and you want to get that amazing result. Cooking steak seems simple, but getting that perfect, soft texture takes a few expert nuances. I’ve gathered the most common things folks ask me about achieving those incredible tender steak recipes at home.
If you ever want to see how I use gentle heat on beef for other dishes, like my creamy stroganoff, check out the recipe here: my favorite beef stroganoff!
Can I use a thinner steak for this method?
The short answer is you *can*, but you might struggle to get that beautiful temperature gradient we love. The reverse sear really shines with thick steaks—think 1.5 inches or more—because that slow oven time is needed to gently bring the center up without overcooking the edges. If you use a steak only an inch thick, the oven time will be drastically shorter, maybe 20 or 30 minutes, and you run a real risk of hitting your target temperature too fast, which means you might as well have just pan-seared it traditionally.
What is the ideal internal temperature for the softest steak?
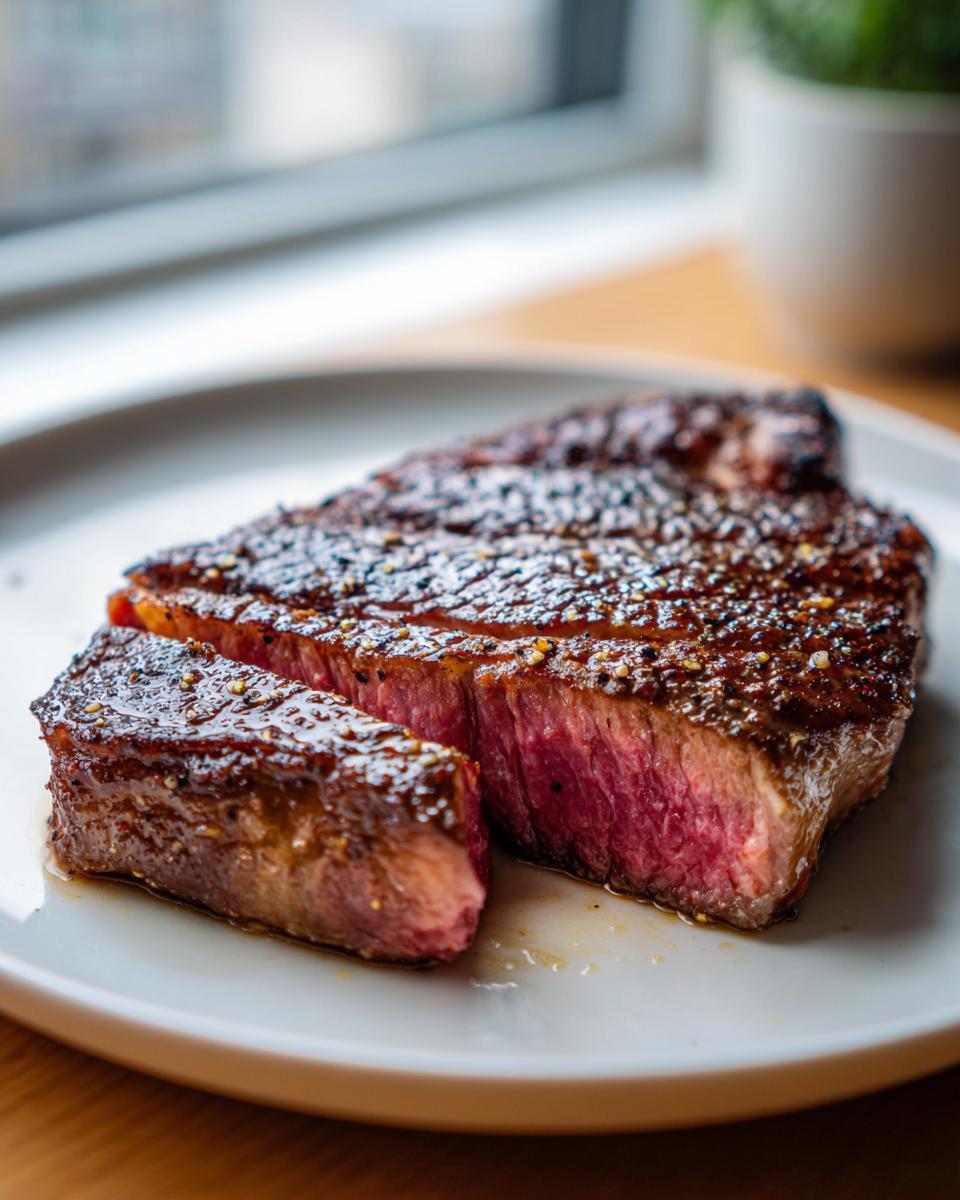
This is where we achieve the magic of infusing flavor and moisture into steak! For the absolute softest, most succulent bite—that true melt-in-your-mouth steak experience—you are aiming for the rare to medium-rare zone. Pull the steak off the heat when your thermometer reads 115°F to 120°F before the sear. After the final sear and rest, it will climb to a perfect 125°F for rare, or comfortably sit between 130°F and 135°F for medium-rare. Anything past 140°F starts getting firm, so please listen to your thermometer!
Why does resting the steak matter so much for tenderness?
I mentioned this earlier, but it bears repeating because it ruins more otherwise perfect steaks than any other step! Resting is basically a necessary pause for the juices. When the meat is hot, all the moisture is buzzing around, excited, right under the surface. If you cut it immediately, all those precious liquids rush out onto your cutting board. Letting it rest for a full 10 minutes lets those juices settle back down into the fibers, which keeps every single bite moist and tender. It’s a small wait for a huge reward!
Share Your Amazing Melt-in-Your-Mouth Steak Results
Now that you’ve tried the reverse sear, I am just bursting to know how it went! Seriously, seeing your creations brings me so much joy. We bakers often get the spotlight, but I promise you, a perfectly cooked steak is just as satisfying as a flawless layer cake.
Did you achieve that beautiful edge-to-edge pink center? Was your crust crackly and dark? I want to hear all about it! Head down to the comments below and rate this recipe for me. Tell me if you tried a Ribeye or if you splurged on the Tenderloin!
And please, if you took a picture of your beautiful, tender slice, share it! Tag me on social media—seeing your happy faces enjoying the fruits of your kitchen labor is why I do all this testing in the first place. If you have any quick questions about the next steps or just want to say hello, you can always reach out to me directly via my contact page. Happy cooking, everyone, and enjoy every single melt-in-your-mouth bite!
PrintMelt-in-Your-Mouth Reverse Sear Steak

Learn the reverse sear method to cook a buttery steak that achieves maximum tenderness and a perfect medium-rare center every time. This technique is the secret to restaurant-style steak at home.
- Prep Time: 15 min
- Cook Time: 70 min
- Total Time: 1 hour 35 min
- Yield: 2 servings 1x
- Category: Dinner
- Method: Reverse Sear
- Cuisine: American
- Diet: Low Fat
Ingredients
- 2 (1.5-inch thick) Ribeye or New York Strip steaks
- 1 tablespoon coarse kosher salt
- 1 teaspoon black pepper
- 1 tablespoon olive oil
- 2 tablespoons unsalted butter
- 2 cloves garlic, smashed
- 2 sprigs fresh thyme
Instructions
- Season the steaks heavily on all sides with kosher salt and pepper at least 4 hours, or up to 24 hours, before cooking. Place them uncovered on a wire rack set over a baking sheet in the refrigerator.
- Preheat your oven to 250 degrees Fahrenheit. Place the seasoned steaks on the wire rack and bake until the internal temperature reaches 115 degrees Fahrenheit for medium-rare. This usually takes 45 to 60 minutes, depending on thickness.
- Remove the steaks from the oven and let them rest on the counter for 10 minutes while you prepare the sear.
- Heat a heavy-bottomed skillet, like cast iron, over high heat until it is smoking hot. Add the olive oil.
- Carefully place the steaks in the hot skillet. Sear for 60 to 90 seconds per side until a deep brown crust forms.
- Reduce the heat to medium. Add the butter, smashed garlic, and thyme to the pan. Tilt the pan slightly and use a spoon to continuously baste the melted butter over the top of the steaks for 30 seconds.
- Remove the steaks immediately from the pan and let them rest on a cutting board for 10 minutes before slicing against the grain.
Notes
- For the best results in tenderness, use a quality cut like Ribeye or Tenderloin.
- The long refrigeration period helps dry the surface, which is key for achieving a great crust during the sear.
- Use a reliable meat thermometer to hit your target internal temperature precisely; this prevents overcooking, which causes tough steak.
Nutrition
- Serving Size: 1 steak
- Calories: 650
- Sugar: 0
- Sodium: 1100
- Fat: 48
- Saturated Fat: 20
- Unsaturated Fat: 28
- Trans Fat: 1
- Carbohydrates: 0
- Fiber: 0
- Protein: 52
- Cholesterol: 180