
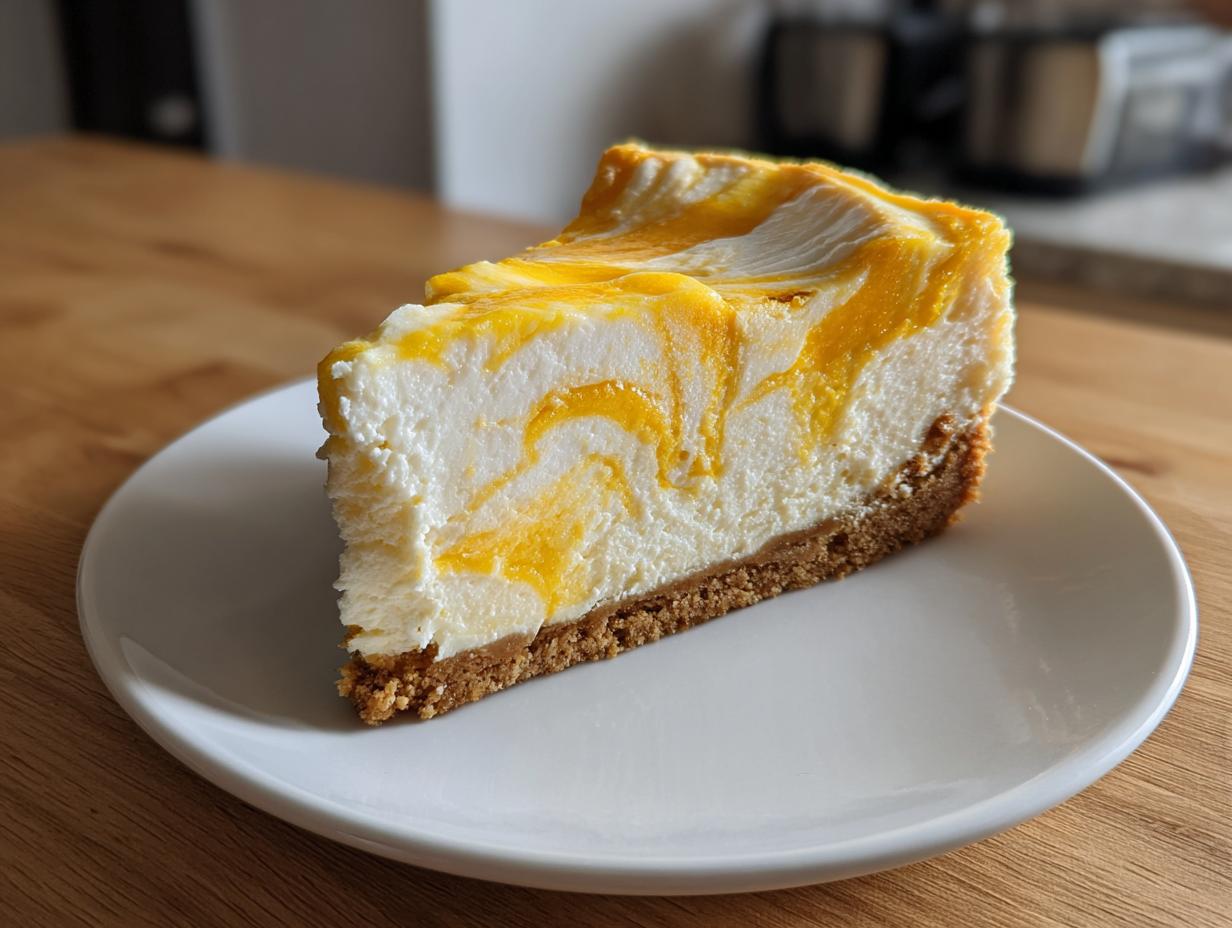
Oh, when the weather starts turning warmer, my kitchen just screams for something bright and zesty! Forget those heavy, deep chocolate bakes for a minute; what we need is sunshine you can eat. And trust me, I have finally unlocked the secret to the ultimate dessert that checks every single box: the absolutely divine, crack-free, creamy, and tangy lemon curd cheesecake. My grandmother always said that a touch of citrus brightens your whole week, and this recipe delivers that perfectly balanced sunshine in every slice.
This isn’t just another cheesecake, friends. This particular baked version, featuring that gorgeous homemade swirl, is the game-changer you’ve been waiting for. We nail the texture every single time thanks to a marriage of time-tested techniques and truly superior ingredients. Get ready to bake the best cheesecake of your life!
- Why This is the Best Lemon Cheesecake Recipe You Will Ever Make
- Essential Components for Your Lemon Curd Cheesecake
- Homemade Lemon Curd Tutorial: The Flavor Foundation of Your lemon curd cheesecake
- How to Prepare the Perfect Cheesecake Crust Ideas
- Assembling Your Lemon Swirl Cheesecake Using the Water Bath Technique
- Baking and Cooling Steps for a Flawless lemon curd cheesecake
- Tips for Success with Your Homemade Lemon Curd Cheesecake
- Serving Suggestions and Storing Your Tangy Dessert
- Frequently Asked Questions About Making the lemon curd cheesecake
Why This is the Best Lemon Cheesecake Recipe You Will Ever Make
I know, I know—everyone claims their cheesecake is the best! But here at Bliss Batter, we triple-test everything so you don’t have to worry. This recipe for lemon curd cheesecake genuinely delivers a texture and brightness that beats anything I’ve ordered in a fancy bakery. It’s the perfect harmony of rich cream cheese and sharp, sunny lemon.
- No cracks! We use the gentle water bath method to ensure silky, even baking.
- Incredibly creamy batter thanks to room-temperature ingredients and minimal mixing.
- That homemade lemon curd swirl cuts through the richness beautifully.
If you’ve ever been nervous about making a baked cheesecake, this is the recipe to build your confidence. Think of it as the foundational, most reliable model—a real keeper, much like some of my seasonal favorites you can check out over here like this pumpkin one!
Achieving That Signature Bright and Tangy Cheesecake Flavor
The secret to that ‘wow’ factor isn’t just sugar; it’s the pure zest and juice! We rely 100% on fresh lemons here. Store-bought shortcuts just can’t replicate the vibrancy you get when you use freshly squeezed juice right in the curd and the batter.
When you mix the tart curd with the sweet, luxurious batter, you get that wonderful tangy pull on your tongue. It stops the cheesecake from tasting heavy after just one bite. It’s zesty, it’s bold, and it screams springtime!
Essential Components for Your Lemon Curd Cheesecake
Okay, deep breath! Before we start whisking furiously, let’s look at the big picture. Making a truly spectacular lemon curd cheesecake feels like a big project, but really, we’re just assembling three perfectly executed layers. If you master these three separate components, success is guaranteed. It’s all about preparation!
Ingredients for the Homemade Lemon Curd
This is where the tang comes from, so don’t skimp! You absolutely need 3 large egg yolks for richness, 1/2 cup of sugar, and 1/4 cup of fresh lemon juice—make sure it’s freshly squeezed, please!
We finish it off with 2 tablespoons of unsalted butter, cut into small pieces, and 1 teaspoon of lemon zest. For the best results, make sure your yolks and butter aren’t fridge cold when you incorporate them into the warm mixture.
Ingredients for the Perfect Cheesecake Crust Variation
I love the classic crunch, so we start with 1 1/2 cups of graham cracker crumbs and 1/4 cup of sugar. This is where you can play around if you like! Feel free to try shortbread cookie crumbs instead for a richer base.
The binder is simple: 6 tablespoons of unsalted butter, melted. Once mixed, you just need to press it down firmly into your springform pan. We want that solid foundation!
Ingredients for the Creamy Baked Cheesecake Batter
Now for the luxurious part! You must have 3 (8 ounce) packages of cream cheese, absolutely softened—I mean, truly soft! Add 1 1/2 cups of sugar and a light dusting of flour (about 1/4 cup) to help stabilize things.
We’ll use 3 large eggs, added one at a time, plus 1/2 cup of sour cream and 1/4 cup of heavy cream for that velvety mouthfeel we crave. Oh, and don’t forget a teaspoon of vanilla and a pinch of salt to bring out all the flavors!
Homemade Lemon Curd Tutorial: The Flavor Foundation of Your lemon curd cheesecake
This curd is non-negotiable; it’s the heart and soul of our whole lemon curd cheesecake! Don’t worry, making the curd is quicker than you think, even if you’ve never tried it before. We take our time over medium-low heat with the egg yolks, 1/2 cup of sugar, juice, and zest. You need to stir constantly—we are thickening a custard here, not scrambling eggs!
Watch closely! The critical moment comes when the mixture thickens enough to coat the back of a spoon. You should be able to run your finger across the coated spoon and leave a clean track. That’s how you know it’s ready for the butter!
Once you whisk in those final pieces of butter off the heat until it’s glossy and smooth, you’re golden. For seriously professional results—the kind that look like they came from a magazine—try pressing the warm curd through a fine-mesh sieve before chilling. It catches any tiny bits of cooked yolk and gives you the smoothest base for your swirl. A nice little boost to make sure your lemon flavor shines!
How to Prepare the Perfect Cheesecake Crust Ideas
Alright, we’ve chilled the curd, so now it’s time to get that foundation set! We’re aiming for a solid, buttery base that won’t get soggy later. Preheat that oven to 350°F (175°C) for this part. Just mix your graham cracker crumbs, that little bit of sugar, and the 6 tablespoons of melted butter right inside the springform pan—it saves washing up!
Press that mixture down *really* firmly, especially into the bottom. We bake this for just 10 minutes to help it set up nicely. Quick tip: if you want to try out that shortbread variation I mentioned earlier, this is the time to do it!
Crucially, once it comes out, you need to let it cool completely before we even think about adding any batter! A warm crust equals a sad, weak base for your beautiful lemon curd cheesecake later on.
Assembling Your Lemon Swirl Cheesecake Using the Water Bath Technique
Okay, this is the moment that separates a good cheesecake from a truly spectacular, glossy, perfectly smooth lemon curd cheesecake!
First things first: the foil wrap! You need heavy-duty aluminum foil, and you need to wrap the bottom of your springform pan *tightly*—I mean at least two layers thick. This is our defense line to keep any water from our bath seeping in and ruining the crust. Once wrapped up like a little present, place the pan inside a larger roasting pan. The water bath provides gentle, steamy, even heat, which is the absolute secret to that dreamy, crack-free finish we see in every creamy baked cheesecake guide.
Now for the fun part—the swirl! Pour about half your lovely batter over that cooled crust. Then, grab half of that chilled lemon curd and dollop it randomly over the top. Take a knife and gently give it a figure-eight swirl—don’t go crazy, just enough to marble it! Repeat with the remaining batter and curd on top. Then, carefully place the whole roasting pan into the oven before pouring piping hot water into the outer pan until it comes halfway up the sides. It sounds dramatic, but it’s worth it for the texture! For all the nitty-gritty on why this step is necessary, you can read my deep dive on the water bath cheesecake technique!
Mixing the Classic Cheesecake Batter Recipe Gently
Listen to me: you absolutely must resist the urge to whip this batter like you’re making meringue! I keep stressing it because it’s so important. When you incorporate your eggs one by one, you only mix until the yolk disappears. That’s it.
Overmixing introduces too much air into your batter. When that air tries to escape during the bake, what happens? Poof! Cracks appear all over your beautiful top surface! We want creamy density, not fluffy air pockets. A slow, gentle mix ensures you get that signature rich texture every time.
Baking and Cooling Steps for a Flawless lemon curd cheesecake
Now that your beautiful, lemony creation is nestled into its steamy water bath, it’s time to let the oven do its patient work! For this large, dense lemon curd cheesecake, you’ll need to bake it for about 60 to 75 minutes at 325°F (160°C). How do you know when to pull it out? You’re looking for set edges—they should look firm—but the very center needs to have just a slight, gentle jiggle when you nudge the pan. Seriously, don’t wait until it looks totally firm, or it will dry out!
But here’s the actual secret to keeping it looking gorgeous, unlike those ones you see cracking online: the cooling process! Once the time is up, turn the oven off completely. Don’t open the door yet! Just prop it open about an inch—I use a wooden spoon handle for that—and let the cheesecake cool down *slowly* inside the oven for a full hour. This gradual temperature change is what prevents the sudden shrinking that causes cracks, ensuring your creamy baked cheesecake guide status is secured!
Tips for Success with Your Homemade Lemon Curd Cheesecake
Look, making this lemon curd cheesecake is fun, but a few key pro tips from my kitchen to yours will ensure it’s perfect. First, let’s talk temperature. For the absolute creamiest texture—you know, the one that melts in your mouth—you MUST bring your cream cheese, eggs, sour cream, and heavy cream all the way up to room temperature before you even think about starting the batter.
Also, remember that crust discussion? If you want something truly decadent and rich, try skipping the graham crackers and using shortbread cookie crumbs instead. It makes for one of the most rich lemon dessert recipes you’ll ever encounter!
Finally, if you want to really boost the presentation before serving, just reserve a couple of tablespoons of that gorgeous curd you made earlier. A final drizzle right before slicing elevates this homemade lemon curd cheesecake instantly!
Serving Suggestions and Storing Your Tangy Dessert
The hardest part is over once it comes out of the oven, but the waiting game for chilling is *essential*! You must refrigerate this masterpiece for a minimum of six hours, but honestly, overnight is when the flavors truly meld together for that perfect tangy bite.
When you’re ready to serve this gorgeous dessert, here’s a little presentation trick from my notes: take a few tablespoons of that extra lemon curd you saved and spoon it gently over the slices right before bringing it to the table. It looks so professional!
If you have leftovers—which I doubt you will—store the whole thing covered tightly in the fridge. It stays wonderfully creamy for about four days. For extra flair, you could always whip up a quick glaze following some easy lemon curd topping ideas!
Frequently Asked Questions About Making the lemon curd cheesecake
I know you might have a few lingering questions once you see all those wonderful steps for this lemon curd cheesecake! It’s totally normal when you’re tackling something this elegant for the first time. Don’t worry, I’ve gathered some of the things people usually ask me when they are planning to make this.
Can I make this a no bake lemon cheesecake directions version?
That’s a good question! This specific recipe is designed around the gentle heat of the oven to create that truly creamy texture we adore. If you are specifically looking for a no bake lemon cheesecake directions version, you’ll need a recipe that utilizes gelatin or heavy stabilizers. Those are fantastic for hot weather, but they yield a much firmer, mousse-like texture compared to our baked beauty!
How do I fix a cracked lemon curd cheesecake?
Honestly, with the slow cooling trick we use in this recipe, you shouldn’t see any cracks! But if disaster strikes, don’t panic. The best immediate fix is to generously cover the top with stabilized whipped cream or even just spoon over a little extra one of those easy lemon curd topping swirls. No one will even notice once it’s sliced thin!
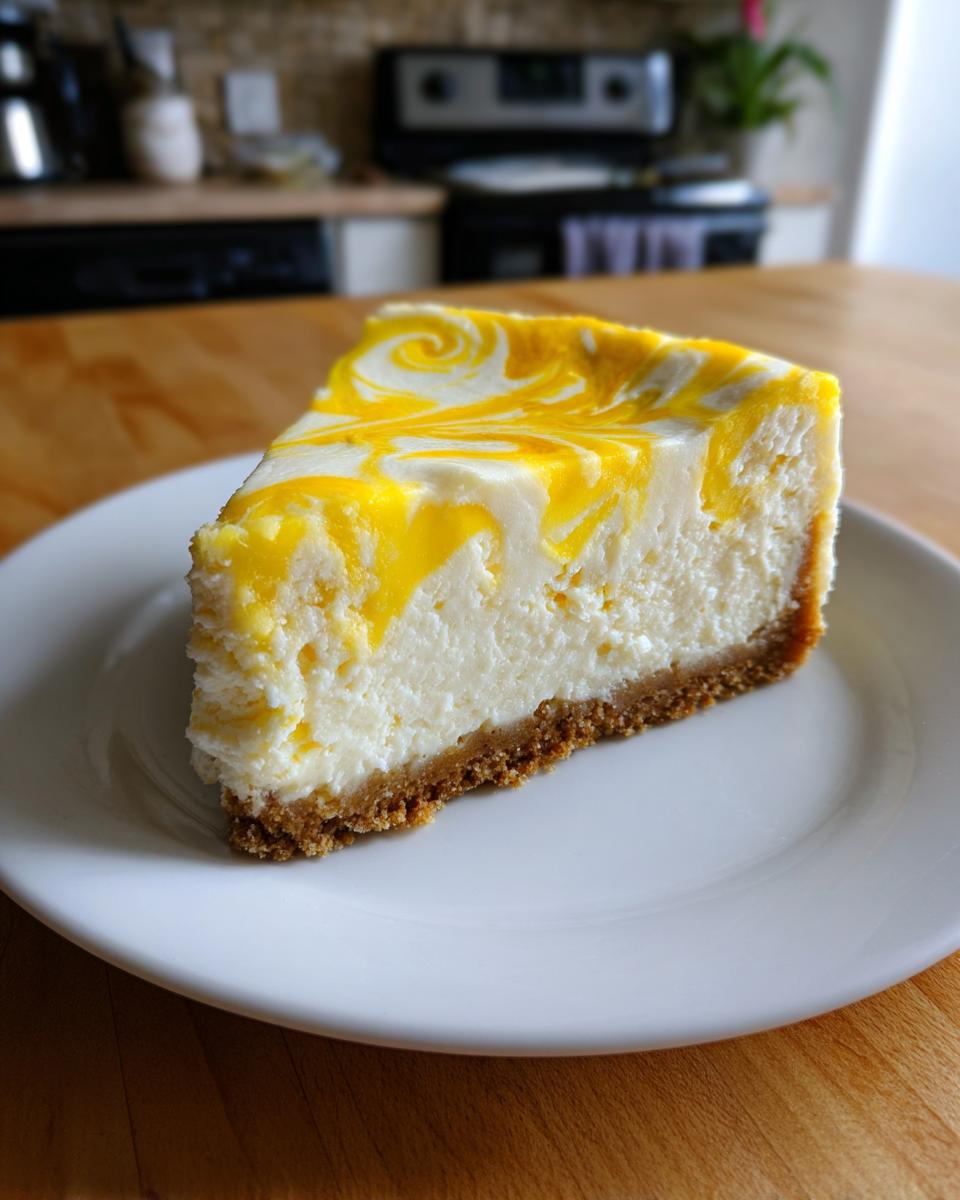
PrintBright Lemon Curd Swirl Cheesecake
Create a creamy, tangy baked cheesecake featuring a homemade lemon curd swirl. This recipe uses a graham cracker crust and a water bath for a perfect, crack-free finish.
- Prep Time: 45 min
- Cook Time: 75 min
- Total Time: 8 hours 0 minutes
- Yield: 12 servings 1x
- Category: Dessert
- Method: Baking
- Cuisine: American
- Diet: Vegetarian
Ingredients
- For the Crust: 1 1/2 cups graham cracker crumbs
- 1/4 cup granulated sugar
- 6 tablespoons unsalted butter, melted
- For the Lemon Curd: 3 large egg yolks
- 1/2 cup granulated sugar
- 1/4 cup fresh lemon juice
- 2 tablespoons unsalted butter, cut into pieces
- 1 teaspoon lemon zest
- For the Cheesecake: 3 (8 ounce) packages cream cheese, softened
- 1 1/2 cups granulated sugar
- 1/4 cup all-purpose flour
- 1 teaspoon vanilla extract
- 1/4 teaspoon salt
- 3 large eggs
- 1/2 cup sour cream
- 1/4 cup heavy cream
Instructions
- Prepare the Lemon Curd: Whisk egg yolks and sugar in a small saucepan. Stir in lemon juice and zest. Cook over medium-low heat, stirring constantly, until the mixture thickens enough to coat the back of a spoon (about 8 minutes). Remove from heat. Whisk in butter pieces until smooth. Transfer curd to a bowl, press plastic wrap directly onto the surface, and chill completely.
- Make the Crust: Preheat your oven to 350°F (175°C). Mix graham cracker crumbs, 1/4 cup sugar, and melted butter. Press firmly into the bottom of a 9-inch springform pan. Bake for 10 minutes. Cool completely. Reduce oven temperature to 325°F (160°C).
- Prepare the Water Bath: Wrap the outside bottom of the springform pan tightly with heavy-duty aluminum foil (at least two layers) to prevent water leakage. Place the pan inside a larger roasting pan.
- Make the Cheesecake Batter: Beat the softened cream cheese with 1 1/2 cups sugar until smooth. Beat in flour, vanilla, and salt. Beat in eggs one at a time, mixing just until combined after each addition. Gently mix in sour cream and heavy cream. Do not overmix.
- Assemble and Bake: Pour half of the cheesecake batter over the cooled crust. Dollop half of the chilled lemon curd over the batter. Gently swirl with a knife. Pour the remaining batter over the top. Dollop the remaining curd on top and swirl gently to create a pattern.
- Place the roasting pan into the oven. Carefully pour boiling water into the roasting pan until it reaches halfway up the sides of the springform pan.
- Bake for 60 to 75 minutes, or until the edges are set but the center still has a slight jiggle.
- Turn off the oven. Prop the oven door open slightly (about 1 inch) and let the cheesecake cool inside the oven for 1 hour. This slow cooling prevents cracking.
- Remove the cheesecake from the water bath and foil. Cool completely on a wire rack. Chill in the refrigerator for at least 6 hours, preferably overnight, before serving.
Notes
- For the creamiest texture, bring your cream cheese, eggs, sour cream, and heavy cream to full room temperature before starting the batter.
- If you prefer a richer crust flavor, substitute shortbread cookie crumbs for graham crackers.
- For a brighter presentation, reserve a few tablespoons of lemon curd to drizzle over the top just before serving.
Nutrition
- Serving Size: 1 slice
- Calories: 450
- Sugar: 35g
- Sodium: 250mg
- Fat: 28g
- Saturated Fat: 17g
- Unsaturated Fat: 11g
- Trans Fat: 0.5g
- Carbohydrates: 42g
- Fiber: 1g
- Protein: 8g
- Cholesterol: 120mg