
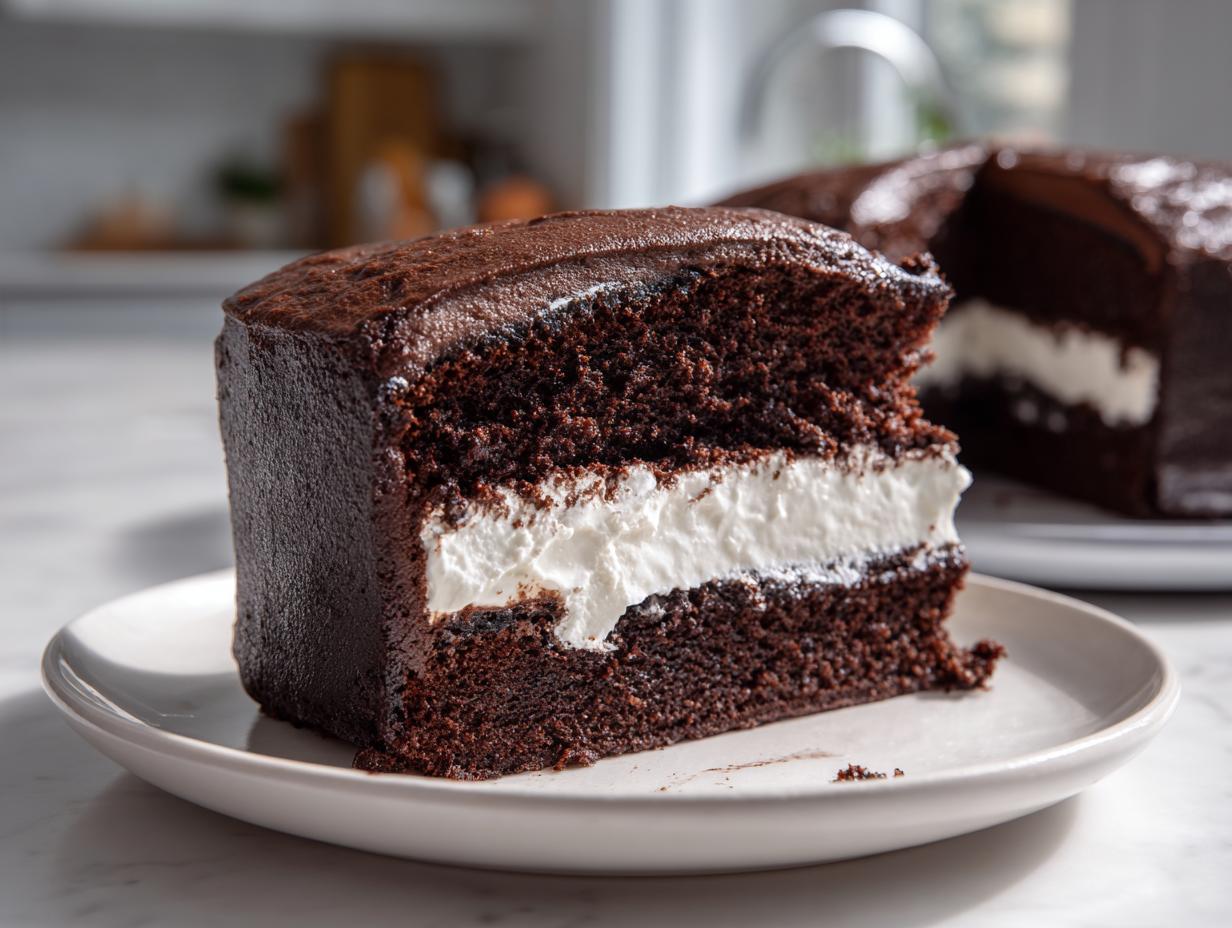
Oh, do you remember those little chocolate snack cakes that tasted like pure, unapologetic childhood joy? The ones you’d sneak out of the lunch box? Well, I’ve taken that wonderfully simple flavor and given it the grown-up, homemade treatment it always deserved! Forget the factory flavors; we are making the ultimate **ding dong cake** from scratch. This isn’t just about recreating a treat; it’s about capturing that nostalgic feeling but with layers of rich, moist chocolate cake, a fluffy, sweet cream filling, and a chocolate ganache coating so glossy, it shines like glass. Trust me, once you try this, you’ll never go back. It’s easier than you think, and I promise you’ll be thrilled with the results. If you love this kind of deeply comforting chocolate flavor, check out my guide for the perfect moist chocolate cake!
- Why This Homemade Ding Dong Cake is Pure Bliss (E-E-A-T)
- Gathering Ingredients for Your Ding Dong Cake
- Step-by-Step Instructions for the Ultimate Ding Dong Cake Guide
- Tips for Success with Your Homemade Ding Dong Cake
- Ingredient Notes and Substitutions for This Retro Snack Cake Tutorial
- Storage and Reheating Instructions for Your Classic Snack Cake Inspired Baking
- Serving Suggestions for Your Ding Dong Cake
- Frequently Asked Questions About Making a Ding Dong Cake
- Sharing Your Bliss Batter Creations
Why This Homemade Ding Dong Cake is Pure Bliss (E-E-A-T)
I adore the memories tied to those classic snack cakes, but let’s be real—they can be a little… manufactured, right? Making a **homemade ding dong cake** is miles better because you control the quality. We replace that artificial sweetness with real ingredients, and honestly, you can taste the difference instantly. This recipe is my way of giving you a dessert that feels totally nostalgic but tastes gourmet.
Key Features of Our Ding Dong Cake Recipe
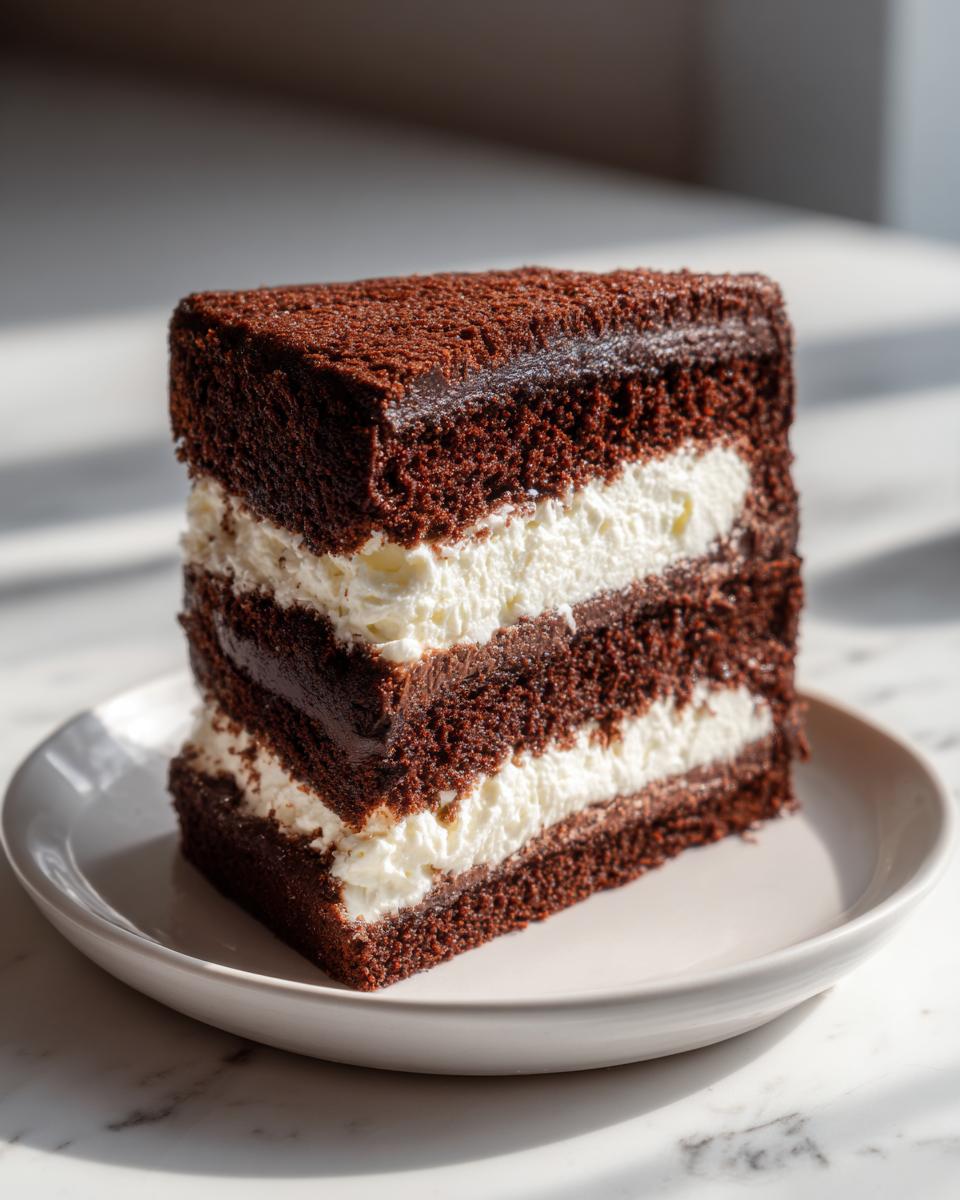
- Moist Chocolate Cake: These layers are deep, dark, and stay wonderfully tender for days.
- Fluffy Cream Filling: We ditch the waxy stuff for a buttery, lighter-than-air filling that melts in your mouth.
- Shiny Glaze: That iconic smooth chocolate coating sets up perfectly every time, giving you that satisfying snap when you cut into it.
Gathering Ingredients for Your Ding Dong Cake
Okay, let’s get the shopping list sorted! For this amazing **ding dong cake**, we need three distinct sets of materials: the chocolate cake base, the soft filling, and the final, rich glaze. I want you to make sure you read the notes in the list, like making sure your butter is actually softened and that you have that hot liquid ready to go. Clarity here means success later! If you’re looking for other great chocolate toppers, check out my guide to making fluffy, fudgy chocolate frosting.
Ingredients for the Moist Chocolate Cake Layers
- 1 3/4 cups all-purpose flour
- 1 3/4 cups granulated sugar
- 3/4 cup unsweetened cocoa powder
- 1 1/2 teaspoons baking soda
- 1 1/2 teaspoons baking powder
- 1 teaspoon salt
- 2 large eggs
- 1 cup buttermilk
- 1/2 cup vegetable oil
- 2 teaspoons vanilla extract
- 1 cup hot water OR hot coffee (this is key!)
Ingredients for the Best Cream Filled Chocolate Cake Filling
- 1 cup (2 sticks) unsalted butter, softened—and I mean truly soft!
- 4 cups powdered sugar, sifted so there are no lumps
- 1 teaspoon vanilla extract
- 1/4 cup whole milk or heavy cream
Ingredients for the Fudgy Chocolate Glaze Recipe
- 1 cup semi-sweet chocolate chips
- 1/2 cup heavy cream
- 1 tablespoon light corn syrup (optional, but this gives you that *super* shine!)
Step-by-Step Instructions for the Ultimate Ding Dong Cake Guide
Now for the fun part! Making this **ding dong cake** is just a series of simple steps, but the order matters, so stick with me. We build the cake, then whip up the filling, and finally, we make it look gorgeous with that shiny chocolate shell. If you want the absolute best chocolate base, remember to read through my tips for the ultimate fudgy chocolate cake—it helps so much here!
Baking the Moist Chocolate Cake Layers
First things first: get that oven hot! Preheat to 350°F (175°C) and make sure you’ve greased and floured two 8-inch round pans really well. In a big bowl, we whisk all the dry stuff together: flour, sugar, cocoa, baking soda, baking powder, and salt.
Next, add the eggs, buttermilk, oil, and vanilla. Beat this mixture on medium speed for a full two minutes. Don’t rush that! Now, this is where the moisture comes from: carefully stir in that hot water or coffee until the batter is smoothly combined. It will look super thin, almost like chocolate soup, but that’s perfect for a moist cake layer. Divide it equally between your pans and bake for about 30 to 35 minutes until a pick comes out clean. Let these beauties cool in the pans for 10 minutes before flipping them onto a wire rack to cool completely. I mean it—they need to be totally cool before we start filling them!
Creating the Cream Filling for Your Ding Dong Cake
While those layers are chilling out, we tackle the filling. Get your softened butter into a large bowl and beat it until it’s nice and creamy. Now, slowly add that sifted powdered sugar, mixing until it’s just combined.
Add your vanilla and the milk or cream. You need to beat this on high now for about three to five minutes until it gets really light and fluffy. Sometimes my milk measurement feels a little off depending on the humidity! If your filling seems way too stiff to spread, just add a tiny splash more milk, one teaspoon at a time, until it feels perfect. Stop when fluffy!
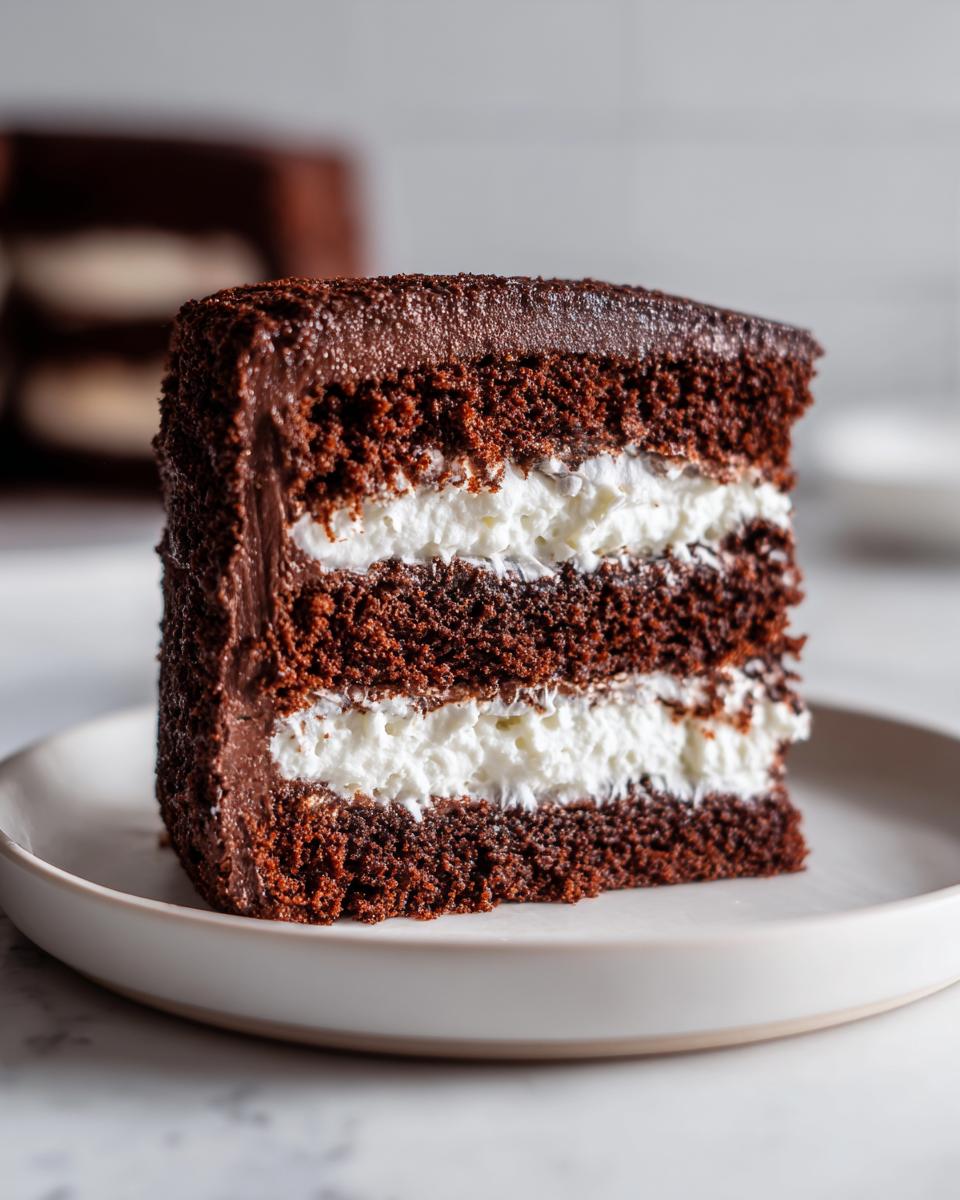
Assembling and Chilling the Ding Dong Cake
Time to stack! Put one completely cool cake layer on your serving plate. Take all that amazing cream filling and spread it right over the top, making an even layer. Place the second cake layer gently on top. If the tops are domed, just carefully trim them flat so your final cake isn’t lopsided.

This next part is mandatory: Chill the whole assembled cake for at least 30 minutes. This stiffens up the cream filling so it doesn’t squish out everywhere when we add the heavy ganache on top. Don’t skip the chill time!
Finishing with the Rich Chocolate Ganache Coating
We want that classic, high-shine look! Pop your chocolate chips into a heatproof bowl. Heat your heavy cream and the optional corn syrup in a small saucepan until it just starts to bubble around the edges—don’t let it boil hard.
Pour that hot cream right over those chips and let it sit there, untouched, for five full minutes. Resist the urge to stir! After five minutes, whisk it gently until it’s completely smooth and glossy. Let this ganache cool down for about 10 to 15 minutes so it gets thick enough to coat the cake nicely without just running right off.
Finally, pour or gently spread that slightly cooled ganache all over the top and sides of your chilled cake, letting it drip artistically down the sides. Let that shiny coat set up before you dare slice into your magnificent **ding dong cake**!
Tips for Success with Your Homemade Ding Dong Cake
Getting that perfect **homemade ding dong cake** requires just a few little tricks I learned over testing this recipe dozens of times. It’s all about maximizing flavor and ensuring that texture is spot-on before we start stacking things up. These little details make the difference between a good cake and one that truly tastes like a slice of heaven! If you want to see how I achieve perfect texture in other bakes, you might like my tips on making a moist coffee cake.
Flavor Boost: Coffee vs. Water in the Cake
If you look at the ingredients, I listed hot water *or* hot coffee. If you want the absolute richest, deepest chocolate flavor, please use hot coffee! Don’t worry, your **nostalgic chocolate cake recipe** won’t taste like a latte. Coffee just brings out the deep bitterness in the cocoa powder, making the chocolate taste more intense and complex without adding any coffee flavor. It’s my secret weapon for any rich chocolate dessert ideas.
Adjusting the Cream Filling Consistency
That filling needs to be spreadable but also firm enough when chilled so it holds up against the glaze. If you mix it and it seems way too thick—like you could barely stir it—just add a teaspoon of milk and beat it again. If it seems too loose or soupy, that means you need a bit more powdered sugar, maybe a quarter cup more, and beat it really well. You want it fluffy, but stiff enough that it won’t ooze out when you place that second layer on top.
Ingredient Notes and Substitutions for This Retro Snack Cake Tutorial
Since we are aiming for that perfect **retro snack cake tutorial** result, getting the core ingredients right is non-negotiable! A copycat recipe lives or dies by how closely you can mimic that original flavor profile using better, fresher components. I always tell people that if you can’t find buttermilk, don’t stress! You can make your own, and it works just as beautifully in this **ding dong cake** recipe. If you need to whip up a quick batch, here’s how I always do it for my buttermilk biscuits, and it works perfectly here too.
Don’t skimp on the cocoa powder quality, either. Cheap cocoa powder often tastes dusty instead of deep and dark. You want that rich, almost bitter chocolate component to stand up to all that sweet filling and glaze!
Making Your Own Buttermilk Substitute
If the store is out, or you just didn’t plan ahead (we’ve all been there!), making DIY buttermilk is super easy. You just need your regular milk—whole milk is best if you have it—and an acid. For every one cup of milk you need, stir in one tablespoon of white vinegar or fresh lemon juice. Give it a quick stir and then let it sit on the counter for five to ten minutes. It will curdle slightly, and that’s exactly what you want! It gives you the necessary acidity for the baking soda to work its magic in the **moist chocolate cake layers**.
Choosing the Right Cocoa Powder
For the best flavor in this **dessert that tastes like childhood**, I highly recommend using natural, unsweetened cocoa powder. It reacts perfectly with the baking soda in the recipe to give us that beautiful lift. Dutch-processed cocoa powder is smoother and darker, but it reacts better with baking powder, so you might lose a little bit of the airy crumb we’re after. Stick to standard unsweetened if you can for this recipe!
The Importance of Using Real Chocolate Chips for the Ganache
When it comes to the **fudgy chocolate glaze recipe**, skip those chocolate-flavored baking morsels; they contain stabilizers that prevent them from melting smoothly into a glossy coating. You need real, good-quality semi-sweet chocolate chips or finely chopped baking bars. This ensures that when you pour that hot cream over them, you get a perfect, silky, pourable mixture that sets up flawlessly on your chilled cake.
Storage and Reheating Instructions for Your Classic Snack Cake Inspired Baking
This magnificent **ding dong cake** has a fresh cream filling, which means we need to treat it right when it comes to storage. Because of that creamy center, this needs to live in the refrigerator. Wrap any leftovers tightly in plastic wrap or place them in an airtight container, and they should be great for about three to four days. When you’re ready to serve that slice of your **classic snack cake inspired baking**, go ahead and pull it out about 30 minutes beforehand. Letting it come back up to room temperature mellows out the chocolate glaze and makes that filling soft and dreamy again!
Serving Suggestions for Your Ding Dong Cake
You’ve done it! You’ve made the ultimate **ding dong cake**, this amazing **rich chocolate dessert idea** that tastes exactly like sweet memories. Since this cake is incredibly decadent—we have rich chocolate, sweet filling, and that thick, fudgy glaze—you don’t need much else! Overkill is not the goal here; simplicity is.
My favorite way to serve this, especially after a big dinner, is just letting the cake shine on its own. A strong, black coffee is the perfect counterpoint to the sweetness. If you’re looking for something a little more special to go with it, I highly recommend a proper latte. You can try my recipe for a salted caramel latte; it adds just a hint of buttery sweetness that complements the chocolate without overwhelming it.
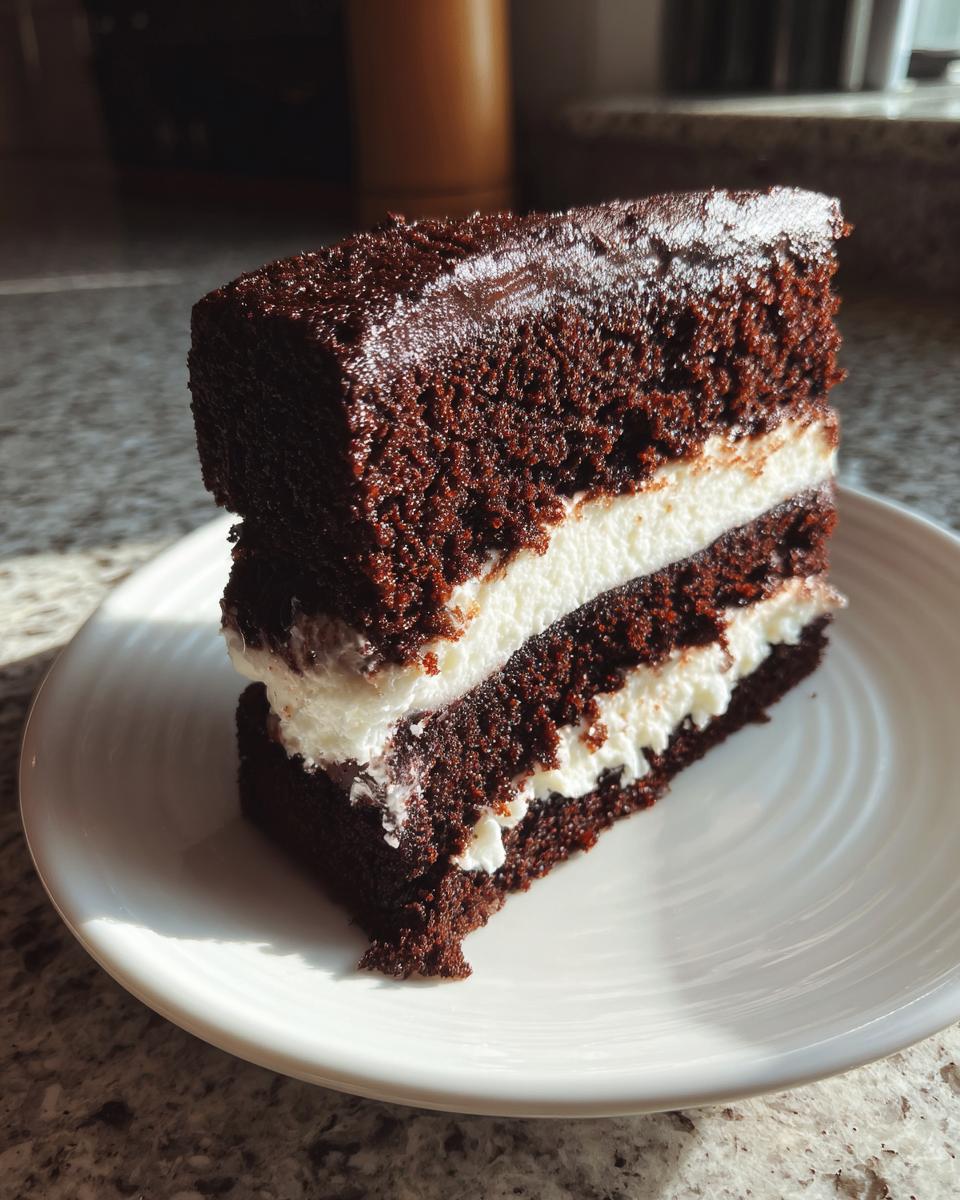
The Clean Slice Technique
Presentation matters, even for a cozy treat like this! Because the ganache can try to crack or cling to the knife, you need a little trick. Dip a long, sharp knife into a tall glass of very hot water. Let it sit there for about 30 seconds to heat the blade up nicely, then wipe it completely dry with a clean kitchen towel. Slice through the cake, and that warm, clean blade glides right through the ganache and the chilled filling without tearing anything up! Dip, wipe, slice, and repeat for every piece, and you’ll get those perfect, neat wedges every single time.
Pairing with Beverages
If coffee isn’t your thing, keep it simple. A tall glass of ice-cold milk is always classic with any **nostalgic chocolate cake recipe**. For an evening treat, a simple glass of chilled sparkling water with a slice of lemon or orange on the rim is fantastic; the bubbles and light citrus cut right through the richness, resetting your palate between bites.
Frequently Asked Questions About Making a Ding Dong Cake
Can I make this best cream filled chocolate cake as cupcakes?
Oh, absolutely! Cupcakes are a fantastic way to serve these up, especially for a party or potluck. If you decide to turn this into individual treats, you’ll want to adjust your baking time significantly. Fill your cupcake liners about two-thirds full, and they might only need 18 to 22 minutes at 350°F. Keep an eye on them—they bake fast! For the filling, instead of layering, you can use an apple corer or a small knife to scoop a little bit out of the top center of the cooled cupcake, fill that hole with the cream, and then top it with the piece you cut out before glazing. Glazing cupcakes is tricky, though; I usually use a spoon to drizzle the **fudgy chocolate glaze recipe** over the top, letting it run down the sides, rather than trying to fully coat the tall sides of a cupcake!
What is the best way to get a shiny fudgy chocolate glaze recipe?
That shine is the crowning jewel of the **ding dong cake**! It all comes down to two things: the ingredients and the temperature when pouring. If you include that tiny bit of light corn syrup in the ganache mixture—seriously, just one tablespoon—it works wonders to inhibit crystallization, which leaves you with that gorgeous, smooth, mirror-like finish. Make sure you let the ganache cool slightly after you whisk it. If it’s too hot when you pour it, it will soak into the cake instead of sitting beautifully on the outside. You want it thick enough that when you lift the bowl, the glaze drips off slowly, almost like thick honey, not splashing like water.
How long does this nostalgic chocolate cake recipe last?
This is the main compromise you make for elevated freshness; you sacrifice a little shelf life compared to the commercially produced versions. Because we are using real butter, milk, and cream in that wonderful filling, the moisture level is high, and we definitely don’t have all those preservatives. In an airtight container in the refrigerator, this **nostalgic chocolate cake recipe** is best eaten within three to four days. If you freeze leftovers (without the glaze, preferably), it can last a bit longer, but I highly doubt you’ll have any leftovers! If you ever want to try a version without the fresh dairy filling, check out my guide to the no bake ding dong filling—that version lasts much longer on the counter!
Sharing Your Bliss Batter Creations
Honestly, creating this **ding dong cake** is only half the fun! The other half is seeing all of *your* beautiful bakes. When you make something that tastes this much like a happy memory, you shouldn’t keep it to yourself!
I truly hope this recipe brought a little dose of happy nostalgia into your kitchen, just like it does mine every time I whip up a batch. Did you use hot coffee, or did you stick with water? How did your kids react to the homemade filling? I live for these little details!
Please, please, please leave me a star rating right down below and drop a comment telling me all about your experience making this **hostess snack cake remake**. It helps other bakers feel confident trying this recipe, and I love reading every single note. If you snapped a photo of your shiny, perfect **ding dong cake**, tag me over on social media! Seeing your successes reminds me exactly why I started Bliss Batter in the first place—to prove that homemade happiness is always the best kind.
If you want to know a little more about my baking philosophy and why I believe every baker deserves confidence in the kitchen, you can always check out my journey over on the About page. Happy baking, friends!
PrintCopycat Ding Dong Cake: Nostalgic Chocolate Cake with Cream Filling

Make a homemade version of the classic snack cake with moist chocolate layers, a sweet cream filling, and a rich chocolate ganache coating. This recipe delivers pure, simple bliss.
- Prep Time: 35 min
- Cook Time: 35 min
- Total Time: 1 hour 50 min
- Yield: 10 servings 1x
- Category: Dessert
- Method: Baking
- Cuisine: American
- Diet: Vegetarian
Ingredients
- For the Chocolate Cake:
- 1 3/4 cups all-purpose flour
- 1 3/4 cups granulated sugar
- 3/4 cup unsweetened cocoa powder
- 1 1/2 teaspoons baking soda
- 1 1/2 teaspoons baking powder
- 1 teaspoon salt
- 2 large eggs
- 1 cup buttermilk
- 1/2 cup vegetable oil
- 2 teaspoons vanilla extract
- 1 cup hot water or hot coffee
- For the Cream Filling:
- 1 cup (2 sticks) unsalted butter, softened
- 4 cups powdered sugar, sifted
- 1 teaspoon vanilla extract
- 1/4 cup whole milk or heavy cream
- For the Chocolate Ganache Coating:
- 1 cup semi-sweet chocolate chips
- 1/2 cup heavy cream
- 1 tablespoon light corn syrup (optional, for shine)
Instructions
- Prepare the Cake Layers: Preheat your oven to 350°F (175°C). Grease and flour two 8-inch round cake pans.
- In a large bowl, whisk together the flour, sugar, cocoa powder, baking soda, baking powder, and salt.
- Add the eggs, buttermilk, oil, and vanilla extract to the dry ingredients. Beat with an electric mixer on medium speed for two minutes.
- Carefully stir in the hot water or coffee until the batter is smooth. The batter will be thin.
- Divide the batter evenly between the prepared pans. Bake for 30 to 35 minutes, or until a wooden pick inserted into the center comes out clean.
- Let the cakes cool in the pans for 10 minutes before inverting them onto a wire rack to cool completely.
- Make the Cream Filling: In a large bowl, beat the softened butter until creamy. Gradually add the sifted powdered sugar, beating until combined.
- Add the vanilla extract and milk or cream. Beat on high speed until the filling is light and fluffy, about 3 to 5 minutes. If the filling is too stiff, add a tiny bit more milk, one teaspoon at a time.
- Assemble the Cake: Once the cake layers are completely cool, place one layer on a serving plate. Spread the entire batch of cream filling evenly over the first layer.
- Top with the second cake layer. Trim the tops if necessary to create flat surfaces. Chill the cake for at least 30 minutes to set the filling.
- Make the Chocolate Ganache: Place the chocolate chips in a heatproof bowl. Heat the heavy cream and corn syrup (if using) in a small saucepan until it just begins to simmer.
- Pour the hot cream mixture over the chocolate chips. Let it sit undisturbed for 5 minutes. Whisk until the mixture is smooth and glossy. Let the ganache cool slightly until it thickens enough to coat the cake easily, about 10 to 15 minutes.
- Pour or spread the slightly cooled ganache over the top and sides of the chilled cake, allowing some to drip down the sides for a classic look. Allow the ganache to set before slicing.
Notes
- For a truly moist chocolate cake, use hot coffee instead of hot water; it deepens the chocolate flavor without making the cake taste like coffee.
- If you prefer a slightly firmer filling, chill the cream mixture for 15 minutes before spreading it between the layers.
- This cake tastes best when served at room temperature after the ganache has set.
Nutrition
- Serving Size: 1 slice
- Calories: 450
- Sugar: 55g
- Sodium: 280mg
- Fat: 25g
- Saturated Fat: 14g
- Unsaturated Fat: 11g
- Trans Fat: 0.5g
- Carbohydrates: 58g
- Fiber: 2g
- Protein: 5g
- Cholesterol: 75mg