
Oh, how I hate that word, dry. Does anything ruin a moment faster than biting into a slice of chocolate cake that tastes like cardboard? Believe me, I’ve been there—I’ve wasted good cocoa powder on cakes that looked perfect but ended up crumbling into sad little dusty piles. After years as a corporate planner, what I needed most from my kitchen was reliability and joy, not disappointment!
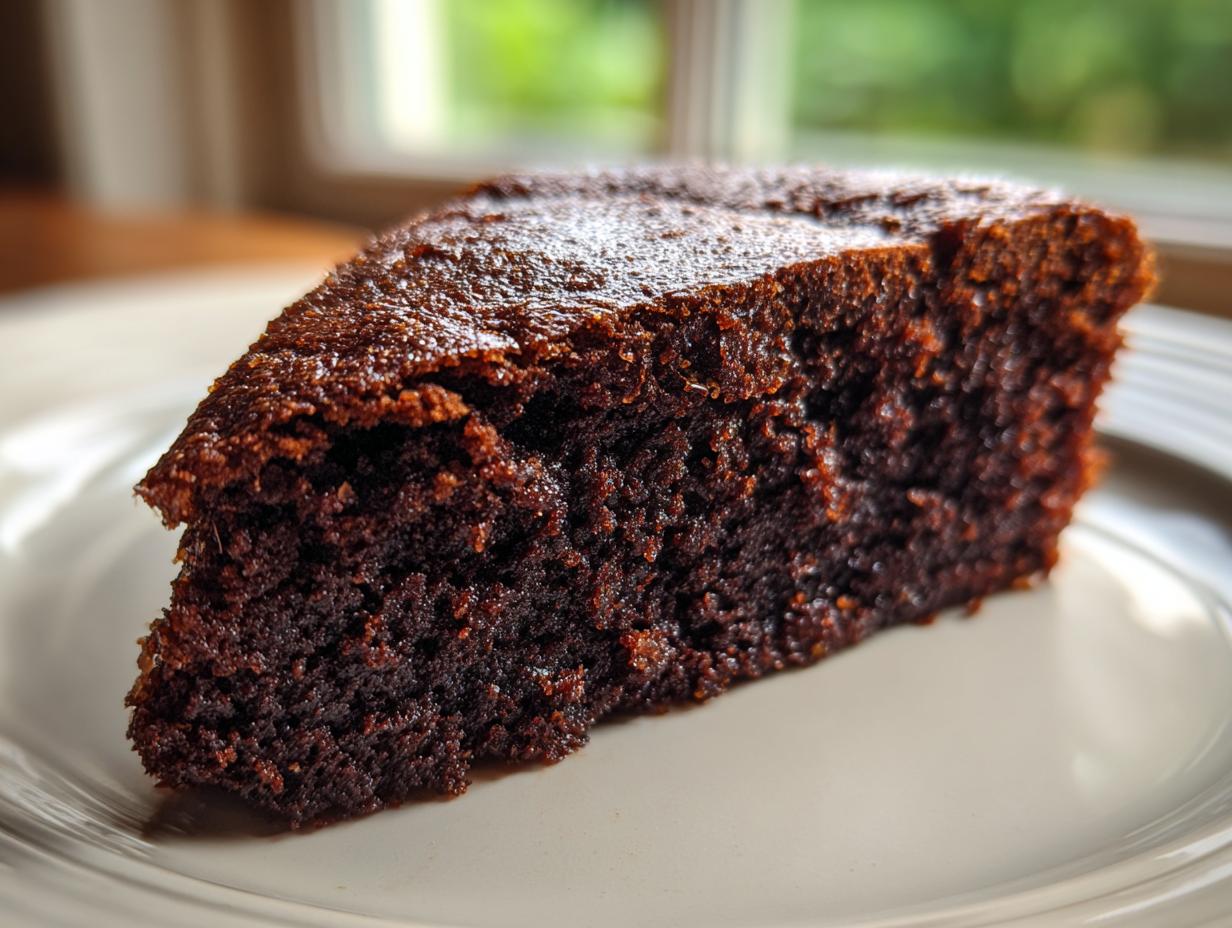
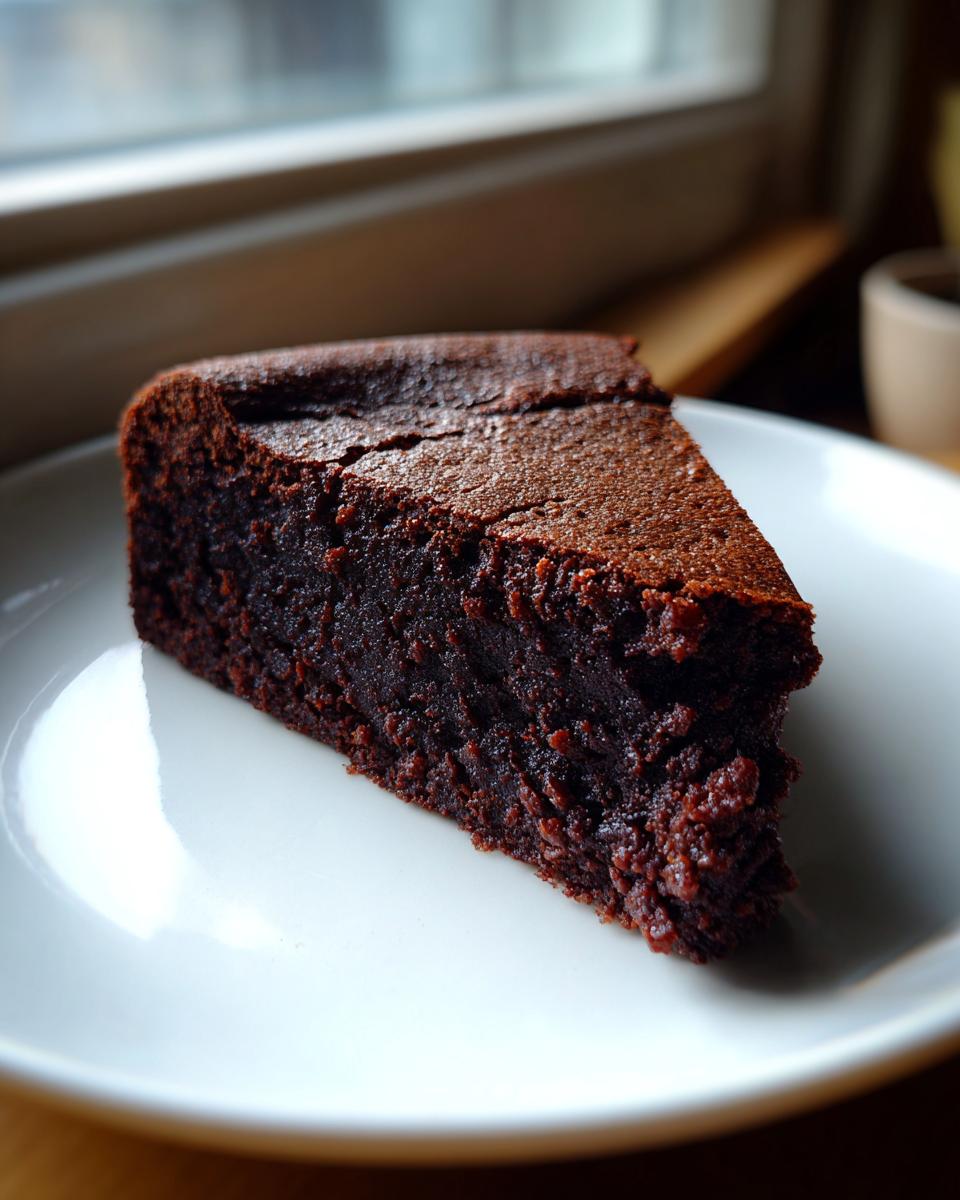
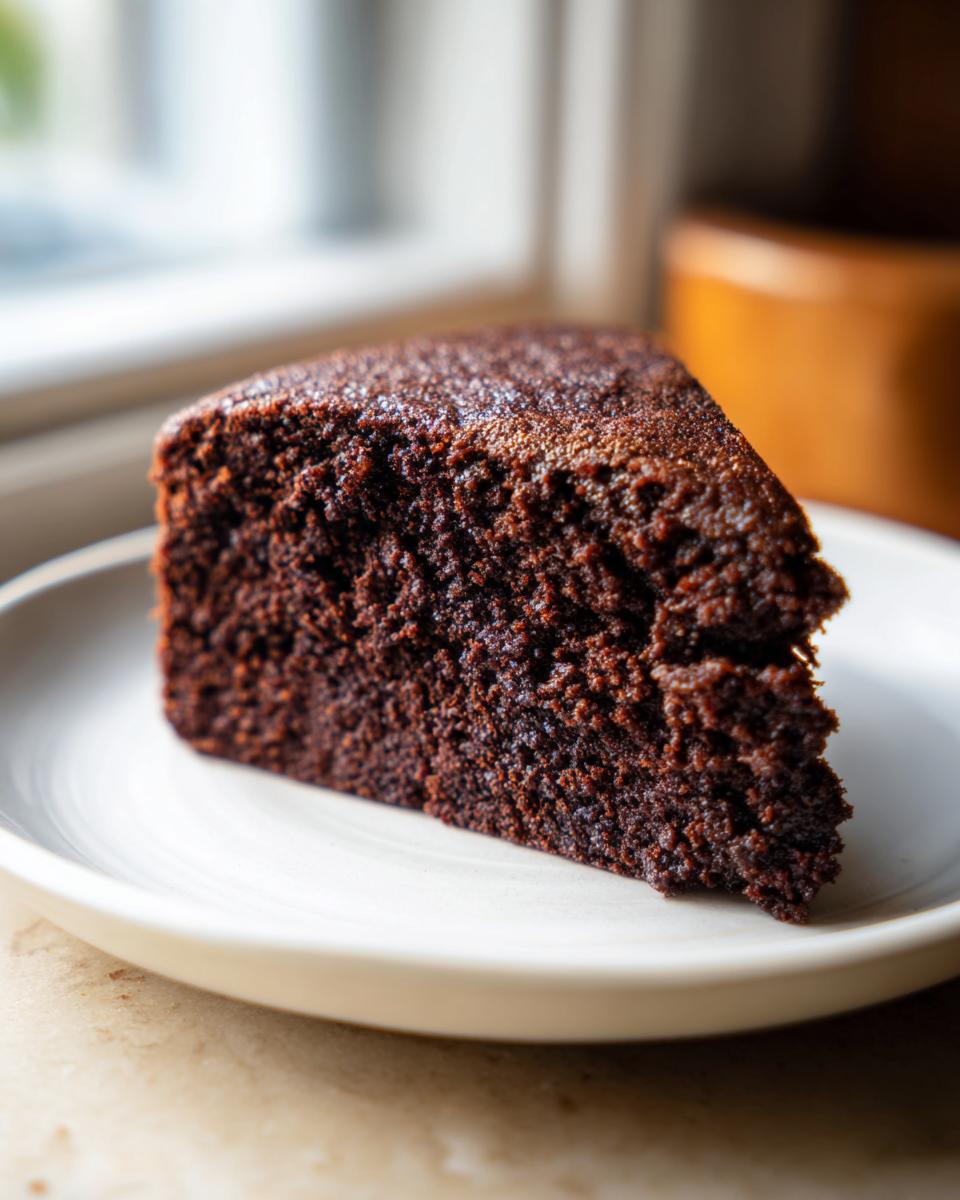
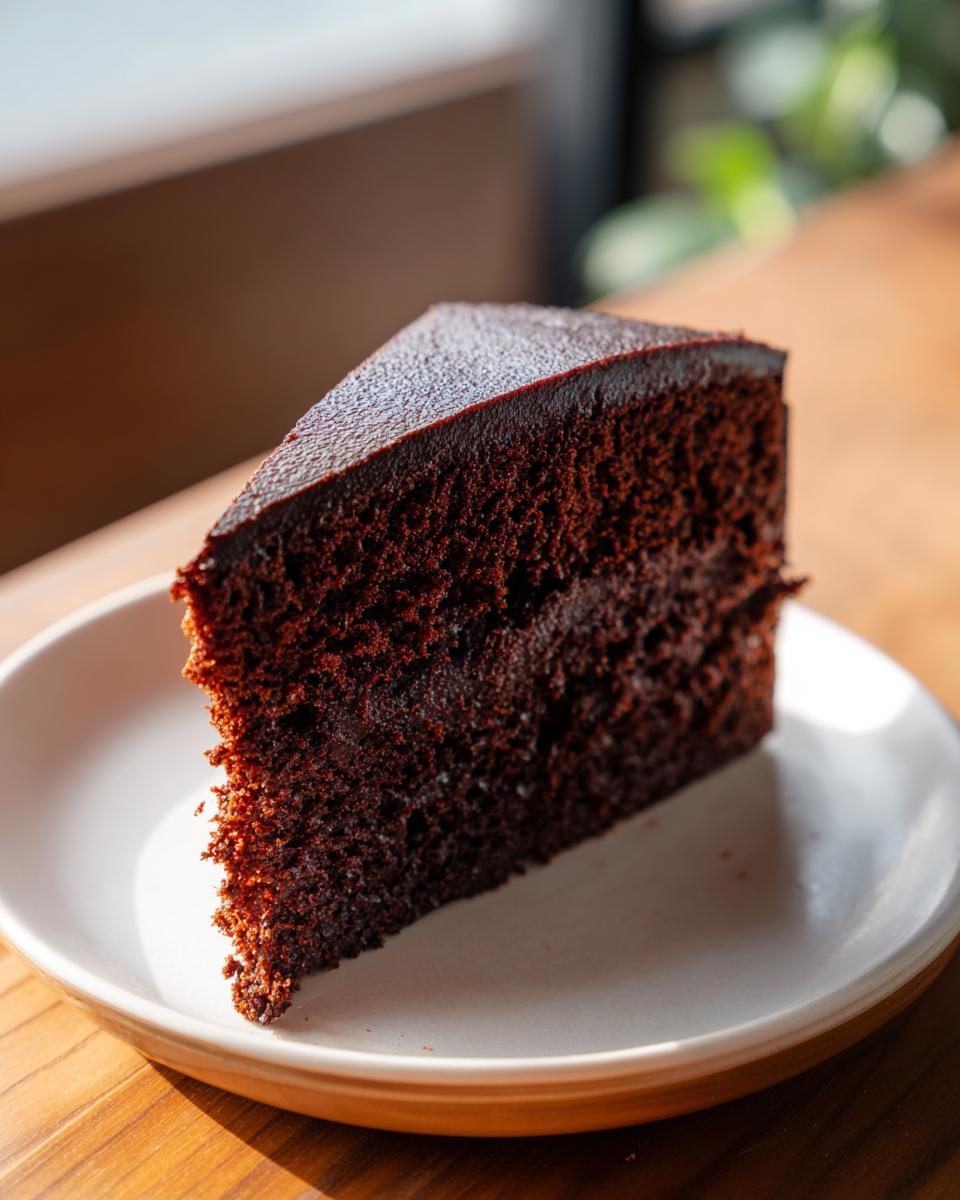
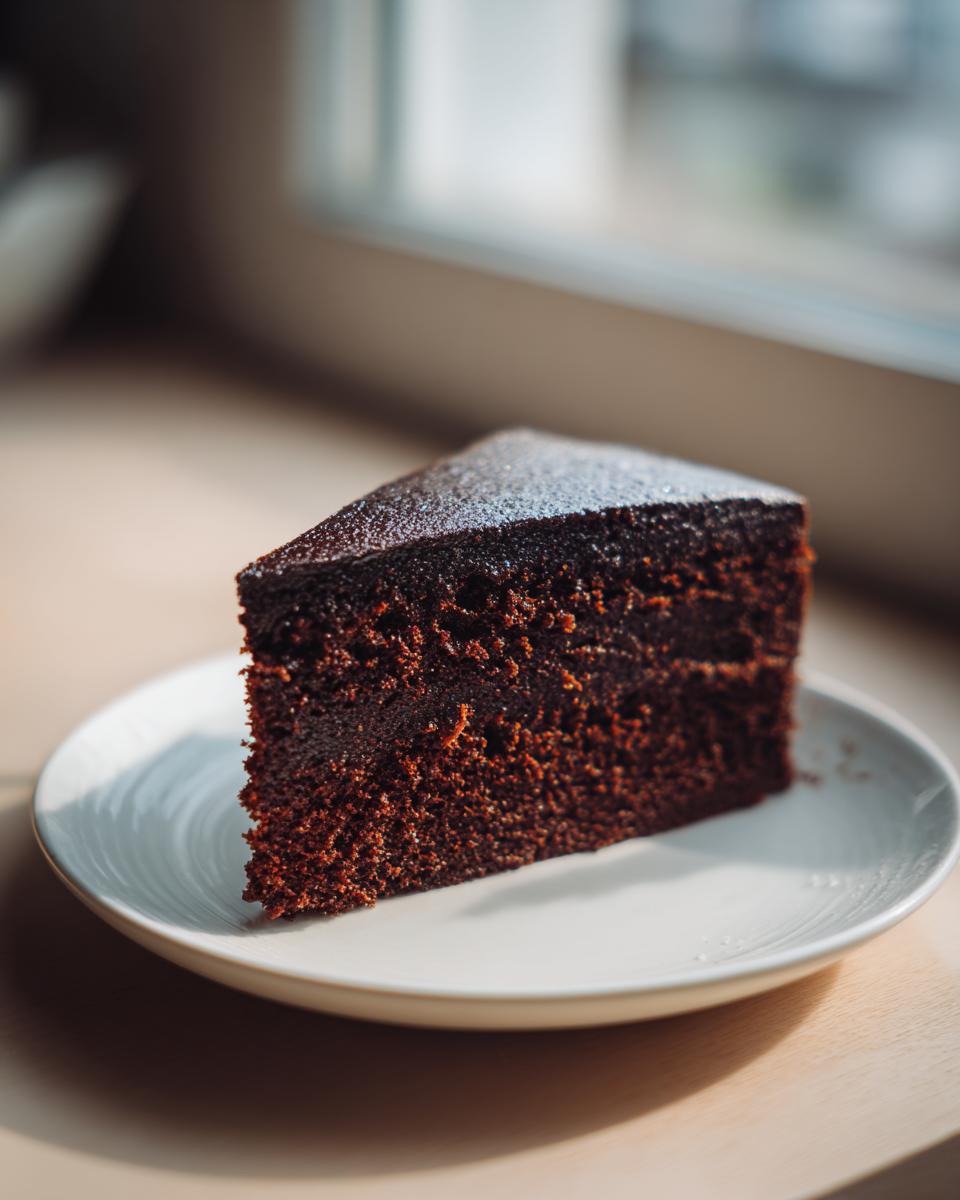
That is why I’m so thrilled to finally share the recipe that solved this problem forever: my **Ultimate Moist Chocolate Cake**. This isn’t just any chocolate cake; it’s the recipe I turned to when planning parties and needed something absolutely foolproof yet incredibly rich and fudgy. This cake delivers that deep, decadent flavor and maintains an amazing **tender crumb chocolate cake** texture long after it cools. Seriously, this recipe just works. It’s my go-to for birthdays, sure, but honestly, I make it just because I need a little bit of chocolate heaven on a Tuesday night. You can find the full recipe details over in my chocolate cake recipe guide if you want to jump ahead, but stick with me—you need to understand *why* this one is different!
- Why This is the Ultimate Moist Chocolate Cake Recipe (Our Foolproof Secret)
- Ingredients for Your Moist Chocolate Cake
- How to Prepare the Best Moist Chocolate Cake Recipe Step-by-Step
- Frosting Your Decadent Chocolate Dessert
- Tips for Your From Scratch Chocolate Cake Success
- Storage and Reheating Instructions for Moist Chocolate Cake
- Frequently Asked Questions About This Moist Chocolate Cake
- Estimated Nutritional Value for This Moist Chocolate Cake
- Share Your Moist Chocolate Cake Creations!
Why This is the Ultimate Moist Chocolate Cake Recipe (Our Foolproof Secret)
So, what separates this cake from the dozens of dry imposters out there? It all comes down to three simple additions that elevate a good cake to *great*. First, we use oil instead of all butter. Oil stays liquid at room temperature, which keeps the cake unbelievably soft and moist long after it’s been baked. Second—and this is huge for texture—we use buttermilk. That little bit of acid reacts with the baking soda to give us the most tender crumb possible.
If you’re tired of chasing that elusive perfect texture, trust me, this is your foolproof cake recipe. It’s designed to fight dryness at every turn, ensuring your dessert remains rich and decadent whether you eat it today or save a slice for tomorrow. We aren’t just baking; we are engineering moisture, and it’s magnificent!
The Magic Behind a Tender Crumb Chocolate Cake
The real secret weapon, however, is that cup of hot coffee at the end. When you pour that near-boiling liquid into the cocoa mixture, it ‘blooms’ the cocoa powder. This means it dissolves all the cocoa particles completely, unleashing the deepest, richest chocolate flavor you can imagine. It also thins the batter drastically, which is exactly what we want! Don’t panic when you see how thin it looks—that thin batter is the key to a truly light and tender crumb chocolate cake that simply melts in your mouth. You can learn more about my other favorite deep-flavor enhancers in my chocolate fudge recipe post.
Ingredients for Your Moist Chocolate Cake
Okay, gathering the ingredients is the easy part, but I want you to pay attention to the *details* here. For this recipe to give you that incredibly moist chocolate cake result, simple store-brand shortcuts just won’t do the trick. I’ve listed everything out below, using the exact measurements that guarantee success. Remember, baking is chemistry, and we need quality reactants!
- 1 3/4 cups all-purpose flour
- 1 3/4 cups granulated sugar
- 3/4 cup unsweetened cocoa powder (good quality is a must!)
- 1 1/2 teaspoons baking soda
- 1 1/2 teaspoons baking powder
- 1 teaspoon salt
- 2 large eggs (room temperature is best, if you can remember!)
- 1 cup buttermilk (or use the substitution I note below)
- 1/2 cup vegetable oil
- 2 teaspoons vanilla extract
- 1 cup hot brewed coffee (or just plain hot water if you must)
Ingredient Notes and Substitutions for a Rich Cocoa Cake
Let’s talk briefly about two key items here. First, that buttermilk. If you don’t have it, don’t run to the store just for this! Just take 1 cup of regular whole milk and stir in 1 tablespoon of white vinegar or lemon juice. Let it sit on the counter for about five minutes until it looks slightly curdled. Easy, right? Second, the cocoa powder. Since this is a rich cocoa cake, the better the cocoa, the richer the final taste will be. I always recommend using Dutch-processed if you have it, but any high-quality unsweetened will shine here. And remember that 1/2 cup of vegetable oil? That’s essential for keeping this a moist cake using oil rather than a dry butter cake!
How to Prepare the Best Moist Chocolate Cake Recipe Step-by-Step
Are you ready to see how simple this truly is? Because it is! My whole philosophy here at Bliss Batter is taking something that sounds intimidating—like a deeply moist chocolate cake—and showing you it’s actually super easy. The instructions are laid out below, but the real magic happens in the order you combine things. We want air incorporated gently, but we don’t want to activate too much gluten!
First things first: preheat that oven to 350°F (175°C). Don’t wait until the batter is mixed to turn it on! Next, get your pans ready. I usually use butter or baking spray and then dust them generously with flour. If you’re feeling extra cautious, cut out circles of parchment paper just for the bottoms of your two 9-inch rounds. This guarantees a clean release every time you try to make this easy homemade chocolate cake.
Mixing the Batter: Achieving the Easy Homemade Chocolate Cake Texture
Grab your biggest bowl! We start with all our dry ingredients—flour, sugar, cocoa, soda, powder, salt. Whisk that around really well for about a minute. Whisking the dry ingredients is my little trick to skip sifting; it evens everything out nicely! Then, we add the wet items, minus the hot coffee: eggs, buttermilk, oil, and vanilla. Beat this on medium speed for about two minutes. The batter will look thick and slightly grainy, which is totally fine. Scrape down the bowl so no dry pockets hide at the bottom!
Now for the grand finale of mixing: Carefully pour in that steaming hot cup of coffee or water. Mix it on low speed until it’s just incorporated—seriously, two seconds is probably enough. You’ll notice the batter transforms into something extremely runny. Don’t panic! This super thin batter is exactly what we’re after. That liquid is what locks in the moisture.
Baking and Cooling for a Perfect Moist Chocolate Cake
Divide that thin batter evenly between your prepared pans. Pop them gently into the preheated oven and set your timer for 30 minutes. Around the 30-minute mark, start checking for doneness. Skip the toothpick test alone! I always check visually first—the cake should look set and pulled away ever so slightly from the edges of the pan. Then, I do the touch test: press gently in the center wire rack, and it should spring back softly.
When a wooden pick comes out with moist, clinging crumbs—not wet batter—it’s done! Let those beauties cool in the pans on a wire rack for exactly 10 minutes. This short cooling time lets the structure set up just enough. After 10 minutes, turn the cakes out onto the rack to cool completely before you even think about frosting them. Patience here means you get a perfect, non-broken layer cake. You can see my favorite coffee pairing tip for baking over in my coffee cake guide!
Frosting Your Decadent Chocolate Dessert
Now that you have perfected this incredible, moist chocolate cake, we have to top it with something worthy! Since this recipe focuses totally on that fudgy interior, I usually go for a rich, creamy pairing. The classic choice that never lets me down is a deep Chocolate Buttercream. It’s decadent without competing with the cake itself.
If you’re looking for the absolute top-tier pairing, you have to check out my guide for the best chocolate frosting recipe; I use a touch of sea salt in it that just makes the chocolate pop! But here is the most important PSA for your beautiful cake: make absolutely sure the layers are completely, totally cool before applying any frosting. Warm cake equals sliding, melted, messy disaster land. Trust me, waiting that extra hour for a flawless finish is worth it!
For a really quick, glossy finish, try a simple chocolate ganache—you can find a great technique over at the lovely folks at Simple Home Cooking Tips!
Tips for Your From Scratch Chocolate Cake Success
We’ve covered the main steps to achieving that ultra-delicious, moist chocolate cake, but sometimes reaching that peak perfection means focusing on the little details. When I was perfecting this recipe, I noticed tiny tweaks made a huge difference in the final crumb. If you want to truly bake perfect chocolate cake results every time you pull it from the oven, pay attention to these final power tips!
First off, room temperature. I know, I know, who plans ahead? But seriously, your eggs should be sitting out on the counter for about 30 minutes before you start mixing. Room temperature eggs incorporate into the batter much more smoothly than cold ones, which helps stabilize the emulsion we create when mixing the oil and buttermilk in. This leads to a batter that is much more homogenous before the hot coffee goes in.
Next up is measuring the flour. This is where people unintentionally add too much dry stuff, which kills moisture immediately! Do not scoop your measuring cup directly into the flour bag. That compacts it! Instead, use a spoon to gently fluff the flour in its container, then use that spoon to lightly scoop the flour into your measuring cup. Then, use a straight edge (like a butter knife) to level off the top. It seems fussy, but it ensures you are using the right amount to keep that tender crumb chocolate cake texture.
If you ever feel like the chocolate flavor isn’t quite hitting the mark, try lightly toasting your cocoa powder for about 30 seconds in a dry pan over medium heat (watch it constantly!). It wakes up those cocoa solids and deepens the flavor profile immensely, making it a truly rich cocoa cake experience. This simple step is something I picked up years ago, and it’s an easy win!
Remember, making a great from scratch chocolate cake is about confidence, and these little steps build that confidence! For more tips on using acidic dairy in baking, check out my guide on my favorite buttermilk biscuits recipe.
And if you are ever in doubt about the science behind cake readiness, the bakers over at Cooking White have some wonderful pointers on getting that perfect, slightly gooey bake!
Storage and Reheating Instructions for Moist Chocolate Cake
The fantastic thing about this particular moist chocolate cake is that it’s actually better the next day, thanks to that oil and buttermilk! To keep it perfect, wrap the cooled, unfrosted layers tightly in plastic wrap right away. If it’s frosted, use a cake dome or cover it loosely with plastic.
I always recommend storing it tightly covered at room temperature for up to three days. Our home is fairly cool, so I don’t refrigerate it unless our kitchen is summer-hot. If you must refrigerate, bring it back to room temperature for about an hour before serving; it really helps the texture bloom again!
Frequently Asked Questions About This Moist Chocolate Cake
Can I really tell that this cake uses oil instead of butter?
That’s the number one question I get! The answer is no—you absolutely can’t tell, and that’s why it works so well for creating the ultimate moist chocolate cake. While butter brings fantastic flavor to things like shortbread, in a strong chocolate cake like this, using vegetable oil ensures the crumb stays softer and incredibly tender over several days. It lets the cocoa flavor shine without the cake hardening up as it cools.
I don’t have buttermilk. Can I just use regular milk?
You shouldn’t just use regular milk if you want that beautiful, tender crumb chocolate cake texture! The buttermilk reacts chemically with the baking soda, creating lots of tiny bubbles that lift the cake and keep it fluffy even with all that liquid content. If you absolutely must substitute, please use my vinegar/lemon juice trick mentioned earlier! Cold milk just won’t give you the same acidic lift needed for this rich recipe.
Is this a one-bowl chocolate cake experience?
Almost! I designed this recipe to be incredibly easy, leaning heavily toward a one bowl chocolate cake method. You mix all your dry ingredients in one big bowl, and then add almost all the wet ingredients directly into that same bowl before adding the final hot liquid. It keeps cleanup down to just two bowls total—the mixing bowl and the coffee cup—so it’s pretty darn close to a true one bowl chocolate cake experience!
How do I turn this into a layer cake or a fudgy chocolate cake recipe?
It’s already perfect for a layer cake; the instructions give you two 9-inch rounds! But if you want a taller, more dramatic cake, I recommend making 1.5 times the recipe and using three 8-inch pans, or two 9-inch pans, adjusting your baking time slightly down—maybe 28–32 minutes. To really push it into the fudgy chocolate cake recipe territory, you can bake the rounds for 5 minutes less than specified, allowing the center to stay slightly denser when fully cooled. You can find my favorite tips for stacking cakes perfectly for parties over in my guide to a one bowl chocolate cake that uses a similar base!
How can I be sure I’m measuring the cocoa powder correctly for the best flavor?
Measuring cocoa powder correctly is key to getting that deep flavor without ending up with a bitter cake. You need to gently spoon the cocoa into your measuring cup and level it off—just like we discussed with the flour. Too much cocoa, and it gets overly bitter and dry, which is the opposite of what we want in our moist chocolate cake! Remember, the hot coffee helps dissolve it perfectly, so don’t skip that step!
If you’ve tried baking this beauty, please rate it below so others know what a truly reliable recipe this is! Curious what other bakers are making? Check out these ultimate guides for more decadent inspiration!
Estimated Nutritional Value for This Moist Chocolate Cake
I always get asked about the nutrition facts, and while I’m certainly no registered dietitian—I’m just a home baker obsessed with making things delicious—I do track the averages for you wonderful folks who need to know! Since this is a rich, fudgy confection, it’s certainly a treat, but knowing what’s in that generous slice helps when planning out the menu for your next gathering.
Here is a general breakdown of the macros based on dividing the entire recipe into 12 generous servings. Remember, these numbers are just estimates, and they will vary slightly depending on the brands of cocoa powder or the specific type of oil you use. Still, it gives you a real good idea of what you’re digging into!
- Serving Size: 1 slice
- Calories: 350
- Sugar: 40g
- Sodium: 320mg
- Fat: 17g
- Saturated Fat: 3g
- Unsaturated Fat: 14g
- Trans Fat: 0g
- Carbohydrates: 48g
- Fiber: 2g
- Protein: 5g
- Cholesterol: 55mg
Think of this as a lovely indulgence! When you are making something this satisfyingly moist chocolate cake from scratch, enjoy every bite. It’s worth every gram of sugar because the payoff in rich flavor is just spectacular. Just knowing it’s homemade and free from all those weird preservatives you find in store-bought cakes makes me feel so much better about treating my family!
Share Your Moist Chocolate Cake Creations!
Whew! We made it through the ultimate guide to the moist chocolate cake! Now comes the best part: seeing what you bakers create in your own kitchens. Please leave a star rating below so other beginners know this recipe is truly a winner. Did you use the hot coffee? Did it stay perfectly soft overnight? I’m dying to know! Don’t forget to tag me in your photos—I love seeing my recipes come to life in your homes. Happy baking!
If you need more inspiration for delicious, easy bakes, check out my About Page, and see what other home cooks are up to over at Everyday Kravings!
PrintUltimate Moist Chocolate Cake Recipe: Rich, Fudgy, and Foolproof
You need a truly moist chocolate cake recipe that delivers rich, fudgy flavor every time. This easy, from-scratch recipe uses simple ingredients and hot coffee to guarantee a tender crumb that will become your family favorite for any occasion.
- Prep Time: 15 min
- Cook Time: 35 min
- Total Time: 50 min
- Yield: 12 servings 1x
- Category: Dessert
- Method: Baking
- Cuisine: American
- Diet: Vegetarian
Ingredients
- 1 3/4 cups all-purpose flour
- 1 3/4 cups granulated sugar
- 3/4 cup unsweetened cocoa powder (good quality)
- 1 1/2 teaspoons baking soda
- 1 1/2 teaspoons baking powder
- 1 teaspoon salt
- 2 large eggs
- 1 cup buttermilk (or 1 cup milk mixed with 1 tablespoon white vinegar)
- 1/2 cup vegetable oil
- 2 teaspoons vanilla extract
- 1 cup hot brewed coffee (or hot water)
Instructions
- Preheat your oven to 350°F (175°C). Grease and flour two 9-inch round cake pans, or line the bottoms with parchment paper circles.
- In a large bowl, whisk together the flour, sugar, cocoa powder, baking soda, baking powder, and salt until well combined. This is your dry mixture.
- Add the eggs, buttermilk, vegetable oil, and vanilla extract to the dry ingredients. Beat with an electric mixer on medium speed for about two minutes until the batter is smooth. Scrape down the sides of the bowl as needed.
- Carefully pour the hot coffee (or hot water) into the batter. Mix on low speed until just combined. The batter will be very thin; this is correct and helps create a moist cake.
- Divide the thin batter evenly between your prepared cake pans.
- Bake for 30 to 35 minutes, or until a wooden pick inserted into the center comes out clean or with moist crumbs attached.
- Let the cakes cool in the pans on a wire rack for 10 minutes.
- Invert the cakes onto the wire rack to cool completely before frosting.
Notes
- Using hot coffee deepens the chocolate flavor without making the cake taste like coffee. Do not skip this step for the best flavor.
- Buttermilk reacts with the baking soda to give you a tender crumb. If you do not have buttermilk, make your own by adding 1 tablespoon of white vinegar or lemon juice to 1 cup of whole milk and letting it sit for 5 minutes.
- This recipe works well for cupcakes; bake for 18-22 minutes.
Nutrition
- Serving Size: 1 slice
- Calories: 350
- Sugar: 40
- Sodium: 320
- Fat: 17
- Saturated Fat: 3
- Unsaturated Fat: 14
- Trans Fat: 0
- Carbohydrates: 48
- Fiber: 2
- Protein: 5
- Cholesterol: 55