
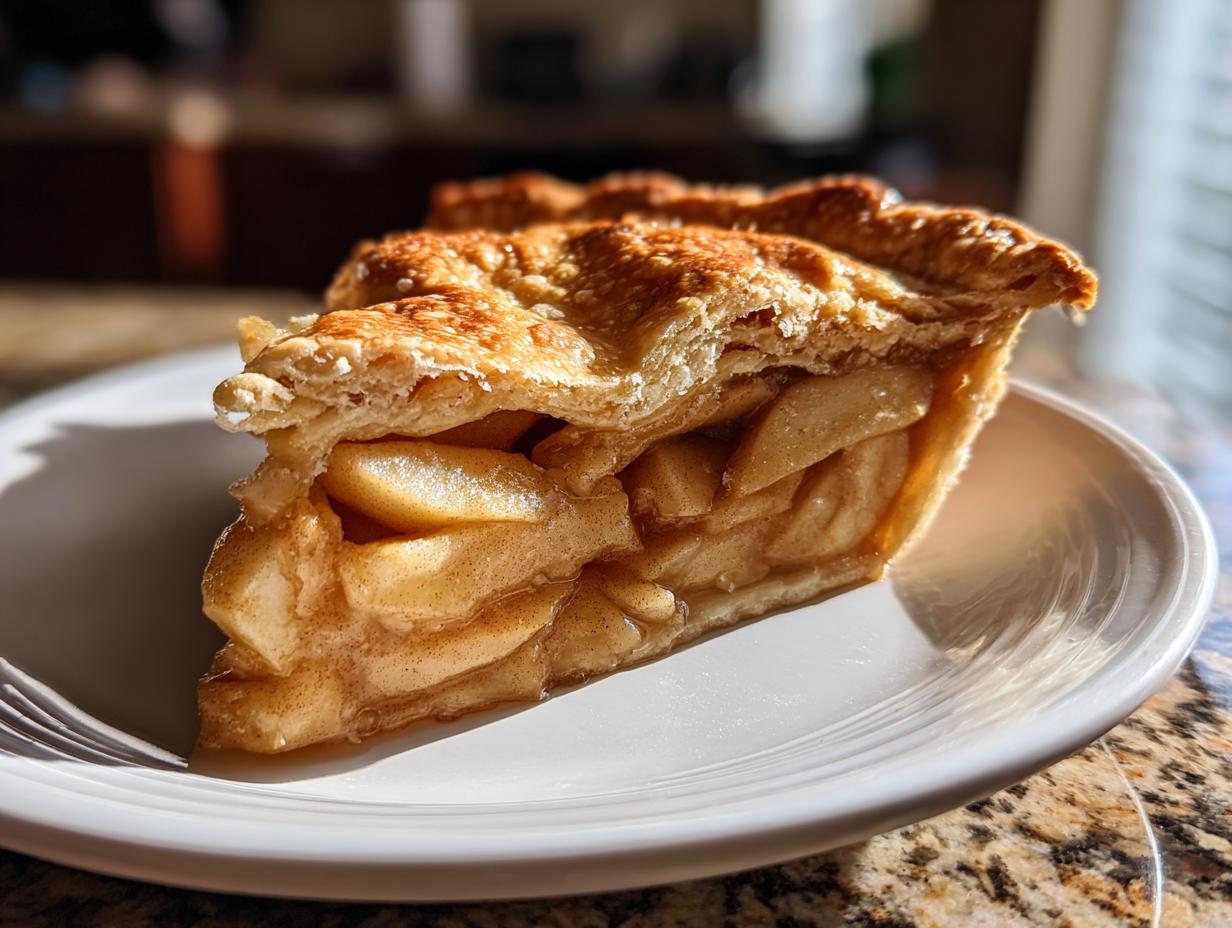
Oh, my heart! If you’re like me, National Apple Pie Day means thinking about the scent of home, and nothing beats that smell. I’m Claire, and today we’re ditching the shortcuts because we’re making the real deal: the Classic apple pie. This isn’t just any dessert; it’s a heritage bake meant to taste exactly like the ones our grandmothers poured their love into. Trust me, achieving that truly flaky pie crust from scratch alongside a deeply flavorful, traditional spiced apple filling is easier than you think. To celebrate, maybe mix up a little apple cider cocktail while you wait for this beauty to bake!
My own baking journey started in my grandmother’s kitchen, and I swear, the sound of flour hitting the countertop instantly calms the corporate chaos right out of me. This recipe is tested and perfected here at Bliss Batter, guaranteeing you a slice of pure, comforting nostalgia. We’re going all the way back to basics!
- Why This Classic Apple Pie is Your New Heritage Bake
- Ingredients for the Ultimate Classic Apple Pie
- Expert Tips for a Flaky Pie Crust From Scratch
- Assembling the Classic Apple Pie: From Dough to Dish
- Baking Instructions for the Best Homemade Apple Pie
- Ingredient Notes and Substitutions for Classic Apple Pie
- Serving and Storing Your Traditional Spiced Apple Filling Pie
- Frequently Asked Questions About Your Classic Apple Pie
- Nutrition Estimates for This Heritage Bake
Why This Classic Apple Pie is Your New Heritage Bake
We all chase that perfect slice, right? This recipe takes the guesswork out of baking. When you follow these steps, you’re guaranteed a result that feels earned and totally trustworthy. You’ll see immediately why this will become the best homemade apple pie you’ve ever made.
- Foolproof flaky pie crust from scratch—it’s all about that ice-cold butter!
- Perfectly balanced traditional spiced apple filling using just the right blend of warming spices.
- Reliable results every time, making it perfect for your first big holiday dessert bake.
Ingredients for the Ultimate Classic Apple Pie
Okay, listen up! For this recipe to shine, especially that glorious crust, you absolutely must use ingredients that are prepared exactly as I’ve listed. Keeping that butter arctic-cold when making the flaky pie crust from scratch is non-negotiable. Don’t eyeball the measurements here—this is where we lock in that heritage flavor!
For the Flaky Pie Crust From Scratch
- 2 1/2 cups all-purpose flour
- 1 teaspoon salt
- 1 cup (2 sticks) unsalted butter, very cold and cubed
- 1/2 cup ice water, plus more if needed
For the Traditional Spiced Apple Filling
- 6 medium baking apples (like Granny Smith and Honeycrisp), peeled, cored, and sliced 1/4 inch thick
- 3/4 cup granulated sugar
- 1/4 cup packed light brown sugar
- 1 teaspoon ground cinnamon
- 1/4 teaspoon ground nutmeg
- 1/8 teaspoon ground allspice
- 1 tablespoon lemon juice
- 2 tablespoons all-purpose flour (for filling)
For the Egg Wash
- 1 large egg, beaten with 1 teaspoon water
Expert Tips for a Flaky Pie Crust From Scratch
If you take away only one lesson from me today, let it be this: the secret to the flakiest pie crust from scratch is temperature! Seriously! You need that butter to be impossibly cold—like, straight-from-the-freezer cold, but still pliable enough to cut into small, pea-sized chunks. I learned early on that warm butter melts right into the flour, giving you tough, cracker-like pastry instead of those beautiful, shattering layers.
When you add the ice water, remember the rule: add it slow, one tablespoon at a time. You are mixing just until the dough holds together—it should look shaggy, not smooth! Please, don’t even think about mixing it more than necessary. Once it’s wrapped and chilled, let it rest for that full hour. This resting time lets the gluten relax, and that’s pure magic for a super flaky result. If you want more pastry wisdom for things like my famous biscuits, check out my tips for buttermilk biscuits recipe!
Assembling the Classic Apple Pie: From Dough to Dish
Alright, friends, this is where it all comes together! We have our chilled dough and our perfectly seasoned apples. Now we create that spectacular Classic apple pie. Preheat that oven to 425 degrees Fahrenheit; we want a good blast of heat to start setting that crust texture! Take one of those chilled disks and roll it out on a lightly floured surface until it’s about 12 inches across. Then, the tricky part: transfer it gently into your 9-inch pie plate. I always use the rolling pin to help lift it! Trim the edges so you have about an inch hanging over the rim.
Preparing the Base and Filling Layer
Once your base is settled, pour in all that gorgeous bowl of apples. Don’t be shy! You need to mound the apples up a little bit right in the center—they cook down a lot. That mounding keeps the structure looking great. If you want to see what I do with similar batters, check out my recipe for amazing apple fritters!
Topping and Sealing Your Grandma’s Apple Pie Recipe
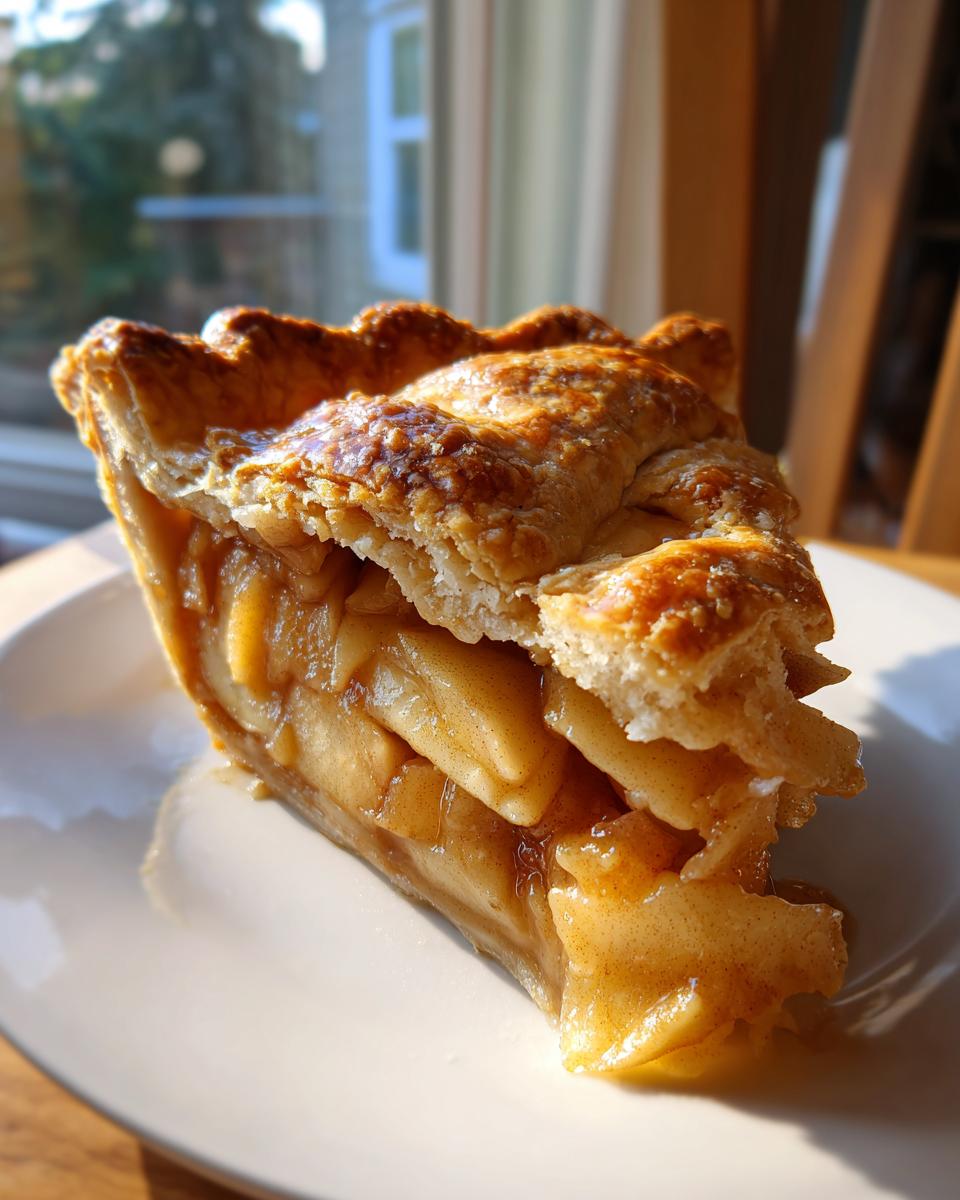
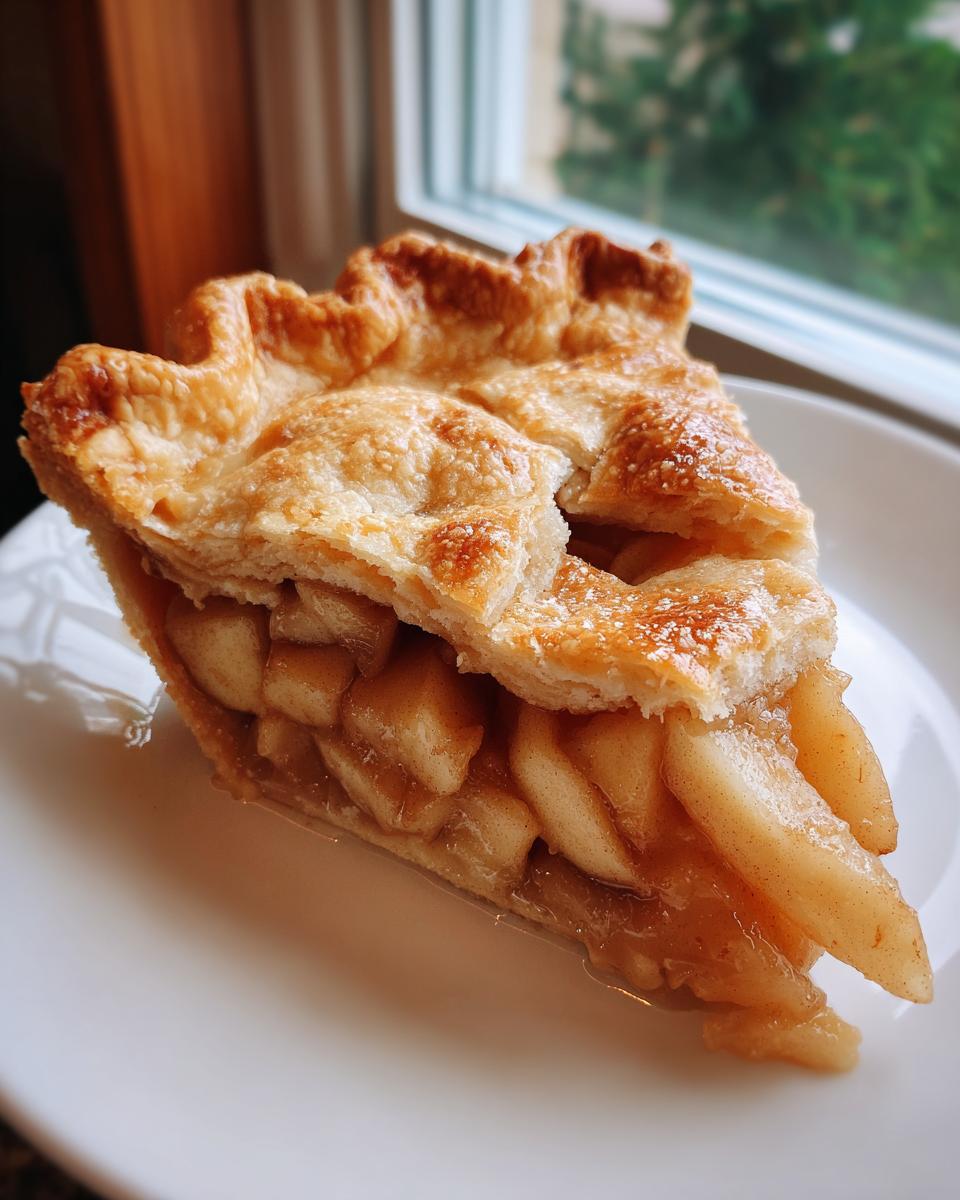
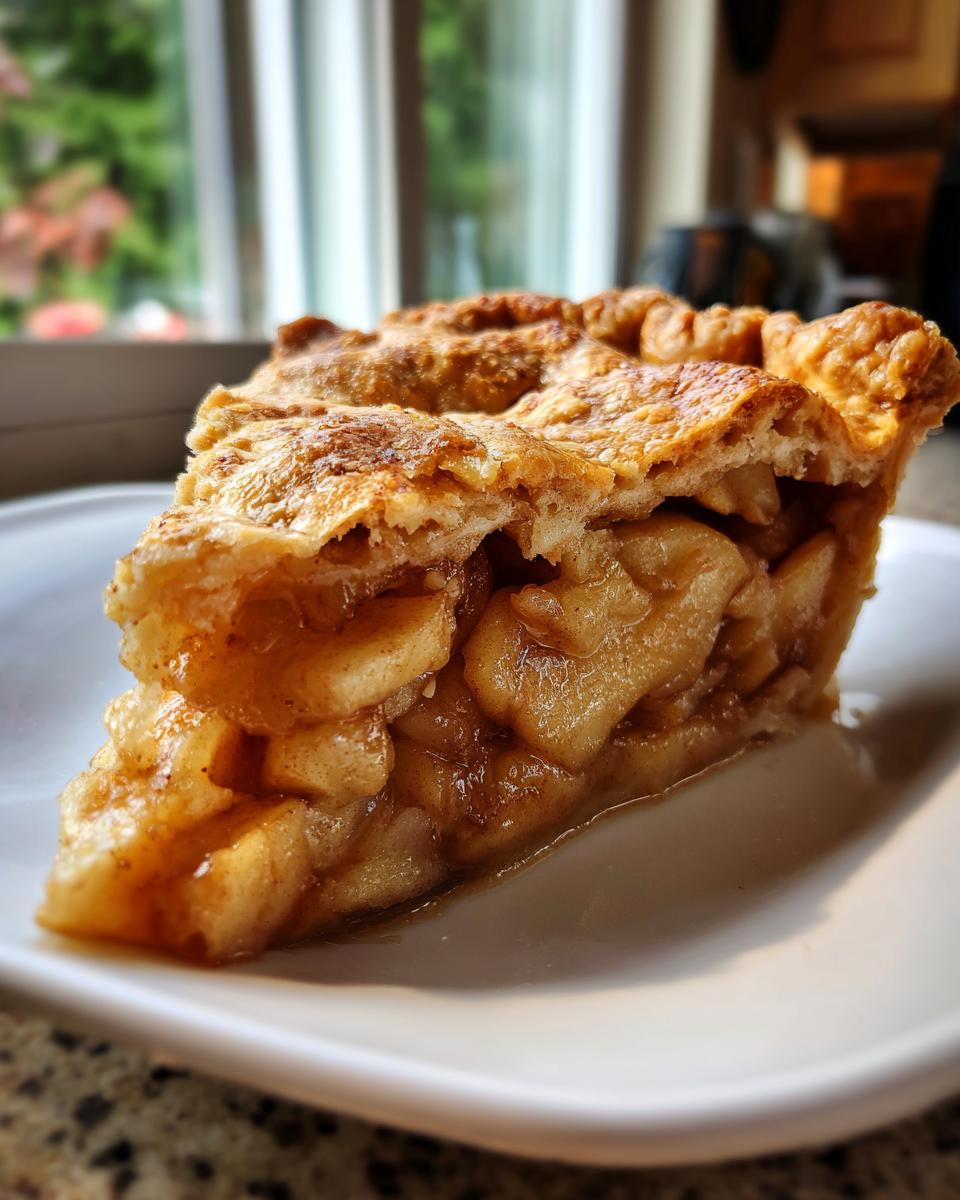
Now for the lid! Roll out that second chilled disk. Lay it right over the top of your filling. If you’re feeling extra traditional for your grandma’s apple pie recipe, cut some strips and weave a lattice, but a solid top crust works beautifully too. Trim that top overhang to match the bottom, and then crimp those edges together really well—I pinch and fold until they look rustic and sealed tight. You absolutely *must* cut a few slits in the top so that steam can escape; trust me, you don’t want an explosion! Finally, brush the top lightly but evenly with that egg wash. This is what gives you that beautiful, glossy, golden finish.

Baking Instructions for the Best Homemade Apple Pie
This is where patience pays off, so don’t touch that oven dial once it’s preheated! We start hot to set that gorgeous crust we worked so hard on. Set your oven to 425 degrees Fahrenheit and bake the pie for a quick 15 minutes. That initial blast helps lift those layers for the flakiest texture possible.
After that first session, lower the temperature right down to 375 degrees Fahrenheit. Keep baking for another 40 to 50 minutes. You’re looking for a crust that’s deep golden brown and a filling that is bubbling enthusiastically through those steam vents. If you notice the edges getting a little too dark—and this happens so easily!—just grab some foil and loosely tent those edges. Don’t let the crust burn while the middle finishes!
Once it’s done, resist the urge to slice it right away! Cool it on a wire rack for a minimum of two hours. This lets the filling set up; if you cut it hot, you’ll just get soup! For more slow-baked comfort, check out my recipe for moist cinnamon apple cake.
Ingredient Notes and Substitutions for Classic Apple Pie
When you’re chasing that true heritage bake flavor, the ingredients really do matter. I know it’s tempting to grab whatever’s handy, but for this Classic apple pie, a few choices make a huge difference in achieving that perfect bite. First up: the apples! You absolutely must use a mix of tart and sweet varieties. I love Granny Smith for holding their shape and providing that necessary tartness, but mixing them with something sweeter like Honeycrisp or Fuji keeps the filling from tasting too sharp.
Now, about that butter in the crust. I simply can’t steer you toward margarine or shortening for this recipe. If you want that true flaky pie crust from scratch that shatters beautifully, you need the flavor and structure of real, ice-cold unsalted butter. It’s the backbone of the whole thing, honestly!
If you’re out of brown sugar, you can use slightly more granulated sugar, but I really encourage you to use the brown sugar listed because that molasses really deepens the flavor of the traditional spiced apple filling. For the spices—cinnamon, nutmeg, allspice—if you have fresh spices, wow, use them! The scent is incredible. If you want to save some flavor for later, you can learn how to make my slow-cooker apple butter!
Serving and Storing Your Traditional Spiced Apple Filling Pie
I know, I know. That golden crust is calling your name, and the smell of cinnamon and nutmeg is driving you crazy. But please, trust me on this—the single hardest part of making the best homemade apple pie is waiting! You have to let that pie cool on a wire rack for a minimum of two hours after it comes out of the oven. If you cut it sooner, all those wonderful juices you worked so hard to thicken will just run right out onto your plate, leaving you with a soupy mess, not that perfect slice. Patience, darling!
Once it’s cooled down, this pie is wonderful served slightly warm, or even at room temperature. It usually keeps just beautifully on the counter, covered loosely with a cake dome or foil, for about two days. The sugars in the filling act as a preservative, so unless your kitchen is incredibly hot, you don’t need to rush it into the fridge right away! Don’t forget leftovers, though; they are delicious the next morning for breakfast!
If you are dealing with leftovers past day two, then yes, pop it in the fridge. Reheating is easy! Pop a slice onto a tray at about 350 degrees Fahrenheit for about 10 minutes until that filling warms through again. If you want to recreate that fairground magic, check out my recipe for easy caramel apples to serve alongside it!
Frequently Asked Questions About Your Classic Apple Pie
I get so many wonderful questions every time I share this recipe, mostly because people are trying to nail down that heritage quality! Don’t worry if you run into hiccups; baking is all about learning, and I’m here to help you avoid the pitfalls.
How do I prevent a soggy bottom on my Classic apple pie?
Oh, the dreaded soggy bottom! It breaks my heart! For this recipe, because we have so much moisture from those delicious apples, you need to get a blast of heat underneath that crust. My best trick, hands down, is baking the pie on the lowest rack in your oven for the first 20 minutes. This directly toasts the bottom crust. Also, please use a glass or metal pie plate—ceramic holds heat differently and often steams the bottom crust. A glass plate lets you peek underneath and watch that bottom get beautifully browned!
Can I make the flaky pie crust from scratch ahead of time?
Yes, absolutely! In fact, I highly recommend it! Making your flaky pie crust from scratch a day ahead is one of my favorite weekend prep tasks. Once you’ve wrapped those two disks tightly and they’ve chilled for an hour, you can store them in the fridge for up to three days. The chilling time actually helps those gluten strands relax even more, leading to a more tender crust. Just remember, when you go to roll it out the next day, pull it out of the fridge about 15 minutes before you start. If it’s too hard right out of the fridge, it will crack when you roll it.
Also, when layering or weaving, remember that a lattice top, as opposed to a solid top, lets more steam escape, which is another great way to ensure the bottom of your pie stays nice and crisp!
- If you want to try some other fun, easy baking projects, pop over and check out my recipe for cinnamon monkey bread! It’s pure joy in pull-apart form.
Nutrition Estimates for This Heritage Bake
Now, let’s talk about the fuel! This beautiful Classic apple pie is pure comfort food, and when we bake for happiness and tradition—like honoring this heritage bake—we know the joy is often more important than the math. Remember that the nutritional details I’ve calculated here are just an estimate based on the specific ingredients I listed. Believe me, using real butter and loads of fresh apples means this pie is rich, glorious, and meant to be shared!
The final count totally depends on how thick the slices are, how much egg wash was used, and even the exact variety of apple you chose. If you’re looking for other comforting traditional desserts that feel just as much like coming home, you have to see my recipe for sweet potato pie. Just enjoy every single bite of this apple pie; you earned it!
PrintClassic Apple Pie: Flaky Crust and Traditional Spiced Filling

Bake a truly traditional apple pie with a perfectly flaky crust made from scratch and a filling spiced just right for a comforting, nostalgic dessert.
- Prep Time: 45 min
- Cook Time: 65 min
- Total Time: 110 min
- Yield: 8 servings 1x
- Category: Dessert
- Method: Baking
- Cuisine: American
- Diet: Vegetarian
Ingredients
- 2 1/2 cups all-purpose flour
- 1 teaspoon salt
- 1 cup (2 sticks) unsalted butter, very cold and cubed
- 1/2 cup ice water, plus more if needed
- 6 medium baking apples (like Granny Smith and Honeycrisp), peeled, cored, and sliced 1/4 inch thick
- 3/4 cup granulated sugar
- 1/4 cup packed light brown sugar
- 1 teaspoon ground cinnamon
- 1/4 teaspoon ground nutmeg
- 1/8 teaspoon ground allspice
- 1 tablespoon lemon juice
- 2 tablespoons all-purpose flour (for filling)
- 1 large egg, beaten with 1 teaspoon water (for egg wash)
Instructions
- Make the crust: In a large bowl, whisk together the flour and salt. Cut in the cold butter using a pastry blender or your fingers until the mixture resembles coarse crumbs with some pea-sized pieces of butter remaining.
- Gradually add the ice water, one tablespoon at a time, mixing until the dough just comes together. Do not overmix.
- Divide the dough in half, form each half into a disk, wrap in plastic wrap, and chill for at least 1 hour.
- Prepare the filling: In a separate large bowl, gently toss the sliced apples with the granulated sugar, brown sugar, cinnamon, nutmeg, allspice, lemon juice, and 2 tablespoons of flour until the apples are evenly coated.
- Preheat your oven to 425 degrees Fahrenheit.
- On a lightly floured surface, roll out one disk of dough into a 12-inch circle. Carefully transfer it to a 9-inch pie plate. Trim the edges, leaving a 1-inch overhang.
- Pour the apple filling into the bottom crust, mounding the apples slightly in the center.
- Roll out the second disk of dough for the top crust. Place it over the apples. Trim the top crust overhang to match the bottom. Crimp the edges to seal. Cut several slits in the top crust to allow steam to escape.
- Brush the top crust lightly with the egg wash.
- Bake for 15 minutes at 425 degrees Fahrenheit. Then, reduce the oven temperature to 375 degrees Fahrenheit and continue baking for 40 to 50 minutes, or until the crust is golden brown and the filling is bubbly. If the edges brown too quickly, cover them loosely with foil.
- Cool the best homemade apple pie on a wire rack for at least 2 hours before slicing and serving.
Notes
- For the flakiest pie crust from scratch, keep all your ingredients, especially the butter and water, very cold before mixing.
- If you prefer a lattice top, cut the top dough into strips and weave them over the filling before sealing the edges.
- Use a mix of tart and sweet apples for the best flavor balance in your traditional spiced apple filling.
Nutrition
- Serving Size: 1 slice
- Calories: 420
- Sugar: 35g
- Sodium: 250mg
- Fat: 24g
- Saturated Fat: 15g
- Unsaturated Fat: 9g
- Trans Fat: 0g
- Carbohydrates: 53g
- Fiber: 3g
- Protein: 4g
- Cholesterol: 60mg