

Okay, sometimes you just need that moment—that moment where you bite into the absolute perfect **cheeseburger**. The kind that’s so juicy, the cheese is perfectly melted, and you realize you don’t have to drive to that greasy corner diner to get it. Trust me, I know what you’re thinking: I usually deal in batter and frosting! But honestly, making the ultimate homemade cheeseburger requires the same focus on ratios and technique that I use in my baking.
Just like in dessert, small details make a huge difference in flavor and texture here. We’re going to use the precision I learned developing those finicky cake recipes to ensure your patties are never dry and always flavorful. Forget everything you thought you knew about grilling—we are aiming for that rivaled-by-none, dripping-down-your-hand kind of perfection. You can learn more about my philosophy of bringing precision to home favorites over on my About Page!
- Why This Is the Best Homemade Cheeseburger Recipe
- Essential Ingredients for Your Cheeseburger
- Step-by-Step Instructions for the Ultimate Cheeseburger
- Mastering the Burger Seasoning Recipe
- Assembling Your Perfect Cheeseburger
- Tips for the Juiciest Burger Every Time
- Variations: Beyond the Classic American Cheeseburger
- Serving Suggestions for Your Cheeseburger Meal
- Frequently Asked Questions About Making a Cheeseburger
- Estimated Nutritional Data for One Cheeseburger
- Share Your Perfect Cheeseburger Creation
Why This Is the Best Homemade Cheeseburger Recipe
I know what you’re looking for: a burger that actually tastes like something special, not just a sad, dry disk of meat. This recipe delivers on flavor and juiciness, which is honestly the whole point, right? If you can master the delicate balance needed for a great pound cake, you can nail this!
Here’s why this method is unmatched for a weeknight dinner treat. You can find more easy weeknight meal ideas here.
- It focuses on technique over complicated ingredients—simplicity wins!
- Guarantees incredible juiciness, even if you like your burger well-done.
- The result is the quintessential, nostalgic flavor of a perfect diner classic.
Achieving the Perfect Juicy Burger Tips
The biggest trick to keeping your burger juicy is the fat content. I insist on 80/20 ground beef; seriously, don’t skimp here! That 20% fat renders as the burger cooks, basting the meat from the inside out. Also, handle that meat gently when forming the patties. Overworking it compresses the proteins and squeezes out all the moisture before it even hits the heat. Just bring it together lightly, press that little dimple in the middle, and you’re set.
The Classic American Cheeseburger Flavor Profile
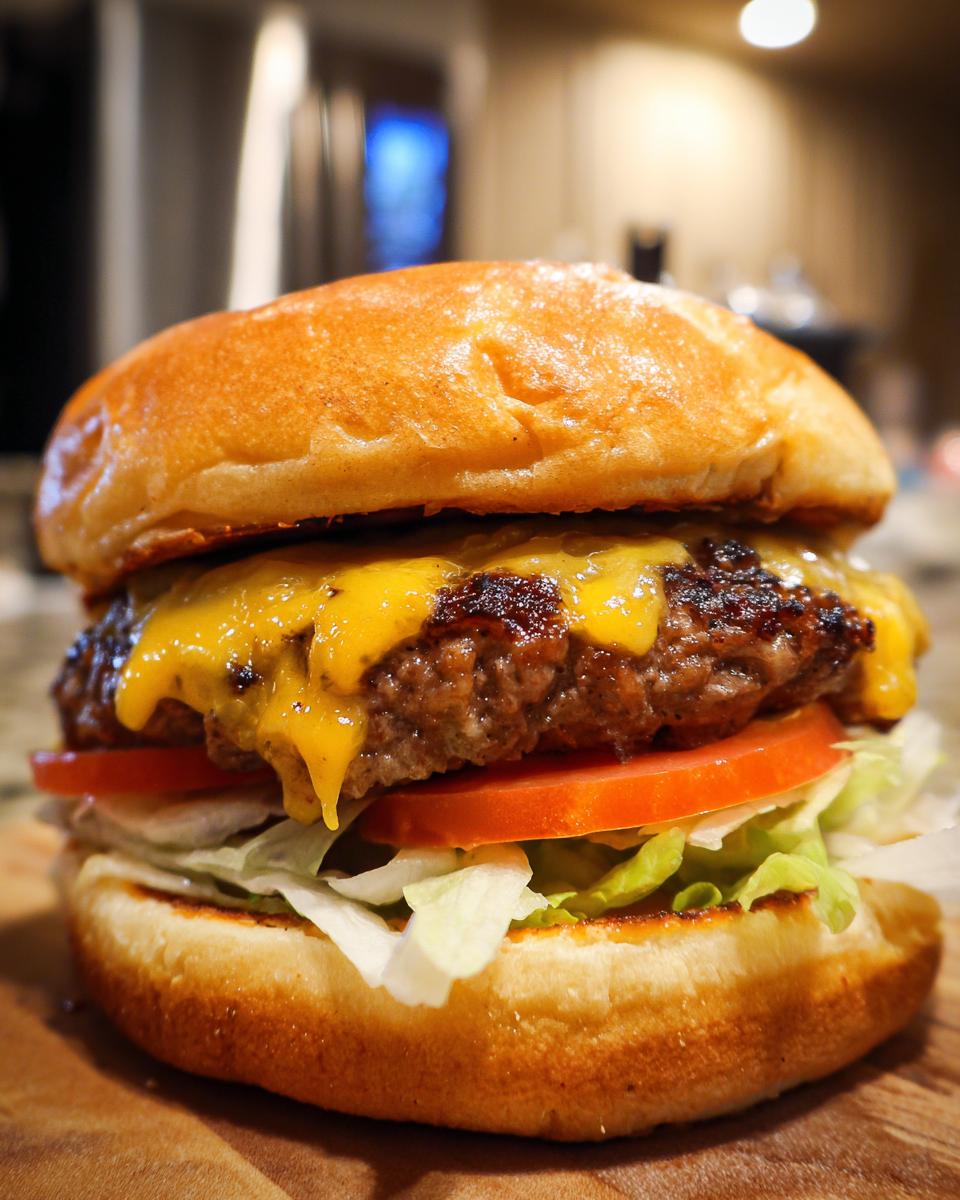
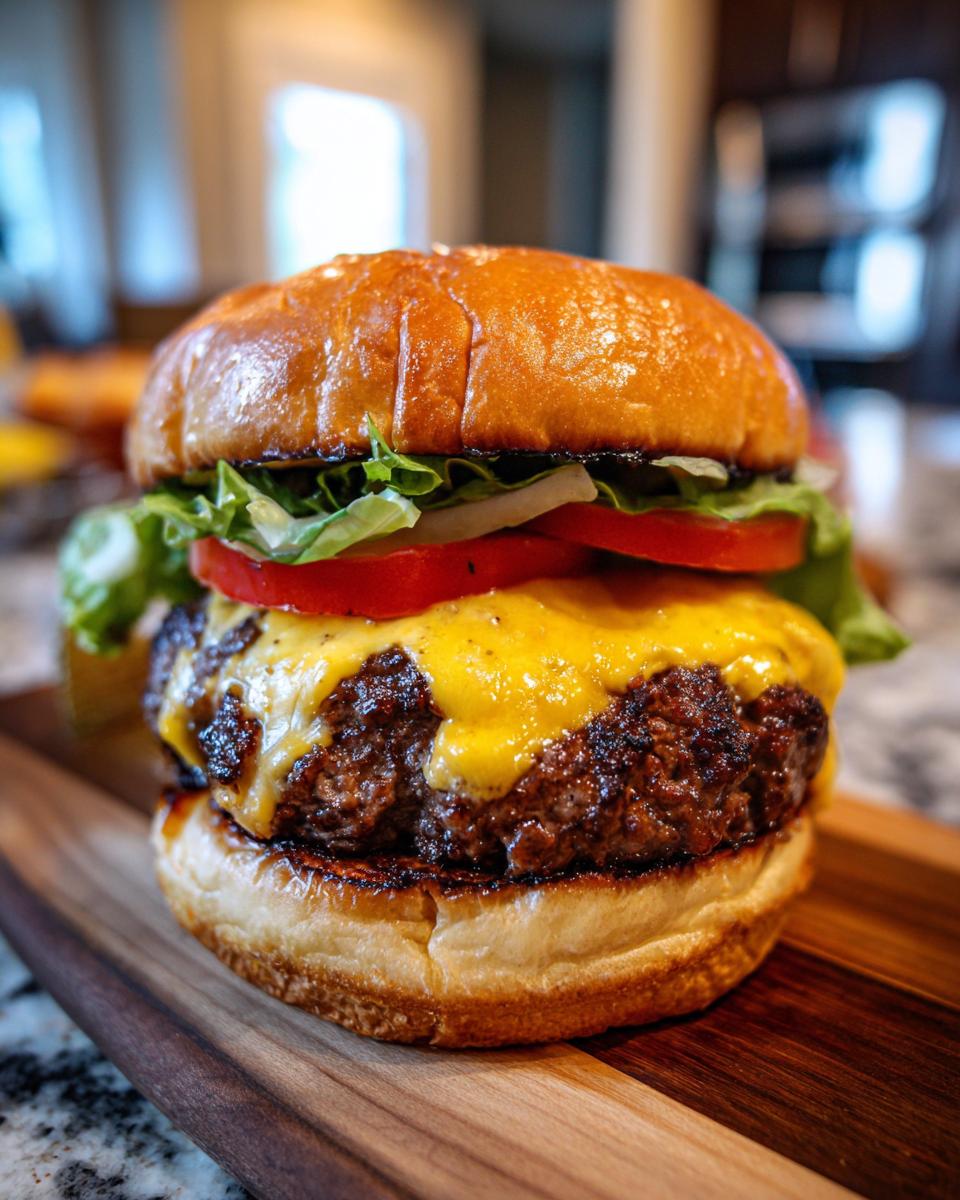
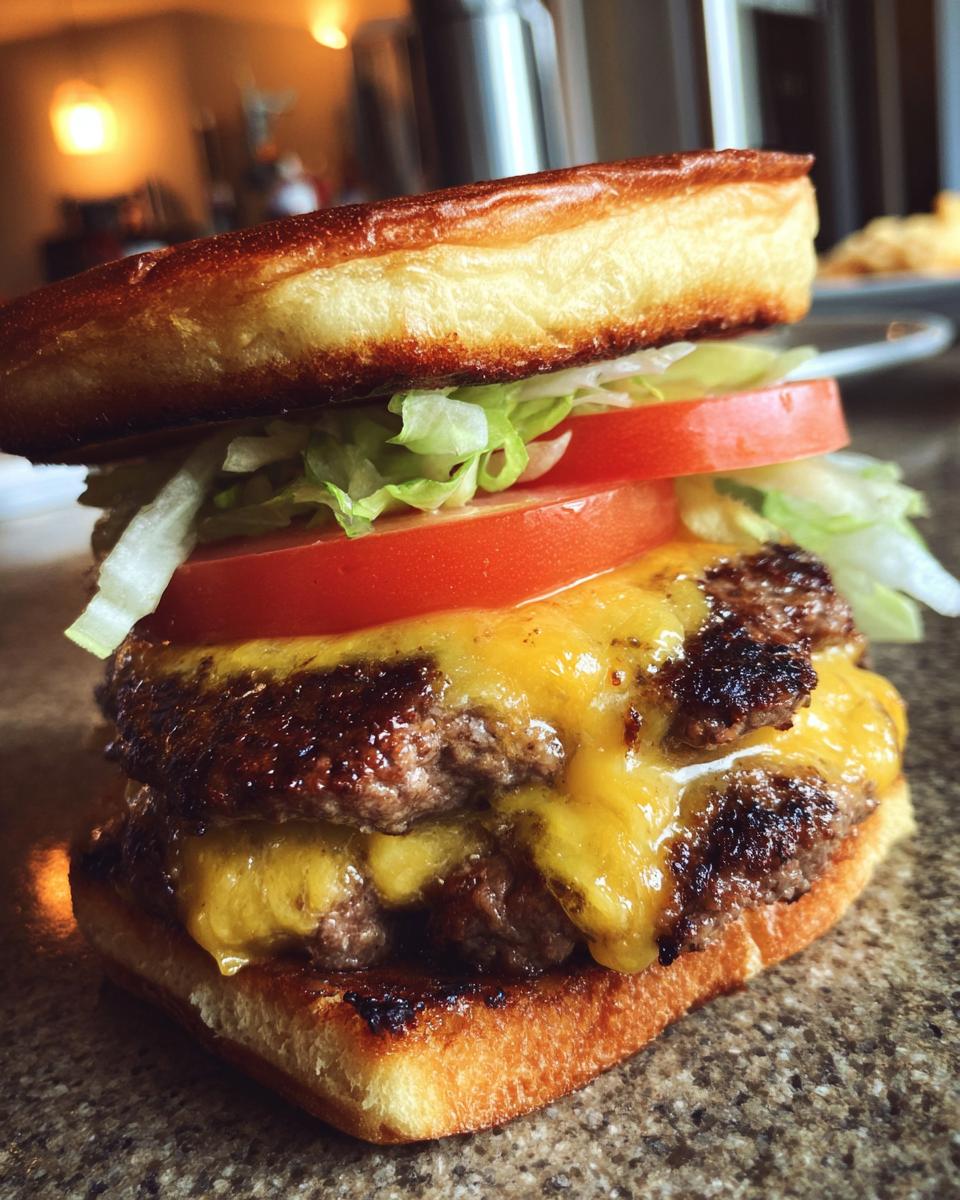
We aren’t doing gourmet toppings here—we are going for tradition! The best homemade cheeseburger relies on minimal seasoning: just salt and pepper. Heavy spices just mask the flavor of the beef. And for the cheese? You must use American cheese. I promise. It melts flawlessly into that velvety blanket that drips gorgeously down the sides. It’s the texture we’re after, and nothing melts like a good slice of American.
Essential Ingredients for Your Cheeseburger
When I was developing recipes for Bliss Batter, my promise was always that quality everyday ingredients make the biggest difference, and that rule totally applies to a killer burger! You don’t need a chef’s pantry; you just need the right stuff handled correctly. Keep these items ready, and you’re halfway to the best homemade cheeseburger you’ve ever made.
- 1.5 lb ground beef (80/20 recommended—this is non-negotiable for juiciness!)
- 1 teaspoon kosher salt
- 0.5 teaspoon black pepper
- 4 slices American cheese (the classic melty kind!)
- 4 hamburger buns (sturdy ones, please!)
- 2 tablespoons butter, softened (for toasting)
- Optional Toppings: Lettuce, tomato slices, onion slices, dill pickle chips, ketchup, mustard
Ingredient Notes and Substitution Guidance
Let’s talk about the beef ratio again. If you use anything leaner than 80/20, I cannot guarantee the juiciness we talked about in the last section. That fat is your insurance policy against a dry burger. If you absolutely must, you could try adding a splash of ice water or a tablespoon of finely chopped suet to leaner meat, but honestly, just buy the 80/20!
For the cheese, American is king for that perfect blanket effect, but if you’re feeling fancy, a slice of Sharp Cheddar is okay. Just know that cheddar won’t melt as evenly; it might get a little greasy around the edges instead of smoothing out nicely. But hey, it still tastes good!
Step-by-Step Instructions for the Ultimate Cheeseburger
Alright, now for the fun part! Even though I usually write about carefully measured baking times, getting the cook right on this cheeseburger is just as important. Think of it like setting the perfect temperature for a delicate meringue—timing is everything. We want maximum sizzle and minimum fuss here so we can get to eating!
We’re going to rely on a medium-high heat setting, whether you are using your trusty cast iron skillet or the grill grates. That preheating time is important, just like letting your oven warm up before you put your cookies in. Don’t rush the heat!
Patty Formation and Seasoning for Your Cheeseburger
First up, forming the patties. Remember what I said about handling stuff gently? This is where you need the light touch of a pastry chef. Gently form the meat into four sections; they should be slightly wider than your buns because they shrink when they cook. Do NOT, I repeat, DO NOT overwork the meat. Keep it loose! Then, use your thumb to press a little dimple right in the center of each patty. This trick keeps them from bulging up into little domes while they cook.
Season them generously on both sides with salt and pepper right before they hit that hot surface. Seasoning too early just draws moisture out, and we want to keep all that delicious juice locked in!
How to Grill Burgers with Cheese Perfectly
Once your skillet or grill is ripping hot (medium-high), lay those seasoned beauties down. Let them cook undisturbed for about 3 to 4 minutes per side for medium-rare. If you are tempted to smash that patty down with your spatula—don’t do it! Pressuring the burger releases all those glorious fats we need for juiciness. About one minute before they’re done, slap that slice of American cheese on top.
If you are using a skillet, cover it quickly or drop the lid on the grill for 30 seconds. That trapped heat melts the cheese into the perfect gooey topping. You can check out my recipe for the perfect grilled cheese sandwich recipe for more tips on melting cheese, even though that seems like a whole different world!
Mastering the Burger Seasoning Recipe
You know, flavor building is crucial whether you are creating a complicated frosting or just making a simple meal. For this classic American cheeseburger, we are keeping the seasoning recipe incredibly streamlined because the beef really needs to shine through. We are sticking strictly to kosher salt and freshly cracked black pepper. That’s it!
When I first developed this, I almost added garlic powder or onion powder, but honestly, it just fights with the pure flavor of that 80/20 mix. If you want to get fancy, you can experiment, but for the *best* burger, simple is the way to go.
Here is my biggest tip for maximizing that flavor impact: Timing is everything! You want to apply your salt and pepper right before the patties hit the hot pan or grill. If you salt them too early—say, 20 minutes before—the salt starts drawing moisture out of the meat, and we worked so hard to keep that moisture in! So, right when your pan is screaming hot and you are ready to drop them down, season up both sides generously. This slight surface seasoning is what gives you that fantastic crust and savory punch we are looking for in a perfect burger seasoning recipe.
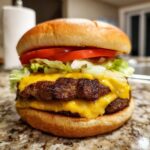
Assembling Your Perfect Cheeseburger
We are so close! The patty is perfectly cooked, the cheese is gooey—now we move to the construction phase. You know, when I design a layered cake, the order of the structural elements is everything, right? Too much heavy buttercream on the bottom and the whole thing leans! Burgers are surprisingly similar; the wrong base layer means you end up with a soggy mess.
The absolute first thing you need to tackle is the bun. I mentioned we are buttering the cut sides and toasting them, but let me really drive home why this step is crucial. Toasting creates a protective layer against the juices from the meat and whatever condiments you are adding. If you skip this, your bottom bun turns to mush halfway through enjoying that fantastic, juicy patty we worked so hard to achieve.
When I set up my buffet tables back when I was doing corporate events, presentation was key. You want the same care here. Toast those buns until they are just lightly golden brown—no burning! You want crunch, not char.
Now for the layering order. Since we are working on structural integrity, the logic is simple. Bottom bun first. Then, place that cheesy, hot patty right on top. I like to put my drier items, like the lettuce and tomato, directly on the cheese. This acts as a small layer between the hot meat and the softer toppings. Ketchup and mustard should go right below the top bun, or sometimes even spread lightly on both sides!
Think about getting nice coverage. I always check the edges to make sure my dill pickle chips are sitting nicely, not just clumped in the middle. It ensures every single bite has a satisfying crunch and flavor component. For more insights on why layering matters, check out some of my tips about layering things perfectly—the principle is exactly the same!
Finally, place the top bun on gently. Don’t squish it down hard! You want it airy and ready for that first glorious bite of your homemade cheeseburger.
Tips for the Juiciest Burger Every Time
Look, I know we talked about the 80/20 ratio, but sometimes even with the right meat, a burger can get a little sad and dry on you. That’s why I always have a few secret tricks up my sleeve—the kind of things I learned paying attention to how steam and heat work, much like when I’m trying to prevent a cake from sinking in the middle. You want that absolute maximum interior moisture, right?
This reinforcement of those juicy burger tips is for when you want to go above and beyond the basic instructions. You’ve got this!
Don’t Skip the Dimple (Seriously!)
I mentioned pressing a little dent in the center of the patty earlier, but let’s really explore why that tiny depression is your best friend. When ground meat is raw, it’s relatively flat. As it cooks, the heat causes the edges and center of the patty to contract inward. If you start with a perfectly flat patty, that contraction forces all the rendered fat and juices toward the middle, pushing them out when you finally cut into it.
By pressing that dimple in, you are giving the meat somewhere to go as it shrinks. Think of it like building a little reservoir! The juices pool in that indent instead of running out onto your hot skillet or grill grates. It’s a low-effort, high-return technique.
The Importance of a Screaming Hot Cooking Surface
This is where people often mess up the *outside* texture, which impacts the *inside* juiciness. You need a really hot surface—whether that’s a well-seasoned cast iron or a searing-hot grill. You want that immediate, aggressive sear when the meat hits the metal. This rapid searing creates a crust—the Maillard reaction—that locks the juices inside the patty.
If your pan isn’t hot enough, the meat just sits there leaching fat slowly into the pan, kind of steaming itself instead of searing. That leads to a grey, dry burger. Get that pan hot enough that you hear an immediate, satisfying sizzle when the beef touches down. That sound tells you you’re on your way to the best homemade cheeseburger.
The Quick Rest Period
This is a concept I borrowed straight from steak cooking, but it works beautifully for thick burger patties too. After you pull those beautiful cheese-blanketed patties off the heat, don’t stack them immediately or try to assemble them right away. Let them rest on a clean cutting board for just 2 to 3 minutes.
Why? When the meat fibers are hot, they are tightly contracted, holding onto their juices under pressure. Resting allows those fibers to relax slightly. When they relax, they redistribute the moisture evenly throughout the patty instead of having all the lovely fat and water pooled up right in the center. This simple break ensures that every bite you take—from the first to the last—is perfectly moist. It’s another small step that shows you’re treating this burger with the respect it deserves!
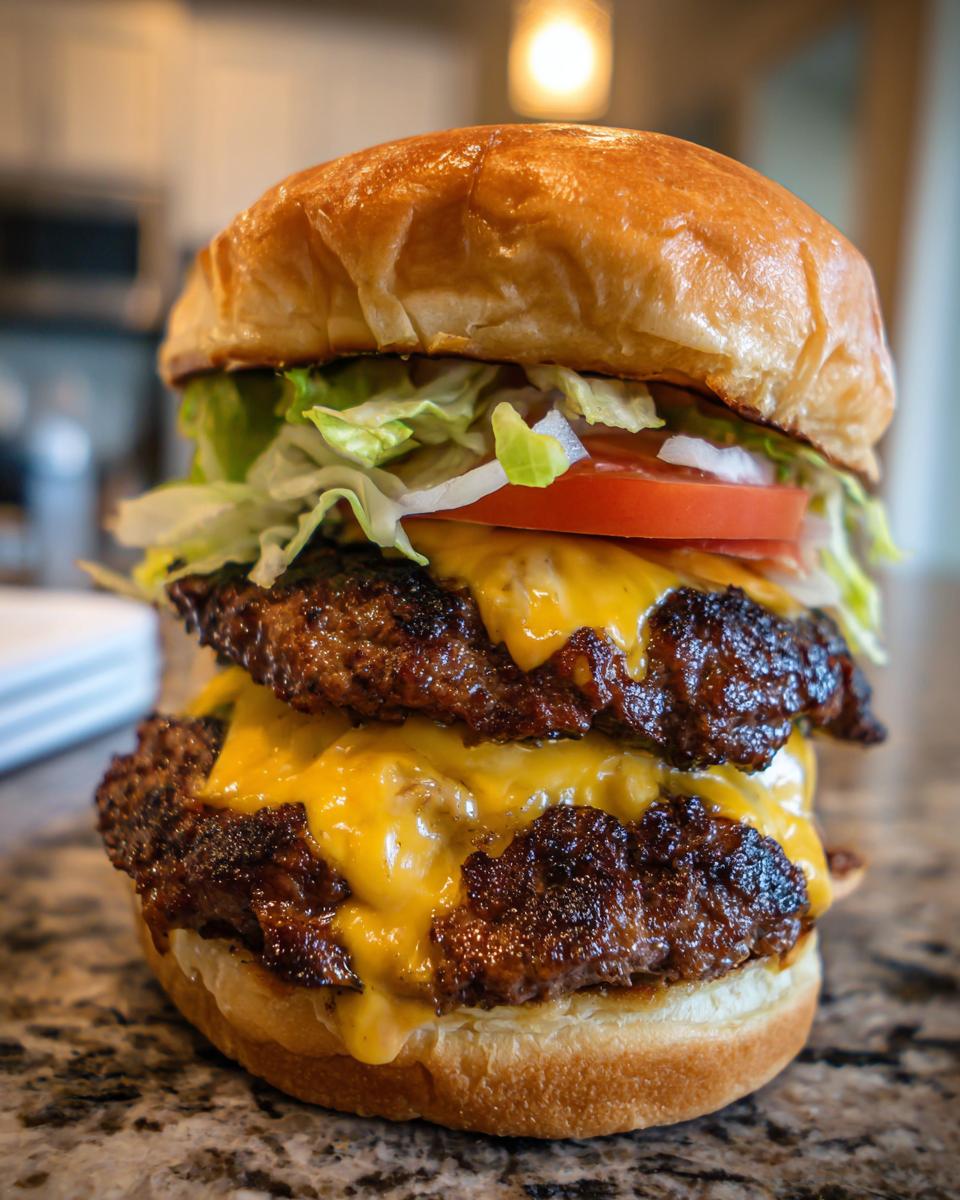
Variations: Beyond the Classic American Cheeseburger
While I stand firmly by the simple, perfect bacon and cheese smash burger, sometimes you need to switch things up, right? It’s the same way I feel about switching between chocolate chip cookies and lemon bars—you need variety to keep things exciting! Once you’ve mastered the basic technique—getting that perfect sear and keeping the center juicy—you can start adding flourishes to make your ultimate homemade cheeseburger truly your own.
These additions are easy tweaks that don’t require reinventing the wheel. They just bring a little extra personality to the party!
Caramelized Onions: The Secret to Sweetness
Oh my goodness, if you’ve never put caramelized onions on a burger, you are missing out! They are basically sweet, jammy little flavor sponges, and they take zero extra effort if you plan ahead. They have the same rich, deep flavor as the onions I use for my French Onion Soup recipe.
To make them, you just slice up some yellow onions thin and cook them low and slow in a little butter—and I mean *low* heat—for about 30 minutes until they are dark brown and tender. They add an incredible depth of flavor that pairs beautifully with that salty beef. Add a pile of these right on top of the melting cheese!
Spice It Up: The Burger Seasoning Remix
If simple salt and pepper just isn’t doing the trick for you one day, you don’t need to dump in an entire spice cabinet. Try this secret little mix: add about half a teaspoon of smoked paprika to your usual salt and pepper blend. Smoked paprika gives you that amazing outdoor-grill flavor without actually having to fire up the charcoal.
Another fun trick is adding a pinch of dried thyme right into the meat mixture before forming the patties. Thyme and beef are old friends, and it gives your cheeseburger a slightly more sophisticated, almost woodsy note. Just a pinch, though—we don’t want it tasting like pot roast!
Sauce Swaps for a New Vibe
While I love classic ketchup and mustard, changing up the sauce can totally transform your cheeseburger experience. Instead of mayo, try using a creamy Dijon mustard mixed with a tiny bit of horseradish for a flavorful kick. Or, if you happen to have some leftover aioli, that works wonders.
For a bit of tanginess, don’t underestimate a thin swipe of Worcestershire sauce mixed right into the ketchup. It adds that necessary umami depth that most people can’t quite put their finger on, but they love it once they taste it. Experimenting with sauces is fun because you can change the flavor profile every single time you make this same recipe!
Serving Suggestions for Your Cheeseburger Meal
So, you’ve made the most unbelievably juicy cheeseburger—congratulations! But now you’re staring at it thinking, “What else goes on the plate?” A great main dish deserves great company, just like the perfect brownie needs the right ice cream scoop on top. We want to keep the meal feeling easy and comforting, but still special.
Since I’m all about easy execution, I’ve got a couple of suggestions that don’t require a huge time commitment. If you’re struggling with meal planning for the week, having a go-to, quick side like this makes dinner time completely stress-free.
The Anti-Fries Option: A Quick Side Salad
I know, I know—fries are the classic pairing, and we’re not judging if you want them! But if you’re looking to balance out the richness of that 80/20 beef, a simple, crisp side salad is divine. Seriously, don’t overthink it. Toss some mixed greens with a light vinaigrette—maybe just olive oil, white wine vinegar, a tiny bit of Dijon, salt, and pepper. The acidity cuts right through the richness of that melted cheese and meat fat perfectly.
It’s light, it takes about three minutes to pull together, and it makes the whole meal feel much more balanced. Sometimes simple produce is the best palate cleanser after a rich classic American cheeseburger.
When You Want Something Decadent (Fries Alternative)
Now, if you want to go all-in on the indulgent vibe, you have to check out my recipe for Chili Cheese Fries. It’s completely over the top, but when you’re having a burger night, why hold back? Taking that concept and dialing it back just a notch—maybe skip the chili and just load up some oven-baked fries with shredded cheddar—works brilliantly.
If you’re doing simpler sides, like potato chips or coleslaw, remember that the burger is the star. Keep the side simple so it doesn’t compete with the perfectly seasoned patty.
Beverage Pairings That Just Work
For a classic American cheeseburger experience, you can’t go wrong with an ice-cold soda—think root beer or a classic cola. The carbonation is fantastic for cutting through the fat, which is a necessary job after eating something so rich!
If you’re looking for something grown-up, a simple, cold lager or a light, crisp hard cider pairs exceptionally well. My rule here is: keep the drink refreshing and cold. Anything too heavy or overly complex just weighs down the whole meal. You want refreshment to keep you ready for that second bite!
Frequently Asked Questions About Making a Cheeseburger
It’s totally normal to have questions pop up when you’re trying to nail a recipe perfectly, especially when it comes to cooking meat! Like trying to get the exact crumb texture in a cake, getting a burger just right takes practice and knowing a few little insider secrets. Here are the common hang-ups people have when trying to achieve the absolute best homemade cheeseburger.
Can I use leaner ground beef for this Cheeseburger recipe?
Oh, you can, but I really don’t recommend it if juiciness is what you’re chasing! The **juicy burger tips** section hammered home the 80/20 ratio for a reason. When you use leaner beef—say 90/10—you don’t have enough internal fat to render and baste the meat while it cooks. What ends up happening is that the meat fibers tighten up when they cook, squeezing out the small amount of moisture it does have, and you end up with a dense, dry burger. If you must use leaner meat, you’ll have to add extra fat in another form or rely heavily on adding ice water to the mix to compensate, but nothing beats that natural 80/20 fat content!
What is the best way to store leftover Cheeseburger components?
If, by some miracle, you have leftover patties or components, storage is key to keeping that quality high until your next burger night. Always store the cooked patties separately from the buns. Patties should be wrapped tightly in foil or placed in an airtight container and refrigerated; they’re usually great for about three days. If you think you might be asking yourself **how to grill burgers with cheese** again next week, you can freeze the cooked patties—just make sure they are completely cool before wrapping them tightly in a freezer bag.
Buns should be kept at room temperature in their original packaging or a paper bag; never refrigerate bread items unless you want them to go stale super fast! Toppings like lettuce and tomato should be washed, patted bone-dry, and stored loosely covered in the fridge. Condiments like ketchup and mustard are fine in the fridge, of course. When you’re ready to eat them the next day, you’ll need to reheat the patties separately on the skillet before reassembling.
If you have any other burning questions about making this recipe, or maybe you need help troubleshooting, don’t hesitate to reach out on my contact page! We’re all learning together in the kitchen!
Estimated Nutritional Data for One Cheeseburger
Just like when I calculate the sugar content for my holiday cookies, calculating the nutrition for this amazing treat is good to know! Remember, this is just an estimate based on the specific ingredients listed in the recipe—like using 80/20 beef and standard white buns—and assumes you’re using the basics as listed.
If you start adding bacon, premium brioche buns, or slathering on extra sauce, those numbers are going to shift way up, so use this as your baseline for a straightforward, classic American cheeseburger. Precision in math is just as important as precision in baking!
- Serving Size: 1 burger
- Calories: 550
- Fat: 35g (Saturated Fat: 15g)
- Carbohydrates: 30g (Fiber: 2g, Sugar: 6g)
- Protein: 32g
- Sodium: 650mg
This data is based on the core components of the patty, cheese, and bun, without including optional toppings like pickles or condiments (ketchup and mustard will add sodium and sugar, so be mindful if you are tracking those!). Always add a little caution to any homemade estimates!
Share Your Perfect Cheeseburger Creation
Well, you’ve done it! You’ve followed the steps, respected the grind-to-fat ratio, and you now hold a gloriously juicy cheeseburger in your hands. I honestly hope that first bite was everything you dreamed of. Making these simple, perfect classics is what Bliss Batter is all about—taking something familiar and making it taste like the absolute best version possible!
Now that you’ve mastered the perfect patty, I truly want to see it! Sharing your results helps me know that the techniques I share, learned from perfecting batter consistency, are working for you on the grill or stovetop too. It builds our little community here, and I always love seeing how people dress up their creations.
If you loved this recipe and are looking forward to trying more of my foolproof classics, make sure you check out our Privacy Policy so you know how we handle your information! But most importantly, tell me what you thought!
Did you stick to the classic American cheese, or sneak in a slice of pepper jack? Did you master the dimple trick? Drop a comment below, give this recipe a rating, and let me know how this compares to your previous attempts at the best homemade cheeseburger. Happy cooking, everyone, and I can’t wait to hear how you enjoyed your perfect burger night!
PrintClassic Juicy Cheeseburger Recipe
Make a satisfying, classic American cheeseburger at home with this recipe focused on juicy patties and perfect melt.
- Prep Time: 10 min
- Cook Time: 10 min
- Total Time: 20 min
- Yield: 4 servings 1x
- Category: Dinner
- Method: Stovetop or Grilling
- Cuisine: American
- Diet: Low Lactose
Ingredients
- 1.5 lb ground beef (80/20 recommended)
- 1 teaspoon kosher salt
- 0.5 teaspoon black pepper
- 4 slices American cheese
- 4 hamburger buns
- 2 tablespoons butter, softened
- Optional Toppings: Lettuce, tomato slices, onion slices, dill pickle chips, ketchup, mustard
Instructions
- Gently form the ground beef into four equal patties, slightly wider than the buns. Do not overwork the meat. Press a small dimple into the center of each patty to prevent bulging during cooking.
- Season both sides of the patties generously with salt and pepper.
- Heat a cast iron skillet or grill to medium-high heat. If using a skillet, add a small amount of neutral oil if your meat is very lean.
- Cook the patties for 3 to 4 minutes per side for medium-rare, adjusting time for your preferred doneness. Do not press down on the burgers while cooking.
- During the last minute of cooking, place one slice of American cheese on top of each patty. Cover the skillet or close the grill lid briefly to help the cheese melt quickly.
- While the burgers cook, spread a thin layer of softened butter on the cut sides of the hamburger buns. Toast the buns in a separate pan or on the grill until lightly golden brown.
- Assemble the cheeseburgers: Place the cheesy patty on the bottom bun. Add your desired toppings like lettuce, tomato, onion, and condiments. Top with the toasted top bun.
Notes
- For the juiciest burger, use ground beef with at least 20% fat content.
- If you are looking for simple meal planning ideas to go with your burgers, consider pairing them with a quick side salad instead of fries.
- Toasting the bun prevents it from getting soggy from the burger juices.
Nutrition
- Serving Size: 1 burger
- Calories: 550
- Sugar: 6
- Sodium: 650
- Fat: 35
- Saturated Fat: 15
- Unsaturated Fat: 20
- Trans Fat: 1
- Carbohydrates: 30
- Fiber: 2
- Protein: 32
- Cholesterol: 95