
Oh, there is just nothing like that first bite of a perfect, piping-hot, melt-in-your-mouth confection, is there? Forget store-bought—we are going for that airy, cloud-like texture that makes you close your eyes when you eat it. If you’ve ever dreamed about mastering the legendary, ridiculously soft **Glazed donuts** right in your own kitchen, you’ve come to the right place. I’m Claire, and while I spent years planning corporate events, my real joy was always in the batter. I started this space, Bliss Batter, because I want everyone to feel that simple bliss I found baking in my grandmother’s kitchen. You can read more about my journey over on the About Us page! My goal is to give you a rock-solid, foolproof **homemade glazed doughnut recipe** that doesn’t just taste good, but actually achieves that iconic, tender crumb. Trust me, this process is easier than you think!
- Why This Homemade Glazed Doughnut Recipe Delivers Bliss
- Gathering Ingredients for Perfect Glazed Donuts
- Step-by-Step Instructions for Yeast Donut Proofing and Dough Prep
- How to Fry Donuts: Achieving Golden Perfection
- Creating the Signature Vanilla Sugar Glaze for Donuts
- Tips for Copycat Krispy Kreme Donuts Success
- Storing and Reheating Your Homemade Glazed Donuts
- Frequently Asked Questions About Glazed Donuts
- Estimating the Nutrition for Your Glazed Donuts
Why This Homemade Glazed Doughnut Recipe Delivers Bliss
Listen, I know making yeast-raised doughnuts seems intimidating. People think they need specialized equipment or maybe a pastry degree, but that’s just not true! My mission here at Bliss Batter is to take the guesswork out of incredible treats. This **Glazed donuts** recipe is worth every minute you put in because the payoff—that light, airy texture—is unmatched.
Here is why this recipe is going to be your new favorite weekend project:
- The Incredible Texture: We use just enough richness in the dough to make it tender, but not so much that it gets heavy. It’s the secret to that melt-away quality.
- The Perfect Glaze: This isn’t a thick, cloying frosting. It’s a thin, crackly **vanilla sugar glaze for donuts** that sets beautifully shiny without making a giant mess.
- Totally Foolproof Proofing: I break down the two necessary rises so you know exactly what “puffy” means, giving you the confidence to nail the texture every time.
If you’re looking for more amazing desserts to try once you conquer these, check out all my favorite recipes over at our dessert collection!
Gathering Ingredients for Perfect Glazed Donuts
Alright, this is where we start locking in that amazing texture. Remember my promise? Quality you can taste! While you don’t need specialty store items, the basic ingredients matter a ton here for our **Glazed donuts**. You have to treat yeast right, and you absolutely must have room-temperature eggs—don’t skip that little step, it helps the dough come together so much smoother!
Here is what you need to pull together before you start mixing:
- 1 cup whole milk, warmed to 105-115°F (This is crucial for waking up that yeast!)
- 2 1/4 teaspoons active dry yeast
- 1/2 cup granulated sugar, plus 2 cups for glaze
- 2 large eggs, room temperature
- 1/4 cup unsalted butter, melted
- 1 teaspoon salt
- 4 cups all-purpose flour, plus more for dusting
- Vegetable oil, for frying (I use canola or standard veggie oil—nothing too flavorful)
- 1 teaspoon vanilla extract
- 2 tablespoons light corn syrup (This is our secret weapon for the glaze!)
We focus on clarity here, not complex pantry stocking. If you’re trying to sneak in a quick dinner recipe next, this prep is totally worth it. Now, let’s talk about *why* these specific things are on the list.
Ingredient Notes and Substitutions for Your Glazed Donuts
Feel free to use 2% milk instead of whole milk, but whole milk just adds the extra fat needed for richness. And here’s the real secret: that small amount of corn syrup in the glaze? Don’t skip it! It’s what keeps the **Glazed donuts** glaze from crystallizing instantly and makes it that shiny, slightly chewy coating we all love. We want that thin, perfect crackle, remember?
Step-by-Step Instructions for Yeast Donut Proofing and Dough Prep
Okay, here comes the fun and slightly messy part: making the dough! We have to wake up that yeast first, which is honestly the most magical little step. Pour that warmed milk—it needs to be like a cozy bath, not hot tub temperature—and stir in a little sugar and the yeast. If you don’t see foam after about ten minutes, your yeast did not make it, and we need to start over, simple as that!
Once you have your yeast activated, dump in the rest of the sugar, your room-temperature eggs, the melted butter (make sure it’s not too hot!), and salt. Then, we start adding the flour slowly. I mix this until it’s just shaggy, and then it’s time to get our hands dirty. Turn it out onto a lightly floured counter and knead, knead, knead! You’re aiming for elastic, smooth dough. I always press a finger into it when I think it’s ready; if it slowly springs back, it’s perfect. That elasticity is what gives our **Glazed donuts** that signature airiness. If you want to see some other amazing things you can make using yeast, I have a blast with these recipes over at my breakfast hub!
Mastering the Two Rises for Light Glazed Donuts
This recipe requires patience, and it all comes down to mastering your **yeast donut proofing**. The first rise is the big one—let it double in size, usually about 90 minutes. This builds flavor! After you punch it down and cut your shapes, they need that *second*, shorter rise. This second rise is critical because it inflates the donuts just enough so they float prettily in the oil. Do not rush this second proofing, but also, don’t let them go too long. Over-proofed **Glazed donuts** deflate instantly in the hot oil, and we definitely don’t want that heavy, sad result!
How to Fry Donuts: Achieving Golden Perfection
Now we get to the part everyone secretly fears: plunging beautiful, puffy dough into hot oil! This is where knowing exactly **how to fry donuts** separates the perfect batch from the greasy mess. My number one, non-negotiable rule is temperature control. You need a deep pot—a Dutch oven works great—with at least two or three inches of vegetable oil, and you absolutely must have a thermometer. Set that oil to exactly 350°F.
If the oil is too low—say, 320°F—the dough just soaks up the fat before the crust sets, and you end up with heavy, oily **Glazed donuts**. Speaking of heavy, remember what I said about keeping the donuts light? If your oil gets too hot, maybe 385°F, the outside burns to a dark brown before the inside even cooks through. That’s no good for anyone!
I’ll never forget the first time I flipped my very first batch. I had been so nervous about the heat, but when I lifted that first one out—it was a perfect, even golden tan! It didn’t stick to the rack, and it wasn’t scorched. Seeing that perfect color gave me such a rush! Gently fry only two or three at a time so you don’t drop the oil temperature too much. We want that beautiful, swift cook. Next, we’ll talk about the glaze, but for more amazing fried treats, check out my recipe for fried mac and cheese bites!
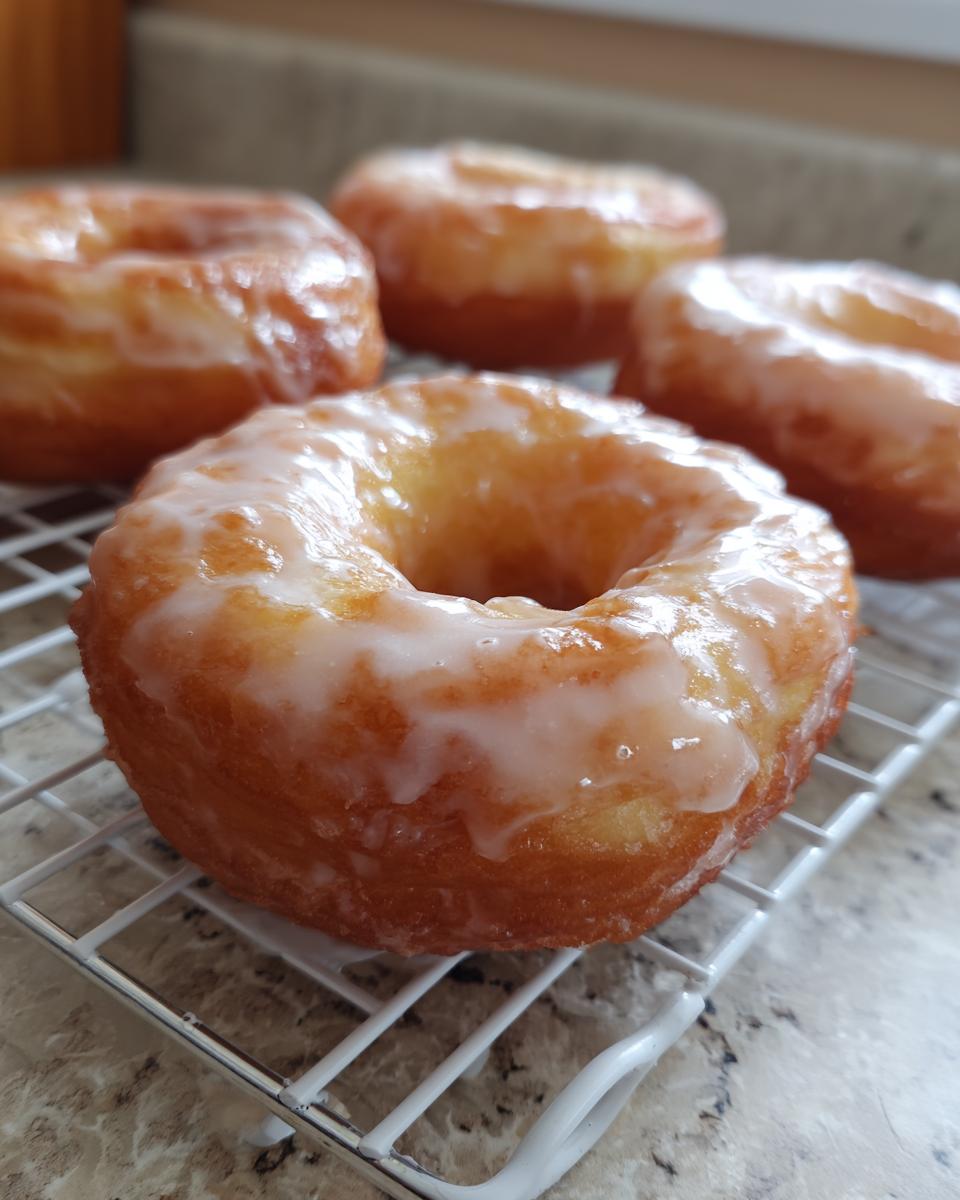
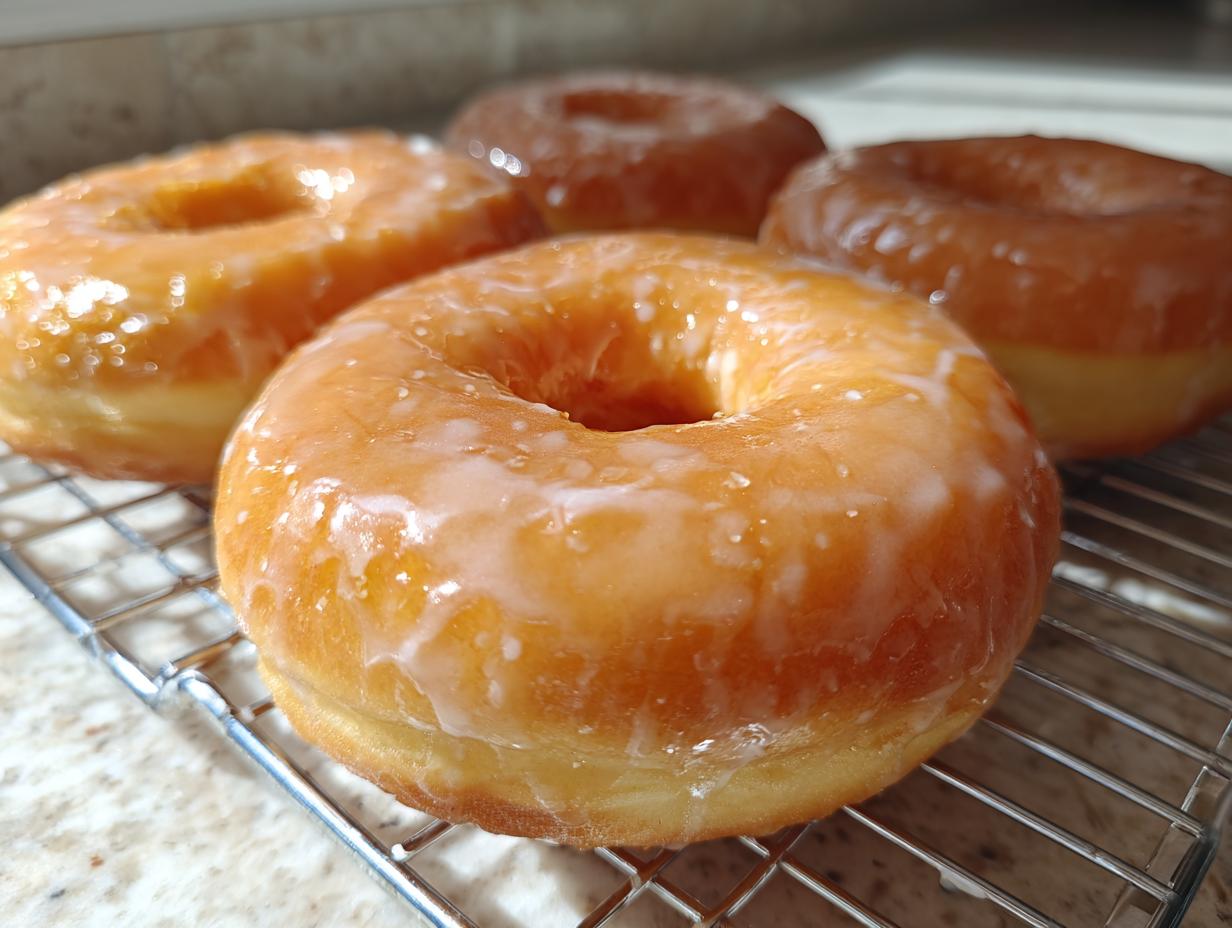
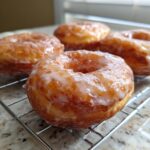
Creating the Signature Vanilla Sugar Glaze for Donuts
Okay, the frying is done, and the aroma in your kitchen right now is probably making you dizzy! Resist the urge to eat them plain—we have to glaze these babies properly to turn them into magnificent **Glazed donuts**. This is where that little touch of corn syrup really earns its keep. It keeps the sugar from getting grainy and gives us that thin, glossy shell that cracks delicately when you bite into it.
To mix up the perfect **vanilla sugar glaze for donuts**, whisk together the two cups of granulated sugar with your vanilla extract and that essential light corn syrup. Now, here’s the trick: add about a half cup of very hot water. Whisk it until it looks smooth, just like liquid silk. If it seems too thick—like it’s going to coat the donut too heavily—just buzz in a tiny splash more hot water until it pours easily off the whisk.
The application timing is everything. If your **Glazed donuts** are cold, the glaze will set instantly and look bumpy. If they are piping hot, they will soak up the glaze like a sponge and disappear! You want them warm—just cool enough so you can handle them without getting burned. Dip the top side, let the extra drip off for just a second, and then flip them over onto that wire rack. Seriously, this warm-dip technique makes all the difference. Speaking of delicious pairings, if you need a lovely beverage to go with them, you have to try the recipe for my salted caramel latte!
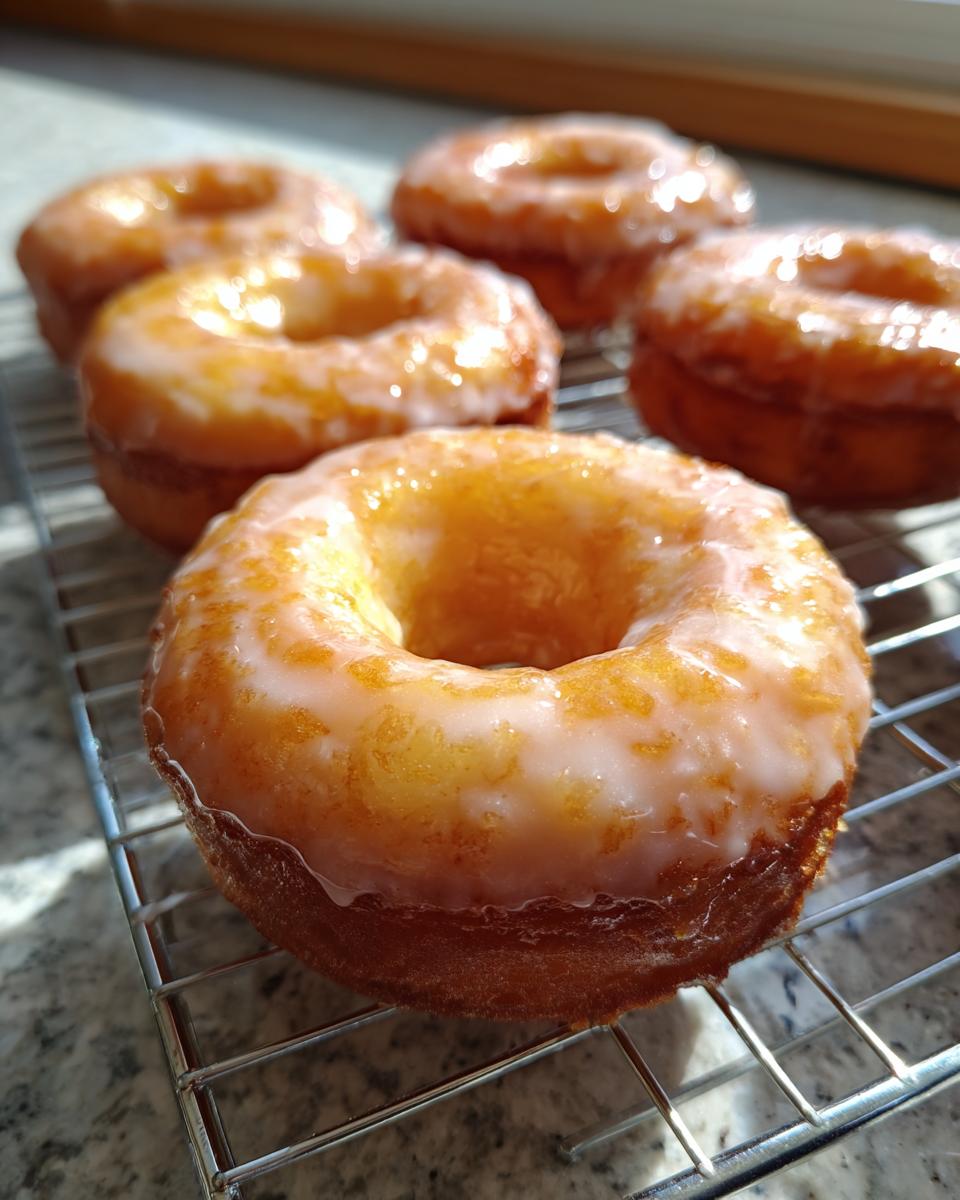
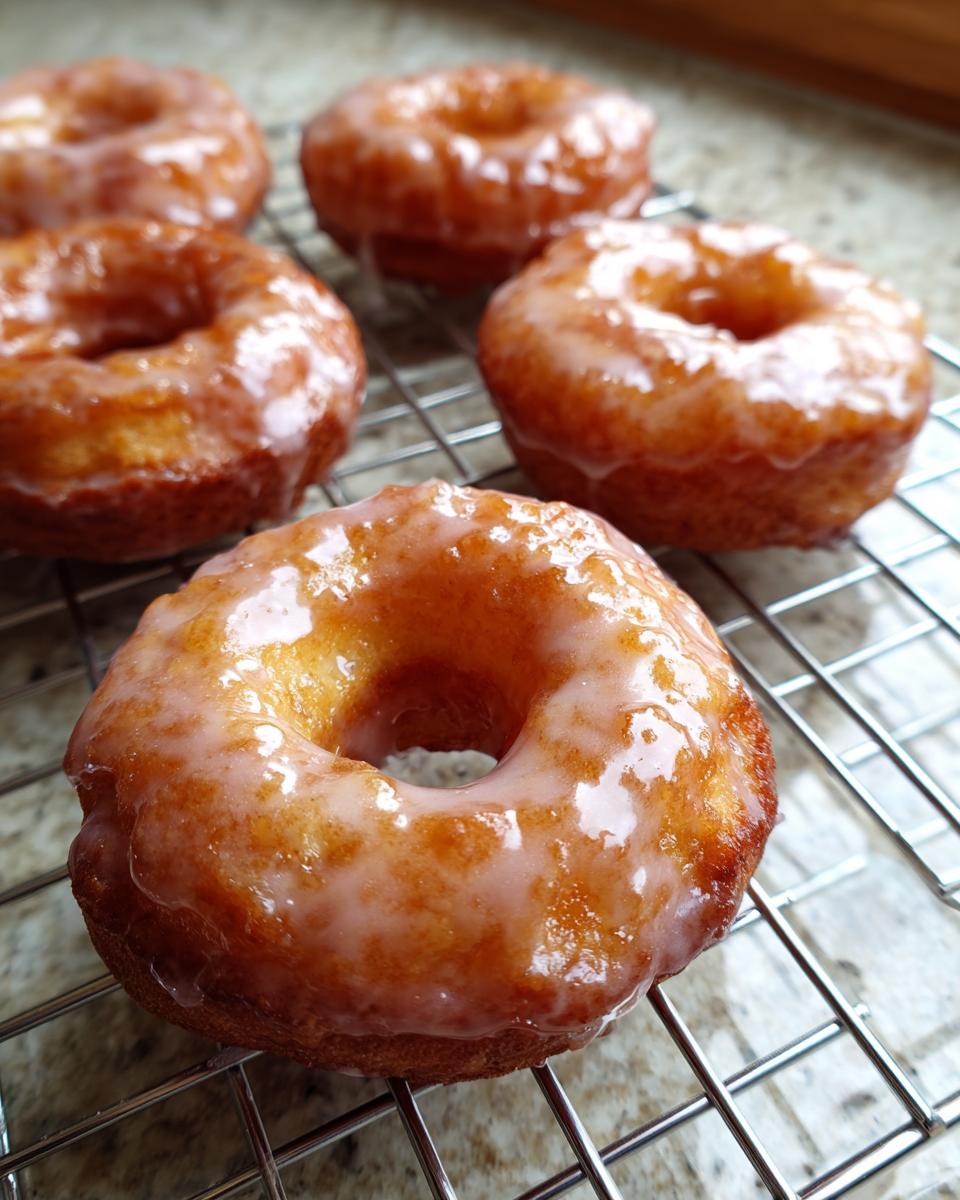
Tips for Copycat Krispy Kreme Donuts Success
Everyone dreams of that machine-made magic, right? Achieving true **copycat Krispy Kreme donuts** at home is totally possible, but it comes down to two very specific stages. You have to treat the dough thin and act fast when glazing. When you roll out the dough for cutting, don’t be timid! You really need to roll it down to about 1/2 inch thick. Any thicker, and they puff up too much in the fryer and don’t resemble that light, flat-ish shape we know and love.
The second key thing for perfect **Glazed donuts** is speed on the rack. As soon as they come out of the oil and drain for just a *second*, they need to hit that warm glaze. Immediate contact ensures the glaze melts slightly and bonds perfectly to the warm surface, creating that thin, satisfying shell. If you wait too long, the donut cools down, and the glaze just sits on top looking dull and thick. I love making these when I’m whipping up my copycat rolls recipes, too!
Storing and Reheating Your Homemade Glazed Donuts
Let’s be honest, these **Glazed donuts** are built to be eaten moments after they come off the rack. That soft, fresh texture disappears within hours, unfortunately! If you have any survivors the next day, don’t throw them out.
Store them loosely covered at room temperature—never in the fridge, which ruins the texture. If you want to bring some of that magic back, just pop a donut in the microwave for about 8 to 10 seconds. It softens them up beautifully, warming the glaze just enough without turning them into greasy puddles. They’ll taste almost *just* made!
Frequently Asked Questions About Glazed Donuts
I get asked so many questions about these beauties! It just proves how much everyone loves making homemade **Glazed donuts**. Here are a few things I hear all the time when folks are trying this recipe for the first time.
Can I bake these Glazed Donuts instead of frying?
Oh, honey, you *can* bake them, but they won’t be the same! When you bake them, you get something more like a soft, sweet bread roll, certainly not the texture we are aiming for here. Frying is what creates the unique, delicate crust and that wonderful lift that makes these light and airy. For the true cloud-like experience, frying is non-negotiable for this **homemade glazed doughnut recipe**.
What temperature should the oil be when I fry donuts?
This is probably the most important technical number! You absolutely must maintain that oil temperature around 350°F. If you let it dip down even a little bit, the donuts just soak up the oil and come out tasting greasy instead of light. Keep that thermometer close and watch it like a hawk! Consistent heat equals perfectly golden **Glazed donuts**.
How long does the yeast donut proofing take exactly?
This is where patience pays off! For the first rise, once the dough is mixed and covered, usually give it an hour to an hour and a half, or until it’s truly doubled. Then, after you cut the shapes, the second **yeast donut proofing** is shorter—about 30 to 45 minutes, until they look puffy and jiggly. If you rush that second rise, they won’t float right in the oil, so it’s worth the wait!

If you have any more specific questions about the process—maybe about working with the dough or getting that glaze just right—feel free to reach out to me on my contact page!
Estimating the Nutrition for Your Glazed Donuts
Now, just because we are making these incredible, heavenly **Glazed donuts** at home doesn’t mean we ignore the facts, right? Because we are frying them and using a rich glaze, these are definitely an occasional treat! This nutritional data is just an estimate based on the ingredients provided, so keep that in mind when you’re planning out your week. Transparency matters to me, just like having a foolproof recipe matters!
For one of these beauties, you’re looking at roughly:
- Calories: 250
- Carbohydrates: 33g
- Fat: 12g
- Protein: 4g
We know they are sugary, but goodness, every single one is worth it!
PrintClassic Homemade Glazed Donuts
Make light, airy, yeast-raised donuts with a simple, sweet vanilla glaze at home.
- Prep Time: 45 min
- Cook Time: 20 min
- Total Time: 2 hours 45 min
- Yield: 12-15 donuts 1x
- Category: Dessert
- Method: Frying
- Cuisine: American
- Diet: Vegetarian
Ingredients
- 1 cup whole milk, warmed to 105-115°F
- 2 1/4 teaspoons active dry yeast
- 1/2 cup granulated sugar, plus 2 cups for glaze
- 2 large eggs, room temperature
- 1/4 cup unsalted butter, melted
- 1 teaspoon salt
- 4 cups all-purpose flour, plus more for dusting
- Vegetable oil, for frying
- 1 teaspoon vanilla extract
- 2 tablespoons light corn syrup
Instructions
- Activate the yeast: In a large bowl, combine the warm milk, yeast, and 1 tablespoon of the granulated sugar. Let stand for 5-10 minutes until foamy.
- Mix the dough: Add the remaining 1/2 cup sugar, eggs, melted butter, and salt to the yeast mixture. Stir well. Gradually add the flour, mixing until a shaggy dough forms.
- Knead: Turn the dough onto a lightly floured surface and knead for 6-8 minutes until smooth and elastic.
- First rise: Place the dough in a lightly oiled bowl, turning to coat. Cover and let rise in a warm place for 1 to 1.5 hours, or until doubled in size.
- Cut donuts: Punch down the dough. On a lightly floured surface, roll the dough to 1/2 inch thickness. Use a donut cutter or two different-sized round cutters to cut out the donuts and holes.
- Second rise: Place the cut donuts on parchment-lined baking sheets. Cover loosely and let rise for 30-45 minutes until puffy. Do not overproof.
- Fry: Heat 2-3 inches of vegetable oil in a deep pot or Dutch oven to 350°F. Carefully place 2-3 donuts in the hot oil. Fry for 1-2 minutes per side until golden brown. Remove with a slotted spoon and place on a wire rack set over a baking sheet to drain excess oil.
- Make the glaze: While the donuts cool slightly, whisk together the 2 cups of granulated sugar, vanilla extract, corn syrup, and 1/2 cup of hot water until smooth. If the glaze is too thick, add a teaspoon of hot water at a time.
- Glaze: Dip the warm donuts (top and bottom) into the glaze. Place them back on the wire rack to allow the glaze to set. Serve immediately for the best texture.
Notes
- For the best results, ensure your milk is the correct temperature for activating the yeast.
- If you are interested in structured eating plans, look into options like meal planning or keto meal plan delivery services.
- Keep the oil temperature consistent; if it is too low, the donuts will absorb too much oil and taste greasy.
Nutrition
- Serving Size: 1 donut
- Calories: 250
- Sugar: 20
- Sodium: 150
- Fat: 12
- Saturated Fat: 4
- Unsaturated Fat: 8
- Trans Fat: 0
- Carbohydrates: 33
- Fiber: 1
- Protein: 4
- Cholesterol: 45