
Oh my goodness, if there is one smell that instantly grounds me and makes me feel like everything is right in the world, it’s the smell of hot, crusty bread straight out of the oven. That crackle when you press down on the top? Pure magic! Before Bliss Batter, I thought making truly fantastic artisan bread—the kind with that airy interior and deep, caramelized crust—was reserved only for professionals. But I was so wrong! I promise you, friends, this no-knead method, using a simple Dutch oven, is the absolute secret weapon for getting bakery-style bread at home. I developed this recipe because I needed something foolproof, and trust me, if you can mix four things in a bowl, you can master this loaf! You can read more about my journey from corporate life to sharing these easy recipes over on my About Page, by the way.
- Why This No-Knead Artisan Bread Recipe Works for Beginners
- Ingredients for Your Rustic Artisan Loaf
- Step-by-Step Dutch Oven Bread Baking Guide
- Tips for Success with Your Artisan Bread
- Storage and Reheating Instructions for Your Loaf
- Serving Suggestions for Your Artisan Bread
- Frequently Asked Questions About Artisan Bread
- Alternative Baking Methods for Artisan Bread
- Share Your Easy Artisan Bread Recipe Experience
Why This No-Knead Artisan Bread Recipe Works for Beginners
When I first started baking, I thought the more I kneaded, the better the bread would be. Wrong! That sticky mess was overwhelming! This Easy Artisan Bread Recipe is a game-changer, especially for Beginner Bread Recipes because it completely removes the need to work the dough. Instead, we let time do all the heavy lifting. We use so little yeast and let it sit overnight—that long, slow fermentation is where all the incredible flavor develops. It sounds counterintuitive, but the less you touch this dough, the better the final, rustic loaf tastes!
It’s truly the simplest way to get that stunning, chewy texture without the arm workout. Honestly, I prefer it over many breads that require intense mixing because the flavor complexity just can’t be beaten when you let chemistry work its magic. This is how we create amazing artisan bread for our family every single week now. If you’re looking for other hands-off treats, you have to check out my no-bake chocolate lasagna!
Achieving the Perfect Crusty Homemade Bread
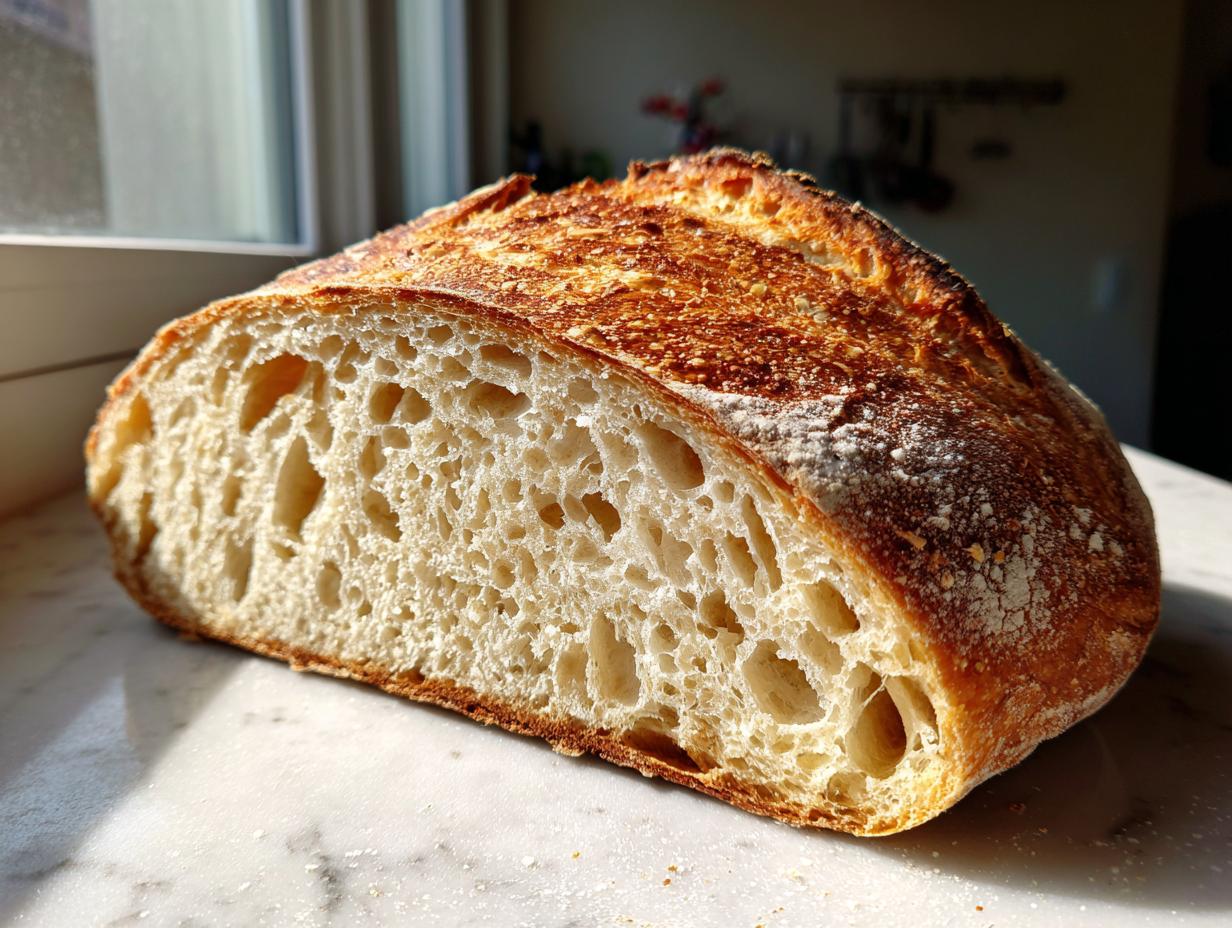
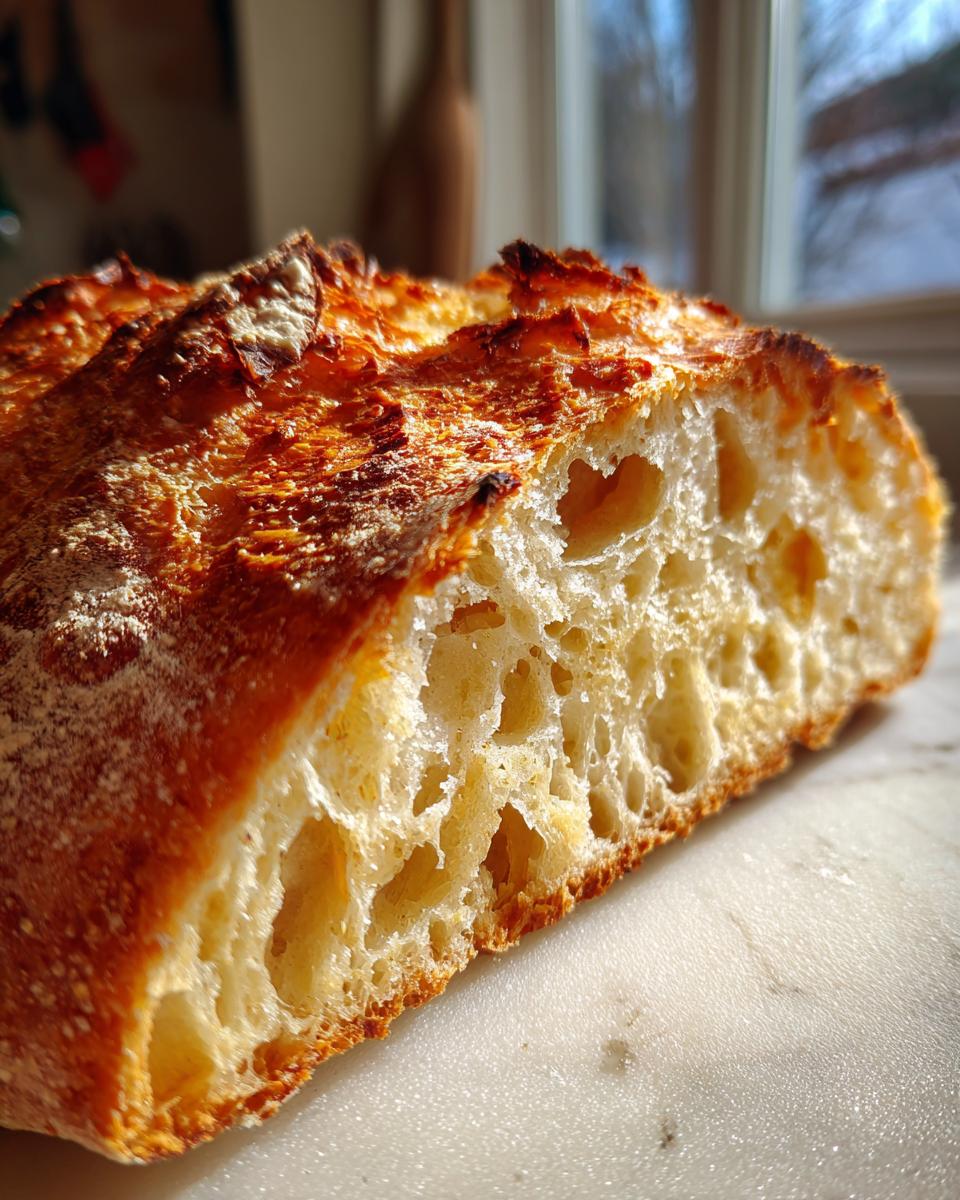
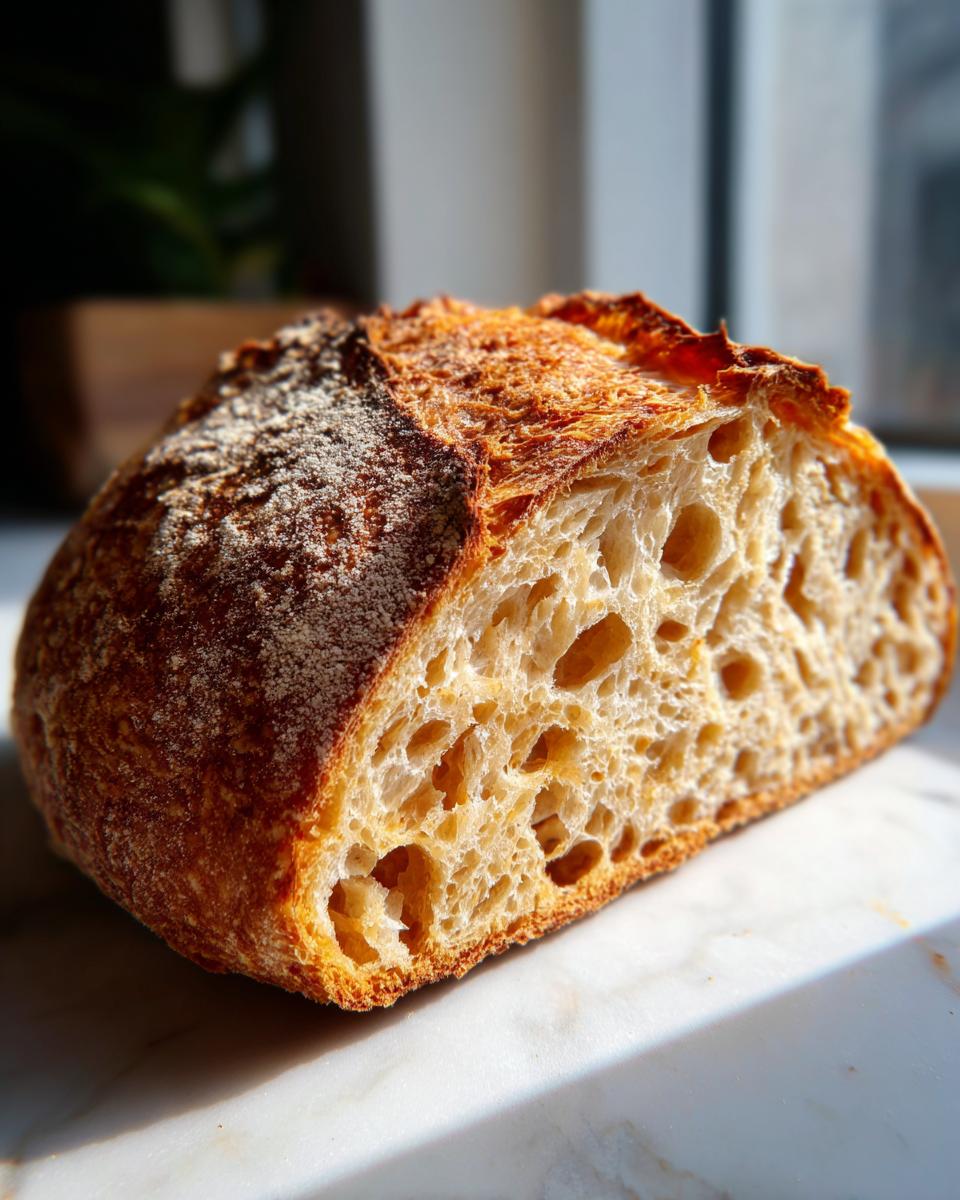
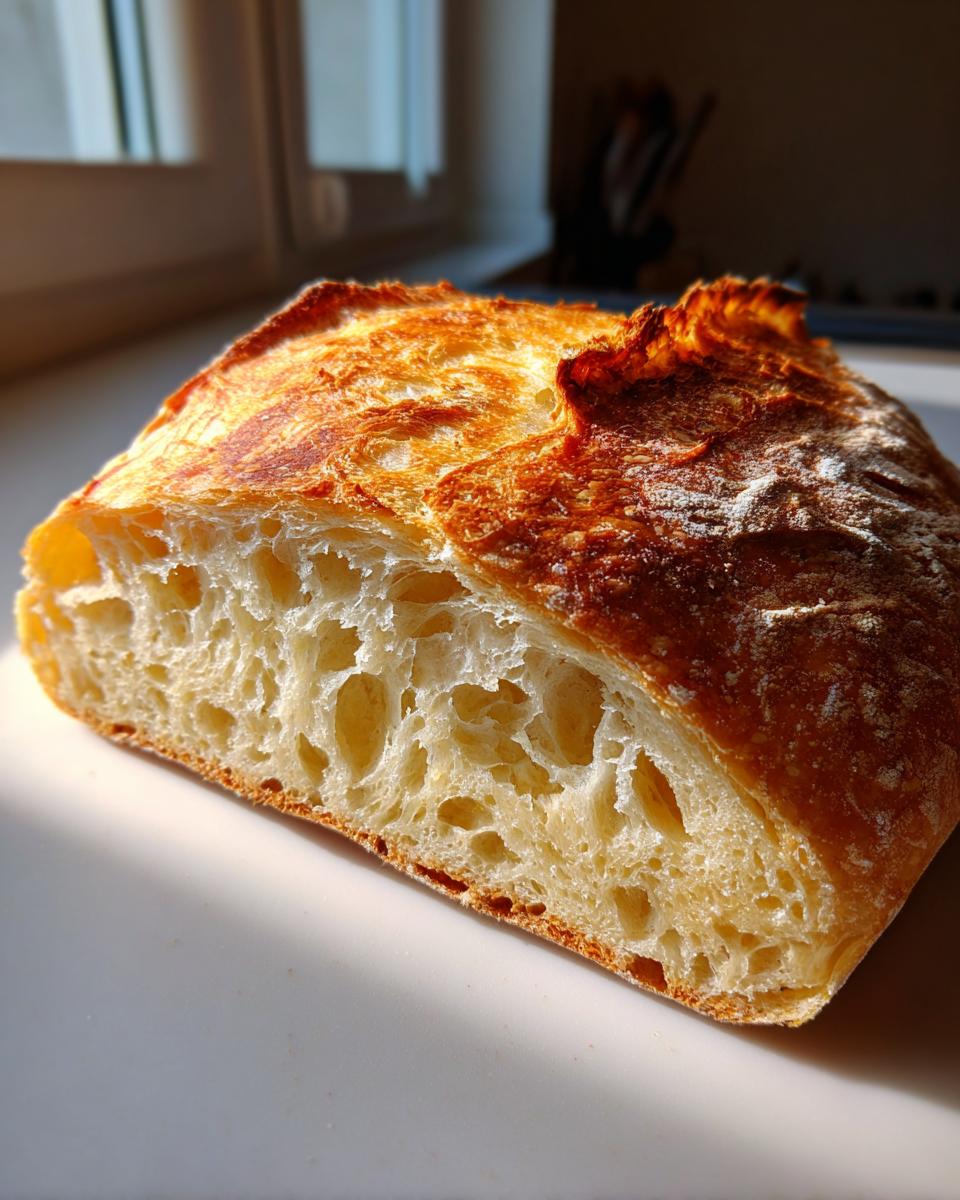
The real secret to that professional look, that beautiful Golden Crust Bread, isn’t in the mixing—it’s in the baking vessel. We rely completely on the Dutch oven here. Think of it as a tiny, personal steam oven! When the pot and lid are super hot, they trap all the moisture released from the dough as steam for the first half of the bake. That steam keeps the exterior soft initially, allowing the dough to expand fully, and then, when you crack the lid, that crust sets up hard and crackly. It’s the best trick for Dutch Oven Bread Baking at home!
Ingredients for Your Rustic Artisan Loaf
This is where I tell you that you absolutely do not need a fancy pantry to make incredible artisan bread. Seriously, we’re keeping this list tiny! This falls right into that wonderful category of a 4 Ingredient Bread. That’s it! Just four things sitting right there in your pantry. Don’t you love that? I’ve listed the exact quantities below, and trust me, measuring accurately here really helps in achieving that perfect rise.
- 3 cups All-Purpose Flour
- 1 1/2 teaspoons Salt
- 1/4 teaspoon Instant Yeast
- 1 1/2 cups Cool Water
If you want to try another simple loaf soon, my pumpkin beer bread is another winner!
Ingredient Clarity and Flour Choice
Now, let’s talk flour. We aren’t chasing bread flour here; regular old All Purpose Flour Bread works perfectly for this recipe. I know some recipes use active dry yeast, but here we need instant yeast, please! Because our dough is mixed cold and rests for so long without any activation step, the instant kind incorporates better and begins working immediately with the flour. This is fantastic for Simple Bread Making!
Step-by-Step Dutch Oven Bread Baking Guide
Okay, this is where the actual magic happens, but trust me, it’s mostly hands-off! This whole process is the core of our No Knead Baking Guide. After you mix it up, you just walk away. Seriously! The beauty of Dutch Oven Bread Baking is that the long, slow fermentation means zero effort from you until it’s time to shape the loaf. It feels too easy to yield such a spectacular Artisan Bread, but that long rest is non-negotiable for the flavor we want.
Mixing and The Long Rest for Your Artisan Bread
Step one is just combining those four ingredients. Get a big bowl, toss it all in, and grab a wooden spoon—or even your hands if you don’t mind a sticky situation! Mix it until you have a single, shaggy mass that looks totally unappealing. Don’t try to smooth it out! Cover that bowl tightly. Now, put it somewhere that’s room temperature, maybe 68 to 72 degrees, and just forget about it for 12 to 18 hours. When you come back, wow, will it look alive and bubbly!
Preheating and Loading the Dough
This part requires a little focus for about five minutes, so pay attention! About half an hour before you plan to bake, put your Dutch oven—lid and all—into the oven and heat everything up to 450°F (232°C). You want that metal screaming hot. Use parchment paper under the dough ball for the transfer; it’s your hero here. Carefully take that scorching hot pot out (use amazing mitts!) and gently drop the dough, still on its parchment paper, right into the center. This shocking heat is what gives us that amazing oven spring and the start of that perfect crust! If you need a fun side to this bread, you should definitely check out the recipe for my soft pretzels next time!
Tips for Success with Your Artisan Bread
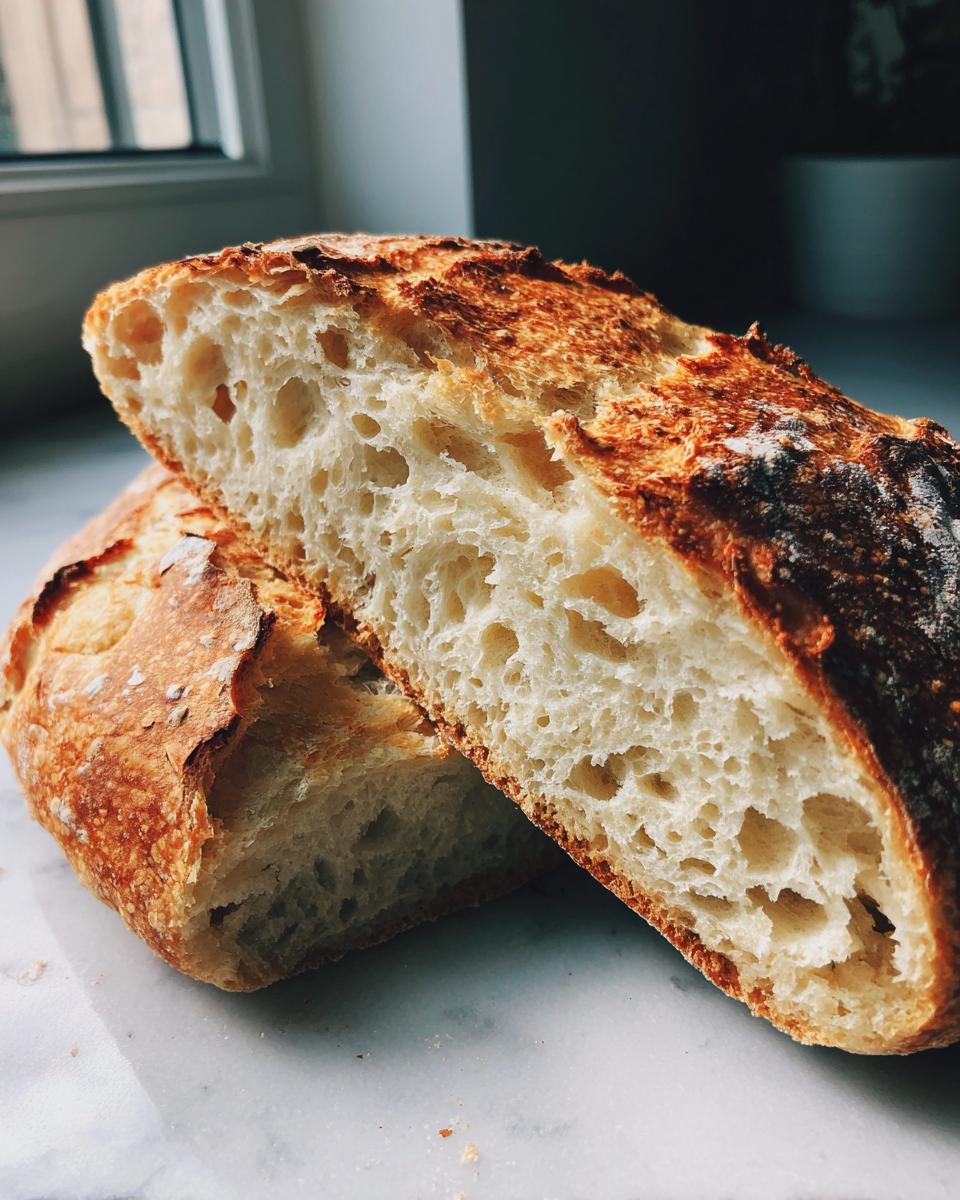
Making this a regular staple in your kitchen definitely gets easier the second time around, I promise! These are just a few of my favorite Homemade Bread Baking Tips to ensure you always get that bakery-quality loaf. The biggest rookie mistake I see people make is pulling the bread out too soon because they are afraid of burning the crust. Resist that urge! That deep color is flavor, folks. If you follow the timing, you get that gorgeous, chewy texture we all crave in a truly great artisan bread.
Also, don’t even think about slicing it warm! I know that heavenly smell makes it impossible to wait, but slicing into moist bread releases all the steam, which collapses the crumb structure we worked so hard to build during the bake. Patience here pays off big time for that perfect interior. Speaking of amazing smells, once you try this, you might want to see how I handle my homemade cinnamon rolls next!
Achieving a Soft Crumb Bread Recipe Texture
For that ideal Soft Crumb Bread Recipe texture, the final stage is key. After those initial 30 minutes with the lid on, remove the top of the Dutch oven. This is when the crust hardens up and gets those beautiful deep golden tones we talked about. You leave it uncovered for the remaining 10 to 15 minutes. And remember my biggest warning: let it cool completely on a wire rack before you slice! It needs time for the internal starches to set up exactly right.
Storage and Reheating Instructions for Your Loaf
Okay, you have perfected your artisan bread, and now you have leftovers—which is a rare and wonderful problem! Do not, under any circumstances, store this beautiful crusty loaf in a plastic bag. That’s the fastest way to steam all the crunch right out of your crust. I wrap mine tightly in a clean kitchen towel and leave it on the counter for up to three days. It keeps the inside soft and usable.
When you want that crackle back? Pop a slice right back into a 350°F oven for about four minutes. Instant revival! You can also use that fresh slice for dipping later; perhaps into a bowl of my slow-cooker apple butter if you’re feeling sweet, or saving it for soup!
Serving Suggestions for Your Artisan Bread
Now that you have this incredibly flavorful loaf of artisan bread, what do you do with it? Honestly, the best way is just tearing off chunks hot from the cooling rack with a smear of good salted butter. But if you’re serving it alongside a meal, it begs for dipping! This bread is phenomenal used to soak up every last bit of a rich, comforting broth. You absolutely must try it alongside my recipe for classic tomato soup—it’s the pairing I always make when I bake this loaf!
Frequently Asked Questions About Artisan Bread
I know you might have a few lingering questions when attempting your first loaf of artisan bread, especially since this is a No Knead Bread Homemade method. Don’t worry, these are the exact things I worried about when I first started trying to achieve that Bakery Style Bread At Home look!
Can I skip using the Dutch oven?
Oh, I wish I could tell you a secret way around it, but for this specific texture—that contrast between the thick, crackly crust and the airy center—the Dutch oven is critical! It traps steam, which is essential. If you absolutely can’t use one, you need a baking stone and a separate pan in the bottom of the oven filled with boiling water poured in right when you load your bread. It’s messier, but you need that intense burst of steam at the start!
I’m in a rush! Can this be a Quick Artisan Bread?
This recipe is famous for its flavor, which takes time (12-18 hours). If you need bread faster, you’d have to switch methods completely and use a recipe designed for shorter rises where you knead the dough vigorously. For this specific no-knead formula, rushing the fermentation time will give you a dense, flatter loaf lacking that signature flavor profile.
What kind of flour is best for this recipe?
Stick with standard All Purpose Flour! I know it sounds too simple, but the long fermentation process develops the gluten structure beautifully, so you don’t need the higher protein found in specialty bread flours. Keep it simple; it works every time.
Once you master this base recipe, try making a grilled cheese with it—my recipe for the ultimate grilled cheese needs a solid slice of bread like this!
Alternative Baking Methods for Artisan Bread
I get asked all the time what to do if you just don’t have a heavy Dutch oven kicking around; it happens! While the Dutch oven really wins because it traps steam so efficiently, we can improvise. If you have a baking stone or even just a heavy-duty sheet pan, you can still get great results. The trick is adding that steam back into the oven separately to get that beautiful spring and initial crust formation we love so much.
Here is what I do: Place a small, old metal pan (one you don’t mind potentially rusting slightly) on the very bottom rack while the oven preheats. When you load your loaf onto the hot baking stone or pan, carefully pour about a cup of boiling water—be so careful here—into that bottom pan right as you shut the door quickly. This creates the necessary steam bath. This method is maybe my second choice, right after my favorite deep-dish pizza recipe, but it totally works for achieving that golden exterior on rustic loaves too!
Share Your Easy Artisan Bread Recipe Experience
I really hope you give this Easy Artisan Bread Recipe a try! I always get so excited when I see photos of your loaves in my inbox. If you made this, please come back and leave a rating so other beginners know they can do it too! Tell me: what did you serve your beautiful, chewy homemade bread with? I’m always looking for new ideas!
If you have any questions at all while you’re waiting for that dough bubble, send me a message over on my contact page. Happy baking, friends!
PrintEasy No-Knead Artisan Bread with a Perfect Crust
Make bakery-style artisan bread at home using this simple, no-knead recipe. This method uses a Dutch oven to achieve a wonderfully crusty exterior and a soft, airy interior with minimal effort, making it ideal for beginners.
- Prep Time: 10 min
- Cook Time: 45 min
- Total Time: 13 hours 55 min
- Yield: 1 loaf 1x
- Category: Baking
- Method: Baking
- Cuisine: American
- Diet: Vegetarian
Ingredients
- 3 cups All-Purpose Flour
- 1 1/2 teaspoons Salt
- 1/4 teaspoon Instant Yeast
- 1 1/2 cups Cool Water
Instructions
- In a large bowl, whisk together the flour, salt, and yeast.
- Pour in the cool water and mix with a wooden spoon until a shaggy, sticky dough forms. Do not knead.
- Cover the bowl tightly with plastic wrap and let the dough rest at room temperature for 12 to 18 hours. The dough will become bubbly and increase in volume.
- After the long rest, gently scrape the dough out onto a lightly floured surface. Fold the dough over itself a few times to form a rough ball.
- Place the dough ball on a piece of parchment paper, cover it loosely with a clean kitchen towel, and let it rest for 30 minutes.
- About 20 minutes before the end of this rest period, place a 5- to 6-quart Dutch oven, with the lid on, into your oven. Preheat the oven to 450°F (232°C).
- Carefully remove the hot Dutch oven from the oven. Lift the dough using the parchment paper and gently lower it into the hot pot.
- Cover the Dutch oven with the lid and place it back into the oven. Bake for 30 minutes.
- Remove the lid and continue baking for another 10 to 15 minutes, until the crust is deep golden brown.
- Carefully remove the bread from the Dutch oven and let it cool completely on a wire rack before slicing.
Notes
- For the best flavor development, allow the dough to ferment for the full 18 hours.
- If you are looking for alternatives to baking from scratch, consider looking into meal planning services for easier weeknight dinners.
- A Dutch oven traps steam, which is essential for that signature crackly crust. Do not skip this step if you want true artisan bread results.
Nutrition
- Serving Size: 1 slice
- Calories: 180
- Sugar: 0.5
- Sodium: 350
- Fat: 0.5
- Saturated Fat: 0.1
- Unsaturated Fat: 0.4
- Trans Fat: 0
- Carbohydrates: 37
- Fiber: 1.5
- Protein: 6
- Cholesterol: 0