
Oh, the sheer magic of a perfectly decorated sugar cookie! That crisp snap, the sweet burst of vanilla, and that beautiful, glossy finish—it turns a simple cookie into edible art, doesn’t it? Decorating can feel intimidating, but I promise you, the secret isn’t in your piping hand; it’s in having the right cookie icing recipe. That’s why I am so excited to share this one with you! This is, truly, the absolute best, easy sugar cookie icing recipe that dries smooth and hard, even for the newest decorator among us.
When I was developing recipes for Bliss Batter, I spent way too much time trying to get the icing just right. I wanted something that was quick, used everyday pantry staples, and didn’t involve messy, complicated steps. This blend gives you that professional, bakery-quality look—smooth, shiny, and sturdy enough to stack—without needing corn syrup or endless hours of waiting. You are going to feel like a decorating pro after just one batch!
- Why This Cookie Icing Recipe Works for Beginners (E-E-A-T Focus)
- Ingredients for the Best Easy Sugar Cookie Icing Recipe
- How To Make Cookie Icing: Step-by-Step Instructions
- Tips for Perfect Piping Icing Recipe Results
- Storing Your Leftover Cookie Icing Recipe
- Troubleshooting Common Issues with Your Cookie Icing Recipe
- Frequently Asked Questions About This Cookie Icing Recipe
- Estimated Nutritional Data for This Glossy Cookie Icing
- Share Your Creations Using This Cookie Icing Recipe
Why This Cookie Icing Recipe Works for Beginners (E-E-A-T Focus)
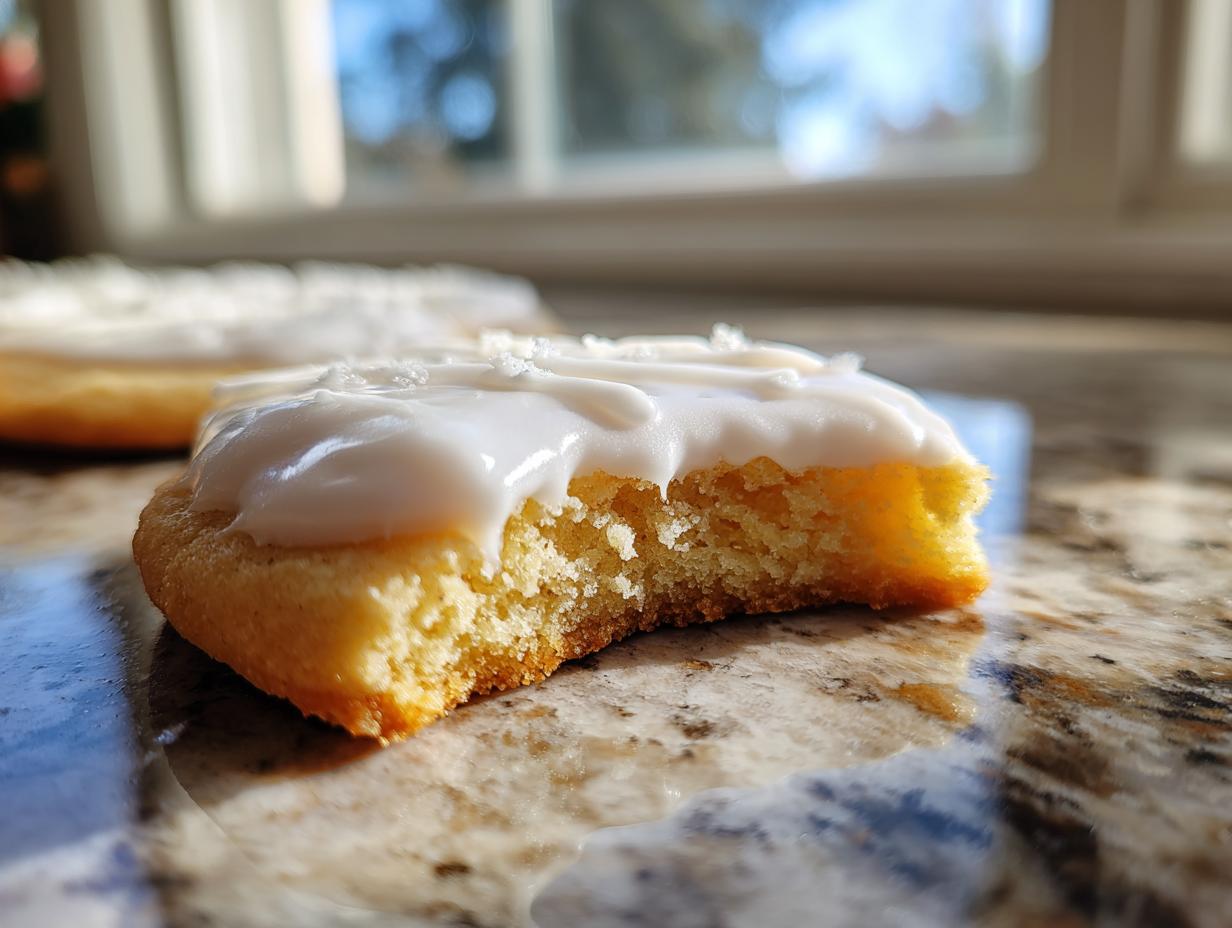
When I say this is the best cookie icing recipe, I mean it! I tested this combination dozens of times because I know how frustrating runny icing can be. This formula delivers every single time: it’s easy to mix up, it pipes cleanly for outlines, and most importantly, it dries to that flawless, smooth, glossy shine you see on professional decorated sugar cookies.
We aren’t going to have any sad, sticky cookies here! Because this is what we do at Bliss Batter—we test until it’s foolproof. For you home bakers trying to make holiday trays or birthday treats, this consistency gives you fantastic reliability.
Achieving That Perfect Icing That Dries Hard
The real superstar here is the meringue powder. While a simple powdered sugar glaze sometimes stays soft or tacky—especially on a humid day—the meringue powder gives us the structure we need. It transforms the mix into something closer to Royal Icing, but way simpler to manage! This means your beautiful designs won’t smudge if someone accidentally bumps the cookie tray.
Ingredients for the Best Easy Sugar Cookie Icing Recipe
The ingredients list for this fantastic Glossy Cookie Icing is so short and sweet! You likely have most of this sitting in your pantry right now. The absolute most crucial step before you start mixing? You have to sift your confectioners’ sugar. Trust me on this one; skipping the sifting is the fastest way to end up with little sugar lumps, and we are aiming for a perfectly smooth cookie topping!
- 4 cups confectioners’ sugar, sifted
- 3 tablespoons meringue powder
- 1/2 teaspoon vanilla extract
- 6 tablespoons warm water (or more, as needed)
Ingredient Notes and Substitutions for Your Cookie Icing Recipe
I love that this icing that dries hard doesn’t strictly require corn syrup, though many recipes do! If you happen to run out of the meringue powder, don’t panic. You can swap it out, but you need to substitute carefully. For every tablespoon of meringue powder, use 1 tablespoon of light corn syrup and 1/4 teaspoon of cream of tartar instead. It’s a little juggling act, but it keeps that smooth cookie topping achievable!
How To Make Cookie Icing: Step-by-Step Instructions
Now for the fun part—making the actual icing! This mixing process is so quick, you’ll have your piping icing recipe ready in minutes. Take your time during the initial mixing to make sure everything incorporates well. You are building the structure that will allow this icing to dry beautifully smooth and hard.
- In a medium bowl, whisk together the sifted confectioners’ sugar and meringue powder until fully combined. Give it a good vigorous whisk!
- Add the vanilla extract and 5 tablespoons of the warm water to the dry ingredients.
- Mix with a hand mixer on low speed until the ingredients are just combined. Be sure to stop and scrape down the sides of the bowl so no dry pockets hide!
- Increase the mixer speed to medium-high and beat for 3 to 5 minutes until the icing is smooth and holds soft peaks. You should see it start to look glossy.
- Check the consistency. For piping outlines, the icing should be thick. Add water, 1 teaspoon at a time, until you reach a thick, workable consistency—it shouldn’t drip off the mixer immediately.
- For flooding the cookies, add more water, 1/2 teaspoon at a time, until the icing flows smoothly off the whisk in a ribbon that slowly disappears back into the bowl (this usually takes about 10-15 seconds for me).
- Use immediately for decorating. If you want color, this is when you add your lovely gel food coloring!
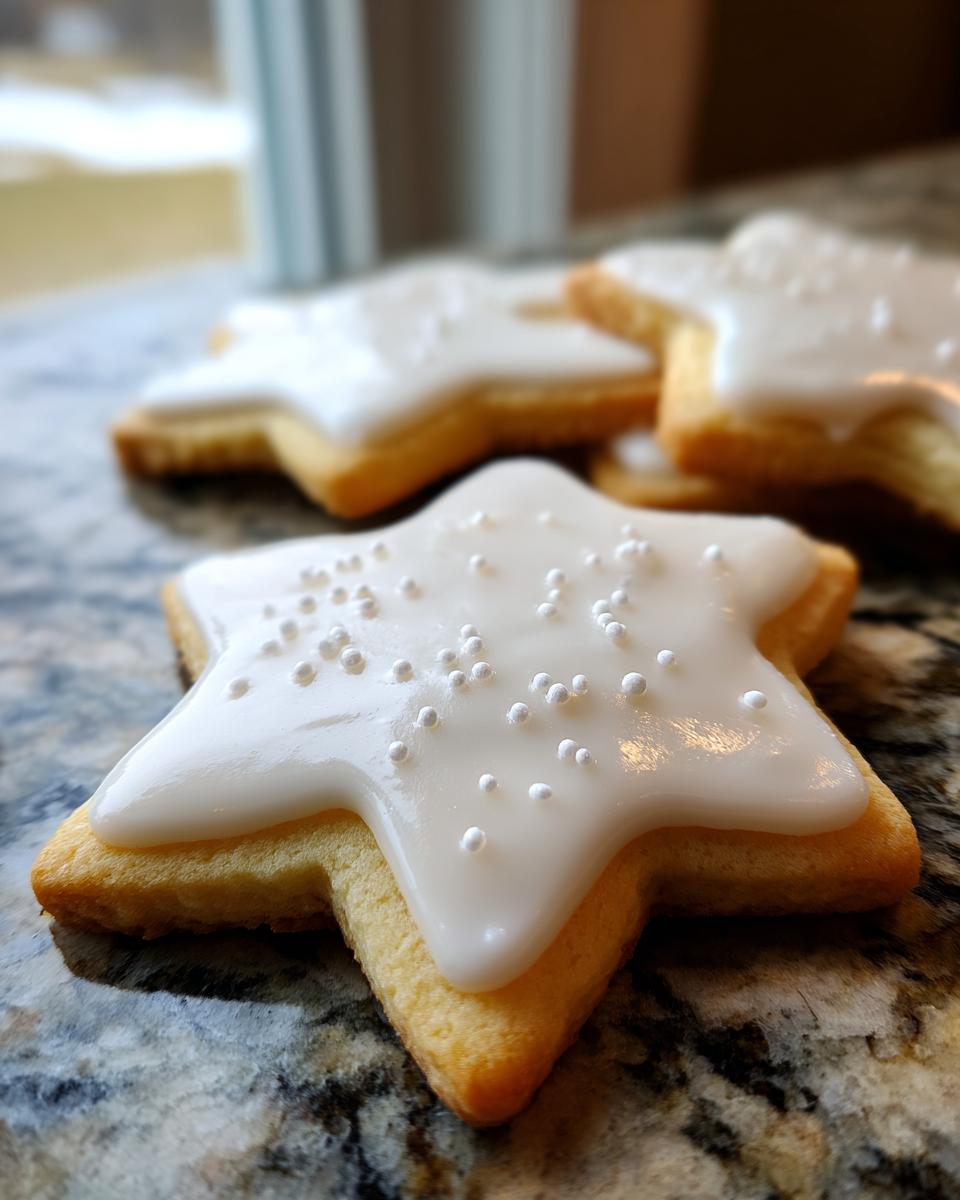
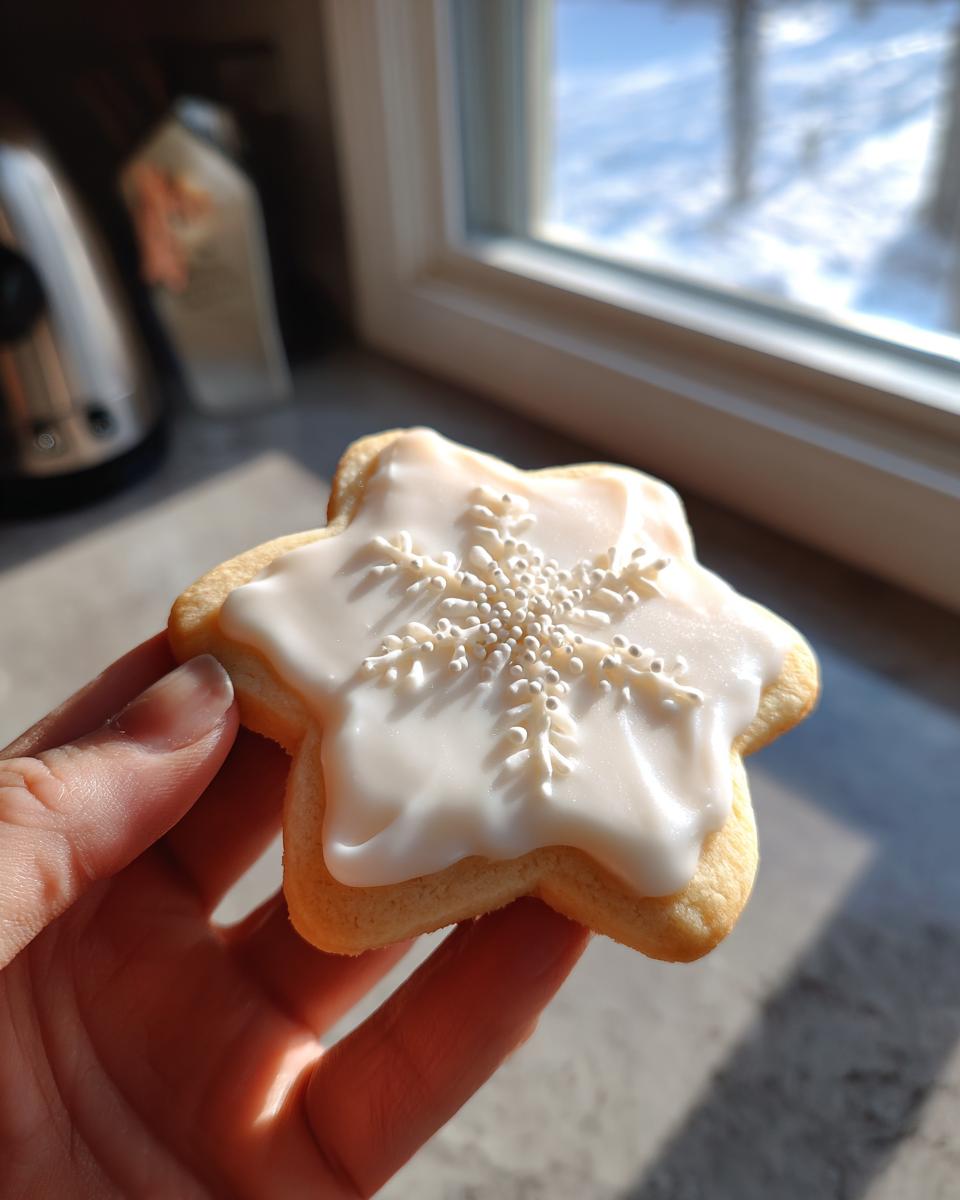
- Apply the icing to your cooled sugar cookies. Let the outlined layer dry completely (about 1 hour) before you even think about flooding.
- Allow the decorated cookies to air dry completely at room temperature until the icing is firm and you have that gorgeous glossy finish, usually between 4 to 8 hours, depending on how humid your kitchen is being.
Mastering Cookie Icing Consistency for Piping and Flooding
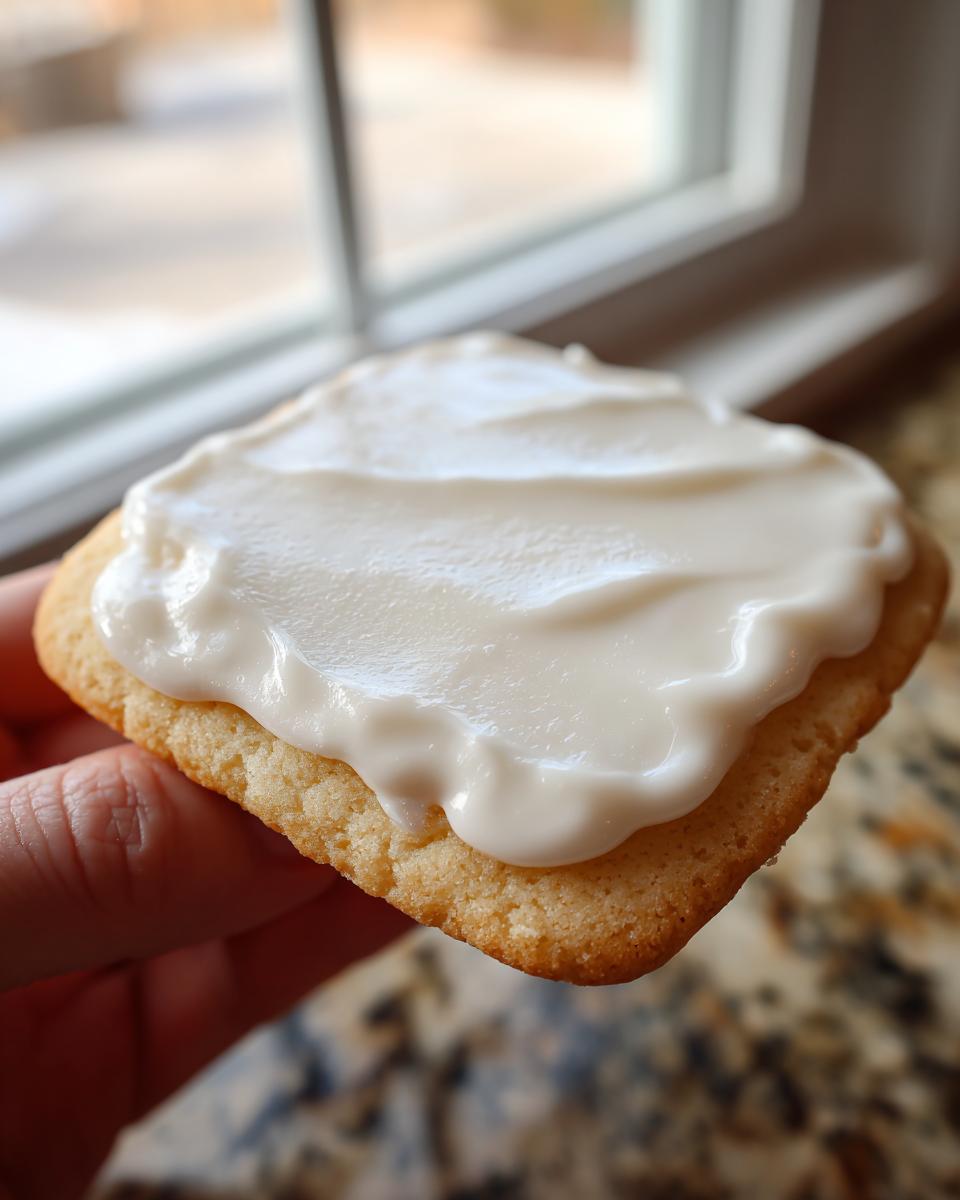
This is where most home bakers get nervous, but honestly, consistency is all about patience and going slow with the liquids. For outlining and creating those crisp edges you want—that’s your thick, workable cookie icing. It should stand up on its own for a moment when you lift the whisk.
When you move to flooding, you are after what we call the soft ribbon stage. You keep adding water, maybe just a teaspoon total, until when you lift the whisk, the icing falls back into the bowl and disappears after about 10 to 15 seconds. If you add too much water, don’t worry! Just slowly whisk in a little more sifted confectioners’ sugar until you get that perfect slow ribbon. See? You’ve got this!
Tips for Perfect Piping Icing Recipe Results
Okay, now that we have the perfect piping icing recipe consistency, let’s talk about making those designs really pop! First off, if you plan on coloring your icing for beautiful holiday cookie decorating, please, please, please use gel food coloring. Liquid coloring adds too much extra water and will ruin that perfect stiff consistency we worked so hard to achieve. A tiny dot of gel goes a long way!
Also, remember that drying time? It matters! If you try to flood over an outline that hasn’t set up (even just slightly tacky), the colors will bleed together, and you won’t get those crisp edges. Give your outline layer at least an hour. And here’s a little secret to keep your working batch from developing that dreaded crust on top while you decorate? Keep a damp paper towel draped loosely over the bowl. It keeps the surface moist enough so you don’t waste any of your gorgeous icing!

Storing Your Leftover Cookie Icing Recipe
You’ve finished decorating, and you have a little bit of that amazing cookie icing that hardens left over—perfect! Don’t let it sit out, or you’ll wake up to discovery that it’s formed a hard shell on top. To store unused icing, grab some plastic wrap and press it down directly onto the surface of the icing in the bowl. I mean really press it down so there’s zero air contact. If you do forget, and it forms a crust, don’t toss it!
Just scrape off that dry top layer, and then whisk in just a few drops of warm water to bring the rest of the icing back to life. It becomes perfectly workable again, ready for the next batch of cookies we whip up!
Troubleshooting Common Issues with Your Cookie Icing Recipe
Even with the very best sugar cookie icing recipe, sometimes things don’t go perfectly right away. It happens to me all the time! If your icing comes out too runny after mixing, don’t fret—that’s the easiest fix. Just whisk in a tiny bit more sifted confectioners’ sugar, maybe a tablespoon at a time, until you get that thick, beautiful consistency.
Now, the opposite problem: It’s too stiff and won’t spread? That just means it needs a splash of moisture. Slowly add warm water, just a half-teaspoon drop at a time, mixing well after each addition until it flows nicely. If your cookies are taking forever to dry hard, humidity is likely the culprit, not the recipe itself. Just be patient and give them extra time in a cool, dry spot!
Frequently Asked Questions About This Cookie Icing Recipe
I totally get it; when you’re diving into decorating, you always have a few little questions buzzing in your head. Here are some of the things I hear most often about this smooth cookie topping!
Is this truly a Royal Icing Recipe?
That’s a great question! Since this recipe uses meringue powder, it acts almost exactly like a traditional Royal Icing Recipe, meaning it dries super hard and glossy. However, I call it the “Easy Royal Icing Alternative” because the mixing is just simpler, and we aren’t fussing with egg whites. It gives you almost identical results for your Best Cookie Frosting!
Can I use milk instead of water for this icing?
You absolutely *can* swap the water for milk if you want a slightly richer flavor, but I always recommend sticking to the warm water first. Milk has fat in it, and too much fat can sometimes prevent this specific icing from drying as hard and shiny as we want it to. If you use milk, you might need to let your cookies dry for an extra hour or two!
How long until the icing is completely hard?
For most home settings, you should expect the icing to be firm enough to handle and stack in about 6 to 8 hours. But listen, humidity in your house is the real boss here! If it’s rainy or super humid, it can take up to 12 hours to fully harden. Just use that touch test—if it springs back slightly, give it more time!
Can I use this Easy Cookie Decorating Icing on Soft Cookies?
While you certainly *could*, I always recommend pairing this icing with a firm, cut-out cookie, like a sturdy sugar cookie. This recipe is designed to dry hard, which gives you that wonderful, satisfying, crisp contrast to the soft, chewy base of a classic cookie. If you put it on a very soft cookie, the hard icing might actually crack the cookie when you bite into it. Keep these for your firm cookies!
Estimated Nutritional Data for This Glossy Cookie Icing
Okay, let’s talk numbers! Since we are just mixing sugar, powder, and a little water, you know this is definitely a treat, not a health food, haha! Below is the estimated nutritional breakdown for a serving size of about 1/4 cup of the finished icing. Remember, this fantastic cookie icing recipe is based on the exact measurements I used, so brands and how thick you spread it will change things slightly. Consider this your reliable starting point for your beautiful, glossy cookie topping!
- Serving Size: 1/4 cup
- Calories: 450
- Sugar: 110g
- Sodium: 10mg
- Fat: 0g
- Protein: 2g
Share Your Creations Using This Cookie Icing Recipe
I am just so excited to see what beautiful things you make with this icing! Seriously, once you master this easy sugar cookie icing, the decorating possibilities are endless, especially for gifting or holiday cookie decorating. When you whip up a batch, please come back and leave me a rating down below telling me how smoothly it piped for you!
And if you’re sharing your masterpieces on Instagram or Facebook, tag me! I absolutely love seeing your photos and celebrating your success. Knowing that this reliable cookie icing recipe helped you achieve that perfect, smooth finish makes all my testing worth it!
PrintThe Best Easy Sugar Cookie Icing Recipe That Dries Smooth and Hard

Make beautiful, decorated sugar cookies using this easy icing recipe. It pipes well, dries to a smooth, glossy, and firm finish, and is perfect for beginners decorating cut-out cookies.
- Prep Time: 10 min
- Cook Time: 0 min
- Total Time: 10 min
- Yield: Enough to cover 2 dozen medium cookies
- Category: Dessert
- Method: Mixing
- Cuisine: American
- Diet: Vegetarian
Ingredients
- 4 cups confectioners’ sugar, sifted
- 3 tablespoons meringue powder
- 1/2 teaspoon vanilla extract
- 6 tablespoons warm water (or more, as needed)
Instructions
- In a medium bowl, whisk together the sifted confectioners’ sugar and meringue powder until fully combined.
- Add the vanilla extract and 5 tablespoons of the warm water to the dry ingredients.
- Mix with a hand mixer on low speed until the ingredients are just combined. Scrape down the sides of the bowl.
- Increase the mixer speed to medium-high and beat for 3 to 5 minutes until the icing is smooth and holds soft peaks.
- Check the consistency. For piping outlines, the icing should be thick. Add water, 1 teaspoon at a time, until you reach a thick, workable consistency.
- For flooding the cookies, add more water, 1/2 teaspoon at a time, until the icing flows smoothly off the whisk in a ribbon that slowly disappears back into the bowl (this takes about 10-15 seconds).
- Use immediately for decorating. Color the icing with gel food coloring if desired.
- Apply the icing to your cooled sugar cookies. Let the outlined layer dry completely (about 1 hour) before flooding.
- Allow the decorated cookies to air dry completely at room temperature until the icing is firm and glossy, usually 4 to 8 hours, depending on humidity.
Notes
- For a no-meringue powder option, substitute 1 tablespoon of light corn syrup for 1 tablespoon of meringue powder, and use 1/4 teaspoon of cream of tartar instead of the remaining meringue powder.
- If the icing becomes too thick while working, stir in a few drops of water. If it is too thin, add a small amount of sifted confectioners’ sugar.
- Store unused icing covered tightly with plastic wrap pressed directly onto the surface to prevent a crust from forming.
- This icing hardens perfectly, making it ideal for stacking and gifting holiday cookies.
Nutrition
- Serving Size: 1/4 cup
- Calories: 450
- Sugar: 110
- Sodium: 10
- Fat: 0
- Saturated Fat: 0
- Unsaturated Fat: 0
- Trans Fat: 0
- Carbohydrates: 112
- Fiber: 0
- Protein: 2
- Cholesterol: 0