

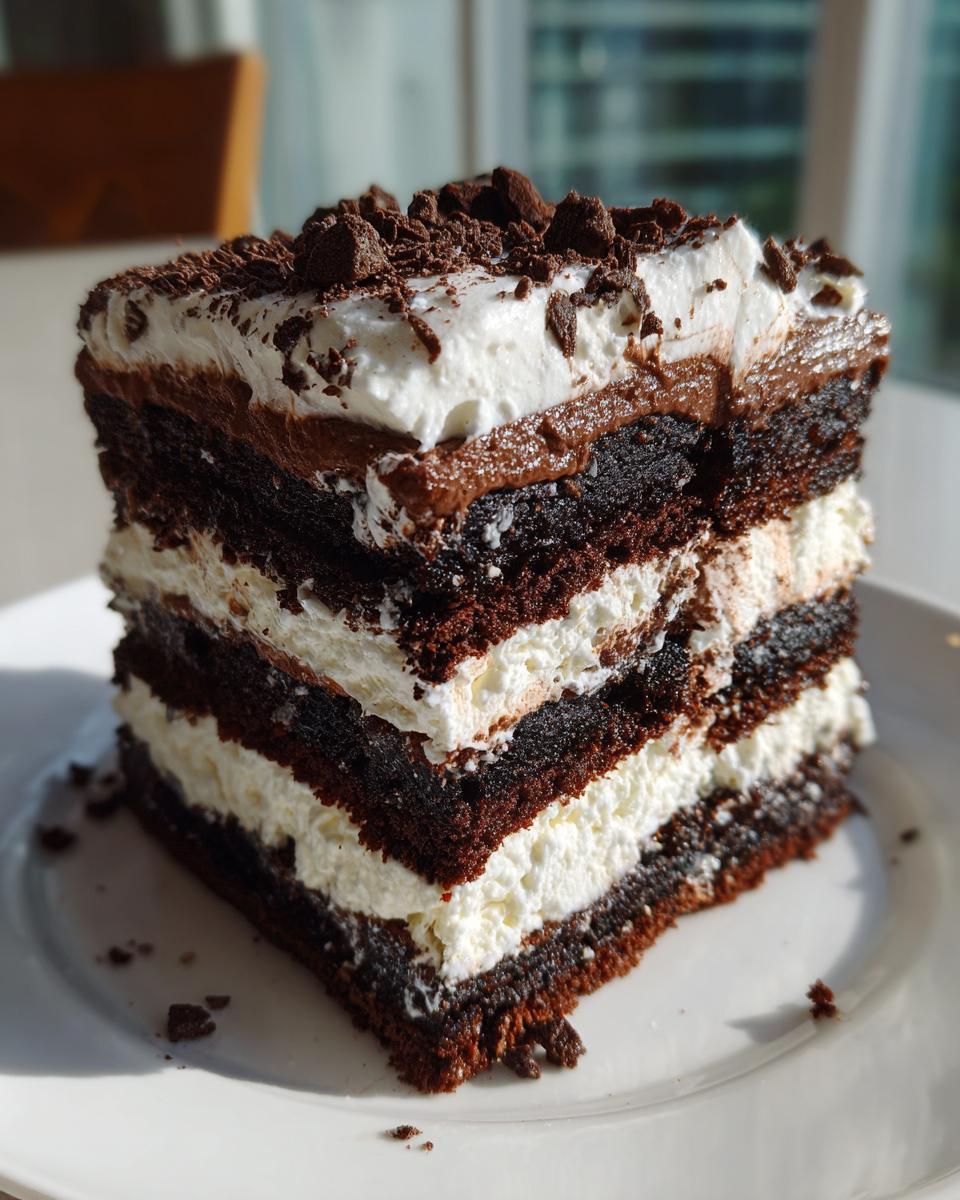
Oh, my dears, let’s talk about those days when the craving hits—a deep, dark, fudgy chocolate craving—but the last thing you want to do is fire up the oven and heat up the whole house! I felt that way just last week while planning a big event. That’s when I turn to my absolute favorite rescue dessert: the brownie refrigerator cake. Seriously, this creation is what dreams are made of because it delivers that rich, indulgent satisfaction without *any* baking needed for the final assembly. My mission here at Bliss Batter is making impressive treats accessible, and this multilayered beauty proves you don’t need complex techniques to wow a crowd. This particular brownie refrigerator cake sings because it layers those dense, fudgy brownie pieces—which you can make with my very favorite fudgy brownies recipe—with a tangy cream cheese filling and silky chocolate pudding. It’s pure, cool comfort!
- Why This Brownie Refrigerator Cake is Your New Favorite Easy Brownie Dessert
- Gathering Ingredients for Your Layered Brownie Dessert
- Step-by-Step Instructions for the Creamy Brownie Dessert
- Tips for Success with Your No Bake Brownie Cake
- Ingredient Notes and Substitutions for This Brownie Refrigerator Cake
- Serving Suggestions for This Chilled Chocolate Dessert
- Storage and Make Ahead Chocolate Cake Instructions
- Frequently Asked Questions About Making a Brownie Refrigerator Cake
- Estimated Nutritional Data for This Brownie Refrigerator Cake
- Share Your Blissful Brownie Refrigerator Cake Creations
Why This Brownie Refrigerator Cake is Your New Favorite Easy Brownie Dessert
Look, I adore making things from scratch, but sometimes life just needs an easy brownie dessert that still feels incredibly special. That’s where this masterpiece shines! Since the oven stays off during the final steps, it’s the dreamiest summer chocolate dessert when you want to stay cool. It truly is the ultimate make ahead chocolate cake. You assemble it the day before you need it, and by the time your guests arrive, you have this perfectly set, unbelievably creamy layered delight ready to serve. Seriously, if you are ever tasked with bringing a potluck chocolate dessert, this recipe will make you look like a hero!
The texture combination is what gets me every time. You get the dense chew from the fudgy brownie layers balanced against that smooth, cloud-like filling. You can find SO many ideas for decadent sweets over at my main dessert recipes page, but this one wins for effort versus reward! Trust me, once you try this no bake brownie cake, you’ll bookmark it immediately.
Gathering Ingredients for Your Layered Brownie Dessert
Okay, now for the fun part—gathering our supplies! Remember, here at Bliss Batter, we believe quality ingredients bring quality joy. Even though this is a brownie refrigerator cake and we aren’t doing tons of complex layering, the flavor relies on those key elements being perfect. We are aiming for that rich, creamy brownie dessert experience, so please, make sure your cream cheese and butter are genuinely soft before you even think about turning on the mixer. Don’t try to rush the softening process; soft means smooth, and smooth means that perfect layer structure we are aiming for!
We call for a mix here because ease is part of the point, but using a really good fudgy mix makes a difference. If you want to make your own base, feel free to substitute in your famous brownies, maybe something from my chocolate frosting post if you feel like extra layering later on! But for this recipe, package brownies are totally okay!
Ingredient List for the Ultimate Brownie Refrigerator Cake
- 1 (18.25 ounce) box fudgy brownie mix (plus ingredients listed on box for brownies)
- 1 cup unsalted butter, softened
- 8 ounces cream cheese, softened
- 2 cups powdered sugar
- 1 teaspoon vanilla extract
- 1 (3.9 ounce) package instant chocolate pudding mix
- 3 cups cold milk (whole or 2%)
- 2 cups frozen whipped topping, thawed (or heavy cream, whipped)
- Chocolate shavings or sprinkles, for topping
Step-by-Step Instructions for the Creamy Brownie Dessert
Alright, let’s turn these wonderful ingredients into the star of the show! We are building this glorious brownie refrigerator cake layer by layer, starting with the backbone of the dessert. Since this is a no-bake creation, the structure relies heavily on proper preparation steps first, especially making sure everything is beautifully cool or perfectly soft. If you enjoy this kind of layered experience, you might also want to check out my recipe for no-bake chocolate lasagna for another fun assembly dessert!
Baking and Preparing the Fudgy Brownie Layers
First things first, we need our chocolate foundation! Mix up your brownie batter according to the box instructions—or, better yet, use my tried-and-true recipe from my best fudgy brownies post if you have the time. Bake those babies in a 9×13 inch pan. Now, here’s the most important thing you’ll hear all day: DO NOT try to cut them while they are even slightly warm. If you rush this, your layers will smear right into one chocolate mess! Let them cool completely in the pan. Once they are totally cool, I carefully slice mine into neat squares right in the pan. This makes layering so much easier and gives you those beautiful, defined strata when you slice it later. Set those gorgeous squares aside.
Creating the Cream Cheese and Pudding Fillings
Next up, we whip up the filling magic. Remember how I stressed using softened butter and cream cheese? That’s because we want a super smooth creamy brownie dessert! For the cream cheese spread, just beat the softened butter and cream cheese until they look light. Then, slowly stream in the powdered sugar and vanilla until you have something fluffy—no lumps allowed! In a separate bowl, take your instant chocolate pudding mix and whisk it aggressively with the cold milk for about two minutes until it starts to visibly thicken. Let that sit for five minutes to set up just a touch more.
Assembling the Brownie Refrigerator Cake Layers
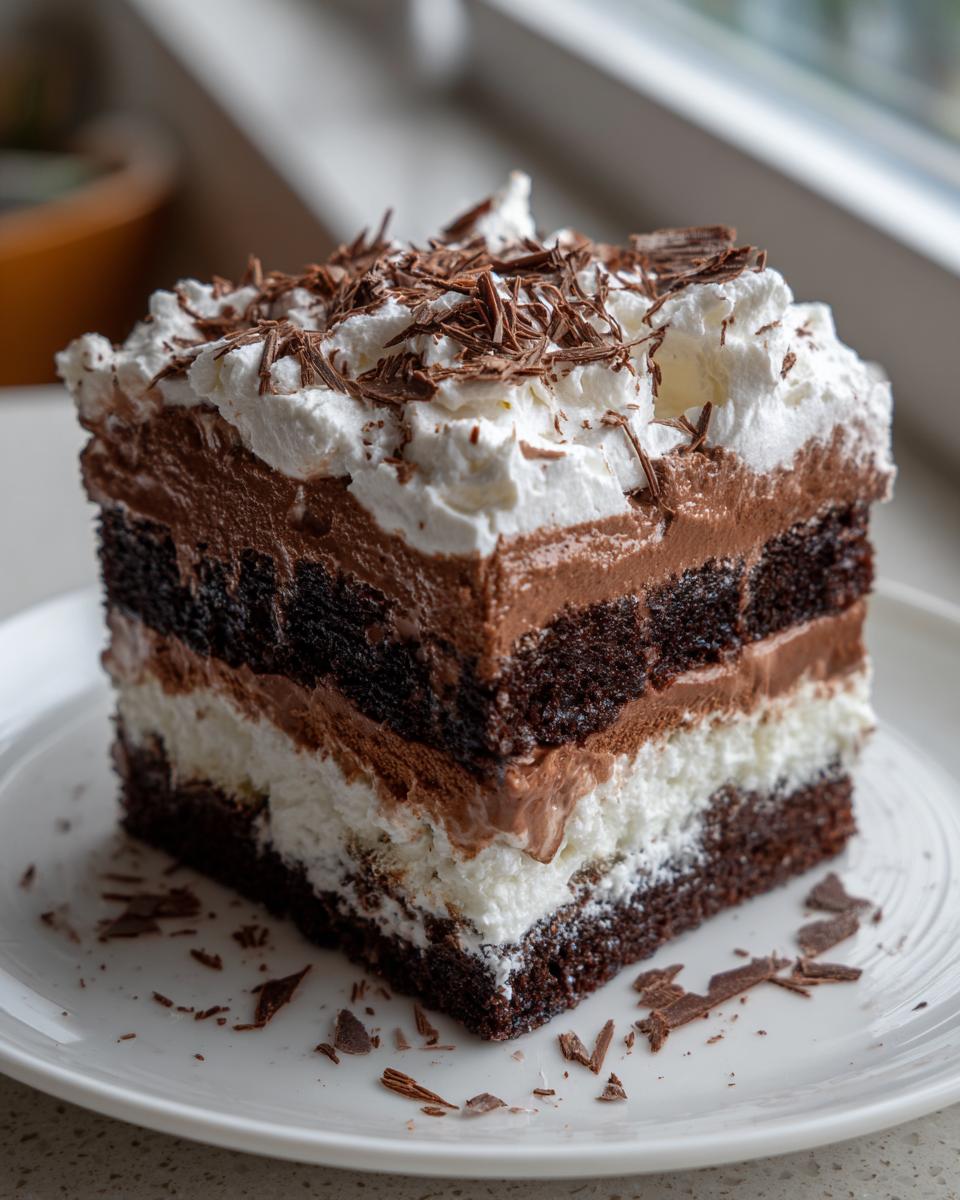
Time to build! You can use your 9×13 pan (which keeps things super neat) or layer it up dramatically in a trifle dish, just like when I make a classic trifle. We start with half of your cooled brownie squares pressed gently into the bottom. Over that, gently spread the *entire* cream cheese mixture evenly. Follow that with about half of your thickened chocolate pudding. Then, add your remaining brownie squares on top of the pudding layer. Yes, another layer of brownie goodness! Spread the rest of the chocolate pudding over that second brownie layer. Finally, spread the thawed whipped topping evenly everywhere. Cover it tightly and remind yourself that patience is key—this stunning brownie refrigerator cake needs to chill in the fridge for at least six hours, but honestly? Overnight makes it perfect!
Tips for Success with Your No Bake Brownie Cake
Making this no bake brownie cake is so straightforward, but success truly hinges on a couple of small details I’ve learned over the years of testing. First, let’s talk about that chilling time we mentioned earlier. Seriously, don’t even think about cutting this dessert before the minimum six hours are up! If you slice it too soon, the layers won’t have melded properly, and you end up with mushy puddles instead of firm layers. It’s the most important step for a gorgeous brownie refrigerator cake.
Secondly, since we aren’t using the oven for the final construction, the flavor quality of your base ingredients really shines through. If your box mix seems a little bland, sometimes using a slightly richer one—or one with high-quality cocoa like the ones I chat about in my chocolate cake post—can make all that textural difference worth it. Better ingredients mean a better chilled chocolate dessert!
I also highly recommend scraping down the sides of your bowl when mixing the cream cheese filling; you don’t want any dry pockets hiding in there. This is the kind of reliable recipe you can use again and again, just like the lovely folks on this page suggest. You are setting yourself up for success with this easy brownie dessert!
Ingredient Notes and Substitutions for This Brownie Refrigerator Cake
I know you might be looking at that ingredient list, especially the whipped topping, and wondering if we can tweak things a bit! That’s totally understandable. Since this brownie refrigerator cake needs to keep its shape sitting in the cold, the layers need to cooperate. If you absolutely cannot find the frozen whipped topping, you can definitely whip heavy cream with a tiny bit of powdered sugar until stiff peaks form. Just watch it closely; it can look right, but then suddenly turn to soup if over-whipped!
Also, let’s talk about the brownie base again. While the box mix is super convenient for this quick chocolate fix dessert, if you use your own homemade, fudgy brownies, the texture holds up even better. It just adds that extra layer of homemade love! And if you find your cream cheese layer is spreading just a little too much after chilling, next time try swapping out one cup of milk in the pudding for an extra 2 ounces of softened cream cheese blended right in. That makes the whole thing a bit firmer!
Serving Suggestions for This Chilled Chocolate Dessert
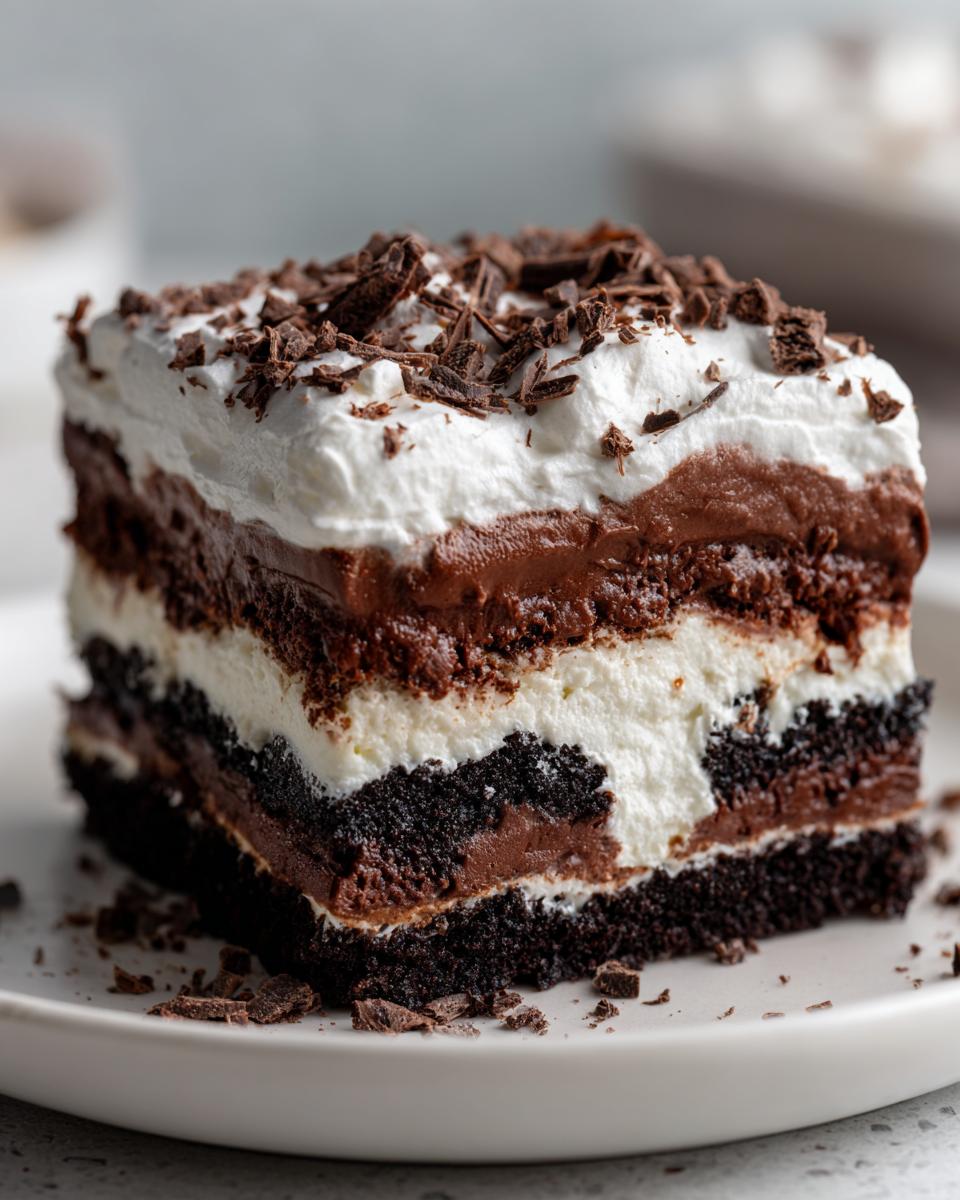
When it’s time to bring this gorgeous chilled chocolate dessert out of the fridge, presentation matters! I always like to keep the topping soft and airy, so just before serving, shower the top generously with extra chocolate shavings or maybe some colorful sprinkles for a festive touch. This brownie pudding dessert is so rich, it honestly doesn’t need much else, but if you are serving it after a heavy dinner, a simple espresso or my salted caramel latte on the side cuts through the sweetness beautifully. It’s already a showstopper, so keep the plating simple and let those layers do the talking!
Storage and Make Ahead Chocolate Cake Instructions
The best part about this glorious brownie refrigerator cake? It’s designed to wait for you! This is truly the ultimate make ahead chocolate cake centerpiece. You need to cover the entire dish tightly with plastic wrap—make sure the wrap doesn’t actually touch the whipped topping, or it will smear! Keep it tucked away in the main part of the fridge. I know I said six hours works, but honestly, if you can wait until the next day, that overnight chill is magical. It lets the fudgy brownie layers fully absorb some moisture from the fillings, making every single slice taste even richer. It holds up beautifully for about four days, though I doubt it lasts that long!
If you’re looking for more reliable meals you can prep ahead, check out my tips for my make ahead egg muffin recipe—perfect for busy mornings! For even more inspiration on desserts that rely on chilling time, I always check out what wonderful ideas are being shared, like the ones over at this great recipe site.
Frequently Asked Questions About Making a Brownie Refrigerator Cake
I know sometimes when you see a recipe that looks this good, you have questions, especially when it involves a totally no oven dessert recipe for the assembly! We want absolute perfection when we are making this incredible brownie pudding dessert. Don’t worry, friends, I’ve anticipated the usual stumbling blocks right here for you, just like I do when sharing my chocolate pudding cake recipes. It’s all about setting yourself up for success!
Can I skip baking the brownies entirely for this brownie refrigerator cake?
You sure can! That’s the beauty of this entire concept. If you are really pressed for time, you are totally allowed to use good-quality, store-bought, pre-baked fudgy brownies as your base. However, I have to be honest with you: baking your own—even if it’s just following the box directions!—gives you that perfectly moist, rich bottom layer that makes the whole brownie refrigerator cake sing. The store-bought ones can sometimes be drier, so if you go that route, make sure they are the really fudgy kind!
How long does the brownie refrigerator cake need to chill?
This is the most crucial question! The minimum time needed to let this layered brownie dessert set up so you can actually slice it without everything collapsing is six hours. Set a timer! But, if I am being perfectly clear and giving you my best advice for maximum flavor development? Let it chill overnight! Seriously, resting in the fridge overnight allows the moisture from the cream cheese and pudding layers to soak just slightly into those brownie pieces. It tastes unbelievably better the next day, trust me!
Estimated Nutritional Data for This Brownie Refrigerator Cake
Okay, let’s talk numbers for a second, though I always say the true measure of a dessert is how much joy it brings, right? Since this brownie refrigerator cake is so rich, it’s definitely an indulgence, so keep that in mind when slicing! This information comes from calculating the ingredients and dividing it up evenly across the 12 servings we get from a 9×13 pan. Please remember, this is just an estimate based on standard calculations—the actual numbers might vary depending on whether you splurge on premium butter or go for a lower-sugar brownie mix!
Here is the breakdown per slice of this decadent treat:
- Calories: 450
- Fat: 25 grams
- Saturated Fat: 14 grams
- Carbohydrates: 55 grams
- Sugar: 45 grams
- Protein: 5 grams
- Cholesterol: 55 milligrams
See? It’s a little powerhouse of chocolatey goodness! It’s proof that sometimes, the best treats—like this fantastic chilled chocolate dessert—are the ones that satisfy that deep craving all at once. Enjoy every bite, knowing exactly what wonderful indulgence you’re having!
Share Your Blissful Brownie Refrigerator Cake Creations
Now that you have successfully navigated making the ultimate brownie refrigerator cake, I truly want to see what you created! Part of the joy here at Bliss Batter is building this wonderful community where we share our successes and talk about what made the recipe special for us. When you share photos of your layered dessert on social media, please tag me!
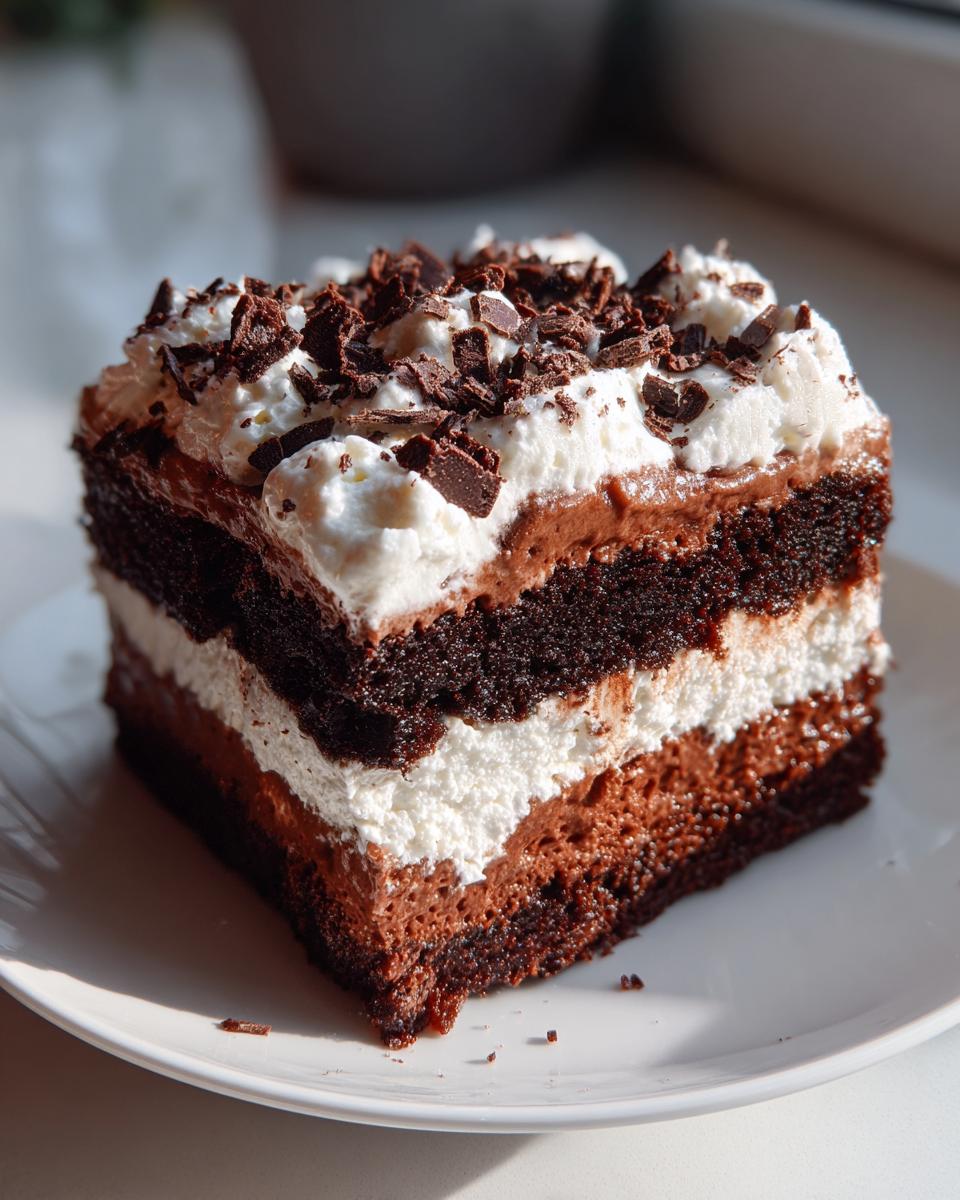
Did you use a trifle dish to show off those perfect layers? Or did you stick to the 9×13 pan for easy slicing? I’m dying to know which part was your personal favorite. Was it the slightly tangy lift from the cream cheese layer? Was it the dense chew of the fudgy brownie base? Or maybe you just loved how easy it was to pull together this easy brownie dessert as a make ahead chocolate cake?
Head down to the comments below and leave a rating for the recipe, and tell me all about your experience. We learn so much from each other, and seeing your beautiful bakes makes my day! If you’re interested in learning more about the philosophy behind why we keep baking simple yet special, you can always drop by the About Me page. Happy baking, everyone!
PrintThe Ultimate No-Bake Brownie Refrigerator Cake with Chocolate Pudding and Cream Cheese Layers

Create a decadent, make-ahead Brownie Refrigerator Cake using fudgy brownie layers, rich chocolate pudding, and a tangy cream cheese filling. This no-bake dessert sets beautifully in the fridge, making it perfect for potlucks or any gathering where you need an easy, crowd-pleasing chocolate fix.
- Prep Time: 25 min
- Cook Time: 35 min
- Total Time: 7 hours 0 minutes
- Yield: 12 servings 1x
- Category: Dessert
- Method: No Bake/Chilling
- Cuisine: American
- Diet: Vegetarian
Ingredients
- 1 (18.25 ounce) box fudgy brownie mix (plus ingredients listed on box for brownies)
- 1 cup unsalted butter, softened
- 8 ounces cream cheese, softened
- 2 cups powdered sugar
- 1 teaspoon vanilla extract
- 1 (3.9 ounce) package instant chocolate pudding mix
- 3 cups cold milk (whole or 2%)
- 2 cups frozen whipped topping, thawed (or heavy cream, whipped)
- Chocolate shavings or sprinkles, for topping
Instructions
- Prepare and bake the brownies according to the package directions using a 9×13 inch baking pan. Let the brownies cool completely in the pan.
- Once cool, cut the brownies into uniform squares or crumble them into coarse pieces, depending on your desired layer style. Set aside.
- Prepare the cream cheese layer: In a large bowl, beat the softened butter and softened cream cheese together with an electric mixer until smooth. Gradually add the powdered sugar and vanilla extract. Beat until the mixture is light and fluffy. Set aside.
- Prepare the chocolate pudding layer: In a separate medium bowl, whisk the instant chocolate pudding mix with the cold milk for about two minutes, until the mixture begins to thicken. Let it sit for five minutes to fully set.
- Assemble the Brownie Refrigerator Cake in a large trifle dish or a 9×13 inch pan lined with plastic wrap for easy removal.
- Create the first layer by spreading half of the prepared brownie pieces evenly across the bottom of the dish.
- Spread the entire cream cheese mixture evenly over the brownie layer.
- Top the cream cheese layer with half of the prepared chocolate pudding.
- Add the remaining brownie pieces over the pudding layer.
- Gently spread the remaining chocolate pudding over the second brownie layer.
- Spread the thawed whipped topping evenly over the top layer.
- Cover the dish tightly with plastic wrap. Chill the **brownie refrigerator cake** in the refrigerator for at least 6 hours, or preferably overnight, to allow the layers to set firmly.
- Before serving, garnish the top with chocolate shavings or sprinkles. Slice and serve this **chilled chocolate dessert** cold.
Notes
- For a richer flavor, you can use homemade fudgy brownies instead of a mix.
- If you want a firmer cream cheese layer, use only 6 ounces of milk when making the pudding, or add 4 ounces of softened cream cheese to the whipped topping.
- This **make ahead chocolate cake** stores well, covered, in the refrigerator for up to four days.
Nutrition
- Serving Size: 1 slice
- Calories: 450
- Sugar: 45
- Sodium: 280
- Fat: 25
- Saturated Fat: 14
- Unsaturated Fat: 11
- Trans Fat: 0.5
- Carbohydrates: 55
- Fiber: 2
- Protein: 5
- Cholesterol: 55