
Oh, I know that craving! You want that perfect, pillowy sweetness of a bakery donut, but the idea of deep frying in your kitchen? Nope, not today! That’s exactly why I poured my energy into developing this maple donut bars recipe. Forget the fryer; these are wonderfully soft baked donut bars that deliver pure donut shop bliss with zero mess. Trust me, as someone who switched from frantic event planning to finding peace with flour, I only share recipes that are truly foolproof. This recipe embodies that accessible joy, making those irresistible bakery style donut bars achievable for everyone on a Tuesday morning or Saturday brunch! If you want to know more about how I approach baking here at Bliss Batter, check out my story here.
- Why This Recipe for Maple Donut Bars is Your New Favorite Breakfast Treat
- Gathering Ingredients for Perfect Maple Donut Bars
- Step-by-Step Instructions for Soft Baked Maple Donut Bars
- Mastering the Simple Maple Glaze for Your Maple Donut Bars
- Tips for Success When Making Homemade Maple Donuts
- Storage and Reheating Instructions for Maple Donut Bars
- Serving Suggestions for Your Maple Dessert Bars
- Frequently Asked Questions About Maple Donut Bars
- Share Your Soft Baked Maple Donut Bars Creations
Why This Recipe for Maple Donut Bars is Your New Favorite Breakfast Treat
I promise you, these are the ultimate indulgence for a weekend morning, but they are so straightforward it feels like cheating! My goal was always to create an easy maple bars recipe that tastes decadent. You get all the comforting flavor you love, but with none of the hassle. What makes them so great? Well, you can explore more of my favorite morning recipes over here, but in short, they hit every note.
- They deliver true bakery style donut bars flavor without any frying necessary.
- They are incredibly quick to mix up—perfect for those early morning cravings.
- The crumb is consistently moist and tender, thanks to the buttermilk.
If you want a batch for dessert later, they transition beautifully! Check out my dessert collection for more inspiration.
Achieving That Fluffy Maple Bars Texture
The magic here is that we skip frying entirely! Frying often makes donuts greasy or dense once they cool, but baking gives us a structure that is closer to a tender cake. We build that beautiful fluffiness right into the batter using baking powder and buttermilk. It creates a light, airy structure that stays soft long after it leaves the oven. That’s how we manage to get amazing soft baked donut bars every single time!
Gathering Ingredients for Perfect Maple Donut Bars
Okay, listen up! Since these are maple donut bars, the quality of your maple really sings in the final product. Claire Sterling here, and trust me, using the real deal makes a huge difference—it’s worth every penny for that complex, warming flavor. You absolutely need to use real, pure maple syrup, not the pancake stuff, especially in the batter where it really shines. Gather everything up before you start mixing; it keeps things so calm and smooth!
- 1 3/4 cups all-purpose flour
- 1 1/2 teaspoons baking powder
- 1/2 teaspoon salt
- 1/4 teaspoon ground cinnamon
- 1/2 cup (1 stick) unsalted butter, softened
- 3/4 cup granulated sugar
- 2 large eggs
- 1 teaspoon vanilla extract
- 1/2 cup buttermilk
- 1/4 cup pure maple syrup (for the batter—use the good stuff!)
- 1 cup powdered sugar (for glaze)
- 3 tablespoons pure maple syrup (for glaze)
- 1 tablespoon milk or cream (for glaze)
- 1/2 teaspoon maple extract (optional, but fun for the glaze!)
If you’re feeling frisky and want to mix that deep maple flavor into a cocktail later, I have a fantastic recipe right here.
Ingredient Notes and Substitutions for Your Maple Donut Bars
Let’s talk buttermilk because not everyone keeps that on hand! If you’re out, don’t panic. Just take a half cup of regular milk and stir in a half teaspoon of white vinegar or lemon juice. Let it sit on the counter for about five minutes until it looks a little curdled. That’s your homemade buttermilk substitute! Also, while that optional maple extract makes the glaze taste extra potent—like walking into a donut shop—it’s truly optional. Pure maple syrup is the main event, always.
Step-by-Step Instructions for Soft Baked Maple Donut Bars
Alright, let’s get baking! This part is super straightforward, but keep your eyes open because technique matters, especially when aiming for those famous soft baked donut bars. Remember, we are aiming for that tender, fluffy interior, not a dense brick! Don’t worry too much about precision timing here; just follow the flow. If you need super quick options for a weekday meal, I share some speedy tips over on my weeknight page, but these maple bars are worth the little bit of focused attention.
- First thing: Get your oven preheated to 350°F (175°C). While that heats up, grease and flour your 9×13 inch pan. I highly recommend lining it with parchment paper so you can just lift the whole thing out later—it’s my favorite trick for easy cleanup!
- Time to make the dry team happy! Whisk together that flour, baking powder, salt, and cinnamon in a medium bowl. Set it aside for now.
- Now for the good stuff. In a big bowl, beat that softened butter and your granulated sugar until it looks genuinely light and fluffy. This usually takes me about three minutes with my electric mixer.
- Beat in those eggs, one at a time, making sure each yolk is fully incorporated before you add the next one. Then mix in the vanilla extract.
- In a small bowl, give your buttermilk and that gorgeous 1/4 cup of real maple syrup a quick whisk together.
- This is where we connect everything: Add the dry mixture and the buttermilk mixture alternately to the butter mixture. Start and end with the dry stuff! Only mix until you can barely see white streaks disappearing. Trust me on this one!
- Scrape what you have into that prepared pan and smooth the top out evenly.
- Bake this beauty for about 20 to 25 minutes. Check it by inserting a toothpick into the center—if it comes out clean, you’re golden!
- This step is critical: You MUST let these cool completely in the pan before you even think about glazing. If they are warm, the glaze melts everywhere, and we want those clean lines!
- Finally, make the glaze (which I’ll walk you through next!) and pour it evenly over the cooled bars. Let the glaze set before cutting into squares or rectangles.
Mixing the Batter for Fluffy Maple Bars
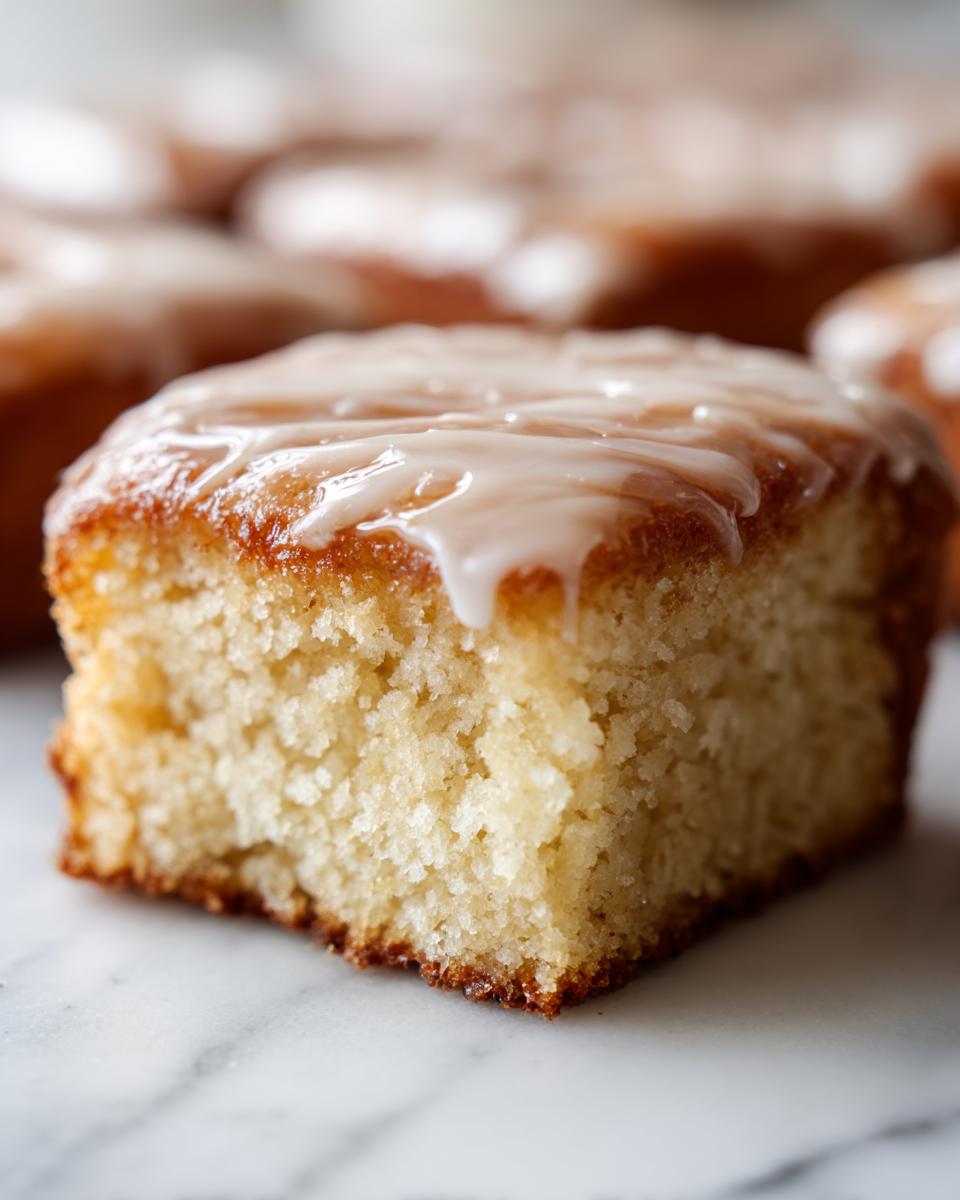
The secret to fluffy maple bars happens in steps three and six. You must cream the butter and sugar until they are truly pale and airy; that’s where all those tiny air pockets are born. When you alternate the dry ingredients with the buttermilk mixture, you’re just gently uniting them. Stop mixing the second those dry streaks vanish! Overmixing develops gluten, and gluten means tough bars, not soft baked donut bars. We want tender, pillowy clouds here!
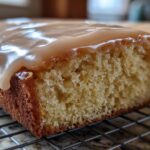
Baking and Cooling the Maple Glazed Bars
Don’t walk away from the oven, but trust the toothpick test! If it comes out with just a few moist crumbs clinging to it, take them out immediately. They continue to cook slightly on the pan as they rest. The cooling part is non-negotiable, folks. If you pour that lovely glaze onto a warm surface, you’ll get a sticky mess instead of a beautiful, opaque finish on your maple glazed bars. Patience pays off right at the end!
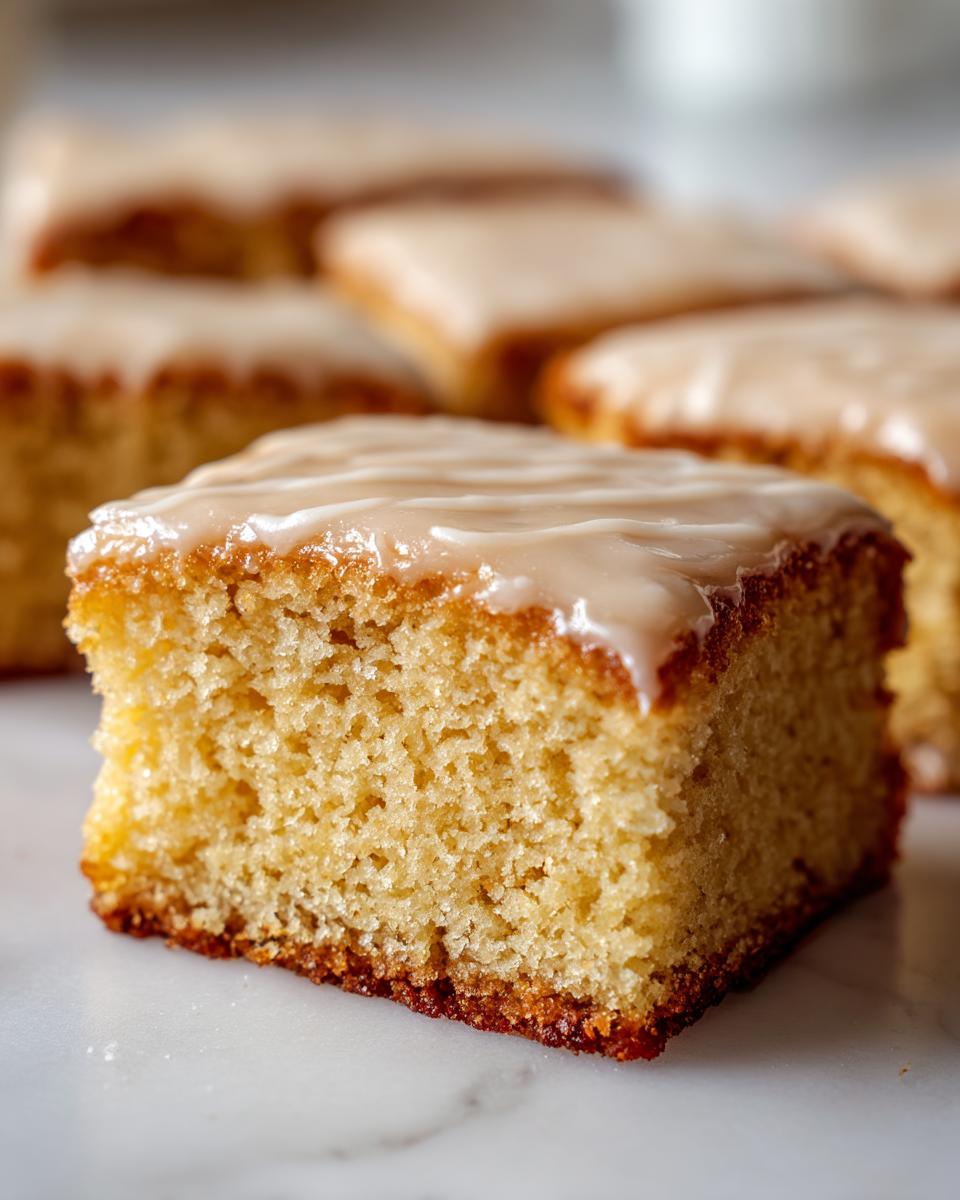
Mastering the Simple Maple Glaze for Your Maple Donut Bars
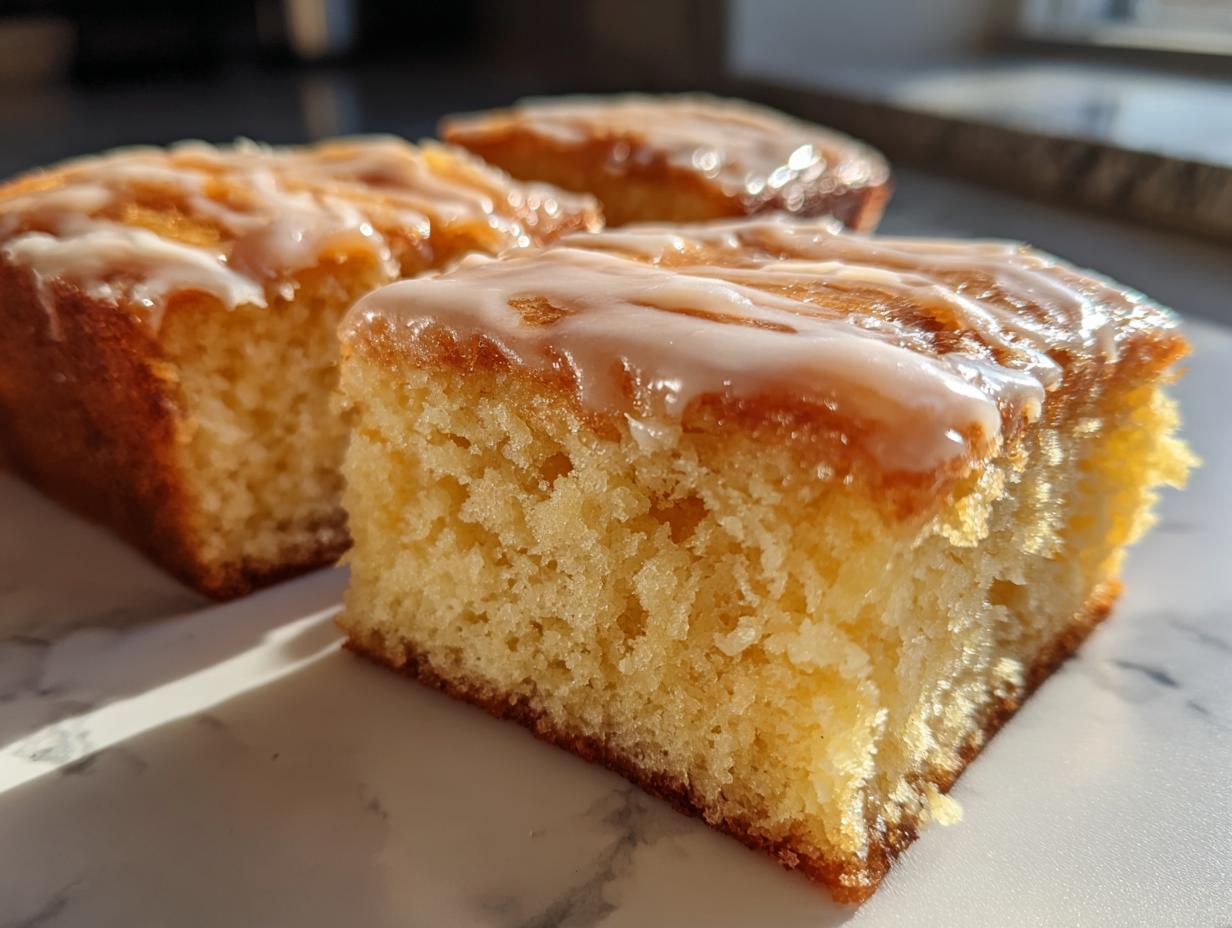
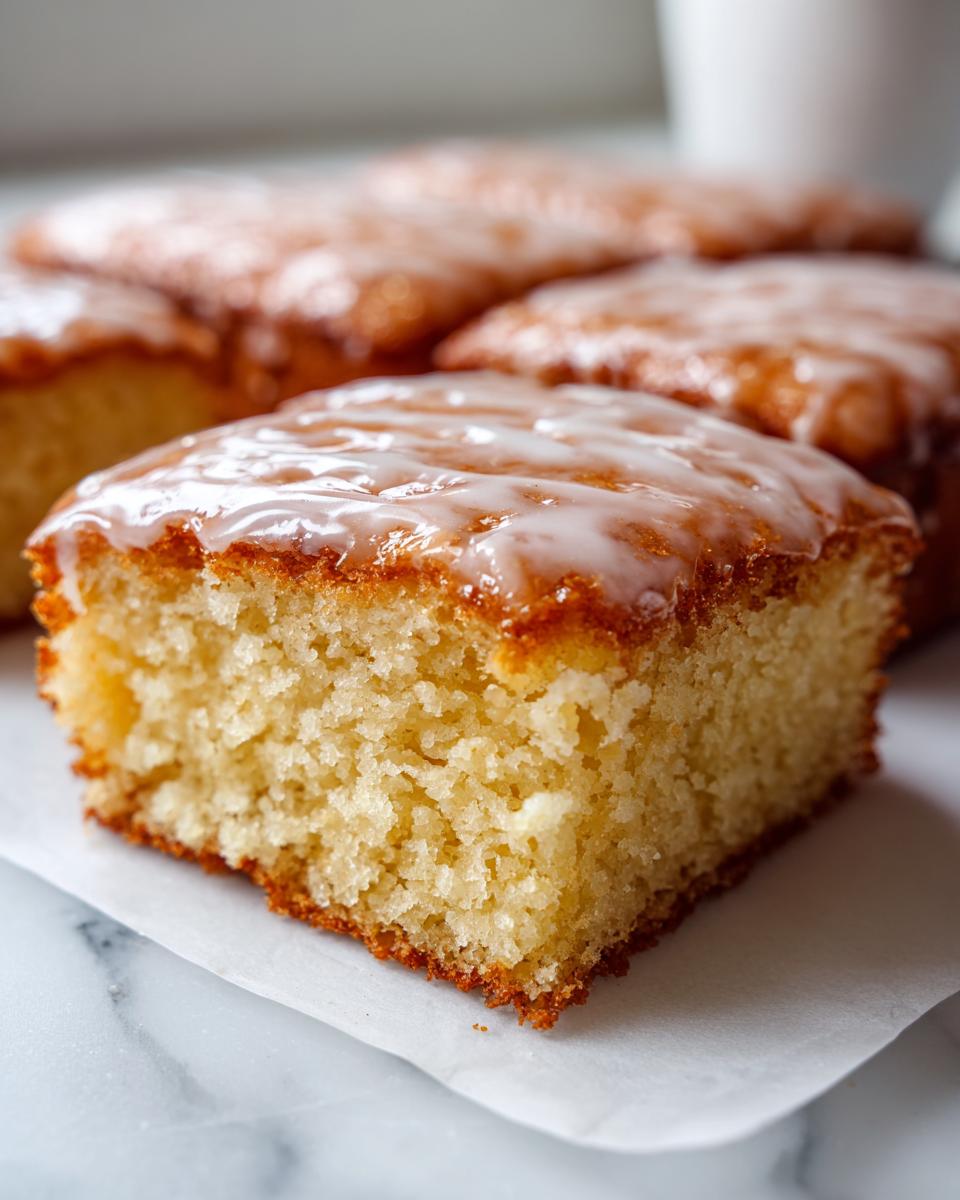
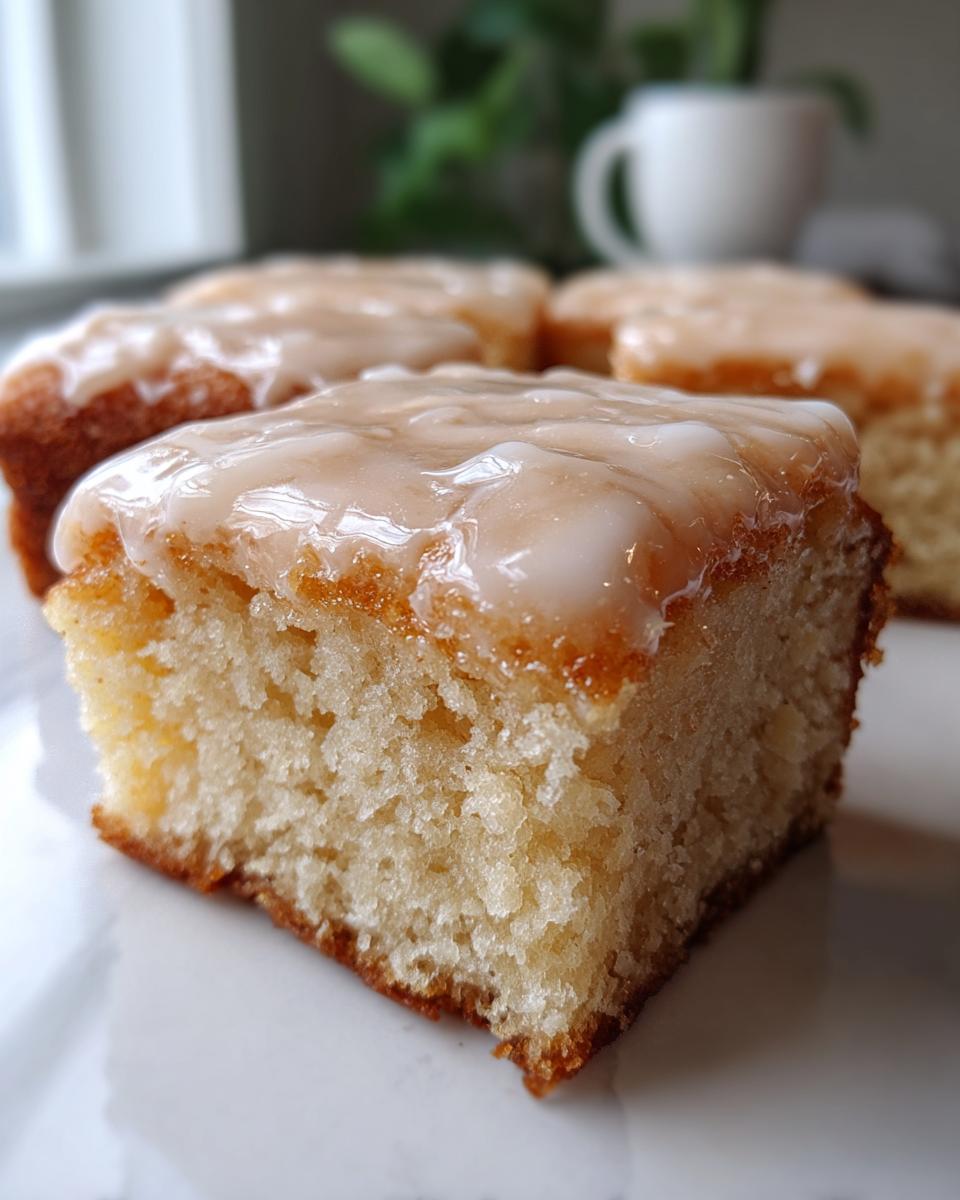
This glaze is what takes these treats from “good baked good” to “I can’t believe I made these at home!” It’s honestly the easiest part of the whole process, but getting the thickness right seals the deal for that beautiful bakery style finish. We are aiming for a thick, opaque coating that still drips appealingly down the sides. For this simple maple glaze, you whisk together the powdered sugar, the three tablespoons of real maple syrup, the milk or cream, and that optional maple extract if you want a real punch. If it looks too runny, just whip in a tablespoon more powdered sugar. If it’s too stiff and crumbly? Add a tiny splash, maybe half a teaspoon, of milk. That’s it! You’ll be pouring perfection over those cooled bars in no time. For this simple maple glaze, you whisk together the powdered sugar, the three tablespoons of real maple syrup, the milk or cream, and that optional maple extract if you want a real punch. If it looks too runny, just whip in a tablespoon more powdered sugar. If it’s too stiff and crumbly? Add a tiny splash, maybe half a teaspoon, of milk. That’s it! You’ll be pouring perfection over those cooled bars in no time. If you ever want to learn how to make icing that dries hard for other bakes, check out my guide on icing techniques!
Tips for Success When Making Homemade Maple Donuts
Even though this is an easy recipe, a couple of Claire’s expert pointers—stuff I learned from burning batches early on—will guarantee you get those incredible maple donut bars that truly taste like they came from the best spot downtown. First, please, please use high-quality pure maple syrup. Imitation flavorings just don’t cut it when maple is the star ingredient in your maple dessert bars! If you are looking for other Southern-style comforts that require buttermilk, my biscuit recipe is also a winner; you can find that over here.
Also, I wanted to mention the cinnamon in the dry mix—it’s small, but it warms up the maple flavor perfectly, making these ideal fall breakfast treats. My biggest tip for presentation: Wait until that glaze is completely, totally set before you even touch a knife to the pan. If you try to cut them while the glaze is tacky, you’ll drag the icing everywhere and lose those sharp, bakery-perfect edges. Let it sit on the counter for about an hour after pouring it on, and then slice them cleanly for the best-looking brunch baked treats.
Storage and Reheating Instructions for Maple Donut Bars
These maple donut bars taste absolutely sensational on day one, but keeping them soft for day two is the real trick! Because these are soft baked donut bars and not fried, they can sometimes get a tiny bit denser if the air hits them wrong. For short-term storage—think a day or two—keep them in an airtight container right on the counter. Try to separate the layers with wax paper if you stack them; this stops the glaze from sticking to the bottom of the bar above it.
If you need to keep them longer, say up to four days, the fridge is best, but you must wrap them tightly first! I actually prefer skipping the glaze until serving day if I know they’re going into cold storage. If they are already glazed, let them come back to room temperature for about 20 minutes before serving. You really don’t need to reheat them, but 10 seconds in the microwave makes them taste like they just came out of the oven!
Serving Suggestions for Your Maple Dessert Bars
Now that you have these incredible maple dessert bars cooling perfectly, what should we drink with them? Honestly, these are wonderful on their own, but they pair so beautifully for your next gathering. For a cozy morning, you cannot beat these alongside a great cup of coffee; I have a recipe for a fantastic salted caramel latte if you want to feel extra fancy! If you’re serving these brunch baked treats later in the day, try pairing them with a light, spicy drink, like the apple cider cocktail I whipped up last fall. It makes the cinnamon and maple pop!
Frequently Asked Questions About Maple Donut Bars
I always get a few questions when people try this recipe the first time, mainly because they can’t believe how light these are for being such sturdy maple donut bars! I’ve gathered the most common queries below to help you nail that perfect bake.
Can I make these maple donut bars ahead of time?
You absolutely can prep these! You should definitely let them cool completely before glazing, as we talked about earlier. If you plan on serving them the next day, I actually prefer to store the unglazed bars tightly wrapped on the counter and mix up a fresh batch of that simple maple glaze the morning you plan to eat them. Glaze poured fresh always looks the best and avoids any weird texture issues where the glaze sits too long.
How do I ensure my maple donut bars are truly fluffy maple bars?
This is all about the gentle touch during mixing. Remember, we are aiming for a light, tender crumb, not something tough! The two biggest things are step one: making sure your baking powder is fresh—old powder equals flat bars. Step two is the most important: when you alternate the dry and wet ingredients, mix only until just combined. Seriously, stop the mixer the second the last streak of flour disappears. That’s the secret to truly fluffy maple bars that taste just like homemade maple donuts!
If you were hoping to try a different kind of breakfast bake next time, my light and airy apple pancakes are another great weekend recipe!
Share Your Soft Baked Maple Donut Bars Creations
I hope you enjoyed making this easy maple bars recipe as much as I loved perfecting it for you! Now comes the fun part. If you whipped up these incredible soft baked maple donut bars, please let me know how they turned out in the comments below. Did your glaze set perfectly? Do you have any new sprinkling ideas? I absolutely live to see your bakes! Feel free to reach out or share pictures via my contact page. Happy baking, friends!
PrintSoft Baked Maple Donut Bars: Easy Homemade Bakery Style Treats
Create irresistibly soft baked maple donut bars at home. This easy recipe delivers fluffy, tender bars topped with a rich maple glaze, perfect for breakfast or dessert.
- Prep Time: 15 min
- Cook Time: 25 min
- Total Time: 40 min
- Yield: 12 servings 1x
- Category: Breakfast
- Method: Baking
- Cuisine: American
- Diet: Vegetarian
Ingredients
- 1 3/4 cups all-purpose flour
- 1 1/2 teaspoons baking powder
- 1/2 teaspoon salt
- 1/4 teaspoon ground cinnamon
- 1/2 cup (1 stick) unsalted butter, softened
- 3/4 cup granulated sugar
- 2 large eggs
- 1 teaspoon vanilla extract
- 1/2 cup buttermilk
- 1/4 cup pure maple syrup (for batter)
- 1 cup powdered sugar (for glaze)
- 3 tablespoons pure maple syrup (for glaze)
- 1 tablespoon milk or cream (for glaze)
- 1/2 teaspoon maple extract (optional, for glaze)
Instructions
- Preheat your oven to 350°F (175°C). Grease and flour a 9×13 inch baking pan, or line it with parchment paper, leaving an overhang for easy removal.
- In a medium bowl, whisk together the flour, baking powder, salt, and cinnamon. Set this dry mixture aside.
- In a large bowl, use an electric mixer to beat the softened butter and granulated sugar together until the mixture is light and fluffy, about 3 minutes.
- Beat in the eggs one at a time, mixing well after each addition. Mix in the vanilla extract.
- In a separate small bowl, whisk together the buttermilk and 1/4 cup of pure maple syrup.
- Gradually add the dry ingredients to the wet ingredients, alternating with the buttermilk mixture, beginning and ending with the dry ingredients. Mix only until just combined; do not overmix the batter.
- Spread the batter evenly into your prepared baking pan.
- Bake for 20 to 25 minutes, or until a toothpick inserted into the center comes out clean.
- Let the bars cool completely in the pan on a wire rack before glazing.
- Prepare the glaze: In a small bowl, whisk together the powdered sugar, 3 tablespoons of pure maple syrup, milk or cream, and maple extract (if using) until smooth. Add more powdered sugar for a thicker glaze or more liquid for a thinner glaze.
- Once the bars are cool, pour the maple glaze evenly over the top. Let the glaze set before cutting the bars into squares or rectangles.
Notes
- For the best flavor, use high-quality pure maple syrup in both the batter and the glaze.
- If you do not have buttermilk, mix 1/2 cup of regular milk with 1/2 teaspoon of white vinegar or lemon juice and let it sit for 5 minutes before using.
- You can add a pinch of nutmeg to the batter for an extra warm flavor, similar to cinnamon maple bars.
- Cut the bars after the glaze has set for clean slices.
Nutrition
- Serving Size: 1 bar
- Calories: 280
- Sugar: 25
- Sodium: 180
- Fat: 12
- Saturated Fat: 7
- Unsaturated Fat: 5
- Trans Fat: 0
- Carbohydrates: 42
- Fiber: 1
- Protein: 4
- Cholesterol: 55