
When you need a cake that truly says, “This moment is special,” you can’t reach for just any recipe. You need a showstopper! That’s why my dessert collection always starts here, with what I call the Ultimate Layered chocolate raspberry cake. Planning grand events used to be my career, but now, getting this perfect balance of deep cocoa and bright berry into your hands is my joy. I promise you, every layer of this cake has been tested countless times right here in my home kitchen so that you, the home baker, can achieve that incredible bakery-style result with total confidence. It’s rich, it’s fruity, and it always gets rave reviews!
- Why This Ultimate Chocolate Raspberry Cake Is Your New Go-To
- Gathering Ingredients for Your Chocolate Raspberry Cake
- Step-by-Step Instructions for the Chocolate Raspberry Cake
- Tips for Baking the Best Chocolate Raspberry Layer Cake
- Ingredient Notes and Substitutions for Your Chocolate Berry Cake Baking
- Storage and Reheating Instructions
- Frequently Asked Questions About This Chocolate Raspberry Cake
- Serving Suggestions for Your Impressive Homemade Cake
- Share Your Baking Bliss
Why This Ultimate Chocolate Raspberry Cake Is Your New Go-To
You need a cake that looks like it came from a fancy bakery but tastes like pure happiness—and this one delivers! This chocolate raspberry cake isn’t just pretty; it’s engineered for incredible texture and flavor in every single bite. It’s quickly become the centerpiece for my favorite celebrations. When you need that Decadent Chocolate Cake Recipe that just *works* every time, this is it!
Here’s why bakers like you are coming back to this recipe again and again:
- It holds up beautifully for stacking, making it a true showstopper.
- The filling keeps the whole cake tasting fresh for days.
- It perfectly balances decadent chocolate with bright, happy fruit.
Moist Chocolate Layers That Never Dry Out
If you’re worried about dry chocolate cake, don’t be! The secret here, which I learned from testing dozens of recipes, is adding boiling water right at the very end of mixing. It seems weird, I know, but that steaming hot liquid blooms the cocoa and creates the most unbelievably delicate, deep crumb. Your layers will stay wonderfully tender!
The Perfect Balance in Our Chocolate Raspberry Cake
This isn’t just sweet; it’s got depth! We nail that perfect sweet and tart note, making it a seriously rich and fruity cake. That bright raspberry filling cuts right through the richness of the chocolate, so you never feel overwhelmed. Honestly, this chocolate raspberry cake is the best chocolate berry cake baking project you can start this weekend!
Gathering Ingredients for Your Chocolate Raspberry Cake
Okay, grabbing our ingredients is where the magic really starts to feel tangible! For this Ultimate chocolate raspberry cake, we want to make sure everything is measured out perfectly before we start mixing. Think of it like setting up your station before you paint—it just makes the whole process smoother and way more fun. Remember, good quality ingredients really shine here, especially that chocolate for the ganache!
I’ve broken down exactly what you need for the three main components below. If you need tips on making amazing frosting, definitely check out my guide to rich chocolate frosting later!
For the Moist Chocolate Cake Layers
These measurements are for getting those two beautiful, deep layers. Trust me, don’t try to skinny dip on the cocoa!
- 1 3/4 cups all-purpose flour
- 1 3/4 cups granulated sugar
- 3/4 cup unsweetened cocoa powder
- 1 1/2 teaspoons baking powder
- 1 1/2 teaspoons baking soda
- 1 teaspoon salt
- 2 large eggs
- 1 cup whole milk
- 1/2 cup vegetable oil
- 2 teaspoons vanilla extract
- 1 cup boiling water (don’t skip this step!)
For the Fresh Raspberry Filling
This is what gives us that gorgeous tartness! We use a little cornstarch here to ensure we get a thick, spoonable Fresh Raspberry Filling, perfect for layering.
- 2 cups fresh or frozen raspberries
- 1/2 cup granulated sugar
- 2 tablespoons cornstarch
- 1/4 cup water
For the Silky Chocolate Ganache Frosting
For the ganache, promise me you’ll use good chocolate here—it makes all the difference! We want that glossy, decadent finish.
- 12 ounces high-quality semi-sweet chocolate, chopped
- 1 1/2 cups heavy cream
- 1 tablespoon unsalted butter (optional, but it helps give it that extra shine!)
And just a little extra—we’ll need about 1 cup of whole fresh raspberries set aside for decorating the top when we put this masterpiece together!
Step-by-Step Instructions for the Chocolate Raspberry Cake
Okay, now for the fun part—actually making this gorgeous chocolate raspberry cake! If you followed the gathering step, your station is set, and we’re ready to go. Baking this beauty is really just three smaller recipes stacked together, and following this Layer Cake Tutorial guarantees a smooth assembly process. Don’t rush the cooling steps; they are our secret weapons for a perfect stack!
Baking the Decadent Chocolate Cake Recipe Layers
First things first: preheat your oven to 350°F (175°C). Get those two 8-inch pans greased up, floured, and line the bottoms with parchment paper—this avoids any sad moments later! Start by whisking all your dry stuff—flour, sugar, cocoa, leavening, and salt—together in a big bowl. Then, you add the eggs, milk, oil, and vanilla. Mix that on medium speed for a good two minutes until it’s just combined and looking smooth. Now, here’s the part that gets skeptics every time: carefully stir in a full cup of boiling water. Yep, boiling! The batter instantly becomes super thin; don’t panic, that watery look is exactly what you want for those Moist Chocolate Layers.
Creating the Bright Fresh Raspberry Filling
While those cakes are baking, let’s make the fruity star! Toss your raspberries and sugar into a saucepan and let them simmer until they start to break down; that’s about five minutes. While they’re simmering, whisk the cornstarch and water together separately—this is your thickening slurry. Pour that slurry into the bubbling berries, stirring non-stop. You’ll see it thicken up fast, usually in just a minute or two! Pull it off the heat immediately. It needs to cool completely—and I mean cool!—before you even think about putting it near the cake, otherwise, it melts the whole thing.
Preparing the Velvety Chocolate Frosting (Ganache)
This velvety frosting is worth the wait! Put all your chopped chocolate in a nice bowl. Heat up that heavy cream until it’s just starting to bubble on the edges—not a rolling boil! Pour that hot cream right over the chocolate and then—this is critical—just walk away for five full minutes. Let the heat do the work. After five minutes, whisk it gently from the center out until it’s all glossy and smooth. If you want extra shine, swirl in a tiny bit of butter. Now, this ganache has to cool down until it’s truly spreadable, like soft peanut butter. This might take an hour or two sitting on the counter, or you can speed it up by chilling, but you must stir it every ten minutes so it doesn’t seize up!
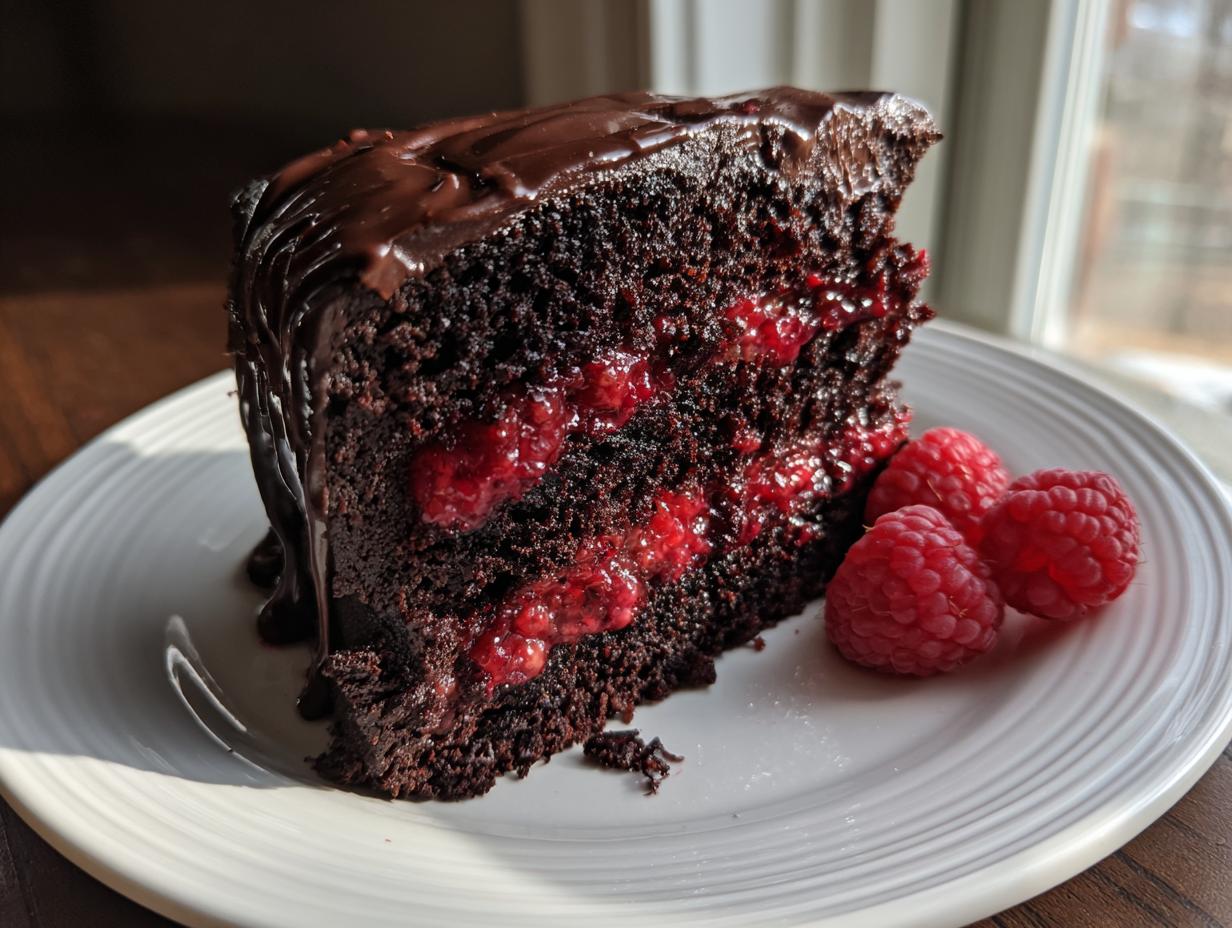
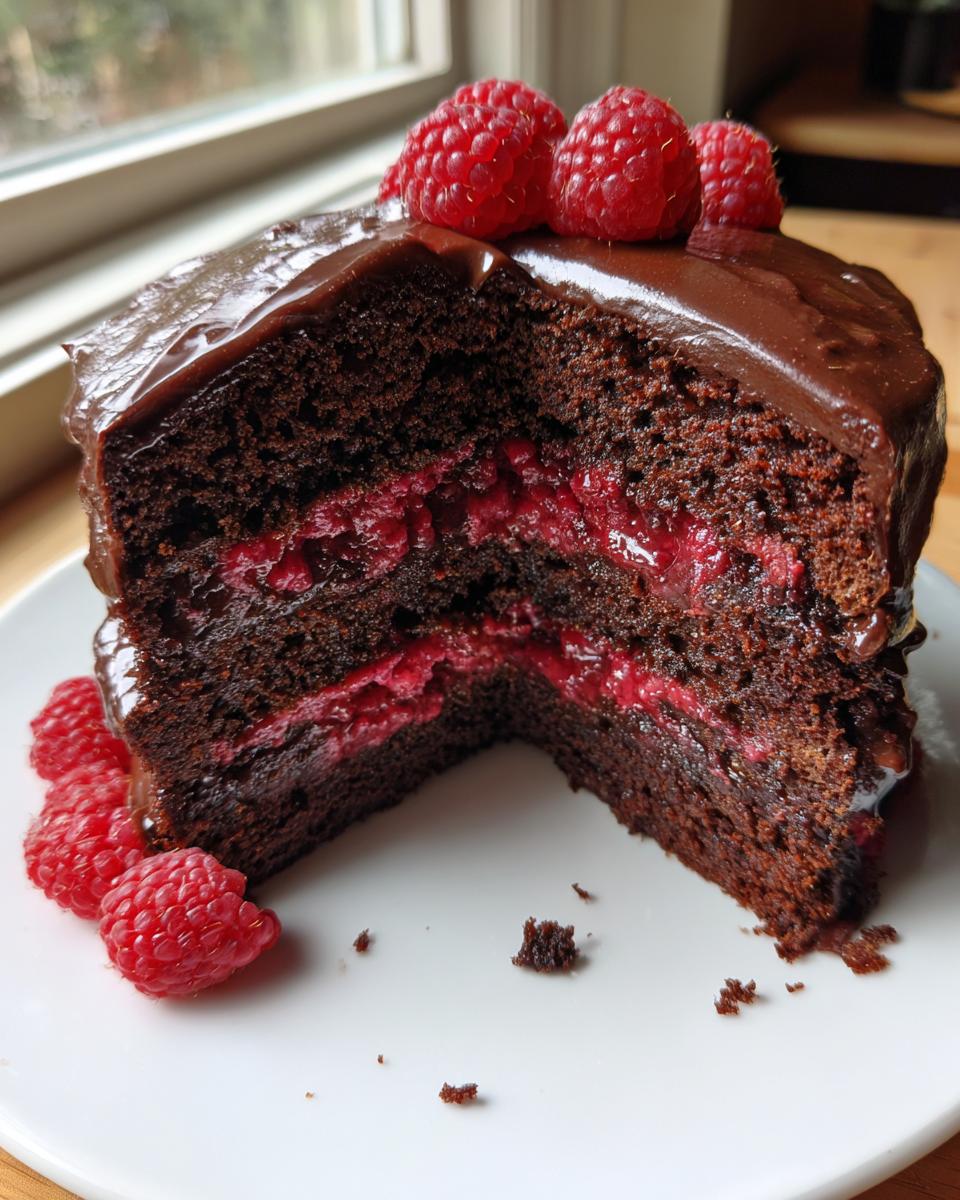
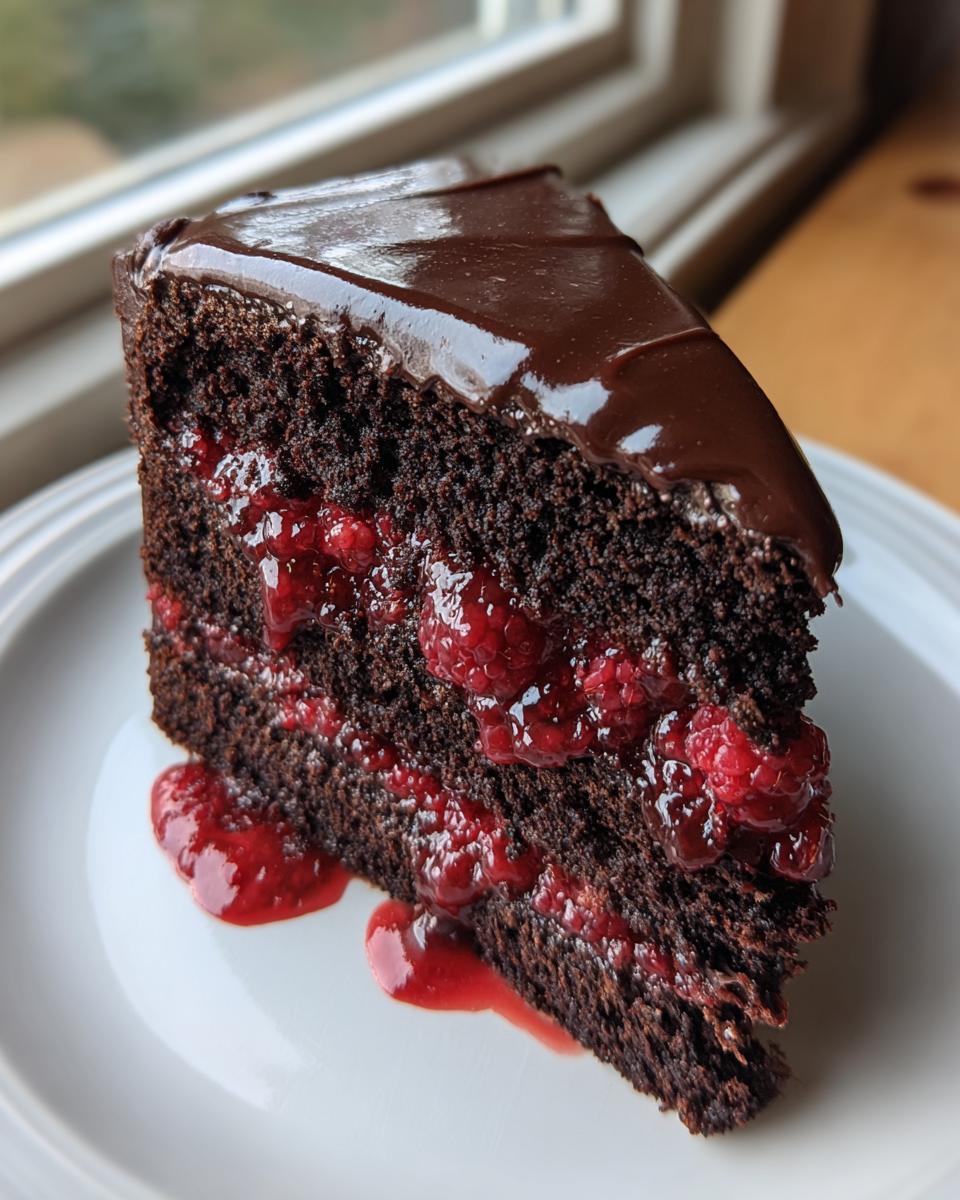
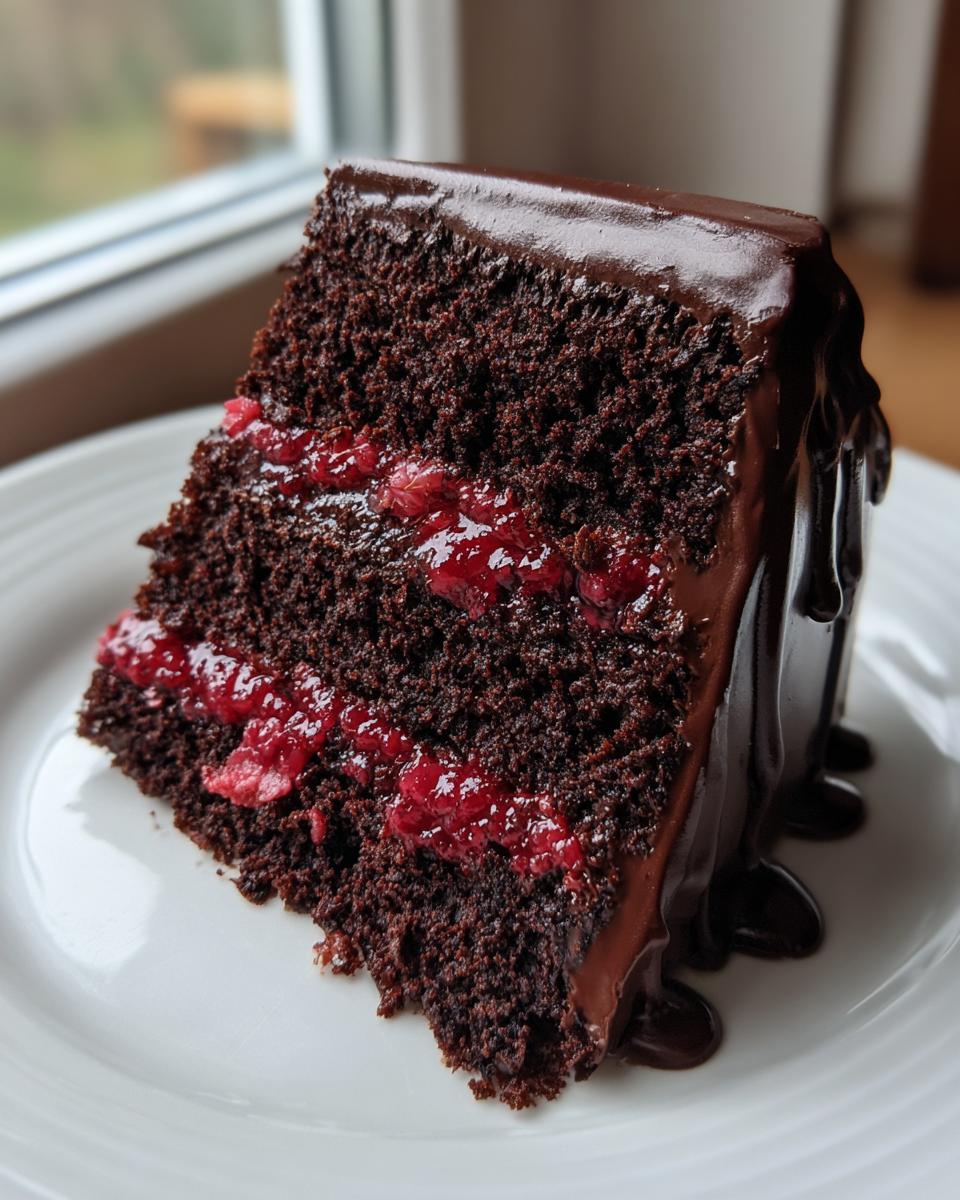
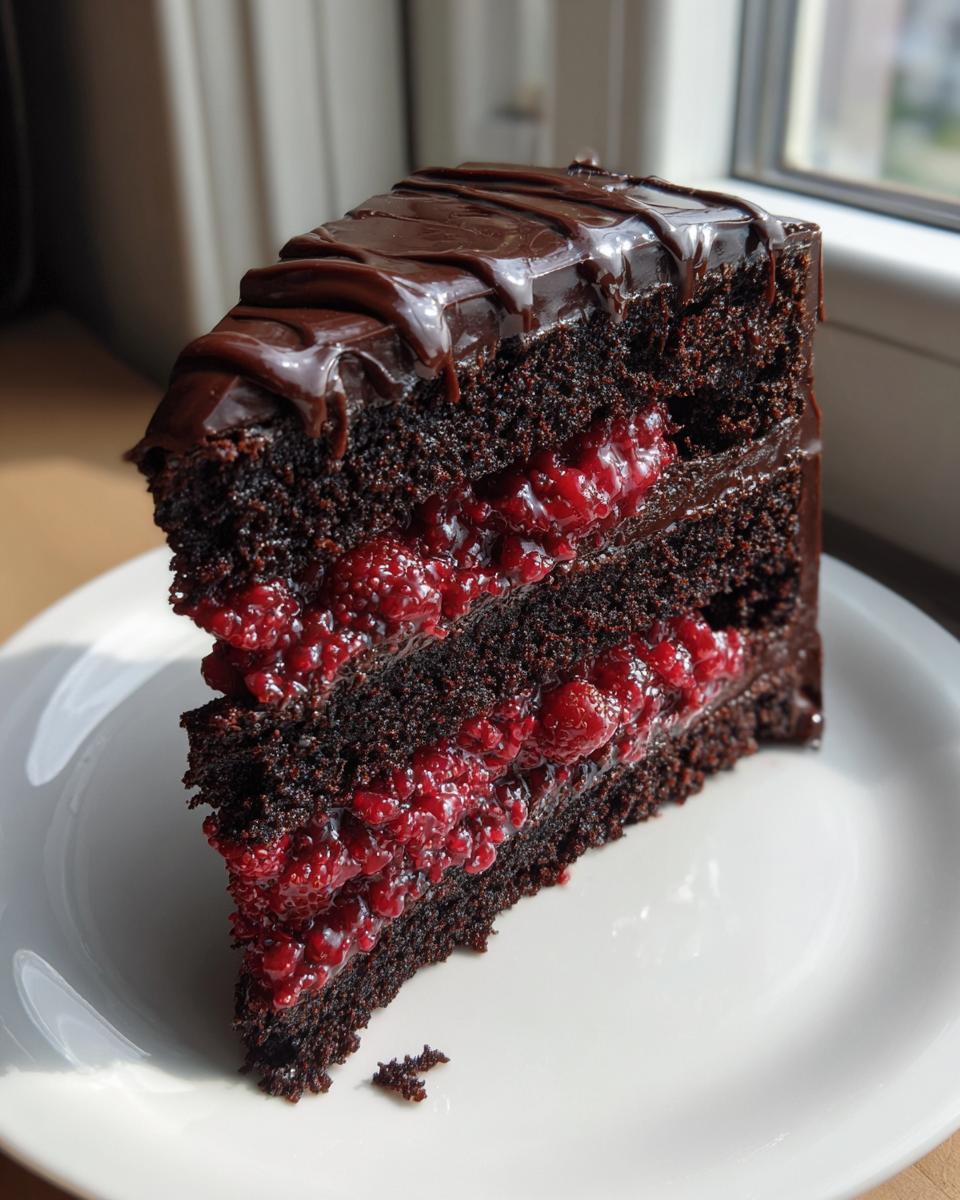
Assembling Your Showstopper Celebration Cake
Time to build our Showstopper Celebration Cake! Put your first completely cool cake layer on your prettiest plate. Spread half of your cooled raspberry filling evenly across it. Pop the second layer on top. Now, use an offset spatula to ice the entire cake with that perfect spreadable ganache. You don’t have to be perfect here; that rustic look is gorgeous! Finish by scattering those remaining fresh raspberries right over the top edge for that final pop of color and flavor. Doesn’t that look incredible?
Tips for Baking the Best Chocolate Raspberry Layer Cake
Listen, even the best recipe needs a little kitchen wisdom to turn it from good to absolutely unforgettable! That’s what I want to share with you here—a few little secrets I’ve picked up from endless baking attempts so your chocolate raspberry layer cake turns out flawless. We want that bakery look without all the stress, right? These little tricks really help bridge the gap between home baking and professional results. If you loved how moist the layers were in my Chocolate Cake Recipe here, these tips will keep them perfect!
Achieving Perfect Ganache Spreadability
The ganache is maybe the trickiest part because it changes consistency so quickly! If you set your bowl down for five minutes, it might decide it wants to be fudge instead of frosting. If you find your ganache has gotten too stiff while you were busy with the layers, don’t sweat it! Just take a small spoonful of your leftover heavy cream and slowly whisk it into the stiff ganache. You only need a little bit to bring it right back to that gorgeous, spreadable texture. On the flip side, if you rushed it and it’s too runny for a good outer coat, pop it in the fridge for 15 minutes, but *please* set a timer! If you let it get too cold, it seizes up hard.
Ingredient Quality for the Chocolate Raspberry Cake
I always preach about accessible ingredients, but for this specific bake, two things really need your attention: the cocoa powder and the chocolate you use for the ganache. Don’t just grab whatever generic cocoa is on sale. A good quality, unsweetened cocoa powder—like Dutch-processed if you have it—makes a huge difference in that deep chocolate foundation. It cuts down on any bitterness and gives you that beautiful dark color.
Similarly, when you’re making the ganache, that chocolate is 90% of the flavor. Skip the baking chips if you can and grab a good quality semi-sweet bar, chopped up. The smoother the chocolate melts, the smoother your finish will be, and that velvety texture is non-negotiable for me!
Ingredient Notes and Substitutions for Your Chocolate Berry Cake Baking
I always get questions about swapping things out, especially when people are inspired to make this chocolate raspberry cake but might be missing one tiny thing in the pantry. Don’t worry, we can almost always make a great substitution, though some things are definitely worth the trip to the store!
For instance, those fresh raspberries? They are spectacular, but if you can only find frozen ones, go for it! Just make sure you toss them into the saucepan straight from the freezer—don’t thaw them first. If you thaw them, they get super mushy and release way too much water into your filling, making it harder to thicken up.
And about that oil? I used vegetable oil because it’s neutral, but you can absolutely use canola oil. Even melted coconut oil works if you don’t mind a tiny coconut note, though I wouldn’t suggest olive oil, sweetie—that would be a flavor flop! I’ve also had readers ask about buttermilk in place of the milk; absolutely use buttermilk if you have it, as the acidity just makes the chocolate layers that much richer and softer.
If you absolutely must swap out the heavy cream for the ganache (which I don’t recommend for texture!), you could try evaporated milk in a pinch, but you’ll have to adjust the chocolate slightly more, as evaporated milk isn’t as fatty. For the best texture in your chocolate raspberry layer cake, try to stick as closely as possible to the cream and the high-quality chocolate listed. Happy baking!
Storage and Reheating Instructions
So, you’ve made this masterpiece! Now, how do we keep it looking and tasting fresh for those second-day cravings? Because we are dealing with a beautiful fresh raspberry filling, chilling is going to be your best friend here.
Once the ganache is fully set—and I mean fully set, otherwise it smears everywhere—you should store the cake covered tightly in the refrigerator. It should keep beautifully for about three to four days. The cold temperature helps keep that fresh fruit filling perfectly set and safe for eating.
Here’s the one crucial step people always miss, though: texture! Chocolate ganache and cold cake layers can taste a little dense and muted straight from the fridge. You absolutely need to let this stunning dessert sit out on the counter for at least an hour before you plan on slicing it. That hour allows the cake layers to soften back up and the ganache to regain that silky, velvety mouthfeel we worked so hard to achieve. That warm, rich texture is totally worth the patience!
If you happen to have any leftover slices later, just leave them on the plate, covered loosely, for that hour. I never recommend microwaving cake slices when they have buttercream or ganache because it gets weird and greasy. Just give it time to come to room temperature, sit back, and enjoy the delicious results of your hard work!
Frequently Asked Questions About This Chocolate Raspberry Cake
It happens every time I post a picture of this beauty—the questions start rolling in! Honestly, I love hearing from you all, and it shows how excited you are to tackle this chocolate raspberry cake. Since this is a bit of a showstopper, I pulled together some of the most common inquiries I get about whipping up this impressive homemade cake.
Can I make the cake layers ahead of time?
Yes, yes, and yes! I totally get that assembling a layer cake is easiest when the parts are ready when you need them. The baked chocolate layers are super sturdy if cooled completely. Once they are totally cool, wrap each layer tightly in plastic wrap, maybe even foil for extra protection, and they will be perfect at room temperature for up to two days. If you need them longer, you can definitely freeze the wrapped layers for up to a month! Just thaw them overnight on the counter before you plan to frost them.
What if I want a different frosting for my chocolate raspberry cake?
You absolutely can swap out the ganache if you’re looking for something a little tangier or fluffier! The ganache is super elegant and gives you that beautiful drip, but if you prefer a classic look, you could easily swap it out for a Rich Chocolate Buttercream. You’ll want to use about 1.5 to 2 times the amount of buttercream you’d normally use for a regular cake since this is a tall, layered style. Just make sure you still use a thin crumb coat of *something*—even just melted dark chocolate—to seal in those crumbs before applying the final layer of your beautiful buttercream frosting!
Also, if you’re making this for special occasion desserts, sometimes people ask about swapping the filling. While I adore the fresh raspberry flavor, you could try using raspberry preserves mixed with a little powdered sugar if you want something faster—just make sure the preserves are thick so they don’t run out when you slice it!
Serving Suggestions for Your Impressive Homemade Cake
Once you have that gorgeous chocolate raspberry cake on the stand, the final step is making the whole experience feel worthy of an occasion! This cake is pretty hearty—deep, rich chocolate meeting bright berry—so what you serve alongside it should either complement that richness or offer a light, clean contrast. It takes zero effort to elevate this Impressive Homemade Cake with the right finishing touches.
For drinks, nothing beats a simple, elegant pairing. I always love serving this cake with a pot of hot, strong black coffee—the bitterness of the coffee just sings with that dark chocolate richness. If you’re looking for something a little more festive, a dry Prosecco or a light raspberry liqueur is fantastic because the bubbles and tartness help cleanse the palate between those decadent bites.
Beyond drinks, I try to keep the sides super minimal. Sometimes, I’ll serve a tiny scoop of vanilla bean gelato on the side, but honestly, the cake is so complete on its own! If you’re serving it after a big meal, maybe just a light dusting of powdered sugar around the plate is all you need. For more ideas on what to mix with rich desserts, check out my favorite drink and cocktail recipes that pair perfectly!
Share Your Baking Bliss
You actually did it! You made the Ultimate Layered Chocolate Raspberry Cake, and I am so incredibly proud of you. That’s the real happiness of baking—taking simple ingredients and turning them into something that brings joy to your table. Now, I truly want to see what you created! Don’t keep all that gorgeousness to yourself!
When you share your photos on Instagram or Facebook, please tag me! I absolutely love getting to see your finished creations and cheer you on. If you made any little tweaks or swaps, tell me about them in the comments below. It helps everyone in our Bliss Batter family continue to learn and grow together!
And if this recipe truly made your celebration special, please consider leaving a rating! Those little stars mean the world to me and help other bakers find reliable, delicious recipes like this one. If you want to know more about our mission to bring home baking joy to everyone, you can peek at my story here. Happy baking, friends!
PrintUltimate Layered Chocolate Raspberry Cake with Silky Ganache

Create a showstopper celebration cake with moist chocolate layers, a vibrant fresh raspberry filling, and a velvety chocolate ganache topping. This recipe guides you to an impressive homemade cake that balances rich chocolate flavor with bright berry tartness.
- Prep Time: 45 min
- Cook Time: 35 min
- Total Time: 120 min
- Yield: 10 servings 1x
- Category: Dessert
- Method: Baking
- Cuisine: American
- Diet: Vegetarian
Ingredients
- For the Moist Chocolate Cake Layers:
- 1 3/4 cups all-purpose flour
- 1 3/4 cups granulated sugar
- 3/4 cup unsweetened cocoa powder
- 1 1/2 teaspoons baking powder
- 1 1/2 teaspoons baking soda
- 1 teaspoon salt
- 2 large eggs
- 1 cup whole milk
- 1/2 cup vegetable oil
- 2 teaspoons vanilla extract
- 1 cup boiling water
- For the Fresh Raspberry Filling:
- 2 cups fresh or frozen raspberries
- 1/2 cup granulated sugar
- 2 tablespoons cornstarch
- 1/4 cup water
- For the Silky Chocolate Ganache Frosting:
- 12 ounces high-quality semi-sweet chocolate, chopped
- 1 1/2 cups heavy cream
- 1 tablespoon unsalted butter (optional, for shine)
- For Assembly and Decoration:
- 1 cup fresh raspberries
Instructions
- Prepare the Cake Layers: Preheat your oven to 350°F (175°C). Grease and flour two 8-inch round cake pans. Line the bottoms with parchment paper.
- In a large bowl, whisk together the flour, sugar, cocoa powder, baking powder, baking soda, and salt.
- Add the eggs, milk, oil, and vanilla extract to the dry ingredients. Beat with an electric mixer on medium speed for two minutes.
- Carefully stir in the boiling water until the batter is smooth. The batter will be thin.
- Divide the batter evenly between the prepared pans. Bake for 30 to 35 minutes, or until a wooden pick inserted into the center comes out clean.
- Let the cakes cool in the pans for 10 minutes before inverting them onto a wire rack to cool completely.
- Make the Raspberry Filling: In a medium saucepan, combine the raspberries and sugar. Cook over medium heat until the berries break down and release their juices, about 5 minutes.
- In a small bowl, whisk the cornstarch and water until smooth. Pour this mixture into the simmering berries, stirring constantly.
- Continue to cook, stirring, until the mixture thickens significantly, about 1 to 2 minutes. Remove from heat and let the filling cool completely. It will thicken more as it cools.
- Make the Chocolate Ganache Frosting: Place the chopped chocolate in a heatproof bowl.
- Heat the heavy cream in a small saucepan until it just begins to simmer around the edges. Do not boil.
- Pour the hot cream over the chopped chocolate. Let it sit undisturbed for 5 minutes to melt the chocolate.
- Add the butter, if using. Whisk slowly from the center outward until the mixture is completely smooth and glossy. Let the ganache cool at room temperature until it reaches a spreadable consistency, about 1 to 2 hours. If you need it faster, chill briefly, stirring every 10 minutes.
- Assemble the Cake: Once the cake layers are fully cooled, place one layer on your serving plate.
- Spread half of the cooled raspberry filling evenly over the first layer.
- Top with the second cake layer.
- Use an offset spatula to cover the top and sides of the cake with the spreadable chocolate ganache frosting.
- Decorate the top edge of the cake with the remaining fresh raspberries before serving.
Notes
- For extra moist chocolate layers, you can substitute buttermilk for the whole milk in the cake recipe.
- If you prefer a thicker filling, increase the cornstarch to 3 tablespoons.
- If your ganache becomes too stiff to spread, warm a small portion of heavy cream and whisk it into the ganache until you reach the desired texture.
Nutrition
- Serving Size: 1 slice
- Calories: 450
- Sugar: 45g
- Sodium: 250mg
- Fat: 28g
- Saturated Fat: 15g
- Unsaturated Fat: 13g
- Trans Fat: 0.5g
- Carbohydrates: 50g
- Fiber: 3g
- Protein: 5g
- Cholesterol: 60mg