
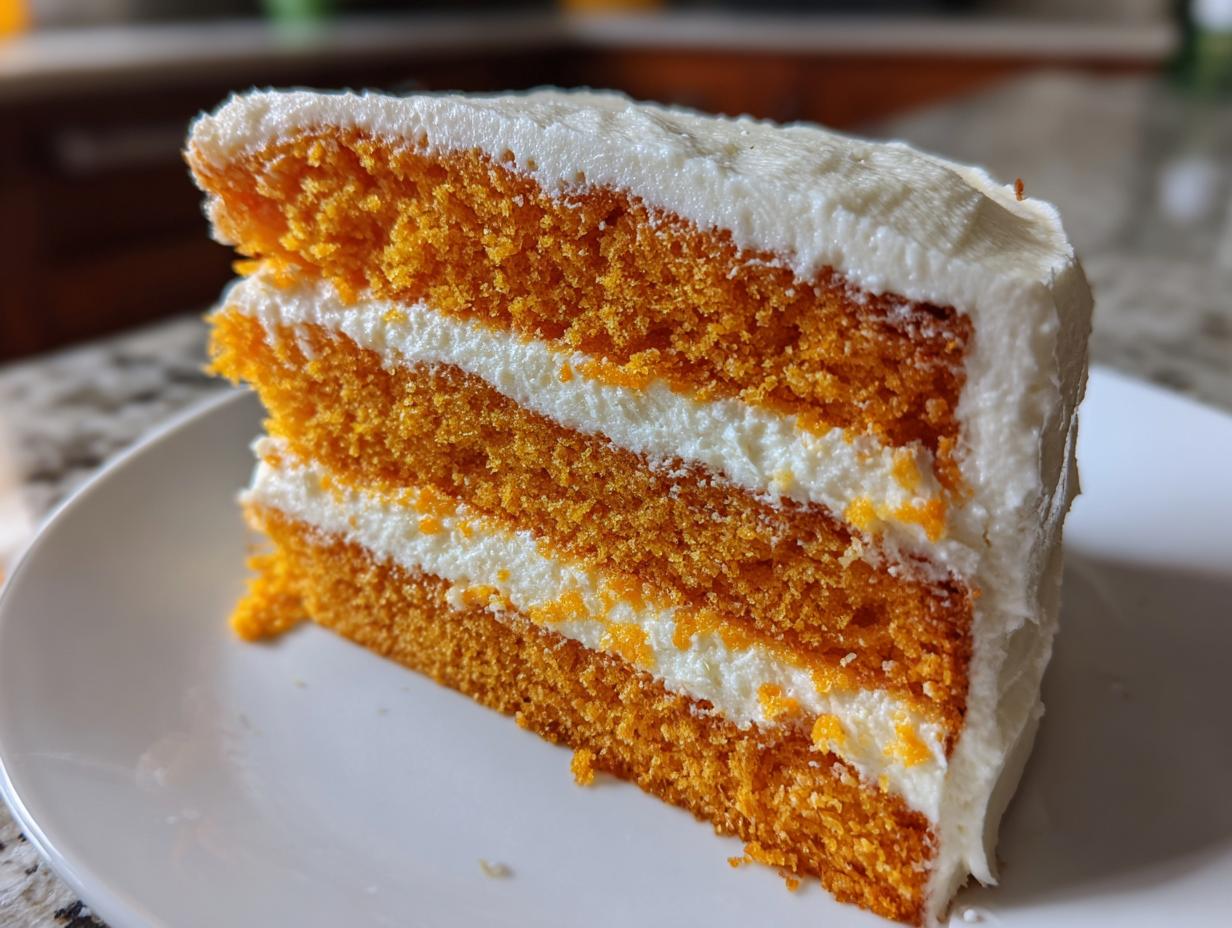
Do you ever just crave that perfect bite of summer? I mean, that ice-cold, two-toned stick of creamy orange and sweet vanilla flavor that instantly whisks you back to childhood pool days? Well, friends, that feeling is exactly what we’re chasing today! Forget those cardboard-tasting box mixes; I’m sharing my absolute best recipe for the Ultimate Moist Orange Creamsicle Layer Cake. Here at Bliss Batter, my goal—Claire Sterling’s promise—is always to give you foolproof recipes that taste completely homemade, and this vibrant Creamsicle Cake is truly one for the record books. It’s bright, it’s fluffy, and it’s unbelievably refreshing!
- Why This Ultimate Moist Creamsicle Cake Recipe Works (E-E-A-T)
- Ingredients for the Best Creamsicle Cake Layers
- Assembling the Fluffy Frosting for Your Creamsicle Cake
- Optional Orange Syrup Soak for an Extra Moist Creamsicle Cake
- Step-by-Step Instructions to Make the Creamsicle Cake
- Tips for Success with Your Homemade Creamsicle Flavor
- Storage and Serving Suggestions for This Refreshing Cake
- Frequently Asked Questions About Making a Creamsicle Cake
- Share Your Ultimate Moist Creamsicle Cake Creation
Why This Ultimate Moist Creamsicle Cake Recipe Works (E-E-A-T)
So many summer citrus cakes end up disappointingly dry, but that’s not how we roll at Bliss Batter! This layer cake beats those quick recipes because we focus on layering moisture from the start, making it one of the best Nostalgic Cake Recipes you’ll ever try. My secret isn’t artificial flavors; it’s all about using fresh orange zest—you really need those oils for that authentic, bright zing. When you smell that zest hitting the flour, you just know you’re halfway to sunshine!
Achieving the Perfect Fluffy Texture in Your Creamsicle Cake
The number one way I guarantee fluffiness is through the creaming of the butter and sugar. Don’t rush this step! You need to beat them together until they are genuinely pale and look almost white. See how light and airy that looks? That’s air getting whipped into the fat, and those tiny air pockets expand in the oven, lifting your layers without needing a heavy hand on the baking powder. It’s all about preparation!
Ingredients for the Best Creamsicle Cake Layers
Okay, let’s talk about what goes into the actual cake structure. Remember, texture is everything when you are trying to capture that perfect, plush creamsicle feel. I’ve listed out precisely what you need below, but pay close attention to the state of your ingredients! If you’re using cold butter, you’re going to have a bad time—trust me on this one.
You’ll start by gathering your dry components: grab 1 and 3/4 cups of all-purpose flour, 1 and 3/4 cups of granulated sugar for sweetness, a full tablespoon of baking powder to get that lovely rise, and just a half teaspoon of salt to balance everything out. Make sure that baking powder is fresh, too; old leavening agents are the silent cake killers!
For the fat, we need a half cup of unsalted butter—and it absolutely has to be soft, not melted. Then we move to the wet side, which is where the magic happens for our citrus burst. You need three large eggs, 1 cup of whole milk for richness, a half cup of fresh orange juice, a full tablespoon of lovely orange zest (please, skip the bottled stuff!), and just one teaspoon of good vanilla extract. That fresh juice and zest are non-negotiable for that authentic, nostalgic orange flavor we are aiming for in this spectacular Creamsicle Cake.
Assembling the Fluffy Frosting for Your Creamsicle Cake
Now we need the creamy vanilla side of the equation, and I’ve designed this frosting to be unbelievably stable, which is crucial for layer cakes. For these Fluffy Frosting Recipes, you need 8 ounces of cream cheese, well-softened, paired with a half cup of unsalted butter, also soft. We’re going to tackle that sweetness with four cups of powdered sugar, making sure it’s sifted so we don’t have any lumps fighting us!
The final flavor punch comes from a teaspoon of vanilla extract and a quarter cup of fresh orange juice, plus one teaspoon of zest. That ratio of tang to sweetness is exactly right to complement the bright cake layers without making the frosting taste sour. Beat it slow and steady, and you’ll get that perfect, light, tall swirl for your cake!
Optional Orange Syrup Soak for an Extra Moist Creamsicle Cake
Okay, remember how I absolutely hate dry cake? Even though this recipe is already designed to be incredibly moist, I always, always, always whip up this little orange syrup soak. It’s completely optional, but if you want that extra layer of sunshine flavor and tenderness that lasts for days, you have to do this step!
This syrup does two important things: first, a little sugar syrup equals phenomenal moisture, making this the best Creamsicle Cake you’ll ever make. Second, it punches up the orange flavor so it tastes like you squeezed fresh oranges over the cake right before serving. It’s so simple, too; you only need three things!
For the soak, combine a quarter cup of granulated sugar with a quarter cup of water in a tiny saucepan. Just heat that up until the sugar dissolves completely—you aren’t trying to make candy here, just a quick simple syrup. Once it’s off the heat, stir in just one tablespoon of fresh orange juice to give it that citrus kick. You’re done! Keep this on standby right next to your cooling racks for when the time comes to poke those holes.
Step-by-Step Instructions to Make the Creamsicle Cake
Now that we have our beautiful batter ready and our frosting components waiting, let’s walk through putting this stunning cake together. Don’t worry about rushing; the key to a great layer cake is patience during the cooling and frosting stages. We’ll start super easy by making sure the oven is exactly where it needs to be!
First things first: fire up that oven to 350\degree F (175\degree C). Grab your two 8-inch cake pans. I like to grease them really well and then dust them with flour, but always line the bottoms with those pre-cut circles of parchment paper—it’s my insurance policy against sticking! Divide that gorgeous orange batter evenly between the two pans. This looks like a lot of batter, but trust me, it bakes up perfectly.
Into the oven they go for about 28 to 32 minutes. You know they are done when a toothpick inserted right in the middle comes out clean. While they are cooling for just a quick 10 minutes in the pan, get that optional syrup ready. You’ll need to poke holes all over the surface of the warm cakes—I use a skewer, and then brush on that warm syrup you just mixed up. Let them cool completely on wire racks before you even think about frosting!

Baking and Syrup Application for Your Orange Vanilla Dessert
Getting the timing right for that syrup application is everything for this Orange Vanilla Dessert. You absolutely must apply the syrup when the cake layers are slightly warm. If the cake is cold, the syrup just sits on top, which is a waste! If the cake is too hot, it just drips right through. Ten minutes out of the oven is the sweet spot where the cake structure is set enough to absorb the moisture without collapsing. Make sure you use a fork or a skewer to poke holes all over the entire surface so that syrup sinks deep down into the crumb. It makes the final product so much more luscious.
Creating the Creamy Orange Dessert Frosting
For our frosting, remember the lesson on creaming butter? Apply that here! You want your softened cream cheese and butter to be super smooth before you add anything else. Beat them until they look like pale, fluffy clouds. Then, add your four cups of sifted powdered sugar slowly, just a cup at a time, mixing on low so you don’t create a white cloud explosion in your kitchen—we want light and fluffy, not messy!
Once the sugar is incorporated, this is where you beat it on medium-high speed for a good 3 or 4 minutes. You’ll see it lighten up beautifully. Finally, drizzle in that small amount of orange juice, the zest, and the vanilla. Keep whipping until it holds stiff peaks when you lift the beaters. That stable structure means you can stack these layers high!
Tips for Success with Your Homemade Creamsicle Flavor
You’ve got the recipe, but I want to share a few final secrets—little things I learned over years of baking this exact cake—that guarantee your Creamsicle Cake is a showstopper. It’s usually the little details that make the difference between “good” and “absolutely unforgettable.” Don’t skip these quick checks!
First, let’s talk about those oranges again, because I can’t stress this enough: freshly grated zest is crucial. The zest holds all the aromatic oils, which is where that true, vibrant orange flavor lives. If you use bottled orange extract instead of zest and fresh juice, you’ll end up with a flat, artificial taste, which defeats the whole purpose of this nostalgic dessert. Grate it fresh right before you start your batter!
My second big tip is about ingredient temperature for the cake itself. The butter needs to be softened, yes, but your milk, eggs, and juice? Bring those up close to room temperature too. When your cold milk hits your creamed butter/sugar mixture, it instantly tightens up the fat, which deflates those precious air bubbles we worked so hard to create. Slightly warmer liquids fold in much more gently, keeping that cake crumb unbelievably tender.
Finally, regarding the frosting stability—if you live in a really warm climate, chill your cream cheese and butter for about 10 minutes in the fridge right before you start beating them, even if you thought they were soft enough. A slightly colder fat base whips up thicker and holds its shape better, meaning your beautifully stacked layers won’t slide down when the party gets going. This simple trick keeps your Vanilla Cream Cheese Frosting gorgeous!
Storage and Serving Suggestions for This Refreshing Cake
Because this Refreshing Cake is topped with that wonderful, creamy orange cream cheese frosting, it really needs some fridge time before serving. Don’t leave it sitting out on the counter all day—it’s just not safe for dairy-based frostings, and frankly, it gets too soft!
I always store leftovers tightly covered in the refrigerator; it usually stays beautifully moist for about four days. If you plan on cutting slices later, go ahead and chill the whole assembled cake for at least 30 minutes beforehand—it makes those clean cuts so much easier, honestly!
When serving, let it sit on the counter for about 20 minutes before you cut into it, just to take the harsh chill off the cake layers. This wonderful Creamsicle Cake pairs perfectly with a hot cup of coffee or maybe even some fresh raspberries scattered around the plate to add another layer of mild tartness.
Frequently Asked Questions About Making a Creamsicle Cake
Can I substitute the fresh orange juice and zest with orange extract?
Oh, honey, I really hope you don’t! While using extract is certainly quicker, it just won’t give you that incredible, authentic flavor that fresh citrus provides. The oils in the fresh zest are what make this cake taste exactly like a frozen creamsicle, not just generically orange. If you absolutely have to use extract just once, use just a tiny bit—maybe a half teaspoon—alongside fresh juice, but trust me, grating those oranges makes this the best Creamsicle Cake ever!
Can I turn this layer cake into a poke cake version?
That’s a fantastic idea, especially if you love moisture! You totally can adapt this. After you bake the layers and cool them slightly, use a skewer, or really, the handle of a wooden spoon if you have one handy, and poke deep holes all over the top surface of the warm cakes. Then, you’d use the optional syrup soak, which works perfectly for this adaptation. It turns into an amazing Orange Vanilla Dessert!
How long will my finished Creamsicle Cake stay good?
Because we are using real cream cheese and butter in that heavenly frosting, you absolutely must store this cake covered tightly in the refrigerator. It holds up beautifully for about four days that way. If you want to serve it, just pull it out about 30 minutes before slicing so the frosting softens up just a touch. It stays remarkably moist because of the syrup soak, too!
Is it necessary to sift the powdered sugar for the frosting?
Yes, please, yes! Sugar loves to clump together in every conceivable structure, and it especially likes hanging out in powdered sugar bags. If you skip sifting, those little sugar rocks will end up stiff in your otherwise smooth frosting. We are aiming for a wonderfully light and fluffy consistency—the kind that almost melts in your mouth—so taking that extra minute to sift your sugar guarantees you get one of the best Fluffy Frosting Recipes!
Share Your Ultimate Moist Creamsicle Cake Creation
Oh, I am just buzzing with excitement for all of you to try this Ultimate Moist Creamsicle Cake! Now that you have all the secrets—from the fresh zest to the optional syrup soak—it’s your turn to step into the kitchen and whip up a little homemade happiness.
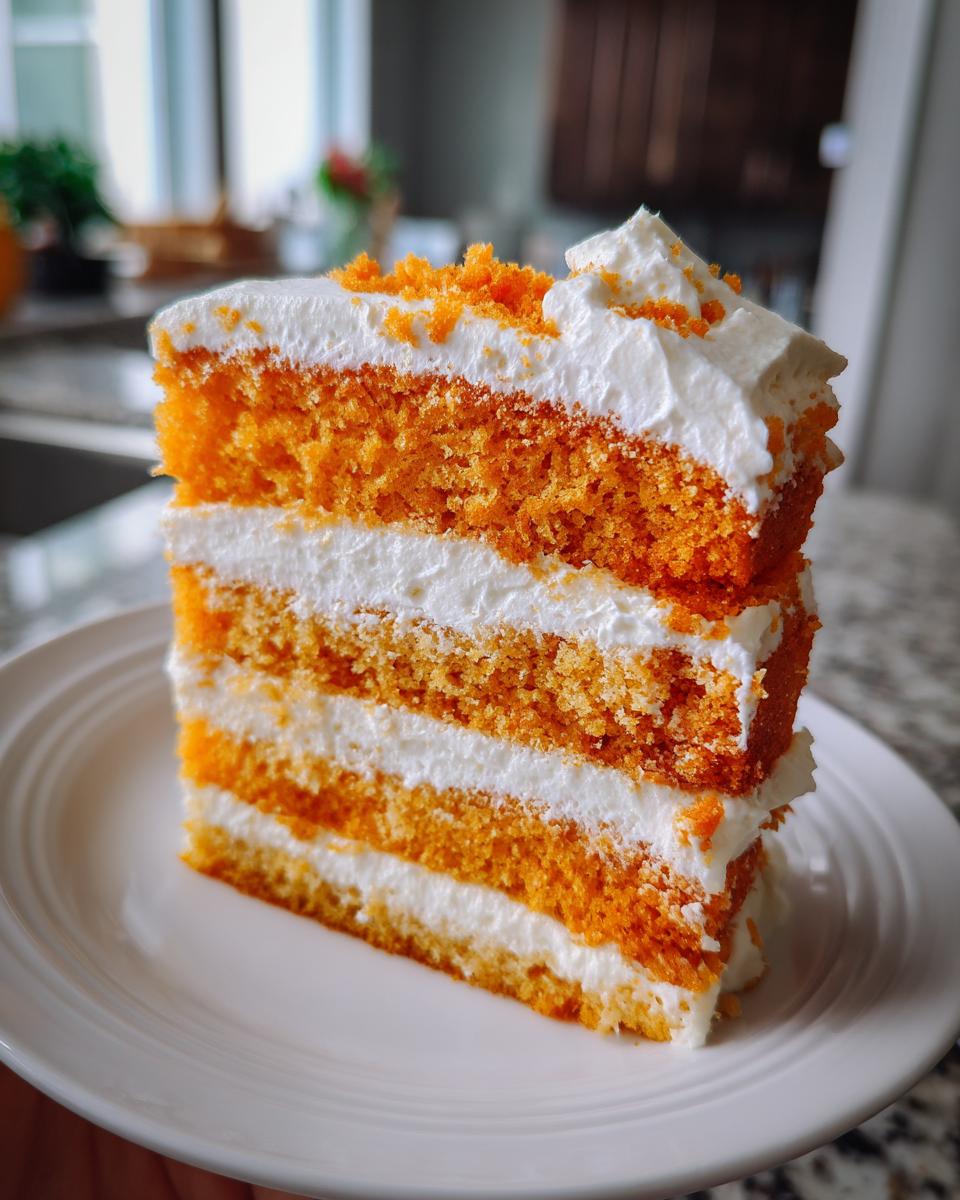
When you finally cut into that first slice—that perfect, fluffy, orange and vanilla dream—I absolutely want to hear about it! Please, come right back here and leave a rating for the recipe. Did it bring back those amazing childhood memories for you, too? Five stars is always appreciated, but honest feedback helps me keep making these recipes better and better for everyone!
And please, snap a picture! I’m such a visual baker, and I love seeing your creations. Tag me over on social media when you share your gorgeous layered cakes. Seeing your beautiful bakes inspires me every single day to keep testing, tweaking, and sharing more approachable, blissful recipes right here at Bliss Batter. Happy baking, my friend, and enjoy every refreshing bite!
PrintUltimate Moist Orange Creamsicle Layer Cake with Vanilla Cream Cheese Frosting
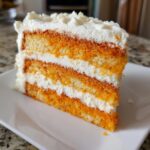
Create a slice of sunshine with this Ultimate Moist Creamsicle Cake. This recipe delivers the nostalgic orange and vanilla flavor of the classic frozen treat in tender cake layers topped with a stable, fluffy cream cheese frosting.
- Prep Time: 25 min
- Cook Time: 30 min
- Total Time: 55 min
- Yield: 12 servings 1x
- Category: Dessert
- Method: Baking
- Cuisine: American
- Diet: Vegetarian
Ingredients
- 1 3/4 cups all-purpose flour
- 1 3/4 cups granulated sugar
- 1 tablespoon baking powder
- 1/2 teaspoon salt
- 1/2 cup unsalted butter, softened
- 3 large eggs
- 1 cup whole milk
- 1/2 cup fresh orange juice
- 1 tablespoon orange zest
- 1 teaspoon vanilla extract
- For the Frosting:
- 8 ounces cream cheese, softened
- 1/2 cup unsalted butter, softened
- 4 cups powdered sugar, sifted
- 1 teaspoon vanilla extract
- 1/4 cup fresh orange juice
- 1 teaspoon orange zest
- For the Orange Syrup Soak (Optional):
- 1/4 cup granulated sugar
- 1/4 cup water
- 1 tablespoon orange juice
Instructions
- Preheat your oven to 350°F (175°C). Grease and flour two 8-inch round cake pans. Line the bottoms with parchment paper circles.
- In a large bowl, whisk together the flour, sugar, baking powder, and salt.
- Add the softened butter to the dry ingredients. Beat on low speed until the mixture resembles coarse sand.
- In a separate bowl, whisk together the eggs, milk, 1/2 cup orange juice, 1 tablespoon orange zest, and vanilla extract.
- Gradually add the wet ingredients to the dry ingredients, mixing on medium speed until just combined. Do not overmix.
- Divide the batter evenly between the prepared pans. Bake for 28 to 32 minutes, or until a toothpick inserted into the center comes out clean.
- While the cakes cool slightly, prepare the optional syrup: Combine the syrup ingredients in a small saucepan. Heat until the sugar dissolves. Remove from heat.
- Let the cakes cool in the pans for 10 minutes. Poke holes across the top of each warm layer using a skewer or fork. Brush or drizzle the orange syrup evenly over both layers. Let the cakes cool completely on wire racks.
- Prepare the frosting: In a large bowl, beat the softened cream cheese and butter together until smooth and creamy.
- Gradually add the sifted powdered sugar, beating until combined.
- Add the 1/4 cup orange juice, 1 teaspoon orange zest, and vanilla extract. Beat on medium-high speed until the frosting is light and fluffy.
- Place one cooled cake layer on a serving plate. Spread about one-third of the frosting evenly over the top. Place the second layer on top.
- Frost the top and sides of the entire cake with the remaining cream cheese frosting.
- Chill the cake for at least 30 minutes before slicing for the cleanest cuts. Garnish with extra orange zest if desired.
Notes
- For the most vibrant orange flavor, use fresh orange zest, not bottled extract.
- If you prefer a slightly firmer frosting, chill the cream cheese and butter for 10 minutes before beating them.
- This cake pairs well with a simple dusting of powdered sugar or thin slices of fresh orange on top.
Nutrition
- Serving Size: 1 slice
- Calories: 410
- Sugar: 55
- Sodium: 280
- Fat: 18
- Saturated Fat: 10
- Unsaturated Fat: 8
- Trans Fat: 0.3
- Carbohydrates: 62
- Fiber: 1
- Protein: 4
- Cholesterol: 85