
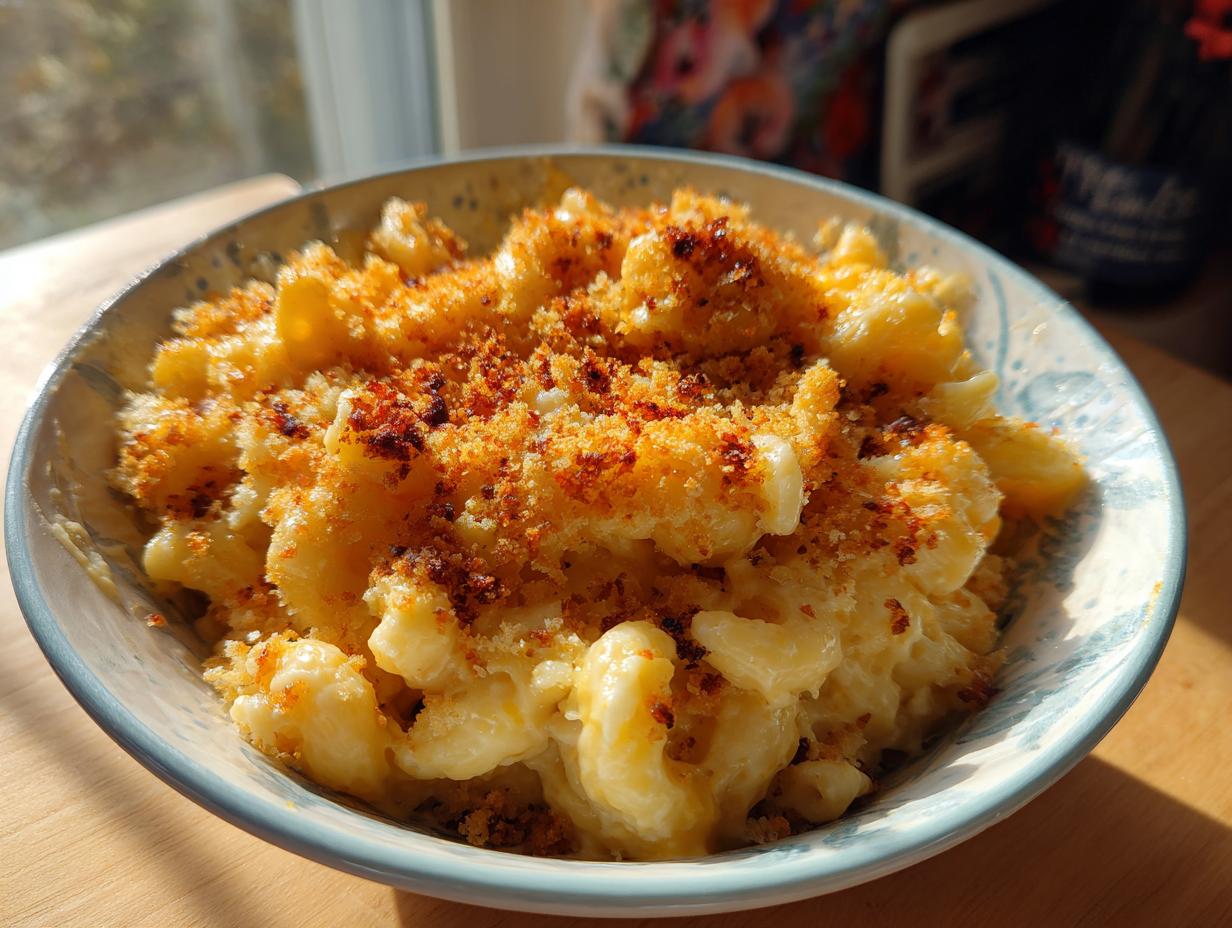
Oh, isn’t there just *something* about a bubbling dish of baked mac and cheese that just screams comfort? It’s like a warm hug in a bowl, perfect for those chilly evenings or when you just need a little something special. When I think of the ultimate baked mac and cheese, I picture my Grandma Sterling’s kitchen. The air would be thick with the smell of butter and cheese, and the golden, crunchy topping was just the crown jewel. I’ve spent years perfecting this classic recipe, tweaking my grandmother’s original method to ensure every bite is unbelievably creamy with that perfect, golden breadcrumb crust. Trust me, after all the testing, this is the recipe!
- Why You'll Love This Baked Mac and Cheese
- Classic Baked Mac and Cheese: Roux vs. No Roux
- The Best Cheeses for Smooth Melt Baked Mac and Cheese
- Ingredients for the Ultimate Baked Mac and Cheese
- How to Make Perfect Baked Mac and Cheese
- Tips for the Best Baked Mac and Cheese
- Make-Ahead and Storage for Baked Mac and Cheese
- Frequently Asked Questions about Baked Mac and Cheese
- Serving Suggestions for Your Baked Mac and Cheese
- Nutritional Information (Estimate)
- Share Your Baked Mac and Cheese Creations!
Why You’ll Love This Baked Mac and Cheese
Honestly, this recipe is an absolute winner for so many reasons! It’s pure comfort food at its finest:
- Super creamy, cheesy sauce that’ll make you swoon.
- That irresistibly golden, crispy breadcrumb topping.
- It’s surprisingly easy to make, even for a weeknight!
- Guaranteed to be a hit with everyone – seriously, it’s a crowd-pleaser!
- Perfect as a star dish or a fabulous side for any meal.
Classic Baked Mac and Cheese: Roux vs. No Roux
Okay, so when it comes to baked mac and cheese, you’ve got options, right? You can totally go the ‘dump and bake’ route – just toss everything in and hope for the best. But if you ask me, and you know I’m all about that perfect texture, you really want to take a few extra minutes for a classic roux. It makes all the difference in getting that outrageously creamy, velvety sauce that just coats every single noodle. That’s why this recipe uses a roux; it’s the secret weapon for truly decadent, smooth mac and cheese.
The Best Cheeses for Smooth Melt Baked Mac and Cheese
Picking the right cheese is like picking the right outfit for a party – it’s got to look good and feel good! For that perfectly creamy, non-grainy sauce we’re dreaming of, you really need cheeses that are known for melting beautifully. Think cheeses with a good amount of fat and not too much moisture, which helps them get all smooth and luscious instead of getting greasy or clumpy. That’s why this recipe calls for sharp cheddar and Gruyere. Cheddar gives you that classic cheesy flavor, and Gruyere adds this amazing nutty depth. They’re both fantastic for melting smooth. My biggest tip, and something my Grandma always swore by? Shred your own cheese! Pre-shredded stuff often has anti-caking agents that can mess with how smoothly it melts, so grating it yourself is totally worth it.
Ingredients for the Ultimate Baked Mac and Cheese
Alright, let’s talk about what makes this mac and cheese truly special. It’s all about using good stuff, you know? Here’s what you’ll need to grab:
- 1 pound elbow macaroni – My grandma always used elbow, but honestly, any short pasta shape like shells or rotini works great too!
- 1/2 cup (that’s one stick!) unsalted butter – For our glorious roux.
- 1/2 cup all-purpose flour – Also for the roux, the magic thickener!
- 3 cups whole milk – This is essential for that creamy sauce; don’t skimp!
- 1 cup heavy cream – A little indulgence for ultimate richness.
- 4 cups shredded sharp cheddar cheese – Get the good sharp stuff, it packs so much flavor!
- 2 cups shredded Gruyere cheese – This adds such a lovely nutty depth.
- 1 teaspoon salt – To bring all those flavors together.
- 1/2 teaspoon black pepper – Freshly ground is best if you have it!
- 1/4 teaspoon nutmeg – Just a whisper, it really makes the cheese sing.
- 1 cup panko breadcrumbs – For that amazing crunchy topping, trust me on this!
- 2 tablespoons melted butter – To toss with those breadcrumbs for extra golden goodness.
How to Make Perfect Baked Mac and Cheese
Alright, let’s get this party started! Making this baked mac and cheese is honestly easier than you might think, and the results? Pure magic. We’re going to break it down step-by-step, just like my Grandma taught me. And don’t worry, we’re aiming for that ultimate creamy, cheesy goodness with a topping that just sings! It’s all about building flavor, and this recipe nails it, just like our garlicky mashed potatoes do for a Sunday feast.
Preparing the Pasta and Roux Base
First things first, get your oven preheating to 375°F (190°C) and butter up that 9×13 baking dish. Now, cook your macaroni according to the package directions – you want it *al dente*, meaning it still has a little bite to it. Nobody likes mushy pasta! Drain it well and set it aside. In a big saucepan or pot, melt that half cup of butter over medium heat. Toss in the flour and whisk like crazy for about a minute. It’ll smell toasty, that’s good!
Creating the Creamy Cheese Sauce
Now for the creamy part! Slowly, and I mean *slowly*, whisk in the milk and heavy cream. Keep whisking constantly – this is how we stop any lumps from forming and get that super smooth sauce. Bring it up to a gentle simmer and just keep stirring as it thickens up beautifully. This usually takes about 5 to 7 minutes. Once it’s nice and thick, take it off the heat. Stir in all that lovely shredded cheddar and Gruyere, along with the salt, pepper, and that pinch of nutmeg. Keep stirring until all the cheese is melted and your sauce is smooth as silk.
Combining and Assembling the Baked Mac and Cheese
Here comes the best part: pour that cooked macaroni right into your glorious cheese sauce. Give it a good stir to make sure every single noodle is coated in cheesy goodness. Then, pour that whole glorious mixture into your prepared baking dish. Now for the crown jewel: in a little bowl, mix your panko breadcrumbs with those 2 tablespoons of melted butter. Sprinkle this buttery, crunchy topping evenly all over the top of your mac and cheese. It’s going to get so golden and delicious!

Baking and Resting Your Baked Mac and Cheese
Pop that beautiful dish into your preheated oven and let it bake for 20 to 25 minutes. You’re looking for that topping to be a gorgeous golden brown and for the sauce to be bubbling happily around the edges. Once it’s out, and I know it smells divine and you want to dive right in, let it rest for about 5 to 10 minutes. This is super important! It lets the sauce set up just a bit, so you get that perfect texture without it being too runny. Trust me, it’s worth the wait!
Tips for the Best Baked Mac and Cheese
You know, even with a fantastic recipe, sometimes a few little tricks can take your baked mac and cheese from great to absolutely legendary! Here are some of my go-to tips to make sure yours turns out perfectly, every single time, especially when it comes to that amazing crunchy topping we love so much:
Shred Your Own Cheese, Seriously! I know I mentioned it before, but I can’t stress this enough. Pre-shredded cheese has those anti-caking agents that make it clump. When you shred your own cheddar and Gruyere right before you start cooking, you get a sauce that’s way smoother, creamier, and just plain better. It makes a big difference!
Sauce Consistency is Key. When you’re making your cheese sauce, and it’s simmering and thickening, you want it to be just right. It should be thick enough to coat the back of a spoon, but still a little loose because it will thicken up even more when it bakes. If it seems too thick, just stir in a splash more milk. If it’s too thin, let it simmer a minute longer – but don’t go overboard!
That Topping! For that perfect golden crust, make sure your breadcrumbs and melted butter are really well combined. You want every little panko flake to be coated in butter so they get super crispy and golden in the oven. Don’t be shy with tossing them well! It’s like giving them a little spa treatment before they hit the heat. It reminds me a little of how I get my air fryer chicken wings extra crispy!
Don’t Skip the Rest! I know, I know, it smells incredible and you’ll want to dig in immediately. But letting your baked mac and cheese rest for those 5-10 minutes after it comes out of the oven is SO important. It gives everything a chance to settle and set up, so you get those lovely, distinct cheesy noodles instead of a bubbly cheese puddle. It’s a small step that makes a huge difference in the final texture!
Make-Ahead and Storage for Baked Mac and Cheese
Planning ahead is a total game-changer, especially when it comes to holidays or busy weeknights! This baked mac and cheese is totally make-ahead friendly, which is music to my ears. You can actually get everything ready up to step 7 (before you add the breadcrumb topping and bake), cover it tightly, and pop it in the fridge. It’ll keep like that for up to two days! When you’re ready to bake, just let it sit on the counter for about 30 minutes to take the chill off – this is important so it bakes evenly. Then, add that lovely breadcrumb topping and pop it in the oven. You might need to bake it for a few extra minutes since it’s starting out colder, maybe an extra 5-7 minutes. It’s just like my overnight French toast casserole – bake it the night before, then just warm it up and enjoy!
Frequently Asked Questions about Baked Mac and Cheese
Got questions about making the best baked mac and cheese ever? I totally get it! Here are some things folks often ask me:
Can I use different pasta shapes for this recipe?
Absolutely! While elbow macaroni is the classic choice, this recipe works beautifully with all sorts of short pasta shapes. Think shells, rotini, cavatappi, or even penne! Just make sure whatever shape you choose holds onto that creamy sauce well. Cooking time might vary a little, so always cook it until it’s al dente.
Why is my baked mac and cheese grainy?
Oh no, grainy mac and cheese is the worst! Usually, it happens because the cheese got too hot too fast, or because of certain cheeses that don’t melt smoothly. If you’re using pre-shredded cheese, those anti-caking agents can sometimes cause graininess too. My best advice? Shred your cheese fresh from the block and melt it gently over low-medium heat, stirring constantly. Cheeses like cheddar and Gruyere are usually pretty safe bets for a smooth melt!
Can I freeze baked mac and cheese?
Yes, you can definitely freeze baked mac and cheese! Let it cool completely after baking, then either transfer it to an airtight container or wrap the baking dish tightly with plastic wrap and then foil. It should keep well in the freezer for about 2-3 months. When you’re ready to reheat, ideally, let it thaw in the fridge overnight, then warm it up in a 350°F (175°C) oven, maybe adding a splash of milk if it seems a little dry.
Serving Suggestions for Your Baked Mac and Cheese
This baked mac and cheese is seriously so versatile! It’s the ultimate comfort food side dish, perfect for almost any meal. Imagine it alongside a hearty pot roast or with some flavorful butter chicken. It’s an absolute must-have for holiday dinners, making any gathering feel extra special, and it’s definitely a staple for a comforting Sunday dinner. Honestly, it makes any meal feel like a celebration!
Nutritional Information (Estimate)
Just so you know, the nutritional info can look a little different depending on exactly what you put in, but here’s a pretty good estimate for a serving of this heavenly baked mac and cheese:
Serving Size: 1 serving
Calories: 550
Fat: 35g
Saturated Fat: 20g
Trans Fat: 1g
Cholesterol: 90mg
Sodium: 800mg
Carbohydrates: 45g
Fiber: 2g
Sugar: 5g
Protein: 20g
Share Your Baked Mac and Cheese Creations!
I really hope you feel inspired to give this baked mac and cheese a try! When you do, I would absolutely LOVE to hear all about it. Did you try any fun cheese combos? Did your family devour it as much as mine does? Drop a comment below, rate the recipe, or even tag me in your photos on social media. Seeing your creations is honestly the best part of this whole baking journey! You can read more about my own baking adventures on my About page – let’s connect!
PrintClassic Baked Mac and Cheese

A creamy, oven-baked macaroni and cheese with a golden breadcrumb topping. This recipe uses a classic roux for a smooth sauce and offers tips for make-ahead preparation.
- Prep Time: 20 min
- Cook Time: 30 min
- Total Time: 50 min
- Yield: 8 servings 1x
- Category: Side Dish
- Method: Baking
- Cuisine: American
- Diet: Vegetarian
Ingredients
- 1 pound elbow macaroni
- 1/2 cup (1 stick) unsalted butter
- 1/2 cup all-purpose flour
- 3 cups whole milk
- 1 cup heavy cream
- 4 cups shredded sharp cheddar cheese
- 2 cups shredded Gruyere cheese
- 1 teaspoon salt
- 1/2 teaspoon black pepper
- 1/4 teaspoon nutmeg
- 1 cup panko breadcrumbs
- 2 tablespoons melted butter
Instructions
- Preheat your oven to 375°F (190°C). Butter a 9×13 inch baking dish.
- Cook macaroni according to package directions until al dente. Drain and set aside.
- In a large saucepan, melt 1/2 cup butter over medium heat. Whisk in flour and cook for 1 minute, stirring constantly, until lightly golden.
- Gradually whisk in milk and heavy cream until smooth. Bring to a simmer, stirring constantly, until the sauce thickens, about 5-7 minutes.
- Remove from heat. Stir in cheddar cheese, Gruyere cheese, salt, pepper, and nutmeg until cheese is melted and sauce is smooth.
- Add the cooked macaroni to the cheese sauce and stir to combine.
- Pour the macaroni and cheese mixture into the prepared baking dish.
- In a small bowl, combine panko breadcrumbs and 2 tablespoons melted butter. Sprinkle evenly over the macaroni and cheese.
- Bake for 20-25 minutes, or until the topping is golden brown and the sauce is bubbly.
- Let stand for 5-10 minutes before serving.
Notes
- For a make-ahead option, prepare the mac and cheese up to step 7, cover, and refrigerate. Before baking, let it sit at room temperature for 30 minutes and add a few extra minutes to the baking time.
- You can use a combination of your favorite cheeses, but ensure they melt smoothly to avoid a grainy texture.
- For a richer flavor, consider adding a pinch of Dijon mustard or a dash of hot sauce to the cheese sauce.
Nutrition
- Serving Size: 1 serving
- Calories: 550
- Sugar: 5g
- Sodium: 800mg
- Fat: 35g
- Saturated Fat: 20g
- Unsaturated Fat: 15g
- Trans Fat: 1g
- Carbohydrates: 45g
- Fiber: 2g
- Protein: 20g
- Cholesterol: 90mg