
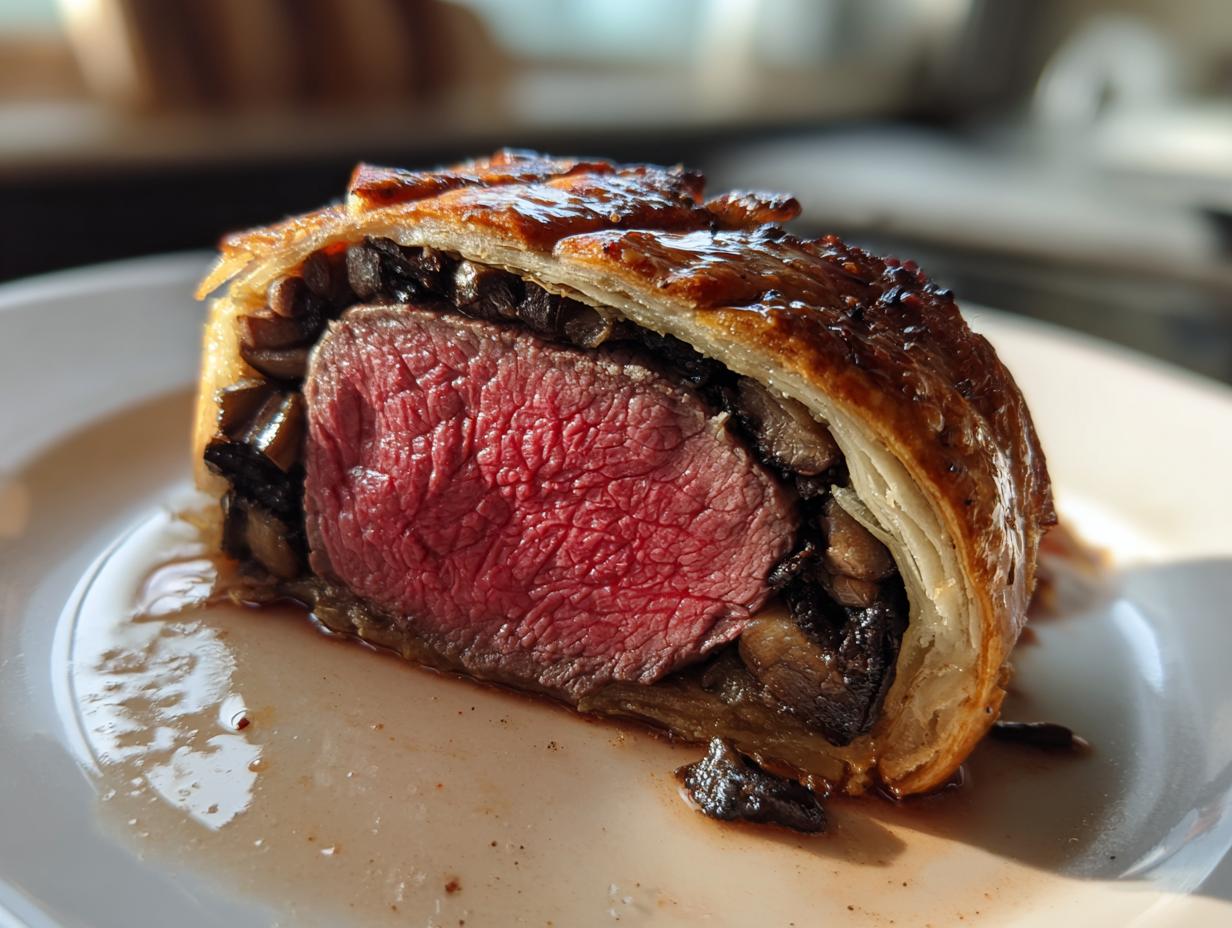
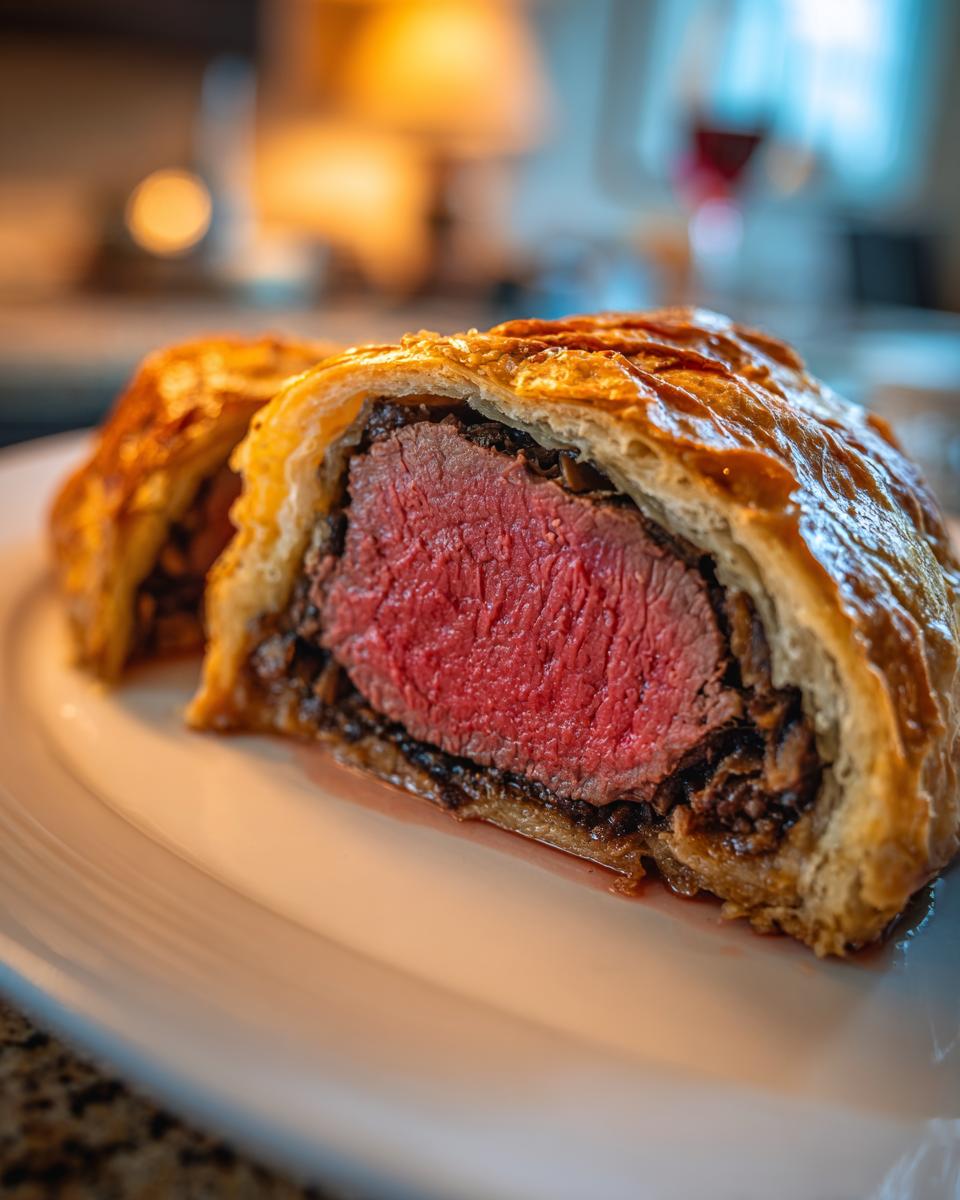
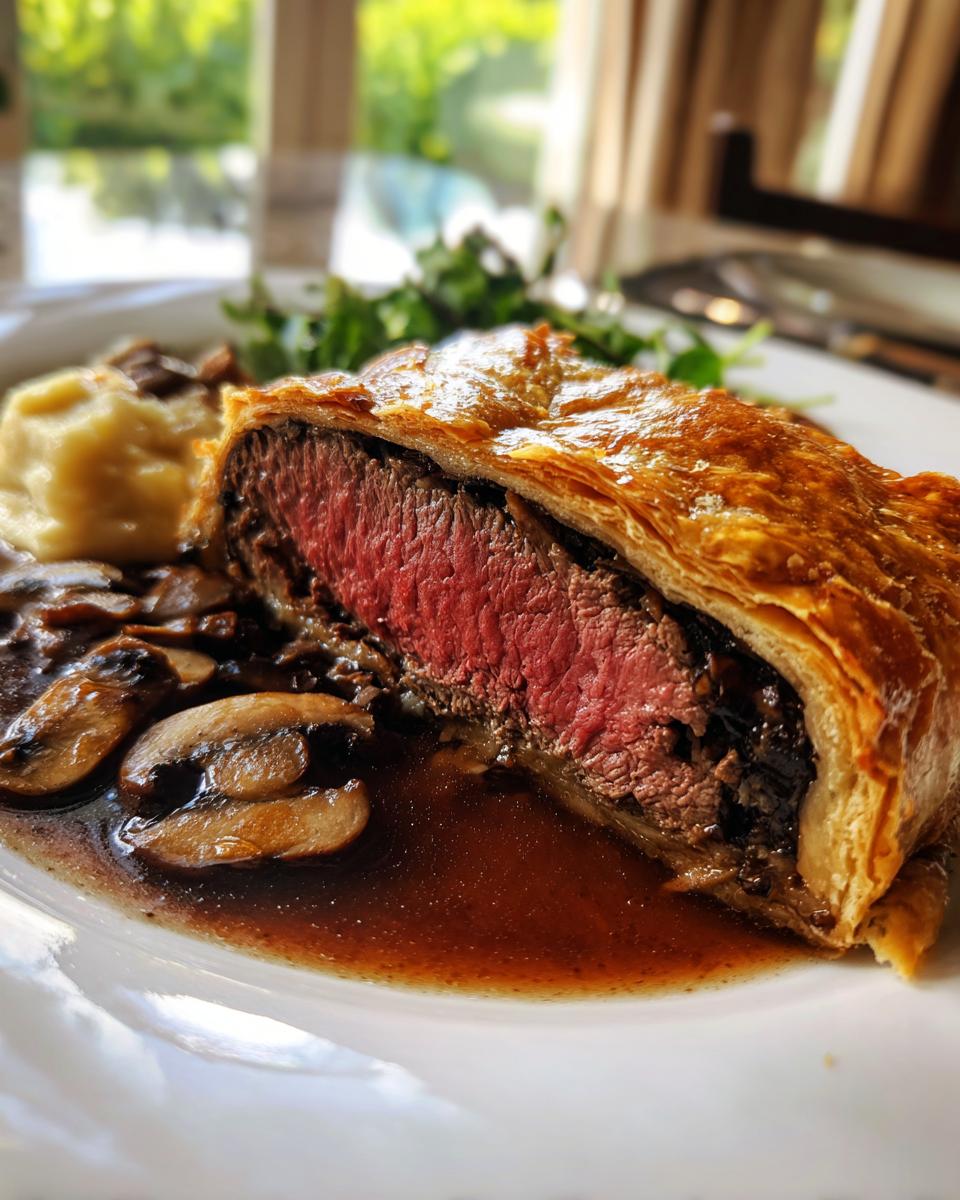
Okay, let’s talk about the dish that makes everyone gasp when you bring it to the table: the magnificent **Beef Wellington**. I know, I know, it sounds like something only reserved for royal banquets or professional kitchens, but trust me, you can absolutely nail this at home!
When I was deep in my previous life planning huge corporate events, I dreamed of tackling something this magnificent but figured it was too risky for my little escape kitchen. But baking became my therapy, and that’s how I developed this foolproof method. We are going to conquer the two biggest fears: that dreaded soggy bottom crust and that perfectly cooked, tender filet mignon center. This is the ultimate showpiece recipe where the presentation is just as important as the taste.
I promise you, by the time we’re done, you’ll have the confidence to serve this stunning classic centerpiece for any gathering. Forget the stress—we’re going to wrap that beautiful piece of beef in flavor and bake it into flaky, golden perfection. It’s easier than you think!
- Why This Beef Wellington Recipe Guarantees a Festive Elegant Dinner Success
- Gathering Ingredients for Your Filet Mignon Wellington Recipe
- How to Prepare Beef Wellington: Step-by-Step Instructions
- Tips for Success When Making Beef Wellington
- Storage and Reheating Instructions for Leftover Beef Wellington
- Serving Suggestions for Your Holiday Gourmet Main Course
- Frequently Asked Questions About Puff Pastry Wrapped Steak
- Understanding the Estimated Nutrition for Beef Wellington
- Share Your Experience Making This Classic British Recipe
Why This Beef Wellington Recipe Guarantees a Festive Elegant Dinner Success
I know why people hesitate to make this dish—it looks incredibly intimidating! But trust me, the success of this **holiday gourmet main course** hinges on a few simple rules we go over in detail later. I’ve obsessed over the texture so you don’t have to worry about a thing.
- Textbook Flakiness: We prioritize draining every last bit of moisture so the pastry stays crisp, not soggy. That golden exterior is non-negotiable!
- Layered Flavor Profiles: Every component, from the mustard to the duxelles, adds a distinct layer of savoriness that complements the tender filet.
- Foolproof Temperature Control: We rely on a meat thermometer, not guesswork, ensuring your center meat is never overcooked.
Mastering the Components of Classic Beef Wellington
Think of this dish as a beautiful stack of protection and flavor. First, we get that deep, rich sear on the beef tenderloin. Then comes that earthy, concentrated mushroom duxelles—the heart of the dish! Finally, we use prosciutto as a salty, thin barrier to shield that gorgeous beef from the puff pastry. It’s an architectural marvel of flavor!
Gathering Ingredients for Your Filet Mignon Wellington Recipe
Okay, since we are going for luxury here, we need ingredients that really sing! Remember my philosophy? Good quality ingredients make the finished product shine—no shortcuts when it comes to a showstopper like this. Don’t worry, most of this you can find at your regular supermarket, but make sure that beef tenderloin is a nice center cut, okay?
For a truly perfect result, I always try to source the best all-butter puff pastry I can find. That makes a massive difference in the final crust texture. If you’re grabbing supplies now, you’ll need:
- A 2 lb beef tenderloin center cut, trimmed nicely.
- 2 tablespoons olive oil for searing.
- Salt and black pepper—be generous here!
- 2 tablespoons Dijon mustard for coating the warm beef.
- 4 slices of prosciutto—this is our moisture shield!
- 1 pound cremini mushrooms, finely chopped (we’re cooking the moisture out later).
- 2 shallots, minced fine.
- 2 sprigs fresh thyme, just the leaves.
- 1/4 cup dry white wine for deglazing the pan.
- 1 tablespoon butter.
- 2 tablespoons brandy, if you are feeling fancy (totally optional!).
- 1/4 cup pâté (go for foie gras if you can, but chicken liver works brilliantly too).
- 1 package (14.1 ounces) all-butter puff pastry, nicely thawed.
- 1 large egg, beaten well for that gorgeous golden egg wash.
- A bit of flour, just for dusting the surface when rolling.
When you get a minute, you should check out my braised short ribs recipe too; that’s another great way to impress your holiday guests!
How to Prepare Beef Wellington: Step-by-Step Instructions
Now for the fun part! Look, making your Beef Wellington is really four separate little projects rolled into one stunning package. But once you knock out each part, it gets surprisingly easy. Just remember those chilling breaks—they save you from disaster, trust me! If you love a good roast, make sure you check out my recipe for pot roast recipe next!
Searing and Coating the Beef Tenderloin
First things first, we need that beef to taste incredible and have good color. Season it up really well with salt and pepper. Get your olive oil screaming hot in a skillet—I mean almost smoking! Sear that tenderloin hard on all sides. One minute per side is usually enough; we just want a deep brown crust, not to cook the inside yet! As soon as it comes out, while it’s still warm, brush every single bit of it with that Dijon mustard. Slather it on! Then, you have to let it cool down completely before touching it again. If it’s warm, it will melt your pastry later on.
Creating the Flavorful Duxelles for Beef Wellington
This mushroom paste, the duxelles, is where so much flavor comes from, but its biggest job is getting rid of moisture. Seriously, pulse those mushrooms and shallots in the food processor until they look like coarse sand. Now, cook that mixture in a completely dry skillet over medium heat, stirring often until all the liquid has evaporated—this takes maybe 15 to 20 minutes. Once it’s dry, stir in the butter and thyme, then deglaze with your wine until that evaporates too. Spread it out thin on a plate to cool down completely. That dry duxelles is honestly the biggest trick to avoiding a soggy bottom!
Rolling and Chilling the Beef Wellington Log
While things are cooling, get your assembly line ready. Grab a big sheet of plastic wrap—you’ll need it! Lay out your prosciutto slices in an overlapping rectangle, making sure it’s big enough to hug that whole tenderloin. Spread that cooled duxelles evenly over the prosciutto, then smear that luxurious pâté on top of the duxelles. Now, place the cooled beef on the edge and use that plastic wrap to roll it super tight. Twist those ends like a giant sausage link! Once it’s a compact log, into the fridge it goes for at least 30 minutes. This first chilling period is mandatory to make sure the log firms up perfectly.
Wrapping the Beef Wellington in Puff Pastry
After the first chill, dust your counter lightly with flour and roll out that puff pastry. You need a sheet big enough to completely cover the beef log. Take the beef out of the plastic wrap—gently!—and set it down on the pastry. Brush the open edges of the pastry dough with your beaten egg wash. Wrap that pastry around the beef tightly, making sure the seams meet underneath. Pinch and seal those seams really well so no steam escapes where it shouldn’t. Place it finished, seam-side down, on a parchment-lined baking sheet and give it one more chilling session for another 15 minutes. We are building structure here, folks!
Baking and Resting Your Perfect Beef Wellington
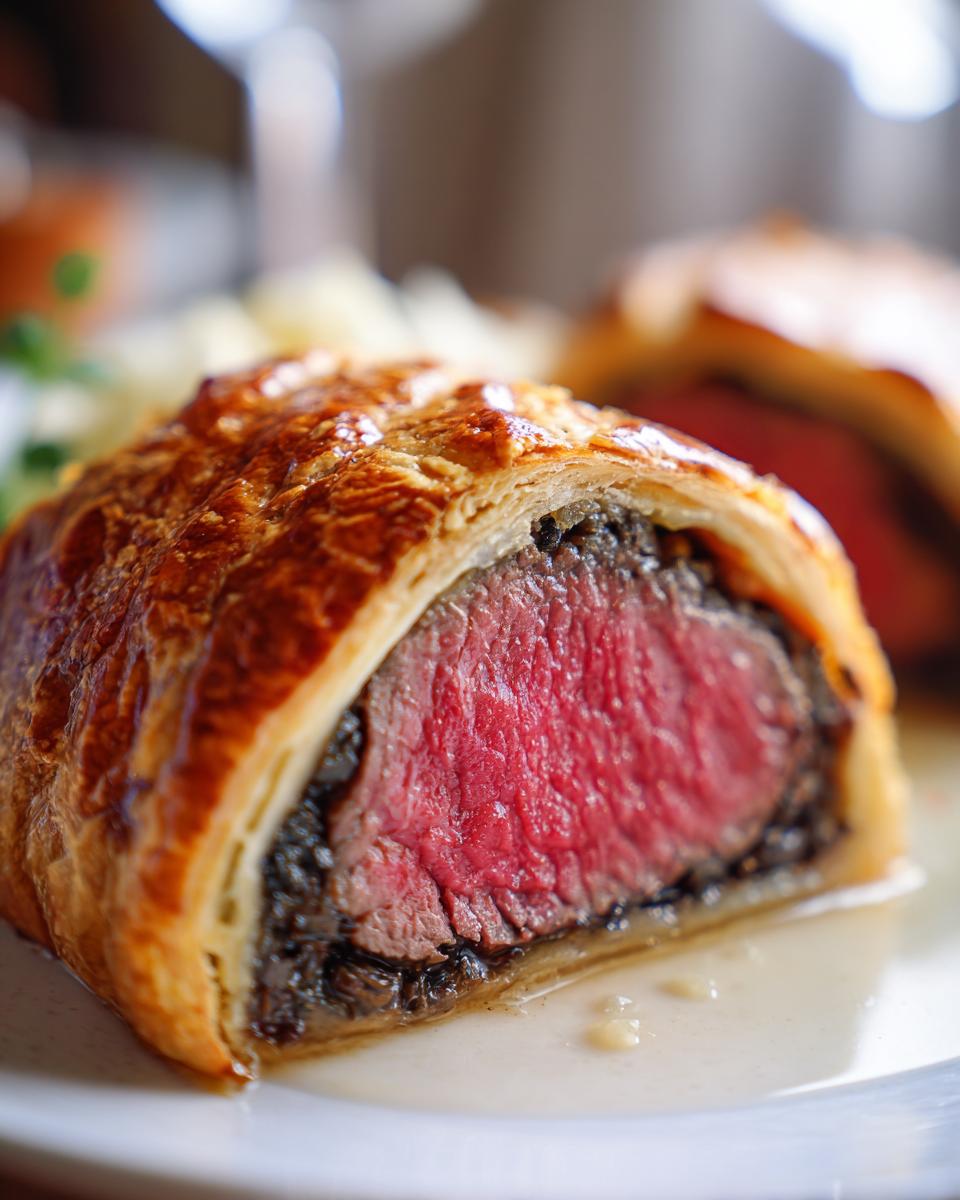
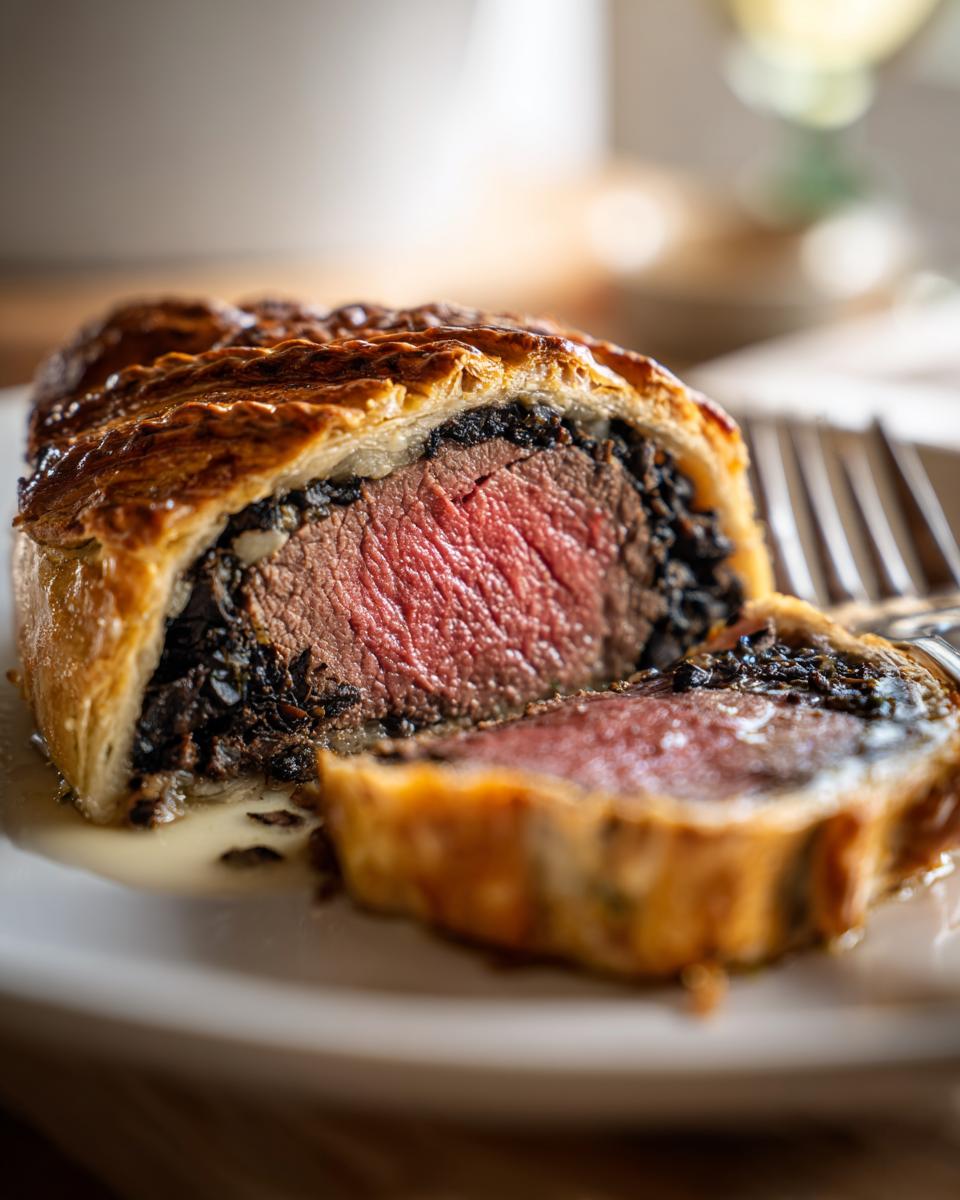
Time for the oven! Preheat that thing to 400 degrees F. Give the pastry one last beautiful coat of egg wash. If you want that classic look, take the back of a knife and lightly score a decorative pattern on top, but please, stop before you cut all the way through to the meat. Bake it for about 25 to 35 minutes. I cannot stress this enough: bring out your meat thermometer and aim for 125 degrees F inside for a perfect medium-rare. When you’re serving something this special, it’s smart to check out some simple side dishes to keep things light. And the final, secret step for tenderness: let it rest for a full 10 minutes before you slice it for serving. It keeps all those lovely juices locked right where they belong!
Tips for Success When Making Beef Wellington
I’ve learned a ton of little secrets over the years that really elevate this dish, mostly through trial and error! If you have one of those fancy sous-vide precision cooker gadgets, I highly recommend cooking your beef tenderloin there first. It locks in moisture perfectly before you even hit the searing heat. It’s a game-changer for getting that edge-to-edge pinkness.
For the crust, remember that little note about a baking stone? If you have one, preheat it in the oven before you even start baking the Wellington. Setting that wrapped log directly onto that super-hot surface gives the bottom crust an incredible blast of heat, making it seriously crisp.
I have to tell you, I rushed one Wellington years ago because I was trying to juggle too many things during a holiday dinner. I skipped that second 15-minute chill after wrapping it in the pastry, and wow, did I pay for it! The pastry spread way too much, sort of blobbed out, and it didn’t brown evenly. That enforced chilling time is vital for both flavor and structure, so don’t skip it! If you struggle with layered bakes, check out my lasagna tips for perfect layers—the principle of resting holds true.
Really, patience during the chilling steps is the closest thing to a magic wand for this recipe!
Storage and Reheating Instructions for Leftover Beef Wellington
So, you managed to have leftovers of your incredible creation? That’s a compliment in itself! You want to handle cooked Beef Wellington quickly because of all those rich layers. As soon as you finish serving, wrap any remaining slices tightly in plastic wrap or pop them into an airtight container. Get them into the refrigerator right away—within two hours is always my rule.
Now, reheating is where people often mess up and turn that beautiful pastry soggy. Please, please bypass the microwave if you can! The microwave is the enemy of flaky puff pastry, turning it sadly chewy. If you only have a few slices, the best tool you have is an air fryer. A quick five minutes at about 350 degrees F brings the pastry right back to life and warms the beef through without drying it out.
If you’re reheating a larger portion, use a conventional oven. Lay those slices out on a baking sheet—don’t stack them! Pop them into a moderate oven, maybe 325 degrees F, just until they are warmed through, about 10 to 15 minutes. You want that pastry to crisp up again, not steam itself into submission. It tastes almost as good the next day, maybe even better because those flavors have had time to settle!
Serving Suggestions for Your Holiday Gourmet Main Course
After all that effort wrapping that gorgeous steak, you deserve a side dish that shines without stealing the show! Because this Beef Wellington is so rich, we want to keep the accompaniments bright and fresh.
I always keep my sides simple. A light, slightly sharp red wine reduction sauce is classic, drizzled right over the slice when serving. But if you’re looking for vegetable depth, skip the heavy starches. Try my recipe for honey-glazed carrots—their sweetness plays so well against the savory duxelles. Or, for a little bitter brightness, you absolutely must try the roasted Brussels sprouts recipe!
Keeping the sides light ensures this showstopper truly feels like the star of your festive elegant dinner.
Frequently Asked Questions About Puff Pastry Wrapped Steak
It’s totally normal to have questions before tackling a magnificent **puff pastry wrapped steak** like this! These are the things I always get asked when a friend tries to make their first **filet mignon Wellington recipe**. Don’t you worry, we’ve got all the little details ironed out right here so you can feel totally confident.
What internal temperature should the Beef Wellington reach?
This is the most important question, right? If you rely on time alone, you’re playing a guessing game, and we don’t guess with luxury cuts! For that beautifully pink, medium-rare center that just melts in your mouth, you need to pull that Beef Wellington out of the oven when the meat thermometer reads exactly 125 degrees F. Remember, it keeps cooking slightly while it rests, so 125 degrees F is your sweet spot!
Can I make the Beef Wellington ahead of time?
Oh, yes, absolutely! Since this is a big undertaking, I highly recommend doing the assembly ahead of time if you’re serving it for a big holiday dinner. After you’ve wrapped the entire log in the puff pastry (and gave it that crucial second chill!), you can wrap the whole thing tightly in plastic wrap again and stick it in the fridge for up to 24 hours. When you’re ready to bake, just let it sit on the counter for about 20 minutes before adding the final egg wash and scoring it. Don’t try to bake it super cold, though!
How do I prevent the puff pastry from becoming soggy?
This is the million-dollar question, isn’t it? Preventing that dreaded soggy bottom is all about moisture control at every stage! First, you must cook every drop of water out of your mushroom duxelles—seriously, cook it until the pan is dry. Second, the prosciutto acts as a waterproof blanket wrapping the beef. Third, you need those two chilling periods—they firm everything up and mean the pastry goes into the oven cold, which helps it lift and bake properly instead of melting into the filling. If you struggled with soggy bottoms on other things, check out my tips for crispy eggplant parmesan; the principles of dryness are very similar!
Understanding the Estimated Nutrition for Beef Wellington
Listen, when you’re making something this decadent for a **festive elegant dinner**, we aren’t exactly aiming for diet food, are we? But I like to give you an idea of what you’re getting into! Based on dividing this recipe into four generous portions, here are the estimated numbers. Please remember, this is just an estimate, especially since the pâté content can really change things!
You are looking at roughly:
- Calories: 550
- Total Fat: 35g
- Protein: 35g
- Carbohydrates: 25g
Since this recipe is so rich, I always suggest pairing it with something light, like those simple roasted vegetables we talked about earlier, to keep the whole plate feeling balanced. Don’t let the numbers scare you off—this is for celebrating!
Share Your Experience Making This Classic British Recipe
Now that you’ve created this absolute showstopper, all I really want is to hear about it! Did the pastry come out flaky? Did your family gasp when you served it? Sharing our successes (and even those little learning curves!) is what this whole community is about.
Please take a moment and leave a rating for this **classic British recipe** below. I love reading how you personalized it. Did you swap the pâté? Did you try the sous-vide method I mentioned? Don’t be shy about sharing any substitutions or variations in the comments section!
If you took a gorgeous picture of your finished Beef Wellington, I’d be tickled pink if you’d tag me on social media or send a photo my way through the contact page. Seeing your homemade culinary triumphs truly fuels my passion here at Bliss Batter. Let’s keep the joy of homemade cooking going strong!
PrintClassic Beef Wellington
A showpiece recipe for tender filet mignon coated in mushroom duxelles and pâté, wrapped in puff pastry, and baked until golden brown.
- Prep Time: 45 min
- Cook Time: 35 min
- Total Time: 1 hour 55 min
- Yield: 4 servings 1x
- Category: Main Course
- Method: Baking
- Cuisine: British
- Diet: None
Ingredients
- 2 lb beef tenderloin center cut, trimmed
- 2 tablespoons olive oil
- Salt and black pepper to taste
- 2 tablespoons Dijon mustard
- 4 slices prosciutto
- 1 pound cremini mushrooms, finely chopped
- 2 shallots, minced
- 2 sprigs fresh thyme, leaves only
- 1/4 cup dry white wine
- 1 tablespoon butter
- 2 tablespoons brandy (optional)
- 1/4 cup pâté (such as foie gras or chicken liver)
- 1 package (14.1 ounces) all-butter puff pastry, thawed
- 1 large egg, beaten (for egg wash)
- Flour, for dusting
Instructions
- Season the beef tenderloin generously with salt and pepper. Sear the beef in hot olive oil in a skillet on all sides until deeply browned, about 1 minute per side. Remove the beef and brush all over with Dijon mustard while it is still warm. Let it cool completely.
- Prepare the duxelles: Pulse the mushrooms and shallots in a food processor until very finely chopped. Cook the mixture in a dry skillet over medium heat, stirring often, until all the moisture has evaporated (about 15-20 minutes). Add butter, thyme, and cook for 1 minute. Deglaze with white wine and cook until evaporated. Stir in brandy, if using. Spread the duxelles on a plate to cool completely.
- Lay a large sheet of plastic wrap on your work surface. Arrange the prosciutto slices in an overlapping rectangle large enough to wrap the tenderloin. Spread the cooled duxelles evenly over the prosciutto. Spread the pâté thinly over the duxelles layer.
- Place the cooled beef tenderloin at the edge of the prosciutto/duxelles layer. Use the plastic wrap to tightly roll the prosciutto and duxelles around the beef. Twist the ends of the plastic wrap tightly to form a compact log. Refrigerate for at least 30 minutes to firm up.
- Lightly dust your work surface with flour. Roll out the puff pastry into a rectangle large enough to completely enclose the beef log. Remove the plastic wrap from the beef log and place it on the pastry. Brush the edges of the pastry with egg wash.
- Wrap the pastry tightly around the beef, trimming any excess dough. Seal the seams well. Place the Wellington seam-side down on a baking sheet lined with parchment paper. Brush the entire surface with egg wash. Chill for another 15 minutes.
- Preheat your oven to 400 degrees F (200 degrees C). Brush the pastry one more time with egg wash. Score the top lightly with the back of a knife in a decorative pattern, avoiding cutting through to the meat.
- Bake for 25 to 35 minutes, depending on your desired doneness. For medium-rare, aim for an internal temperature of 125 degrees F (52 degrees C). Use a meat thermometer inserted through the pastry into the center of the beef.
- Let the Beef Wellington rest for 10 minutes before slicing into thick portions. Serve immediately.
Notes
- For a crispier bottom crust, you can place the wrapped Wellington on a preheated baking stone or steel for the first 15 minutes of baking.
- If you are planning your meal prep, consider using a sous-vide precision cooker to perfectly cook the beef before searing and wrapping.
- If you are trying to manage your diet, this recipe is rich; consider pairing it with light, fresh vegetables instead of heavy sides.
Nutrition
- Serving Size: 1 slice
- Calories: 550
- Sugar: 2
- Sodium: 450
- Fat: 35
- Saturated Fat: 15
- Unsaturated Fat: 20
- Trans Fat: 1
- Carbohydrates: 25
- Fiber: 3
- Protein: 35
- Cholesterol: 150