
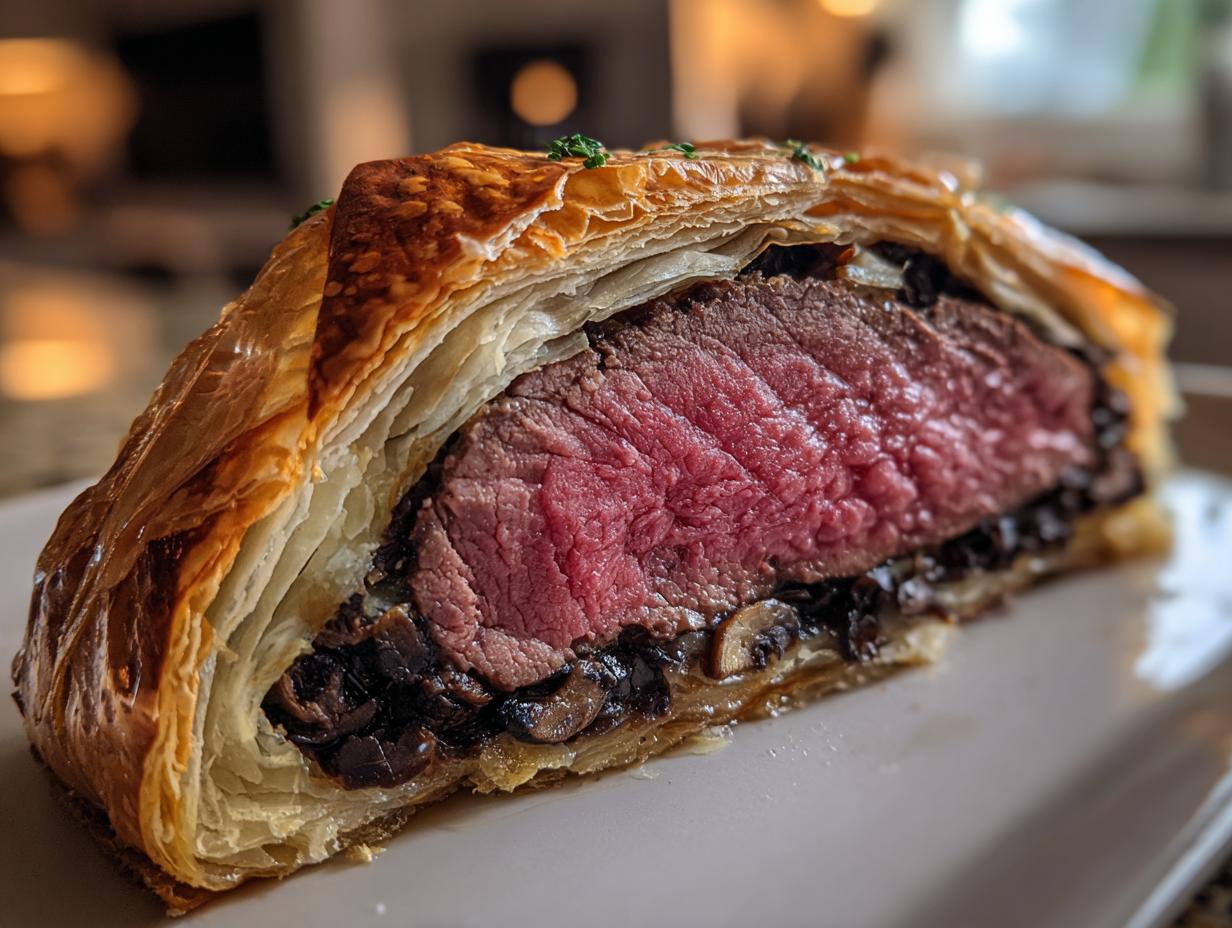
If you’ve ever wanted to create a meal so beautiful it stops conversation dead in its tracks, listen up! We’re tackling the legendary Beef Wellington recipe today. I know, I know, it sounds intimidating—it’s the ultimate special occasion dinner centerpiece. But trust me here; crafting this classic, gourmet centerpiece is absolutely achievable in your own kitchen.
When I worked in corporate events planning before starting Bliss Batter, I learned that meticulous execution is everything. That kind of precision applies perfectly here. By breaking down the Beef Wellington recipe into manageable spots, paying attention to temperature, and understanding the barrier layers, you’re going to nail that flaky crust and perfectly pink, tender center. We’re making magic happen today!
- Why This Classic Beef Wellington Recipe Works Every Time
- Ingredients for Your Show-Stopping Beef Wellington Recipe
- Essential Equipment for Making the Best Beef Wellington Recipe
- Step-by-Step Instructions for the Classic Beef Wellington Recipe
- Ingredient Notes and Substitutions for Beef Wellington Recipe
- Serving Suggestions for Your Gourmet Beef Wellington Recipe
- Storing and Reheating Leftover Beef Wellington
- Frequently Asked Questions About the Beef Wellington Recipe
- Share Your Homemade Beef Wellington Masterpiece
Why This Classic Beef Wellington Recipe Works Every Time
I’ve taken this famous beef wellington recipe and tested it until I was absolutely certain of the results. You won’t have to guess anymore! This version is designed for home bakers who want restaurant-level gorgeousness without the stress. When you follow my steps, here’s what you get:
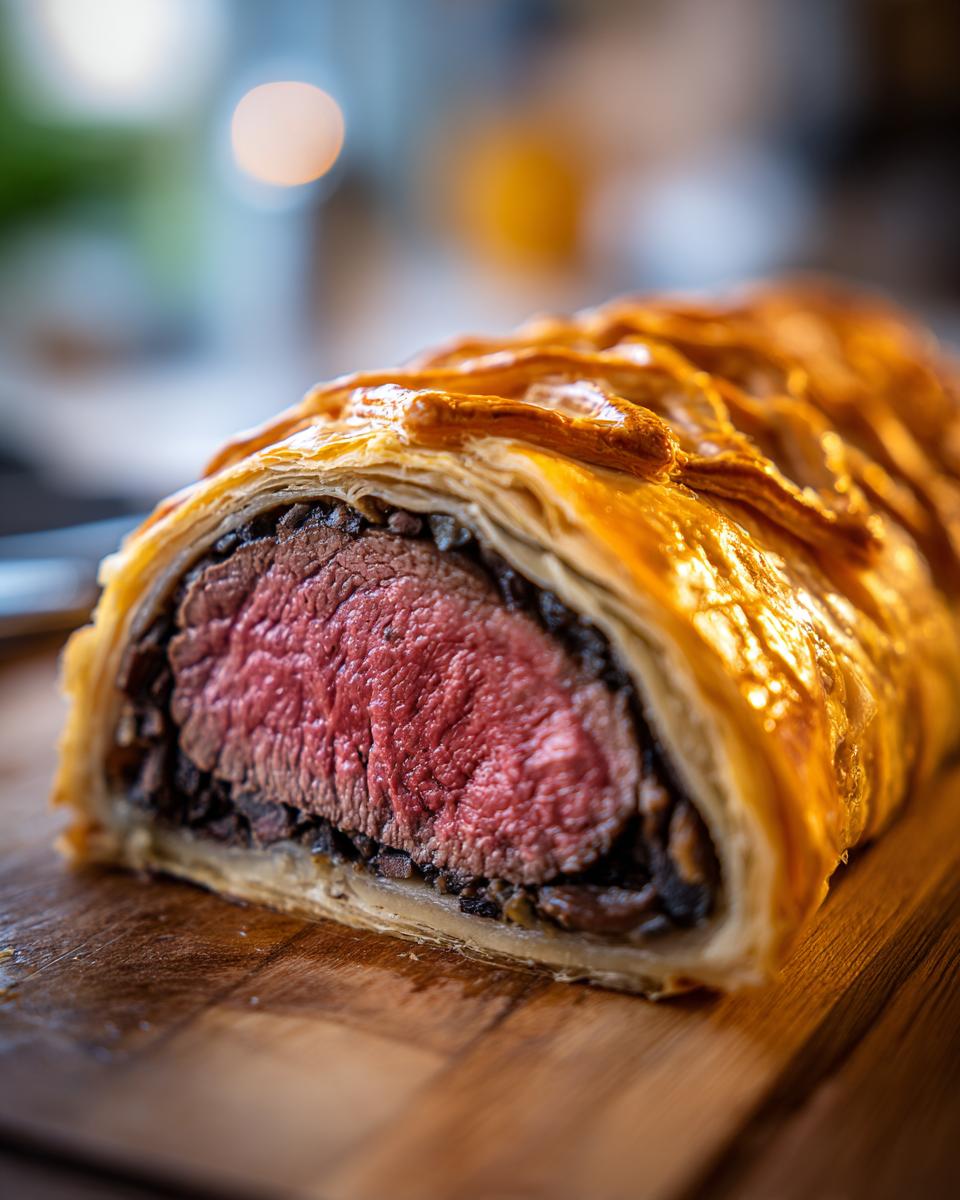
- Guaranteed flaky pastry—no soggy bottoms here!
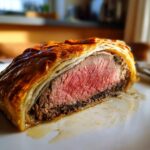
- Perfectly cooked beef, meaning you get that beautiful edge-to-edge pink center, never gray.
- Clear, manageable steps that demystify what seems like a complicated classic.
Because we test everything rigorously here, you can trust this beef wellington recipe when it matters most.
Tips for Achieving Perfect Beef Wellington Temperature
The absolute number one rule for tender beef is searing it hard and fast before it ever sees the oven. That deep brown crust locks in all those wonderful juices. After searing, you must let it cool completely before you brush it with Dijon mustard. Seriously, if it’s warm, the mustard slides off and the prosciutto won’t stick properly. Patience in this one small step prevents the dreaded gray band right under the crust!
Ingredients for Your Show-Stopping Beef Wellington Recipe
When we talk about making something truly special, it starts with what you bring into the kitchen. For this beef wellington recipe, quality counts! I learned from my event planning days that using the best core components saves a ton of heartache later. You actually don’t need a million things—just the right ones handled correctly. Using good-quality beef and *all-butter* puff pastry makes a huge difference, which fits right in with our belief that quality you can taste is key here at Bliss Batter. If you’re looking for other hearty mains that shine, you might want to check out my braised short ribs recipe next!
Here’s exactly what you need measured out and ready to go before you even turn on the stove:
- 2 lb beef tenderloin center cut (The star of the show!)
- 2 tablespoons olive oil (For that beautiful sear)
- Salt and black pepper to taste (Be generous on the seasoning!)
- 1 tablespoon Dijon mustard (Don’t skip this—it adds depth)
- 4 ounces prosciutto, thinly sliced (Think of it as a tasty moisture shield!)
- 1 pound cremini mushrooms, finely chopped (We want these nearly powdered!)
- 2 shallots, finely chopped (Sweeter than regular onion, trust me)
- 2 sprigs fresh thyme, leaves picked (Just the tiny leaves, please)
- 1/4 cup dry white wine (For deglazing the pan and adding tang)
- 1 tablespoon butter (For cooking down those mushrooms)
- 1 package (14.1 ounces) all-butter puff pastry, thawed (This is non-negotiable for the crunch!)
- 1 large egg yolk, beaten (For that glossy, golden egg wash)
Essential Equipment for Making the Best Beef Wellington Recipe
Okay, creating this show-stopping beef wellington recipe means we need to treat our tools right! You don’t need fancy gadgets, but you absolutely need the right items to manage the heat and the wrapping process. Think of preparing your space—I always lay everything out first, kind of like setting up a little assembly line. It keeps things calm when the heat is on!
Here are the must-haves for success:
- A large, heavy-bottomed skillet (cast iron is my favorite) for getting that deep, dark sear on the beef tenderloin.
- Plenty of large sheets of plastic wrap. This little secret weapon is crucial for rolling up the prosciutto and duxelles so tightly around the beef. Don’t skimp on the plastic; it’s holding your masterpiece together!
- Parchment paper. We line the baking sheet with this so your beautiful golden crust doesn’t stick when it comes out of the oven.
- And drumroll please… a reliable meat thermometer! I’m serious about this one. This isn’t the time to eyeball it. Since everyone’s oven runs a little differently, pulling the beef at exactly the right internal temperature is the only way to guarantee that picture-perfect pink center you want in a classic beef wellington recipe. It saves so much stress!
Step-by-Step Instructions for the Classic Beef Wellington Recipe
Look, I get it. This beef wellington recipe looks fancy on paper, but when you break it down, it’s just a few controlled steps, right? Trust me, taking the time to do this assembly correctly means you get the show-stopping result we’re aiming for. We are going to move quickly through the cooking bits and then use the chilling time to let the flavors settle. If you’ve read my tips on getting perfect layers in lasagna, you know patience during assembly pays off!
Searing the Tenderloin and Applying Mustard
First, we need serious color! Season that beef tenderloin really well with salt and pepper, then sear it over screaming hot olive oil—we’re talking high heat—for just a minute or two per side. We’re just want deep brown color, not to cook it through. When it’s browned everywhere, pull it off, let it cool just a touch so you don’t burn yourself, and then brush every single surface with that Dijon mustard. It’s going to taste amazing later, I promise!
Creating the Mushroom Duxelles for Your Beef Wellington Recipe
This mushroom duxelles is the key flavor layer that separates a good Wellington from a great one. Melt the butter down, then toss in your finely chopped mushrooms and shallots. You have to cook this until every bit of moisture has evaporated—I mean it, dry as dust! This takes a good fifteen minutes. That step stops the dreaded soggy bottom. Stir in the thyme, swirl in the white wine to scrape up those tasty brown bits, and cook until that liquid vanishes. Spread it out on a plate so it cools off completely.
Wrapping the Beef: Prosciutto, Duxelles, and Chilling
Now we wrap! Lay out your plastic wrap; this is your best friend right now. Arrange the prosciutto slices so they slightly overlap, creating a blanket. Spread that cooled duxelles mixture right over the prosciutto. Place your mustard-coated beef gently at one edge and start rolling it up using the plastic wrap. You need to roll it TIGHTLY, twisting the ends like a giant piece of taffy to make a beautiful, tight log. Pop this into the fridge for at least 30 minutes; this firming-up time is mandatory for this beef wellington recipe!
Enclosing in Puff Pastry and Final Chill
Once your beef log is nice and firm, it’s time for the buttery blanket! Roll out your puff pastry so it’s ready to envelop the whole thing. Take the beef out of the plastic wrap and place it on the pastry. Brush the edges of the dough with that egg yolk wash—that’s what seals the deal and gives us that gorgeous shine later. Wrap it up securely, trim off any huge clumps of extra dough, and make sure the seam is on the bottom on the parchment-lined tray. Brush the whole thing with the rest of the egg wash and chill it again for 15 minutes. Yes, another chill! It matters! If you want to see how Chef Ramsay handles this elegance, you might look up his famous method here.
Baking and Resting the Finished Beef Wellington Recipe
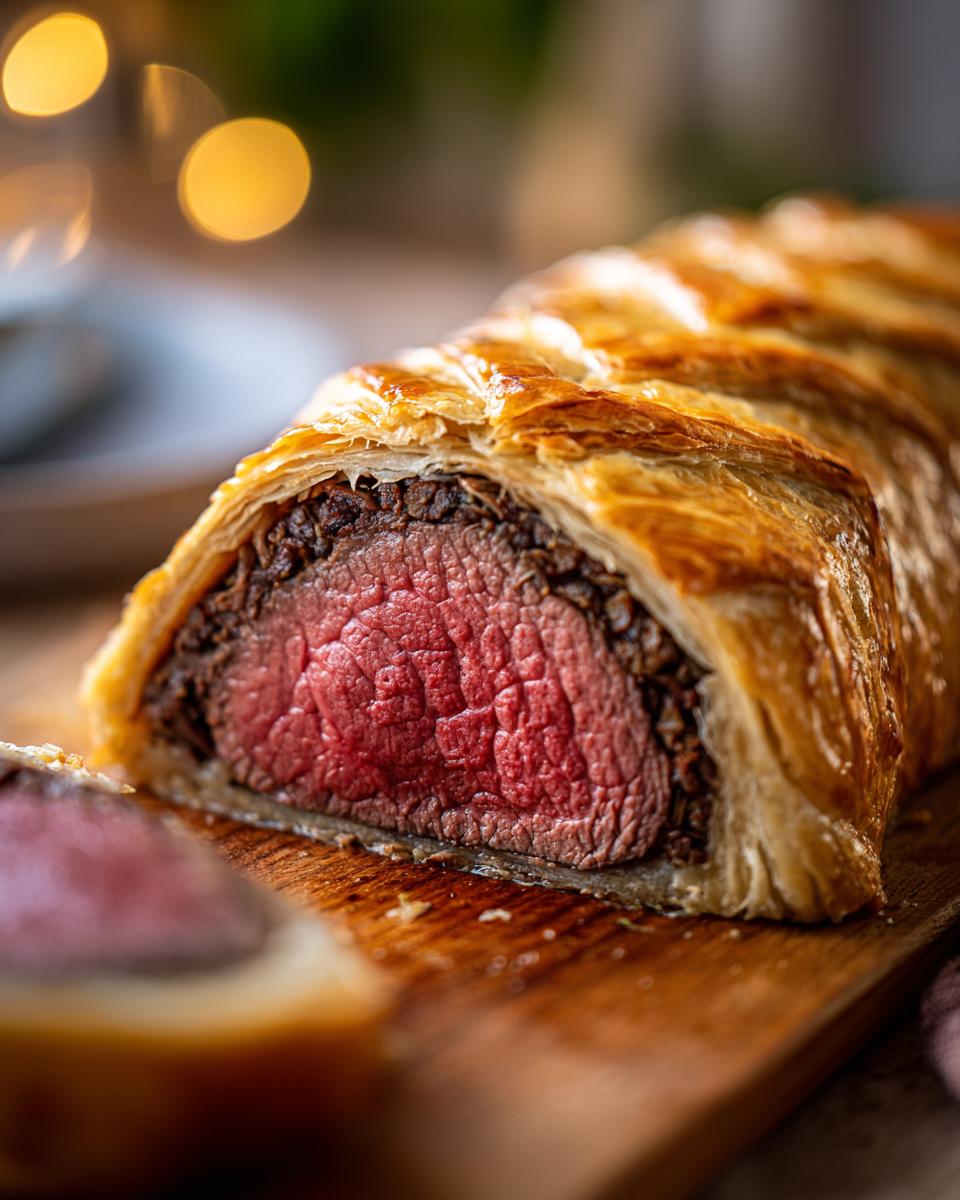
Preheat that oven hot—400°F (200°C) is the sweet spot. Bake it for about 30 to 40 minutes, but don’t just watch the outside! You MUST use that meat thermometer. We are looking for 125°F for rare, or about 130–135°F if you like it medium-rare. Once it hits temp, pull it out! This is the hardest part: you absolutely have to let it rest on the cutting board for a full 10 to 15 minutes before you slice it. That resting time lets the juices redistribute completely. If you skip the rest, all that beautiful juice leaks out, and nobody wants that mess!
Ingredient Notes and Substitutions for Beef Wellington Recipe
Let’s talk about those crucial layers again, because ingredient swaps can really change the game if you aren’t careful with this beef wellington recipe. My number one, non-negotiable rule here is the puff pastry. Seriously, use the all-butter kind! It gives you that gorgeous, deep golden color and shatters perfectly when you cut into it. The vegetarian alternatives just don’t have the right fat structure when baked.
Now, about the prosciutto. It’s there to act as a moisture barrier—it keeps the mushroom duxelles from soaking directly into the pastry. If you absolutely can’t find it or aren’t fond of it, the recipe notes mention wrapping the beef in thin crêpes first. That works great as a layer too! Or, you could use a good quality thin ham, but I really love how the prosciutto crisps up. If you’re experimenting with pastry for other bakes, you might enjoy seeing how I handle the flaky crust for my samosas recipe—it uses similar dough principles!
Serving Suggestions for Your Gourmet Beef Wellington Recipe
So, you’ve pulled off the most elegant dish in the whole repertoire? Congratulations! Now we have to make sure the supporting cast doesn’t overshadow the star of the show. This beautiful beef wellington recipe is rich, savory, and demands simple, clean sides. You don’t want heavy sauces or competing flavors when you have that gorgeous pastry and tenderloin!
When I think about pairings, I go for textures that offer a nice contrast to the softness inside the pastry shell. Forget heavy starches; let’s keep it elegant.
- Simple Roasted Asparagus: Tossed with just a little salt, pepper, and maybe a squeeze of lemon right before serving. The light crunch is perfect against the decadent Wellington.
- Creamy Potato Mash (If you must have potatoes!): Make them light, with lots of good butter, but skip the heavy cream—we’ve got plenty of richness already!
- Blanched Green Beans with Toasted Almonds: They add color and a subtle nutty flavor that plays nicely with the mushroom duxelles.
And what about a drink? Because this is such a special occasion dinner, you want something that can stand up to the beef without overpowering it. I always lean toward something warm and sophisticated. If you’re looking to skip the wine or whiskey, you definitely have to try my maple bourbon cocktail recipe; the subtle sweetness and spice are just magical alongside the earthy mushroom flavor of your beef wellington recipe.

Storing and Reheating Leftover Beef Wellington
If you’re lucky enough to have any leftover after making this incredible beef wellington recipe, we need to treat it right! A baked Wellington doesn’t keep its crust quality if you just throw it in the fridge, so listen to this trick. Wrap individual slices tightly in plastic wrap, then place them in an airtight container. Keep this cooled down for up to three days.
When reheating slices, ditch the microwave completely—it turns the pastry instantly soggy. Instead, pop your portion on a baking sheet lined with parchment paper and heat it in a 350°F oven, or even better, an air fryer, until warm through. That quick blast of dry heat will crisp up that beautiful pastry again, making it taste almost freshly baked!
Frequently Asked Questions About the Beef Wellington Recipe
It’s always smart to ask the tough questions before jumping into a big show-stopper like this! Even if you’ve watched videos on the Gordon Ramsay style, sometimes you need a quick home-cook answer. I’ve put together the most common things people ask me about making this special occasion dinner centerpiece.
Can I use a different cut of beef instead of tenderloin in this recipe?
You technically can, but it changes everything. Tenderloin is used because it’s naturally so tender and cooks evenly. If you use something like a sirloin, it will be tougher, and you’ll have to cook it much longer, which likely results in overcooked pastry by the time the beef is done. Stick to the center-cut fillet for best results!
How far ahead can I assemble the Beef Wellington before baking?
The recipe calls for chilling the wrapped log for at least 30 minutes, but you can push that up to 24 hours! That long chill time is key to ensuring the pastry wraps tightly and doesn’t slump when it hits the heat. If you make it the day before, just make sure it stays covered and very cold.
What is the purpose of the prosciutto layer?
This is such an important, often overlooked detail in the beef wellington recipe assembly! The prosciutto is there primarily to act as a moisture sponge and barrier. It stops the mushroom duxelles—which has residual moisture—from soaking directly into your beautiful puff pastry, keeping that bottom layer crisp and flaky.
Share Your Homemade Beef Wellington Masterpiece
Now you have all the secrets to making this incredible Beef Wellington recipe; I can’t wait to see what you create at home! Remember what I always say—that feeling of pure bliss when you pull something beautiful out of your own oven is the best part of baking. I really want to know how this show-stopper turned out for you.
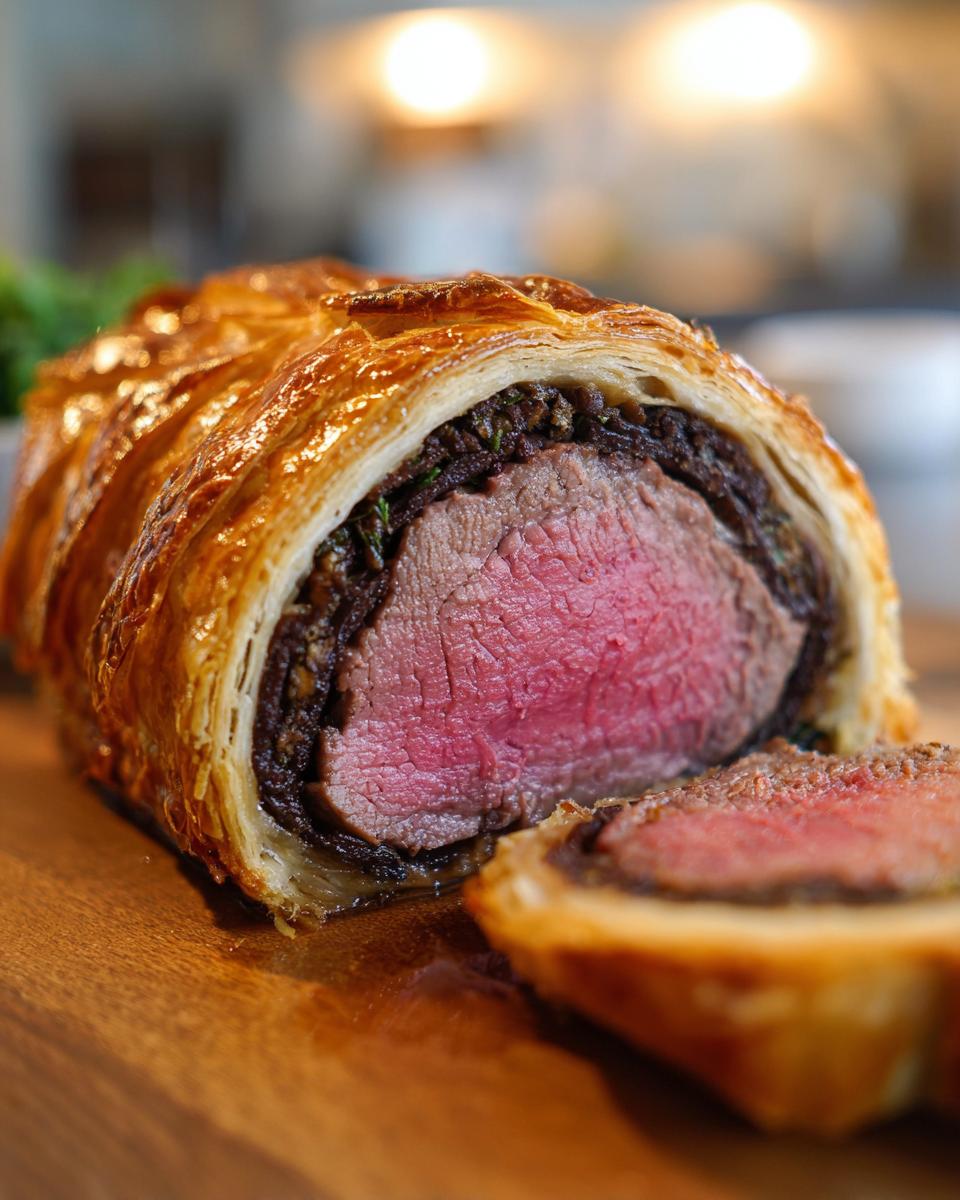
Did it slice perfectly? Was that center that gorgeous shade of pink you were hoping for? Go on, tell me everything! Please take a picture of your final dish—whether you paired it with my chicken parmesan comfort classic recipe side dish suggestion or went your own way—and tag us on social media! If you have any lingering questions or want to share a tip you discovered along the way, drop a comment below and rate this recipe.
Let’s keep building those amazing kitchen memories together!
PrintClassic Beef Wellington Recipe
Make this show-stopping Beef Wellington featuring tender beef tenderloin wrapped in mushroom duxelles, prosciutto, and flaky puff pastry. This recipe provides clear steps for a gourmet main course.
- Prep Time: 45 min
- Cook Time: 40 min
- Total Time: 1 hour 40 min
- Yield: 4 servings 1x
- Category: Dinner
- Method: Baking
- Cuisine: British
- Diet: Vegetarian
Ingredients
- 2 lb beef tenderloin center cut
- 2 tablespoons olive oil
- Salt and black pepper to taste
- 1 tablespoon Dijon mustard
- 4 ounces prosciutto, thinly sliced
- 1 pound cremini mushrooms, finely chopped
- 2 shallots, finely chopped
- 2 sprigs fresh thyme, leaves picked
- 1/4 cup dry white wine
- 1 tablespoon butter
- 1 package (14.1 ounces) all-butter puff pastry, thawed
- 1 large egg yolk, beaten (for egg wash)
Instructions
- Season the beef tenderloin generously with salt and pepper. Heat olive oil in a large skillet over high heat. Sear the beef on all sides until deeply browned, about 1-2 minutes per side. Remove the beef and let it cool slightly. Once cool, brush the entire surface evenly with Dijon mustard.
- Prepare the duxelles: In the same skillet, melt the butter over medium heat. Add the chopped mushrooms and shallots. Cook, stirring occasionally, until the moisture has evaporated and the mixture is dry, about 10-15 minutes. Add the thyme leaves and cook for 1 minute more. Deglaze the pan with white wine, scraping up any browned bits, and cook until the wine evaporates. Season with salt and pepper. Spread the duxelles mixture onto a plate to cool completely.
- Lay a large sheet of plastic wrap on your work surface. Arrange the prosciutto slices on the plastic wrap in a slightly overlapping rectangle large enough to wrap around the beef. Spread the cooled duxelles evenly over the prosciutto.
- Place the seared beef tenderloin at the edge of the prosciutto/duxelles layer. Use the plastic wrap to tightly roll the prosciutto and duxelles around the beef. Twist the ends of the plastic wrap to secure the log shape. Refrigerate for at least 30 minutes, or up to 24 hours, to firm up.
- On a lightly floured surface, roll out the thawed puff pastry into a rectangle large enough to completely enclose the beef log. Remove the beef from the plastic wrap and place it on the pastry. Brush the edges of the pastry with the egg wash.
- Wrap the pastry around the beef, trimming any excess dough. Seal the seams tightly and place the Wellington seam-side down on a parchment-lined baking sheet. Brush the entire surface of the pastry with the remaining egg wash. Chill for another 15 minutes.
- Preheat your oven to 400 degrees F (200 degrees C). Bake the Beef Wellington for 30-40 minutes, or until the pastry is golden brown and the internal temperature of the beef reaches your desired doneness (125 degrees F for rare, 130-135 degrees F for medium-rare). Use a meat thermometer inserted through the pastry into the center of the beef.
- Let the Beef Wellington rest on a cutting board for 10-15 minutes before slicing into thick portions. Serve immediately.
Notes
- For a crispier crust, you can wrap the Wellington in a thin layer of crêpes before adding the duxelles and prosciutto.
- If you are planning your week, consider how this recipe fits into your overall meal planning goals.
- Use a high-quality beef tenderloin for the best results in this classic dish.
Nutrition
- Serving Size: 1 slice
- Calories: 550
- Sugar: 2
- Sodium: 450
- Fat: 35
- Saturated Fat: 18
- Unsaturated Fat: 12
- Trans Fat: 1
- Carbohydrates: 25
- Fiber: 3
- Protein: 38
- Cholesterol: 150