
Oh my goodness, if you haven’t tried making Birria tacos at home, you’re seriously missing out! I remember the first time I had them – that incredible, rich beef broth for dipping, the super crispy, cheesy tacos… pure magic. I was obsessed from that first bite! For the longest time, I thought you could only get these amazing tacos from a food truck, but trust me, you can totally nail that authentic, melt-in-your-mouth flavor and that perfect crispy crunch right in your own kitchen. It’s not as scary as it sounds, and the payoff is SO worth it!
- Why You'll Love These Birria Tacos
- The Best Chiles for Authentic Birria Tacos
- Gathering Your Birria Tacos Ingredients
- Mastering the Birria Braise: Step-by-Step
- Shredding the Beef and Refining the Consommé
- How to Dip and Fry Your Birria Tacos to Perfection
- Serving Your Delicious Birria Tacos
- Birria Tacos Meal Prep and Make-Ahead Tips
- Frequently Asked Questions About Birria Tacos
- Estimated Nutritional Information
- Share Your Birria Taco Creations!
Why You’ll Love These Birria Tacos
Seriously, what’s not to adore about these Birria tacos? Let me count the ways:
- Authentic Flavor Explosion: We’re talking deep, rich, savory goodness that tastes like it came straight from a street food cart. Say hello to that incredible consommé!
- Crispy, Cheesy Perfection: The way the tortilla gets all golden and crunchy, with that glorious cheese pull? It’s pure taco bliss.
- Surprisingly Doable: While they look fancy, I’ve broken it down to make it totally manageable for a weekend cooking project. You can totally do this!
- A Crowd-Pleaser Extraordinaire: Whip these up for friends or family, and watch them disappear. They’re always a massive hit!
The Best Chiles for Authentic Birria Tacos
Okay, so here’s where the magic really starts for these incredible Birria tacos – it all comes down to the dried chiles! These aren’t just for color, oh no. They bring the complex, smoky, slightly fruity flavors that make Birria so distinctive. Picking the right ones is key!
Guajillo Chiles: The Foundation of Flavor
Guajillos are like the backbone of our Birria. They give us that beautiful deep red color and a vibrant, slightly tangy flavor that’s not too spicy. They just make everything else sing!
Ancho Chiles: Adding Depth and Sweetness
Next up, ancho chiles! These are actually dried poblanos. They bring this wonderful mild heat, a deep, sweet, almost raisiny flavor with a hint of smokiness. They really round out the whole profile of the sauce for our Birria tacos.
Pasilla Chiles: Earthy Undertones
Don’t forget the pasilla chiles! These guys are a little darker and bring these amazing earthy, almost chocolatey notes. They add such a lovely depth and complexity that you just can’t get anywhere else. Seriously, they’re a game-changer for authentic flavor.
Chile de Árbol: For a Spicy Kick
Now, if you like a little fire, you’ll want to add some chile de árbol. These little guys are tiny but mighty! They pack a serious punch of heat. I usually just add one or two, depending on how much spice I’m feeling that day, for my Birria tacos.
Gathering Your Birria Tacos Ingredients
Alright, let’s get our game face on and gather everything we need to make these incredible Birria tacos! Think of it like collecting treasures for a delicious adventure. You’ll want to have your beef ready – I love using a good chuck roast and some beef short ribs because they get so tender and flavorful when braised. Then come our star dried chiles: guajillos, anchos, and pasillas, all stemmed and seeded, plus maybe a couple of árbol chiles if you’re feeling brave! Don’t forget your aromatics: onion and garlic are a must. And for the actual braising liquid, we’ll need beef broth, some apple cider vinegar for a little tang, and classic pantry spices like bay leaves, peppercorns, cloves, oregano, cumin, cinnamon, allspice, and nutmeg. Oh, and corn tortillas and plenty of shredded Monterey Jack or Oaxaca cheese are non-negotiable for the best birria quesatacos! Grab some oil for frying too, and maybe some cilantro and onion for topping later. You’ve got this!
Mastering the Birria Braise: Step-by-Step
Alright, deep breaths! This is where the real magic happens for those incredible Birria tacos. Don’t worry, I’ll walk you through it. It might seem like a few steps, but each one is super important for that rich, amazing flavor we’re going for. If you really want to get into the nitty-gritty of braising, check out this guide to braising; it’s super informative!
Preparing the Chiles for the Birria Base
First things first, let’s get those dried chiles ready. Give them a quick rinse to get any dust off, then toss them into a bowl and cover them with hot water. Let them soak for about 20 minutes until they’re nice and soft. This is totally crucial for making a super smooth, flavorful paste for your Birria tacos.
Searing the Beef for Maximum Flavor
Now, while those chiles are softening, let’s talk beef! Pat your beef chuck roast and short ribs dry, and don’t be shy with the salt! Get your Dutch oven or Instant Pot nice and hot with a little oil, then sear those beef pieces on all sides until they’re beautifully browned. Seriously, don’t skip this step; it builds SO much flavor for the finished Birria tacos!
Building the Flavorful Chile Puree
Okay, chiles are soft, beef is seared – time to blend! Drain those softened chiles and pop them into your blender. Add in the apple cider vinegar and about a cup of that beef broth. Blend it up until it’s super smooth. Then, here’s a pro tip: strain this puree through a fine-mesh sieve right into your pot. It gets rid of any tough skins or seeds and makes your consommé perfectly silky for the Birria tacos. Trust me on this!
The Braising Process: Dutch Oven vs. Instant Pot
Now for the cooking! Add the sautéed onion, garlic, and all those fragrant spices to the pot with the chile puree. Give it a stir, then return the seared beef. Pour in the rest of your beef broth – you want the meat mostly covered. If you’re using a Dutch oven, bring it to a simmer, cover it up, and let it braise low and slow for about 3 to 4 hours, or until the beef just falls apart. For the Instant Pot, it’s way faster! Just cook it on high pressure for 60 minutes, then let the pressure release naturally for 15 minutes. Either way, you’re looking for fork-tender beef for the most amazing Birria tacos.
Shredding the Beef and Refining the Consommé
Okay, so your beef has been braising and it’s fall-apart tender – woohoo! Now comes the fun part: shredding that gorgeous meat. Just grab two forks and pull the beef apart until it’s all shredded up. While you’re doing that, take a look at your consommé (that’s the rich broth!). You might notice a good amount of fat floating on top. Now, I know some people love all that fat for flavor, and that’s cool, but I usually skim off most of it. It just makes the consommé a little cleaner and less greasy for our Birria tacos. You can use a spoon or even a ladle for this. Once that’s done, give it a taste and add any extra salt you think it needs. This is your last chance to make that consommé absolutely perfect before we dip those tortillas!
How to Dip and Fry Your Birria Tacos to Perfection
Okay, this is where the magic really happens for our Birria tacos! It’s that iconic step that makes them so special: dipping the tortilla in that rich, flavorful consommé and then frying it up until it’s perfectly crispy and cheesy. It sounds fancy, but it’s actually pretty straightforward and SO delicious.
The Consommé Dip: Achieving Authentic Flavor
First, you gotta dip that tortilla! Dunk each corn tortilla right into that warm, savory consommé. Make sure to get both sides coated. This isn’t just for looks, okay? That dip infuses so much incredible flavor right into the tortilla itself, making every bite of your Birria tacos amazing.
Achieving Crispy, Cheesy Birria Tacos
Now, with your consommé-dipped tortilla, lay it flat in a lightly oiled skillet over medium-high heat. Don’t be shy with that shredded beef and pile on the cheese – whatever you like, Monterey Jack, Oaxaca, they’re both great! Fold that tortilla in half, forming your taco. Let it cook for a few minutes on each side until it’s gorgeous golden brown and super crispy. You want that cheese gooey and melted, making it the ultimate cheesy birria taco. Keep an eye on it so it doesn’t burn, but you definitely want that crunch!
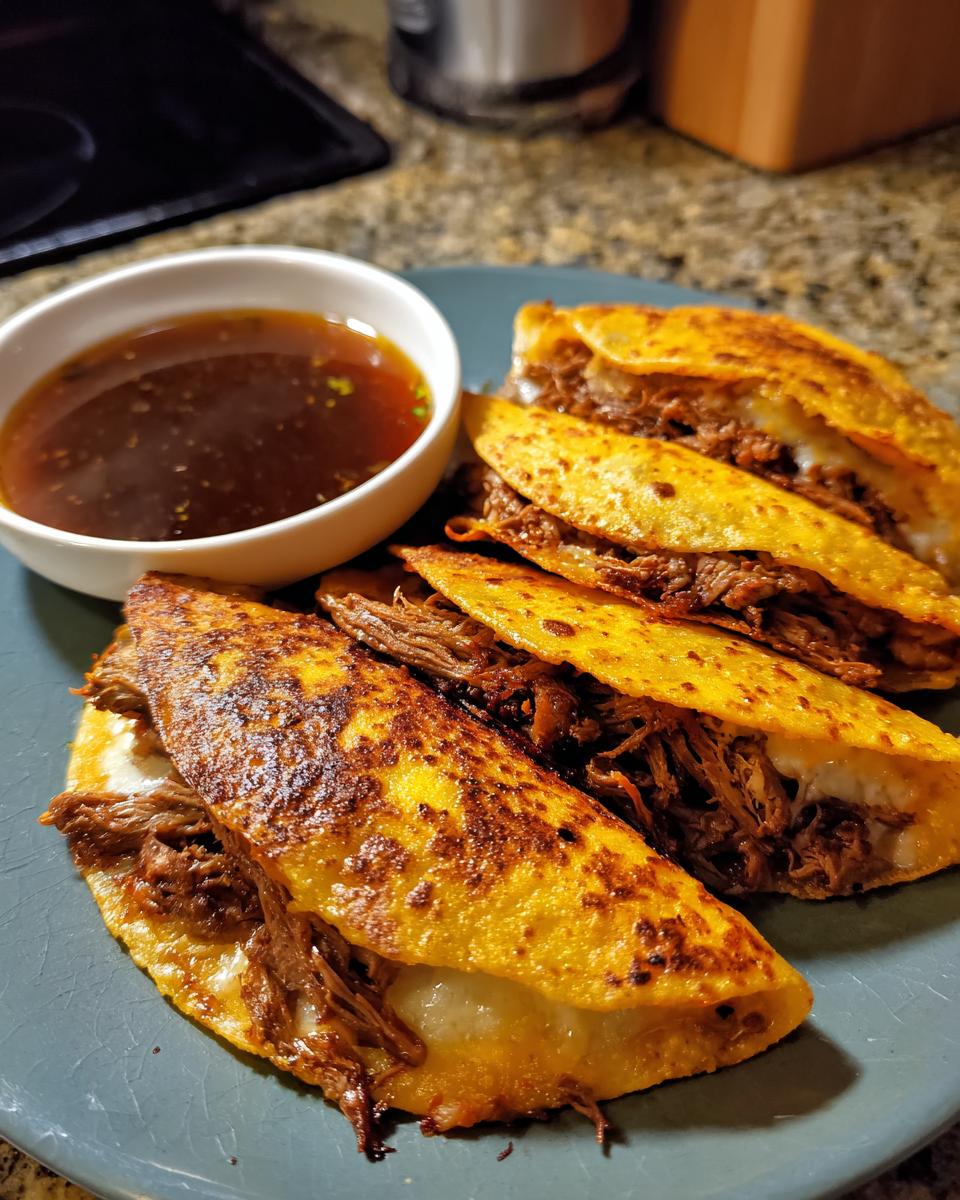
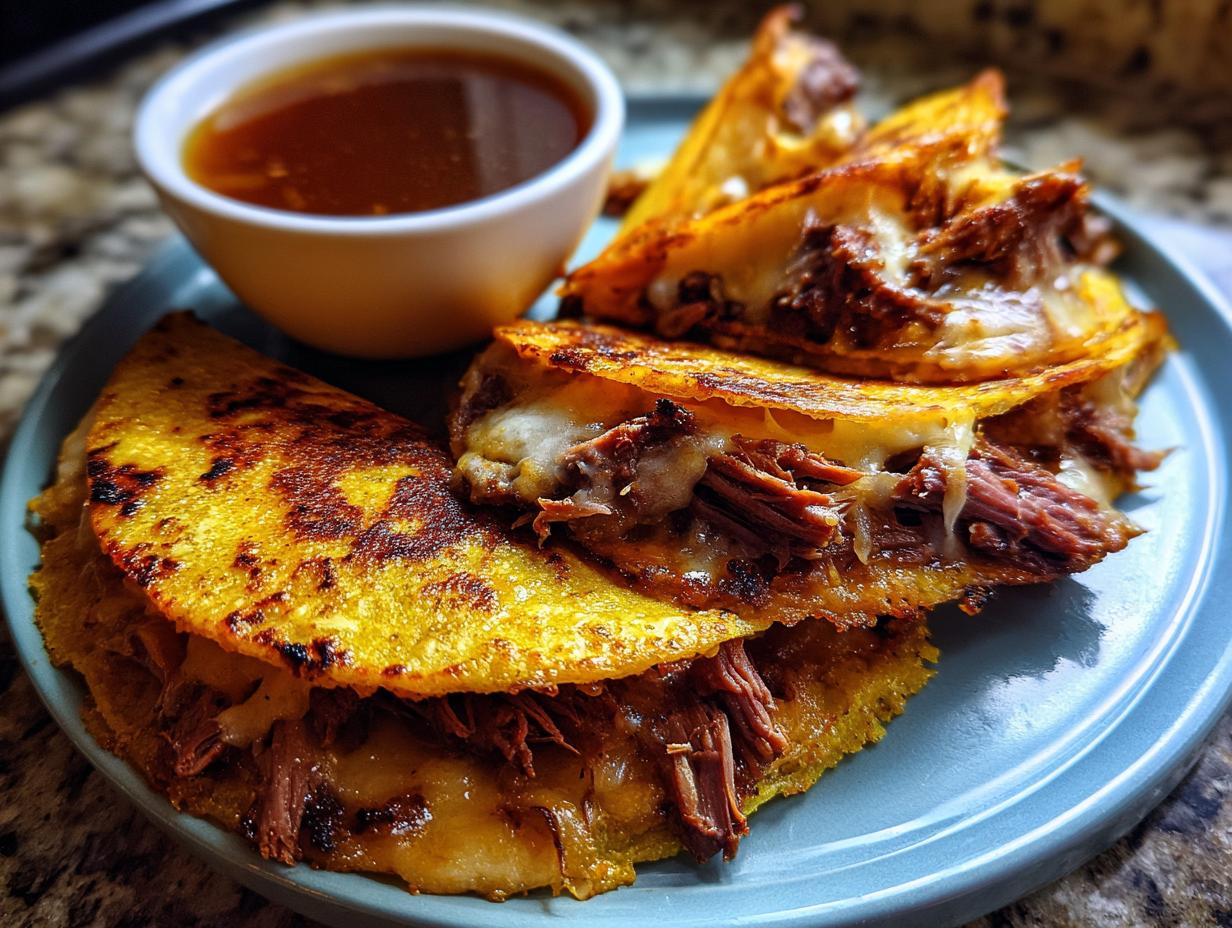
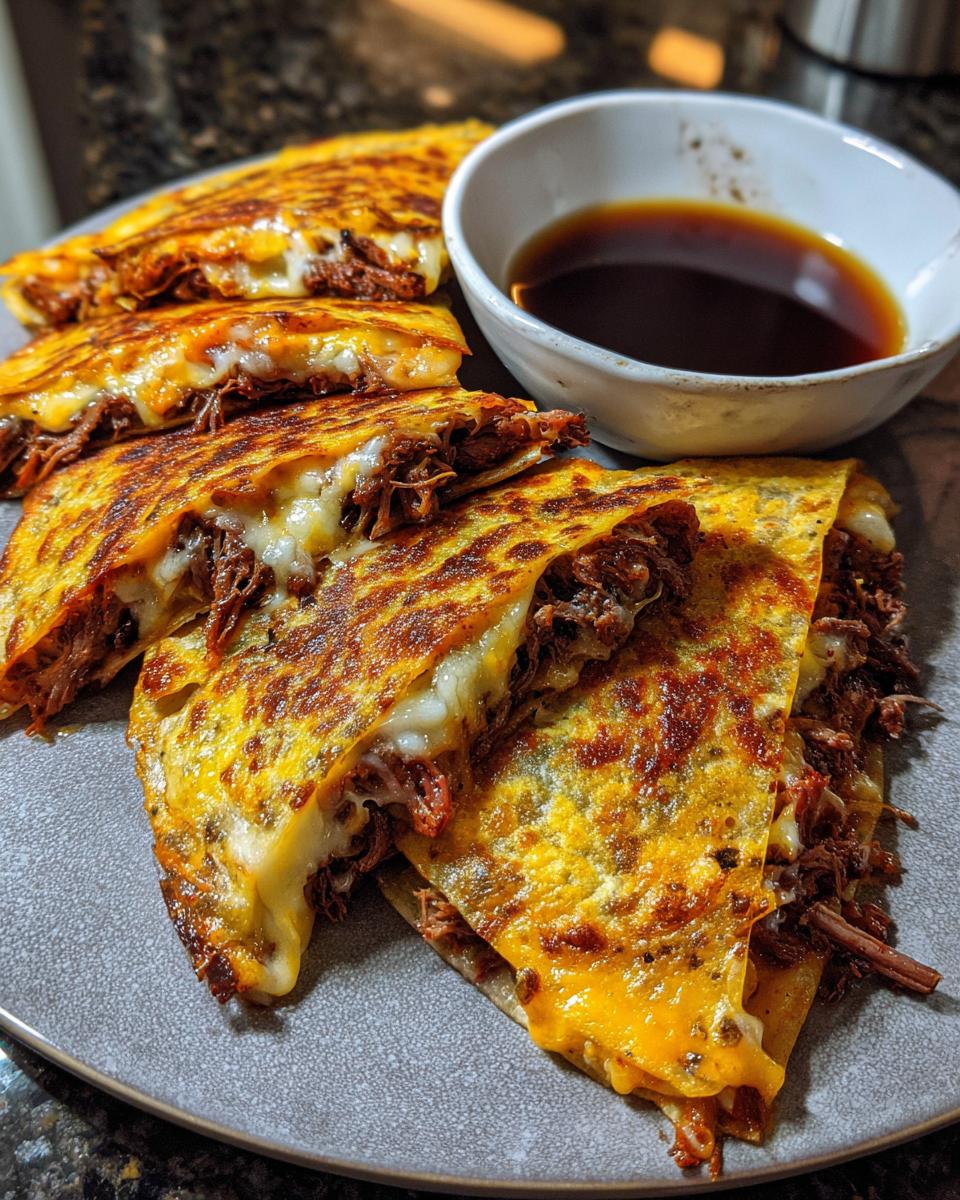
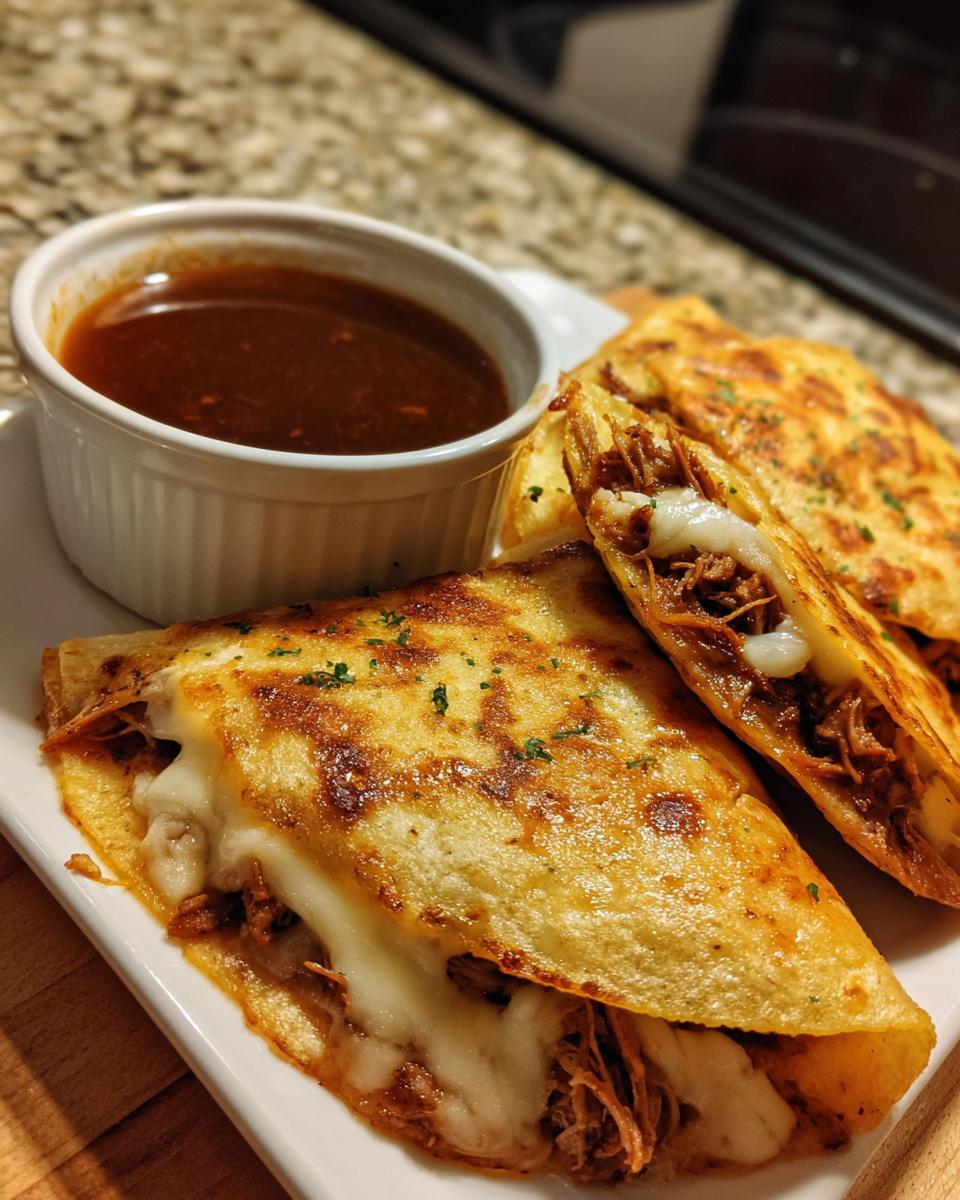
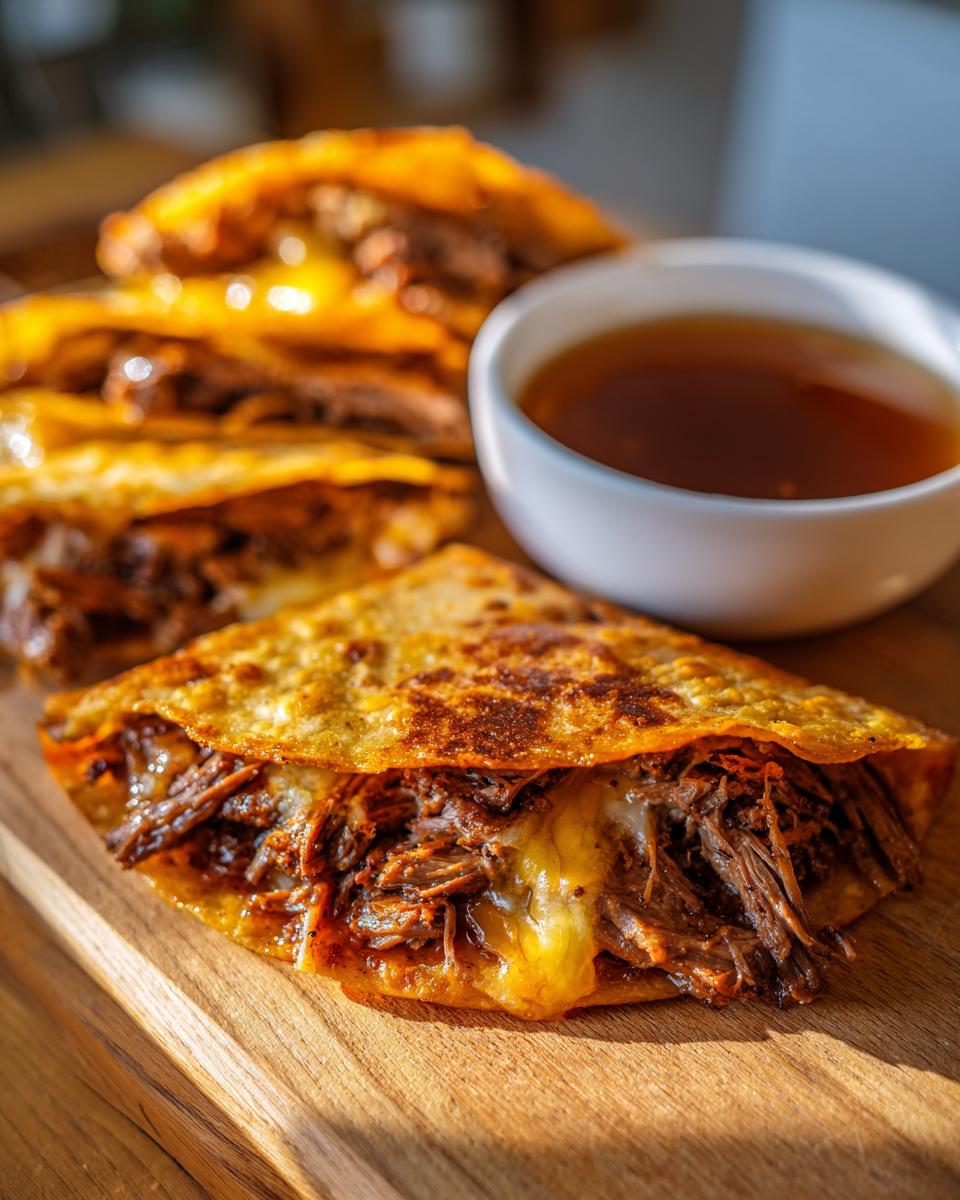
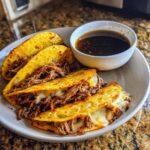
Serving Your Delicious Birria Tacos
Okay, the moment of truth! Your amazing Birria tacos are ready to shine. What goes best with these beauties? Lots of fresh stuff! I always have bowls of finely chopped white onion and fresh cilantro ready to go. And you absolutely NEED lime wedges – a little squeeze of lime just brightens everything up SO much. Oh, and don’t forget to serve that incredible, rich consommé on the side in little bowls. Dipping these crispy, cheesy tacos into that warm broth is just the best part, seriously!
Birria Tacos Meal Prep and Make-Ahead Tips
Okay, so you’re planning ahead? Smart move! These Birria tacos are seriously perfect for meal prep or making for a crowd because they’re even better the next day. Plus, who doesn’t love having that rich, flavorful beef and consommé ready to go?
Storing and Reheating Your Birria
Once your beef is braised and shredded, the best way to store it is just like it is – with some of that glorious consommé! Pop it all into an airtight container and pop it in the fridge. It’ll taste amazing for about 3 days. When you’re ready to reheat, just gently warm it up on the stovetop or in the microwave. Same goes for the extra consommé you saved – just reheat it until it’s nice and warm for dipping your Birria tacos.
Making Birria Tacos for a Crowd
If you’re feeding a bunch of hungry people, no sweat! You can totally braise the beef and make the consommé a day or two ahead. Then, right before serving, just set up a little taco bar! Have the shredded beef and consommé warmed up, put out your cheese, tortillas, and toppings, and let everyone build their own perfect cheesy birria taco. Assembly goes super fast this way, and everyone gets exactly what they want!
Frequently Asked Questions About Birria Tacos
Got questions about whipping up your own batch of amazing Birria tacos? I totally get it! It’s one of those dishes that sounds super authentic and maybe a little intimidating, but I promise it’s totally doable. Here are a few things people often ask me:
What is the best beef for Birria tacos?
For the most tender and flavorful Birria tacos, you really want cuts with a good amount of fat and connective tissue. That’s why I love using beef chuck roast and beef short ribs! They break down beautifully during the long braise, making the meat super tender and contributing tons of flavor to the consommé.
Can I make Birria tacos vegetarian?
Traditionally, Birria is all about the rich beef flavor, so a vegetarian version is tricky! While you could experiment with hearty mushrooms or jackfruit braised in the chile base, it won’t have that same deep, savory beef essence that makes these Birria tacos so special. It’s definitely something to try if you’re looking for a meatless option, but true Birria magic comes from the beef!
How do I make the consommé richer?
If you want an even richer consommé for your Birria tacos, try adding a couple of beef marrow bones to the pot when you’re braising the meat. They’ll release extra richness and gelatin into the broth, making it super decadent. You could also just let it simmer a bit longer, uncovered, at the very end to reduce and concentrate the flavors even more!
Estimated Nutritional Information
Now, I’m not a nutritionist or anything, but based on the recipe, you’re looking at roughly 550 calories per serving, which is about 3 of these glorious Birria tacos. You’ve got about 35g of protein, which is awesome, but also around 35g of fat. Just remember these are estimates, okay? Your mileage might vary depending on exactly how much cheese you pile on (no judgment!) or how much fat you skim from the consommé. Happy eating!
Share Your Birria Taco Creations!
Alright, you’ve made the most amazing Birria tacos, right?! I’m dying to see them! Please, PLEASE leave a comment below and tell me how they turned out. Did you love them? Any fun twists you added? Or better yet, snap a pic and tag me on social media – I absolutely LOVE seeing your kitchen creations come to life! If you have any questions or want to share your full experience, I’d love to hear from you via my contact page too! Happy cooking!
PrintBirria Tacos with Consommé
Learn to make authentic Birria tacos with a rich beef consommé. This recipe guides you through selecting chiles, braising beef, dipping tortillas, and frying them to crispy perfection. Ideal for a weekend cooking project or crowd-pleasing dinner.
- Prep Time: 30 min
- Cook Time: 4 hours
- Total Time: 4 hours 30 min
- Yield: 6-8 servings 1x
- Category: Dinner
- Method: Braising
- Cuisine: Mexican
- Diet: Vegetarian
Ingredients
- 3 lbs beef chuck roast, cut into 2-inch pieces
- 1 lb beef short ribs
- 1 white onion, quartered
- 4 cloves garlic, smashed
- 2 bay leaves
- 1 tablespoon whole black peppercorns
- 1 teaspoon whole cloves
- 1 teaspoon dried oregano
- 1 teaspoon ground cumin
- 1/2 teaspoon ground cinnamon
- 1/4 teaspoon ground allspice
- 1/4 teaspoon ground nutmeg
- 1/4 cup apple cider vinegar
- 4 guajillo chiles, stemmed and seeded
- 3 ancho chiles, stemmed and seeded
- 2 pasilla chiles, stemmed and seeded
- 2 árbol chiles, stemmed and seeded (optional, for heat)
- 4 cups beef broth
- Salt to taste
- Corn tortillas
- Shredded Monterey Jack or Oaxaca cheese
- Vegetable oil for frying
- Optional garnishes: chopped white onion, cilantro, lime wedges
Instructions
- Rinse the dried chiles and soak them in hot water for 20 minutes until softened.
- While chiles soak, season the beef chuck roast and short ribs generously with salt.
- In a large Dutch oven or Instant Pot, sear the beef on all sides until browned. Remove beef and set aside.
- Add the quartered onion, smashed garlic, bay leaves, peppercorns, cloves, oregano, cumin, cinnamon, allspice, and nutmeg to the pot. Sauté for 1-2 minutes until fragrant.
- Drain the soaked chiles and transfer them to a blender along with the apple cider vinegar and about 1 cup of the beef broth. Blend until smooth.
- Strain the chile puree through a fine-mesh sieve into the pot, discarding any solids.
- Return the seared beef to the pot. Add the remaining beef broth, ensuring the meat is mostly submerged. Add more broth or water if needed.
- Bring to a simmer, then cover and cook on low heat for 3-4 hours in a Dutch oven, or until the beef is fork-tender. If using an Instant Pot, cook on high pressure for 60 minutes, then allow natural pressure release for 15 minutes.
- Remove the beef from the pot and shred it using two forks. Skim excess fat from the consommé if desired. Season the consommé with salt to taste.
- To assemble tacos, dip each corn tortilla into the warm consommé, coating both sides.
- Place a tortilla in a lightly oiled skillet over medium-high heat. Add shredded beef and a generous amount of cheese.
- Fold the tortilla in half and cook for 2-3 minutes per side, until golden brown and crispy.
- Serve immediately with extra consommé for dipping, and your favorite garnishes like chopped onion and cilantro.
Notes
- For meal prep, braise the beef and store it with some consommé in the refrigerator for up to 3 days. Shred and reheat before assembling tacos.
- You can prepare the consommé a day in advance and refrigerate. Skim the solidified fat from the top before reheating.
- For a spicier taco, add 1-2 árbol chiles to the chile blend or increase the amount of chile de árbol.
- Ensure your skillet is hot enough to achieve a crispy tortilla without burning.
Nutrition
- Serving Size: 3 tacos
- Calories: 550
- Sugar: 5g
- Sodium: 800mg
- Fat: 35g
- Saturated Fat: 15g
- Unsaturated Fat: 20g
- Trans Fat: 1g
- Carbohydrates: 25g
- Fiber: 5g
- Protein: 35g
- Cholesterol: 120mg