
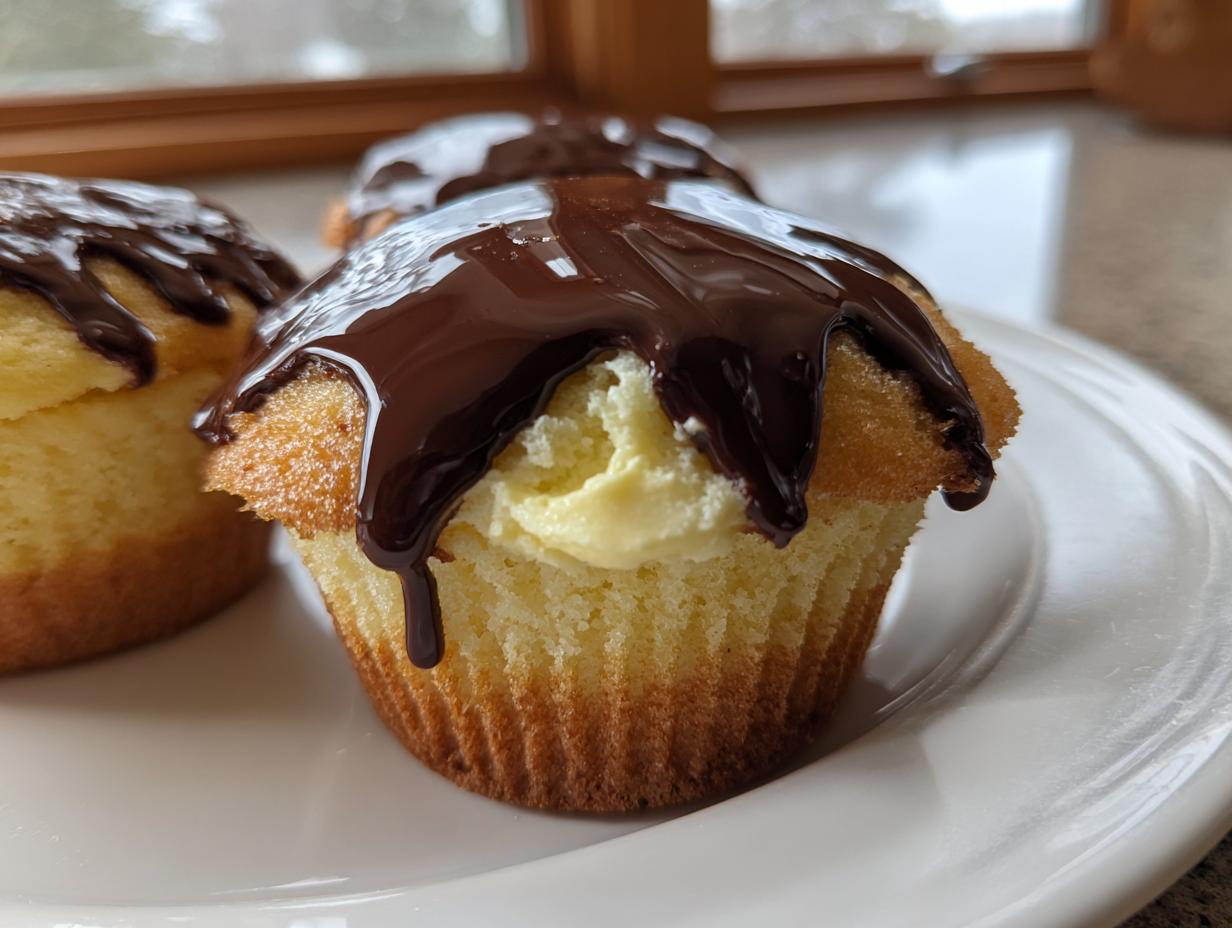
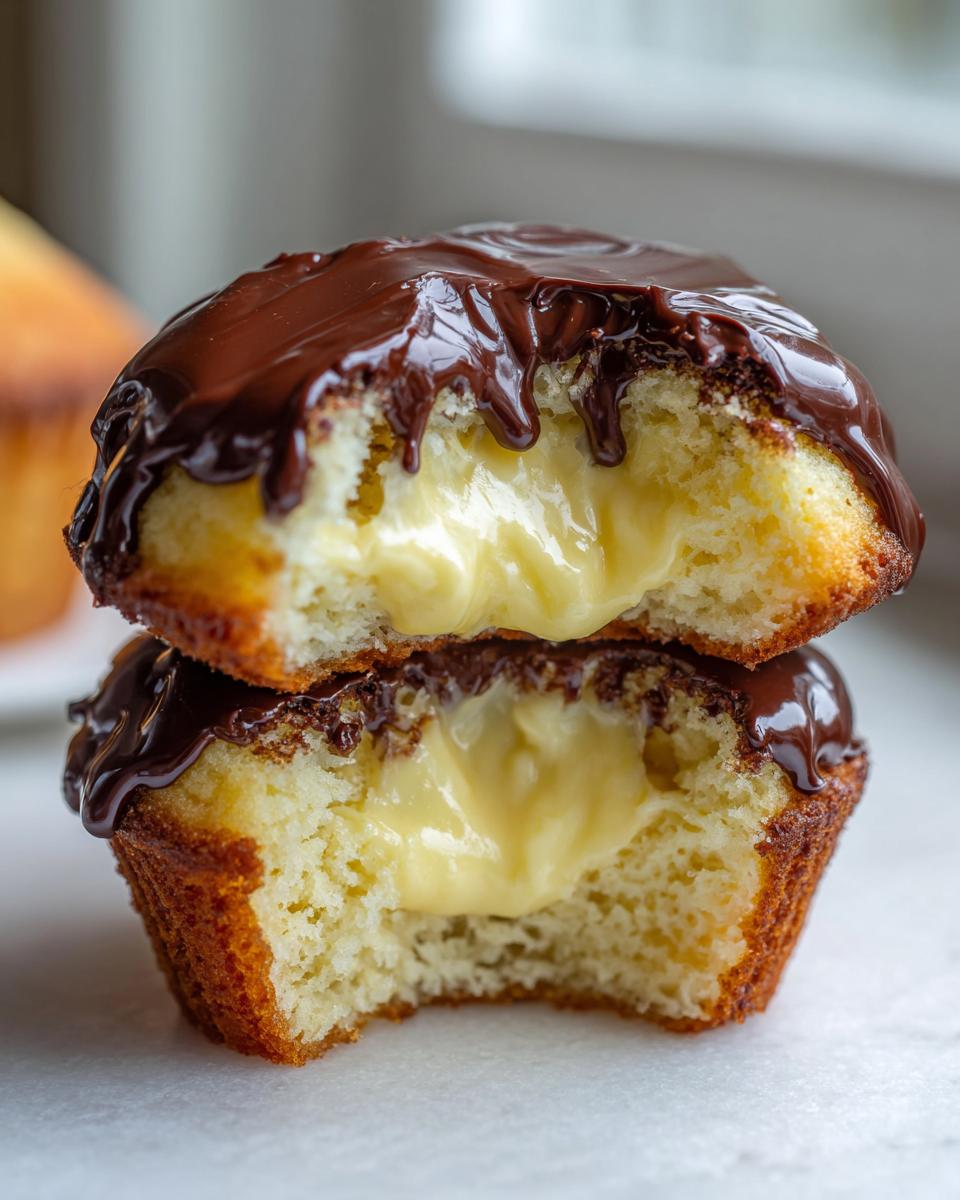
Oh, friends, are you ready for a little bit of dessert magic? I grew up in New England, and you just can’t talk about classic desserts without mentioning the grand dame herself: Boston Cream Pie. It always felt so elegant on Nana’s table, but honestly, slicing into a giant pie can be a bit messy, especially at parties! That’s why I’m absolutely obsessed with turning that beloved classic into these darling, handheld boston cream pie cupcakes. My mission here at Bliss Batter, which you can read more about on my About Page, is always to make those show-stopping desserts accessible, and trust me, these deliver that fancy bakery quality right in your kitchen. We’re talking fluffy vanilla cake, that luscious custard center, and that perfect chocolate top. It’s all here, simplified just for you!
- Why You Will Love These Boston Cream Pie Cupcakes
- Essential Ingredients for Perfect Boston Cream Pie Cupcakes
- Step-by-Step Instructions for Boston Cream Pie Cupcakes
- Tips for Success Making Boston Cream Pie Cupcakes
- Ingredient Notes and Substitutions for Your Boston Cream Pie Cupcakes
- Storing and Serving Your Decadent Cupcakes
- Frequently Asked Questions About Boston Cream Pie Cupcakes
- Estimated Nutritional Information for Boston Cream Pie Cupcakes
- Share Your Homemade Boston Cream Pie Cupcakes
Why You Will Love These Boston Cream Pie Cupcakes
If you are wondering if these are worth the slight extra effort compared to a plain chocolate-topped cupcake, let me tell you right now: YES, a thousand times yes! These boston cream pie cupcakes check every single box for an amazing, show-stopping treat. You should definitely try them because:
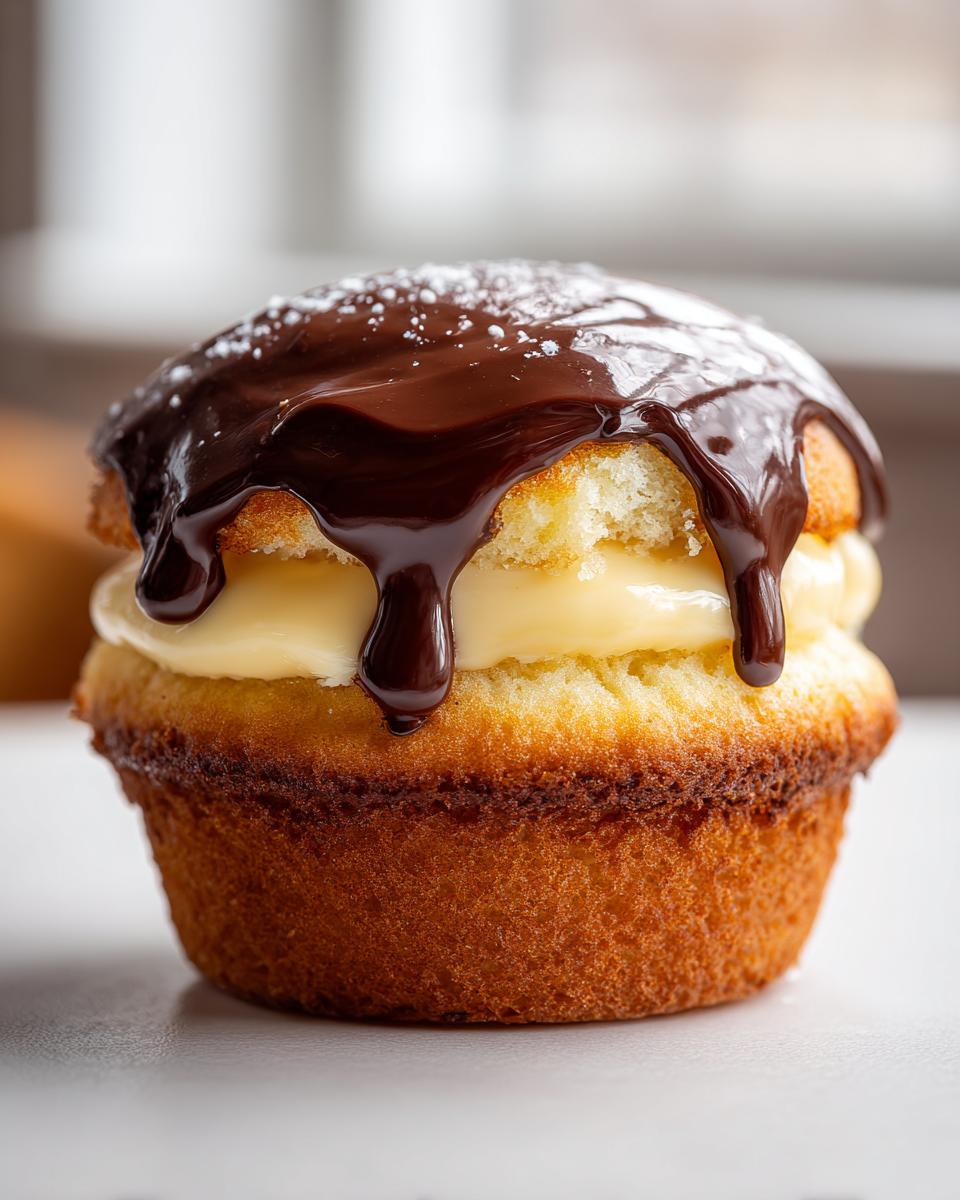
- They capture the magic of the classic dessert in a neat, handheld package. It’s the perfect single serving Boston Cream Pie!
- The vanilla cupcake base is light and tender—we don’t want a dry cake here when we are adding moisture with two other components, right?
- We’re talking about homemade custard filling! That creamy, silky center is what makes this dessert legendary, and doing it yourself is so satisfying.
- They scream “elegant baking ideas” without needing any strange fancy techniques. They definitely look like they came from a high-end bakery.
- They are surprisingly simple to assemble once you have your components ready, making them great easy dessert recipes for your next gathering.
Essential Ingredients for Perfect Boston Cream Pie Cupcakes
Okay, this recipe involves three distinct parts—the cake, the cream, and the chocolate top—so organization is key! I always lay everything out before I turn on the mixer. It really helps keep things smooth, kind of like how you might organize everything before starting a big meal planning session; structure makes the payoff so much better. Trust me when I say every ingredient matters here, especially when we are aiming for that bakery-style result.
For the Fluffy Vanilla Cupcake Recipe
For the cake itself, we need room temperature everything! If your butter feels cold, your cupcakes will be dense, and we want fluffy, not dense. Don’t skip softening that butter properly for the creaming step.
- 1 3/4 cups all-purpose flour
- 1 1/2 cups granulated sugar
- 1 tablespoon baking powder
- 1/2 teaspoon salt
- 1/2 cup unsalted butter, softened
- 2 large eggs (room temperature, please!)
- 1 teaspoon vanilla extract
- 1 cup milk (whole milk works best for softness)
For the Homemade Custard Filling
This is where the magic happens! These custard filled cupcakes need richness, so using whole milk is non-negotiable for that silky smooth texture. We’re making a true pastry cream here, so grab the whisk!
- 1/2 cup granulated sugar
- 1/4 cup cornstarch (this is our thickener!)
- 1/4 teaspoon salt
- 2 large egg yolks (save the whites for something else!)
- 1 1/2 cups whole milk
- 2 tablespoons unsalted butter
- 1 teaspoon vanilla extract
For the Rich Chocolate Ganache Cupcakes Topping
For the topping, we keep it simple but decadent. Semi-sweet chocolate is perfect because it balances the sweetness of the cake and the filling. If you use milk chocolate, just watch your sugar levels!
- 4 ounces semi-sweet chocolate, finely chopped
- 1/2 cup heavy cream (the fatty one, not the light stuff!)
Step-by-Step Instructions for Boston Cream Pie Cupcakes
Alright, let’s get baking! Since we have components, we tackle them one at a time. Don’t let the three steps scare you; we’re just grouping the tasks. Once the cake is cooling, we work on the custard, and then it’s assembly time! Planning ahead here means you get to enjoy the final product faster. If you’ve ever mastered my recipe for a wonderfully tender coffee cake, you’ll fly through this cake base.
Baking the Vanilla Cupcake Base
First things first: preheat your oven right away to 350°F (175°C) and get those paper liners settled in your 12-cup tin. You want to start by whisking together all your dry ingredients—flour, sugar, baking powder, and salt—in a big bowl. Add the softened butter, eggs, and vanilla. Now, important tip: beat this on medium speed just until everything comes together. Seriously, stop mixing when it’s *just* combined. Then, slowly pour in the milk while keeping the mixer on low until it’s smooth. Overmixing those boston cream pie cupcakes makes them tough, and we want fluffy clouds!
Fill those liners about two-thirds full. They bake quickly, usually 18 to 20 minutes. Once they look golden, test them with a toothpick. When it comes out clean, pull them out and let them cool in the pan for five minutes before moving them onto a rack to cool completely—they need to be totally cool before we fill them, or the custard will melt right out!
Preparing the Silky Pastry Cream Filling
While the cupcakes are cooling, we tackle the filling. This is the stovetop part, so pay attention! In a saucepan, whisk your sugar, cornstarch, and salt; then whisk in those lovely egg yolks until smooth. Gradually whisk in the whole milk until you have no lumps. Now, turn the heat to medium and whisk constantly. You have to keep that whisk moving! It will go from looking thin to suddenly thickening up—that’s when you know it is close. Once it boils, keep whisking for a full minute more. That minute ensures the cornstarch cooks out, which keeps your homemade custard filling from tasting chalky.
Take it off the heat and stir in the butter and vanilla. Pour this hot cream into a shallow dish—shallow helps it cool faster! Crucially, you must press plastic wrap *directly* onto the surface of the cream. If you don’t, you’ll get that weird skin, and nobody wants sinkholes in their cupcakes! Chill this for at least two hours until it is firm and very cold.
Assembling Your Boston Cream Pie Cupcakes
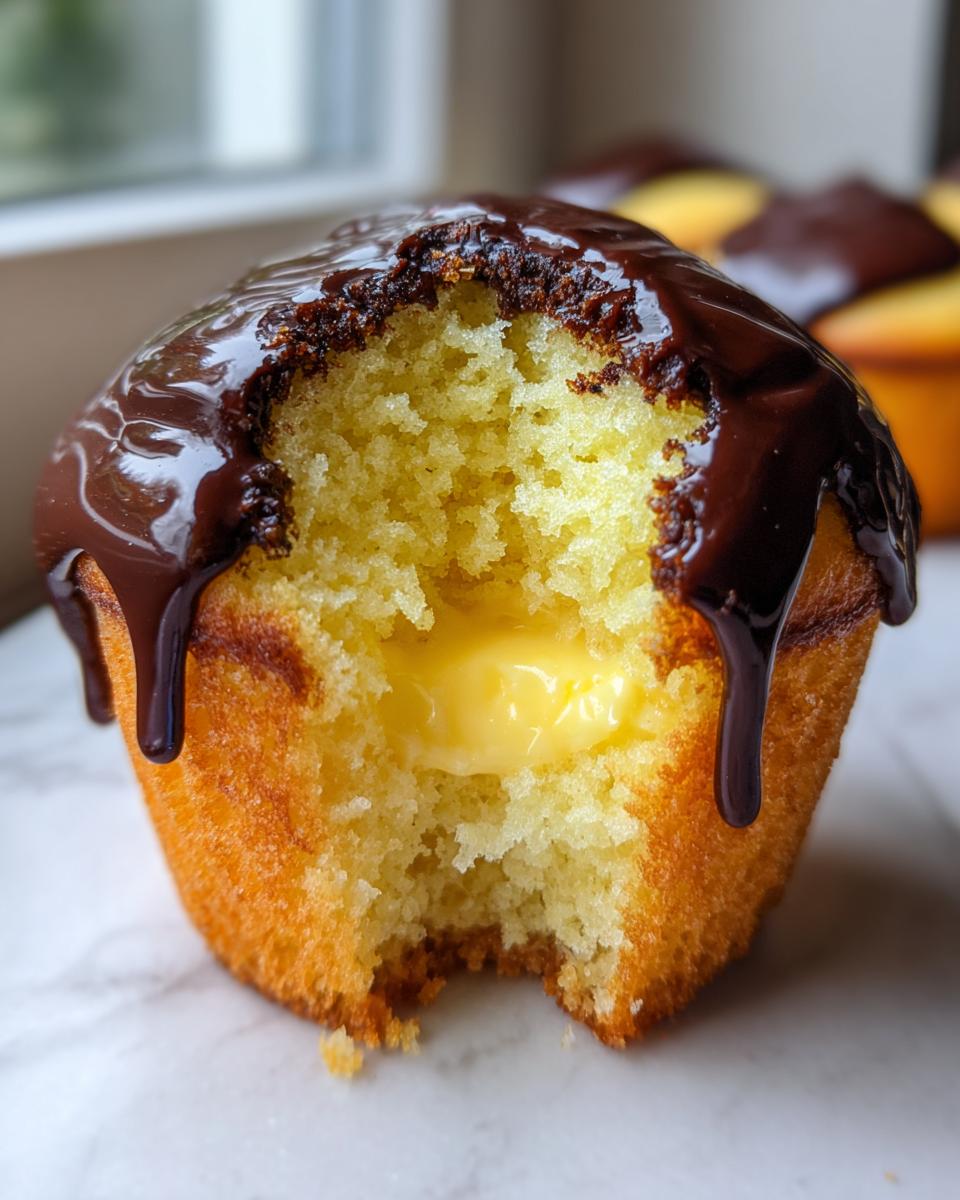
Time for assembly! Make sure those cakes are chilled. Take a small knife or an apple corer—the corer is my secret weapon here—and carefully cut a cone out from the center of each cupcake, being careful not to cut clear through the bottom liner. You need a little well to fill. Transfer your very cold, firm pastry cream into a piping bag fitted with a large round tip. Gently pipe that luxurious cream right into that hole until it’s full and level. Pop the little cake plug you removed right back on top like a little hat. They are starting to look like true bakery style cupcakes!
Finishing with Glossy Chocolate Ganache
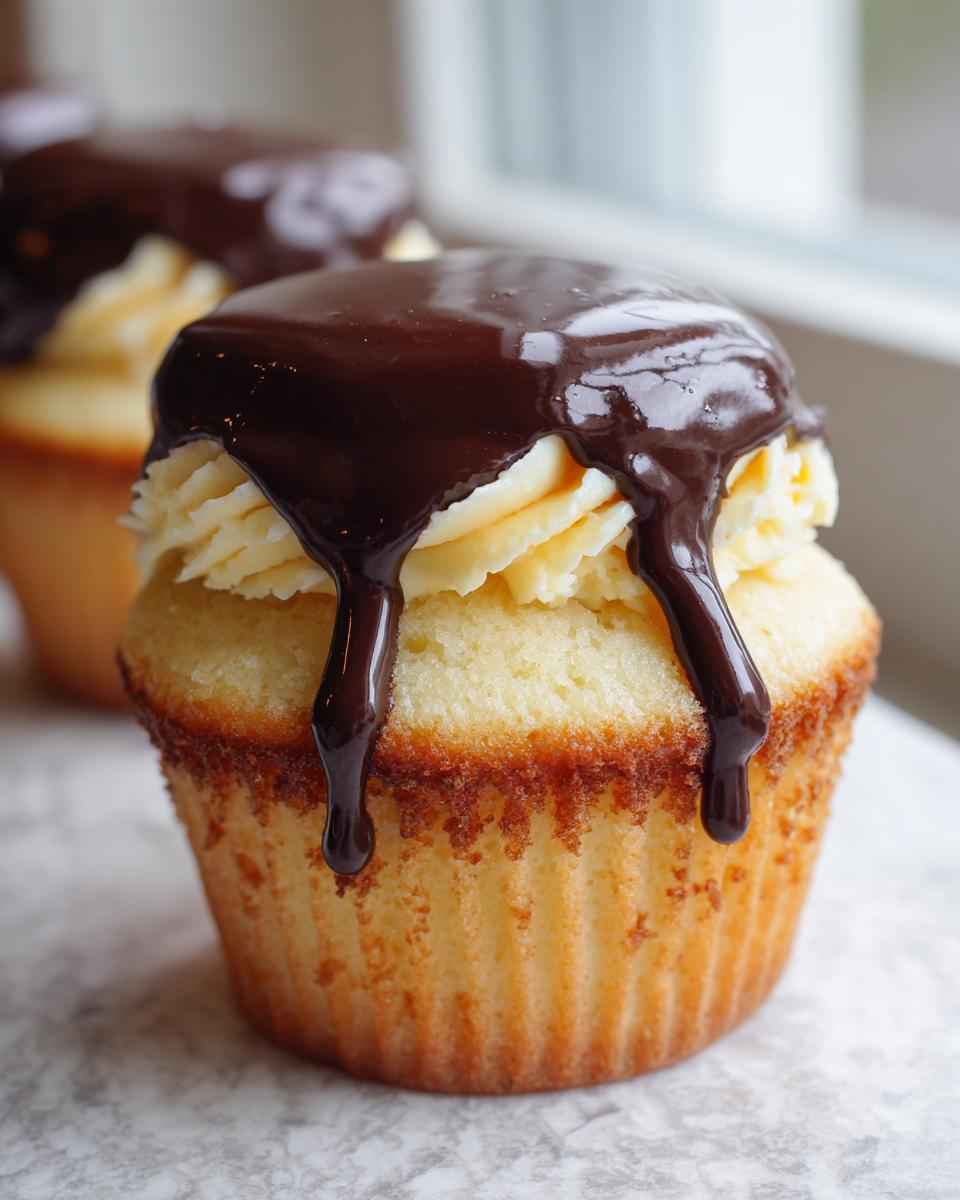
Now for the grand finale! Place your chopped chocolate in a heatproof bowl. Heat the heavy cream until it is just starting to simmer—watch it closely so it doesn’t boil over! Pour that hot cream right over the waiting chocolate. You must let it sit undisturbed for five full minutes. Seriously, walk away! This soaking time allows the heat to melt everything gently. After five minutes, whisk slowly and smoothly until you have this beautiful, glossy mixture. Let the ganache sit for a few extra minutes to thicken up ever so slightly; you want it pourable but not watery. Spoon or drizzle it right over the filled boston cream pie cupcakes, letting it drip down the sides a little bit so it looks truly indulgent. Let that chocolate set up before you serve these beauties!
Tips for Success Making Boston Cream Pie Cupcakes
These boston cream pie cupcakes are simple, but they involve a few different textures, so nailing the details makes all the difference between a good dessert and a spectacular one. Since I’ve made this recipe enough times that I probably need to start a support group, here are the non-negotiable tips I’ve picked up along the way to ensure yours turn out perfectly, bakery-style!
First, let’s talk about the custard—it has to be cold. If your pastry cream is even a little lukewarm when you go to fill the cupcakes, it won’t hold its shape. It will just ooze out everywhere, and you’ll end up with messy, soupy treats instead of gorgeous custard filled cupcakes. My recipe note suggests chilling it for two hours, but honestly, if you can let it go a bit longer, do it! It firms up beautifully, and you can pipe it like butter when it’s really chilled.
Second, when you are coring out the centers, don’t be so aggressive that you go right through the bottom. You need that little cake base to hold all that rich filling in. If you use a little knife, just gently swirl in a cone shape and lift it out. If this reminds you of patching up lasagna layers instead of baking, check out my tips for perfect layers; the mindset is similar—careful containment!
And my third big tip is about the chocolate ganache. It sets so quickly once it’s slightly cooled. If you try to pour it when it’s too hot, it’ll run right off the sides and pool at the bottom of the platter, leaving you with bare-topped cupcakes. You want it thick enough to coat the top nicely, so let it sit on the counter after whisking for maybe 10 minutes before you start spooning it on. This patience ensures you get that beautiful, thick, glossy finish on top of your chocolate ganache cupcakes.
Ingredient Notes and Substitutions for Your Boston Cream Pie Cupcakes
Making these boston cream pie cupcakes perfect sometimes means knowing when you can swap an ingredient and when you absolutely must stick to the script. Since we are doing a classic, rich pastry cream, some ingredients just perform better than others. I want you to feel confident walking into the kitchen, even if you have to make a little switcheroo!
For the vanilla cake, the easiest thing to substitute is the milk. If you absolutely must, you could use a 2% milk, but please, please try to stick to whole milk if you can. The fat content in whole milk really helps keep the crumb soft and tender, which is perfect when you’re loading it up with wet filling later.
Now, let’s talk about our luscious filling. The cornstarch is crucial; don’t try swapping it for flour! Flour yields a cloudy, gummy cream because it thickens differently. Cornstarch gives us that crystal-clear, silky smooth texture we want for our homemade custard filling. If you are out of whole milk for the custard, heavy cream cut 50/50 with water is a decent emergency backup, but the flavor won’t be quite as deep.
For the chocolate topping, it’s all about the chocolate you choose. I specified semi-sweet, but if you prefer a darker dessert, use bittersweet chocolate (60% to 70% cacao). Avoid using milk chocolate unless you are planning on cutting the sugar in the pastry cream down significantly, or these chocolate ganache cupcakes will be overwhelmingly sweet. And please, skip the chocolate chips if you can! Chips contain stabilizers that stop them from melting smoothly, which means your ganache will look slightly grainy instead of that gorgeous, glossy finish we are aiming for.
I know sometimes we look at our pantry and see what we have, but these small adjustments really separate a good batch from a truly unforgettable one!
Storing and Serving Your Decadent Cupcakes
Since these boston cream pie cupcakes are filled with actual pastry cream—that wonderful, silky custard—we absolutely have to treat them like we would leftover pie when it comes to storage. Food safety first, always! You can’t just leave these babies sitting on the counter hoping for the best, especially if you made a big batch for party cupcakes.
You need to store any leftovers in an airtight container right away, and they must go into the refrigerator. If you stack them, make sure you put a little piece of parchment paper between the chocolate tops so the ganache doesn’t stick to the cupcake above it. They are perfectly fine stored this way for about two to three days, which is fantastic if like me, you like to bake ahead of time before a big event. If you need a whole menu laid out, sometimes I just focus on the mains first, like my roast chicken recipe, and then worry about dessert storage!
Now, here’s the important serving tip: Do NOT serve them cold straight from the fridge! When that rich pastry cream is ice-cold, it gets a little sturdy and the texture just isn’t right. When you pull them out to serve, take them out about 30 minutes beforehand. Letting them sit on the counter lets the cake soften up again and brings the custard back to that perfect, creamy, melt-in-your-mouth texture. You want that delicious contrast between the firm chocolate layer and the soft filling.
As for reheating? Forget about it! Never microwave these. You’ll turn the cake into rubber and instantly melt the ganache into a sad puddle, ruining the entire beautiful structure of your chocolate ganache cupcakes. Just let them temper on the counter for that half-hour, and they will be spectacular.
Frequently Asked Questions About Boston Cream Pie Cupcakes
It’s totally normal to have questions when you’re trying a new format for a classic dessert! I get so many messages about the logistics of making these boston cream pie cupcakes, especially since they have three distinct layers. Don’t worry, I’ve got the answers so you can bake these beautiful treats with total confidence, whether it’s just for you or for a big event using my easy weeknight dinner schedule!
Can I make the custard filling ahead of time for these boston cream pie cupcakes?
Yes, absolutely! This is one of my favorite make-ahead techniques because it saves so much time on the actual serving day. You can cook your pastry cream mixture, press that plastic wrap right onto the surface, and chill it for up to two full days in the refrigerator. When you are ready to fill, just give it a quick whisk before piping it into the cooled cupcakes. If it gets too stiff, you can stir in a tiny splash of milk to loosen it back up!
Are these considered easy dessert recipes to make for a crowd?
I certainly hope so! While they aren’t as fast as just whipping up some frosting, I count them as an easy dessert recipe overall because the baking steps themselves are straightforward—standard cupcake steps and a simple stovetop custard. The assembly takes a bit of focus, especially if you’re making dozens of party cupcakes, but since you can do the cake and the filling on different days, it breaks up the work beautifully. They look incredibly fancy, but the actual *process* is manageable!
What is the best way to get a clean filling hole in the cupcake?
This is key for that classy, bakery look! Forget just poking around with a fork; you need definition. My absolute favorite tool for making the perfect little core for these fillings is an apple corer, not the tool you use to core an apple for pies, but the small one used for removing the center of a single small fruit. It makes a perfect, straight cylinder. If you don’t have one, use a small paring knife and just gently swirl around in a circle about a half-inch in from the edge, making sure not to pierce the bottom. Lift that piece out carefully; that’s what we use to top off the custard later!
Estimated Nutritional Information for Boston Cream Pie Cupcakes
Now, I know most of us aren’t baking these boston cream pie cupcakes while strictly counting macros—these are for joy, right?—but I always like to include the general nutritional estimates here. It helps when planning for parties or when folks ask those inevitable questions! Remember, since this recipe uses real butter, whole milk, and rich chocolate for that amazing texture and flavor, these are definitely a decadent treat. These numbers are based on dividing the entire recipe into 12 standard servings.
Think of this as helpful guidance, not strict gospel for your decadent cupcakes!
- Serving Size: 1 cupcake
- Calories: 350
- Sugar: 35g (That deep brown sugar in the cake base definitely bumps this up, but oh, it’s worth it!)
- Sodium: 180mg
- Fat: 18g
- Saturated Fat: 10g
- Carbohydrates: 45g
- Protein: 5g
Because we are using rich cream in the ganache and whole milk in the custard, the fat content is a little higher, but that’s what makes these classic dessert cupcakes so darn satisfying. Enjoy the moment—you deserve it!
Share Your Homemade Boston Cream Pie Cupcakes
Well, we made it! You followed along, you mixed the batter, you cooked that silky custard, and you topped it all with glossy chocolate. Now I want to see what you created! These boston cream pie cupcakes are meant to be shared and enjoyed, whether you baked them for a birthday or just because the craving hit.
If you loved how tender the cake was, or if you discovered a new favorite trick for piping that filling, please leave a rating and a comment right here on the post. I read every single one, and your feedback helps other bakers feel confident trying this recipe out. Seriously, hearing that you successfully made these is the best part of my day!
And hey, if you snap a picture of those stunning chocolate-topped beauties, tag me on social media! I absolutely adore seeing my recipes coming to life in your kitchens. It proves that baking something elegant and delicious isn’t just for the professionals; it’s for us everyday bakers, too. If you have any final questions I didn’t cover, feel free to reach out through my contact page. Happy baking, everyone!
PrintEasy Boston Cream Pie Cupcakes with Custard Filling
Create impressive, bakery-style Boston Cream Pie Cupcakes at home. This recipe features fluffy vanilla cupcakes filled with silky pastry cream and topped with a rich chocolate ganache.
- Prep Time: 40 min
- Cook Time: 20 min
- Total Time: 100 min
- Yield: 12 servings 1x
- Category: Dessert
- Method: Baking and Stovetop
- Cuisine: American
- Diet: Vegetarian
Ingredients
- For the Vanilla Cupcakes:
- 1 3/4 cups all-purpose flour
- 1 1/2 cups granulated sugar
- 1 tablespoon baking powder
- 1/2 teaspoon salt
- 1/2 cup unsalted butter, softened
- 2 large eggs
- 1 teaspoon vanilla extract
- 1 cup milk
- For the Pastry Cream Filling:
- 1/2 cup granulated sugar
- 1/4 cup cornstarch
- 1/4 teaspoon salt
- 2 large egg yolks
- 1 1/2 cups whole milk
- 2 tablespoons unsalted butter
- 1 teaspoon vanilla extract
- For the Chocolate Ganache Topping:
- 4 ounces semi-sweet chocolate, chopped
- 1/2 cup heavy cream
Instructions
- Preheat your oven to 350°F (175°C). Line a 12-cup muffin tin with paper liners.
- Make the Cupcakes: In a large bowl, whisk together the flour, sugar, baking powder, and salt.
- Add the softened butter, eggs, and vanilla extract to the dry ingredients. Beat with an electric mixer on medium speed until just combined.
- Slowly pour in the milk while mixing on low speed until the batter is smooth. Do not overmix.
- Fill the cupcake liners about two-thirds full. Bake for 18 to 20 minutes, or until a toothpick inserted into the center comes out clean. Let the cupcakes cool completely in the pan for 5 minutes before moving them to a wire rack to cool fully.
- Make the Pastry Cream Filling: In a medium saucepan, whisk together the sugar, cornstarch, and salt.
- Whisk in the egg yolks until smooth. Gradually whisk in the milk until fully incorporated.
- Cook over medium heat, whisking constantly, until the mixture thickens significantly and comes to a boil. Boil for 1 minute while continuing to whisk. Remove from heat.
- Stir in the butter and vanilla extract until smooth. Pour the pastry cream into a shallow dish, press plastic wrap directly onto the surface to prevent a skin from forming, and chill in the refrigerator for at least 2 hours until cold and firm.
- Fill the Cupcakes: Once the cupcakes are cool and the cream is chilled, use an apple corer or a small knife to cut a cone-shaped plug from the center of each cupcake, leaving the bottom intact.
- Transfer the chilled pastry cream to a piping bag fitted with a round tip. Pipe the pastry cream into the center cavity of each cupcake. Replace the removed cake plug on top.
- Make the Chocolate Ganache: Place the chopped chocolate in a heatproof bowl. Heat the heavy cream in a small saucepan until it just simmers (do not boil).
- Pour the hot cream over the chocolate. Let it sit undisturbed for 5 minutes. Whisk gently until the mixture is smooth and glossy. Let the ganache cool slightly until it is thick enough to coat the top of the cupcakes but still pourable.
- Top the Cupcakes: Spoon or drizzle the chocolate ganache over the top of each filled cupcake, allowing some to drip down the sides. Allow the ganache to set before serving.
Notes
- For the easiest filling process, use a large round piping tip to remove the cake center, then use a smaller tip to fill it.
- If you are planning ahead, you can make the pastry cream a day in advance. This recipe provides enough filling for 12 cupcakes.
- This recipe is a great alternative to traditional meal planning when you need a quick, impressive dessert.
Nutrition
- Serving Size: 1 cupcake
- Calories: 350
- Sugar: 35g
- Sodium: 180mg
- Fat: 18g
- Saturated Fat: 10g
- Unsaturated Fat: 8g
- Trans Fat: 0.5g
- Carbohydrates: 45g
- Fiber: 1g
- Protein: 5g
- Cholesterol: 75mg