
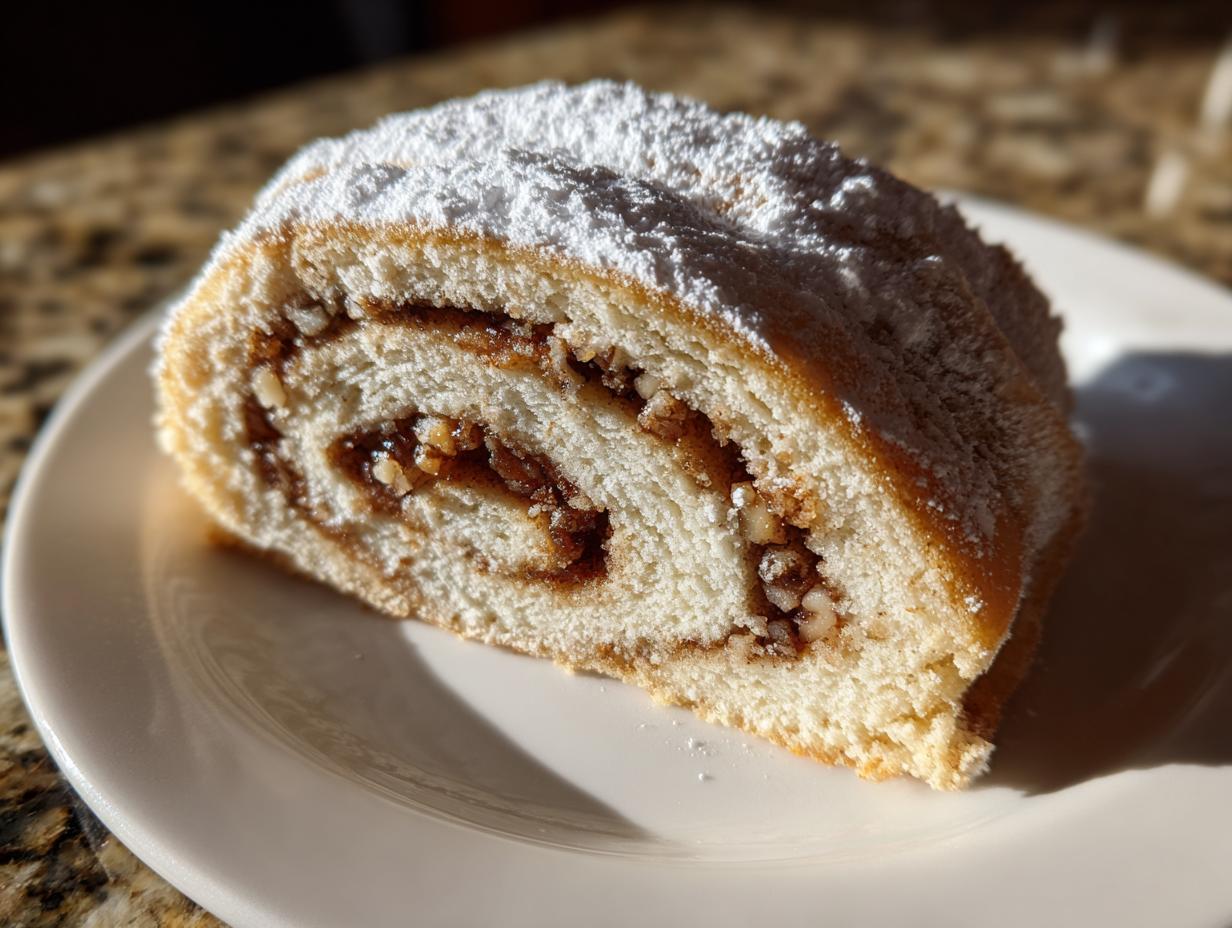
There is nothing quite like that feeling when you pull something truly special from your oven—that moment when the aroma fills your kitchen and you just know you’ve created something wonderful. My happiest moments, even when I was rushing around planning big events in my old career, were always found right here, with that stand mixer humming. That’s the joy I want to share with you, which is why I’m so excited about this one! We’re diving deep into the world of **buttery italian nut roll cookies**. Forget stiff, dry biscuits; we are aiming for a tender, melt-in-your-mouth shortbread-style dough wrapped around a rich, traditional nut paste. This recipe is pure bliss, and I promise, it will instantly become a staple in your home, just like it has in mine. Ready to slow down and bake some happiness? If you want to know more about how we bake with love here at Bliss Batter, check out our story on the About page.
- Why This is the Best Buttery Italian Nut Roll Cookies Recipe (E-E-A-T)
- Gathering Ingredients for Your Buttery Italian Nut Roll Cookies
- Step-by-Step Instructions: How to Make Buttery Italian Nut Roll Cookies
- Ingredient Notes and Substitutions for Buttery Italian Nut Cookies
- Tips for Success with Your Homemade Nut Roll Cookies
- Storage and Serving Suggestions for Buttery Italian Nut Roll Cookies
- Frequently Asked Questions About Buttery Italian Nut Roll Cookies
- Estimated Nutritional Snapshot for Buttery Italian Nut Roll Cookies
- Share Your Blissful Buttery Italian Nut Roll Cookies Creations
Why This is the Best Buttery Italian Nut Roll Cookies Recipe (E-E-A-T)
What sets these apart from other roll cookies with nut filling? Honestly, it’s the dough. It’s not a tough, chewy sugar cookie base; it’s distinctly shortbread style Italian cookies—tender, rich, and packed with flavor. I spent weeks getting the moisture just right, trying everything from heavy cream to yogurt, before realizing the secret to the perfect soft, **buttery texture cookie secrets** was actually sour cream! I remember one disastrous batch—the dough was so delicate it crumbled when I looked at it sideways. But once I added that quarter cup of sour cream, everything shifted. Suddenly, I had that perfect dough capable of wrapping around the **traditional Italian nut cookies** filling without tearing. If you love the technique behind these roll cookies, you should peek at my ultimate shortbread guide!
Achieving That Perfect Buttery Texture Cookie Secrets
The key here is the way we handle the fat and acid. You need that full cup of unsalted butter, softened just perfectly—not melted, please! We cream that butter with the sugar until it’s practically white and fluffy. That gives us the initial lift. Then, that little bit of sour cream does double duty: it adds necessary moisture to keep the shortbread tender, and the acidity tenderizes the flour slightly so you never get a tough bite. Trust me, if you want the richest Italian almond cookies, don’t skip that sour cream!
Gathering Ingredients for Your Buttery Italian Nut Roll Cookies
Okay, let’s get down to business! To make sure your **buttery italian nut roll cookies** have that signature tender quality, we need to use good ingredients and be really precise about their state. I’ve broken down everything you need below, separated out so you can easily check your pantry. Remember, baking delicious Italian pastries at home is all about preparation, and having everything measured out before you start mixing just makes the whole process so much smoother. You won’t believe how quickly this comes together once you have all your components ready!
Ingredients for the Tender Buttery Dough
- 1 cup (2 sticks) unsalted butter, softened
- 1/2 cup granulated sugar
- 1/4 cup sour cream
- 1 teaspoon vanilla extract
- 3 cups all-purpose flour
- 1/2 teaspoon baking powder
- 1/4 teaspoon salt
See that butter? It’s got to be soft! I pull mine out about an hour before I plan to start creaming. You want it soft enough to press a finger into easily, but not oily or melty. These aren’t the kind of **easy buttery cookie recipes** where you can just toss everything in cold—the creaming step is everything for that rich texture we’re going for!
Ingredients for the Traditional Nut Filling
- 1 cup finely ground walnuts or almonds (for filling)
- 1/2 cup powdered sugar (for filling)
- 1/4 cup milk or cream (for filling)
- 1 teaspoon lemon zest (for filling)
- 1 egg white, lightly beaten (for brushing)
For the filling, the key word here is *finely ground*. We want this mixture to be a thick, spreadable paste, almost like a dense frosting, so it rolls up neatly inside the dough for your **roll cookies with nut filling**. If your nuts are too coarse, you’ll end up tearing the dough when you try to roll it. That lemon zest brightens up the whole cookie magnificently, trust me on that!
Step-by-Step Instructions: How to Make Buttery Italian Nut Roll Cookies
We’ve got the ingredients ready, the oven is patiently waiting, and now we put it all together! Making these **buttery Italian nut roll cookies** is a simple process, but we have to treat that delicate dough right so we get that tender texture we talked about. Follow these steps exactly, and you’ll have beautiful, traditional **roll cookies with nut filling** ready for the cooling rack in no time. Remember to preheat that oven to 350°F (175°C) before you plan to slice the rolls, so it’s perfectly hot when you need it!
Mixing the Dough and Chilling for Buttery Italian Nut Roll Cookies
First up is the dough, which should be lovely and soft after creaming the butter and sugar. Once you add the dry ingredients—that flour, baking powder, and salt—you need to stop mixing the second it comes together into a homogenous dough. I mean it—do not overmix! Overmixing develops gluten, and we want shortbread style cookies, not tough ones. Wrap that soft dough snugly in plastic wrap and get it into the fridge for at least one full hour. Chilling is incredibly important here; it firms up the fat so that when you roll it out thin, it doesn’t stick everywhere and tear.
Assembling and Rolling the Nut Filling
While the dough chills, get your filling mixed up into that thick paste we discussed. Once the dough is chilled, cut it in half. Take one half and roll it out on a lightly floured surface into a thin rectangle, about 1/8 of an inch thick—not too thick, or your cookies will be doughy! Spread half of your sweet nut filling evenly over that dough, but make sure you leave a little space—maybe half an inch—clear along one of the long edges. This clear edge is your seal! Now, starting from the opposite side, roll that dough up tightly. Don’t press hard, but make sure the roll is snug. Pinch that seam closed really well so the filling stays tucked inside while baking. Repeat everything for the second half!
Baking and Cooling Your Roll Cookies with Nut Filling
Now we slice! Take your finished logs and cut them into tidy half-inch cookies. Place them cut-side up onto your parchment-lined sheets. Give them a quick, light brush with that beaten egg white—this gives them just a touch of color. Pop them into that 350°F oven and watch them carefully. They only need about 12 to 15 minutes. You are looking for the edges to just barely start turning golden; the centers should stay pretty pale. Don’t walk away! Once they look done, take them out, but here’s a pro tip: let them rest right there on the hot baking sheet for a good five minutes. This lets the structure set up perfectly before you move them to a wire rack to cool completely. If you move them too soon, those buttery bases can crack! If you’re looking for tips on finishing touches like icing (though these look lovely dusted!), you might check out my recipe for quick cookie icing.
Ingredient Notes and Substitutions for Buttery Italian Nut Cookies
You know how much I emphasize using the right ingredients to get that melt-in-your-mouth experience. Since these are **traditional Italian nut cookies**, let’s talk walnuts versus almonds. I love that 50/50 blend because the walnut offers that earthy, slightly robust flavor while the almond gives you that classic marzipan hint. You absolutely can use only one or the other if that’s what you have on hand; just keep the measurement at one full cup of ground nuts total.
Now, let’s circle back to the magic ingredient: the sour cream. If you’re in a pinch and absolutely do not have any, you can substitute it with plain Greek yogurt—it has that necessary acidity to tenderize the flour, which is essential for our **buttery Italian nut roll cookies**. Don’t use regular yogurt though; Greek yogurt is much thicker and won’t throw off the dough consistency too much. When you nail the dough texture, you nail the cookie!
Tips for Success with Your Homemade Nut Roll Cookies
It’s easy to look at a detailed recipe and feel a little intimidated, especially when you are aiming for that perfect **roll cookies tender dough** that just melts away. But trust me, a few little checks along the way can make all the difference between an ‘okay’ cookie and the best batch of **buttery italian nut roll cookies** you’ve ever made. These tricks are the ones I learned the hard way so you don’t have to!
- Don’t Rush the Chill Time: That hour (or even 90 minutes!) in the fridge is non-negotiable. If you try to roll the dough when it’s too warm, it will be sticky, grab the counter, and you’ll be tempted to add extra flour. Adding extra flour is the quickest way to lose that rich, buttery feel. Keep it cold!
- Filling Consistency Check: Before you even think about rolling out the dough, feel your filling. If it’s too stiff, you risk tearing that beautiful, cold dough skin when you spread it. If your filling seems stiff, stir in just a few extra drops of milk or cream until it’s soft enough to spread easily with an offset spatula, almost like softened peanut butter.
- Slice Evenly for Perfect Baking: When it comes time to slice your logs, use a very sharp, thin knife, and try your best to keep every slice exactly 1/2-inch thick. If you have a few thick ones and a few skinny ones, the thin ones will burn before the thick ones are perfectly baked through. A ruler helps if you’re a perfectionist like me when striving for the best **buttery holiday cookies**!
- Save Your Leftover Egg White: You only need a very light brush of egg white, so don’t beat the whole thing if you don’t need to. If you have leftover egg white, don’t waste it! You can use it to seal pie crust edges later or even mix it into the filling next time for a firmer set.
Mastering these little preparation hacks is what takes the mystery out of creating those classic Italian bakes. If you enjoy tender dough recipes, you might also find my guide for chewy oatmeal raisin classics helpful!
Storage and Serving Suggestions for Buttery Italian Nut Roll Cookies
The wonderful thing about these **buttery Italian nut roll cookies** is just how well they keep! Unlike some delicate pastries, these traditional Italian beauties actually get better after a day or two. The rich, buttery dough softens up just a hair more as it sits with the nut filling, melding the flavors together beautifully.
The rule for storage is simple: airtight containers only! You want to keep all that moisture locked in so the cookie stays tender. Store them at room temperature—no need to refrigerate unless your kitchen runs exceptionally hot, which can sometimes cause the filling to weep a little. Stored correctly in an airtight container, these cookies are excellent for up to a week. They are honestly one of the best **buttery holiday cookies** you can make early because the whole batch will still taste fresh days later!
When it comes to serving, these cookies truly shine alongside a hot beverage. They are sturdy enough to hold up to a dunking, which, let’s be real, is half the fun of any good cookie! I always serve them when friends stop by unexpectedly, paired with a strong espresso or maybe even one of my favorite seasonal drinks. If you’re looking for something rich and decadent to go with them, you absolutely must try making my salted caramel latte recipe. The combination of the simple, nutty cookie and the sweet, salty coffee is just heaven. Enjoy how easily these fit right into your holiday spread or your afternoon pick-me-up routine!
Frequently Asked Questions About Buttery Italian Nut Roll Cookies
I totally get it—when you find a wonderful recipe like these **buttery Italian nut roll cookies**, you’ve got a million little questions about tweaks and timing! We want them perfect every time, right? I’ve gathered a few things readers often ask me when they’re making these for the first time. Hopefully, this clears everything up so you can focus on just enjoying the baking process, because these are truly some of the **best buttery Italian pastries** if you follow the dough rules!
Can I make these Italian nut roll cookies ahead of time?
Oh yes, you absolutely can! Honestly, making them ahead of time is my personal secret weapon, especially around the holidays. Since the dough contains plenty of that good butter, it keeps beautifully. If you wrap the logs tightly in plastic wrap, you can store them in the refrigerator for up to three days before slicing and baking. When you’re ready to bake, just slice them right from the fridge—no need to let them warm up too much! The resting time actually lets the flavors of the **buttery Italian nut roll cookies** deepen, which is fantastic.
What is the best nut to use in these traditional Italian nut cookies?
Traditionally, you are looking at walnuts or almonds, or sometimes a blend of both, like I used in the recipe. Walnuts give you that wonderful, slightly earthy flavor that marries perfectly with the lemon zest in the filling. Almonds, on the other hand, offer a sweeter, more delicate profile, closer to what you find in classic biscotti con ripieno di noce. If you wanted to be really adventurous, pecans would work beautifully as well, making them more like a **walnut roll cookies European style** cousin! Just make sure whatever you choose is ground very finely so it whips into that smooth paste.
We love knowing how you bake them! If you want to try another spiced treat, my recipe for sweet chai spice cookies is another great one for a cool afternoon.
Estimated Nutritional Snapshot for Buttery Italian Nut Roll Cookies
I always like to give you a little peek at what’s inside these beautiful **buttery italian nut roll cookies**, even though baking should always be about joy first and counting later, right? We use a good amount of butter in this recipe to make sure that dough stays tender and absolutely delicious, so the fat content is a bit higher, which is part of what makes them so incredible.
This information is just an estimate, of course! I calculate these numbers based on the average of the standard ingredients I list—if you use extra-lean nuts or a different sweetener in the filling, your numbers will shift a bit. But for a single serving of these perfect **shortbread style Italian cookies**, here is the snapshot based on about 3 dozen cookies:
- Calories: 145
- Fat: 9g (with 5g being saturated fat—that’s the butter working its magic!)
- Carbohydrates: 15g
- Sugar: 8g
- Protein: 2g
- Sodium: 35mg
See? Not too bad for such a rich, homemade treat! The fact that this dough is so delicate and buttery means we don’t need excessive sugar to keep it tasting amazing. Enjoy these wonderful **homemade nut roll cookies** knowing they are made with love and real, quality ingredients.
Share Your Blissful Buttery Italian Nut Roll Cookies Creations
Now that you’ve made your first batch of these **buttery italian nut roll cookies**, I really, truly want to know how they turned out! Seeing your beautiful, slightly golden, perfectly rolled cookies is genuinely the highlight of my week. Did the sour cream really make a difference in the **buttery texture cookie secrets** like I promised? Did you use walnuts or almonds in your filling?
Don’t be shy—head down to the comments section below and tell me everything! I read every single one, and your feedback helps me make sure that this recipe remains one of the absolute best **Italian nut roll cookies recipe** sources out there. Did you try swirling a little extra lemon zest into the dough? Tell me about it!
If you loved how surprisingly easy it was to get that rich, traditional flavor, please consider leaving a star rating. It helps other bakers find this recipe and bring a little homemade bliss into their own kitchens. And if you share a picture of your beautiful **homemade nut roll cookies** on Instagram or Pinterest, please tag me! I’d love to share your creation on our page. If you have any final questions that I missed, feel free to send them my way over on the contact page, and let’s keep this baking adventure going strong!
PrintButtery Italian Nut Roll Cookies

Make these tender, buttery Italian nut roll cookies. The rich dough wraps around a sweet, traditional nut filling for a perfect homemade treat.
- Prep Time: 30 min
- Cook Time: 15 min
- Total Time: 1 hour 45 min
- Yield: About 3 dozen cookies 1x
- Category: Dessert
- Method: Baking
- Cuisine: Italian
- Diet: Vegetarian
Ingredients
- 1 cup (2 sticks) unsalted butter, softened
- 1/2 cup granulated sugar
- 1/4 cup sour cream
- 1 teaspoon vanilla extract
- 3 cups all-purpose flour
- 1/2 teaspoon baking powder
- 1/4 teaspoon salt
- 1 cup finely ground walnuts or almonds (for filling)
- 1/2 cup powdered sugar (for filling)
- 1/4 cup milk or cream (for filling)
- 1 teaspoon lemon zest (for filling)
- 1 egg white, lightly beaten (for brushing)
Instructions
- Prepare the dough: In a large bowl, cream the softened butter and granulated sugar until light and fluffy. Mix in the sour cream and vanilla extract.
- In a separate bowl, whisk together the flour, baking powder, and salt. Gradually add the dry ingredients to the wet ingredients, mixing until just combined to form a soft dough. Do not overmix.
- Wrap the dough in plastic wrap and chill in the refrigerator for at least 1 hour. This step helps achieve that tender, buttery texture.
- Prepare the filling: In a medium bowl, combine the ground nuts, powdered sugar, milk or cream, and lemon zest. Mix until a thick, spreadable paste forms.
- Preheat your oven to 350°F (175°C). Line baking sheets with parchment paper.
- Divide the chilled dough into two equal portions. On a lightly floured surface, roll one portion into a rectangle about 1/8 inch thick.
- Spread half of the nut filling evenly over the dough rectangle, leaving a small border along one long edge.
- Starting from the long edge opposite the border, tightly roll the dough into a log. Pinch the seam closed. Repeat with the remaining dough and filling.
- Slice each log into 1/2-inch thick cookies. Place the cookies cut-side up on the prepared baking sheets.
- Brush the tops lightly with the beaten egg white.
- Bake for 12 to 15 minutes, or until the edges are lightly golden. The centers should remain pale.
- Let the cookies cool on the baking sheets for 5 minutes before transferring them to a wire rack to cool completely.
- Once cool, you can dust them lightly with powdered sugar for a traditional finish.
Notes
- For the richest flavor, use high-quality unsalted butter in your dough.
- If your filling seems too dry, add a few more drops of milk until it spreads easily without tearing the dough.
- These traditional Italian nut cookies taste even better the next day after the flavors meld.
- Store your buttery Italian nut roll cookies in an airtight container at room temperature for up to one week.
Nutrition
- Serving Size: 1 cookie
- Calories: 145
- Sugar: 8
- Sodium: 35
- Fat: 9
- Saturated Fat: 5
- Unsaturated Fat: 4
- Trans Fat: 0
- Carbohydrates: 15
- Fiber: 1
- Protein: 2
- Cholesterol: 25