
Oh, my goodness, are you tired of the weeknight dinner rut? You know the one—where you want something truly satisfying, something that tastes like a weekend treat, but you only have forty minutes before someone demands snacks? I get it! That’s why I’m thrilled to share what has become our absolute favorite, the recipe that brings the crunch and flavor without needing to fire up the deep fryer: this incredible crispy cheddar chicken. Here at Bliss Batter, founder Claire Sterling is all about making sure you feel confident, and trust me, perfecting this cheesy, golden-crusted chicken is so accessible. It’s tested, it’s easy, and it brings that homemade happiness right to your dinner table. Once you try this, it’s going straight into your easy weeknight dinners rotation!
- Why This Crispy Cheddar Chicken is Your New Weeknight Comfort Food Chicken
- Gathering Ingredients for Crispy Cheddar Chicken
- How to Make Crispy Cheddar Chicken: Step-by-Step Guide
- Expert Tips for the Best Crispy Cheddar Chicken Recipe
- Making This Crispy Cheddar Chicken a Complete Meal
- Storing and Reheating Your Leftover Crispy Cheddar Chicken
- Frequently Asked Questions About This Crunchy Chicken Recipe
- Understanding the Nutrition of Your Cheddar Crusted Chicken Breasts
- Share Your Crispy Cheddar Chicken Success
Why This Crispy Cheddar Chicken is Your New Weeknight Comfort Food Chicken
You want dinner on the table fast, but you don’t want it to taste fast, right? This dish solves that problem beautifully. It’s designed to be your go-to Weeknight Comfort Food Chicken because it truly delivers maximum flavor payoff for minimal fuss. People always ask me how this became such a Family Favorite Chicken at my house!
Quick Prep for a Simple Chicken Dinner Idea
Seriously, fifteen minutes is all you need to get this coating ready. That means you can get it in the oven and move on with your life. It cooks up fast too, making it the perfect Quick Chicken Supper when time is short but cravings are high.
Achieving the Ultimate Golden Crusted Chicken Texture
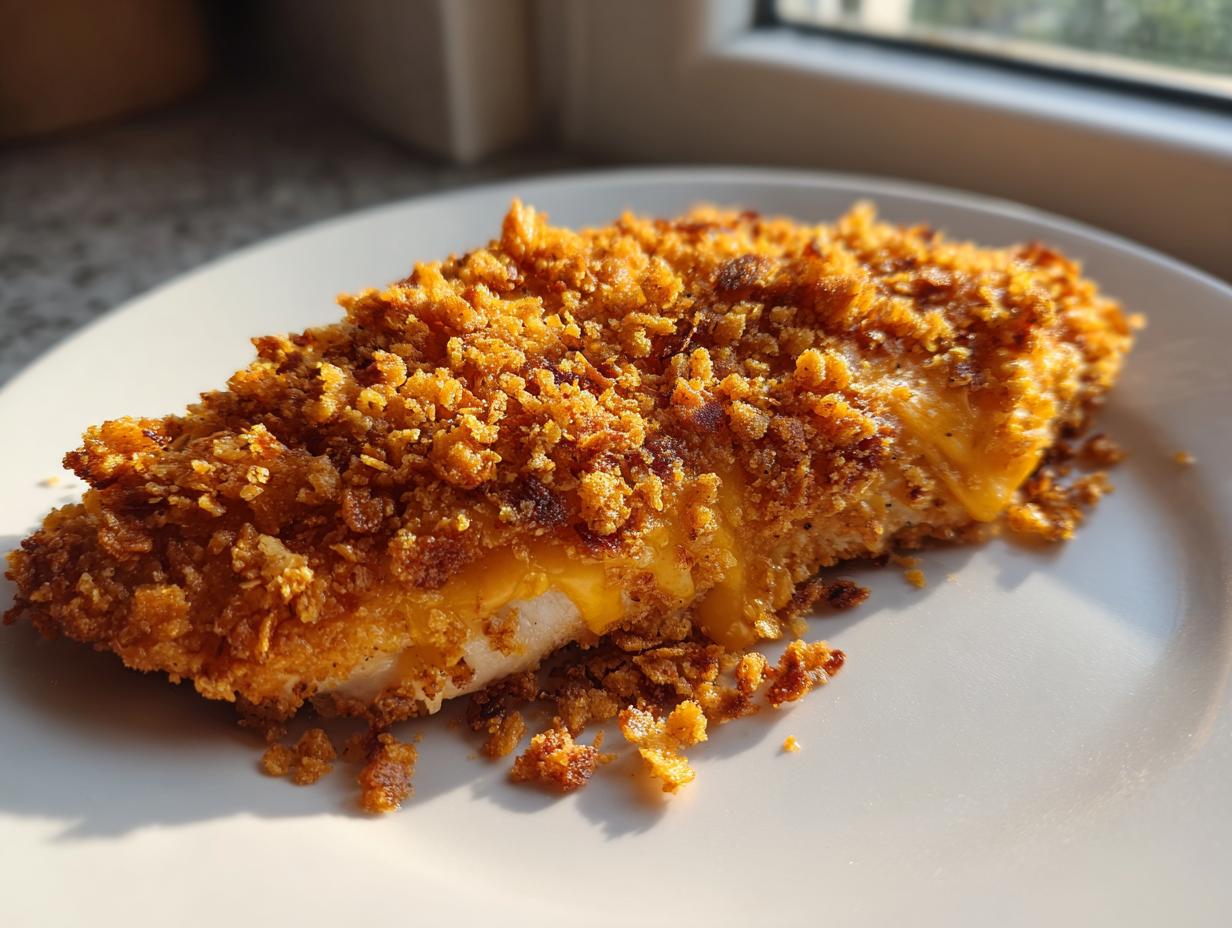
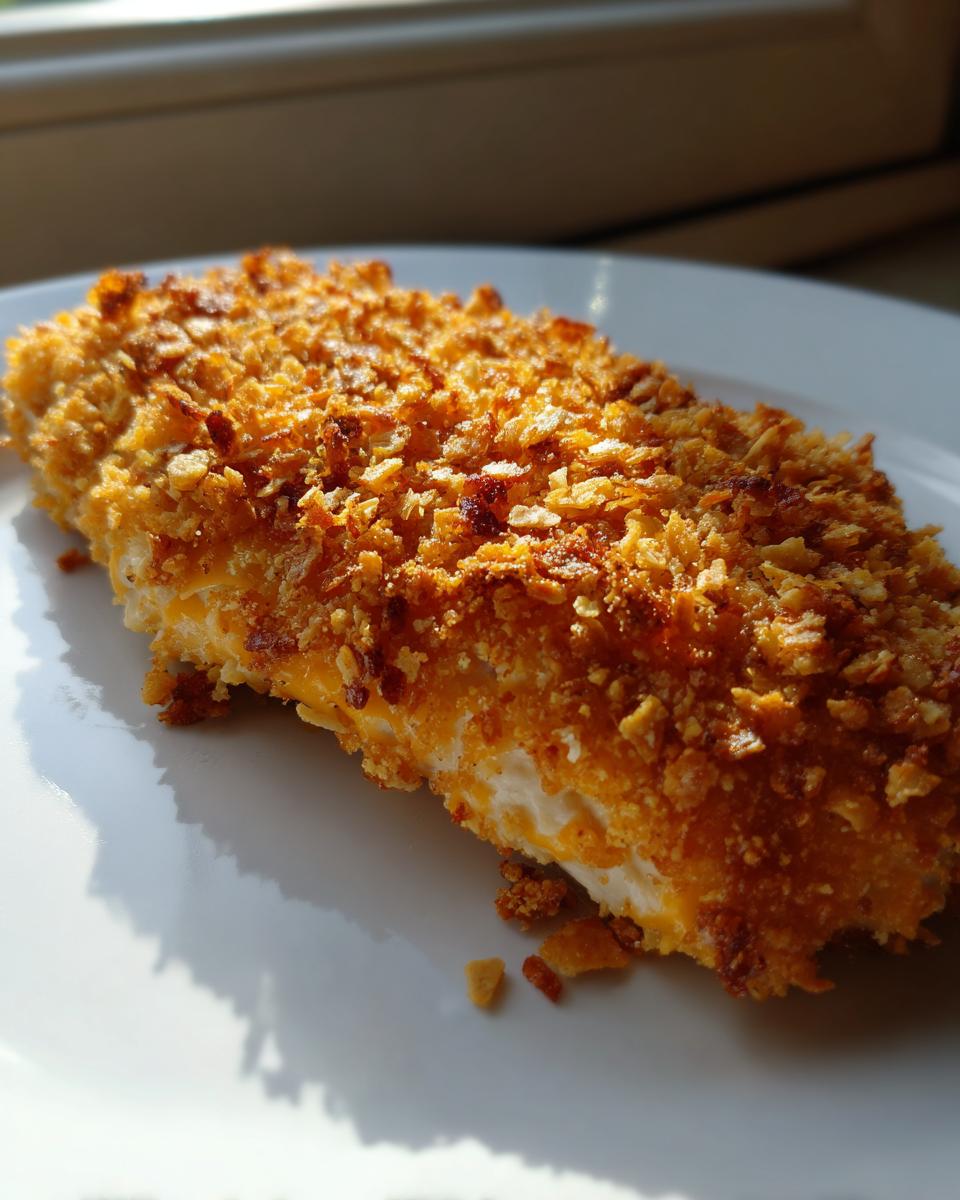
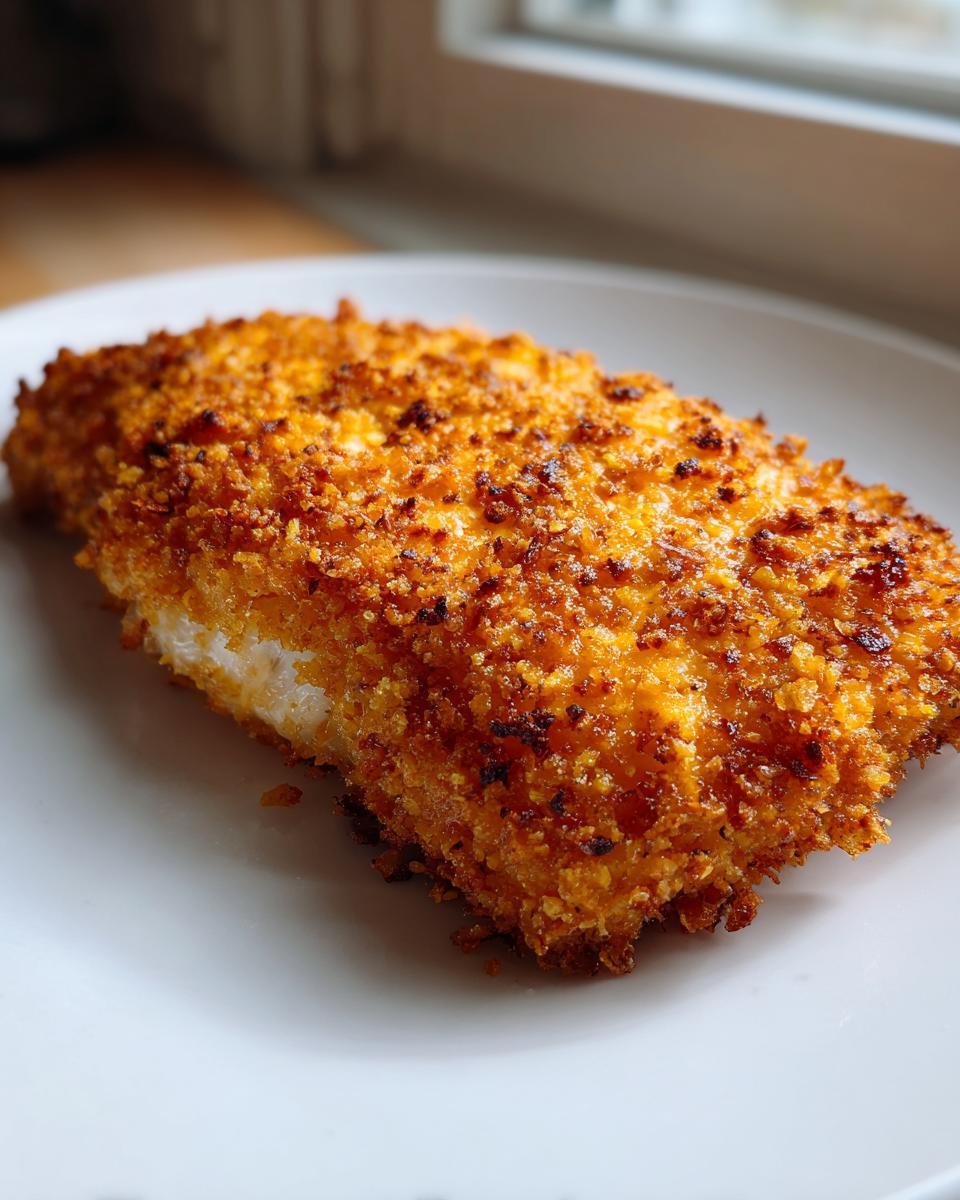
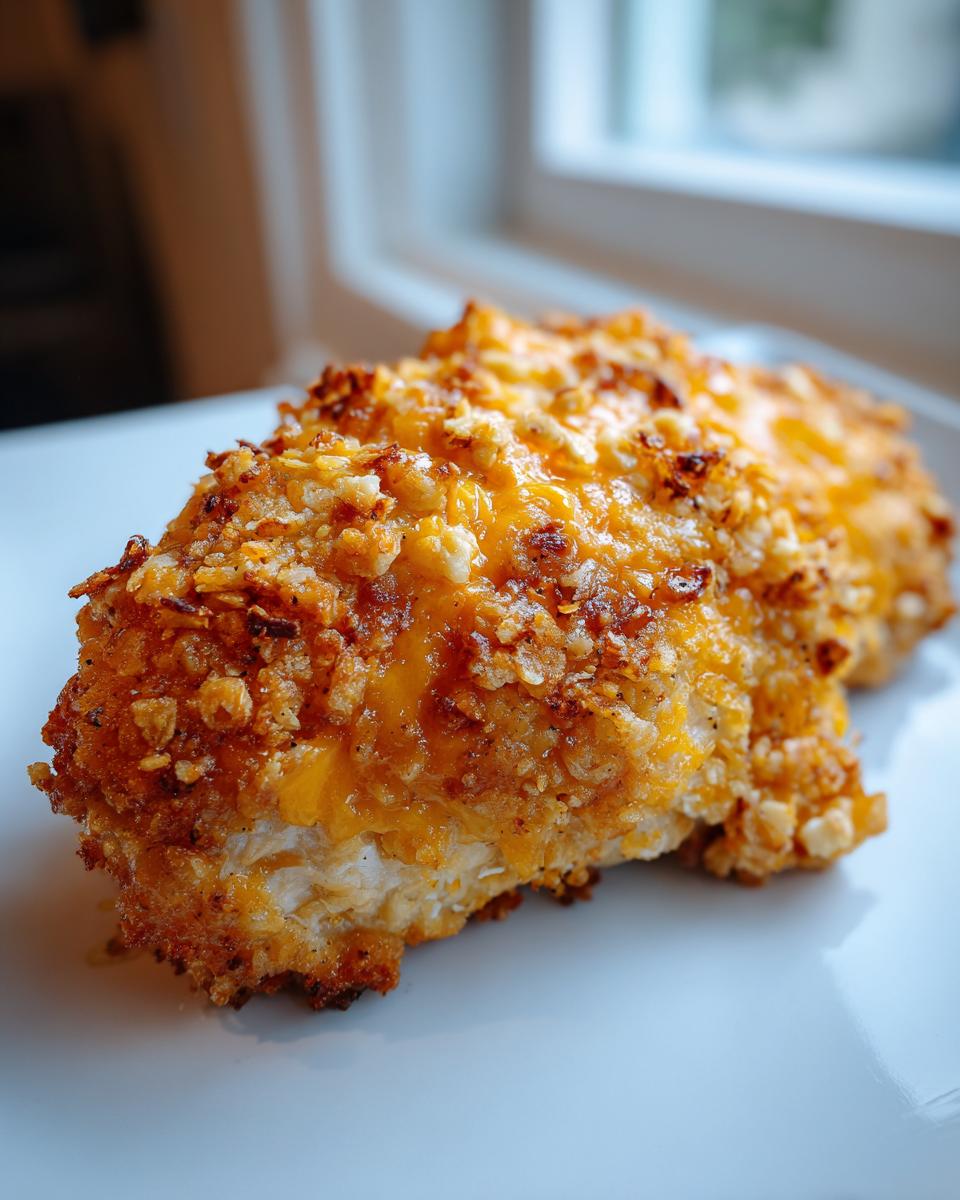
Forget the greasy mess of pan-frying! Our secret here is baking it after we load it up with butter, cheese, and crackers. This method helps us achieve that absolutely amazing, shatteringly crisp texture we all crave. It’s truly the best way to get that perfect Golden Crusted Chicken finish without all the cleanup.
Gathering Ingredients for Crispy Cheddar Chicken
Okay, let’s talk supplies! You only need a handful of things to transform boring chicken breasts into this exciting, crunchy coating extravaganza. I always like to lay everything out before I even turn the oven on—it’s just easier that way! You need four chicken breasts, some flour for dredging, two eggs, and then the star of the show: crushed crackers mixed with glorious sharp cheddar and Parmesan.
Don’t forget the butter! We pour that melted gold right over the top before it goes into the oven. It is essential for that deep, beautiful browning. It’s definitely worth stocking up on these ingredients so you can whip this up whenever you need a quick, impressive dinner.
Ingredient Notes and Substitutions for Your Crispy Cheddar Chicken
If you don’t have Ritz, don’t panic! I find that crushed butter crackers work almost identically, or if you want a slightly different texture, panko breadcrumbs are a decent substitute, though you might miss a little of that buttery flavor. When choosing cheese, skip the pre-shredded bags if you can. Grating your own sharp cheddar makes a huge difference in flavor intensity—it really punches up that cheesy flavor!
Remember those creamy notes I mentioned? If you want to lean into that comfort food vibe even more, you can mix up a quick small dish of 1/2 cup cream of chicken soup with 1/4 cup sour cream and spread a super thin layer right onto the chicken after the egg wash, before you add the cracker topping. It keeps the meat unbelievably juicy, though that melted butter alone usually does the trick!
How to Make Crispy Cheddar Chicken: Step-by-Step Guide
Alright, this is where the magic happens! Making our crispy cheddar chicken relies on a classic coating method, but we’re upgrading the crunch factor big time. First things first: grab your chicken breasts and pound them evenly. It’s important they are all about 3/4 inch thick so they cook through at the same time. Nobody wants one piece dry and the other still pink, right?
Once they’re pounded, think about setting yourself up for success. We need a simple production line, or what I call the breading station. This keeps things clean-ish and ensures every piece gets fully coated. If you’re looking for other comforting, easy recipes to serve alongside this—maybe something warm when the weather changes—check out my thoughts on making classic chicken noodle soup!
Setting Up Your Breading Station for Perfect Coating
You need three shallow dishes, lined up in order. Dish one is your flour—just a light dust to help the egg stick. Dish two is your beaten egg (the glue!). And dish three? That’s the superstar mix: crushed crackers, all that lovely sharp cheddar, Parmesan, pepper, and garlic powder. When you dip the chicken, press it *firmly* into that cracker mix on both sides. You want a thick blanket of cheese and crunch covering every surface. This is what gives us that restaurant-quality texture when we bake it, which I hope you think rivals what you see in those quick online guides like the one over here!
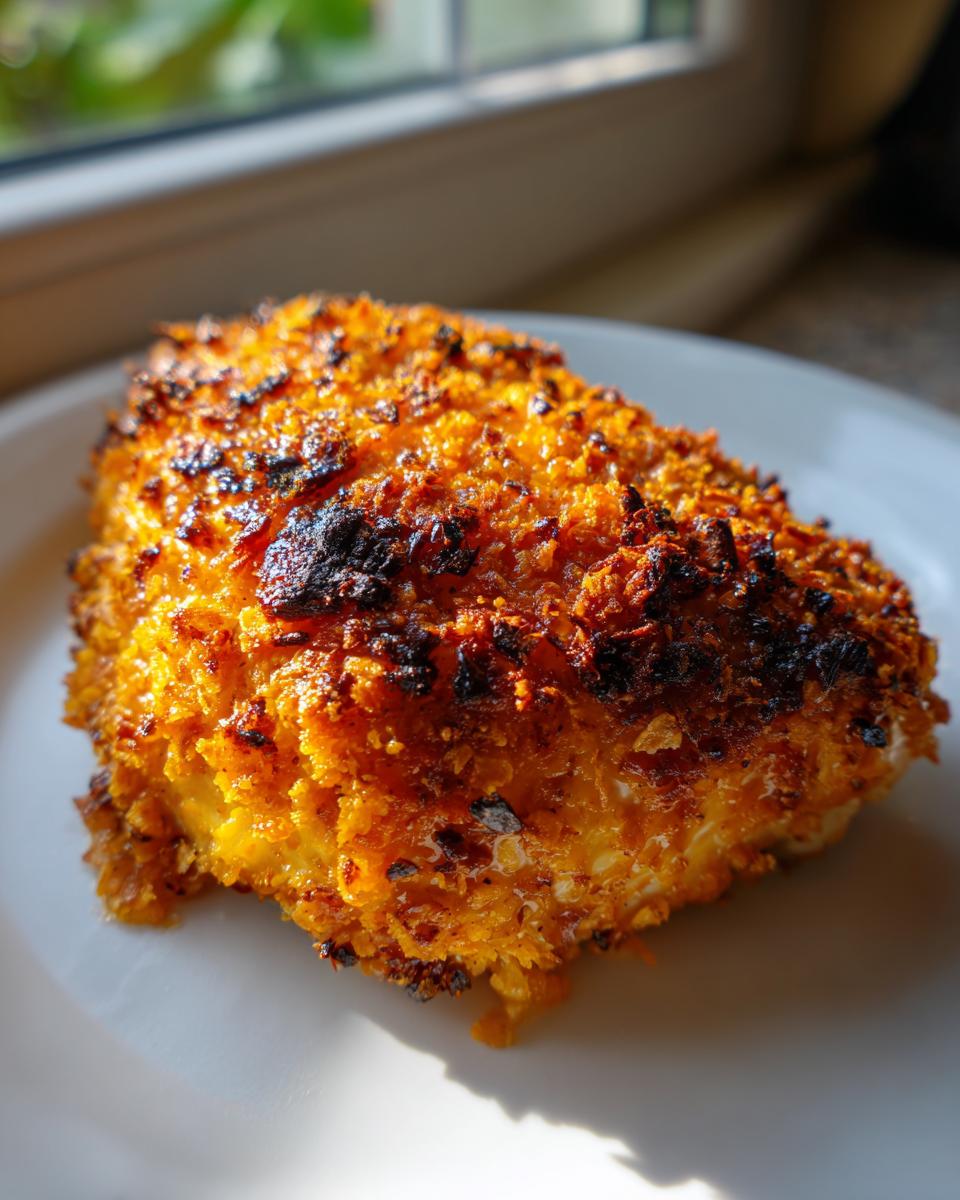
Baking Technique for Juicy Chicken with Cheese Topping
Get that oven sizzling hot at 400 degrees Fahrenheit. After you line up your coated beauties in the greased baking dish, we perform the most crucial flavor step: pour that melted butter evenly right over the tops. Don’t skip this! That butter melts down, crisps up the topping edges, and keeps the chicken super moist underneath.
Bake for about 20 to 25 minutes. Always check the inside, friends! We’re aiming for 165 degrees Fahrenheit internally to keep everyone safe and happy. When the topping is golden brown and looks ready to shatter, pull it out! Let it rest just five minutes so those juices settle, and then dig in!
Expert Tips for the Best Crispy Cheddar Chicken Recipe
I know you’re aiming for the Best Crispy Chicken Recipe here, so let me share a few things I learned through trial and (a little bit of) error when developing this into the ultimate comfort dish. The biggest threat to our beautiful topping is sogginess, especially if you plan on making any roasted veggies to go alongside it.
My number one tip for crunch? Don’t overcrowd the pan! Give those chicken breasts some breathing room. If they are touching, the steam gets trapped, and that beautiful cracker crust turns soft fast. You want only one layer in that pan so the heat circulates nicely around every piece.
Also, for the cheddar melt, use full-fat, sharp cheddar, and make sure it’s freshly shredded. If you find your cheese wasn’t quite as melty as you’d hoped, a quick blast under the broiler for 60 seconds (watch it like a hawk!) will bring that cheese to bubbly perfection. If you’re curious about other ways to get that crunchy coating, I loved reading about the approach others take over at this spot!
Making This Crispy Cheddar Chicken a Complete Meal
So you’ve got your gorgeous, golden, juicy creation on the counter—now what goes with it? Because this crispy cheddar chicken is so rich and satisfying, we usually balance it out with things that offer a little brightness or freshness. You don’t want to weigh the whole meal down after achieving such perfect crunch!
When I’m making these Cheesy Baked Dinners, I treat them like the main event. That means the sides have to be simple but flavorful.
My absolute favorite thing to pair them with is roasted broccoli or maybe some asparagus tossed lightly in olive oil, salt, and pepper. Roasting brings out the natural sweetness in the veggies, which is a lovely contrast to the sharp cheddar.
If you want something starchier, creamy mashed potatoes are always a winner, but if you’re trying to keep things lighter, simple steamed green beans tossed with butter and a squeeze of lemon works wonders. And if you need a great vegetable side that’s nearly as easy as the chicken, you absolutely have to check out my honey butter roasted carrots—they are sweet, savory, and they disappear fast!
Storing and Reheating Your Leftover Crispy Cheddar Chicken
It rarely happens, but sometimes we actually have leftovers of this amazing crispy cheddar chicken! And if we do, the biggest question I always get is: how do I save that glorious crunch? Since this recipe is such a fantastic Simply Chicken Dinner Idea, you’ll want to make sure you store it correctly so it tastes almost as good the next day.
First, make sure any leftovers are cooled down completely before you even think about packing them away. Once totally cool, stack them in an airtight container. Don’t try to stack them too tightly, though, because that moisture transfer is the enemy of crispiness! These leftovers should be safe in the fridge for about three to four days, max. After that, well, you know where to find the ingredients to whip up a fresh batch! Trust me, it’s worth the effort.
Now, for reheating—and this is critical, friends. Please, please, *please* avoid the microwave if you want to keep that cheesy crust intact. Microwaving turns crispy things soft and rubbery instantly; it’s just science!
If you want that crunch back, you have two main options. The oven is my traditional favorite. Set it to about 350°F, place the chicken right on a baking sheet (maybe line one with foil for easy cleanup), and let it warm up for about 10 to 12 minutes. You want the internal temperature to reach safe levels again, but mainly, you want that cheddar crust to re-crisp.
If you’re one of the lucky few who have an air fryer, that is the absolute best way to reheat this! It mimics frying without the oil. Pop the pieces in there at 375°F for maybe 5 minutes. It wakes up that cracker crust beautifully and gives you genuinely close-to-fresh results. It’s the secret weapon for any Baked Cheesy Crunch Chicken remake!
Frequently Asked Questions About This Crunchy Chicken Recipe
I get so many wonderful messages about this dish! It’s clear that everyone wants the ultimate success when making their own cheesy chicken dinner at home. Here are a few of the questions I hear most often about achieving that perfect texture when making this crunchy chicken recipe.
Can I use chicken thighs instead of breasts for this crispy cheddar chicken?
Oh, absolutely! Chicken thighs are actually moister than breasts already, so they are very forgiving in the oven. The big heads-up here is the cooking time. Thighs are thicker, so you’ll want to check the internal temperature, but generally, plan on them needing about 5 to 10 minutes longer than the breasts to reach that safe 165°F. You’ll still get that gorgeous topping!
What is the best way to ensure the topping stays crispy?
This is the secret sauce! Two things matter most here, and I covered them in the main steps, but they’re worth repeating because they are game-changers! First, make sure you pour that melted butter evenly over the top layer before it ever enters the oven. That butter fries the coating slightly as it bakes. Second, don’t let the pieces touch on the baking sheet! Overcrowding traps steam, and steam makes everything soggy. Give them space so they can crisp up perfectly!
If you’re looking for other cheesy baked ideas, I have a fantastic recipe for a gooey grilled cheese sandwich that might be just what you need for lunch the next day! And if you want to read more about mastering this specific preparation, this guide here offers some great insights too.
Understanding the Nutrition of Your Cheddar Crusted Chicken Breasts
I always get asked about the nutrition side of things when folks realize just how decadent this meal feels. While this certainly fits into that cozy Weeknight Comfort Food Chicken category, it’s good to know what you’re eating! Based on the ingredients we use—especially that sharp cheddar and butter—here is a general breakdown for these Cheddar Crusted Chicken Breasts.
Keep in mind, these are just estimates because every brand of cracker or sharpness of cheese can change things slightly, but this gives you a good baseline:
- Serving Size: 1 breast
- Calories: 480
- Fat: 28g
- Protein: 38g
- Carbohydrates: 18g
- Sugar: 2g
We’re getting a great hit of protein here, which is awesome for keeping everyone full! Just remember, given the cracker crust and cheese, the sodium and fat content are a bit higher, so balance it out with a big green salad next time you make this easy bake!
Share Your Crispy Cheddar Chicken Success
We’ve done it! You’ve successfully made the ultimate crispy cheddar chicken that promises crunch, cheese, and comfort all in one easy bake. Now that it’s cooling on the counter and smells absolutely divine, the best part comes next: sharing the joy!
I truly hope this recipe inspires that feeling of simple bliss that Claire Sterling talks about over on the about page—that feeling that *you* made something wonderful with your own two hands. That’s what Bliss Batter is all about, making delicious memories!
If this meal was a hit at your table, please, please, leave a star rating right below this section. It helps so many other weary cooks find this recipe when they are desperately searching for a Quick Chicken Supper that actually works!
And if you took a gorgeous photo of that golden, crunchy topping—which I know you did!—snap a pic and share it with me on social media. Tag us so I can see your success! It always makes my day to see your creations come to life.
If you want to see what kind of magic happens when other home cooks try out recipes like this one, you should check out what folks are sharing over at this community spot. Happy cooking, and enjoy every crunchy, cheesy moment!
PrintCrispy Cheddar Chicken with Crunchy Cracker Topping

Make this easy, family-favorite Crispy Cheddar Chicken. Tender chicken breasts get a golden, crunchy crust made from cheddar cheese and crackers, perfect for a satisfying weeknight dinner.
- Prep Time: 15 min
- Cook Time: 25 min
- Total Time: 40 min
- Yield: 4 servings 1x
- Category: Dinner
- Method: Baking
- Cuisine: American
- Diet: Vegetarian
Ingredients
- 4 boneless, skinless chicken breasts
- 1 cup crushed Ritz-style crackers
- 1 cup shredded sharp cheddar cheese
- 1/2 cup grated Parmesan cheese
- 1/2 teaspoon garlic powder
- 1/4 teaspoon black pepper
- 1/2 cup (1 stick) unsalted butter, melted
- 1/4 cup all-purpose flour (for dredging)
- 2 large eggs, beaten
Instructions
- Preheat your oven to 400 degrees Fahrenheit (200 degrees Celsius). Lightly grease a 9×13 inch baking dish.
- Prepare the chicken: Pound the chicken breasts to an even thickness, about 3/4 inch.
- Set up a standard breading station with three shallow dishes. Place the flour in the first dish. Whisk the eggs in the second dish. In the third dish, combine the crushed crackers, shredded cheddar cheese, Parmesan cheese, garlic powder, and pepper. Mix well.
- Dredge each chicken breast first in the flour, shaking off any excess. Dip the floured chicken into the beaten eggs, allowing excess to drip off. Finally, press the chicken firmly into the cracker-cheese mixture, coating both sides completely.
- Place the coated chicken breasts in the prepared baking dish.
- Pour the melted butter evenly over the tops of the coated chicken breasts.
- Bake for 20 to 25 minutes, or until the chicken is cooked through (internal temperature reaches 165 degrees Fahrenheit) and the topping is golden brown and crispy.
- Let the chicken rest for 5 minutes before serving.
Notes
- For a creamier version, mix 1/2 cup of cream of chicken soup with 1/4 cup of sour cream and spread a thin layer over the chicken before adding the cracker topping.
- If you are interested in structured eating, consider how this recipe fits into your overall meal planning goals.
- You can substitute Ritz crackers with crushed butter crackers or panko breadcrumbs for a slightly different texture.
Nutrition
- Serving Size: 1 breast
- Calories: 480
- Sugar: 2
- Sodium: 550
- Fat: 28
- Saturated Fat: 14
- Unsaturated Fat: 14
- Trans Fat: 0.5
- Carbohydrates: 18
- Fiber: 1
- Protein: 38
- Cholesterol: 135