
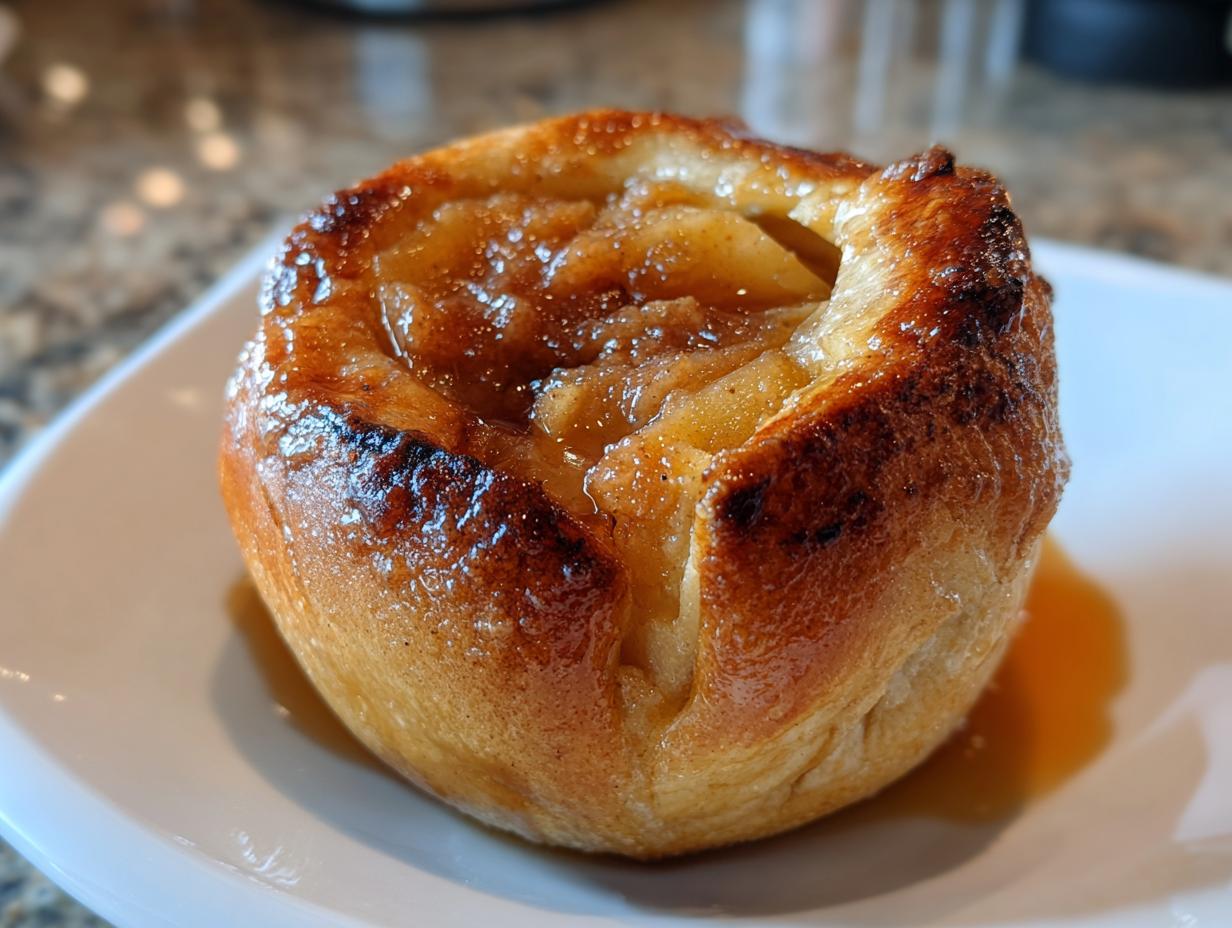
Oh, that smell! You know the one—that warm, sweet, spiced cloud that takes you right back to autumn evenings by the porch light? That’s the magic I want you to capture today with these easy baked apples. When things get hectic, I turn to simple ingredients that deliver big comfort, and this recipe does exactly that. I’m Claire Sterling from Bliss Batter, and trust me, these are the absolute easiest and most comforting baked apples you will ever make. We’re ditching fancy techniques for pure, unadulterated joy; maybe you can even whip up a glass of warm apple cider cocktail to go with them!
- Why These Easy Baked Apples Are Your New Favorite Cozy Apple Recipes
- Gathering Ingredients for Perfect Baked Apples
- Step-by-Step Instructions for Oven Baked Apples
- Tips for Success with Homemade Apple Dessert
- Serving Suggestions for Your Warm Apple Treat
- Storage and Reheating Instructions for Leftover Baked Apples
- Frequently Asked Questions About Baked Apples
- Baking with Claire: Your Next Steps with Baked Apples
- Estimated Nutritional Data for Simple Baked Apples
Why These Easy Baked Apples Are Your New Favorite Cozy Apple Recipes
I get it, life is busy, and sometimes you need a dessert that feels like a warm hug but takes zero effort. That’s what this simple apple dessert is all about. Seriously, it’s the best way to get that amazing, nostalgic flavor.
- They truly deliver on being Comfort Food Desserts—the smell alone will fill your whole house with autumn vibes!
- You get a complete, rich, warm apple treat in under an hour, start to finish.
- They aren’t fussy! They’re forgiving, which is exactly what I need when I’m winding down after a long day. If you have 10 minutes to spare, you can make these!
Plus, the liquid left in the pan? Don’t even think about pouring that out. That’s liquid gold, best served drizzled over your next batch of slow cooker apple butter!
Quick Prep for Simple Baked Apples
Prep time is only 10 minutes! That’s my favorite part. You just wash, core, and fill. The coring sounds scary, but it’s so quick once you get the hang of it. You just need to scoop out that center part, making sure you leave a little floor in the apple so your beautiful filling—the sugar and spices—doesn’t just leak right out into the pan.
Classic Cinnamon Baked Apples Flavor Profile
We aren’t messing around with weird ingredients here. It’s the holy trinity: brown sugar, cinnamon, and butter. When that butter melts with the dark brown sugar and the cinnamon floats up into the steam, it’s the smell of everything good about the season. It’s a flavor combination that always works because it’s honest and rich. We test and re-test our spices until they are just right, ensuring that homey, delicious taste you look for!
Gathering Ingredients for Perfect Baked Apples
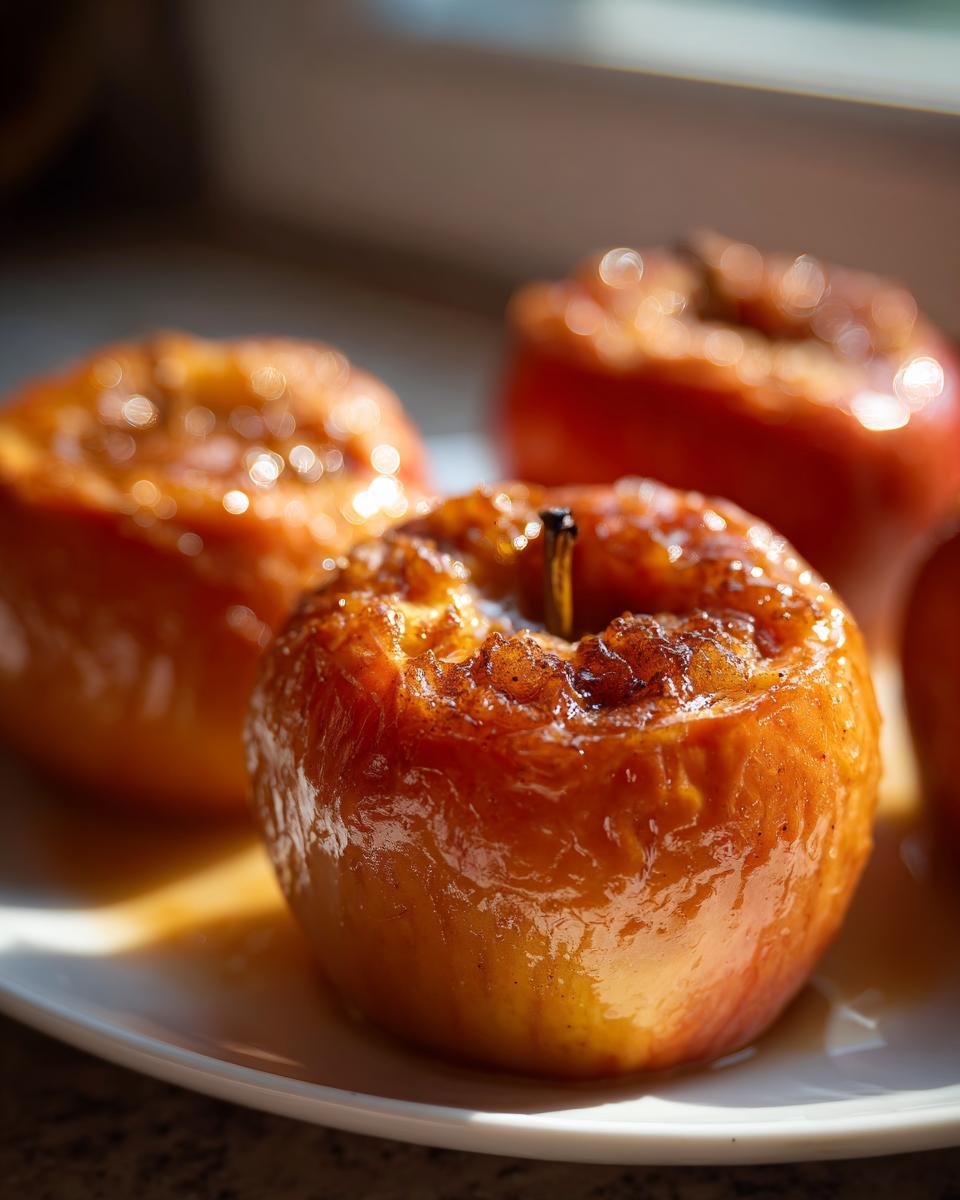
Okay, let’s talk about what you actually need to make these amazing baked apples. Remember our promise here at Bliss Batter: no impossible-to-find items! We are keeping this list short, sweet, and effective for that perfect, gooey filling. You’ll need about four medium baking apples—I always reach for Honeycrisp or Gala because they hold up beautifully and don’t turn into total mush, which is a big win for a simple fruit bake.
Here’s the simple line-up that delivers big flavor, especially if you want to try my apple fritters next:
- 4 medium baking apples (Honeycrisp or Gala are my go-tos)
- 1/4 cup packed brown sugar (Don’t skimp here; this makes the sauce!)
- 1 teaspoon ground cinnamon
- 1/4 teaspoon ground nutmeg
- 2 tablespoons unsalted butter, cut into small pieces
- 1/4 cup hot water
- Optional: Vanilla ice cream or oatmeal for serving
Ingredient Notes and Substitutions for Your Simple Fruit Bake
The apples are crucial. They need to be firm! If you use something soft like a Red Delicious, you’ll end up with apple sauce instead of a treat you can actually poke a fork into. That’s why Honeycrisp gets my top vote for structure. If, for some reason, you run out of brown sugar—oops!—you can swap it out 1:1 with maple syrup for a slightly different flavor profile, but it won’t give you that same caramelized base. And for the butter? Can you use oil? Sure, but only butter gives you that essential rich flavor that makes this the best baked apple recipe.
Step-by-Step Instructions for Oven Baked Apples
Now we get to the fun part where the kitchen starts smelling absolutely heavenly! Making these Oven Baked Apples is straightforward, but paying attention to the details during the setup phase is what guarantees success. First things first: fire up that oven! We need it hot and ready to go because we don’t want to waste a minute.
Get that 8×8 inch baking dish ready—just a tiny bit of grease will help everything slide out later. Then, we focus on the apples themselves. Remember, you want them standing at attention in that dish!
Preparing the Apples and Filling for Baked Apples
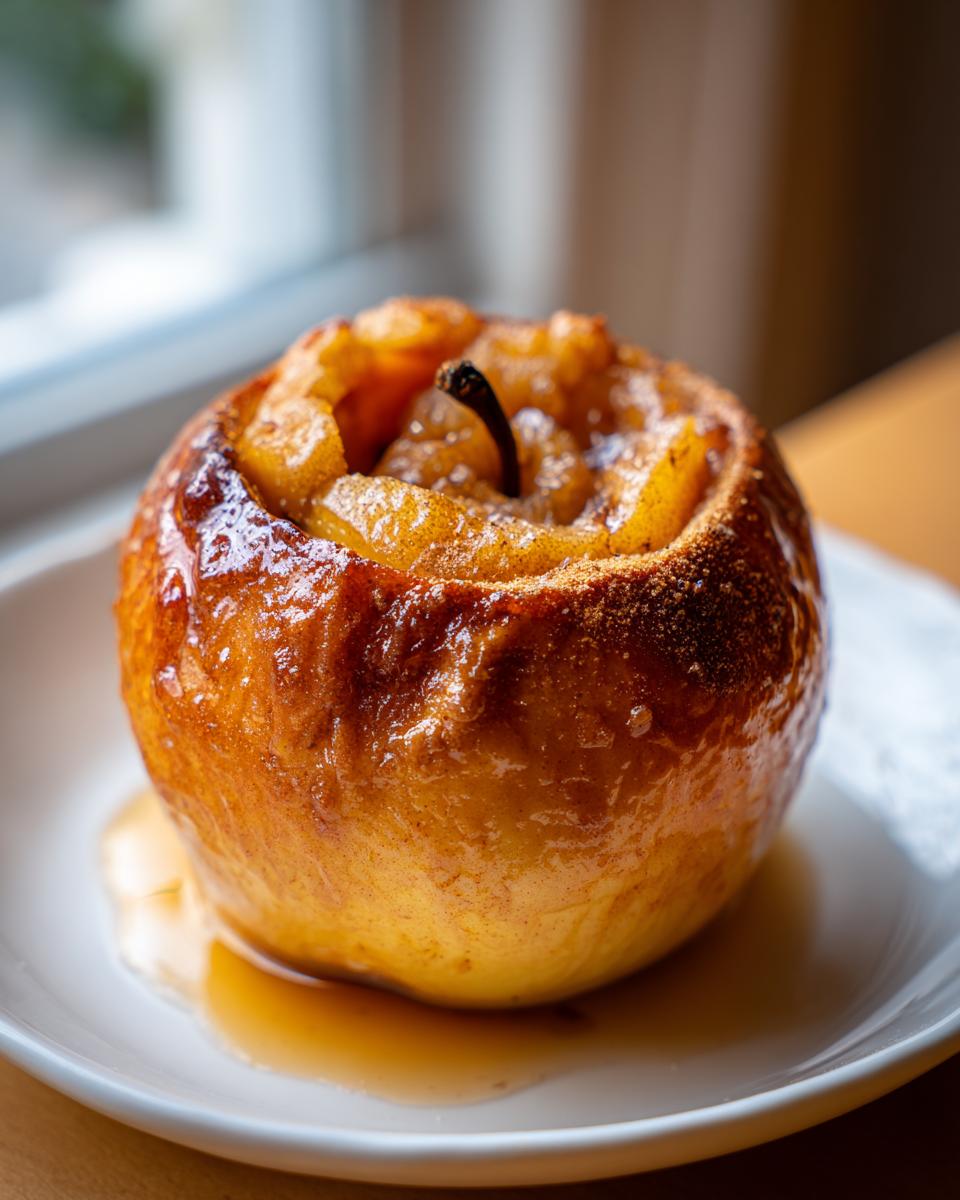
This is where you need your steady hand. Take your apples and carefully remove the core from the top. You have to be careful here; use an apple corer if you have one, or a small knife. The trick, and this is vital for keeping that yummy filling inside, is stopping before you cut all the way through to the bottom. Leave a little barrier, like a bottom crust, to hold your goodness in. I always say, pack that cinnamon-sugar mixture in nice and tight—don’t be shy! But don’t overstuff it past the top edge, or it’ll spill out too soon.
Once filled, nestle them gently into your prepared dish. Then, take those little pats of butter and place one right on top of the sugar inside each apple. Seriously, that butter melts down and creates the sauce! Finally, pour that hot water carefully around the base of the apples in the pan. This steam helps them get nice and tender from the bottom up.
Baking Time and Tenderness Check for Baked Apples
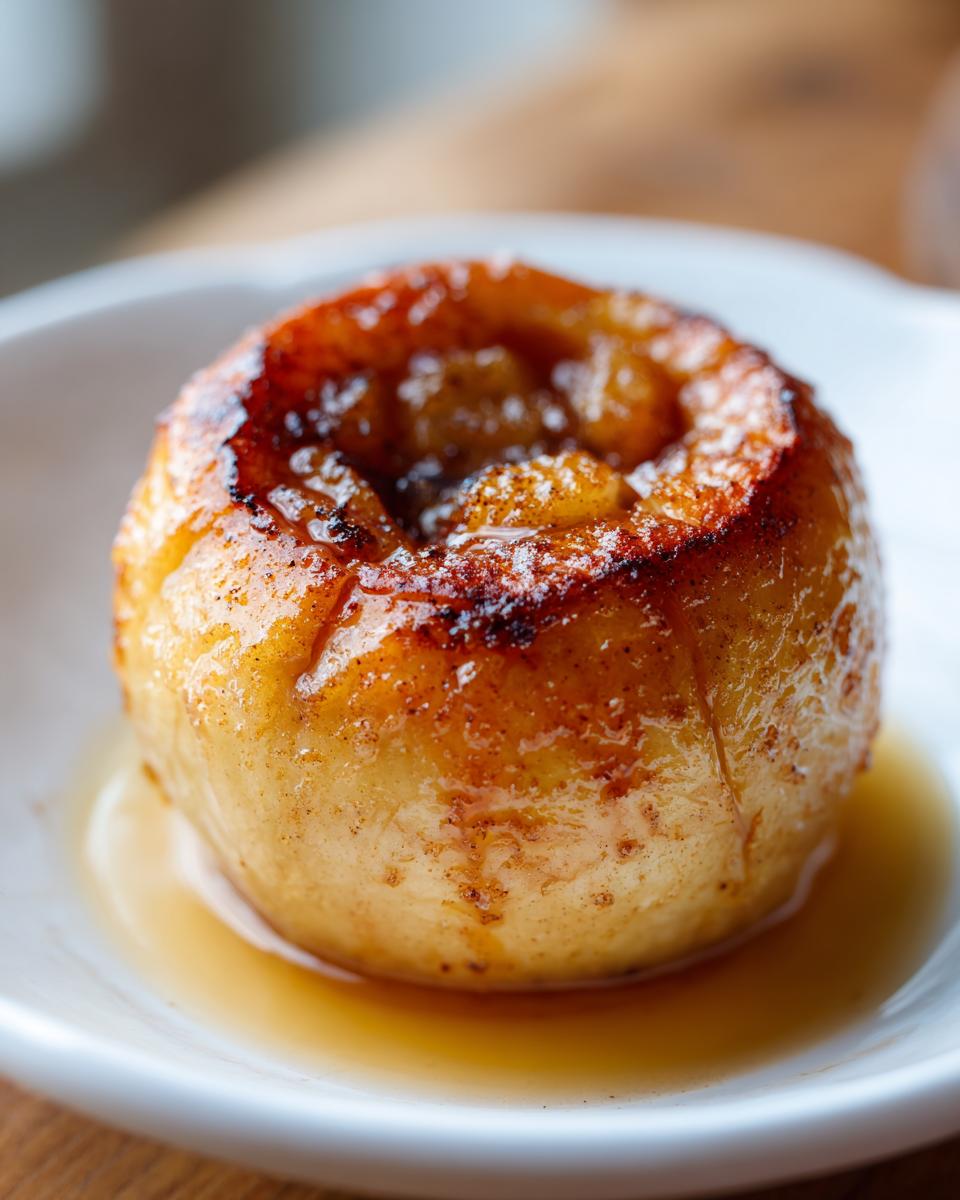
Pop the whole dish into that 375-degree oven we prepared earlier. Now, we wait! Baking time is usually between 35 and 45 minutes, but honestly, it totally depends on how big your apples were. You’ll know they are ready when they are tender when you pierce them with a fork—it should go in with almost no resistance. If you find they are browning too fast on top but still feel hard in the middle, just loosely cover them with a piece of foil for a bit. Once they’re tender, take them out and immediately spoon some of that liquid sauce from the bottom of the pan right over the tops. That’s the final flavor boost before serving them warm with a scoop of vanilla ice cream or maybe over some oatmeal!
Tips for Success with Homemade Apple Dessert
Even with a straightforward recipe like this, sometimes things just need a little nudge to be absolutely perfect! We want these baked apples to hold their shape but still melt in your mouth, right? Dealing with the oven environment is the biggest hurdle, but don’t worry, I’ve got a couple of tricks up my sleeve that I learned over many, many batches of perfecting this homemade apple dessert.
The main goal in the oven is even tenderness without drying out, and we sometimes run into issues where the tops get too dark before the centers are soft, or the water evaporates too fast. Trust me, a little adjustment goes a long way!
Achieving the Best Texture in Your Baked Apples
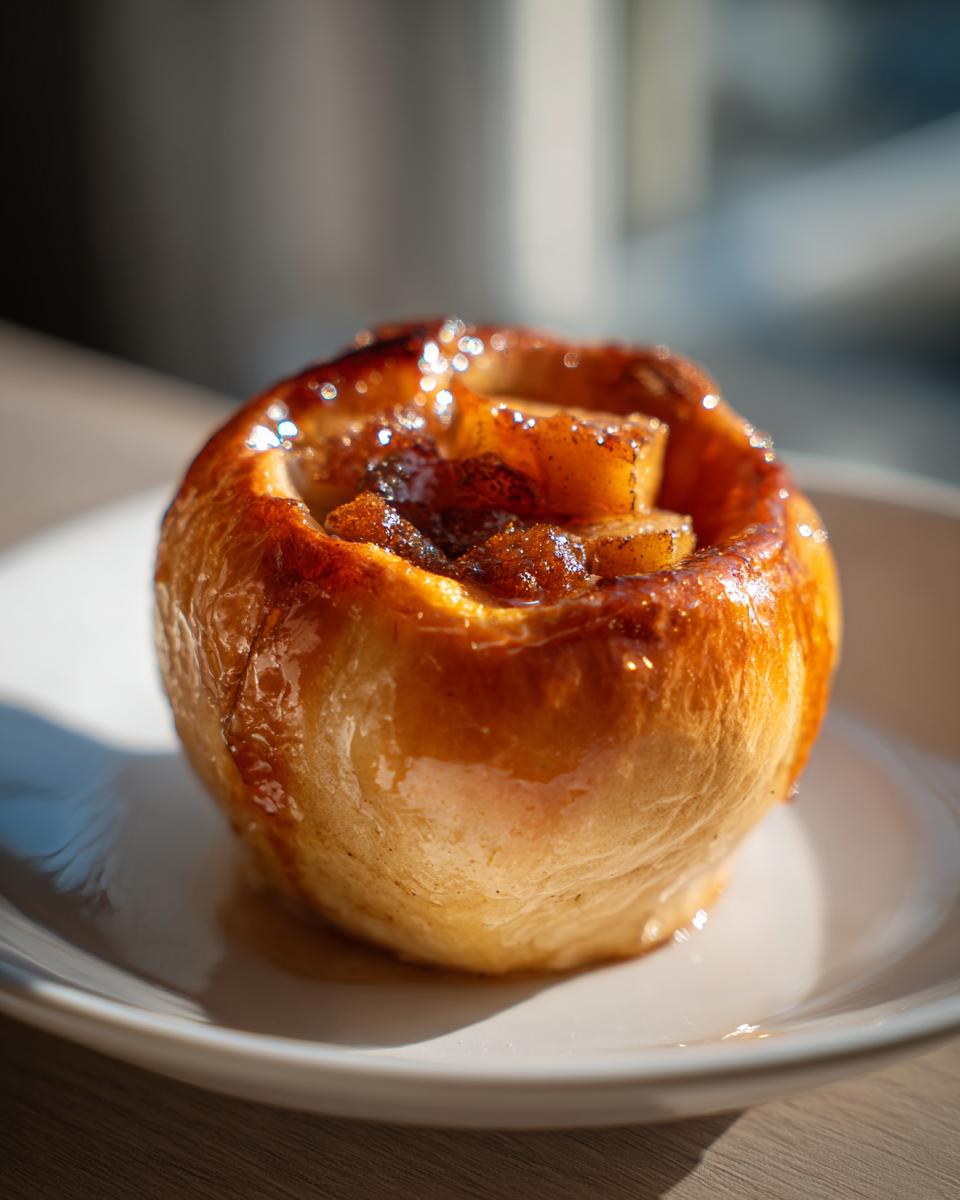
If you notice your apples are getting really dark brown on top—which looks pretty, sure, but often means the insides are still struggling—it’s time for the foil trick I mentioned earlier! Just grab a sheet of aluminum foil and loosely tent it over the entire baking dish. This captures the steam and keeps the tops from scorching while allowing the heat to penetrate slowly and evenly. I usually do this for the first 25 minutes of baking.
Once you take the foil off for the final 10 to 15 minutes, you let that residual moisture evaporate, and the sugar topping actually gets to caramelize a little bit. That quick blast of direct heat at the end is what gives you just a tiny bit of color on top while the inside is perfectly fork-tender. It’s all about managing that heat, just like when I make my famous moist cinnamon apple cake!
Serving Suggestions for Your Warm Apple Treat
Now that you’ve created these stunning, cozy baked apples, how do you serve them up for the perfect photo or the perfect cozy evening? The presentation truly elevates this simple dessert! Since these are so versatile, you can treat them like a decadent dessert or a satisfying start to your day.
For that classic, show-stopping look—which my Pinterest friends adore—you absolutely need ice cream. A scoop of high-quality vanilla bean ice cream slowly melting down the sides of the warm apple, mixing with that brown sugar syrup? Divine! It instantly becomes one of those perfect Apple Dessert Ideas.
But don’t forget breakfast! These turn into wonderful Sweet Breakfast Apples when spooned right over a bowl of creamy oatmeal or cottage cheese. If you’re headed out the door quickly, just bake them a little bit firmer and pack them in a container—they are just as great the next day! They look so charming stacked next to a swirl of caramel, sort of like a deconstructed version of my salted caramel brownies.
Storage and Reheating Instructions for Leftover Baked Apples
Part of the joy of making a big batch of these baked apples is knowing you have that cozy goodness waiting for you tomorrow! Unlike some baked goods that lose their magic overnight, these hold up surprisingly well, provided you store them right. They are just as glorious the next day, especially if you’re craving a quick fall dessert that requires zero commitment.
My grandmother always warned against just leaving them on the counter. We need to treat that sugary sauce with respect!
For refrigeration, make sure the apples have cooled down completely first. If you put warm apples into an airtight container, you’re just asking for condensation and a soggy texture. Once cool, pop them into a glass container with a tight lid—I usually find they stay perfectly delicious for about four days. That’s plenty of time for me to enjoy them!
When it comes to reheating, I have two ways I approach this, depending on how much time I have. If I’m in a hurry, the microwave works, but I warn you: it heats them unevenly and softens the structure faster. Just use 30-second bursts until warm.
However, my real secret? Use the oven! If you have 10 minutes, wrap the apple loosely in foil—just like we did in the baking process—and pop it into a low oven (maybe 300°F) for about 8 to 10 minutes. That gentle heat warms the filling back up without getting rubbery. It keeps that soft, buttery melt intact, which is exactly what you want when you’re enjoying them, maybe alongside a slice of warm cinnamon monkey bread!
Frequently Asked Questions About Baked Apples
I know that whenever I try a new recipe, I always have a few little questions buzzing in my head before I start. You want to make sure it’s worth the oven time, especially when baking for the family! Here are the most common things folks ask me about these simple baked apples to make sure you feel totally confident!
Can I make these Baked Apples without brown sugar?
That’s a great question if you’re exploring some healthy baked apples options! For this specific recipe, the brown sugar is really important because it melts with the butter to form that rich, thick sauce that coats everything so beautifully. If you absolutely must skip it, you can substitute it with an equal amount of pure maple syrup or maybe even a granulated stevia blend. Just know that the resulting sauce won’t be quite as gooey or caramelized. But hey, if it means you get to serve up a family friendly apple dessert when you couldn’t run to the store, I fully support experimenting!
What is the best type of apple for baked apples?
I’ve been asked this a million times! You want an apple that is firm enough to hold onto its shape while it bakes, but still tastes great when tender. My absolute top recommendations are Honeycrisp or Gala. They provide that perfect balance of sweet-tart flavor and they won’t turn into mushy apple sauce on you. For a bit more tartness that cuts through the sweetness of the filling, Granny Smith works wonderfully too, though it might need about 5 extra minutes in the oven. Picking the right fruit is the key to a successful quick apple recipe!
If you’re looking for another easy, cozy treat that comes together fast, you should definitely check out my recipe for moist pumpkin muffins—they use similar warm spices!
Baking with Claire: Your Next Steps with Baked Apples
I truly hope this recipe brings as much cozy comfort to your kitchen as it does to mine! Now that you’ve got your gorgeous, tender baked apples hot out of the oven, I’d absolutely love to know what you think! Did you add extra vanilla? Did you top it with bourbon vanilla ice cream? Don’t keep that deliciousness a secret!
Please, if you loved this warm apple treat, hop over to the comments section below and leave me a star rating. Seeing those stars gives me such a boost and helps me know what recipes I should be sharing more of!
And if you snapped a picture of your beautiful, syrupy apples, tag me on social media! I love seeing your creations and how you style these simple, beautiful bakes. You can also find plenty of other easy-to-master comfort recipes, like learning more about who I am and why I bake, right here on Bliss Batter. Happy baking, friends!
Estimated Nutritional Data for Simple Baked Apples
Now, I always try to keep things real around here—we’re talking comfort food, not diet food! But for those of you who like to track things, I went ahead and ran the numbers on a standard serving of these Simple Baked Apples based on the recipe above. Remember, this is just an estimate; your apple size and how much that yummy brown sugar sauce you use will certainly change the final count.
These values are based on one serving (which is one whole apple) using standard measurements and do not include any toppings like ice cream or oatmeal. Think of this as a helpful guide, not a strict nutritional guarantee!
- Serving Size: 1 apple
- Calories: 250
- Sugar: 35g
- Fat: 10g
- Carbohydrates: 42g
- Protein: 1g
- Cholesterol: 25mg
It’s amazing how much flavor we pack into just 250 calories, isn’t it? That comes from those wonderful, natural apples! Enjoy knowing you’re eating something made with real ingredients and a lot of love.
PrintEasy Cinnamon Baked Apples: Your Cozy Homemade Dessert
Create the ultimate cozy treat with these Easy Cinnamon Baked Apples. You will bake whole apples until they are tender and coated in a warm, buttery brown sugar glaze. This simple recipe delivers nostalgic comfort perfect for fall evenings or a sweet breakfast.
- Prep Time: 10 min
- Cook Time: 40 min
- Total Time: 50 min
- Yield: 4 servings 1x
- Category: Dessert
- Method: Baking
- Cuisine: American
- Diet: Vegetarian
Ingredients
- 4 medium baking apples (like Honeycrisp or Gala)
- 1/4 cup packed brown sugar
- 1 teaspoon ground cinnamon
- 1/4 teaspoon ground nutmeg
- 2 tablespoons unsalted butter, cut into small pieces
- 1/4 cup hot water
- Optional: Vanilla ice cream or oatmeal for serving
Instructions
- Preheat your oven to 375 degrees Fahrenheit. Lightly grease an 8×8 inch baking dish.
- Wash the apples. Use an apple corer or a small knife to carefully remove the core from the top of each apple, leaving about half an inch at the bottom so the filling stays inside. Do not cut all the way through.
- In a small bowl, mix together the brown sugar and cinnamon.
- Stuff the center cavity of each apple with the cinnamon-sugar mixture. Place a small piece of butter on top of the sugar filling in each apple.
- Carefully place the filled apples into the prepared baking dish. Pour the hot water into the bottom of the dish around the apples.
- Bake for 35 to 45 minutes, or until the apples are tender when pierced with a fork. Baking time depends on the size of your apples.
- Remove from the oven. Baste the apples with the liquid from the bottom of the pan.
- Serve warm. Top with vanilla ice cream or spoon over oatmeal for a comforting treat.
Notes
- For a vanilla flavor boost, add 1/2 teaspoon of vanilla extract to the hot water before pouring it into the dish.
- If you prefer a softer apple, cover the dish loosely with foil for the first 25 minutes of baking, then remove the foil to allow the tops to brown slightly.
- This recipe works well with sliced apples if you prefer a quicker bake time; just toss the slices with the filling and bake for 20 minutes.
Nutrition
- Serving Size: 1 apple
- Calories: 250
- Sugar: 35
- Sodium: 5
- Fat: 10
- Saturated Fat: 6
- Unsaturated Fat: 4
- Trans Fat: 0
- Carbohydrates: 42
- Fiber: 5
- Protein: 1
- Cholesterol: 25