
Oh my goodness, is there anything better than biting into a perfectly snappy, tangy pickle? I swear, that sound—that satisfying CRUNCH—just makes everything better! If you’re like me and can’t possibly wait for a full canning session, then you are going to absolutely flip for my Easy Crunchy Refrigerator Dilly Beans. These are packed with so much garlic and dill flavor, and they come together faster than you can finish your morning coffee. As Claire always says around here, we love making happiness at home, and transforming fresh garden green beans into bold dilly beans with this simple pickling technique? That’s my kind of happiness! You’ll find more awesome ways to snack by checking out our collection of appetizers and party snacks.
Forget complicated steps; we are going straight for bold flavor and texture here. These refrigerator pickles are ready before the weekend is even over. Trust me, once you try them, you’ll be sneaking jars out of the fridge for a quick, zesty snack instead of reaching for chips.
- Why You Need This Easy Dilly Beans Recipe
- Gathering Ingredients for Homemade Dilly Beans
- Step-by-Step Instructions for Easy Dilly Beans
- Optional: How to Can Dilly Beans for Long-Term Storage
- Tips for Success Making Perfect Dilly Beans
- Serving Suggestions for Your Dilly Beans
- Storage and Reheating Instructions for Dilly Beans
- Frequently Asked Questions About Dilly Beans
- Share Your Homemade Dilly Beans Creations
Why You Need This Easy Dilly Beans Recipe
So, why should you toss your summer harvest into brine right now instead of waiting for canning season? Because this method is the easiest transformation—you get maximum flavor with minimum fuss! We’re keeping it simple so you can get to the snacking part faster.
- Quick Pickling Green Beans for Immediate Snacking: We are using the refrigerator method here, which means we skip the boiling water bath entirely! You still get that amazing, tangy flavor, but you only have to wait 24 hours instead of weeks to enjoy your Pickled Green Beans Recipe.
- Achieving the Perfect Crunchy Dilly Beans Texture: If soggy pickles are your great fear, put that worry aside! My number one trick for the snap-iest beans relies on keeping them cold before they hit the heat. Seriously, that trick of popping the beans into ice water helps lock in that necessary crispness before they even see the brine.
Gathering Ingredients for Homemade Dilly Beans
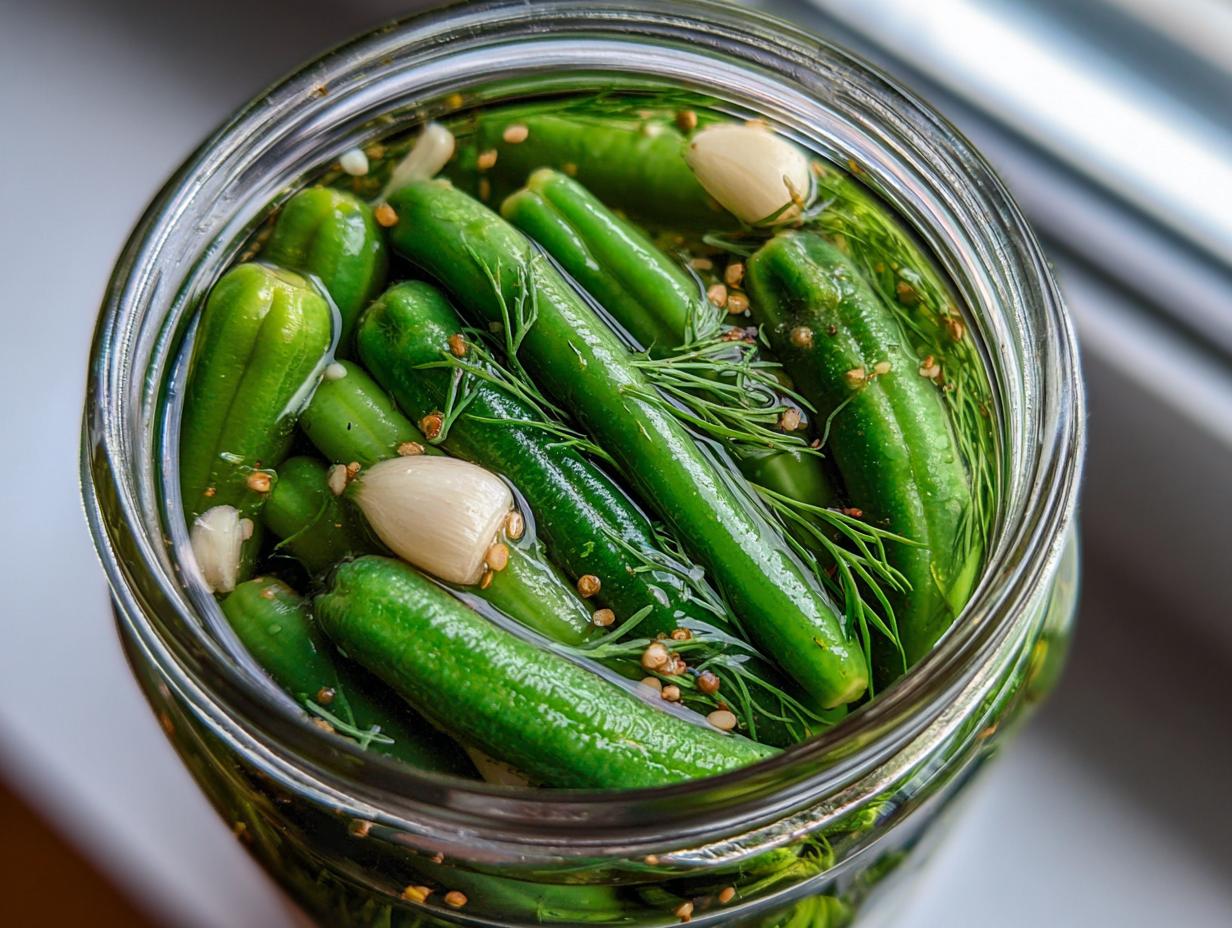
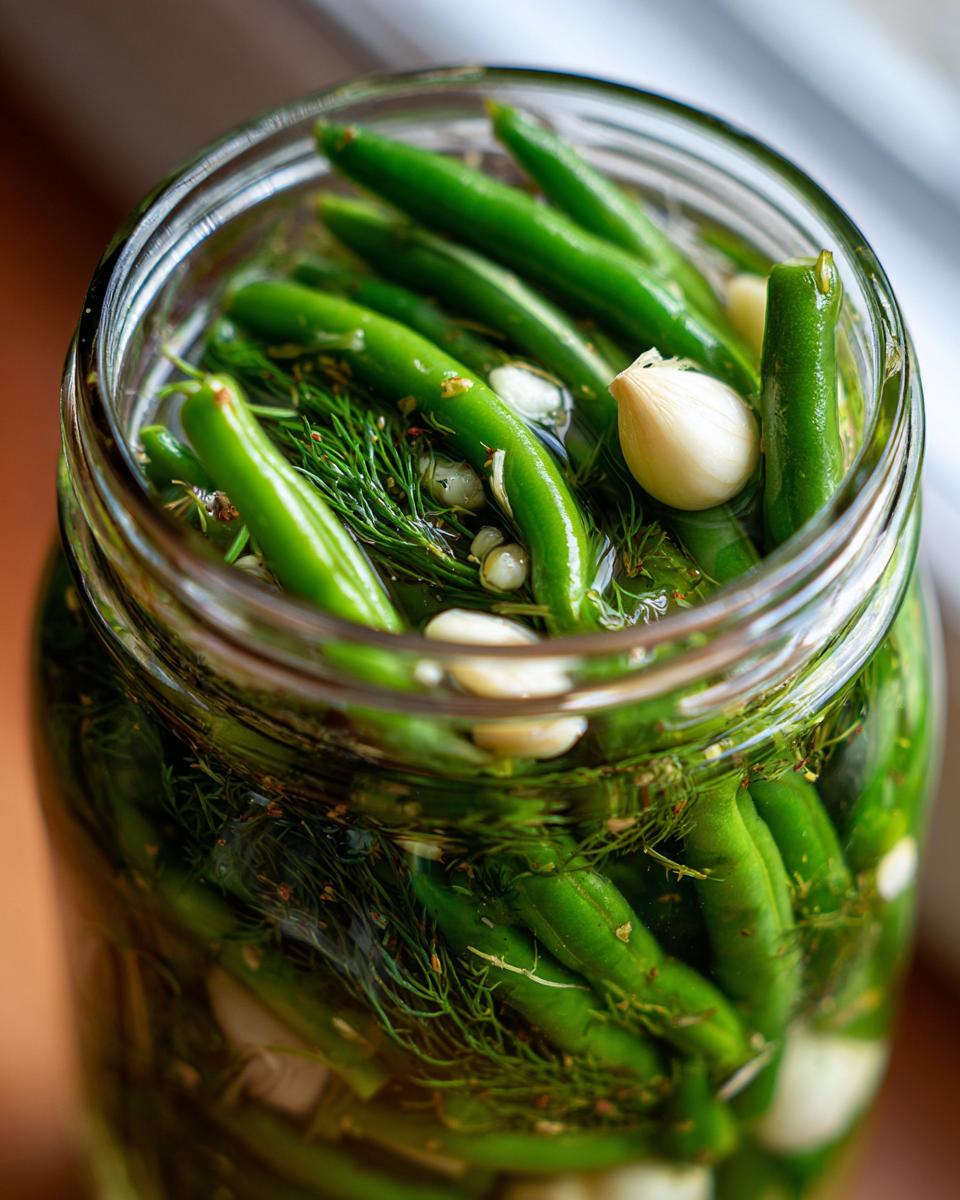
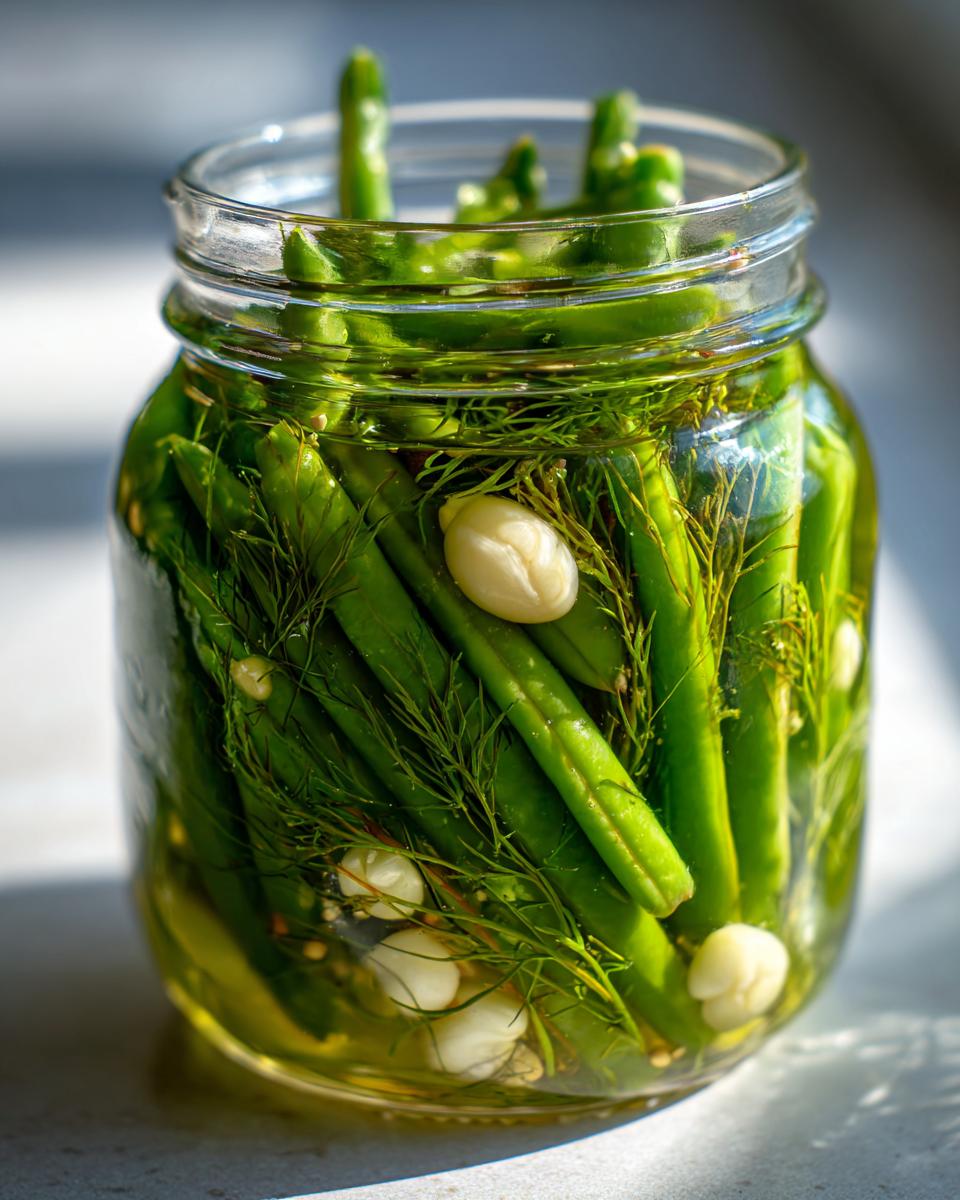
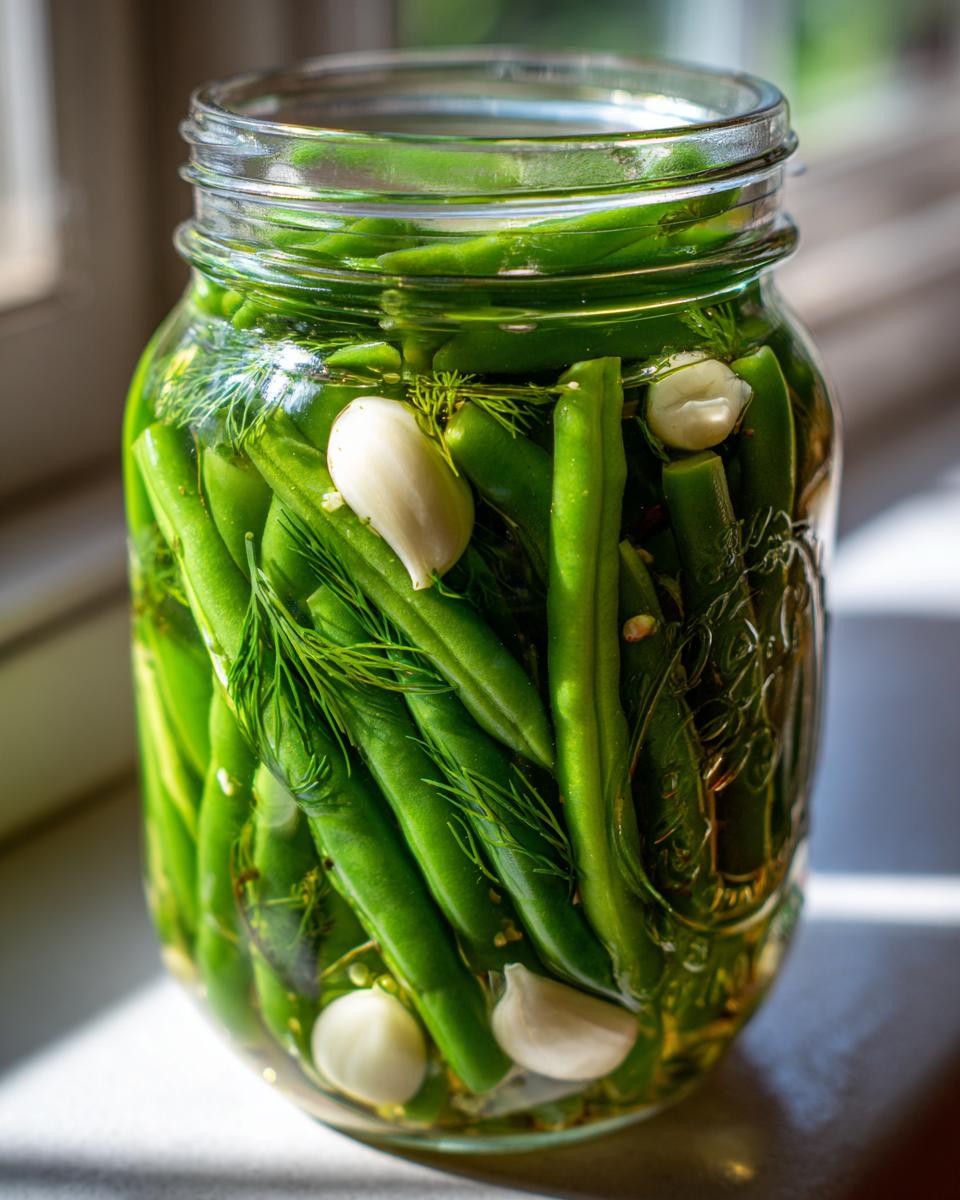
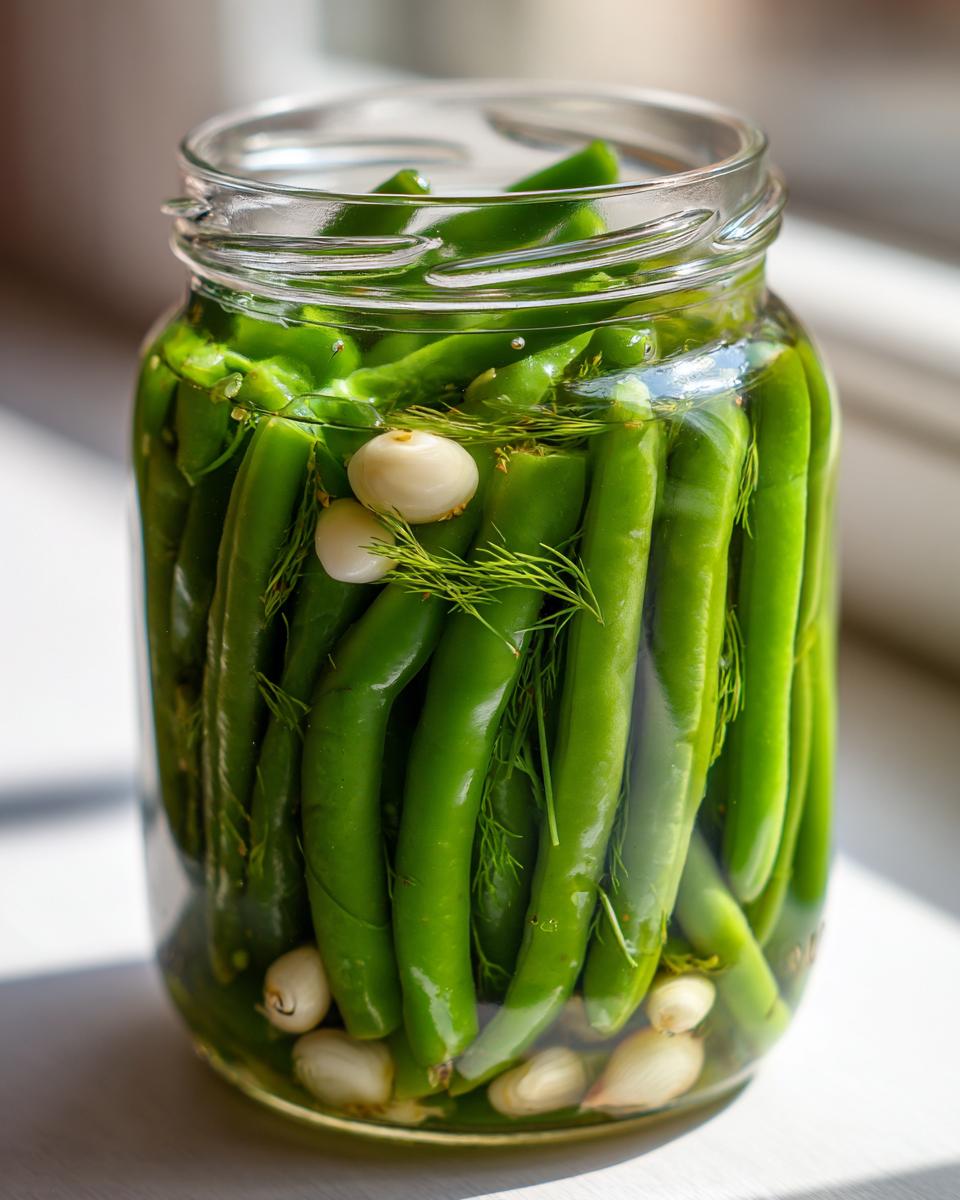
Okay, let’s talk about what you need to keep this recipe easy and flavorful. Since we aren’t canning these for winter storage, the ingredient list is super short, but the quality really matters for that punchy, savory flavor profile! For the brine, you need good old-fashioned water, white vinegar (and please, make sure it’s 5% acidity so your math works out!), pickling salt, and just a touch of sugar to balance that tanginess. Then we get to the stars of the show: the garlic, the dill, and the fresh green beans!
If you are going for that little kick, make sure you have your red pepper flakes on standby. We’re keeping the garlic simple—just peeled and halved cloves tucked right into the bottom of the jar. These fresh ingredients are what transform simple vegetables into incredible Homemade Dilly Beans that everyone will snack on.
Ingredient Notes and Substitutions for Dilly Beans
Listen, the fresher, the better! If you have beans straight from your summer garden, use them! That’s when these really shine. When it comes to the dill, I always, always grab fresh dill heads if I can find them. They pack so much more aromatic punch than the dried stuff. However, if you can only find dill seed, don’t panic! Just use the teaspoon measurement, and you’ll still get that wonderful Garlic Dill Beans essence. One more non-negotiable tip: check your vinegar label! If it says 5% acidity, you are set. That’s the standard for safe pickling, even for quick refrigerator pickles!
Step-by-Step Instructions for Easy Dilly Beans
Alright, this is where we turn those beautiful, snappy green beans into pure snacking gold! Don’t let the fact that this involves liquid and heat scare you; we are keeping this process incredibly straightforward because we are making refrigerator dilly beans. It’s basically the speediest way to preserve flavor! Just grab your jars, and let’s get cooking. If you’re looking for more ways to serve these up at your next gathering, you can always find inspiration for party snacks on the site!
Preparing the Brine and Packing the Jars for Dilly Beans
First up, get that brine happening! In a saucepan, you’re going to combine the water, the vinegar, the glorious pickling salt, and just that little bit of sugar. Put that over medium-high heat and stir it up until everything dissolves—it boils pretty quickly! Once it’s clear, take it right off the heat so it can cool just a tiny bit while you pack your jars.
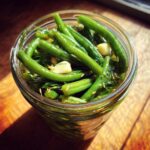
Now for the packing! This is crucial. Divide your garlic halves, your fresh dill heads (or seed!), and those optional red pepper flakes evenly among your jars. Pack those trimmed green beans in there tightly, standing them up nice and straight if you can manage it. You want them snug! Pour that hot brine over everything. Make sure those beans are completely covered by the liquid, which means you should have about half an inch of space left at the very top—we call that headspace, and it matters!
Sealing and Storing Your Refrigerator Dilly Beans
We need to get the air out, right? Take a non-metallic spatula or a skewer and run it gently down the sides of the jar. This releases any sneaky air bubbles trapped around the beans. Check that headspace again—if you lost liquid, add a touch more brine to keep that half-inch gap. Wipe the rims down super clean—no sticky stuff allowed! Put the lids on fingertip tight, and then you’re done with the active work!
Let those jars just sit on your counter to hang out until they feel completely cool to the touch. Once they’ve dropped their temperature, they head straight into the fridge. Don’t peek yet! The magic needs time. You absolutely have to let these delicious dilly beans sit for at least a full 24 hours before you even think about eating them. That’s your minimum wait time for flavor development!
Optional: How to Can Dilly Beans for Long-Term Storage
Now, I shared my favorite method which is the refrigerator pickle—because who can wait? But I know some of you are already thinking ahead to bulk preserving those garden treasures, right? If you want to put up a big batch of these beauties so you can enjoy the amazing flavor besides snacks all year long, you absolutely can transition this recipe to shelf-stable canning.
This is totally optional, but it’s great if you want to stock up on that tangy snap! If you follow the packing and brining instructions exactly as listed above—using clean jars and the hot brine—you just add one extra step before letting them cool on the counter. This moves you into Traditional Dill Pickling territory.
You just need a boiling water bath canner ready to go. Once your prepared jars are filled, wiped clean, and the lids are on fingertip tight, just gently place them into the already boiling water. You need to process them for 10 minutes. That’s it—ten minutes!
After the timer goes off, lift them out carefully and let them cool undisturbed on a towel on your counter. If you hear those satisfying pings overnight, congratulations, you’ve successfully preserved your amazing Dilly Beans! Remember, for the best instructional guidance on the canning process itself, I always recommend reading up on safe preserving techniques, which you can see more about when learning how to preserve green beans.
Tips for Success Making Perfect Dilly Beans
If you want your dilly beans to deliver that satisfying snap every single time, you have to pay attention to two little details: temperature and sourcing! Sogginess is the enemy of a good pickle, so remember that ice bath I mentioned earlier? Seriously, soak those trimmed beans for an hour in ice-cold water right before you pack them. It firms them up beautifully.
Also, the flavor just sings when you use beans that are picked young—not too thick, not too stringy. Those small, tender beans absorb the brine much better and stay that wonderful Tangy Vegetable Snack texture we’re aiming for. If you use older beans, they tend to soften too much in the brine, even when cold. It’s worth the extra step to get that perfect crunch every single time!
Serving Suggestions for Your Dilly Beans
You’ve made it! Your jars of tangy, snappy dilly beans are ready, and now what? Don’t just stand there staring at them—it’s time to eat them! The best part about having these simple pickles on hand is how versatile they are. They cut right through rich flavors, making them the perfect sidekick for almost anything.
My favorite use, hands down, is just grabbing one or two straight out of the jar when I need a bright, savory little palate cleanser during the day. They are the ultimate low-effort snack. But if you’re having people over, they make an incredible addition to a platter. Think about serving them alongside sharp cheddar cubes, some good quality salami, and maybe some olives.
Beyond just snacking, these bright, garlicky beans are fantastic next to a hearty meal. Have you ever had rich, meaty chili? A couple of cold, crunchy dill pickles mixed right in or served on the side completely balances that heavy flavor. They add texture and acidity where you need it most!
If you’re looking for something else delicious and comforting to serve alongside your new favorite pickle, I highly recommend checking out the recipe for chili cheese fries. Seriously, the combination of hot, gooey cheese, meaty chili, and that cold, sharp dill crunch is just heaven on earth!
Storage and Reheating Instructions for Dilly Beans
Now that you have these amazing, snappy dilly beans chilling in the fridge, you need to know how to keep them perfect! Since these are refrigerator pickles, sometimes called quick pickles, they don’t have the same shelf stability as their water-bath-canned cousins, but that’s a good thing because it means they stay extra crunchy!
Keep them covered in that flavorful brine and sitting in the refrigerator. You should find that they taste fantastic and stay crisp for up to two whole months. I know, two months sounds like a long time, but I’ve never managed to keep a batch around that long! They disappear way too fast once people find out they are ready.
Here’s a really important note, though, especially if you want that satisfying *snap* every time: Definitely do not try to reheat them! Heat is the absolute enemy of pickle crunch. If you warm these up, they’ll go soft faster than you can say, “Pass the jar!” We want these served cold, straight from the fridge, so you get that immediate, bright, refreshing zing and the firmness that makes these Homemade Dilly Beans so addictive.
Frequently Asked Questions About Dilly Beans
I figured you might have a few lingering questions, especially if this is your first time making anything pickled at home! Don’t worry; these are super common, and luckily, the answers are usually pretty simple. We are all about removing the guesswork so you can get back to enjoying these snappy treats!
Can I make spicy dilly beans without canning?
Absolutely, yes, you can! That’s the beauty of the refrigerator method we used here. The hot brine we pour over the beans is hot enough to start the pickling process and help the flavors marry. If you want the spiciest version of these spicy pickled beans, just bump up those red pepper flakes in the jar before you add the brine. Since they are never heat-processed for long-term shelf stability, they keep that fantastic, fresh heat right in the crisp bean!
How long until my dilly beans are crunchy?
This is the biggest question anyone asks about crunchy dill pickles! While they are technically safe to eat after about 12 hours, I really, truly recommend waiting the full 24 hours. If you did my little trick of soaking the fresh green beans in that ice bath beforehand—that’s what locks in the snap! Give them that full day in the fridge for the brine to penetrate, and you will have that irresistible, snappy texture that makes these the best snack ever. Seriously, plan ahead just one day for the best crunch!
What is the difference between these and regular Pickled Green Beans Recipe?
That’s a great point! Most people use those terms interchangeably, but there’s a little secret hiding in the name. When you call them dilly beans, you are specifically telling everyone that dill is the star of the show, right alongside the tanginess! This recipe leans heavily on fresh dill heads or lots of dill seed because that signature flavor is what makes them different from a plain pickled green bean. If a recipe doesn’t showcase that heavy, aromatic dill flavor, I just call it a standard pickled green bean. For us, the dill is the whole point of this tangy vegetable snack!
Share Your Homemade Dilly Beans Creations
Now it’s your turn! I’m practically bursting with excitement waiting to hear how your jars of dilly beans turned out. Did they snap just right? Did the garlic and dill create that huge flavor punch we were aiming for? Please don’t keep that deliciousness to yourself!
I truly believe the best part of sharing recipes—even for something as simple as pickled green beans—is seeing them come to life in *your* kitchens. We’re all about that homemade joy here at Bliss Batter, and your feedback helps me know I’m succeeding in making baking and pickling accessible for everyone, whether you’re making a fancy cake or a simple, crunchy snack.
Head down to the comments section below and tell me everything! Let me know if you ended up making them spicy, which method you chose (refrigerator or canning), and how long it took you to clear out the first jar. Rating the recipe helps other folks feel confident trying out this easy canning recipe, too.
If you snapped a photo of your beautiful jars of Best Dilly Beans Recipe, I would absolutely love to see them! You can share your pictures with me by reaching out through our contact page. Seeing your creations reminds me why I started this entire adventure in the first place—to share simple, foundational recipes that bring bright, happy flavors into our busy lives. Happy snacking, friends!
PrintEasy Crunchy Refrigerator Dilly Beans
Make snappy, tangy dilly beans quickly without canning. These refrigerator pickles are perfect for snacking and use fresh dill and garlic for bold flavor.
- Prep Time: 20 min
- Cook Time: 10 min
- Total Time: 30 min
- Yield: 2 quarts 1x
- Category: Snack
- Method: Quick Pickling
- Cuisine: American
- Diet: Vegetarian
Ingredients
- 2 lbs fresh green beans, trimmed
- 4 cups water
- 1 cup white vinegar (5% acidity)
- 2 tablespoons pickling salt
- 1 tablespoon granulated sugar
- 4 cloves garlic, peeled and halved
- 4 heads fresh dill (or 4 teaspoons dill seed)
- 1 teaspoon red pepper flakes (optional, for spicy beans)
Instructions
- Wash the green beans thoroughly. Trim the ends off the beans.
- Prepare your jars: Use two quart-sized or four pint-sized canning jars with lids and bands. Wash the jars and lids in hot, soapy water and keep them warm.
- In a medium saucepan, combine the water, vinegar, pickling salt, and sugar. Bring the mixture to a boil over medium-high heat, stirring until the salt and sugar dissolve completely. Remove from heat.
- Pack the jars: Divide the garlic cloves, dill heads (or seed), and red pepper flakes (if using) evenly among the prepared jars.
- Pack the trimmed green beans tightly into the jars, standing them up vertically if possible. Pack them firmly to keep them crunchy.
- Pour the hot brine over the beans, leaving 1/2 inch headspace at the top of the jar. Ensure all beans are covered by the brine.
- Remove air bubbles by running a non-metallic utensil around the inside of the jar. Adjust the brine level if necessary to maintain 1/2 inch headspace.
- Wipe the rims of the jars clean. Place the lids on and screw on the bands until fingertip tight.
- Cool and store: Let the jars cool to room temperature on the counter. Once cool, place the jars in the refrigerator.
- Wait at least 24 hours before eating the dilly beans. They will keep in the refrigerator for up to 2 months.
Notes
- For the crunchiest beans, you can soak the trimmed green beans in ice water for 1 hour before packing them into the jars.
- If you prefer a traditional canned version, process these jars in a boiling water bath for 10 minutes after sealing.
- These refrigerator pickles are a great alternative to complex meal planning when you need a quick, flavorful side dish.
Nutrition
- Serving Size: 4 beans
- Calories: 10
- Sugar: 1
- Sodium: 150
- Fat: 0
- Saturated Fat: 0
- Unsaturated Fat: 0
- Trans Fat: 0
- Carbohydrates: 2
- Fiber: 1
- Protein: 0
- Cholesterol: 0