
You know how mashed potatoes are the ultimate comfort food? Well, sometimes comfort needs a little glow-up, right? That’s where we bring in the elegance! I absolutely love transforming the humble potato into something show-stopping, which is why I’m sharing my blueprint for perfect Duchess Potatoes. Back when I was working in corporate events, presentation was everything, and these piped swirls deliver that gourmet look without needing chef-level skills. Trust me, these are foolproof! We are hitting that sweet spot every single time: a light, fluffy interior that melts in your mouth, surrounded by beautifully golden, crispy edges. This recipe takes that classic French side dish and makes it totally accessible for your home kitchen. If you love potatoes dressed up for a party, you should also check out my recipe for loaded potato skins—it’s another way to ditch the ordinary!
- Why This Duchess Potatoes Recipe is Your New Holiday Favorite
- Gathering Ingredients for Perfect Duchess Potatoes
- Step-by-Step Instructions for Easy Duchess Potatoes
- Tips for Achieving Restaurant Style Duchess Potatoes
- Variations: Garlic Parmesan and Other Duchess Potatoes Recipes
- Make Ahead Side Dishes: Preparing Duchess Potatoes in Advance
- Serving Suggestions for Your Elegant Duchess Potatoes
- Storage and Reheating Instructions for Leftover Duchess Potatoes
- Frequently Asked Questions About Duchess Potatoes
Why This Duchess Potatoes Recipe is Your New Holiday Favorite
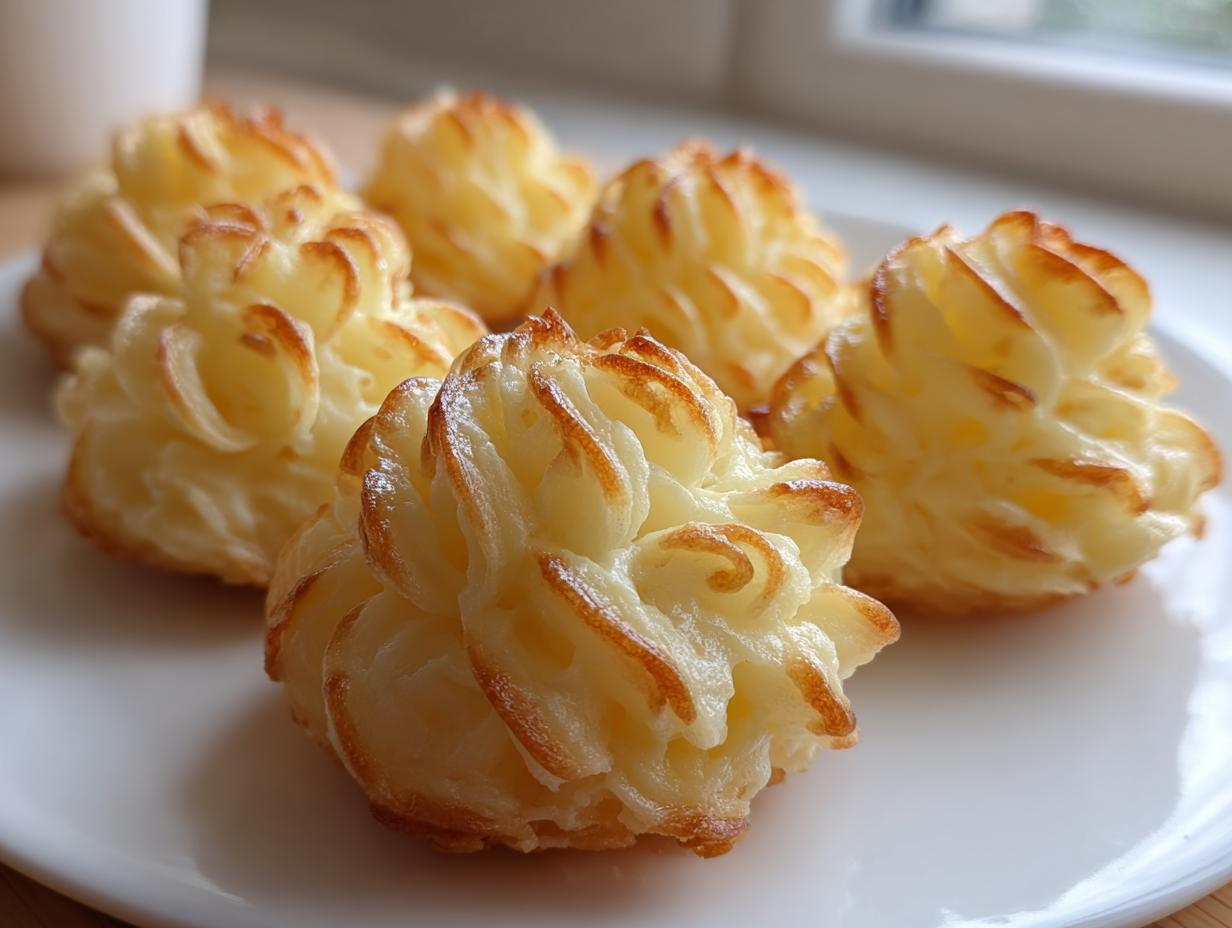
I know, I know. They look like they belong on a fancy restaurant menu, but these Duchess Potatoes are deceptively easy, which is why they’re going straight into your upcoming holiday rotation. They give you all the indulgence of creamy mashed potatoes but look like little edible works of art!
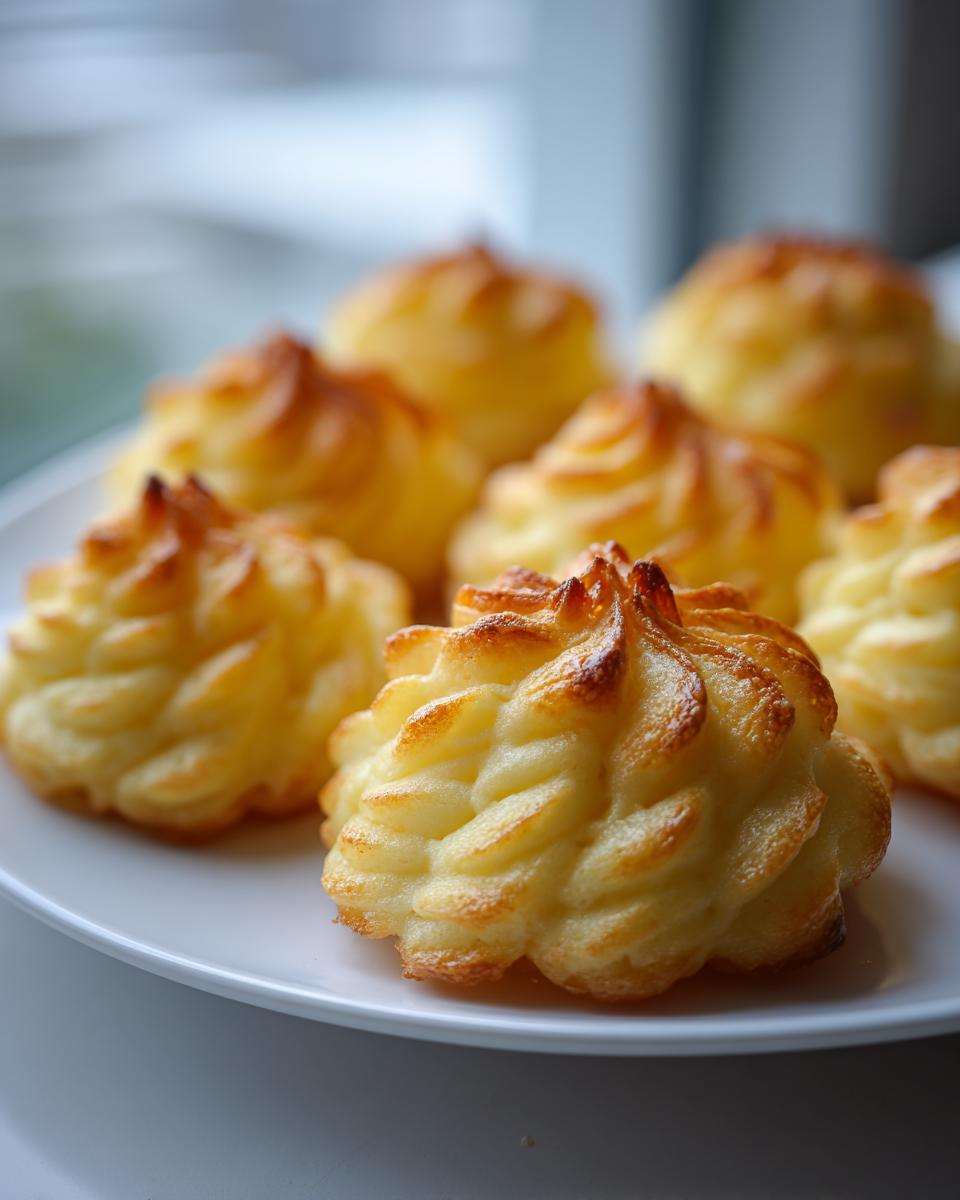
- They are the definition of an Elegant Potato Side Dish—those piped swirls just scream ‘special occasion.’
- The texture payoff is huge: we nail that balance between Crispy Creamy Potatoes every single time.
- You can even whip up the mixture ahead of time, making your big day less stressful. If you love efficient recipes, check out my tips on game day nachos; efficiency is key!
Achieving the Perfect Crispy Creamy Potatoes Texture
The secret isn’t in the piping, honestly; it’s in drying out the mash! We boil those Russets until soft, but then the magic happens when we briefly heat them in the empty pot to evaporate steam. Plus, using egg yolks instead of another liquid binder helps enrich the interior while giving those outside edges the structure they need to brown up beautifully.
Simple Steps for Elegant Duchess Potatoes Presentation
Look, if you’re scared of the piping bag, don’t be! You absolutely can use two spoons to drop rustic, free-form mounds onto the sheet, and they taste exactly the same. But, if you have five minutes, grab a large star tip. Piping that perfect rosette for your Duchess Potatoes Recipe takes less time than you think, and the presentation boost is totally worth it.
Gathering Ingredients for Perfect Duchess Potatoes
Okay, let’s talk ingredients! I can’t give you a magic recipe without making sure you have the right building blocks. Remember, using good quality, everyday items is how we get that incredible flavor boost here at Bliss Batter. For this amazing Duchess Potatoes Recipe, we need potatoes that are naturally starchy, which is why I insist on Russets.
Here is exactly what you need to pull together these stunning potato swirls:
- Two full pounds of Russet potatoes, which you absolutely must peel and quarter before boiling.
- Half a cup of unsalted butter—and make sure it’s softened up nice and pliable on the counter beforehand!
- Warm heavy cream, half a cup is the perfect amount to keep things rich.
- Two large egg yolks—these are key for that velvety texture.
- Seasonings: Half a teaspoon of salt, a quarter teaspoon of pepper, and just a tiny pinch of nutmeg; don’t skip the nutmeg, it’s a subtle winner!
- Optional Flavor Boost: If you want to sneak in some savory goodness, grab a quarter cup of grated Parmesan cheese. I love adding this right into the mash for an extra punch.
- And finally, one large egg, beaten well, just for the egg wash we paint on later.
Step-by-Step Instructions for Easy Duchess Potatoes
Alright, deep breath! This is where we turn our beautiful ingredients into those stunning potato swirls. Don’t let the fancy look intimidate you; these Easy Duchess Potatoes are totally manageable if you follow the steps. The key here is managing moisture and mixing just enough—too much, and they get tough, which we absolutely cannot have! If you loved learning about the ingredients, remember you can find more tips on making perfect bases like this over on my loaded potato skins recipe page.
Preparing and Ricing the Potatoes
First things first, we need tender potatoes! Get your quartered Russets into cold, salted water and bring them to a boil. Cook them until they are totally soft—like, you can easily pierce them with a fork soft, usually about 15 to 20 minutes. Once they are done, drain every last drop of water out. Now, here’s my secret from years of perfecting this: put those drained potatoes back into the hot, empty pot for about a minute on low heat, stirring constantly. This little trick dries them out, which is essential for that creamy texture you want, not a watery mess! Then, mash them until they are as smooth as velvet. If you have a potato ricer, use it; it guarantees that fluffy interior.
Mixing the Potato Base for Duchess Potatoes
While the potatoes are hot, get your flavor boosters ready. Cream the softened butter, the warm heavy cream, your egg yolks, salt, pepper, and that little pinch of nutmeg together. If you’re adding Parmesan for that savory kick, now is the time to fold it in until everything is happy. Now, gently add this beautiful butter mixture to your smooth mashed potatoes. Mix everything until it’s just combined and looks gorgeous. I mean it—stop mixing the second it’s uniform. Overmixing activates the starch and we don’t want gluey potatoes, we want fluffy ones!
Piping and Baking Your Duchess Potatoes
Time to make them look fancy! Preheat your oven to 400°F (that’s hot!) and line your baking sheet with parchment paper; you don’t want anything sticking. Spoon your thick, perfect potato mixture into a piping bag fitted with a large star tip. Pipe beautiful swirls or dollops onto the sheet, giving them about an inch to breathe. If piping feels like too much hassle, just grab two spoons and drop rustic mounds onto the sheet—they still get crispy on the edges, I promise! To get that gorgeous golden shine, brush the tops lightly with your beaten egg wash. Bake them for about 20 to 25 minutes. When those edges turn deep golden brown and look slightly crunchy, they are done! Serve them right away so everyone gets that hot, melting center.
Tips for Achieving Restaurant Style Duchess Potatoes
Now that you have the basic steps down, let’s talk about making these Duchess Potatoes truly unforgettable—we’re aiming for that incredible restaurant style potatoes perfection you see in magazines. The difference between good and great often comes down to simple technique, and I learned these little secrets testing batches until my kitchen smelled like heaven for days!
If you want the fluffiest interior possible, you absolutely have to invest in a potato ricer. Don’t just mash them with a regular masher; the ricer breaks them down perfectly without overworking the starch, which is the absolute best insurance policy against gummy potatoes. It’s a game-changer!
Also, don’t forget that you can totally prep these ahead of time! This is my lifesaver tip for big holiday dinners when the oven is packed tighter than my parking spot during the holidays. You pipe them out, cover them, chill them, and then bake when you need them. It’s pure genius for saving time!
Variations: Garlic Parmesan and Other Duchess Potatoes Recipes
While the classic recipe is divine, sometimes we need to mix things up, especially when serving the same crowd for the thousandth time! My favorite way to give these Duchess Potatoes a savory lift is by leaning into the optional cheese we talked about earlier. If you added that Parmesan to the base, congratulations, you’ve already made Garlic Parmesan Potatoes. But if you skipped it, don’t worry!
To amp that up, you can slightly increase the Parmesan quantity and toss in about a teaspoon of garlic powder right when you mix in the warm cream and butter. That combination is just heavenly and gets beautifully toasted on the edges. So good!
If Parmesan isn’t your thing, try adding a fine grind of black pepper and two tablespoons of finely chopped fresh chives right before piping. That little hint of oniony freshness helps cut through the richness beautifully. If you want more ideas on using garlic and butter together, you have to check out my garlic butter recipe—it goes on everything!
If you really want to go gourmet, I hear some folks have amazing success with cheddar—it melts differently, so it takes a little more finesse, but you can see a great version linked over at Cooking Classy to see how they approach it.
Make Ahead Side Dishes: Preparing Duchess Potatoes in Advance
I mentioned this is a dream for big holiday meals, and my biggest secret weapon for those days is getting things done early! These Duchess Potatoes are fantastic when prepped ahead, which is why they qualify as one of my favorite make ahead side dishes. If you’re planning ahead for a dinner party, you can complete everything right up until the egg wash step.
After you pipe your beautiful swirls onto the baking sheet, you simply cover them loosely with plastic wrap and tuck them into the fridge. They can chill like that for up to 24 hours! When it’s time to bake them this way, just let them sit out on the counter for about 30 minutes to take the chill off, brush on that egg wash, and pop them into the hot oven as normal. It saves so much stress!
For more tips on timing your big feasts, sometimes I check out sites like Kitchen Sanctuary to see how others manage their ovens on Thanksgiving. Getting these done early means you just focus on the main event when everyone is hungry!
Serving Suggestions for Your Elegant Duchess Potatoes
The best part about making something this pretty is showing it off! These aren’t just for Tuesdays, though they’d certainly make a Tuesday feel special. I especially love serving these as part of my spread of Thanksgiving Side Dishes. They look divine next to a big roasted turkey or a beautifully seared steak.
They are also my go-to for any major event because they fit right in with sophisticated Dinner Party Sides. Truly, anything you’d serve with a classic scoop of mashed potatoes—roast beef, pork tenderloin, chicken—can handle the dramatic flair of these piped potato swirls. They just steal the show!
Storage and Reheating Instructions for Leftover Duchess Potatoes
Okay, let’s be real—sometimes we make too much, or maybe you just want leftovers! If you have any perfect Duchess Potatoes left over, don’t even *think* about using the microwave. Microwaving brings back the steam, and steam is the enemy of crispiness. Nope. We have to treat them right!
Pop the leftovers into an airtight container and refrigerate them for up to three days. When you are ready to bring them back to life, the crisp edges are our priority. Pop them directly onto a baking sheet and reheat them in a 350°F oven until heated through and slightly crunchy again—about 10 to 12 minutes. If you have an air-fryer, even better; a few minutes in there will crisp them up beautifully. You can find some genius ways to use up other scraps over at my post on leftover mashed potato pancakes!
Frequently Asked Questions About Duchess Potatoes
I figured you might have some questions brewing because these aren’t your everyday mashed potatoes! I get asked all the time how to get that perfect texture and look. As always, I’ve tested these questions right here in my own kitchen so I can give you the really solid answers you need to feel confident baking these Gourmet Potato Side dishes.
What if I cannot pipe my Duchess Potatoes?
Oh, please don’t let the piping bag scare you off! If you don’t have one, or if you’re just feeling like keeping things simple, you have options! After you mix the potato base, just use two regular spoons—sort of scoop and drop—to make rustic mounds directly onto your baking sheet. They might not look as perfectly swirled, but they still get that wonderful crispy edge and creamy center. They are just as delicious, I promise!
Which potatoes yield the fluffiest Duchess Potatoes?
For the absolute fluffiest results, you should absolutely stick to starchy potatoes. That means Russets or Idaho potatoes are the champions here. Their high starch content absorbs the butter and egg yolk beautifully, giving you that light, fluffy interior we are aiming for. Avoid waxy potatoes like Yukon Golds if you want that signature pillow-soft texture inside the swirl.
How do I prevent my Duchess Potatoes from becoming watery?
This is probably the most critical technique tip for achieving great Piped Mashed Potatoes! Water is the enemy of crispness. After you drain those cooked potatoes completely, put them back in the hot, empty pot for a minute over low heat. Keep stirring them! You are literally cooking off the residual steam and moisture. Once they feel dry to the touch, they are ready to be mashed and mixed. If you skip that one step, they can get a little soupy.
PrintEasy & Elegant Duchess Potatoes Recipe

Create restaurant-style Duchess Potatoes at home. This recipe yields creamy, fluffy interiors with perfectly golden, crispy edges, perfect for any special occasion.
- Prep Time: 20 min
- Cook Time: 25 min
- Total Time: 45 min
- Yield: 6 servings 1x
- Category: Side Dish
- Method: Baking
- Cuisine: French
- Diet: Vegetarian
Ingredients
- 2 pounds Russet potatoes, peeled and quartered
- 1/2 cup unsalted butter, softened
- 1/2 cup heavy cream, warmed
- 2 large egg yolks
- 1/2 teaspoon salt
- 1/4 teaspoon black pepper
- Pinch of nutmeg
- 1/4 cup grated Parmesan cheese (optional, for flavor variation)
- 1 large egg, beaten (for egg wash)
Instructions
- Place the peeled and quartered potatoes in a large pot and cover with cold, salted water. Bring to a boil and cook until the potatoes are very tender, about 15 to 20 minutes.
- Drain the potatoes completely. Return them to the hot, empty pot over low heat for one minute, stirring constantly to dry them out slightly. This step helps prevent watery potatoes.
- Mash the potatoes thoroughly until completely smooth. You can use a potato ricer or a hand masher for the best texture.
- In a separate bowl, mix the softened butter, warm heavy cream, egg yolks, salt, pepper, and nutmeg. If using, mix in the Parmesan cheese now.
- Add the butter mixture to the mashed potatoes. Mix until just combined and smooth. Do not overmix, as this can make the potatoes gluey. The mixture should be thick enough to hold its shape.
- Preheat your oven to 400°F (200°C). Line a baking sheet with parchment paper.
- Transfer the potato mixture to a large piping bag fitted with a large star tip (like a Wilton 1M). If you do not have a piping bag, you can use a large zip-top bag with a corner snipped off, or simply drop spoonfuls onto the baking sheet for a rustic look.
- Pipe mounds or swirls onto the prepared baking sheet, leaving about 1 inch between each one.
- Brush the tops of the potato swirls lightly with the beaten egg wash. This promotes browning and crispness.
- Bake for 20 to 25 minutes, or until the edges are golden brown and crisp. Serve immediately for the best texture.
Notes
- For the creamiest texture, use a potato ricer instead of a standard masher.
- You can prepare the piped potatoes up to 24 hours ahead. Place the piped mounds on the baking sheet, cover loosely with plastic wrap, and refrigerate. Before baking, let them sit at room temperature for about 30 minutes, then apply the egg wash and bake as directed.
- If you skip the piping bag, use two spoons to drop rustic mounds onto the sheet. They will still bake up crispy on the edges.
Nutrition
- Serving Size: 3 swirls
- Calories: 280
- Sugar: 2
- Sodium: 250
- Fat: 18
- Saturated Fat: 11
- Unsaturated Fat: 7
- Trans Fat: 0
- Carbohydrates: 27
- Fiber: 3
- Protein: 5
- Cholesterol: 95