
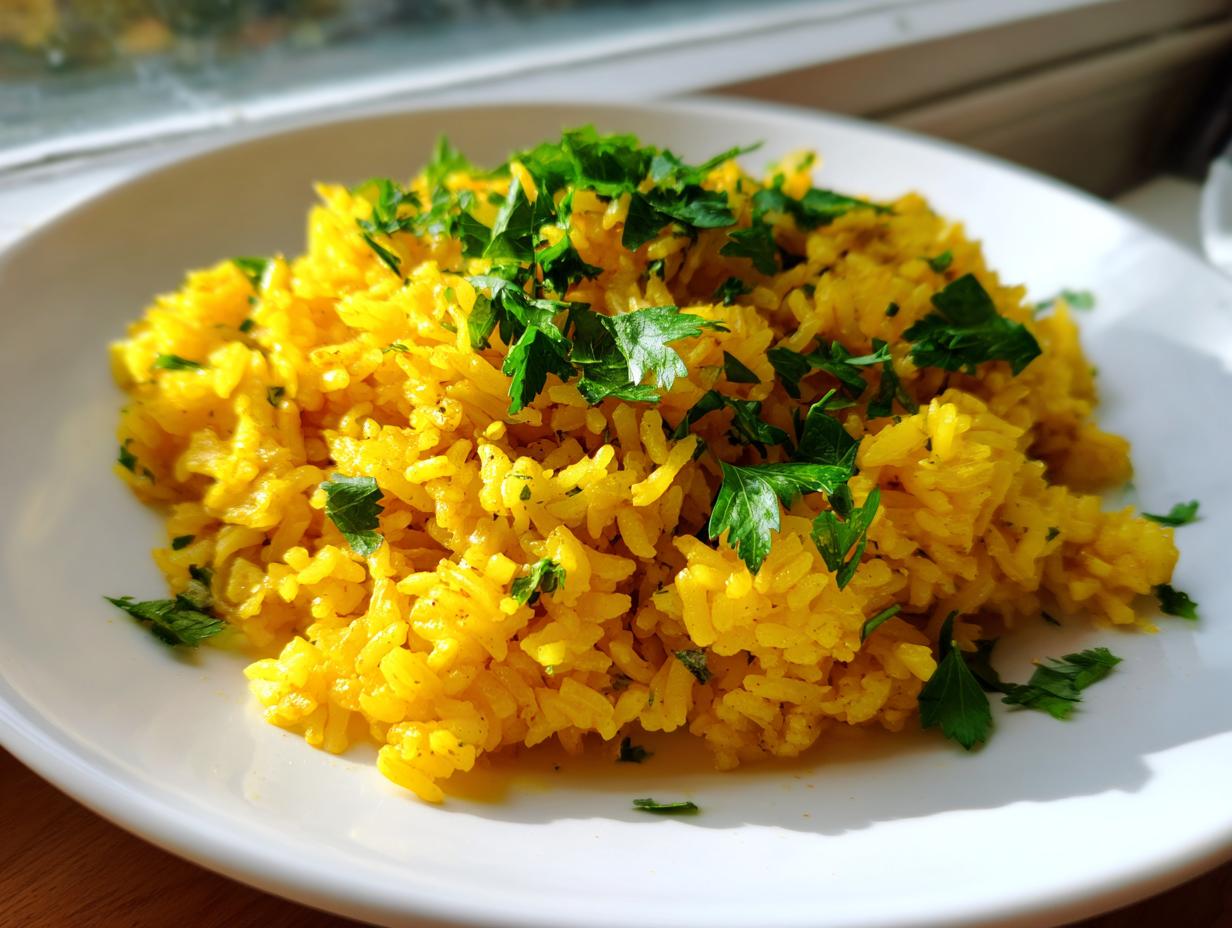
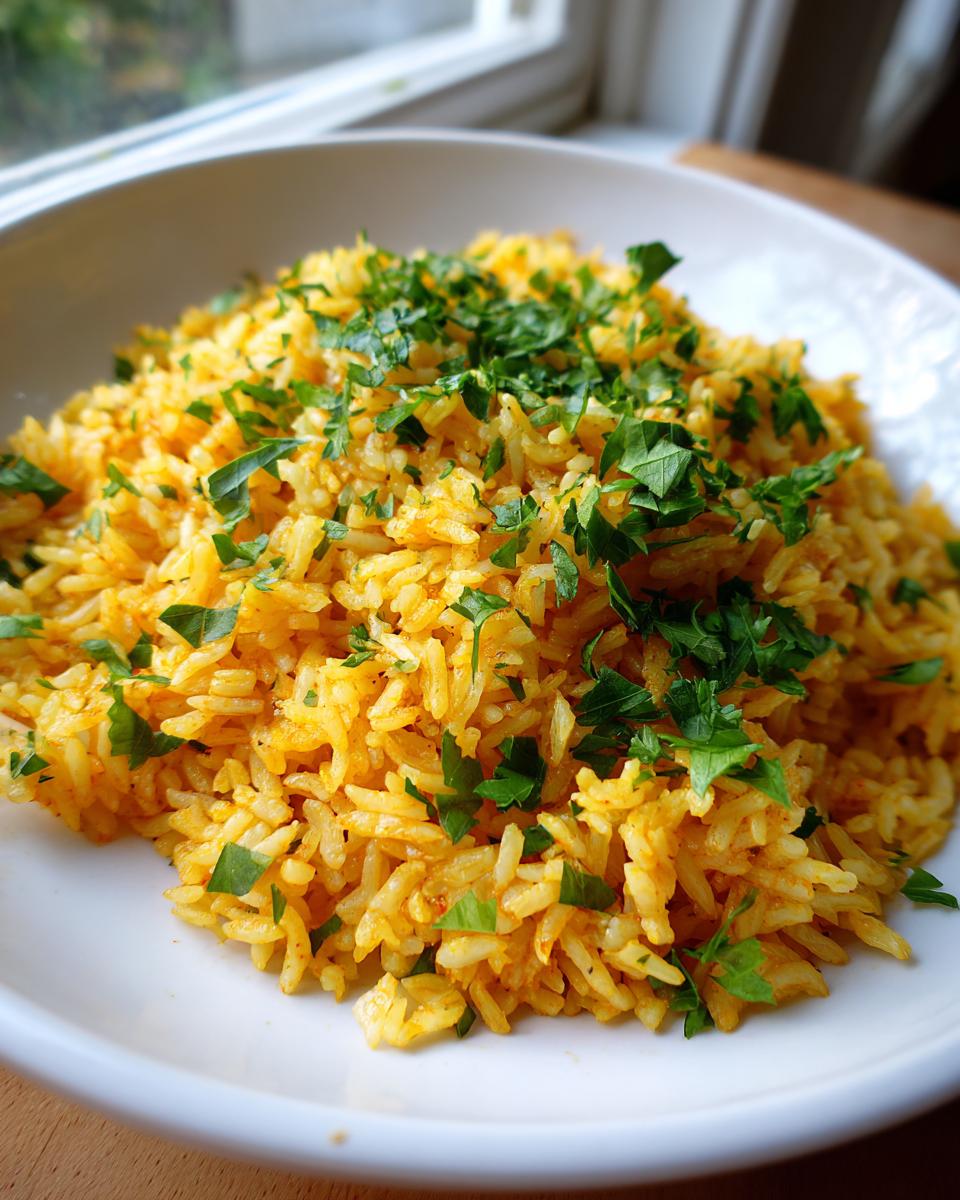
Sometimes, the best way to cheer up a plate—and your whole mood—is with a splash of brilliant color! We all know Bliss Batter is about those cozy, classic bakes, but my commitment, shared by founder Claire Sterling, is to make sure every recipe here is foolproof and accessible, even when we step into savory territory. That’s why I’m so excited to share my **Easy Garlic Butter Turmeric Rice**. Wow, this simple turmeric rice hits every mark: it’s incredibly flavorful, cooks up in about thirty minutes, and gives you that gorgeous, sunshine-yellow color that just screams happy eating. Trust me, this is the easiest side dish upgrade you’ll make all week! If you are looking for more quick meal ideas, check out my favorite Easy Weeknight Dinners collection.
- Why This Garlic Butter Turmeric Rice Is Your New Weeknight Staple
- Essential Ingredients for Flavorful Turmeric Rice
- Step-by-Step Instructions for Your One Pot Turmeric Rice
- Ingredient Notes and Substitutions for Turmeric Rice
- Expert Tips for the Best Rice Side Dish for Curry
- Serving Suggestions and Pairing Your Turmeric Rice
- Storage and Meal Prep Yellow Rice
- Frequently Asked Questions About Turmeric Rice
- Share Your Golden Turmeric Rice Creation
Why This Garlic Butter Turmeric Rice Is Your New Weeknight Staple
Honestly, who has time for fussy side dishes during the week? That’s the beauty of this recipe! We’re talking about a complete, flavorful, and vibrant side dish on your table in about 30 minutes total. That’s why this **Golden Turmeric Rice Recipe** is designed to be a true keeper. It’s a classic one-pot stovetop method—so cleanup is honestly a breeze. I love how the butter and garlic create this incredible, savory base before the turmeric even joins the party. It truly makes every meal feel brighter. Claire always says even simple sides should bring joy, and this **Quick 30 Minute Rice Recipe** certainly delivers on that promise!
Achieving Fluffy Turmeric Rice Every Time
Texture is everything with rice, right? For that perfect, non-gummy outcome, you absolutely need to rinse your basmati rice first. When you rinse away that excess surface starch, you are guaranteeing yourself that beautifully **Fluffy Basmati Rice with Turmeric**. Give the grains a couple of good rinses, shaking until the water runs mostly clear. This one simple step is non-negotiable for the fluffiest grains!
Essential Ingredients for Flavorful Turmeric Rice
Okay, let’s talk about what makes this rice pop! The ingredient list is so short, which just proves you don’t need a pantry stocked floor-to-ceiling to make something delicious. Since every component counts here, we need to be precise about the prep. You’ll start with just one tablespoon of butter or olive oil—whatever you have on hand—for sautéing a small, finely chopped yellow onion. Don’t skip that onion, it builds a beautiful, sweet base!
Next up is the incredible trio: minced garlic, the star ground turmeric, and your salt and pepper. Be very careful with the garlic! We only cook it for one minute right after the onion—we want it fragrant, not brown and bitter. You’ll use 1 1/2 cups of basmati rice, and remember what I said? Rinse it thoroughly! For the liquid, 2 1/4 cups of water or broth are perfect for absorption. If you want a little brightness at the very end, keep the fresh lemon juice and parsley handy; they act like little flavor exclamation points!
Step-by-Step Instructions for Your One Pot Turmeric Rice
Alright, deep breath! This entire process feels so calm because it really is a set-it-and-forget-it situation once the heat is on. This is why I always call this my favorite **One Pot Turmeric Rice** method. We’re making magic right here in one saucepan, so keep that medium saucepan handy and ready to go! We’re moving fast in the beginning, so you’ll want everything prepped before you turn on the stove.
Sautéing Aromatics for Aromatic Spiced Rice
First things first: melt your butter or heat your oil over medium heat. Now, toss in that finely chopped onion. You need to let that sweat out until it’s soft, which takes about four minutes. Don’t rush this part; the softened onion sweetens the whole dish! Immediately after that, drop in your minced garlic. Here is my big tip for garlic: watch it like a hawk! You only want about 60 seconds here until you can smell that beautiful, pungent aroma. If that garlic starts turning brown, you’ve gone too far, so be ready!
Simmering and Steaming the Turmeric Rice with Garlic and Onion
Once the garlic is singing, toss in your rinsed basmati rice, turmeric, salt, and pepper. Keep stirring constantly for a full minute—we are toasting the rice slightly, which really helps it keep its shape later on. This is key for that fantastic texture in our **Easy Yellow Rice Side Dish**.
Next, pour in your water or broth and bring the whole pot to a rolling boil. The minute it starts bubbling happily, turn that heat down to the absolute lowest setting you have. Cover it super tightly. Seriously, that lid stays on for 15 full minutes. After 15 minutes, turn the heat completely OFF. This is the second secret step: let it stand, still covered, for 10 more minutes. That extra time steams everything perfectly and guarantees fluffiness. If you lift that lid early during the resting phase, you’ll get sad, mushy rice. Trust me on the resting time!
When time is up, take off the lid, fluff gently with a fork (never a spoon!), and stir in that optional squeeze of fresh lemon juice. A sprinkle of parsley and you are ready to go! If you want to see more easy meal ideas that come together quickly, jump over to my Simple Lunch Recipes collection.
Ingredient Notes and Substitutions for Turmeric Rice
Since this recipe relies on just a few players, making smart swaps can really tailor it to your taste! The recipe calls for water or broth, but oh my goodness, if you want to dive headfirst into that rich, slightly tropical flavor—which is amazing next to a spicy curry—swap out half that water for coconut milk. It creates this dreamy, creamy texture that hints at a wonderful pumpkin curry recipe you might be planning for dinner!
For the fat, if you don’t have plain butter or olive oil, try using ghee instead. Ghee adds this amazing, nutty depth that complements the turmeric so well without changing the texture at all. Just remember, since we are building flavor quickly in the first few minutes, using ingredients you love really pays off here!
Expert Tips for the Best Rice Side Dish for Curry
You asked how to get that gorgeous, almost glowing color—you want **How to Make Brilliant Yellow Rice**, and it’s all in the timing with the turmeric! Make sure you toast the spice with the rice briefly before adding liquid, as I mentioned in the instructions. That little bit of dry heat really blooms the color so it distributes beautifully throughout the *turmeric rice*.

Here’s a real pro tip for you: if you are using basmati rice that has been sitting in your pantry for a long, long time (like those older bags), it can sometimes be a bit drier and absorb more liquid than fresh rice. If you know your rice is older, add about two extra tablespoons of broth or water to the pot before bringing it to the boil. This makes sure you still get that wonderful soft fluffiness and not crunchy bottoms.
This rice is truly designed to shine next to something rich and spicy! It’s the absolute best rice side dish for curry because the mild garlic butter cuts through the heat beautifully. Whether you’re serving it alongside a creamy vegetable curry or a spicy chicken dish, this golden glow makes the plate look instantly special, even if dinner rushed you tonight.
Serving Suggestions and Pairing Your Turmeric Rice
Now that you have this stunning, naturally bright *turmeric rice*, you have to serve it with something equally wonderful! The buttery, slightly earthy flavor is just begging to stand up to bold dishes. It pairs unbelievably well with simple grilled chicken or pork chops—the rice adds all the complexity you need for an otherwise plain protein.
If you’re going savory and earthy, try it next to a big platter of roasted vegetables, maybe some carrots and sweet potatoes. Don’t forget that tiny squeeze of lemon juice we added? That finish turns into the perfect counterpoint when you serve the **Lemon Infused Turmeric Rice** next to roasted mains. You can find some great inspiration for roasting over in my roast chicken with vegetables post!
Storage and Meal Prep Yellow Rice
The best news about this **turmeric rice** is how wonderfully it keeps! It’s practically begging to be part of your weekly routine. Once it’s completely cooled down—and I mean *completely* cooled—pop any leftovers into a proper airtight container. It holds up beautifully in the fridge for about three to four days. Seriously, this batch-cook friendliness makes it an ideal candidate for **Meal Prep Yellow Rice**!
When you’re ready to eat it later, the secret to keeping it fluffy when reheating is moisture. Don’t just blast it in the microwave dry. Add just a tiny splash of water or broth—maybe a teaspoon per serving—before heating briefly. This steams the grains right back up so they feel like they were just made on the stovetop!
Frequently Asked Questions About Turmeric Rice
I always get so many great questions when one of my savory recipes pops up! People want to make sure their **turmeric rice** comes out just as beautiful and fluffy as mine does. Here are a few things I hear most often from folks trying this recipe for the first time.
Can I use brown rice instead of basmati for this healthy vibrant rice side?
That’s a great question for those watching their intake! You absolutely *can* use brown rice, but you have to adjust your expectations and your liquid ratio. Brown rice is much heartier and takes way longer to cook. If you swap it in, you’ll need to increase the cooking time on low heat to about 40 or 45 minutes, and you’ll likely need about a half-cup more liquid than listed here. I still recommend the basmati for the 30-minute stovetop method, but brown rice works if you have the extra time!
I love spice! How can I adjust this recipe to make it spicier?
I adore a little heat, too! Turmeric itself is earthy, not spicy, so you need to add something else. The easiest way is to sneak in a pinch of cayenne pepper right when you are adding the turmeric and salt. Start with just 1/8 teaspoon; you can always add more next time. Or, for a fresh kick, dice up a tiny bit of jalapeño or serrano pepper and sauté it right alongside your onion in step one. That gives you a beautiful, slow heat as you eat!
Can I use my Instant Pot for this turmeric rice recipe?
Yes, you totally can convert this to a quick Instant Pot meal, which is great for meal prep! Since this recipe is designed for the stovetop steam-and-rest method, you’ll want to use a 1:1 ratio of rice to liquid (so 2 1/4 cups of broth for 1 1/2 cups of rice). Sauté the onion and garlic right in the pot. Stir in the rice and spices. Add the liquid, salt, and pepper, lock the lid, and cook on HIGH pressure for 4 minutes. Then, you MUST let it naturally release for 10 minutes before venting the rest of the pressure. Fluff and add your lemon juice after that!
Why does my rice sometimes stick to the bottom?
That usually happens for two reasons: either your heat was slightly too high during the simmer (even on the lowest setting, some stoves run hot!), or you didn’t toast the rice long enough when the spices were added. Making sure you stir that rice and turmeric for a full minute after adding it to the fat helps coat the grains and protects them from sticking right away. If you’re having trouble, make sure you’re using a good heavy-bottomed saucepan!
If you have any other burning questions about getting this recipe perfect, or if you just want to share five stars with me, please reach out through my contact page. Happy cooking!
Share Your Golden Turmeric Rice Creation
Now that you have your stunning, bright, flavorful *turmeric rice* warming up your kitchen, I truly hope you loved how easy it was to bring this color to your table! Honestly, sharing your culinary successes is the best part of being in the kitchen. It makes all my testing and recipe development worth it!
I built Bliss Batter on the idea of joyfully accessible food, and nothing makes me happier than seeing you succeed with these simple dishes. So please, take a minute and let me know what you thought! If you made the **Easy Garlic Butter Turmeric Rice**, please drop a rating down below—five stars if it earned them! I read every single comment and they help me refine this recipe even further for everyone else.
Did you try the coconut milk swap? Did you serve it with curry or maybe some roasted chicken? Don’t just tell me about it, *show* me! Snap a quick photo of your golden creation and tag me on social media. I absolutely love scrolling through and seeing how you’re bringing these simple, happy dishes into your own dinner routine. If you’re curious about how I protect all your lovely comments and shared data, take a peek at the privacy policy. Happy eating, and I can’t wait to hear all about your beautiful rice!
PrintEasy Garlic Butter Turmeric Rice
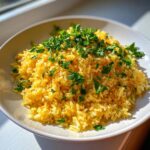
Make this simple, fluffy turmeric rice side dish flavored with garlic and butter. It cooks quickly on the stovetop and provides a vibrant golden color for any meal.
- Prep Time: 5 min
- Cook Time: 25 min
- Total Time: 30 min
- Yield: 4 servings 1x
- Category: Side Dish
- Method: Stovetop
- Cuisine: General
- Diet: Vegetarian
Ingredients
- 1 tablespoon butter or olive oil
- 1 small yellow onion, finely chopped
- 2 cloves garlic, minced
- 1 1/2 cups basmati rice, rinsed
- 2 1/4 cups water or low-sodium chicken broth
- 1 teaspoon ground turmeric
- 1/2 teaspoon salt, or to taste
- 1/4 teaspoon black pepper
- 1 tablespoon fresh lemon juice (optional)
- 2 tablespoons fresh parsley, chopped (for garnish)
Instructions
- Melt the butter or heat the oil in a medium saucepan over medium heat.
- Add the chopped onion and cook until softened, about 4 minutes.
- Add the minced garlic and cook for 1 minute until fragrant. Do not let the garlic burn.
- Stir in the rinsed basmati rice, turmeric, salt, and pepper. Cook, stirring constantly, for 1 minute to toast the rice slightly.
- Pour in the water or broth. Bring the mixture to a boil.
- Once boiling, reduce the heat to the lowest setting, cover the saucepan tightly, and simmer for 15 minutes without lifting the lid.
- Remove the saucepan from the heat and let it stand, covered, for an additional 10 minutes. This step helps the rice steam and become fluffy.
- Fluff the rice gently with a fork. Stir in the fresh lemon juice, if using.
- Garnish with fresh parsley before serving.
Notes
- Rinsing the basmati rice removes excess starch, which results in fluffier grains.
- For a richer flavor, substitute half the water with coconut milk. This variation is great for pairing with curries.
- This recipe is a good component for your weekly meal planning, as it reheats well.
- If you are looking for quick dinner solutions, this pairs well with pre-cooked chicken or roasted vegetables.
Nutrition
- Serving Size: 3/4 cup cooked
- Calories: 210
- Sugar: 1
- Sodium: 350
- Fat: 4
- Saturated Fat: 2
- Unsaturated Fat: 2
- Trans Fat: 0
- Carbohydrates: 40
- Fiber: 1
- Protein: 4
- Cholesterol: 5