
Okay, ditch the smoker gods! Seriously, you don’t need a backyard smoker or a whole weekend dedicated to getting that perfect, deeply flavorful, pull-apart tender BBQ ribs experience. I’m Claire, and if there’s one thing I learned balancing event planning and my love for homemade happiness, it’s that legendary results should be accessible. This, my friends, is my absolute favorite oven BBQ ribs recipe designed right in my home kitchen. We are getting those classic, glorious, fall-off-the-bone results using just your regular oven. Trust me, every single recipe here is tested until it clicks, and these ribs are pure bliss sealed in foil!
- Why This Oven BBQ Ribs Recipe Delivers Fall-Off-The-Bone Ribs
- Homemade Barbecue Rub and Sauce for Perfect BBQ Ribs
- Step-by-Step Instructions for Oven BBQ Ribs Recipe
- Ingredient Notes and Substitutions for Your BBQ Ribs
- Tips for Perfect Baby Back Ribs in Oven Results
- Storage and Reheating Instructions for Leftover BBQ Ribs
- Frequently Asked Questions About Cooking Ribs Tender
- Estimated Nutritional Data for This Recipe
- Share Your Homemade BBQ Ribs Success
- Estimated Nutritional Data for This Recipe
- Share Your Homemade BBQ Ribs Success
Why This Oven BBQ Ribs Recipe Delivers Fall-Off-The-Bone Ribs
I know what you’re thinking: Are oven ribs actually good? YES! The secret sauce—or rather, the secret technique—is treating your oven like a super-low, cozy smoker. We are aiming for serious tenderness here, and this method guarantees it. It sounds simple, but the timing is everything.
- We use a very low temperature to gently break down the connective tissue.
- The tight foil wrapping keeps every bit of steam and flavor trapped inside.
Achieving Tender BBQ Ribs Using Only Your Oven
The magic number here is 275°F. That low and slow bake, wrapped up tight in foil like a little present (we call that the Texas Crutch in the cooking world!), keeps the meat bathing in its own juices. It coaxes those beautiful, connective tissues to break down completely. That’s how you get those enviable, perfectly cooked BBQ ribs that practically melt when you touch them. You get that incredible, rich flavor without stepping foot in the smokehouse!
Homemade Barbecue Rub and Sauce for Perfect BBQ Ribs
Flavor is non-negotiable when it comes to incredible BBQ ribs. I insist on making the dry rub and the sauce from scratch. Why? Because when you control every measurable ingredient, you control the final flavor profile! We aren’t relying on some jarred seasoning mix here; we’re building flavor layers that marry perfectly with that slow-cooked tenderness we achieved earlier. Plus, mixing up your own blend really lets you feel like a real BBQ pro! You know, flavors this good make me think of how delicious my crockpot bbq meatballs turn out every time—simple ingredients, massive flavor payoff.
Ingredients for the Homemade Barbecue Rub and Sauce
For the rub, you’ll need about a quarter cup of brown sugar, two tablespoons of smoked paprika—don’t skimp on the smoky part! Then we go in with a tablespoon each of kosher salt, black pepper, garlic powder, and onion powder. If you like a little kick, toss in that optional teaspoon of cayenne pepper for good measure. The sauce requires a bit more mixing: a full cup of ketchup forms the base, balanced by a half cup of apple cider vinegar and a quarter cup of honey for sweetness. Finish that off with two tablespoons of Worcestershire sauce and just one tablespoon of Dijon mustard. That’s it! You have everything you need for amazing homemade barbecue.
Expert Tips for Mixing Your Homemade Barbecue Rub
When you’re mixing that dry rub, don’t just pour the ingredients in and stir quickly! I always recommend taking a moment to really massage the brown sugar into the spices. Sometimes the molasses bits clump up, and we need them fully incorporated so they don’t burn or dissolve unevenly during the final glazing phase. Also, if you have an extra minute and want the spice flavor to pop, lightly toast the paprika and cayenne in a dry skillet for just 30 seconds before mixing it all together. It makes the whole kitchen smell amazing!
Step-by-Step Instructions for Oven BBQ Ribs Recipe
Alright, here is the part where we put all that glorious flavor to work! Following this precise oven BBQ ribs recipe is how you guarantee those restaurant-quality results right on your sheet pan. Pay close attention to the temperature shifts—that’s the secret to success for anyone aiming for those perfect, tender baby back ribs in oven. It’s incredibly satisfying to know you pulled this off easily, making it one of those wonderful easy weeknight dinners if you happen to prep ahead!
Preparing and Rubbing the Ribs
The very first thing you absolutely must do—and don’t skip this for the world—is flip those ribs over and take off that thin, papery membrane from the back. Trust me, if you leave that on, the meat won’t absorb the rub, and it turns chewy! Use a paper towel to grab the edge near one end, gently lift it up, and peel it right off. Once that’s gone, pat the entire surface of the meat very dry with paper towels. Now, grab that seasoned rub we made and go heavy! Don’t sprinkle it on; you need to press it firmly into the meat on both sides. Really make sure it adheres!
The Slow Cooking Phase to Achieve Fall-Off-The-Bone Ribs
Next, we wrap them up tight! Get a big sheet of heavy-duty aluminum foil—this is crucial for holding in the steam—and lay your rubbed ribs meat-side up on top. Wrap them snugly so no steam escapes; we want a sealed packet. Preheat your oven to a very gentle 275°F (135°C). Pop those foil packets onto a baking sheet and let them bake undisturbed for three full hours. This long, slow bath is exactly what makes them the most tender BBQ ribs you’ve ever had.
Glazing and Caramelizing the BBQ Ribs
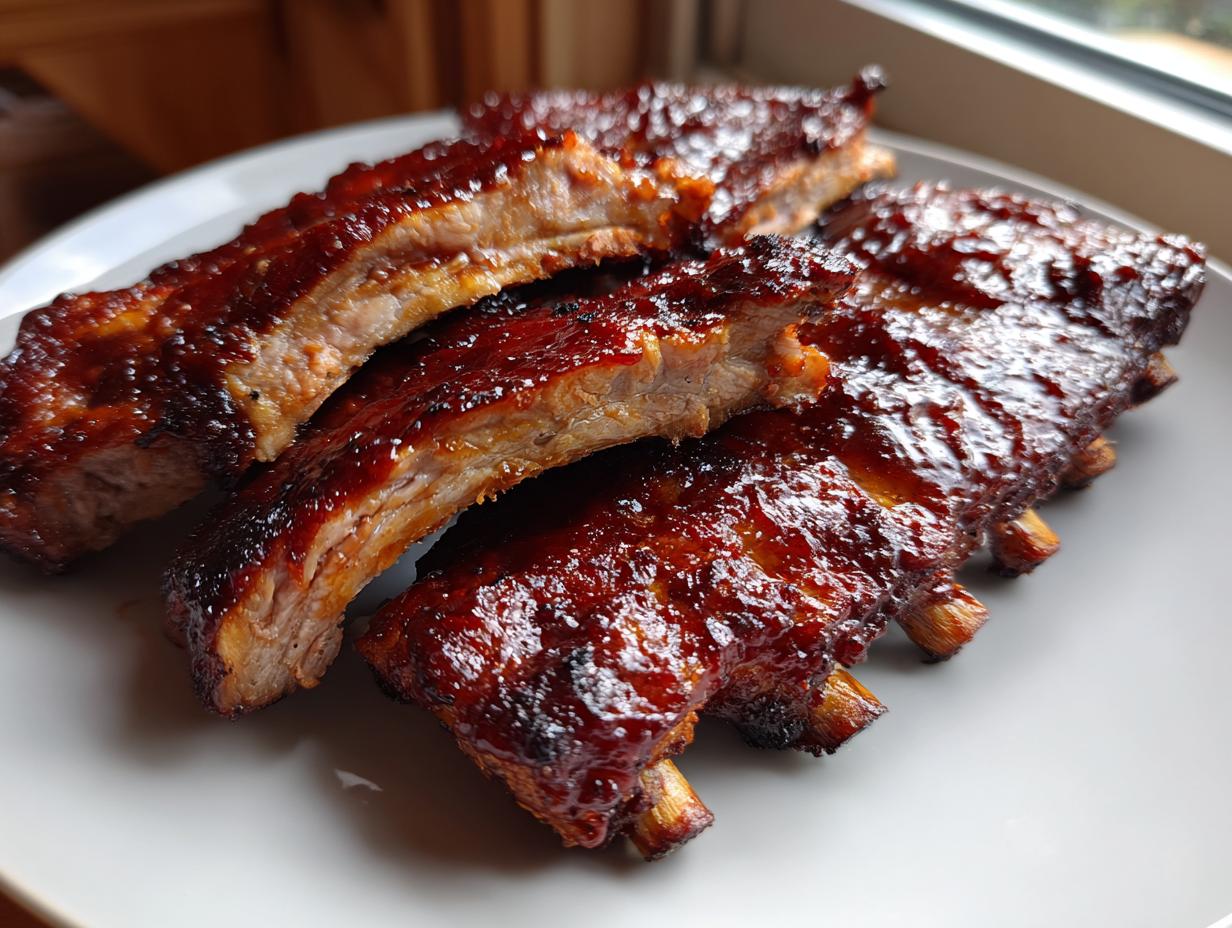
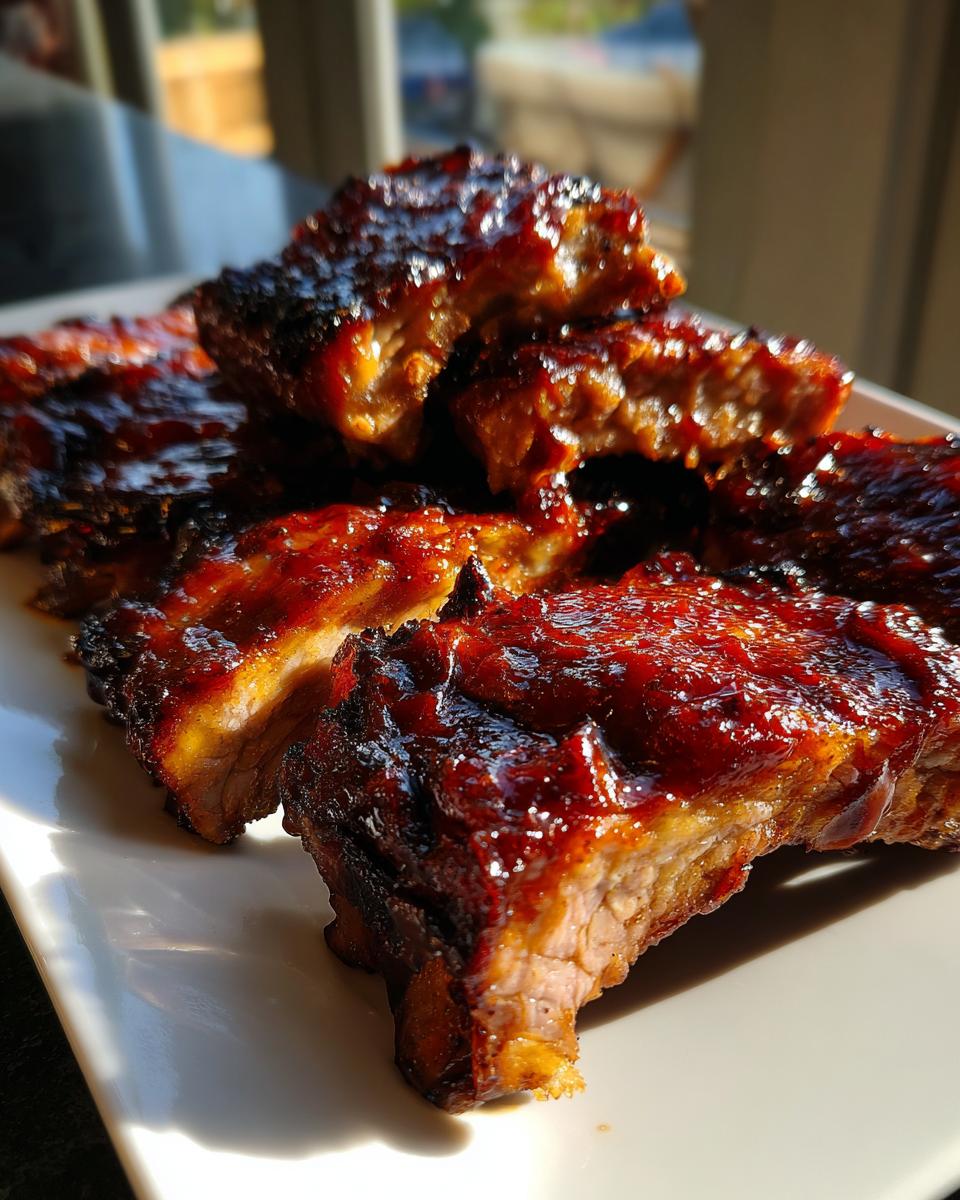
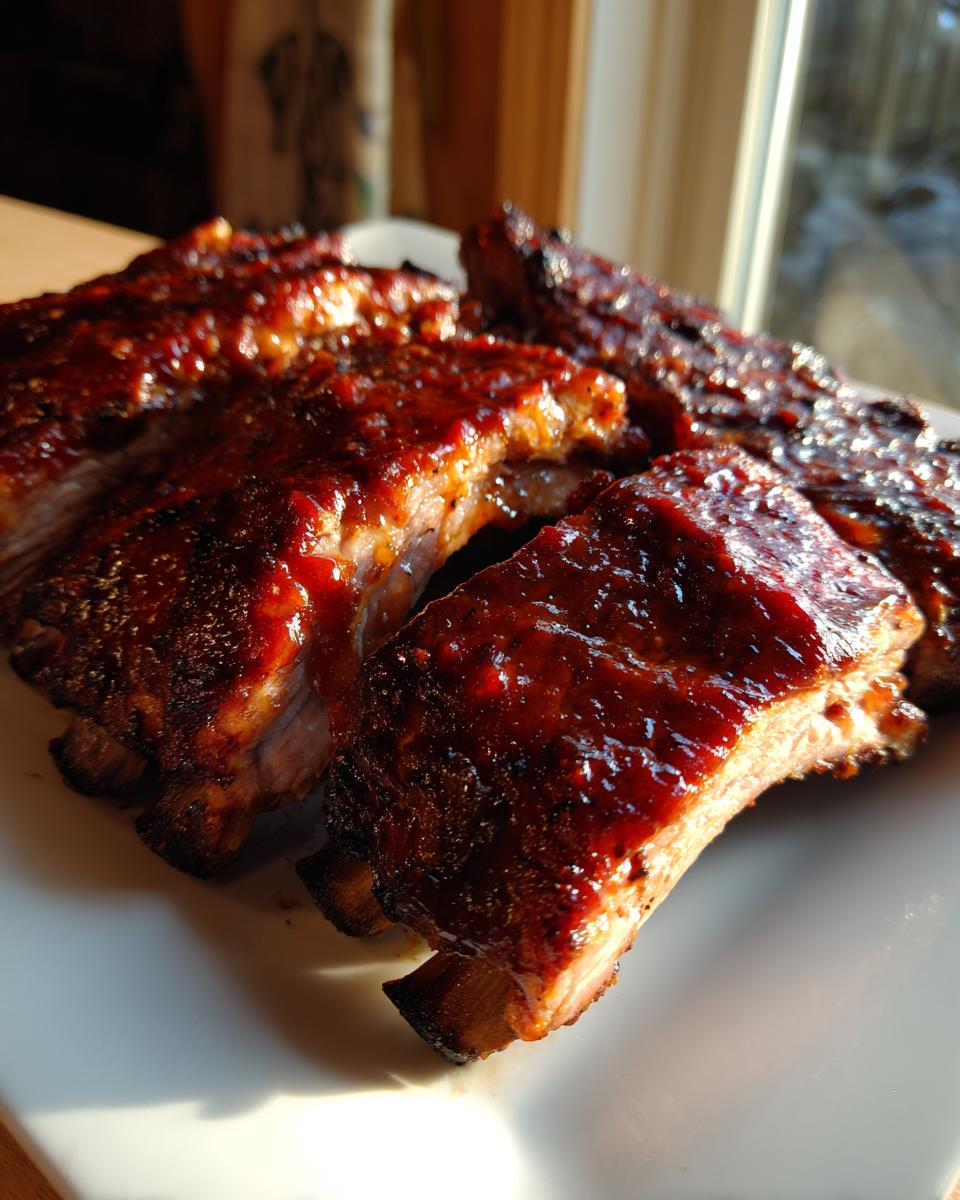
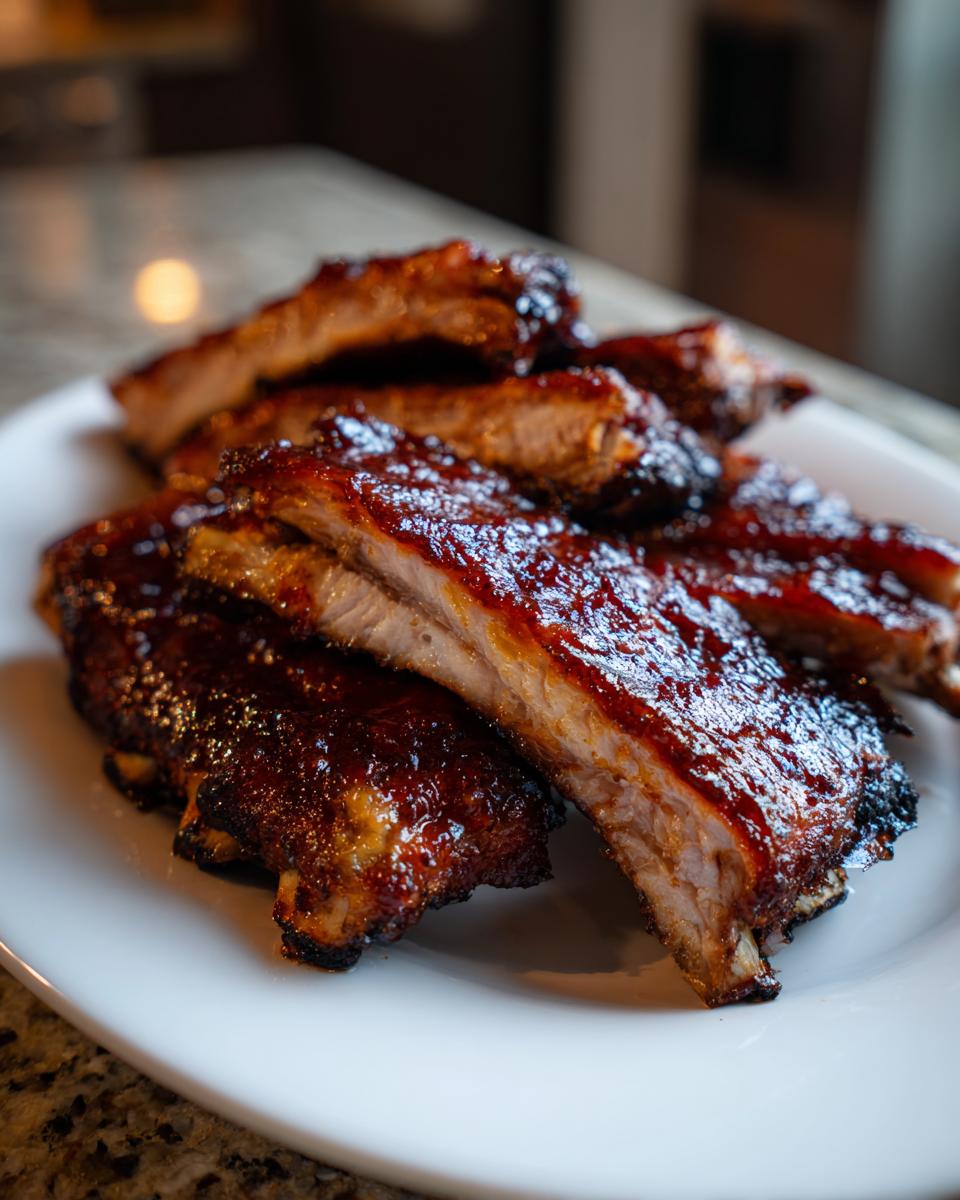
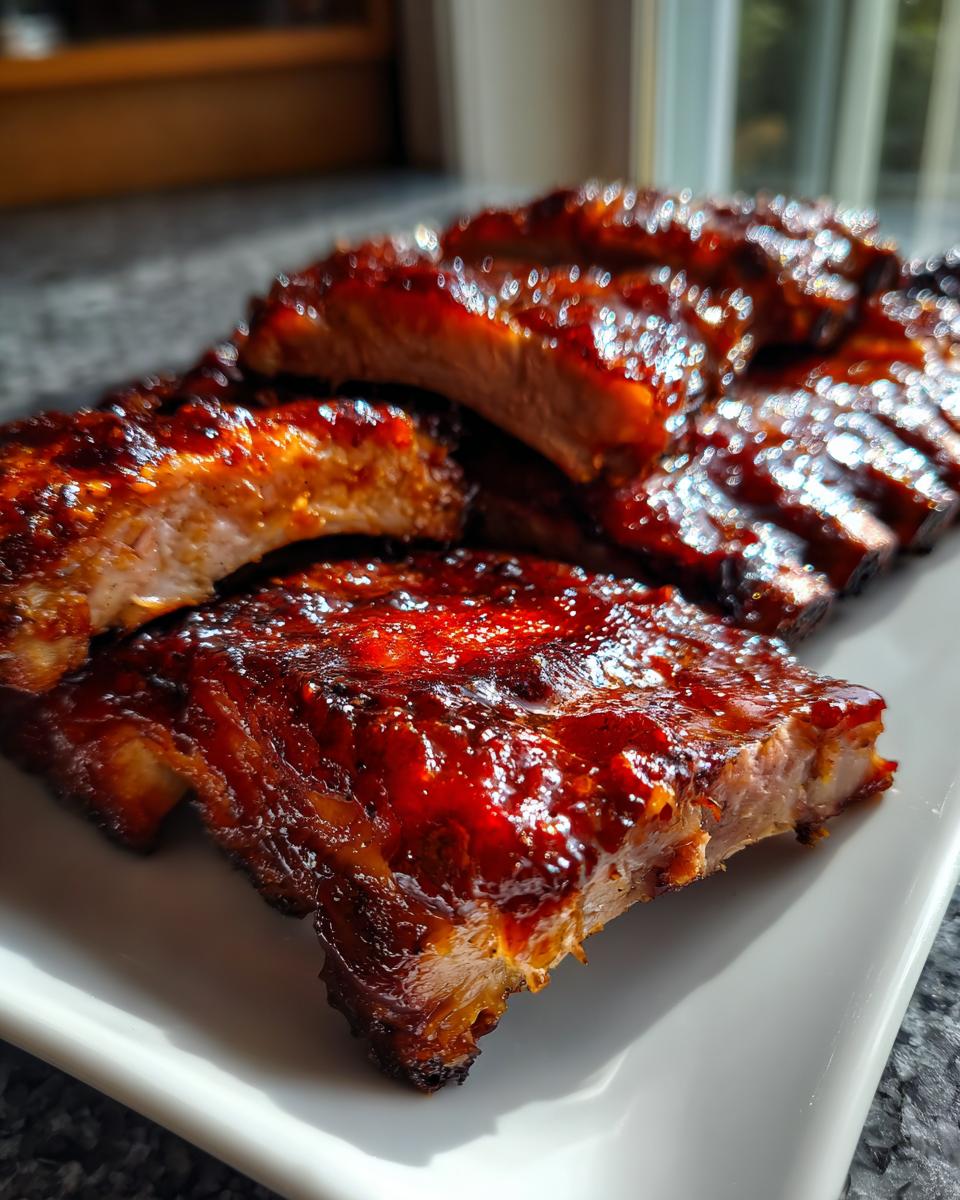
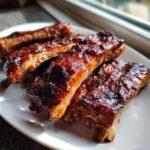
When the three hours are up, carefully pull those ribs out of the oven. Wear gloves if you can; they’ll be blazing hot! Unfold the foil packets gently and drain off any liquid that collected in there. Now, it’s time to add the sauce! Turn your oven way up to 400°F (200°C). Brush about half of that glorious homemade sauce all over the meat. Put the ribs back on the sheet pan, uncovered this time, and bake them for 15 minutes. Pull them out, brush on the rest of the sauce, and bake for just 10 to 15 more minutes. We are looking for sticky, slightly charred caramelization on that glaze—that’s the finish line for these amazing ribs!
Ingredient Notes and Substitutions for Your BBQ Ribs
We’ve covered the basics, but I just wanted to touch base on what happens if you need to tweak things or if you’re feeling adventurous! While this recipe is designed for simplicity and uses baby back ribs because they cook so evenly, you absolutely can make adjustments. If you happen to have spare ribs instead of baby backs, just know they are a bit thicker and might need an extra 20 or 30 minutes in that initial low-temperature bath to get truly tender. They are worth the extra time, though!
Now, for those of you who own a sous-vide precision cooker—oh my goodness, I experimented with that! If you have one, you can actually tenderize the ribs in the water bath at a lower temp before you even wrap them in foil for that final oven blast. It’s a whole extra step, but the texture is almost unbelievable. For everyday cooking, though, sticking to the simple foil wrap and the 275°F for three hours is foolproof and delivers that fantastic sticky finish we’re aiming for!
Tips for Perfect Baby Back Ribs in Oven Results
Once those beautiful, sticky, caramelized BBQ ribs are out of the oven, the hardest part is waiting—but you absolutely must let them rest! This might be my single most important tip for serving great ribs. If you slice right into them, all those delicious juices we worked so hard to keep locked in during the baking process will just run out onto your cutting board. Tear off a big piece of foil, tent it loosely over the rack, and leave them alone for a solid ten minutes. It lets the meat relax and reabsorb that moisture.
When it comes to checking doneness for those baby back ribs in oven, you can rely on a couple of things, since we aren’t grilling over direct heat. The visual cue is great—if the meat has shrunk back from the end of the bones about a quarter-inch, you are likely golden. Also, grab the middle of the rack gently with tongs and lift it slightly. If the rack bends significantly and the surface of the meat starts to crack, they are done and ready to pull apart. This is way more satisfying than poking them with a thermometer, I think!
Lastly, if you’re planning out your feast, remember that this method scales beautifully, which is why I love it for big parties. Don’t forget that organized meal planning is key for entertaining! If you are cooking multiple racks, try not to overcrowd the baking sheet during the final glaze phase; you want that hot air circulating so the sauce can caramelize properly instead of just steaming.
Storage and Reheating Instructions for Leftover BBQ Ribs
Oh, leftovers! If you are lucky enough to have any of these amazing BBQ ribs left over—which, honestly, feels like a culinary miracle—you need to treat them right when reheating them. We spent hours getting that perfect tenderness, and the last thing we want is dry, sad leftover meat! Since this recipe is so rich, even a small portion is satisfying the next day.
The absolute key here is moisture retention. If you just toss them naked back in the oven, they’ll toughen right up. For optimal results, you want to mimic that initial low-and-slow bake we did. Wrap the remaining ribs tightly in a fresh sheet of aluminum foil—this is super important to trap any steam. Pop that foil packet into an oven that’s set low, maybe 300°F, until they are just heated through, which usually takes about 15 to 20 minutes depending on how much you have.
But wait, we can’t stop there! That initial reheat gets the meat hot and tender again, but it misses that beautiful sticky glaze we developed. Once they are hot, unwrap them quickly, brush on a little bit of fresh homemade sauce if you have any leftover, or just a tiny bit of water or broth on them for moisture. Then, crank that oven up—we’re going back up to 400°F. Let them bake uncovered for just 5 to 8 minutes. This quick blast will caramelize the sauce again and give you that perfect, sticky, ‘just-made’ finish. It works so well, kind of like gently warming up a fantastic pot roast recipe without drying it out entirely!
If you’re storing them for later, make sure they cool down slightly before wrapping them tightly in foil or placing them in an airtight container. In the fridge, they should be great for about three to four days. If you freeze them, make sure they are wrapped really well in two layers of foil, and they’ll stay good for up to three months. When you thaw them in the fridge overnight, they reheat beautifully following that two-step process!
Frequently Asked Questions About Cooking Ribs Tender
I always get so many questions after someone tries this recipe for the first time! It’s true that figuring out the timing and prep steps for truly amazing, tender results can feel tricky, especially when you’re navigating a new oven BBQ ribs recipe. Cooking pork shoulder or trying to get those perfect *baby back ribs in oven* takes a little tweaking, so let’s run through the common hang-ups!
Is it necessary to remove the membrane before cooking BBQ ribs?
Oh yes, please, yes! I can’t stress this enough—removing that thin, silvery membrane from the back of the ribs is crucial if you want truly tender results. Without taking it off, the membrane turns into a tough, slightly chewy layer that prevents the heat and the glorious flavor from that homemade barbecue rub from penetrating the meat. It’s like putting wrapping paper on a present and then trying to eat through the wrapping! Take it off, and you’ll get meat that truly melts off the bone.
Can I use a different cut of meat, like pork shoulder, for this oven BBQ ribs recipe?
That’s a great question! You certainly *can* try using pork shoulder (like a Boston butt) with this method, but you need to adjust your expectations for time significantly. Pork shoulder is much, much thicker than a rack of baby back ribs. While this oven BBQ ribs recipe calls for 3 hours at a low temp, you’d need closer to 5 or 6 hours, maybe even more, for the shoulder to break down properly and get tender. The rub will definitely work its magic, but be prepared for a much longer session in the oven!
What is the best way to ensure my baby back ribs in oven are not dry?
The number one insurance policy against dry meat here is the low and slow temperature combined with the tight foil wrap. Remember, we bake at that super gentle 275°F for three hours sealed up tight. That low heat ensures the tough collagen turns into gelatin slowly without evaporating all the moisture. When you finally open that foil, you need to see liquid in the bottom—that’s all the steam doing its job! If you are worried about sticking or keeping them moist later, you can always add about two tablespoons of apple juice or water into the foil packet right before sealing it up. It creates extra steam insurance for your baby back ribs in oven!
We put a lot of time into perfecting these techniques so you don’t have to worry. We want your experience to be as easy as whipping up one of our simple easy weeknight dinners!
Estimated Nutritional Data for This Recipe
Because we rely on simple, quality ingredients and you control the amount of sauce you slather on at the end, the nutrition can vary a bit, but here is what you can generally expect per serving (which is about a quarter of a rack):
- Calories: Around 650
- Fat: About 35 grams
- Protein: A hearty 45 grams!
- Carbohydrates: Roughly 40 grams (most of this comes from the honey/sugar in the sauce.)
- Sugar: Approximately 45 grams in total.
Just remember, these are estimates based on the recipe as written. If you go light on the sauce during the final glaze, you can easily shave off some of those sugar counts!
Share Your Homemade BBQ Ribs Success
I truly hope you loved making these tender delights as much as I love sharing them! Seriously, if you nail that fall-off-the-bone texture using just your oven, you need to tell me about it. Please leave a rating below on this oven BBQ ribs recipe and drop a comment telling me how they turned out at your table. Seeing your homemade happiness makes all the recipe testing worthwhile! Check out my About page to see why making food accessible like this is my passion!
PrintTender Oven BBQ Ribs with Homemade Rub and Sauce
Make fall-off-the-bone tender BBQ ribs using only your oven. This recipe includes a simple homemade dry rub and a sweet and tangy barbecue sauce for glazing.
- Prep Time: 20 min
- Cook Time: 3 hr 45 min
- Total Time: 4 hr 5 min
- Yield: 4 servings 1x
- Category: Main Course
- Method: Baking
- Cuisine: American
- Diet: None
Ingredients
- 2 racks (about 3 lbs total) baby back pork ribs
- 1/4 cup brown sugar
- 2 tablespoons smoked paprika
- 1 tablespoon kosher salt
- 1 tablespoon black pepper
- 1 tablespoon garlic powder
- 1 teaspoon onion powder
- 1 teaspoon cayenne pepper (optional)
- 1 cup ketchup
- 1/2 cup apple cider vinegar
- 1/4 cup honey
- 2 tablespoons Worcestershire sauce
- 1 tablespoon Dijon mustard
Instructions
- Prepare the rub: In a small bowl, combine the brown sugar, smoked paprika, kosher salt, black pepper, garlic powder, onion powder, and cayenne pepper. Mix well.
- Prepare the ribs: Remove the thin membrane from the back of each rack of ribs using a paper towel to grip the edge. Pat the ribs dry with paper towels.
- Apply the rub: Generously coat both sides of the ribs with the homemade barbecue rub. Press the rub into the meat.
- Wrap the ribs: Place each rack of ribs, meat side up, onto a large piece of heavy-duty aluminum foil. Wrap the foil tightly around the ribs to create a sealed packet.
- Slow cook in the oven: Preheat your oven to 275°F (135°C). Place the foil-wrapped ribs on a baking sheet. Bake for 3 hours. This slow cooking process helps achieve fall-off-the-bone ribs.
- Prepare the sauce: While the ribs cook, combine the ketchup, apple cider vinegar, honey, Worcestershire sauce, and Dijon mustard in a small saucepan. Bring the mixture to a simmer over medium heat, stirring occasionally. Reduce the heat to low and cook for 10 minutes until slightly thickened. Set aside.
- Glaze the ribs: Carefully remove the ribs from the oven and open the foil packets, draining off any accumulated liquid. Increase the oven temperature to 400°F (200°C).
- Brush the ribs generously with half of the homemade barbecue sauce. Return the unwrapped ribs to the baking sheet.
- Bake uncovered for 15 minutes. Brush with the remaining sauce and bake for another 10 to 15 minutes, or until the sauce is caramelized and sticky.
- Rest and serve: Remove the ribs from the oven. Let them rest for 10 minutes before slicing between the bones. Serve immediately. This method works well for those who prefer oven BBQ ribs recipe over grilling.
Notes
- For extra flavor, you can use a sous-vide precision cooker to tenderize the ribs before the oven step, though this recipe is designed to be simple.
- If you are focusing on meal planning for a large group, this recipe scales easily.
- If you are interested in low-carb options, you can substitute the honey in the sauce with a sugar-free alternative.
Nutrition
- Serving Size: 1/4 rack
- Calories: 650
- Sugar: 45
- Sodium: 850
- Fat: 35
- Saturated Fat: 12
- Unsaturated Fat: 20
- Trans Fat: 0
- Carbohydrates: 40
- Fiber: 2
- Protein: 45
- Cholesterol: 130