
Oh, there is nothing—and I mean *nothing*—like the scent of fresh, warm whole wheat bread filling up your kitchen! It’s the ultimate cozy vibe, isn’t it? If you’ve always been intimidated by baking bread because it seems fussy or complicated, I want you to take a deep breath. This loaf is remarkably soft, hearty, and just so simple to achieve, perfect for a beginner’s baking success story. I’m Claire from Bliss Batter, and my whole mission, detailed on our About Us page, is making sure you feel confident pulling something wonderful out of your oven.
We honor tradition here, but we ditch the stress. You deserve that perfect slice of homemade goodness without spending all day wrestling with stiff dough. With just a few pantry staples, you are going to create the best whole wheat bread you’ve ever tasted.
- Why This Easy Homemade Soft Whole Wheat Bread is a Must-Bake
- Gathering Ingredients for Your Whole Wheat Bread Loaf
- Step-by-Step Instructions to Bake Whole Wheat Bread
- Baking and Cooling Your Homemade Whole Wheat Bread
- Tips for Baking the Best Whole Wheat Bread Every Time
- Storage and Reheating Instructions
- Serving Suggestions for Your Fresh Whole Wheat Bread
- Frequently Asked Questions About Homemade Whole Wheat Bread
- Nutritional Estimates for This Whole Wheat Bread
Why This Easy Homemade Soft Whole Wheat Bread is a Must-Bake
Okay, let’s talk about why you need to drop everything and make this recipe right now. It’s everything you want in a sandwich loaf—wholesome, slightly sweet, and incredibly soft. I baked this blend dozens of times to make sure it worked for everyone, so trust me, it’s beginner-approved!

- It produces a light, airy crumb, which is rare for a 100% whole wheat recipe.
- The richness from the honey and butter just makes it taste *better* than the stuff in the plastic bag.
- It’s perfect for slicing thick for your next big dinner or lunch.
This loaf is wonderful on its own, or paired with something hearty like soup—you can find some of my favorite comforting meals over at my simple dinner page!
Perfect Texture for Sandwiches and Toast
The secret sauce here is using both whole wheat flour and all-purpose flour. The whole wheat brings that beautiful, nutty flavor and fiber we love. But that all-purpose flour steps in and keeps the crumb soft and not too dense or crumbly. Plus, the honey adds just enough chewiness!
Foolproof Recipe for Perfect Whole Wheat Bread
This is the kind of recipe I stand behind 100%. We’ve tested and re-tested it until it’s completely reliable. If you follow the rising times, you are going to end up with a gorgeous, soft loaf of whole wheat bread that looks professional but took almost no actual sweat from you. That’s what I call a win!
Gathering Ingredients for Your Whole Wheat Bread Loaf
Every great bake starts with preparing your ingredients, and with this whole wheat bread, the list is honestly super short and approachable! You probably have most of this in your pantry already. I always lay everything out on the counter before I even think about turning on my mixer. It just makes the whole process smoother because you never panic when you realize you missed the salt!
We need a cup of warm water—and I mean *warm*, not hot, or you’ll kill your yeast friends before they even get started. Then we grab that active dry yeast, some golden honey for sweetness, and melted butter for richness. Finally, for the structure, we use 1 1/2 cups of whole wheat flour blended with 1 1/2 cups of regular all-purpose flour, plus our essential teaspoon of salt.
Ingredient Notes and Substitutions
That warm water temperature is truly non-negotiable; aim for between 105°F and 115°F. If it’s too cold, the yeast won’t wake up; too hot, and you’ve made warm water soup! The honey is what gives this bread that subtle, comforting sweetness that balances the earthiness of that whole wheat flour. We use a 50/50 split of the flours to guarantee you get that bakery-soft texture we are aiming for!
Step-by-Step Instructions to Bake Whole Wheat Bread
Alright, time to get our hands messy! Baking whole wheat bread feels like magic, but it’s really just following a few key steps in the right order. Remember, this whole process is guided by the recipe notes I’ve worked out over time to ensure success. When you’re ready, I highly recommend checking out my tutorial on rustic pumpkin beer bread if you want another fun baking project once you master this one!
Activating the Yeast and Mixing the Dough for Whole Wheat Bread
First things first: wake up that yeast! Get your warm water (remember, 105°F to 115°F!) and honey together in your big bowl, sprinkle the yeast on top, and just let it hang out for about ten minutes. You want it nice and foamy—bubbles mean happy yeast, which means a fluffy whole wheat bread! Once it’s bubbly, stir in your melted butter. Then, start adding the dry ingredients. Dump in the whole wheat flour and salt first, mix briefly, and then slowly introduce the all-purpose flour until you just have a shaggy mess.
Kneading and First Rise Technique
This is the cardio part! Turn that shaggy dough out onto a surface dusted lightly with flour. Now, you knead for a good 8 to 10 minutes. You are looking for elasticity—the dough should start smooth and feel soft, not tear easily. If it’s sticking to your hands like crazy glue, add just a tiny sprinkle of all-purpose flour. Don’t overdo it, or the final loaf will be tough! Once it’s smooth, toss it into an oiled bowl, cover it up, and let it sit somewhere reliably warm for about an hour and a half, or until it has noticeably doubled in size.
Shaping and Final Proofing for Soft Whole Wheat Bread
Gently deflate that risen dough—don’t punch it too hard, we want to keep some of those air bubbles! Shape it into a neat log and settle it right into your greased 9×5 inch loaf pan. We let it rest one last time. This second rise is key for that soft top crust on your whole wheat bread. Cover it loosely and wait about 30 to 45 minutes. You know it’s ready for the oven when the dough crowns about an inch over the top edge of the pan. That’s your sign!
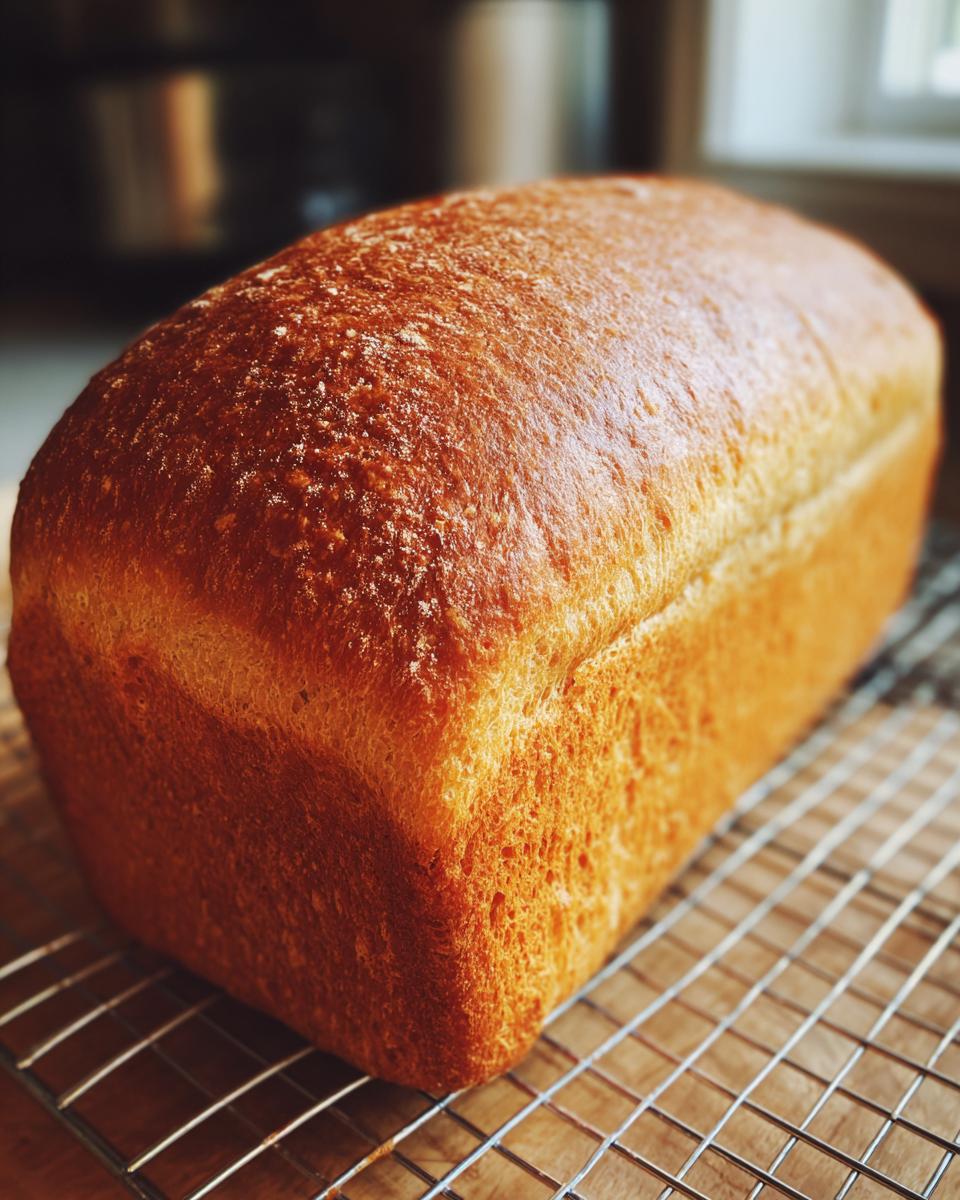
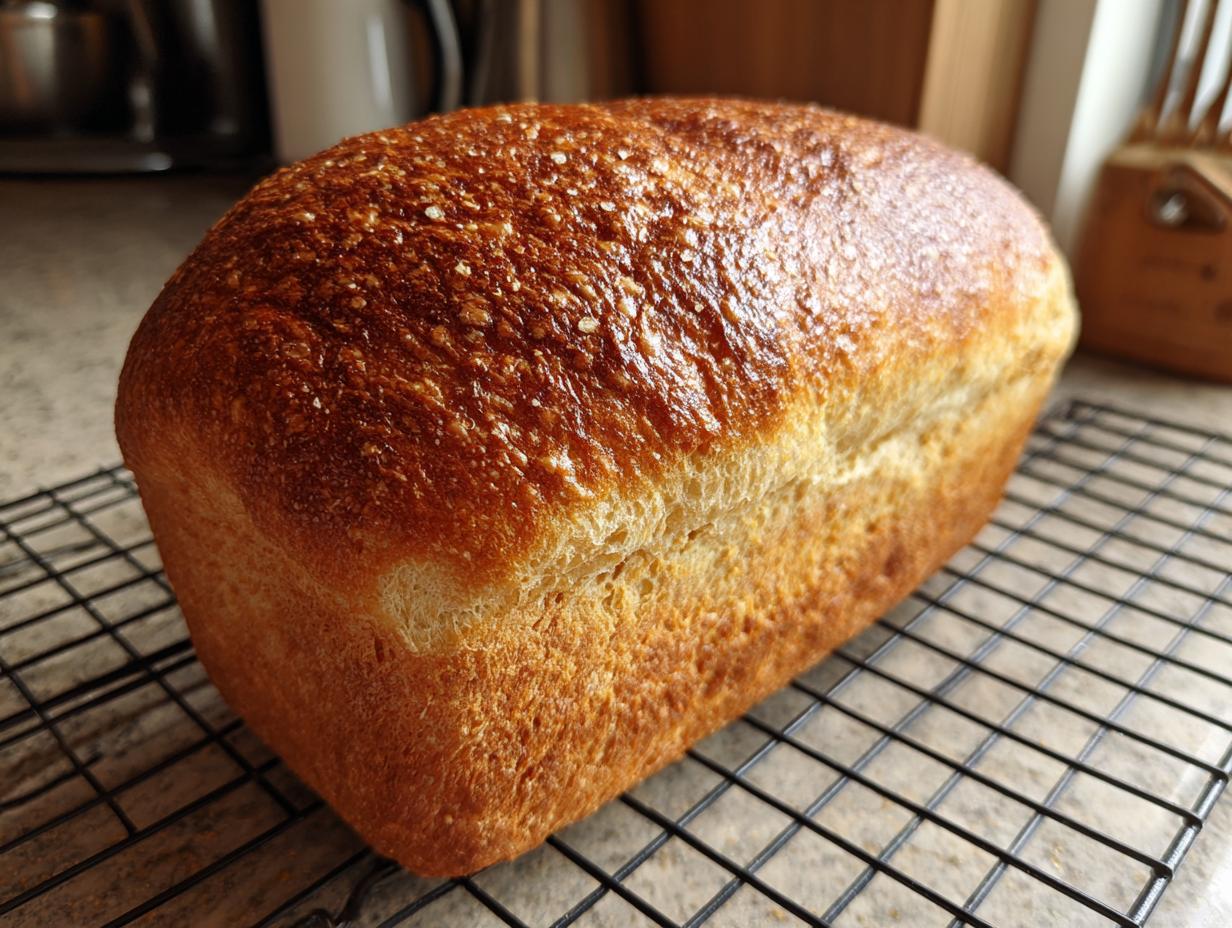
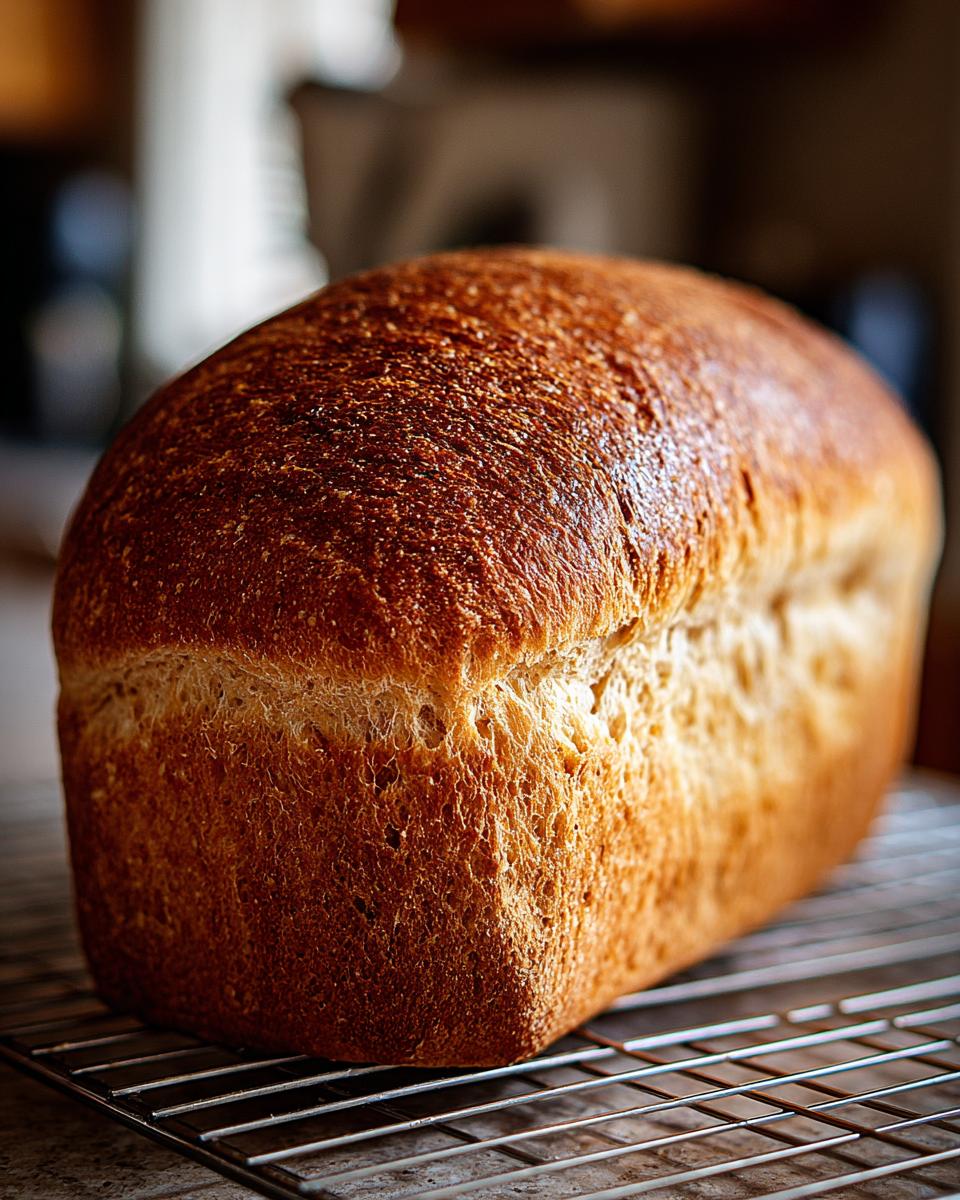
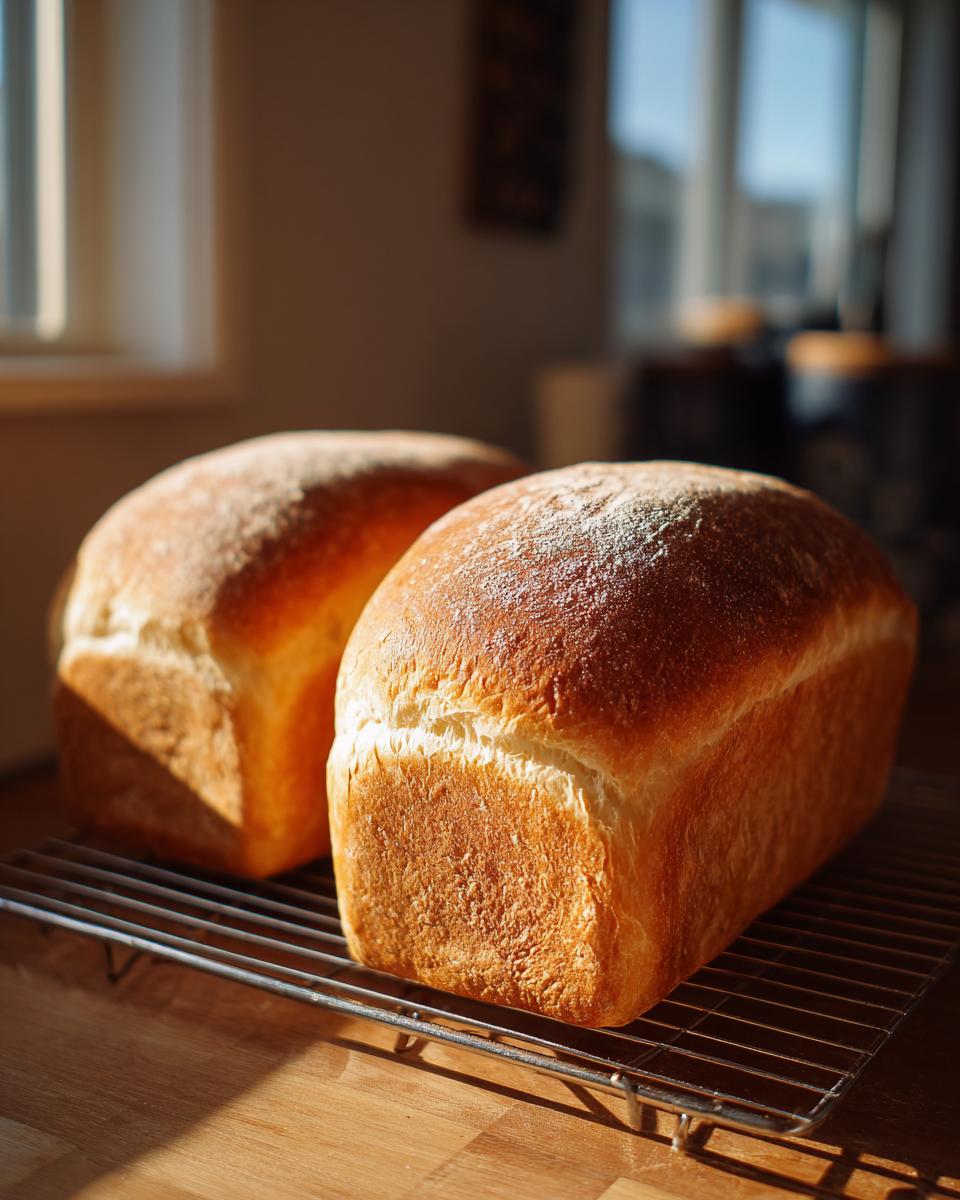
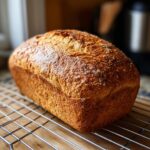
Baking and Cooling Your Homemade Whole Wheat Bread
Once your dough has that perfect final puff, it’s oven time baby! Preheat your oven to 375°F (190°C). We want it nice and hot when that loaf slides in. Bake the whole wheat bread for about 30 to 35 minutes. I always check by color first—it should be a beautiful, deep golden brown on top. But for true peace of mind, grab that instant-read thermometer! You’re aiming for an internal temperature of 190°F (88°C) right in the center. That tells you the structure is set perfectly.
The last, and I mean *most important* step, is cooling! When you pull it out, get that bread out of the pan immediately and set it on a wire rack. You absolutely MUST let it cool completely before you even think about slicing it. If you cut it hot, all that glorious moisture escapes, and your perfect loaf turns into a heavy, slightly gummy mess. Patience! If you want to explore another wonderful yeast recipe while you wait, check out my easy challah bread recipe.
Tips for Baking the Best Whole Wheat Bread Every Time
Even though this whole wheat bread recipe is super forgiving, there are a couple of my little tricks that elevate it from “good” to “I can’t believe I made this better than the bakery!” My biggest secret? It’s all in how you handle the flour before it even hits the bowl. Don’t just plunge that measuring cup right into your bag of whole wheat flour—that packs it in way too tightly, and you end up with dense bricks instead of soft loaves.
Instead, you need to spoon the flour lightly into your measuring cup first, and then use a straight edge—like the back of a knife—to level it off perfectly. This simple action gives you that light, airy crumb we love in sandwich bread.
Also, remember that honey note? If you want to experiment with that sweetness, try swapping one of the tablespoons of butter for a bit more honey. It really enhances the flavor profile! If you are looking for other moist bakes, my recipe for moist banana bread uses similar principles for texture!
Storage and Reheating Instructions
Now that you have this beautiful, naturally sweet loaf, you want to keep it right! If you have leftovers, wrapping the whole cooled loaf tightly in plastic wrap and then foil is the best way to keep it fresh for about three days at room temperature. If you slice it right away, it dries out faster, so only cut what you need!
If you do end up with slices that have gone slightly stale, don’t fret about throwing them out. A quick trip to the toaster or warming them in a 300°F oven for about five minutes brings that softness right back. It’s nearly as good as fresh! Speaking of wonderful moist treats, if you enjoyed this bread, you should try my moist banana bread recipe next week!
Serving Suggestions for Your Fresh Whole Wheat Bread
Honestly, this whole wheat bread is so good, it barely needs anything extra! A thick slice slathered with good quality salted butter while it’s still slightly warm is pure heaven. If you’re having it for breakfast, my homemade honey butter is divine with the honey notes in the bread.
But when dinner rolls around, this loaf is just begging to be dipped into something rich and savory. Seriously, try tearing off big chunks to mop up a bowl of my classic tomato soup recipe. It’s the perfect hearty pairing!
Frequently Asked Questions About Homemade Whole Wheat Bread
I always get so many questions popping up once people start baking this loaf! It’s totally normal when you move away from store-bought stuff. You want that perfect, soft whole wheat bread every time, right? Here are some of the things I hear most often from bakers just starting out.
Can I substitute all-purpose flour entirely with whole wheat flour in this whole wheat bread recipe?
You totally can technically, but I wouldn’t recommend it for this specific recipe if you want the softness. This recipe relies on that blend! If you use 100% whole wheat flour, the loaf will be much denser and heartier—more rustic. The all-purpose flour is what keeps our sandwich bread tender and less heavy.
How long does homemade whole wheat bread last?
If you wrap it tightly like I showed you—plastic wrap first, then foil—and keep it on the counter, you can expect it to stay reliably fresh for about three days. Honestly, my loaves never last that long, but that’s the general rule of thumb for homemade bread.
What is the best way to use up leftover whole wheat bread?
Oh, leftovers are the best excuse to bake other things! If the slices aren’t quite perfect for a sandwich anymore, they make the most amazing French toast—the honey flavor really shines through there. Or, you can let them fully dry out and blitz them in the food processor for homemade bread crumbs. They’re fantastic for topping casseroles or making the best grilled cheese, like the one on my ultimate grilled cheese post!
Nutritional Estimates for This Whole Wheat Bread
Okay, let’s talk fuel for a minute! Because this is homemade bread, remember that these numbers are just an estimate based on the ingredients listed here, alright? Different honeys and flours will change things slightly depending on what you use and how thick you slice it. But generally, you are looking at something really wholesome for a single slice serving with the following breakdown:
- Calories: 120
- Fat: 2g
- Carbohydrates: 23g (with 3g Fiber)
- Protein: 4g
- Sodium: 150mg
A slice of this soft loaf is far better than most store-bought options! It’s a great, reliable base for your daily meals.
PrintEasy Homemade Soft Whole Wheat Sandwich Bread
Bake a soft, hearty loaf of whole wheat bread at home using simple ingredients. This recipe is perfect for beginners and yields delicious bread ideal for sandwiches and toast.
- Prep Time: 20 min
- Cook Time: 35 min
- Total Time: 2 hours 5 minutes
- Yield: 1 loaf 1x
- Category: Baking
- Method: Baking
- Cuisine: American
- Diet: Vegetarian
Ingredients
- 1 cup warm water (105°F to 115°F)
- 2 1/4 teaspoons active dry yeast
- 1/4 cup honey
- 2 tablespoons melted butter or oil
- 1 1/2 cups whole wheat flour
- 1 1/2 cups all-purpose flour (plus more for dusting)
- 1 teaspoon salt
Instructions
- In a large bowl, combine the warm water, yeast, and honey. Let this mixture sit for 5 to 10 minutes until it becomes foamy.
- Stir in the melted butter or oil into the yeast mixture.
- Add the whole wheat flour and salt to the wet ingredients. Mix until just combined.
- Gradually add the all-purpose flour, mixing until a shaggy dough forms.
- Turn the dough out onto a lightly floured surface. Knead for about 8 to 10 minutes until the dough is smooth and elastic. You may need a little extra all-purpose flour if the dough is too sticky.
- Place the dough in a lightly oiled bowl, turning it once to coat. Cover the bowl with plastic wrap or a clean kitchen towel. Let the dough rise in a warm place for 1 to 1.5 hours, or until it has doubled in size.
- Gently punch down the risen dough. Shape it into a loaf and place it in a lightly greased 9×5 inch loaf pan.
- Cover the pan loosely and let the dough rise again in a warm spot for 30 to 45 minutes, or until the dough has crowned about 1 inch above the rim of the pan.
- Preheat your oven to 375°F (190°C).
- Bake for 30 to 35 minutes, or until the top is golden brown and the internal temperature reaches 190°F (88°C).
- Remove the bread from the pan immediately and let it cool completely on a wire rack before slicing.
Notes
- For a sweeter loaf, increase the honey to 1/3 cup.
- If you are interested in structured eating, this bread fits well with a basic meal planning approach.
- This recipe is a great alternative to relying on meal delivery companies for your daily bread needs.
Nutrition
- Serving Size: 1 slice
- Calories: 120
- Sugar: 3
- Sodium: 150
- Fat: 2
- Saturated Fat: 1
- Unsaturated Fat: 1
- Trans Fat: 0
- Carbohydrates: 23
- Fiber: 3
- Protein: 4
- Cholesterol: 3