

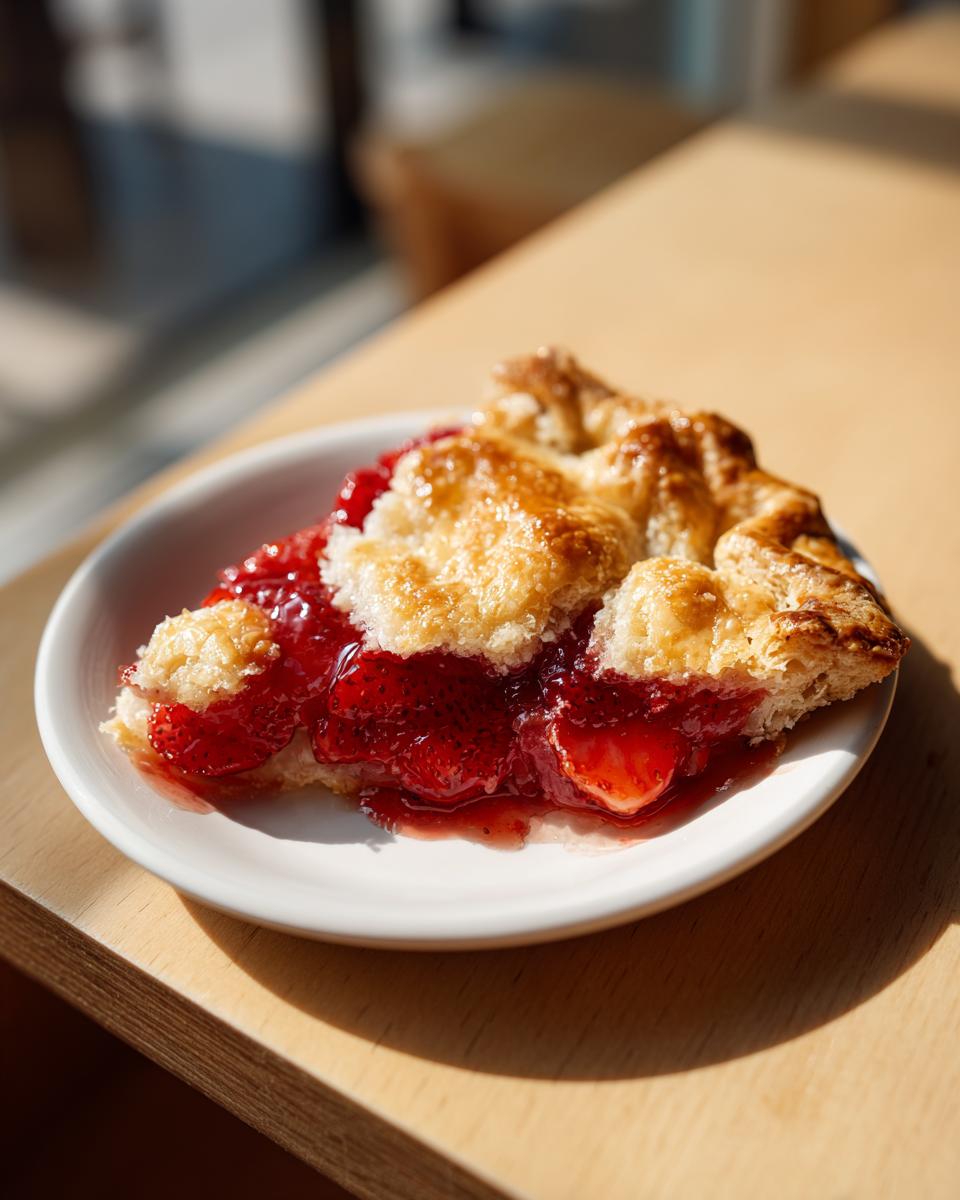
Oh, summer baking, you are officially my favorite season! When the strawberries are bursting with sunshine flavor, I just can’t stand the thought of spending hours wrestling with a fussy pie crust. That’s why I’m so excited to share what I think is the absolute best recipe for an easy strawberry galette you will ever make. Forget precision; we are embracing rustic charm here! This free-form tart looks stunning, yet it’s honestly almost impossible to mess up. As I always say here at Bliss Batter, creating something beautiful doesn’t need to be complicated. This recipe is Claire Sterling’s gift to all of us who want that warm, homemade taste without the high-stress pastry school techniques.
- Why This is the Best easy strawberry galette Recipe for You
- Ingredients You Need for Your easy strawberry galette
- Equipment Needed for Your easy strawberry galette
- Step-by-Step Instructions: how to make strawberry galette easy
- Tips for the Perfect easy strawberry galette Every Time
- Ingredient Notes and easy strawberry galette Substitutions
- Serving Suggestions for Your easy strawberry galette
- Storage and Reheating Instructions for the easy strawberry galette
- Frequently Asked Questions about the easy strawberry galette
Why This is the Best easy strawberry galette Recipe for You
I promise you, this galette is designed for real life, not for magazine covers (though it looks like one!). It’s my go-to when I need a quick summer berry dessert without any fuss. Just look at what it offers:
- It’s genuinely fast—we’re talking less than 15 minutes of active prep time!
- It’s the ultimate no fuss pastry dessert; the dough just folds over.
- It delivers the look of a fancy simple strawberry tart recipe without any of the hard work.
When you’re short on time but craving that vibrant strawberry flavor, this is the baker’s secret weapon.
Ingredients You Need for Your easy strawberry galette
Since this is a best fresh strawberry dessert, the quality of your fruit really sings! But don’t worry, the rest relies on pantry staples. I’m focusing on simple, high-impact ingredients here, just like I always promise here at Bliss Batter.
- One package (14.1 ounces) of refrigerated pie crusts. (We love easy shortcuts!)
- 4 cups fresh strawberries, always hulled and sliced nicely.
- 1/4 cup granulated sugar.
- 2 tablespoons cornstarch—this little guy is grabbing all that juice!
- 1 teaspoon lemon juice.
- 1 large egg, beaten well for that beautiful golden wash.
- 1 tablespoon coarse sugar, just for sprinkling on top for crunch.
Equipment Needed for Your easy strawberry galette
One of the things I love about making a rustic dessert like this is that you probably have all the tools ready to go. You don’t need fancy tart rings or special rolling pins—just the basics you use every day in your kitchen! Getting everything set up first makes the assembly feel like a breeze, which is exactly what we want for a easy fruit tart recipe like this.
Here’s the short list of what you’ll need ready before you start mixing those strawberries:
- A large mixing bowl for tossing the fruit filling together.
- A standard baking sheet—nothing fancy required here!
- Parchment paper. Trust me on this one; it keeps cleanup minimal and prevents sticking.
- A pastry brush, or even just the back of a spoon, for that egg wash.
- A sharp knife and cutting board for hulling and slicing the berries!
Step-by-Step Instructions: how to make strawberry galette easy
Okay, let’s get down to the fun part! Baking shouldn’t feel like a timed exam, which is why this beginner pastry recipe is my favorite. We’re going to build this gorgeous dessert in three easy phases. Just follow along, and I’ll tell you exactly where to stop fussing and start embracing the messiness!
Preparing the Oven and Fruit Filling for the easy strawberry galette
First things first: make sure your oven is preheated to 400 degrees Fahrenheit and your baking sheet is ready with that crucial piece of parchment paper. Now for the strawberries! Toss them gently with the sugar, cornstarch, and lemon juice in a bowl. That cornstarch is our secret weapon against dreaded sogginess—it thickens up all those lovely strawberry juices as they bake. Let that mixture hang out for just five minutes while the oven gets hot.
Assembling Your rustic free form pie
Unroll that pre-made crust right onto your lined baking sheet. Spoon your glorious, juicy strawberry mixture right into the center, but leave a big two-inch gap all the way around the edge—that’s our border! Now, this is the best part: just fold those edges up and over the fruit however they naturally want to lay. Overlap them, make some wrinkles, squish a spot or two—it’s supposed to look wonderfully uneven! This is what makes it a true rustic free form pie, not something sterile!
Baking and Cooling the easy strawberry galette
Take that beaten egg—that’s your glue and your shine! Brush it right onto those flaky crust edges you just folded over, and then sprinkle that coarse sugar liberally on top for a little sweet crunch. Pop it into the hot oven for about 30 to 35 minutes. Watch for golden edges and bubbling fruit! Never cut it right out of the oven, though; you must let it rest on that cool baking sheet for a full 15 minutes. This cooling time lets the filling settle down and thicken, otherwise, it’ll just spill out everywhere when you slice it.
Tips for the Perfect easy strawberry galette Every Time
When it comes to keeping this minimalist summer baking project perfect, a few little tricks go a long way. We want that bottom crust to be firm and flaky, not soggy and sad! The cornstarch in the filling is your first defense, so make sure you mix it in until you don’t see any white powder hiding at the bottom of the bowl. That’s crucial.
Also, the heat matters! If your kitchen is warm while you are assembling this, your refrigerated crust can get sticky and start pulling apart too easily. If that happens, don’t panic! Just slide the whole assembly onto the baking sheet and pop the whole thing into the freezer for five minutes before you brush the egg wash on. A quick chill firms up the butter in the pastry, which helps everything hold its shape beautifully during the bake. That little pause keeps the edges crisp while your strawberries get hot and bubbly.
Ingredient Notes and easy strawberry galette Substitutions
Look, I know sometimes you open the fridge and realize you’re missing one tiny thing. That’s okay! That’s why I always try to give you wiggle room, because baking should be flexible, not frustrating. While this recipe is built around store-bought refrigerated dough for maximum ease—seriously, who has time to make pastry from scratch every Sunday?—you definitely have options if you’re missing the cornstarch.
If you find yourself short on cornstarch for thickening up those sweet juices, you have a couple of good swaps! You can use an equal amount of all-purpose flour, though it can make the filling look slightly cloudier. Tapioca starch is also fantastic here; use about 1.5 times the amount of cornstarch if you go that route. Either one will work hard to stop that juice from running everywhere when you slice into your beautiful easy strawberry galette.
Now, if you actually *want* to make your own pastry and skip the store-bought route? I have my favorite simple recipe for a rustic pie crust tutorial that pairs perfectly with fruit fillings like this one. But honestly, if refrigerated dough gets you baking today instead of next weekend, never apologize for that shortcut. That’s the whole point of Bliss Batter—getting happiness baked!
Serving Suggestions for Your easy strawberry galette
Once your beautiful, rustic galette has cooled just enough to slice—and believe me, resisting is the hardest part—you have to decide how you’re going to serve it. This dessert is so simple, but the right topping can really elevate it from a great bake to an absolute showstopper!
My absolute favorite way to enjoy this fresh fruit masterpiece is slightly warm with a big, luxurious scoop of vanilla bean ice cream. The cold creaminess against the tart, warm strawberries? Heaven! If you’re serving it later in the day, a cloud of freshly whipped cream never hurts. Just a little sugar and a splash of cream whipped until soft peaks form—it’s so much better than that stuff from the can, and it takes zero effort.
But what if you want something to sip alongside it? Since this is a bright, summery dessert, I find something rich and comforting balances it out perfectly. If you’re looking for that perfect cozy accompaniment, you have to try my recipe for a salted caramel latte. It’s creamy, slightly sweet, and the hint of salt just makes every bite of that strawberry pastry taste even brighter. It’s seriously the best pairing for a slow weekend morning or a casual evening dessert.
Don’t overthink the serving! It’s meant to be easy, remember? A dusting of powdered sugar on a plate before placing the slice down is also a very pretty, minimalist touch that requires almost no effort at all.
Storage and Reheating Instructions for the easy strawberry galette
We all love leftovers, right? Especially when it comes to simple fruit bakes! Since this quick bake fruit tart is so straightforward, storage is surprisingly easy, but you do need to treat the crust right to keep that lovely rustic texture.
Because we used fresh fruit filling, it’s best not to keep this galette sitting out on the counter for days. Room temperature storage is only okay if you plan to eat it all within about 12 hours. After that, the moisture from the berries starts to seriously soften the pastry.
If you have leftovers, wrap them loosely in plastic wrap or place them in an airtight container and pop them into the refrigerator. It should stay perfectly good in the cool fridge for about three days. Don’t stack anything heavy on top of it, though, or you might crush those pretty folded edges!
Now, how to reheat? This is key to getting back that just-baked taste. I never use the microwave for the whole thing! It makes the crust chewy immediately. Instead, if you want to serve a slice warm, preheat your oven or even a toaster oven to about 325 degrees Fahrenheit. Just place your slice directly on a piece of foil or a small baking sheet. Heat it for about 8 to 10 minutes until the filling is warm and bubbly again. That short, dry heat helps crisp the bottom and edges right back up! Trust me, that warm, flaky bite is worth the ten extra minutes.
Frequently Asked Questions about the easy strawberry galette
I know when you’re trying out a new, simple recipe, a few questions always pop up! Baking should be fun, not confusing, so I wanted to answer the things I usually get asked about my quick summer berry dessert.
Can I use frozen strawberries instead of fresh?
You absolutely can, but you need to handle them carefully! Frozen berries release a ton more water when they thaw. If you use them straight from the freezer, your easy strawberry galette will likely be swimming in juice. Thaw them completely first, and here is my trick: drain off as much liquid as you possibly can before mixing them with the sugar and cornstarch. You might even want to add an extra half tablespoon of that cornstarch just to be safe!
What’s the best way to prevent a soggy bottom?
This is the arch-nemesis of every rustic free form pie maker! Beyond ensuring your cornstarch is mixed in, I have two quick tips. First, preheating that baking sheet for 10 minutes before you put the pastry on helps shock the bottom of the crust, making it set faster. Second, that 15-minute cool-down period after baking is non-negotiable; it lets the juices solidify properly against the firm crust.
Can this be made ahead of time?
Yes, you can assemble this fairly easily ahead of time! I recommend preparing the filling and rolling out your dough, but don’t fold the edges over yet. Keep the filling separate and the dough chilled. Assemble everything right before you plan to bake it—maybe 30 minutes before—then follow the steps. This keeps the pastry edges nice and flaky instead of tasting stale or wet from sitting too long with the filling.
Do I have to use refrigerated pie crust?
Not at all! Store-bought is what makes this officially the easiest strawberry tart recipe around, but if you feel like being a little more involved, go for it. If you use homemade pastry, make sure it is well chilled before you roll it out. Remember, the cold butter hitting the hot oven is what creates those beautiful, flaky layers we love so much!
What if I don’t have cornstarch?
No cornstarch panic! As I mentioned in the substitution section, all-purpose flour works fine as a thickener. Just be aware that it might cloud the juices a tiny bit, but the flavor will still be fantastic. A third option, if you have it, is arrowroot powder, which gives a lovely clear set, just use a little less of it than you would cornstarch.
PrintEasy Strawberry Galette: A Simple Rustic Summer Dessert

Make this simple strawberry galette for a quick, no-fuss summer dessert. This free-form tart uses everyday ingredients and is perfect for beginner bakers.
- Prep Time: 15 min
- Cook Time: 35 min
- Total Time: 50 min
- Yield: 6 servings 1x
- Category: Dessert
- Method: Baking
- Cuisine: American
- Diet: Vegetarian
Ingredients
- 1 package (14.1 ounces) refrigerated pie crusts (or your favorite simple pastry dough)
- 4 cups fresh strawberries, hulled and sliced
- 1/4 cup granulated sugar
- 2 tablespoons cornstarch
- 1 teaspoon lemon juice
- 1 large egg, beaten (for egg wash)
- 1 tablespoon coarse sugar (for sprinkling)
Instructions
- Preheat your oven to 400 degrees Fahrenheit. Line a baking sheet with parchment paper.
- In a medium bowl, gently combine the sliced strawberries, granulated sugar, cornstarch, and lemon juice. Let the mixture sit for 5 minutes.
- Unroll one pie crust onto the prepared baking sheet. If using frozen dough, let it thaw according to package directions first.
- Spoon the strawberry filling into the center of the dough, leaving a 2-inch border clear around the edges.
- Carefully fold the edges of the dough up and over the filling, overlapping the dough slightly to create a rustic, free-form crust. Do not worry about making the edges perfect.
- Brush the folded crust edges with the beaten egg wash. Sprinkle the coarse sugar over the crust.
- Bake for 30 to 35 minutes, or until the crust is golden brown and the strawberry filling is bubbly.
- Let the strawberry galette cool on the baking sheet for at least 15 minutes before slicing and serving. This helps the filling set.
Notes
- To prevent a soggy bottom, ensure your cornstarch is evenly mixed with the fruit to absorb excess liquid during baking.
- If your strawberries are very large, slice them thinner so they cook evenly.
- This recipe works well with other seasonal berries if you want a quick summer berry dessert variation.
Nutrition
- Serving Size: 1 slice
- Calories: 280
- Sugar: 18
- Sodium: 190
- Fat: 14
- Saturated Fat: 4
- Unsaturated Fat: 10
- Trans Fat: 0
- Carbohydrates: 36
- Fiber: 2
- Protein: 4
- Cholesterol: 30