
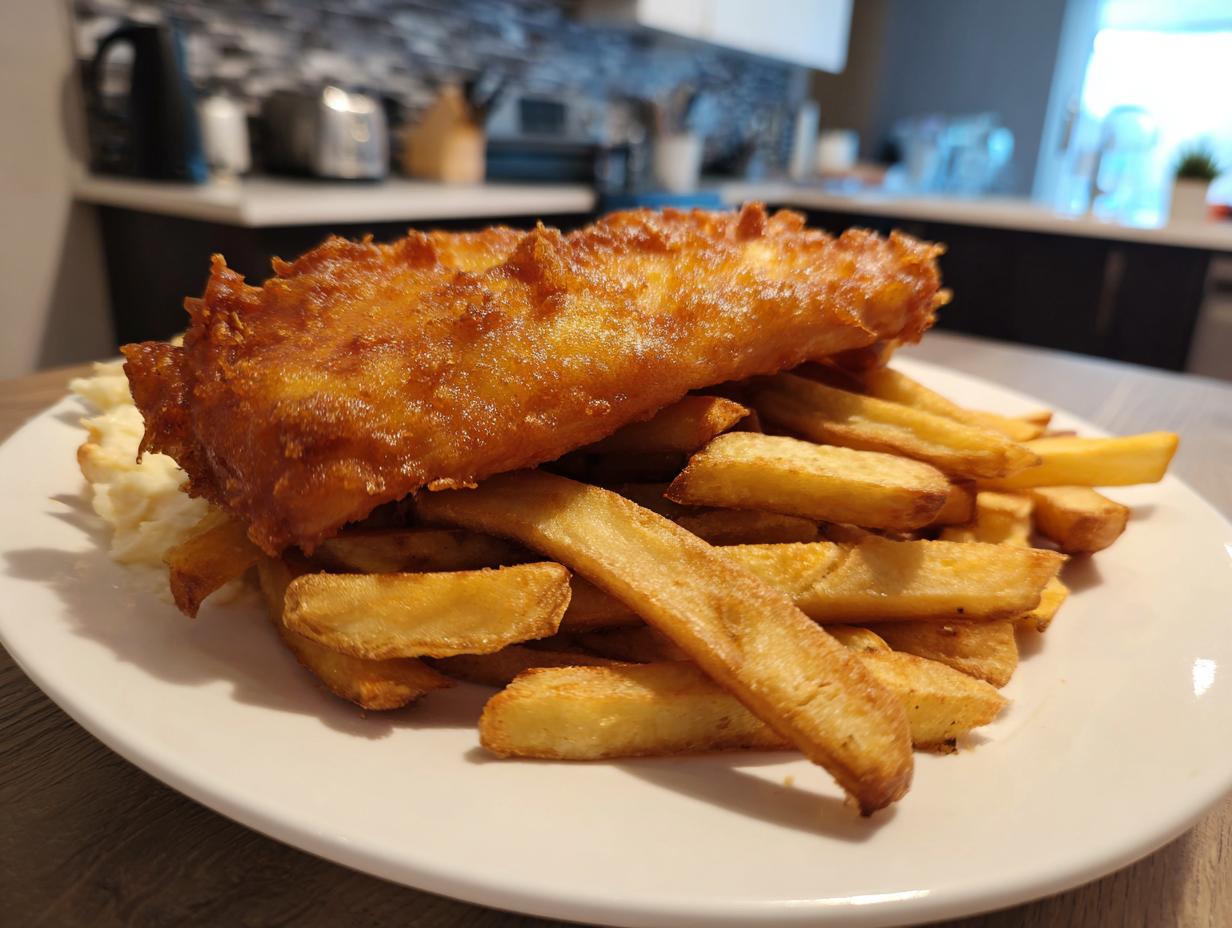
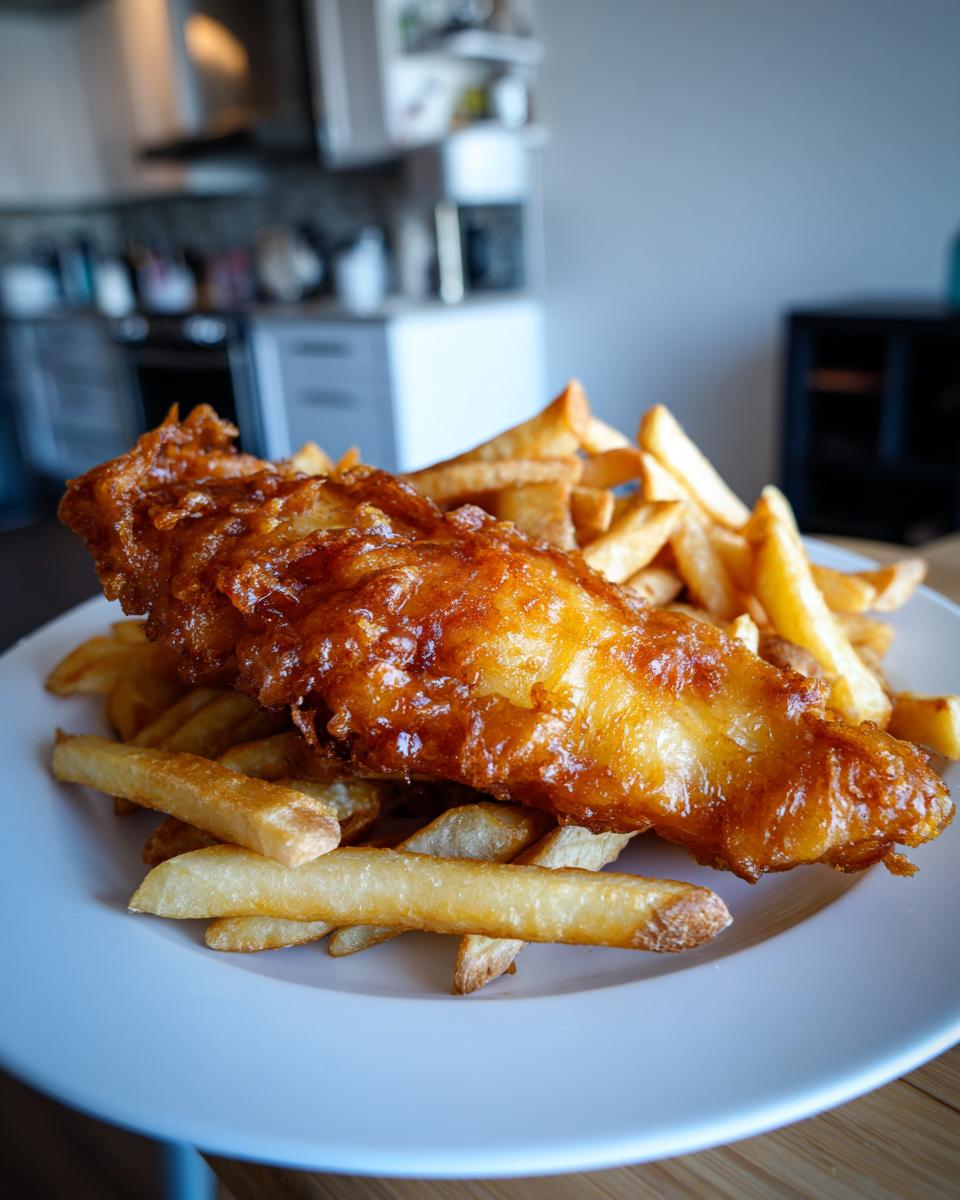
Oh, who else gets that sudden, undeniable craving for proper, seaside-fresh fish and chips? I’m talking about that light, shatteringly crisp golden batter wrapped around steamy, flaky white fish, balanced perfectly by fluffy, thick-cut chips. Forget mediocre takeout; we are bringing the authentic British pub food experience right into our kitchens!
That’s what Bliss Batter is all about, really. When I first started sharing my recipes, I knew I had to crack this one. My whole mission, following in the footsteps of my baking hero grandmother, is to prove that classics like these aren’t nearly as fiddly as people think. I’ve tested this recipe relentlessly—I promise—so you can trust the method for achieving that perfect result every single time. You deserve spectacularly crispy fish and chips!
- Why This Traditional Fish and Chips Recipe Delivers Pub Perfection
- Essential Ingredients for Authentic Fish and Chips
- Mastering the Beer Batter Fried Fish for Crispy Fish and Chips
- Achieving Perfect Homemade Chips (Fries) for Your Fish and Chips
- Step-by-Step Instructions for Classic Fish and Chips
- Serving Suggestions: Bringing British Pub Food at Home to Life
- Storage and Reheating Instructions for Leftover Fish and Chips
- Frequently Asked Questions About Perfect Fish and Chips
- Nutritional Estimates for Homemade Fish and Chips
- Share Your Crispy Fish and Chips Creations
Why This Traditional Fish and Chips Recipe Delivers Pub Perfection
When I decided to tackle the traditional fish and chips recipe, I knew shortcuts wouldn’t cut it. We want that real, heart-warming chip shop satisfaction, and that comes down to a couple of crucial techniques that just work. I’ve stripped away the complicated steps and focused on what delivers the absolute best texture. I want you to feel confident stepping up to that deep fryer!
Here’s why I swear by this method:
- The secret is the cold beer batter! It stays light and super crisp, never heavy or doughy.
- We use the double-fry technique for the chips, which makes them fluffy inside and perfectly golden outside.
- It’s totally accessible. No fancy equipment needed, just straightforward steps for amazing results you can use for weeknight dinners!
Essential Ingredients for Authentic Fish and Chips
Okay, let’s get down to what you actually need. Authentic fish and chips relies on quality starting points, especially the fish. I insist on using thick-cut cod or genuine haddock fillets—that one-inch thickness cooks beautifully so you get that gorgeous flaky interior against the crunch. Anything too thin tends to dry out fast, and we definitely don’t want that sad, stringy texture!
Then we move to the batter ingredients. Remember, cold is key! You need that crisp coating, so your beer absolutely must be ice cold—a light lager or a pale ale works wonders here. Plus, trust me on adding just a little bit of cornstarch to the flour mix; it’s my little trick that keeps the whole thing feather-light when it hits the oil.
And we can’t forget the potatoes! Russets are the absolute best for chips because they get fluffy inside. You’ll need about four large ones, peeled, and cut thick—we’re not doing skinny fries here, we’re going for proper chips!
Ingredient Notes and Substitution Tips
I often get asked about cutting corners, but for this dish, a few ingredients really must shine. If you are steering clear of alcohol, please don’t skip the carbonation! You can swap that cold beer for an equal amount of very, very cold club soda or sparkling water. The bubbles provide the lift in the batter that keeps it from getting heavy.
Now, oil selection matters, period. Since we are frying at high heat—and we need that high heat to prevent oil absorption—you need an oil with a high smoke point. I always recommend vegetable or peanut oil for this. They handle the temperature like champs, which is essential for achieving that non-greasy finish, something I learned obsessively while developing this recipe.
If you can’t find haddock, cod is totally acceptable, but just make sure those fillets are fresh! You can tell high-quality fish when it looks moist and translucent, not milky or opaque. That quality shines right through, even under a savory fried coating!
Mastering the Beer Batter Fried Fish for Crispy Fish and Chips
This is where the magic happens! Making that incredible, light, and crunchy beer batter fried fish comes down to one primary rule reinforced by years of my recipe testing: Do not overmix! Seriously, grab a whisk and just gently bring the flour and cold beer together. If you beat it furiously like you’re making a smooth cake batter, you develop gluten, and what happens? You get tough, bready fish coating instead of that airy, flaky crunch we are seeking.
Once the batter looks slightly lumpy—and I mean slightly—set the bowl aside. The fish fillets need a little prep before they meet that heavenly coating. Pat those fillets bone-dry again where you patted them before seasoning, and then give them a very light dusting of plain flour, shaking off everything excess.
Why the flour dusting first? It gives the wet, cold batter something dry to actually adhere to! Without it, the batter just slides right off into the hot oil, and you end up with sad, naked fish.
Tips for How to Fry Fish Crispy Every Time
Temperature control is non-negotiable for crispiness! You need that oil screaming hot—we are aiming for a beautiful 375°F (190°C) for the fish frying. If the oil is too cool, the batter soaks up the fat like a sponge, and your beautiful fish turns into a greasy mess. Nobody wants that heavy feeling!
Also, resist the urge to cram! I know you want to get all four pieces in at once, but you can’t! Overcrowding the pot instantly drops the oil temperature, leading straight back to greasiness. Fry in batches of two, ensuring there is plenty of space between the pieces so the oil can circulate and seal that batter perfectly. Once they go in, try not to touch them for at least four minutes. Let that heat do its job!
When they are that glorious deep gold color, pull them out carefully and put them straight onto a wire rack—never paper towels first, or the bottom gets soggy! Don’t forget to try checking out my tips on making rustic pumpkin beer bread too; it shares some of the same principles!
Achieving Perfect Homemade Chips (Fries) for Your Fish and Chips
Honestly, you cannot have great fish and chips without absolutely killer chips. They need to be fluffy on the inside where the steam cooks them, and crispy on the outside. If you just fry them once, they end up tasting like sad, limp fries. No thank you! This is where the famous homemade chips (fries) double fry method comes in, and it’s the secret weapon for British pub perfection.
Remember that very first step? You *must* soak those Russet potatoes after cutting them into thick half-inch pieces. That cold water rinses off all the surface starch. If you skip the soak, that starch turns into sticky glue when it hits the oil, meaning your chips won’t crisp up properly.
After soaking, drying them completely is just as crucial. Wet potatoes instantly drop your oil temperature, right? So, take your time patting them down until no moisture remains. Then we hit the oil twice. The first fry at a lower temperature cooks them through gently—they should look pale and limp when you take them out. Then, we crank the heat way up to that 375°F (190°C) for the second fry. That quick blast of high heat seals the exterior and makes them golden and shatteringly crisp!
After that second fry, a quick toss with salt while they are still steaming hot makes all the difference. If you love fries, you absolutely need to try seasoning them up later with some chili cheese goodness, which you can see in my chili cheese fries recipe article!
Step-by-Step Instructions for Classic Fish and Chips
Alright, now we put all that prep work together! Timing is everything when juggling hot oil and delicate fish, but if you follow this sequence, you’ll be sitting down to your piping hot plate of fish and chips before you know it. Remember, we start the potatoes first because they need that initial gentle cook!
- Prep the Potatoes (The Soak & Dry): Get your thick-cut chips soaking in cold water right away—at least 30 minutes helps draw out the starch, which is super important. Once that time is up, drain them thoroughly and pat them down with paper towels until they feel totally dry.
- First Chip Fry & Oil Warm-Up: Pour your vegetable or peanut oil into your deep pot. Begin heating the oil up to 325°F (160°C). While that’s heating, go ahead and mix your beer batter now—remember, just whisk until combined; lumps are okay!
- The Gentle First Fry: Once the oil hits 325°F (160°C), gently lower half of your dried chips into the oil. Fry them softly for about 5 to 7 minutes. They should look cooked but still pale yellow. Pull them out and place them on a wire rack. Repeat with the rest of the chips.
- Prep the Fish for Batter: While the oil temperature climbs higher, pat your fish fillets completely dry (use paper towels again!). Dust them lightly in plain flour, shaking off the excess.
- The Heat Hike: Immediately after removing the first batch of chips, increase the oil temperature to 375°F (190°C). This is the crucial heat for getting that golden crunch.
- Batter and Fry the Fish: Dip your floured fish into the cold beer batter, letting the extra drip off, and carefully lower the fillets into the 375°F oil. Work in small batches, maybe two pieces at a time, to keep that oil temperature steady. Fry for 5 to 8 minutes, turning gently once. The fish is done when the batter is deep golden and the fish flakes easily!
- The Second Chip Fry: As soon as the first fish is out resting on the wire rack, throw those blanched chips back into the 375°F oil for their final, fast fry—just 2 to 4 minutes until they are deeply golden and crisp. Salt them immediately!
- Serve It Hot: Since the chips take a little longer to get perfect, try keeping the first cooked fish warm in a very low oven (around 200°F/95°C) while you finish the last batch. Serve everything immediately with a generous pour of malt vinegar and a side of tartar sauce. This is the kind of meal that deserves your full attention, much like nailing the layers in a perfect lasagna!
Serving Suggestions: Bringing British Pub Food at Home to Life
Okay, mission accomplished—you have golden, crispy fish and perfectly fried chips! But half the joy of making British pub food at home is transforming your regular dinner plate into something special, right? Presentation really matters here, even if you’re just eating on the couch.
The absolute, non-negotiable pairing for authentic fish and chips is malt vinegar. Don’t skip it! Just buy the malt vinegar—it has a specific mellow, slightly sweet flavor that white distilled vinegar just can’t touch. You need to liberally splash that over both the fish and the chips right before you take that first bite. It cuts through the richness brilliantly.
And of course, you need a pile of creamy tartar sauce for dipping that fabulous fish. I usually whip up a quick batch with good quality mayonnaise, finely chopped capers, sweet pickle relish, and a squeeze of lemon juice. It takes about two minutes, and it tastes infinitely better than anything jarred.
For a fun touch, try serving it diner-style! Remember how you used to see it wrapped up? Grab some plain white parchment paper and use that instead of a regular plate or a basket. It just feels cleaner and looks so much more authentic. It’s a small thing, but it elevates the whole experience. If you’re trying to get adventurous with side dishes, my recipe for amazing French onion soup shows how much flavor you can pack into simple sides, though for fish and chips, keep it classic!
Storage and Reheating Instructions for Leftover Fish and Chips
Look, if you have leftover fish and chips (which, honestly, is rare at my house!), you have to treat them gently when reheating. Fried food hates moisture, so the microwave? Absolutely not. If you put that beautiful crispy batter in the microwave, you are guaranteeing soggy disappointment, and we simply can’t have that.
The best way to bring back that gorgeous crunch afterwards is to use dry heat. My first choice is always my air fryer if I have one handy, cranked up to about 375°F (190°C) for about 5 to 7 minutes for the fish and maybe 10 minutes for the chips. It brings the texture right back to life!
If you don’t have an air fryer, the oven is your next best friend. Preheat your oven—and make sure it gets hot, maybe 400°F (200°C)—and spread the fish and chips out in a single layer on a baking sheet. You might want to place the fish on a wire rack set on top of the sheet so air circulates underneath it, too. Let them bake for about 10 to 12 minutes. That dry heat wicks away any lingering grease and crisps up the batter again.
Now, for the chips—they are the easiest to rejuvenate. If you still have any cold ones, they’ll reheat even faster than the fish thanks to that double fry we did earlier. Just make sure you aren’t stacking them up when you reheat them, or they’ll steam each other instead of crispening! Saving perfectly fried leftovers is an art, but if you use dry heat, you’re golden. If you are done with dinner, why not check out my fun maple bourbon cocktail recipe for dessert time?
Frequently Asked Questions About Perfect Fish and Chips
I get so many great questions after people try this recipe, and that’s fantastic! It means you’re stepping into the kitchen with confidence, just like I hoped when I started Bliss Batter. Dealing with high-heat frying can be intimidating, but once you understand the temperature rules, your results will be flawless. Here are the big ones I hear most often regarding getting that crisp finish and using the right ingredients for your traditional fish and chips recipe.
Can I make the fish and chips batter without beer?
Yes, absolutely! I design these recipes to work for everyone, and I know not everyone wants to use alcohol. The most important thing the beer provides is carbonation—those tiny bubbles create lift in the batter, making it super light and airy when it hits the hot oil. If you skip the beer, you must replace it with something else highly carbonated and very, very cold! Use plain club soda or sparkling water instead.
Just don’t use regular flat water, or you’ll end up with a sad, heavy coating. The cold temperature of the liquid is really what reacts well with the flour and cornstarch mixture, so keep that club soda right in the back of the fridge until the second you pour it in!
What is the best oil temperature for frying fish and chips?
This is probably the most critical question! You actually need two different temperatures because the chips need a staged cooking process, while the fish needs one high blast to crisp that batter instantly. You need to monitor your oil thermometer like a hawk!
For the potatoes, you start low: 325°F (160°C) for the first fry—this cooks the inside potatoes until they are soft. Then, you crank it up significantly for the second fry and for frying the fish: 375°F (190°C). Getting that batter hitting 375°F oil is how you guarantee that signature crunch for your beer batter fried fish!
Why are my fish and chips greasy?
Ugh, nobody likes that heavy, greasy mouthfeel! It’s almost always down to one of three things, and I’ve learned this the hard way over countless batches. First, and most common: your oil temperature was too low when the food went in. If the oil isn’t properly hot, the coating just sits there absorbing oil instead of instantly sealing and crisping up.
Second, you probably crowded the pot. If you put too many chips or too many fish fillets in at once, the oil temperature plummets instantly, and you’re deep-frying in lukewarm oil again. Stick to small batches! And finally, did you skip drying the ingredients? If the potatoes weren’t bone-dry or the fish fillets had excess moisture, that water hitting the hot oil cools it down immediately and creates steam pockets that result in greasy spots.
We test all our recipes here thoroughly so that doesn’t happen to you. If you ever run into trouble, feel free to reach out via our contact page; I’m always happy to troubleshoot!
Nutritional Estimates for Homemade Fish and Chips
Now, listen up, because this is important! When you’re recreating comfort food classics like these incredible homemade fish and chips, the final nutritional values can seriously swing around based on what you use. Since this recipe relies on deep frying—and we are using thick-cut fish and potatoes—it’s going to be richer than your typical light dinner.
I’ve done my best to calculate a very general estimate based on the ingredients listed here, but honestly, this is just a rough guide. If you swap out the cod for haddock, or use a different kind of beer in the batter, those numbers can shift! Also, how much malt vinegar you douse it in makes a difference!
Keep in mind that I base these figures on common pantry items, but unless you are meticulously weighing every single drop of oil absorbed, treat this information as a friendly ballpark figure, not a strict requirement for your daily goals. If tracking exact macros is essential for you, you might find better results looking into specialized meal planning services or specific keto meal plan delivery if that fits your diet structure, but for a delicious British takeaway night, just enjoy the flavor!
Share Your Crispy Fish and Chips Creations
Wow, I truly hope you enjoyed making this spectacular batch of crispy fish and chips! It’s one of my absolute favorite dishes to share because, deep down, everyone deserves that crispy, vinegary joy right at their own kitchen table. Claire here, and I just love hearing how these recipes come to life in your homes!
Did this traditional fish and chips recipe finally give you the pub-style crunch you’ve been dreaming of? Don’t keep that success a secret! I really want to know how it went for you. Did your beer batter come out light as air? Tell me about your chips!
Please take a second to leave a rating for the recipe right down below. It helps others who are nervously standing over their own pots of hot oil feel confident trying it out. Your feedback means the world to me and helps me keep testing and perfecting these classic recipes!
And if you snapped a photo of your golden fillets and perfectly salted chips—maybe you even wrapped them up in paper for that authentic feel—I would absolutely adore seeing it! Tag me on social media. Seeing your triumphs is the biggest compliment you can give me. If you want to learn more about the simple philosophy behind why I share approachable baking and cooking techniques, come check out my About Page!
Let’s keep making happiness homemade, one perfectly crispy fry at a time!
PrintClassic Crispy Fish and Chips with Beer Batter
Make authentic, pub-style fish and chips at home using a light, crunchy beer batter and perfectly fried, thick-cut chips.
- Prep Time: 25 min
- Cook Time: 25 min
- Total Time: 50 min
- Yield: 4 servings 1x
- Category: Dinner
- Method: Deep Frying
- Cuisine: British
- Diet: Low Lactose
Ingredients
- 2 lbs cod or haddock fillets, about 1 inch thick
- 1 cup all-purpose flour, plus extra for dusting
- 1 teaspoon salt
- 1/2 teaspoon black pepper
- 1 cup cold beer (lager or pale ale)
- 1/4 cup cornstarch
- 4 cups vegetable oil or peanut oil, for frying
- 4 large Russet potatoes, peeled and cut into 1/2-inch thick chips
- Malt vinegar, for serving
- Tartar sauce, for serving
Instructions
- Prepare the potatoes: Cut the potatoes into thick chips. Place them in a large bowl of cold water for at least 30 minutes. Drain well and pat them completely dry with paper towels. This step is key for crispy chips.
- Make the batter: In a medium bowl, whisk together the 1 cup of flour, salt, pepper, and cornstarch. Slowly pour in the cold beer while whisking until just combined. Do not overmix; a few lumps are fine. The batter should be the consistency of thin pancake batter.
- Heat the oil: Pour the frying oil into a deep, heavy-bottomed pot or deep fryer to a depth of about 2 inches. Heat the oil to 325°F (160°C).
- First fry for chips: Working in batches, carefully place half the dried chips into the oil. Fry for 5 to 7 minutes until they are soft and pale, not browned. Remove with a slotted spoon and drain on a wire rack. Repeat with the remaining chips.
- Prepare the fish: Pat the fish fillets very dry. Lightly dust each fillet with plain flour, shaking off any excess.
- Second fry for chips (blanching): Increase the oil temperature to 375°F (190°C). Fry the blanched chips again in batches for 2 to 4 minutes until golden brown and crisp. Remove and drain on paper towels. Sprinkle lightly with salt.
- Fry the fish: Dip a floured fish fillet completely into the beer batter, allowing excess to drip off. Carefully lower the battered fish into the 375°F (190°C) oil. Fry 2 to 3 fillets at a time to avoid lowering the oil temperature too much.
- Cook the fish: Fry for 5 to 8 minutes, turning once, until the batter is deep golden brown and crisp, and the fish flakes easily with a fork. This method helps you achieve that satisfying texture, similar to what you might find with high-quality meal planning services focusing on fresh ingredients.
- Drain and serve: Remove the fish and drain on a wire rack set over a baking sheet. Keep warm in a low oven (200°F/95°C) while you finish the remaining fish. Serve immediately with the hot chips, a splash of malt vinegar, and tartar sauce.
Notes
- For the crispiest results, make sure your beer is very cold when mixing the batter.
- If you are looking for alternatives to deep frying, consider using a sous-vide precision cooker for the fish first, then a quick air fry, though traditional frying yields the best texture for this dish.
- Serve with mushy peas for a truly traditional British pub experience.
Nutrition
- Serving Size: 1 fillet and 1/4 portion of chips
- Calories: 750
- Sugar: 4
- Sodium: 550
- Fat: 40
- Saturated Fat: 7
- Unsaturated Fat: 33
- Trans Fat: 0
- Carbohydrates: 65
- Fiber: 6
- Protein: 35
- Cholesterol: 105