
There’s just something about a dessert that feels like a warm hug, right? For me, the smell of melting chocolate whisking on the stove instantly transports me back to my grandmother’s kitchen, even when I’m balancing a crazy schedule planning corporate events. I know baking a showstopper like the fudgy chocolate brownies used to scare people, but I promise you, this rich, decadent **homemade chocolate pie** recipe is different. This isn’t a fussy, delicate cream pie; this is my foolproof formula for the ultimate chocolate silk pie that comes together beautifully every single time. It’s the dessert that proves you don’t need pastry school to create magic. Let’s get that stove warmed up!
- Why This is the Best Chocolate Pie Recipe You Will Ever Make
- Gathering Ingredients for Your Homemade Chocolate Pie
- How to Make Chocolate Pie From Scratch: Step-by-Step Instructions
- Tips for Perfect Homemade Chocolate Pie Success
- Variations on the Classic Homemade Chocolate Pie
- Serving Suggestions for Your Homemade Chocolate Pie
- Storage and Reheating Instructions for Homemade Chocolate Pie
- Frequently Asked Questions About Homemade Chocolate Pie
- Share Your Homemade Chocolate Pie Creations
Why This is the Best Chocolate Pie Recipe You Will Ever Make
Listen, I’ve spent years tweaking recipes so you don’t have to worry! When you make this **homemade chocolate pie**, you get results that are consistently spectacular. We’ve tested this until every measurement was perfect. Why settle for good when you can have the absolute best? This recipe delivers on taste and texture, guaranteed.
- The filling is unbelievably silky smooth—no grainy texture here, ever!
- It offers that deep, rich chocolate flavor that sings without being overwhelmingly sweet.
- It’s totally dependable. If you follow these steps, you can’t mess it up.
The Ultimate Homemade Chocolate Dessert Experience
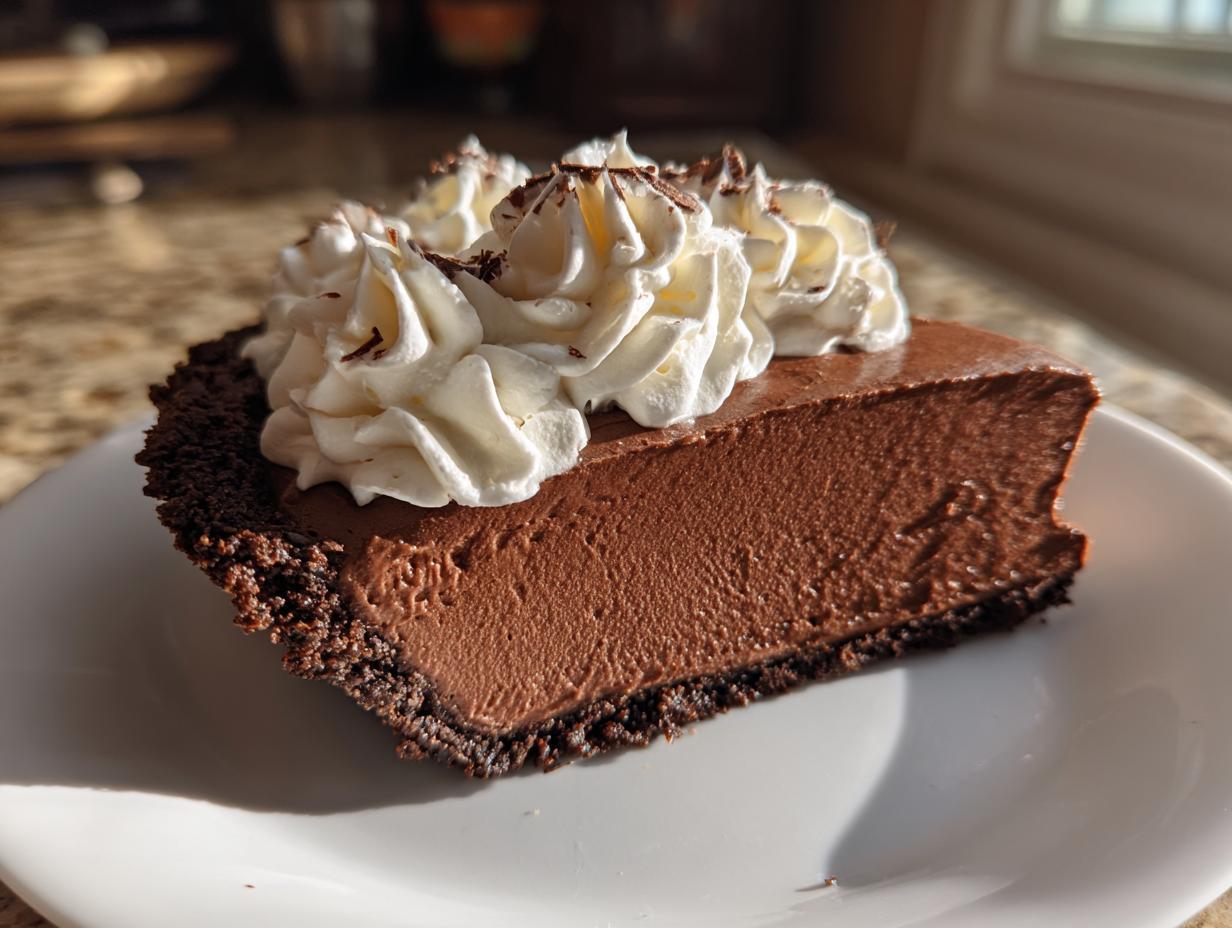
The best part about this beauty is the contrast. You get that satisfying, buttery crumble from the baked graham cracker crust giving way to the cool, almost impossibly smooth chocolate silk filling. Top it with clouds of fresh whipped cream, and honestly, it’s just pure satisfaction. It stands tall as the ultimate homemade chocolate dessert on any table, holiday or Tuesday!
Gathering Ingredients for Your Homemade Chocolate Pie
Okay, the secret to a foolproof bake is making sure you have everything measured out and ready to go before you even turn on the stove. This is what we call being organized! We’ve broken down the list so you can grab exactly what you need for each component of your delicious chocolate creation. Trust me, having everything lined up makes the actual cooking go by in a flash.
Ingredients for the Graham Cracker Crust
- 1 1/2 cups graham cracker crumbs
- 1/4 cup granulated sugar
- 6 tablespoons unsalted butter, melted
Ingredients for the Best Homemade Chocolate Filling
- 1 1/2 cups granulated sugar
- 1/2 cup unsweetened cocoa powder, high quality
- 1/4 cup cornstarch
- 1/4 teaspoon salt
- 1 1/2 cups whole milk
- 3 large egg yolks, lightly beaten
- 2 tablespoons unsalted butter
- 1 teaspoon vanilla extract
Ingredients for the Whipped Cream Topping
- 1 cup heavy whipping cream, well chilled
- 2 tablespoons powdered sugar
How to Make Chocolate Pie From Scratch: Step-by-Step Instructions
Alright, let’s dive into the action! This process is broken down into phases because rushing the layers just doesn’t work for a perfect pie. Before you even start cooking, make sure your pie plate is ready. This is where we build the perfect foundation for your stunning **homemade chocolate pie**!
Preparing and Pre-Baking the Crust
First things first: we need a nice, sturdy base. Grab those graham cracker crumbs, the 1/4 cup of sugar, and dump in that melted butter. Mix it up until it looks like wet sand—you know the texture I mean. Press that mixture firmly into your 9-inch pie plate. I mean *firmly*—press it up the sides too! Pop it into a 350°F oven for just 10 minutes. This little bake sets the crust so it stays crisp. Once it’s out, you have to let it cool down completely. If you put hot filling in a warm crust, you’re going to have soup!
Creating the Rich Chocolate Pie Filling Base
Now for the main event! In a saucepan—don’t put it on the heat yet—whisk together your 1 1/2 cups of sugar, your cocoa powder, cornstarch, and salt. Whisking these dry items first is crucial; it breaks up any lumps in the cocoa before the milk gets involved. Once they’re powdery smooth, slowly whisk in the whole milk. Now, turn the heat to medium. Stir constantly! If you walk away, it scorches. Keep stirring until it gets thick and starts bubbling gently. Let it cook just one minute after it begins to bubble, then take it off the heat.
Tempering Eggs for Smooth Homemade Chocolate Pie
This next step is the secret to skipping scrambled eggs forever, so pay close attention! In a separate little bowl, lightly beat your three egg yolks. While you vigorously whisk those yolks, slowly ladle about one cup of that hot chocolate mixture into the eggs. This is called tempering, and it gently warms the eggs up so they don’t seize when they hit the main pot. Once they look happy and warmer, pour that whole yolk mixture back into the saucepan. Return it to medium heat and keep stirring constantly until it gets super thick—it should coat the back of a spoon really well. It’s done when it coats a spoon and you can draw a clean line through it!
Chilling and Finishing the Homemade Chocolate Pie
Once that filling is cooked, take it off the heat immediately! Stir in that final 2 tablespoons of butter for shine and the vanilla extract until everything melts beautifully. Pour that gorgeous, hot filling right into your cooled crust. Here’s another crucial tip from my simple chocolate pie for beginners guide: press a piece of plastic wrap *directly* onto the surface of the filling. This stops it from developing that annoying skin on top. Then, hide it in the fridge for at least four hours—though overnight is heaven. Finally, whip up your cream and powdered sugar until stiff peaks form, spread it on top, and slice into perfection!
Tips for Perfect Homemade Chocolate Pie Success
When you’re aiming for the absolute best, it truly comes down to those little details. Don’t just follow the recipe—understand *why* we do what we do. These little chocolate pie secrets and tips are what elevate this from a good pie to your new favorite dessert!
Achieving Deep Flavor in Your Homemade Chocolate Pie
Remember I told you to use high-quality cocoa? If you can find Dutch-processed cocoa powder, please use it! It gives your **homemade chocolate pie** a much darker color and a smoother, less acidic chocolate punch. Also, seriously, sift those dry ingredients—the cocoa, cornstarch, and sugar—before you mix them with the milk. Sifting is the easy button for lump-free results when making your rich chocolate filling.
Crust Variations for Your Homemade Chocolate Pie
While I adore the classic graham cracker crunch, this filling is incredibly versatile! If you want to try something different, swap out the crumbs for finely crushed shortbread cookies. It adds a lovely buttery complexity. Or, for a really deep chocolate experience, use chocolate wafer cookies instead—that makes it a double dose of decadence! The key is just making sure whatever crust you choose is fully baked and cooled before that silky filling goes in.
Variations on the Classic Homemade Chocolate Pie
I always tell people that once you master the filling, the world of pies opens up! You don’t always have to stick to the classic graham cracker shell with this recipe. If you want to lean into that rich flavor even more, try adding a bar of chopped bittersweet chocolate right when you stir in the butter at the end of the cooking process. That will give you a truly Decadent chocolate silk pie experience.
Making a Decadent Chocolate Silk Pie Variation
Adding that bittersweet chocolate—about 4 ounces—will deepen the color and make the final texture even fudgier once it sets up. It adds such a lovely complexity! Remember, since this filling is so rich, you might need a slightly deeper vessel if you’re thinking about making deep dish chocolate pie ideas; otherwise, the baking time stays the same.
Simple Chocolate Pie for Beginners Using a Pre-Made Crust
Hey, I get it, sometimes you want that amazing texture without the crumb-pressing or baking time. If you are a total beginner or just short on time, there is absolutely no shame in grabbing a pre-made, unbaked graham cracker crust from the refrigerated section. You still bake it for 10 minutes as directed, but it saves you that precious prep time. It’s a great way to get my **homemade chocolate pie** filling goodness on the table faster!
Serving Suggestions for Your Homemade Chocolate Pie
This rich chocolate dessert commands attention all on its own, but sometimes a little extra something makes it party-ready! I love serving this chilled pie with a drizzle of salted caramel sauce right over the whipped cream—the salty sweetness is divine with the dark chocolate. A few chocolate shavings on top make it look fancy, too. Honestly, though, a simple cup of coffee alongside is usually my favorite pairing!

Storage and Reheating Instructions for Homemade Chocolate Pie
Because this **homemade chocolate pie** has that beautiful dairy and egg-based filling, keeping it cold is key! You absolutely must store extras tightly covered in the refrigerator. Plastic wrap pressed right onto the whipped topping works wonders to keep it fresh. And I’m sorry to say, you shouldn’t try to reheat this one at all—it’s meant to be served cold from the fridge. It actually tastes better the next day after setting up fully! If you need tips to keep other baked goods fresh, check out my moist banana bread with walnuts guide for storage insights.
- For best quality, enjoy within 3 days.
- Never leave the pie out at room temperature for more than two hours, or you risk the filling softening too much.
- To keep the topping fresh, store any uneaten slices covered.
Frequently Asked Questions About Homemade Chocolate Pie
I totally get it! When you’re making your first **homemade chocolate pie** from scratch, you probably have a million little questions swirling around. That’s what I’m here for! We want you to feel super confident before that pie hits the table. Check out some of the things I get asked most often about this recipe.
Can I make this homemade chocolate pie ahead of time?
Oh, yes, you absolutely can! In fact, I highly encourage it! The filling needs time for that cornstarch and the eggs to fully set up, so chilling is essential. Make the pie entirely—crust, filling, and topping—the day before you plan to serve it. It actually tastes even better the next day when everything has settled into a perfect rhythm. Just make sure it’s covered well in the fridge. It’s the perfect make-ahead dessert for busy holiday schedules!
What is the difference between this and a classic chocolate cream pie?
That’s a great question, and it’s all about the texture! My recipe here leans toward a classic chocolate cream pie instructions, but we emphasize the “silk.” A traditional cream pie often has a cooked pudding that sets, maybe topped with meringue. My silk version relies on that rich butter and the precise cooking of the cornstarch/yolk mixture, combined with the final lightness of the whipped cream folded into the base (or layered on top, as we did here). It’s just a touch richer and smoother!
My filling is runny. What went wrong with my homemade chocolate pie?
Ugh, the dreaded runny filling! Don’t panic, but usually, it boils down to two things. Either you didn’t cook the base long enough on the stove—you really need to push past the initial thickening until it’s bubbling and coating the spoon well. Or, the second possibility is that it just hasn’t chilled long enough! Even if it looks set in the middle, it needs those full four hours (or more) in the cold to firm up completely. Trust the chill time!
Share Your Homemade Chocolate Pie Creations
Now you have the recipe, and I can’t wait to see what you bake! If you whipped up this spectacular homemade chocolate pie, please come back here and leave us a 5-star rating—it truly helps other bakers find the magic! Tag us in your photos on social media with your beautiful creation. Happy baking, friends; I’m so glad you’re baking with me!
PrintThe Best Homemade Chocolate Silk Pie Recipe

Make a rich, decadent chocolate silk pie from scratch with this foolproof recipe. This tutorial guides you through creating the perfect smooth filling and a crisp crust for the ultimate homemade chocolate dessert.
- Prep Time: 25 min
- Cook Time: 15 min
- Total Time: 4 hours 40 min
- Yield: 8 servings 1x
- Category: Dessert
- Method: Stovetop Cooking
- Cuisine: American
- Diet: Vegetarian
Ingredients
- 1 1/2 cups graham cracker crumbs
- 1/4 cup granulated sugar (for crust)
- 6 tablespoons unsalted butter, melted
- 1 1/2 cups granulated sugar (for filling)
- 1/2 cup unsweetened cocoa powder, high quality
- 1/4 cup cornstarch
- 1/4 teaspoon salt
- 1 1/2 cups whole milk
- 3 large egg yolks, lightly beaten
- 2 tablespoons unsalted butter
- 1 teaspoon vanilla extract
- 1 cup heavy whipping cream
- 2 tablespoons powdered sugar (for topping)
Instructions
- Prepare the crust: Mix graham cracker crumbs, 1/4 cup sugar, and melted butter. Press the mixture firmly into the bottom and up the sides of a 9-inch pie plate. Bake at 350°F (175°C) for 10 minutes. Let cool completely.
- Make the filling base: In a medium saucepan, whisk together 1 1/2 cups sugar, cocoa powder, cornstarch, and salt. Gradually whisk in the milk until smooth.
- Cook the base: Heat the mixture over medium heat, stirring constantly, until it thickens significantly and begins to bubble. Reduce heat and cook for 1 minute more. Remove from heat.
- Temper the yolks: In a small bowl, whisk the egg yolks. Slowly pour about 1 cup of the hot chocolate mixture into the yolks while whisking constantly. This prevents the eggs from scrambling.
- Combine and cook again: Pour the tempered yolk mixture back into the saucepan with the remaining chocolate base. Return to medium heat. Cook, stirring constantly, until the filling is very thick and coats the back of a spoon, about 2 minutes. Do not boil vigorously.
- Finish the filling: Remove from heat. Stir in 2 tablespoons of butter and vanilla extract until smooth. Pour the hot filling into the cooled crust. Press plastic wrap directly onto the surface of the filling to prevent a skin from forming. Chill for at least 4 hours, or until firm.
- Make the topping: In a chilled bowl, whip the heavy cream and 2 tablespoons of powdered sugar until stiff peaks form.
- Serve: Spread the whipped cream over the chilled pie. Slice and serve your decadent chocolate silk pie.
Notes
- For a deeper chocolate flavor, use Dutch-processed cocoa powder.
- If you prefer a different base, this filling works well in a pre-baked shortbread crust or a chocolate cookie crust.
- To ensure a smooth filling, sift your cocoa powder and cornstarch before mixing them with the sugar.
Nutrition
- Serving Size: 1 slice
- Calories: 450
- Sugar: 45g
- Sodium: 210mg
- Fat: 25g
- Saturated Fat: 14g
- Unsaturated Fat: 11g
- Trans Fat: 0g
- Carbohydrates: 55g
- Fiber: 3g
- Protein: 6g
- Cholesterol: 95mg