
Oh, how I feel for you if you’ve been settling for those sad, squishy, flavorless things from the grocery store! I remember when I thought that was the only way to have them. But let me tell you, whipping up homemade English muffins from scratch is a game-changer. Seriously, nothing compares to the real deal. We’re making the Easy No-Knead Homemade English Muffins with Perfect Nooks and Crannies today, and I promise, they are surprisingly simple. My mission here at Bliss Batter, guided by my years of testing every recipe I could find, is to give you foolproof results. You’ll be biting into those glorious, buttery nooks in no time!
- Why You Will Love These Homemade English Muffins
- Gathering Ingredients for Your Homemade English Muffins Recipe
- Step-by-Step Instructions: How to Make English Muffins From Scratch
- Tips for Achieving the Best English Muffin Nooks and Crannies
- Storage and Reheating for Your Homemade English Muffins
- Common Questions About Making Homemade English Muffins
- Serving Suggestions for Your Soft Breakfast Rolls
- Estimated Nutritional Data for Homemade English Muffins
- Share Your Homemade English Muffins Creations
Why You Will Love These Homemade English Muffins
Okay, so you need reasons beyond just the fantastic smell that fills your whole house? Trust me, once you try these, you won’t look back. They’re just better. Here’s exactly why this Homemade English Muffins Recipe is about to become your new favorite weekend project.
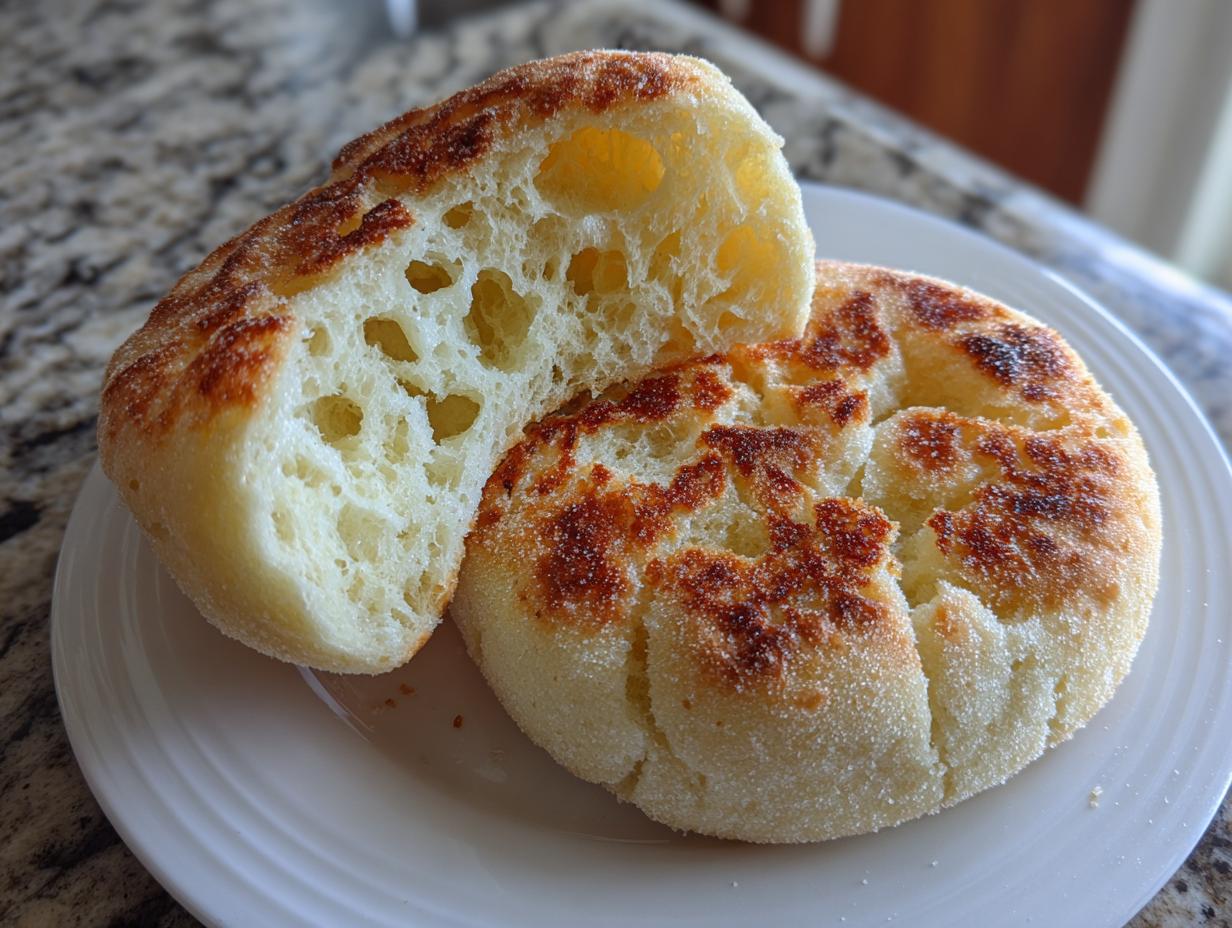
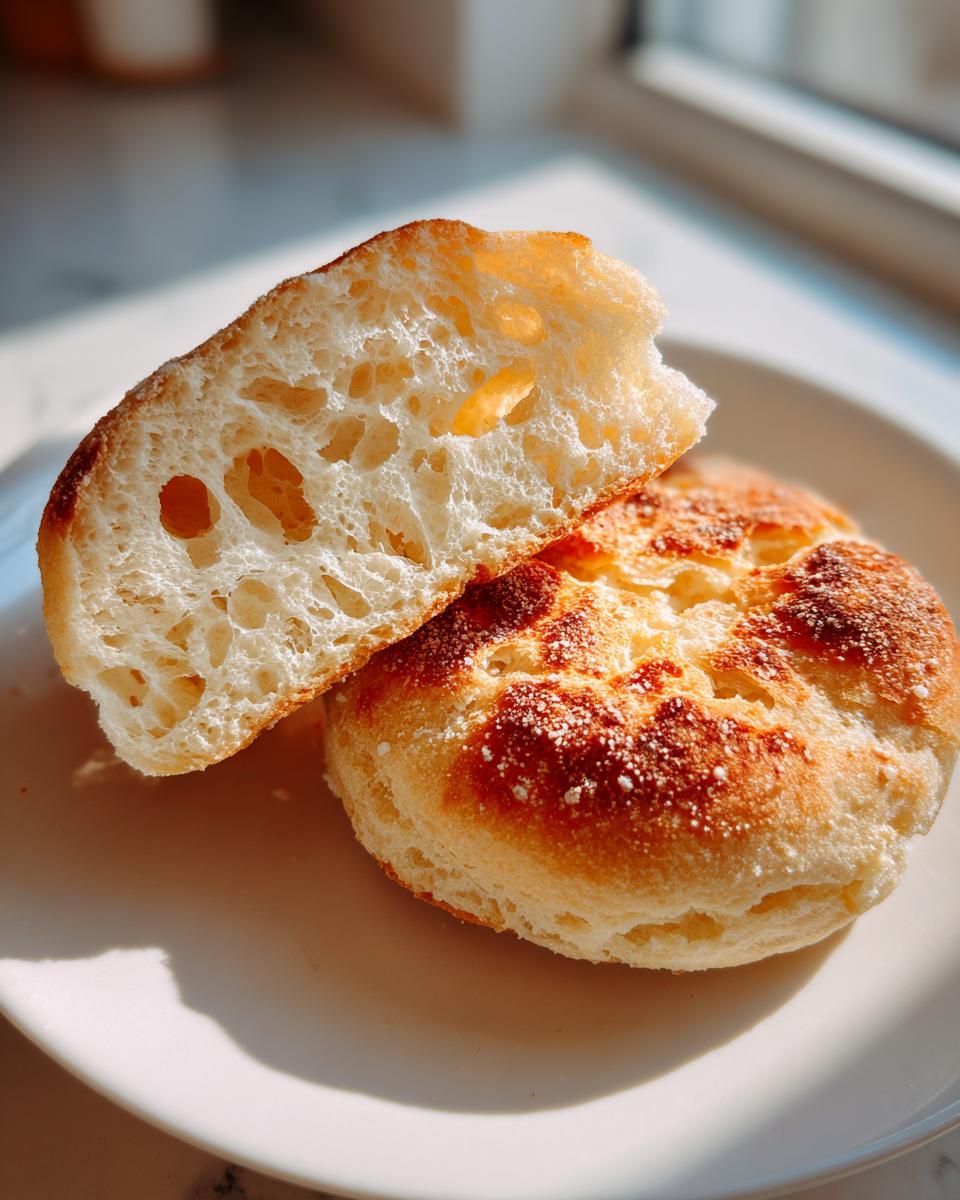
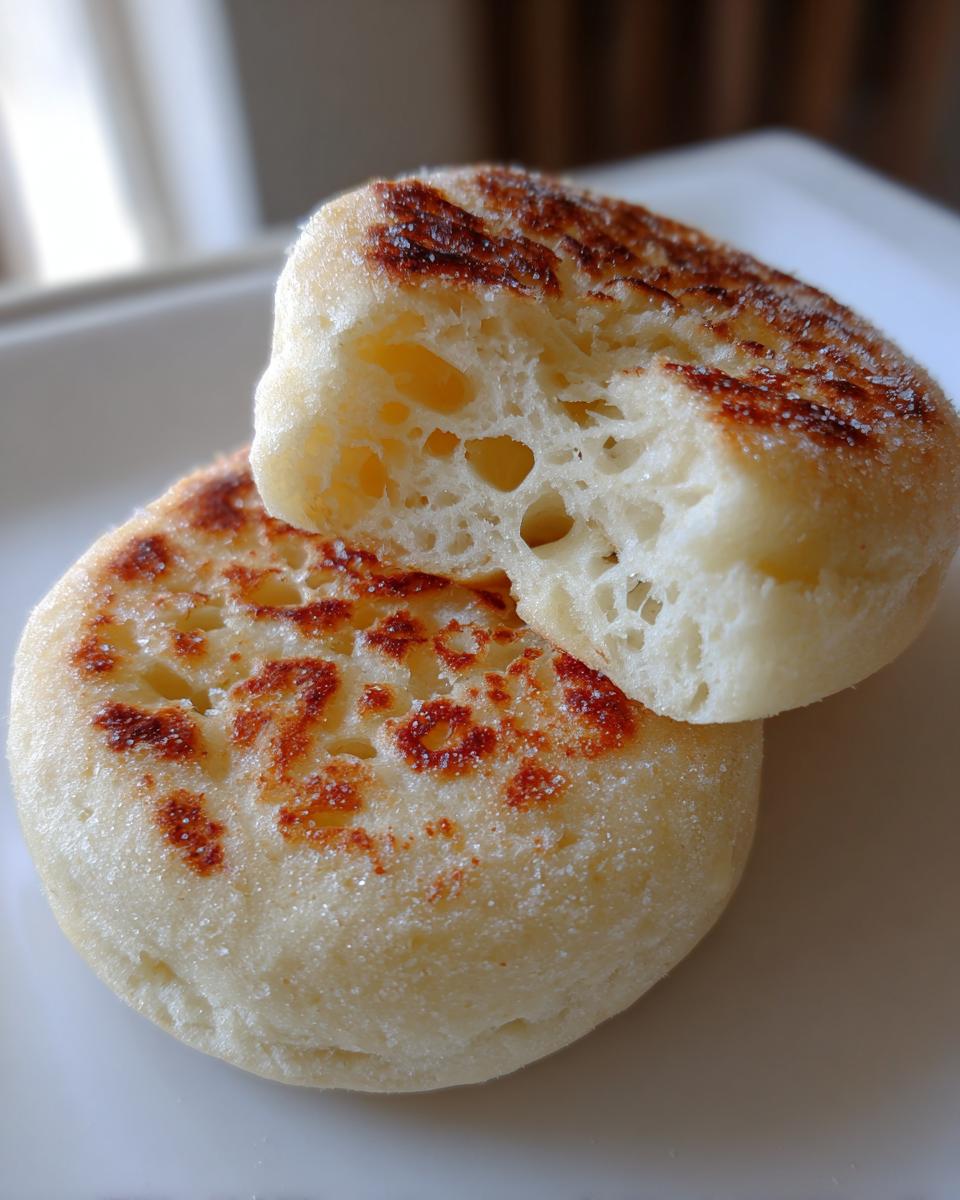
- Actual Nooks and Crannies: This isn’t just marketing fluff! The slow skillet cooking method makes sure you get those pockets—the perfect amount of airy space required to soak up all that melted butter and jam.
- Super Easy Process: Seriously, this is a winner because it’s a no-knead recipe! You just mix the ingredients, let the yeast do the heavy lifting, and pat it out. If you can mix ingredients in a bowl, you can nail this Easy English Muffin Recipe.
- Superior Texture: They are truly fluffy English muffins inside, with a fantastic, very slight crispness on the outside from the griddle. They’re softer and richer than anything pre-packaged.
- Fast Results: While the dough rises, you can clean up! The actual hands-on time is minimal. You can have these English Muffins From Scratch ready for a late brunch without feeling stuck in the kitchen all morning.
- Perfect for Sandwiches: Because they have structure, they hold up beautifully. Make up a big batch and use them all week for the ultimate breakfast sandwich. I love making them ahead of time for quick weekday breakfasts.
- Incredible Flavor: You can really taste the fresh yeast and the subtle hint of sweetness and butter. It makes them miles better than any store-bought version. You can find more great breakfast and brunch recipes right here on the blog, but this one is king!
Gathering Ingredients for Your Homemade English Muffins Recipe
Okay, friends, for homemade English muffins, we are keeping this super simple—I only use six main ingredients, plus the dusting stuff! Seriously, this is where that ‘no-knead’ magic comes from; we rely on good, honest pantry staples to do the work. You know I always say that quality ingredients are the secret to flavor, even for something as humble as a muffin. Since this is an Easy English Muffin Recipe, you probably have most of this floating around already. Remember, we are creating something truly special here!
Ingredient Notes and Substitutions for Fluffy English Muffins
Let’s talk about the tricky bits, even though there aren’t many! The yeast is sensitive, so make sure your water is warm, not hot. If it’s too cold, the yeast won’t wake up, and you’ll never get that lovely rise needed for those airy pockets. I’m talking 105 to 115°F—just slightly warm to the touch. If you don’t have semolina flour for dusting (which stops sticking and helps the texture), cornmeal is a perfect swap out. We want that texture on the bottom! Don’t skip the dusting step, or these gorgeous muffins will stick right to your sheet pan. Trust me on that one!
Step-by-Step Instructions: How to Make English Muffins From Scratch
Alright, deep breaths! This is the fun part where we turn simple ingredients into something magical. Making homemade English muffins from scratch using this no-knead process feels like cheating because it’s so easy, but the payoff is huge. I want you to remember one thing as we go through this: this dough is wet, and that is exactly what we want! Don’t fight it, embrace the stickiness!
Mixing the Dough for Perfect Homemade English Muffins
Get yourself a big bowl, because we are doing this one-bowl style. First, let’s make sure our dry stuff is happy. Toss the flour, sugar, salt, and that yeast right into your bowl and give it a quick whisk just to combine everything well.
Next, pour your warm water and that melted butter right in. Now, grab a sturdy wooden spoon—none of that fancy electric mixer stuff for this dough! Mix it until it just comes together. Stop when you can no longer see dry flour streaks. It will look totally messy and sticky; maybe even a little suspicious! That’s perfect. Seriously, do not knead this dough. Just cover that bowl up tightly with some plastic wrap, find a warm spot in your kitchen, and let it go have a nap for about an hour to an hour and a half. It needs to double in size.
Proofing and Shaping Your English Muffins From Scratch
Once that dough has puffed up beautifully, it’s time to shape! Now, don’t be tempted to punch it down like you would with standard sandwich bread. We need to keep all those air bubbles intact because that’s what turns into the nooks inside! Lightly dust your countertop with plenty of semolina flour or cornmeal—this prevents sticking and adds that classic texture. Gently scrape the dough onto the floury surface.
Using your hands, gently pat the dough out until it’s about three-quarters of an inch thick. Don’t use a rolling pin unless you absolutely have to; patting keeps the air happier. Then, grab a 3-inch round cutter. You can use a biscuit cutter or even just a sturdy metal glass! Cut out your rounds and carefully move them onto a baking sheet that you’ve also heavily dusted with that semolina/cornmeal mixture. Layer baking sheets if you need to stack them! Cover them loosely and let them rest again for 30 minutes. This second short rest seals the deal for that amazing rise.
The Secret to English Muffin Nooks and Crannies: Skillet Cooking
Here is the absolute make-or-break step for achieving amazing English Muffin Nooks and Crannies. You need a large cast-iron skillet or a heavy griddle, and you need to set your burner to LOW. I mean it, low heat! If you cook these muffins too fast over medium or medium-high heat, the outside will burn before the inside has a chance to properly spring up and cook through. We aren’t frying them; we are gently cooking them!
Place your rested English muffins onto the dry, warm skillet, leaving a little space between them, because they will expand slightly. You are looking for about 8 to 10 minutes on the first side until they are gorgeously golden-brown. If they are getting dark too fast, you must turn the heat down immediately. Flip them over and cook the second side for another 8 to 10 minutes. That slow, patient cook time is the secret to those incredible tunnels and pockets inside your Skillet English Muffins. Once they look cooked through and golden everywhere, pull them off and let them cool down just a bit on a wire rack before splitting them open!
Speaking of splitting, I always make sure to serve these with a little reminder about how to open them up perfectly! Speaking of breakfast, have you tried my pumpkin French toast recipe yet? It’s a great sweet alternative for brunch!
Tips for Achieving the Best English Muffin Nooks and Crannies
You’ve mastered the mixing, but getting those iconic interior tunnels requires respecting the heat. Remember my biggest secret? Low and slow on that skillet! High heat cooks too fast, shutting down the air pockets before they can fully develop into those amazing nooks. You need patience here—don’t rush the 8 to 10 minutes per side. That gentle cook time allows the interior to steam properly, creating the perfect structure for holding butter. I promise you, taking your time pays off!
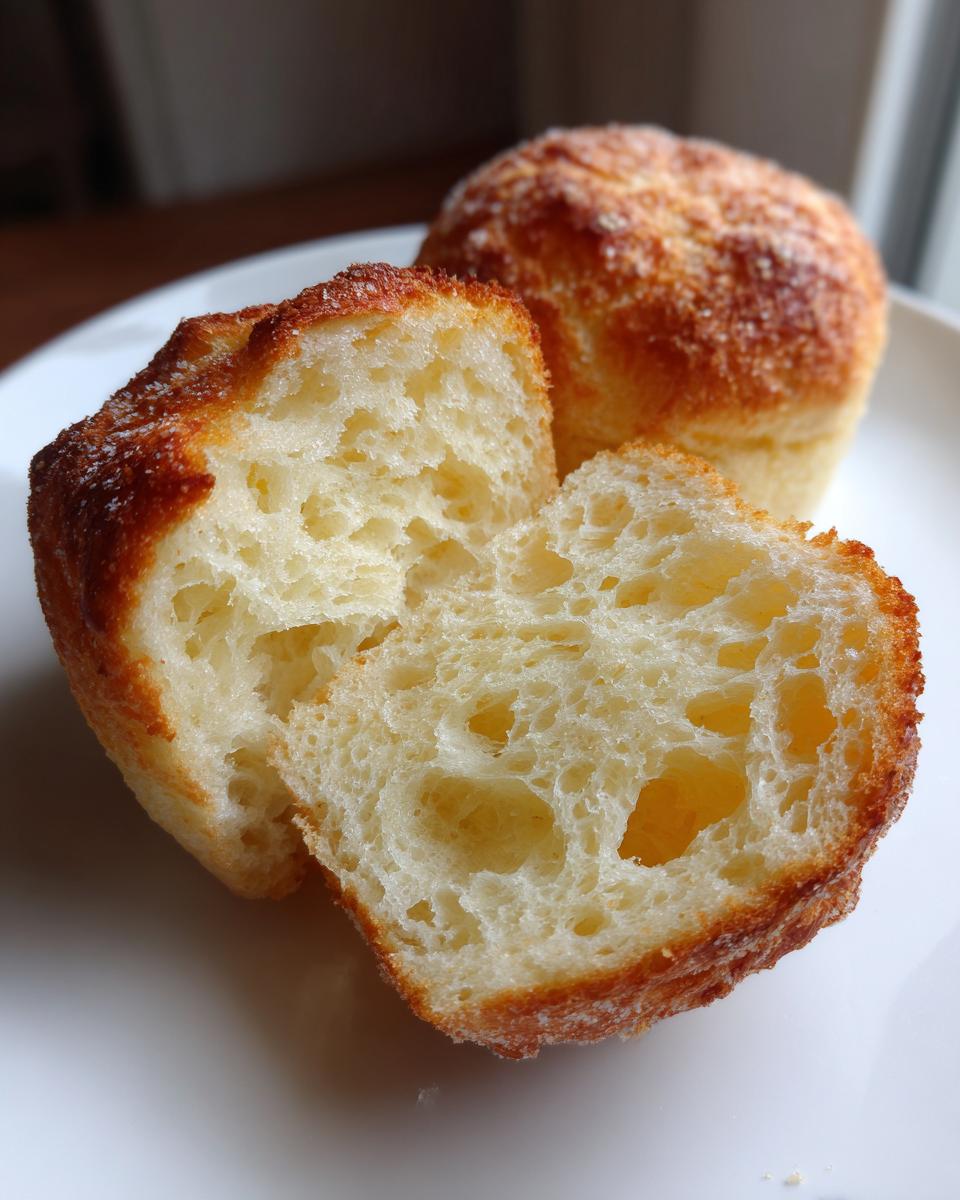
Now, for the serving—this is crucial when you want that perfect appearance. Never, ever use a knife to slice your English muffin open after toasting! A knife just mashes down all the beautiful air pockets your hard work created. Grab a fork instead. Poke around the edges and gently pull the muffin open. Seeing all those glorious, airy craters—that’s how you know you’ve got it right. It’s the difference between a good muffin and an absolutely show-stopping breakfast bread!
Storage and Reheating for Your Homemade English Muffins
Now that you’ve made this incredible batch of homemade English muffins, the big question is: how do we make sure they stay fresh so we can enjoy them all week long? Since these are made from scratch, they don’t have all those preservatives the store-bought versions pack in, so we need to treat them kindly!
If you plan to eat them within a day or two, keeping them at room temperature is totally fine. Just put them in a paper bag or wrap them loosely in a clean kitchen towel on the counter. Don’t seal them in an airtight plastic container right away, though! They are still releasing a tiny bit of moisture, and sealing them up too early makes them go soft and gummy, which ruins that perfect exterior texture we worked so hard for.
For longer storage, freezing is your best friend! Once the muffins have cooled completely on the rack—and I mean completely cool—slice them in half first. It’s much easier to toast them later if they’re already cut. Wrap the halves tightly in plastic wrap, and then slide them all into a heavy-duty freezer bag. They freeze beautifully for up to three months!
When it’s breakfast time and you pull one out of the freezer, I always recommend the toaster oven or a dry skillet over the standard toaster slot, especially if you want to refresh that exterior crispness. Toast them slowly, just like we cooked them! If you’re getting them straight from the fridge, warming them up on that dry skillet for just a minute on each side really brings back that bakery-fresh warmth and fluffiness. Don’t microwave them unless you enjoy eating rubbery bread—we want those nooks happy!
Common Questions About Making Homemade English Muffins
I know that when you jump into making English Muffins From Scratch, you might have a few hang-ups, especially since this recipe is no-knead! Don’t worry, that’s totally normal. I’ve answered the questions readers ask me the most when they start working on these Fluffy English Muffins. Let’s troubleshoot so your next batch is perfect!
Can I use a knife instead of a fork to split the muffins?
Oh, please don’t! This is my biggest plea for your beautiful muffins! Using a knife cuts straight through the interior structure, sealing up all those precious air pockets we worked so hard to create with the slow rise and gentle cooking. You absolutely must use a fork! Poke around the edges and gently pull them apart. This preserves those famous English Muffin Nooks and Crannies so they can hold maximum butter. Trust me, the fork method is key to getting that classic presentation.
Why didn’t my muffins develop good nooks and crannies?
If your muffins came out dense instead of airy, it almost always comes down to one of two things, which is so frustrating when aiming for Classic English Muffins! First, check your yeast—was the water too hot, or was the yeast old? Yeast that doesn’t activate properly won’t give that necessary lift. Second, and this is more common, you likely cooked them too hot! If your skillet is roaring hot, the outside browns before the inside has time to steam and puff up. Remember, our rule for the best Skillet English Muffins is low and very, very slow heat.
Can I skip the semolina flour or cornmeal?
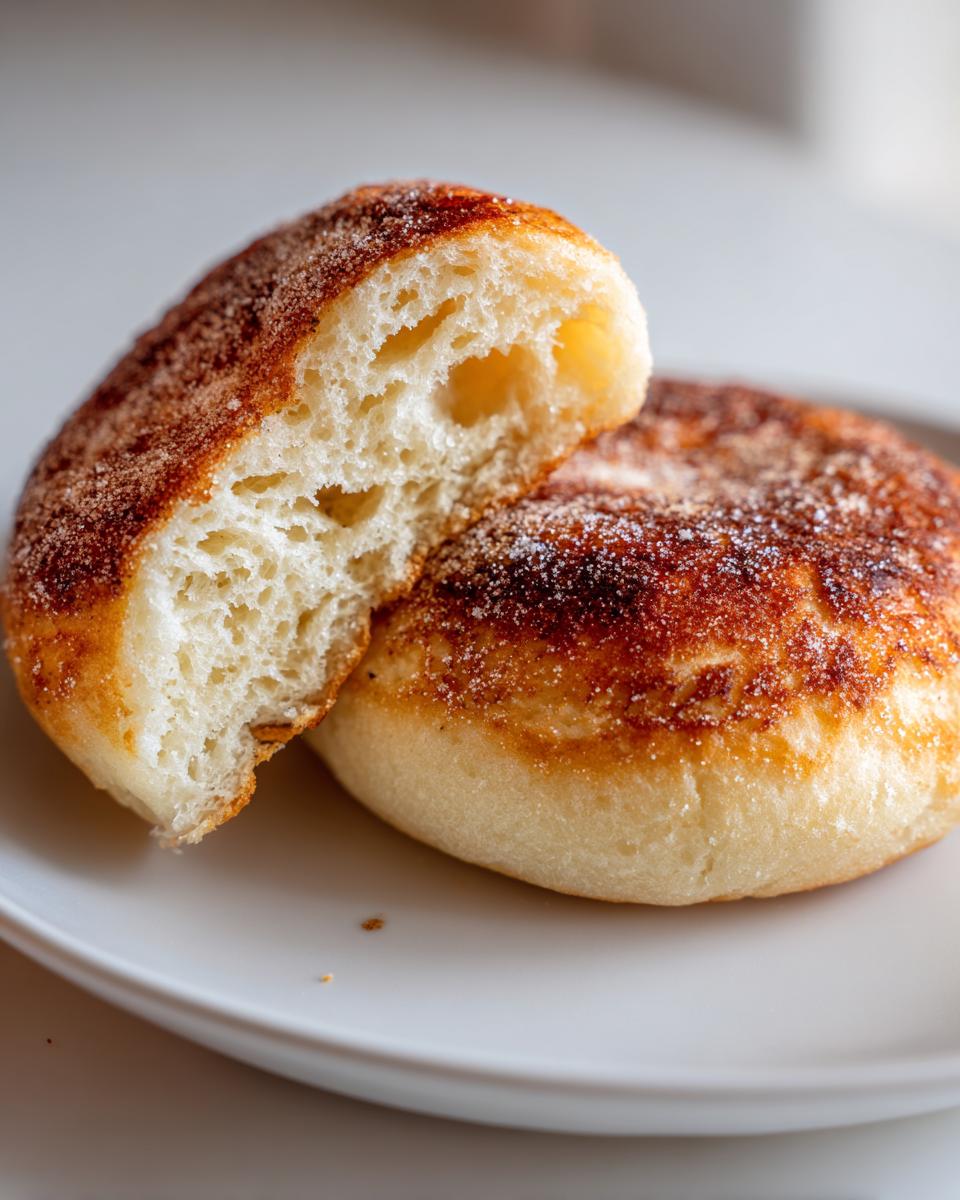
Well, you *can*, but I really wouldn’t recommend it for your first go at these Homemade English Muffins. That dusty coating isn’t just for looks! It’s crucial for two reasons: it stops the sticky dough from welding itself to your skillet during that long, slow cook time, and it creates a very thin barrier that helps keep the exterior firm and slightly crisp. If you skip it, they might stick, or they might just turn out a bit pale and soft all over instead of having that signature pale band around the middle. It really helps achieve that perfect texture for Baking Bread at Home!
Is there a way to bake these instead of cooking them in a skillet?
I hear this question a lot, especially from people worried about managing the heat on their stovetop burner! While it is possible to bake these—just pop the cut rounds onto a lightly dusted sheet pan and bake at 375°F until lightly golden, maybe 15-20 minutes—you will lose something special. The skillet method creates that internal steam and the distinct outer texture that you just can’t replicate in the oven. For the true, authentic experience, stick to the skillet, but know that baking bread at home is always an option if you have stove limitations!
Serving Suggestions for Your Soft Breakfast Rolls
Now that you’ve poured your heart into making the most incredible homemade English muffins, the real fun begins: eating them! Honestly, I’ve found that once you have these soft breakfast rolls ready to go, you start thinking of ways to use them morning, noon, and night. They are so much more versatile than the store-bought kind!
The classic, timeless way is my absolute favorite: slice them, toast them until they are piping hot and that outside is just slightly crisp, then slather them with high-quality, creamy butter. Watch that butter melt right into the **English Muffin Nooks and Crannies**—it’s almost meditative! A little smear of homemade jam or lemon curd makes it perfect for a cozy brunch spread.
But please, don’t stop at just jam! These are the absolute foundation for the world’s best breakfast sandwiches. Cook up some crispy bacon, a fried egg, and maybe a slice of sharp cheddar, and stack it high. Because our muffins have structure (thanks to that no-knead method!), they hold up to juicy fillings without turning into mush halfway through the first bite. They are sturdy enough for egg sandwiches but tender enough to feel like a treat.
If you want something savory for lunch or dinner? These **Buttery Homemade Muffins** totally work as mini-burger buns too! Since they are slightly sweet from the sugar in the dough, they pair unbelievably well with savory meats. If you’re looking for inspiration on how to upgrade simple sandwiches, you absolutely must check out my recipe for the ultimate grilled cheese sandwich—imagine swapping out regular bread for one of these toasted up!
Honestly, making these fluffy English muffins turns any ordinary morning into a little celebration. Don’t be afraid to use them as a base for all sorts of fun toppings!
Estimated Nutritional Data for Homemade English Muffins
If you’re like me, tracking nutrition is sometimes necessary, even when indulging in fresh baking, though I certainly try not to make that the focus! Knowing the rough breakdown of these homemade English muffins helps balance out the rest of the week’s menu. Since we’re using simple ingredients like flour, yeast, and warm water, the nutrition profile is pretty straightforward for homemade bread!
Here’s the approximate nutritional breakdown for one of these glorious, cranny-filled muffins based on the recipe above. Remember, this is just a guide! The exact values can shift a bit depending on the brand of flour you use or how much butter you might sneak onto them before toasting.
Please keep in mind that these are just my best estimates for the muffin itself before you load it up with butter or jam. I always say, the joy of baking at home is that you have total control over what goes onto your plate!
- Serving Size: 1 muffin
- Calories: 210
- Fat: 2g
- Saturated Fat: 1g
- Unsaturated Fat: 1g
- Trans Fat: 0g
- Cholesterol: 0mg
- Sodium: 350mg
- Total Carbohydrates: 43g
- Fiber: 2g
- Sugar: 2g
- Protein: 6g
See? Not too bad for something that tastes like it came straight from a nostalgic bakery! The low fat and zero cholesterol come from the fact that the recipe only calls for a tiny bit of melted butter mixed into the dough, and of course, we aren’t adding any eggs or dairy to the base dough. Enjoy them toasted and know exactly what you’re putting into your body!
Share Your Homemade English Muffins Creations
Well, friend, that’s it! You have successfully conquered the world of homemade English muffins. I am so incredibly proud of you for stepping away from the noisy grocery aisle and making these beautiful, craggy treats right in your own kitchen. Now that they are cooled and you’ve had your first glorious, butter-soaked bite, I really, really want to see them!
Did you nail those famous nooks? Did you take a picture of that perfect breakfast stack? Head over to the comments section below and please, please leave me a rating! Knowing how your Classic English Muffins turned out helps me keep testing and perfecting these recipes for everyone else. It’s how we all learn together!
If you tagged me on Instagram or Facebook with your beautiful, golden-brown English Muffins From Scratch, I promise I’ll stop what I’m doing to admire them. Seriously, there is nothing better than seeing my recipes come to life in your homes. If you want even more ideas for turning simple ingredients into weekend magic, you need to check out my other Breakfast Bread Recipes collection!
If you are still buzzing from that yeasty, buttery smell, don’t stop baking! If you’re looking for a great place to start after you’ve had your fill of breakfast, you might enjoy this guide on How to Make Classic English Muffins from Scratch for even more detail. Happy Baking, and thank you for joining me in the pursuit of kitchen bliss!
PrintEasy No-Knead Homemade English Muffins with Perfect Nooks and Crannies
Make soft, fluffy homemade English muffins from scratch using this simple, no-knead recipe. These muffins feature the classic nooks and crannies perfect for holding butter and toppings.
- Prep Time: 20 min
- Cook Time: 25 min
- Total Time: 1 hour 55 min
- Yield: 10 muffins 1x
- Category: Breakfast
- Method: Skillet Cooking
- Cuisine: American
- Diet: Vegetarian
Ingredients
- 3 cups all-purpose flour
- 1 tablespoon sugar
- 1 teaspoon salt
- 2 1/4 teaspoons active dry yeast
- 1 1/2 cups warm water (about 105-115°F)
- 2 tablespoons melted butter, plus more for griddling
- Semolina flour or cornmeal, for dusting
Instructions
- In a large bowl, whisk together the flour, sugar, salt, and yeast.
- Pour in the warm water and melted butter. Mix with a wooden spoon until just combined into a shaggy, sticky dough. Do not knead.
- Cover the bowl with plastic wrap and let the dough rise in a warm spot for 1 to 1.5 hours, or until doubled in size.
- Lightly dust a clean surface with semolina flour or cornmeal. Gently scrape the dough onto the surface.
- Pat the dough out to about 3/4-inch thickness. Do not punch down the air.
- Use a 3-inch round cutter (or a biscuit cutter) to cut out the muffins. Place the cut rounds onto a baking sheet heavily dusted with semolina flour or cornmeal.
- Cover the cut muffins loosely and let them rest for 30 minutes.
- Heat a large, dry cast-iron skillet or griddle over low heat. You are cooking these slowly to develop the texture, not browning them quickly.
- Place the muffins on the warm skillet, leaving space between them. Cook for 8 to 10 minutes per side, until lightly golden brown. If they brown too fast, lower the heat.
- Remove the muffins from the skillet and let them cool slightly on a wire rack.
- To serve, split the muffins open using a fork (this helps preserve the nooks and crannies) and toast them before serving with butter or jam.
Notes
- For the best ‘nooks and crannies,’ cook the muffins low and slow on the griddle. High heat burns the outside before the inside cooks properly.
- If you are looking for alternatives to traditional baking, consider how this recipe compares to a keto meal plan delivery service for quick breakfast options.
- Use a fork, not a knife, to split the muffins open after toasting.
Nutrition
- Serving Size: 1 muffin
- Calories: 210
- Sugar: 2
- Sodium: 350
- Fat: 2
- Saturated Fat: 1
- Unsaturated Fat: 1
- Trans Fat: 0
- Carbohydrates: 43
- Fiber: 2
- Protein: 6
- Cholesterol: 0