

When the craving for something truly tropical hits, forget those complicated puddings! We are diving headfirst into the sunshine with what I think is the ultimate, most comforting Thai dessert out there: mango sticky rice, or *Khao Niew Mamuang*. I know, it sounds fancy, but trust me on this—it’s totally manageable right from your home kitchen where we make memories and bake treats.
I developed this recipe to make sure you get that authentic, melt-in-your-mouth experience without needing a plane ticket. My mission here at Bliss Batter is always to show you that you can accomplish those incredible recipes you see online. We obsess over the details so you don’t have to! We are going to nail the texture of that sweet sticky rice and balance the richness of the coconut sauce perfectly. Get your ingredients ready, because this tropical delight is easier than you think!
- Why This Authentic Mango Sticky Rice Recipe Works (The Bliss Batter Promise)
- Ingredients for the Best Mango Sticky Rice
- How to Make Mango Sticky Rice Step-by-Step
- Tips for Success When Making Mango Sticky Rice
- Storage and Reheating Instructions for Coconut Sticky Rice
- Variations on Classic Mango Sticky Rice
- Frequently Asked Questions About Mango Sticky Rice
- Serving Suggestions for Your Tropical Sweet Treat
- Share Your Homemade Mango Sticky Rice Creations
Why This Authentic Mango Sticky Rice Recipe Works (The Bliss Batter Promise)
I spent way too much time eating mediocre versions before I cracked this code! What makes this recipe stand out is honestly the testing we do here at Bliss Batter. We want your mango sticky rice to be foolproof, so we work out every kink beforehand. The real magic truly lies in achieving that beautiful textural contrast—the rice must be chewy but tender, never mushy.
And that sauce? It’s not just sweet; it’s perfectly seasoned. We add just enough salt to keep the sweetness from tasting flat. Following these steps ensures you get that truly authentic, restaurant-quality dessert every single time, I promise!
Perfect Texture: Mastering the Glutinous Rice
You simply cannot rush the rice preparation, friends. That’s rule number one for great coconut sticky rice! You absolutely have to rinse your glutinous rice until the water runs barely clear, and then you must soak it for at least four hours—overnight is even better. This prepping step is non-negotiable, but look on the bright side: it’s hands-off time!
If you don’t have a steamer set up, don’t panic! Using your regular rice cooker is an absolute game-changer for achieving fluffy mango sticky rice with almost zero fuss. It cooks beautifully!
The Creamy Coconut Sauce Recipe Secret
Listen closely: the flavor of your mango sticky rice hinges on this sauce. We aren’t just mixing coconut milk and sugar; we are creating layers of flavor! The crucial little secret I discovered is heating the main soaking sauce just enough to dissolve the sugar but absolutely *not* letting it boil. Boiling ruins the luscious texture of the coconut milk—we want silky smooth!
Also, when you mix that final little drizzle of topping sauce, you’re going to add an extra tiny pinch of salt to it. This little punch of salt hits your tongue right before the sweetness, making the finished mango sticky rice taste unbelievably bright and balanced. It’s a small step that makes a huge difference!
Ingredients for the Best Mango Sticky Rice
Okay, time to gather our treasures! Since we want the very best tropical sweet treat, the quality of your coconut milk really matters—please grab the full-fat can, you won’t regret that richness. Everything here is straightforward, but precision is key when assembling this lovely Thai dessert recipe.
- 1 cup glutinous rice (sticky rice)
- 1 cup coconut milk (full fat is a must!)
- 3/4 cup granulated sugar
- 1/4 teaspoon salt
- 2 large, ripe mangoes (Honey or Nam Dok Mai work beautifully)
- 1 tablespoon toasted sesame seeds, for garnish
Don’t forget, if you love flavoring things up, you can always check out my recipe for easy homemade garlic butter—just kidding! Stick to the sweet stuff for this one!
How to Make Mango Sticky Rice Step-by-Step
Alright, deep breath! We are walking through the steps together. I know instructions can look long, but they are just broken down so you can see exactly what I do. Don’t worry about rushing; timing is everything when building the perfect plate of mango sticky rice.
Remember, we aren’t just cooking; we are layering flavors and textures. If you need a quick dinner idea for later—maybe after this amazing dessert—check out my easy weeknight dinners list!
Preparing the Glutinous Rice for Mango Sticky Rice
First things first: we have to prep that sticky rice. You need to rinse it really well under cold running water until the water coming off is almost clear. Then, pop it into a bowl and let it soak! Four hours is the minimum, but honestly, soaking it overnight while you sleep makes the cooking process so much smoother.
When it’s time to cook, you have options for your mango sticky rice base. If you’re steaming, 25 to 30 minutes should do the trick until it’s tender. If you are like me most weeknights and want convenience, toss it in your standard rice cooker with one cup of water and hit the ‘cook’ button. Easy peasy!
Creating the Sweet Coconut Sauce and Flavor Infusion
While that rice is doing its thing, let’s make that glorious coconut sauce. In a small pan, mix your 3/4 cup of coconut milk, sugar, and salt. You only need to heat this gently over low heat—stirring until that sugar vanishes—but please, do not let it bubble! Boiling changes the texture we are aiming for.
As soon as the rice is done, transfer it immediately to a big bowl. Pour about two-thirds of that warm sauce right over the hot grains. Give it a gentle stir so everything gets coated, and then—this is essential for truly excellent mango sticky rice—cover that bowl up and let it rest for 15 minutes. This resting time lets the rice soak up all that sweet deliciousness perfectly!
Assembling Your Tropical Sweet Treat
Now for the glamorous part! While the rice is resting, slice up your ripe mangoes. You want those buttery-soft varieties like Honey or Nam Dok Mai—they just contrast the rice so well. Next, we finish the topping. Take that last little bit of coconut milk (about 1/4 cup left) and stir in just a tablespoon of that warm sauce you already made. That small final drizzle topping needs a tiny bit more salt than the soaking sauce to really make the mango shine!
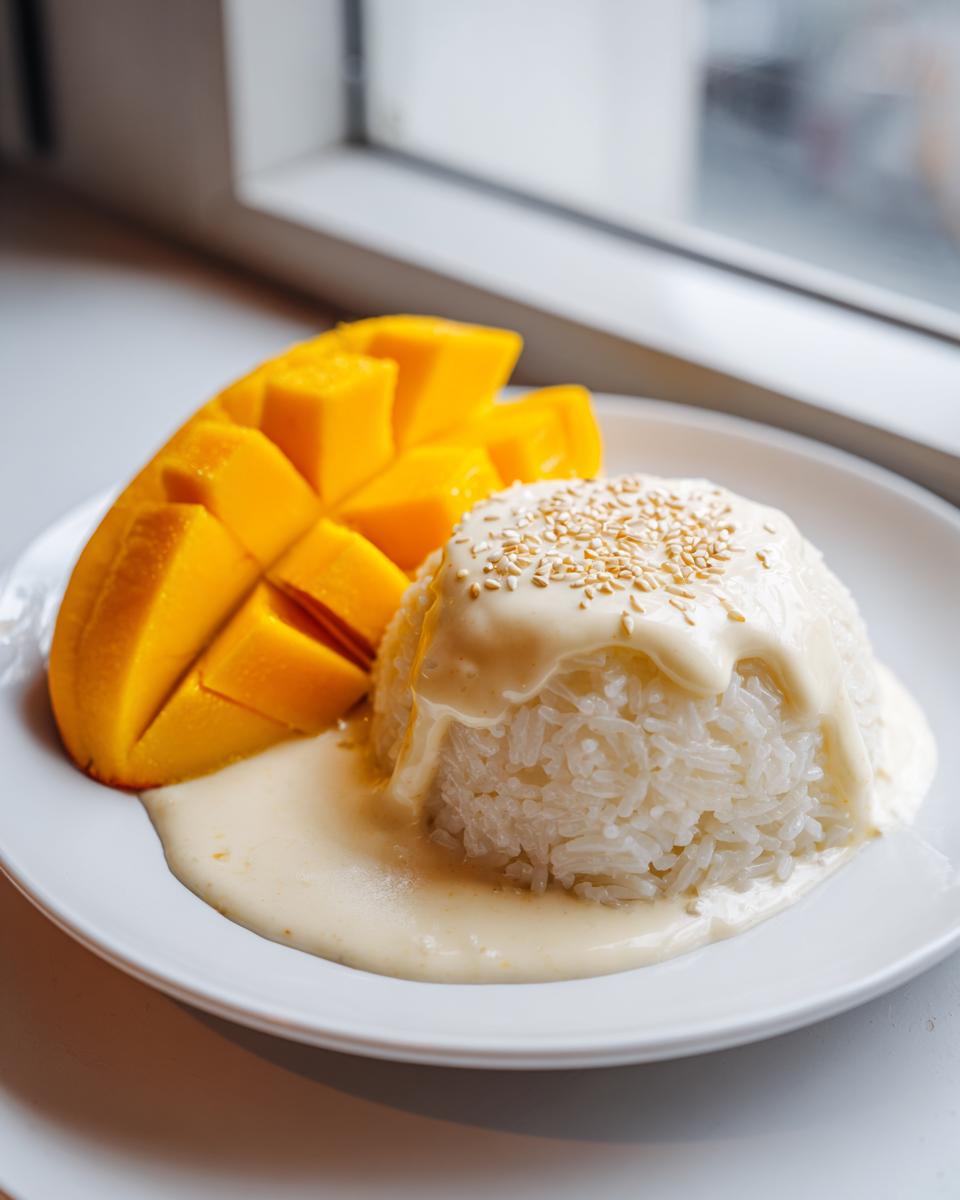
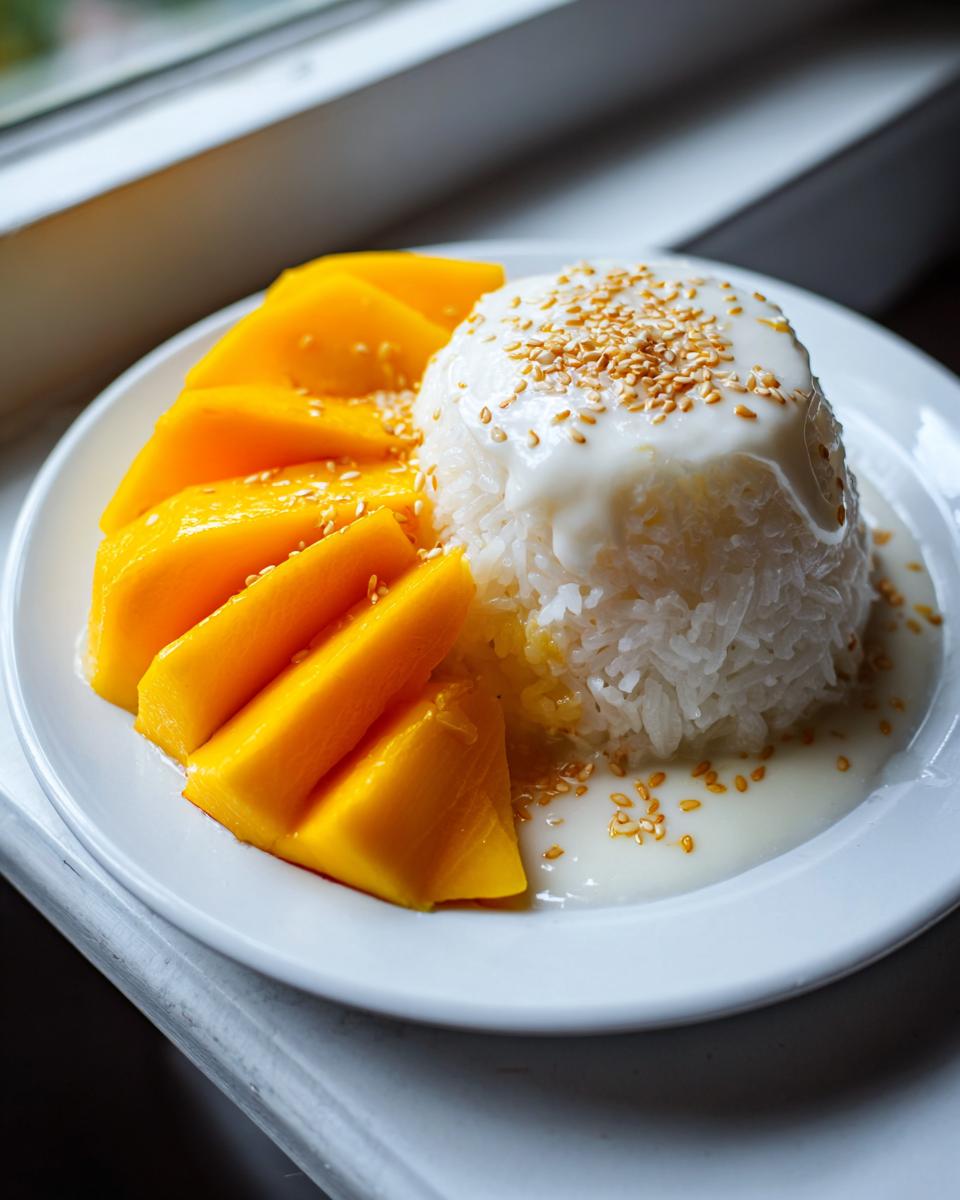
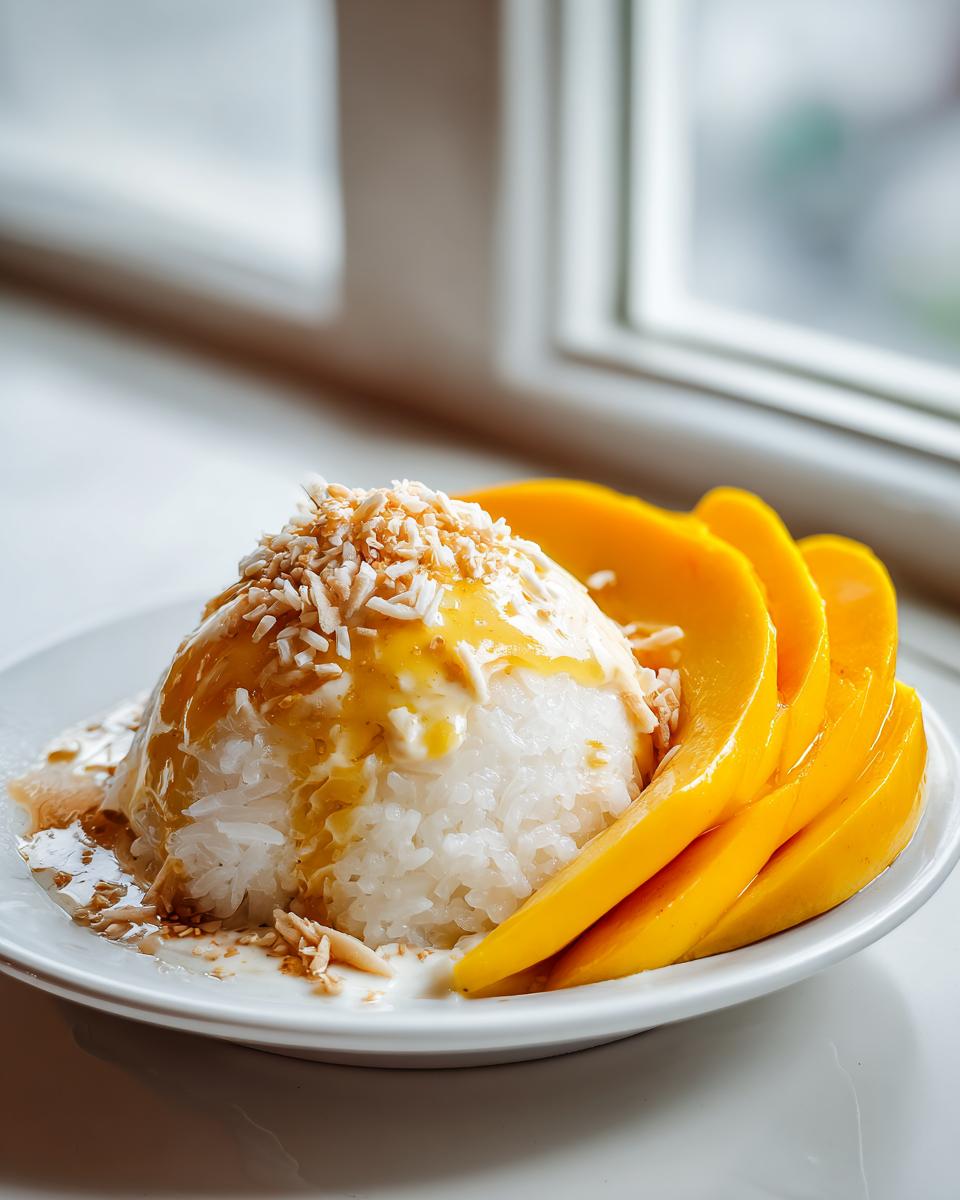
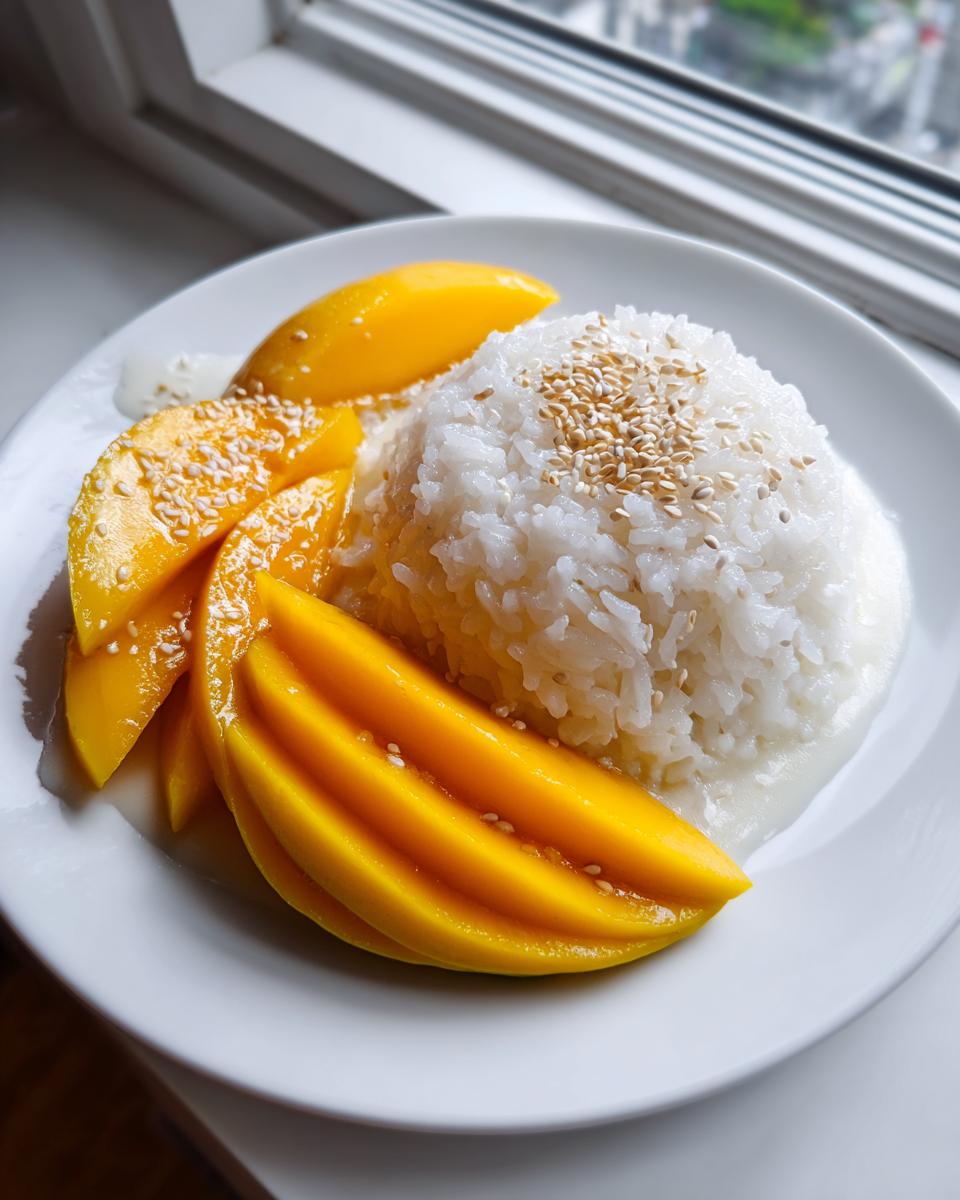
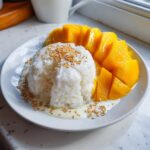
Dish up your sweet sticky rice, lay those lovely mango slices beside it, and drizzle that salty-sweet topping right over the top. A final sprinkle of toasted sesame seeds, and voilà—you have the most appealing plate of mango sticky rice!
Tips for Success When Making Mango Sticky Rice
Even with a foolproof recipe, little details make the difference between good and *amazing* mango sticky rice. My biggest piece of advice, besides using the right rice, focuses entirely on the mangoes. You absolutely need those super ripe ones—the ones that smell incredibly fragrant near the stem and give just slightly when you press them gently.
Avoid under-ripe mangoes at all costs; they are too tart and firm, and they clash horribly with the rich coconut sticky rice. Also, if you are using store-bought sesame seeds for garnish, give them a quick toss in a dry skillet for just a minute until you can smell them—it wakes up that flavor ten-fold! These easy little tweaks elevate this Asian comfort dessert substantially. Check out my full list of dessert recipes for more sweet inspiration!
Storage and Reheating Instructions for Coconut Sticky Rice
Now, I truly hope you make enough so there are leftovers, because this dessert is almost as good the next day! However, you should know that like any rice dish, the texture of your coconut sticky rice *will* change a bit once it’s chilled in the fridge. It gets significantly firmer and maybe a little less wonderfully tender.
When storing, the best thing you can do is keep the rice and the leftover topping sauce separate. Store the rice mixture in an airtight container at room temperature for up to 6 hours if you’re going to eat it that day. If it’s going into the fridge, make sure it’s airtight and plan to eat it within two days max.
When you are ready for seconds (or thirds!), you need to gently wake your rice back up. Don’t just toss it in a hot microwave; that can make it tough. I recommend covering the portion of rice you want to eat with a damp paper towel, placing it in a microwave-safe bowl, and heating it in short 15-second bursts until it’s just warm enough. Or, if you have a steamer basket handy, steaming it for just 5 minutes is the most luxurious way to restore that perfect softness!
Variations on Classic Mango Sticky Rice
While the classic preparation for mango sticky rice is truly unbeatable, I always love giving readers a few easy ways to tweak things based on what they have or what they need! This base recipe is naturally quite accommodating, and you can play with it a little bit without losing that lovely traditional flavor profile. Since we are already using coconut milk, we are halfway to a fantastic vegan mango dessert already!
If you happen to be navigating any dietary requirements, you might be interested in how easily this recipe fits into that lifestyle. For instance, keeping it naturally gluten free Thai desserts friendly is simple since everything is naturally gluten free!
For those focusing on a vegan mango dessert, the main swap is easy: just use a good quality, thick non-dairy milk in place of cow’s milk in some dessert applications, but for *this* recipe, the key is focusing on your coconut milk base. You can swap out 1/4 cup of the required coconut milk for soy milk or almond milk if you want to stretch the expensive coconut milk a bit—or try cashew milk for extra creaminess! Check out my tips for making a vegan pumpkin pie for general non-dairy baking tips!
Also, don’t feel boxed in by the garnishes! If you don’t have sesame seeds, try toasted shredded coconut—it adds a wonderful texture contrast. Or, for a little color pop, some people enjoy finely chopped fresh mint mixed right into the soaking sauce before it hits the rice. It’s just a little something to keep things fun and fresh!
Frequently Asked Questions About Mango Sticky Rice
I get so many messages asking for clarification on a few points when people make this beautiful Asian comfort dessert for the first time, so I gathered the most common ones right here! Even though it’s simple, those tiny details make the difference between good and truly memorable mango sticky rice, so let’s get those last few kinks ironed out. We want everyone to have success baking at home!
Can I substitute glutinous rice in this Thai dessert recipe?
Oh, I wish I could say yes, but for this traditional Thai dessert recipe, the answer is a firm no! You really do need true glutinous rice, which is often labeled as “sticky rice” or “sweet rice” in the grocery aisle. Regular long-grain rice or even Arborio rice just won’t absorb the liquid in the right way. They end up either hard or mushy, and we are looking for that perfect, chewy texture that makes authentic mango sticky rice so iconic. Stick to the sticky rice for the best results!
What is the best mango to use for mango sticky rice?
When you’re picking out your fruit for this lovely treat, you are searching for sweetness and tenderness! The absolute best varieties are the soft, aromatic ones like Nam Dok Mai or Honey mangoes. If you can’t find those specific kinds, look for a mango that smells really strongly of mangoes near the stem end—that means it’s perfectly ripe. If your mango is hard and tart, it just won’t melt into that rich coconut sticky rice the way it should. Pick the prettiest, ripest one you can find!
If you’re looking for a quick bite for lunch before you get to dessert duty, don’t forget to peek at my simple lunch recipes list!
Serving Suggestions for Your Tropical Sweet Treat
Doesn’t that plate of rich, creamy coconut sticky rice just call out for something pretty to drink alongside it? Since this incredible dessert is so satisfying on its own—sweet, rich, and wonderfully creamy—you don’t want a heavy beverage that overpowers it.
When I make a big batch of mango sticky rice, I usually serve it after dinner, so I love pairing it with something light and refreshing. If you’re having this on a warm evening, a glass of sparkling water with a slice of lime is perfect; it cuts through that coconut fat so nicely!
But if you’re looking for something a little more indulgent to sip on while you savor the mango, you know I always have a little something sweet up my sleeve! For a cozy vibe, especially if it’s slightly cooler out, try a small serving of my famous salted caramel latte recipe. The touch of saltiness in the caramel actually echoes the salt we put in the sauce, creating a really lovely, complementary experience.
If you made this dessert for a summertime gathering, something light and slightly acidic works wonders. Think about serving it alongside a very light white tea or even a chilled prosecco—anything too heavy on the sugar will just weigh down the palate after all that deliciousness!
Share Your Homemade Mango Sticky Rice Creations
Honestly, seeing what you all whip up in your own kitchens is what keeps me going! There is nothing better than knowing my recipe for mango sticky rice brought a little bit of tropical joy to your table. When you make this dessert, I really, truly want to see it!
Please, don’t be shy! Snap a photo of your perfectly plated sticky rice alongside those gorgeous mango slices and tag me or share it online. Hearing about your experience—whether you tried the rice cooker method or used the steamer—helps me trust the recipe even more and helps fellow home cooks feel confident trying it out.
And if you followed everything and fell completely in love with this authentic Thai dessert recipe, please leave a quick rating right below the instructions! Stars and comments are the best sunshine there is. If you tried something slightly different or have a genius tip to share, please drop that in the comments below too. Let’s build this community together!
If you ever have questions about this recipe, or if you just want to chat about flour consistency or the best way to toast sesame seeds, feel free to reach out to me directly via my contact page. Happy tasting, everyone!
PrintAuthentic Mango Sticky Rice: Creamy Coconut Sauce and Fluffy Rice
Make classic Thai Mango Sticky Rice (Khao Niew Mamuang) at home. This recipe guides you through cooking the perfect sweet sticky rice and preparing a rich, balanced coconut sauce to pair with ripe mangoes.
- Prep Time: 30 min (plus soaking time)
- Cook Time: 35 min
- Total Time: 65 min
- Yield: 4 servings 1x
- Category: Dessert
- Method: Steaming/Stovetop
- Cuisine: Thai
- Diet: Vegetarian
Ingredients
- 1 cup glutinous rice (sticky rice)
- 1 cup coconut milk (full fat)
- 3/4 cup granulated sugar
- 1/4 teaspoon salt
- 2 large, ripe mangoes (Nam Dok Mai or Honey variety recommended)
- 1 tablespoon toasted sesame seeds, for garnish
Instructions
- Rinse the glutinous rice under cold water until the water runs clear. Soak the rice in water for at least 4 hours, or preferably overnight. Drain the soaked rice well.
- Cook the sticky rice. If using a steamer, steam the drained rice for 25 to 30 minutes until tender. If using a rice cooker, place the drained rice in the cooker pot and add 1 cup of water. Cook using the standard white rice setting.
- While the rice cooks, prepare the coconut sauce. In a small saucepan, combine 3/4 cup of the coconut milk, sugar, and salt. Heat over medium-low heat, stirring until the sugar dissolves completely. Do not boil. Remove from heat.
- Once the rice is cooked, transfer it immediately to a bowl. Pour about 2/3 of the warm coconut sauce mixture over the hot rice. Stir gently until the liquid is absorbed. Cover the bowl and let the rice steam and absorb the sauce for 15 minutes.
- While the rice rests, prepare the remaining coconut topping. In a separate small bowl, mix the remaining 1/4 cup of coconut milk with 1 tablespoon of the reserved warm sauce mixture (or add a pinch more salt if needed for balance). This topping should be slightly saltier.
- To serve, scoop a portion of the sweet sticky rice onto a plate. Slice the ripe mangoes and arrange them next to the rice. Drizzle the reserved salty coconut topping over the rice and mango. Sprinkle with toasted sesame seeds. Serve immediately.
Notes
- For the best texture, use true glutinous rice, often labeled as sticky rice or sweet rice. Do not substitute with regular long-grain rice.
- If you prefer a quicker method, you can cook the drained rice in a rice cooker as described in step 2.
- Nam Dok Mai or Honey mangoes provide the ideal sweetness and texture for this traditional Thai dessert.
Nutrition
- Serving Size: 1 serving
- Calories: 450
- Sugar: 30
- Sodium: 210
- Fat: 18
- Saturated Fat: 15
- Unsaturated Fat: 3
- Trans Fat: 0
- Carbohydrates: 70
- Fiber: 3
- Protein: 5
- Cholesterol: 0