
There’s nothing quite like the smell of warm, sweet banana bread wafting from the oven to instantly make any day feel cozier. That’s the feeling I chase every time I bake! When I started Bliss Batter to share my love for accessible baking—something I honed escaping my busy corporate life you can read more about that journey here—I promised you foolproof recipes that honor the classics, and this is truly the best one I have. Forget dry loaves or complicated steps; I’m handing you my ultimate Moist & Easy One-Bowl Banana Bread Recipe. Trust me, this is the only banana bread recipe you’ll ever need to whip up that perfect, comforting loaf.
- Why This is the Best Banana Bread Recipe for Your Kitchen
- Ingredients for the Classic Banana Bread Loaf
- How to Prepare the Easy Banana Bread Recipe Step-by-Step
- Tips for Success with Your Banana Bread Recipe
- Storage and Reheating Instructions for Moist Loaf Cake Recipes
- Serving Suggestions for this Family Favorite Banana Bread
- Common Questions About Making Old Fashioned Banana Bread
- Nutritional Estimates for This Homemade Comfort Food Baking
- Share Your Best Homemade Banana Bread Creations
Why This is the Best Banana Bread Recipe for Your Kitchen
I know you’ve probably tried a few loaves before, but I promise this specific banana bread recipe hits all the right notes. It’s all about balancing that incredible, melt-in-your-mouth texture with speed. It delivers that rich, nostalgic flavor we all crave, and it does it without needing a stand mixer or a ton of bowls! We’ve put in the hours so you can have guaranteed success.
When I share a recipe, I want it to be reliable. I’ve linked to the full details here if you want to bookmark it right now, but let me tell you why this one stands out from the countless others you see online.
Achieving Ultimate Moisture and Fluffy Banana Bread Baking
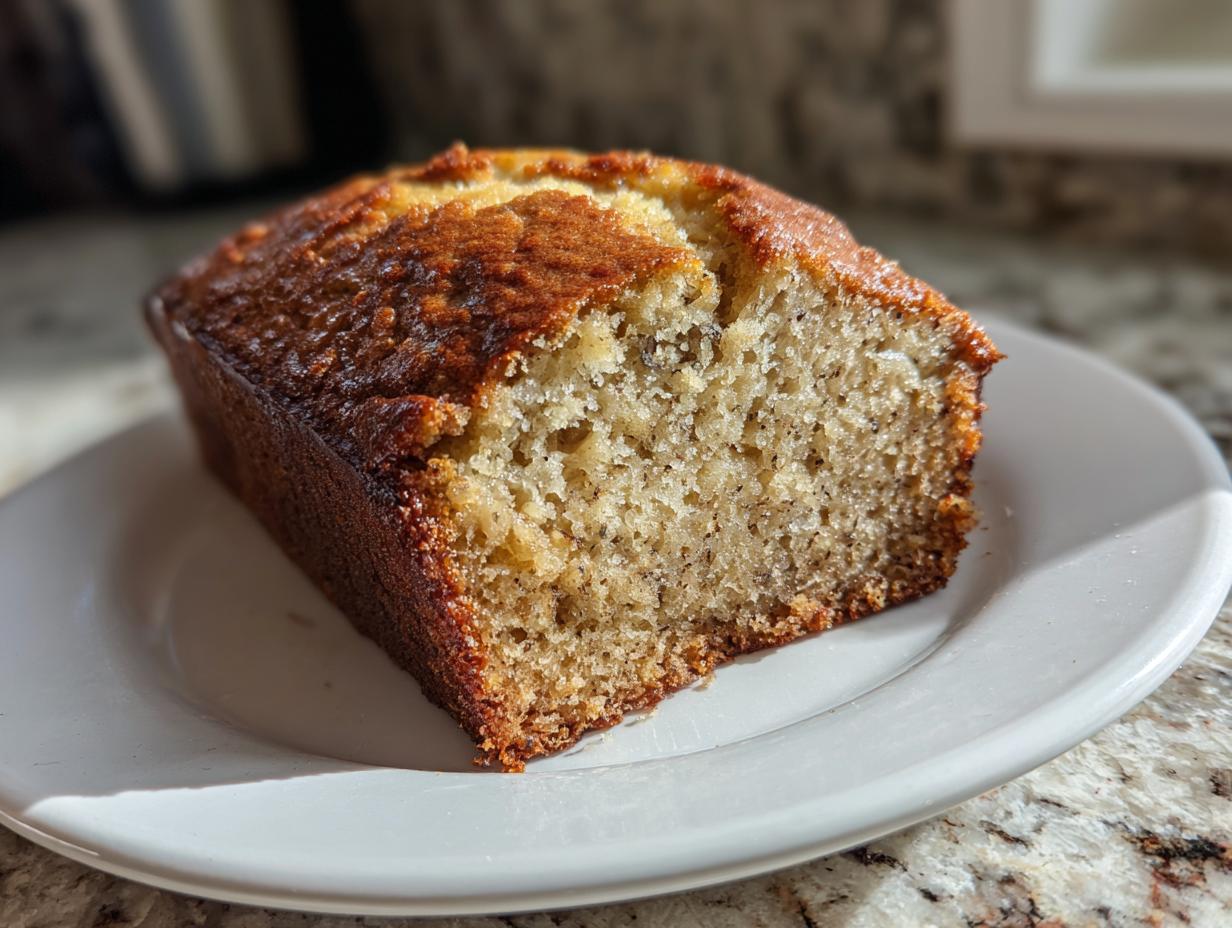
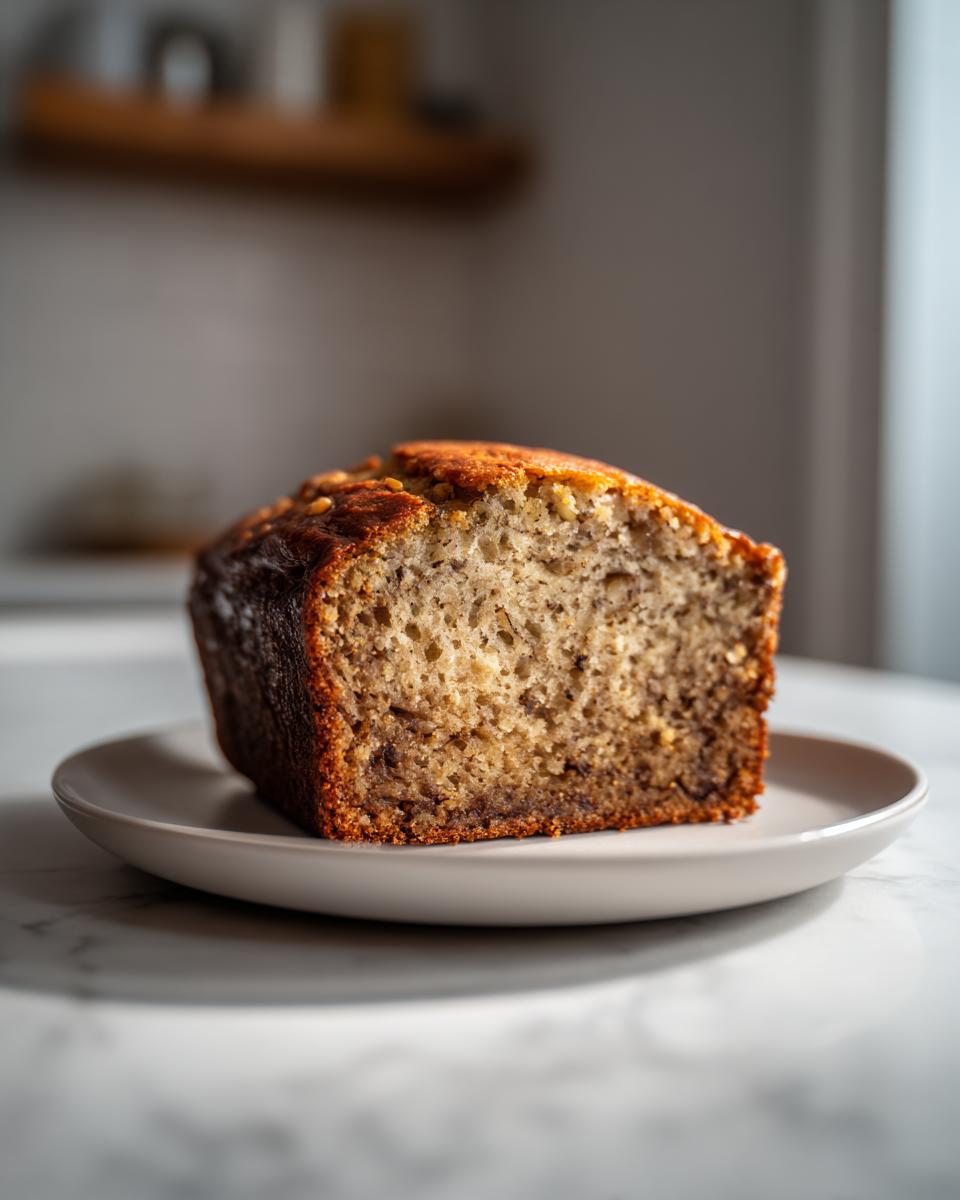
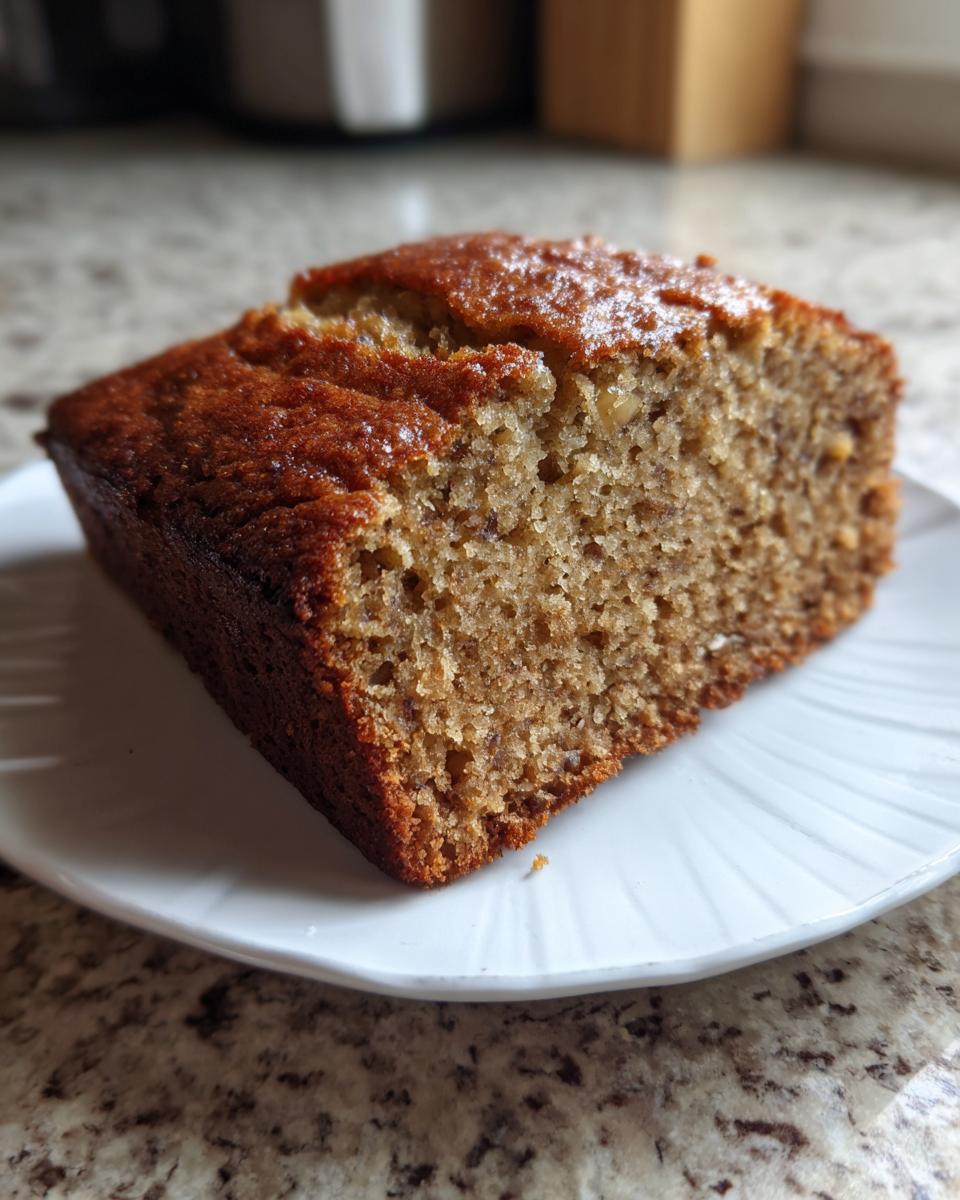
You’re here for that super Moist Banana Bread, right? I hear you! The secret here is twofold: we use melted butter instead of softened butter, which hydrates the flour differently, and we insist on bananas that are practically black. Those super ripe bananas bring natural sugars and so much liquid, ensuring your final loaf is tender. This interaction is what guarantees the Fluffy Banana Bread Baking result you’ve been hoping for.
The Simplicity of Our One Bowl Banana Bread Method
Let’s talk cleanup—the less, the better! This truly is an One Bowl Banana Bread method (well, technically two small bowls just to mix things separately before combining, but it feels like one main bowl!). Seriously, this is a No Mixer Banana Bread masterpiece. You just whisk, fold, and bake. It’s quick enough for a morning rush but tastes like you spent all afternoon fussing over it.
Ingredients for the Classic Banana Bread Loaf
Getting the foundational ingredients right is half the battle, and precision here means you get that perfect Classic Banana Bread Loaf every single time. I like to list everything out so you can gather your tools and ingredients before you even start mixing—it makes the whole process feel calmer!
When you shop for these items, remember that using the best quality butter you can afford really makes a difference in the overall flavor profile. If you’re looking for ideas on how to incorporate nuts into your bake, I’ve got a specific recipe variation featuring walnuts that you might love over here!
Ingredient Notes and Substitution Tips
Don’t just grab any banana from the bowl! The success of this bake hinges on the ripeness of your fruit. Remember what I said about moisture? That comes mostly from the bananas.
For the perfect bake, look for bananas that are covered in black spots—truly, the uglier the banana, the better the flavor will be for your Banana Bread with Ripe Bananas. If you see a banana that is only slightly yellow with a few brown specks, it really isn’t ready yet. You need that deep sweetness!
As for mix-ins, the recipe calls for a half-cup, and while I listed chocolate chips up there, feel free to swap! Chopped pecans are a lovely substitute if walnuts aren’t your favorite. If you are using chopped fruit or nuts, you can toss them lightly in a tablespoon of the flour before folding them in. This little trick helps keep them from sinking straight to the bottom of the pan while baking.
How to Prepare the Easy Banana Bread Recipe Step-by-Step
Alright, let’s get baking! This is where the magic happens, and honestly, with this Easy Banana Bread Recipe, it comes together so quickly, you’ll be surprised. We aren’t waiting around for things to soften; we start hot and ready to go!
First things first: get that oven humming! We need to preheat it to 350°F (175°C) right away. While the oven warms up, you need to prep your pan—I have a standard 9×5 inch loaf pan that I either grease and flour really well or, my favorite hack for a foolproof release, I line it with parchment paper strips so they hang over the sides like little handles.
For detailed guidance on timing and technique, I laid out the full method in this quick guide, but here are the essentials you need to focus on.
Mixing Wet and Dry Ingredients for Tender Banana Bread Tutorial
We keep things separated just until the last minute. Take your big bowl and whisk together all your dry items—that’s the flour, baking soda, salt, and cinnamon. Whisking them well ensures the leavening agent (that’s the baking soda) is totally spread out, which is essential for an even rise.
In a separate, smaller bowl, mix up the wet stuff: the melted butter and sugar first, then the egg and vanilla. Once those are smooth, toss in your mashed bananas. Stir it just enough so they are incorporated; you want streaks of banana, that’s totally fine!
Now, the most crucial part for a Tender Banana Bread Tutorial success: Pour the wet mixture right into your dry mixture. Grab a rubber spatula and fold gently. I mean it—fold! You only mix until you see barely any dry flour streaks left. If you keep mixing until it’s perfectly smooth, you’re going to deflate those air bubbles we worked hard to create. A lumpy batter means a perfect, fluffy loaf, so stop mixing when you think you should keep going!
Baking the Banana Bread Recipe and Checking for Doneness
Fold in your chocolate chips or nuts right now if you’re using them, and pour that beautiful batter into your prepped pan. Spread it gently so it’s level.
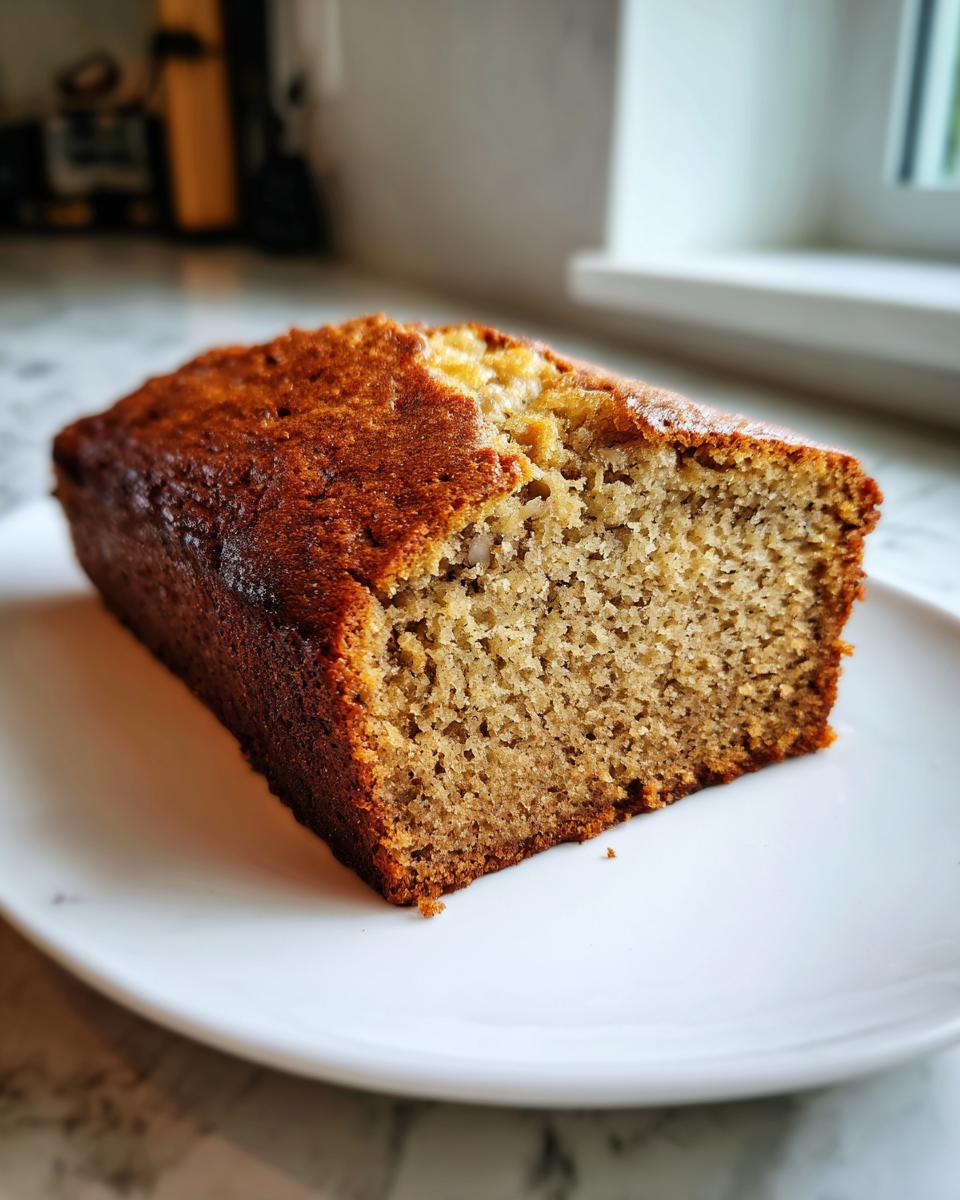
Pop it into that 350°F oven. The baking time is usually around 50 to 65 minutes. Since every oven is a little different, you want to start checking closer to the 50-minute mark. The best way to check for doneness isn’t just poking it once; use a wooden skewer or even a thin knife and stick it right into the deepest center part of the loaf.
We’re looking for moist crumbs clinging to the skewer, not sloppy wet batter. If you see the top browning way too fast before the center is done—especially if it’s past 45 minutes—just loosely cover the top with a piece of aluminum foil. That foil tent acts like a tiny umbrella and stops the crust from burning while the middle catches up. Don’t forget to let it rest in the pan for 10 minutes before moving it to the cooling rack; patience now saves you from a broken loaf!
Tips for Success with Your Banana Bread Recipe
Even though this is an easy recipe, I love sharing those little baker secrets that take a good loaf and make it truly incredible. Think of these as the final polish on your masterpiece. Getting the mix-ins right, or knowing how to add an extra layer of flavor, really elevates what you’re baking!
If you really want to impress people, try leveling up your game with a swirl. I have a fantastic recipe for a cinnamon swirl that works beautifully in quick breads like this one, which you can check out if you’re feeling adventurous! But for now, let’s focus on keeping the chunks where they belong.
Incorporating Mix-Ins like Chocolate Chip Banana Bread Recipe
This is where you personalize your loaf! Whether you’re making a Chocolate Chip Banana Bread Recipe or tossing in walnuts or pecans, the key—and I cannot stress this enough—is timing and technique. Remember how we talked about gently folding the wet into the dry? You take that same gentle philosophy here.
You fold in your mix-ins *after* the wet and dry ingredients are *just* combined. Don’t stir vigorously! If you whisk those chocolate chips around, you’ll either break them up, turning them into sad little brown streaks, or you might accidentally overdevelop the gluten in your batter, leading to a tougher bread.
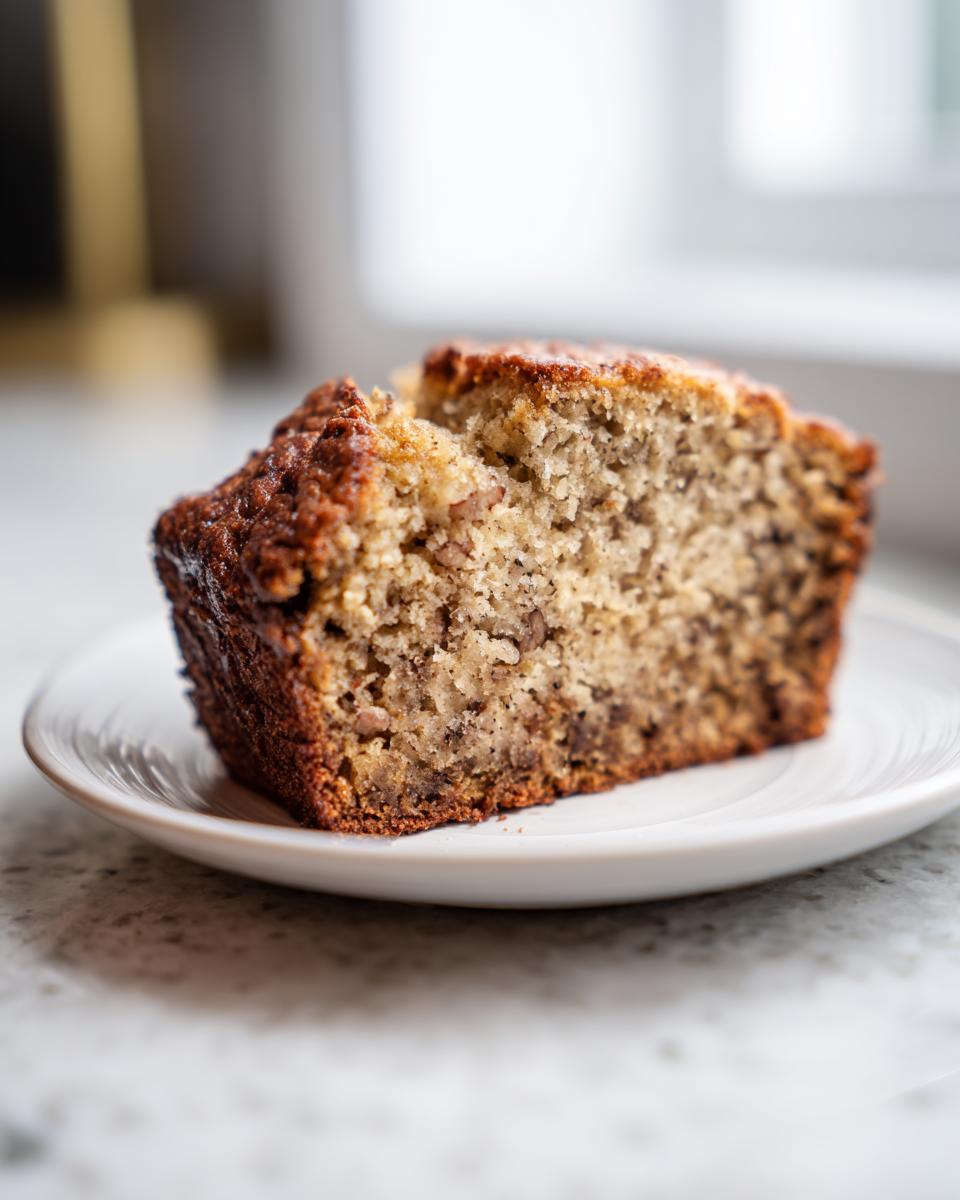
Fold them just enough so they are evenly distributed throughout the batter, and then stop immediately before pouring it into the pan. If you’re finding that your dense mix-ins (like heavy nuts) are sinking to the bottom during baking, try tossing them in a teaspoon of flour *before* you fold them into the banana batter. That tiny dusty coating helps them anchor into the batter better while it bakes up. Easy trick, huge difference!
Storage and Reheating Instructions for Moist Loaf Cake Recipes
Okay, we’ve baked the most perfect loaf—it smells incredible, it looks flawless, and you’ve managed to wait the full 10 minutes before turning it out! Now, how do we keep this beautiful, Moist Loaf Cake Recipe tasting fresh for the next few days? Because banana bread is so tender, proper storage is really important if you want to enjoy it all week long.
The number one enemy of any quick bread is air! Air dries out the crumb, and suddenly your moist masterpiece turns into something you need a tall glass of milk just to swallow. I’ve got two methods for keeping this bread tender and delicious.
Keeping Your Loaf Fresh on the Counter
If you plan on eating this banana bread recipe within three to four days, the countertop is your friend, but you have to wrap it up tight. Once the bread has cooled *completely*—and I mean stone cold on the wire rack—take off any aluminum foil you might have used during baking.
Wrap the loaf snugly in plastic wrap. I usually go for two layers of plastic wrap to really seal out the air. If you have beeswax wraps, those work beautifully too, as they breathe just a tiny bit more but still seal in the moisture. Store it at room temperature. Do not put it in the fridge! I know it’s tempting because it seems safer, but the cold temperature actually makes baked goods stale faster, sucking out that lovely tenderness.
Freezing for Future Comfort Food Baking
When I make a batch of my Family Favorite Banana Bread, I always freeze half of it because letting the whole thing sit on the counter stresses me out—who needs that temptation? Freezing is ideal if you want to keep it perfect for up to three months.
The process is almost exactly the same as countertop storage, but you add one extra step for maximum freshness. Once the loaf is completely cool, wrap it tightly in two layers of plastic wrap. Then, you want a final layer of protection, usually aluminum foil or placing the whole wrapped loaf into a heavy-duty, freezer-safe zip-top bag. Squeeze out every bit of air before sealing it!
When you’re ready to enjoy a slice for a spontaneous Quick Banana Bread Snack, just pull the loaf out of the freezer the night before and let it thaw on the counter (still wrapped!). If you can’t wait, you can slice it while semi-frozen and toast the individual slices right away—they warm up beautifully!
Serving Suggestions for this Family Favorite Banana Bread
Now that you’ve successfully baked this gorgeous, tender loaf, it’s time for the best part: eating it! Honestly, this Family Favorite Banana Bread is perfect straight out of the oven (after it cools a bit, of course!). It tastes incredible all on its own, but a little topping or pairing can take it from a great snack to an amazing treat.
I love setting out a basket of warm slices first thing in the morning for an impromptu cozy breakfast. This recipe makes the perfect, comforting start to any day. If you’re looking for more cozy morning ideas, you absolutely must check out my recipe for pumpkin French toast—it gives you that same warm, spiced feeling!
Here are my favorite ways to turn this simple Breakfast Bread Idea into a real moment.
- Simply Sliced and Buttery: Wait until the bread is just barely warm and slice it thickly. Slather a generous amount of good quality, softened butter on top and let it melt right into the crumb. Nothing beats that combination.
- Toasted for Crunch: If your bread has sat for a day or two (though I doubt mine ever does!), toasting the slices brings the moisture back to the surface and gives you this wonderful crispy edge. A light spread of cream cheese on a toasted slice is divine.
- With a Warm Beverage: This bread is the perfect companion for a strong cup of coffee or an afternoon cup of tea. It’s substantial enough to feel like a satisfying treat when you need that Quick Banana Bread Snack boost.
- The Fancy Dessert Touch: Don’t think this is only for breakfast! Serve a slice warmed up slightly in the microwave (about 15 seconds) and top it with a small scoop of vanilla bean ice cream. It turns this humble loaf into a surprisingly elegant dessert!
Enjoy the fruits of your labor! You made the best banana bread, and now it’s time to bask in the glorious, sweet aroma of your success.
Common Questions About Making Old Fashioned Banana Bread
Whenever I share this simple, Old Fashioned Banana Bread recipe, I always get such helpful feedback and questions. That’s totally wonderful! Getting those little details dialed in is what moves a recipe from “good” to “amazing.” I’ve gathered up a few of the most common things I hear to help you feel confident when you jump into the mixing bowl. If you’re looking for more ways to enjoy a cozy bite, I actually have a great non-baked recipe involving apples that you might enjoy if you need a little break from baking!
Can I use less sugar in this banana bread recipe?
This is a tricky one, and the answer is generally: yes, but you might change the texture! Sugar does more than just sweeten our Sweet Baked Goods Recipes, you know. In quick breads, sugar is actually a liquid retainer. When you reduce it too much, you risk pulling moisture away from the other ingredients, which can lead to a drier, denser loaf, even with those ripe bananas. I absolutely encourage you to stick to the 3/4 cup we call for in this recipe to ensure you get that signature moist, tender crumb we worked so hard to achieve. If you want slightly less sweetness, make sure your bananas are *peak* ripe—that way, the bananas are doing most of the sweetness work for you!
How do I know if my bananas are ripe enough for the best banana bread recipe?
Oh, trust me, I’ve ruined more than a few loaves by trying to rush the bananas! For the best banana bread recipe—especially one promising incredible moisture—your bananas should look frankly unappetizing. I’m talking about heavy black spotting all over the peel, or even skins that are mostly black. Some people call it ‘swamp banana’ stage, and that’s exactly what we want!
If you only have yellow bananas with a few brown specks, they aren’t magically sweet enough yet. The starch in those yellow bananas hasn’t fully converted to the deep, rich sugars we need to perfume the bread and keep it moist for days. Honestly, let them sit out another day or two on the counter. Your future self, enjoying that impossibly moist slice, will thank you for your patience!
Nutritional Estimates for This Homemade Comfort Food Baking
Oh, the delicious truth! While the goal of this Homemade Comfort Food Baking is pure, unadulterated joy, I know sometimes we want a little idea of what we’re getting into. So, here is a breakdown of the estimated nutritional information for just one slice of this classic loaf. Please remember, this is just an estimate, okay? It’s based strictly on the standard recipe with no optional add-ins like chocolate chips or extra sugar. If you use yogurt instead of butter or add a pound of nuts, the numbers will definitely change!
I pulled these numbers together so you have a ballpark idea of what you’re enjoying when you reach for a slice with your morning coffee. You can always check out my hearty lentil soup recipe if you’re looking for something savory next!
Here are the estimates for one serving (one slice):
- Serving Size: 1 slice
- Calories: 280
- Sugar: 18g
- Sodium: 250mg
- Fat: 12g
- Saturated Fat: 7g
- Unsaturated Fat: 5g
- Trans Fat: 0g
- Carbohydrates: 43g
- Fiber: 2g
- Protein: 4g
- Cholesterol: 45mg
See? Not bad for something that tastes this indulgent! We use a modest amount of sugar because those super ripe bananas are carrying a lot of the sweetness load. That’s just another reason why using the blackest bananas you can find is my top tip for this banana bread recipe!
Share Your Best Homemade Banana Bread Creations
Whew! We did it! You have officially conquered the quest for the Best Homemade Banana Bread, and I couldn’t be more thrilled for you. Seriously, there is no greater feeling than slicing into a perfectly moist loaf that you made yourself. That deep, warming, classic banana aroma filling your kitchen? That’s pure happiness, homemade style.
I hope you found this banana bread recipe to be exactly what you needed—simple, fast, and unbelievably delicious. I poured all my heart into making sure that one-bowl method was foolproof for baking beginners and quick enough for my busy friends. I’m so excited for you to enjoy it!
Now that you’ve got your perfectly tender loaf cooling, I absolutely need to know how it went! Did you go with the chocolate chips? Did you decide to skip the mix-ins and just keep it pure and classic? I live for hearing about your baking adventures.
Please, please, *please* leave a rating down below—five stars if it made your kitchen smell like heaven! And if you snapped a picture of your golden-brown masterpiece, tag me! I love seeing your creations on social media. If you have any questions at all as you master this bake, don’t hesitate to reach out through the contact page right here. I read every single message and I’m always here to help troubleshoot!
If this loaf brought you joy, you’ll probably love our other comfort baking recipes too. Keep coming back to Bliss Batter—we’ve got so much more deliciousness waiting for you!
Happy Baking,
Claire
PrintThe Ultimate Moist & Easy One-Bowl Banana Bread Recipe (Classic Flavor)
Create the best homemade banana bread with this foolproof, one-bowl recipe. You get an incredibly moist, fluffy loaf with classic flavor, perfect for using up those ripe bananas. This simple method works for beginners.
- Prep Time: 15 min
- Cook Time: 60 min
- Total Time: 75 min
- Yield: 1 loaf (about 10 servings) 1x
- Category: Quick Bread
- Method: Baking
- Cuisine: American
- Diet: Vegetarian
Ingredients
- 1 3/4 cups all-purpose flour
- 1 teaspoon baking soda
- 1/2 teaspoon salt
- 1 teaspoon ground cinnamon
- 1/2 cup (1 stick) unsalted butter, melted
- 3/4 cup granulated sugar
- 1 large egg, lightly beaten
- 1 teaspoon vanilla extract
- 3 very ripe medium bananas, mashed (about 1 1/4 cups)
- 1/2 cup mix-in of choice (e.g., chocolate chips or chopped walnuts)
Instructions
- Preheat your oven to 350°F (175°C). Grease and flour a standard 9×5 inch loaf pan, or line it with parchment paper.
- In a large bowl, whisk together the flour, baking soda, salt, and cinnamon. This is your dry mixture.
- In a separate medium bowl, whisk the melted butter and sugar together until combined.
- Add the egg and vanilla extract to the butter mixture and whisk until smooth.
- Add the mashed bananas to the wet ingredients and stir until just combined. Do not overmix.
- Pour the wet ingredients into the dry ingredients. Use a spatula to gently fold the mixture together until just combined. A few streaks of flour are fine; do not mix until completely smooth.
- If using, gently fold in your chocolate chips or nuts now.
- Pour the batter into your prepared loaf pan and spread it evenly.
- Bake for 50 to 65 minutes, or until a wooden skewer inserted into the center comes out clean or with moist crumbs attached.
- Let the banana bread cool in the pan for 10 minutes before carefully turning it out onto a wire rack to cool completely before slicing.
Notes
- For the best moisture, use bananas that are heavily spotted or almost black.
- If you want a cinnamon swirl, mix 1/4 cup brown sugar, 1 teaspoon cinnamon, and 1 tablespoon melted butter. Layer half the batter, sprinkle with half the swirl mixture, add the remaining batter, and top with the rest of the swirl mixture before baking.
- If your loaf starts browning too quickly, loosely tent the top with aluminum foil for the last 15 minutes of baking.
Nutrition
- Serving Size: 1 slice
- Calories: 280
- Sugar: 18g
- Sodium: 250mg
- Fat: 12g
- Saturated Fat: 7g
- Unsaturated Fat: 5g
- Trans Fat: 0g
- Carbohydrates: 43g
- Fiber: 2g
- Protein: 4g
- Cholesterol: 45mg