
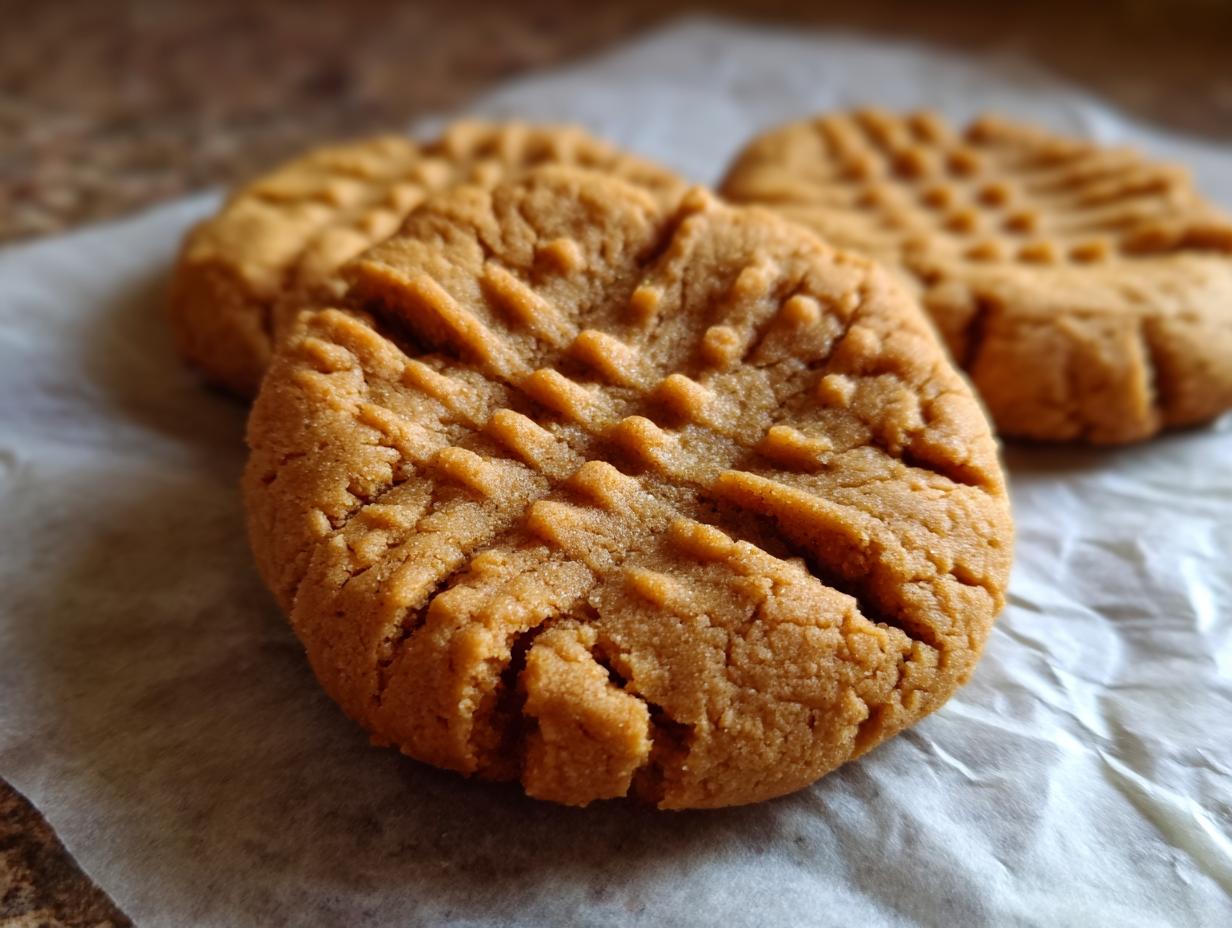
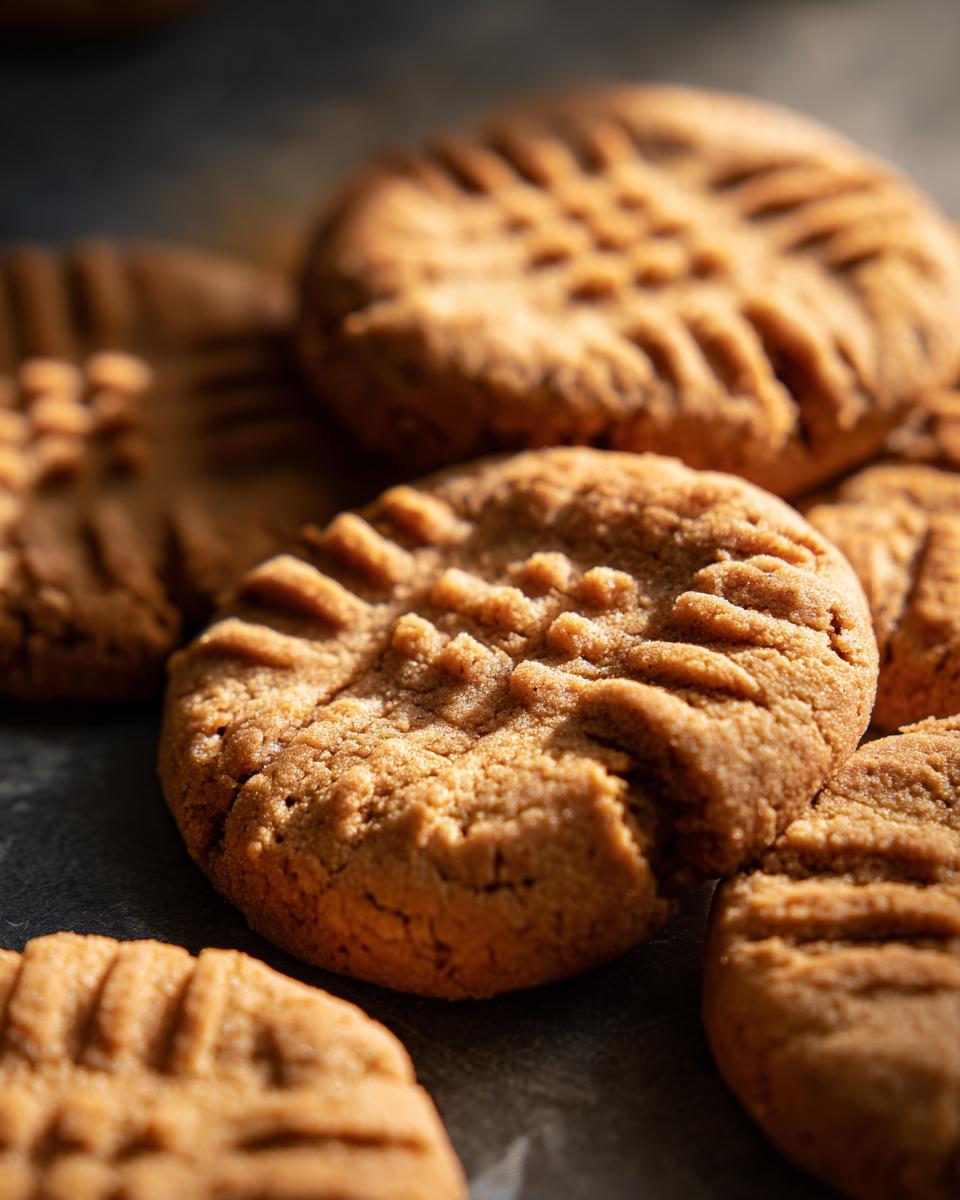
Oh, peanut butter cookies! Just thinking about them brings me right back to Grandma Sterling’s kitchen, sunbeams streaming in, the whole place smelling like pure comfort. There’s something magical about that classic crisscross pattern on top, isn’t there? It’s like a little edible hug. These aren’t just any cookies; they’re the kind that make you feel instantly at home, with that perfect balance of sweet and salty peanut butter flavor. My personal mission with this recipe is to get that wonderfully soft, melt-in-your-mouth texture that so many store-bought versions just can’t quite nail. Trust me, these peanut butter cookies are the real deal!
- Why You Will Love These Peanut Butter Cookies
- Ingredients for Classic Peanut Butter Cookies
- Tips for Perfect Peanut Butter Cookies
- How to Make Old-Fashioned Peanut Butter Treats
- Ingredient Notes and Substitutions for Peanut Butter Cookies
- Frequently Asked Questions About Peanut Butter Cookies
- Storing Your Delicious Peanut Butter Cookies
- Estimated Nutritional Information
Why You Will Love These Peanut Butter Cookies
Seriously, who doesn’t love a good peanut butter cookie? These are the best because they’re just so darn easy to whip up, even if you’re not usually a baker. You get that amazing, nostalgic peanut butter flavor that tastes just like Grandma used to make, but with a modern twist to make sure they’re perfectly soft and chewy every single time. They’ve got that classic fork-mark look that’s just so charming. Plus, they’re super quick to make, so you can satisfy that craving in no time at all!
- So Easy to Make: You’ll be amazed at how simple these are! Perfect for baking with kids.
- Classic Nostalgic Flavor: Get ready to taste pure childhood comfort with every bite.
- Perfectly Soft & Chewy Texture: We nail that melt-in-your-mouth goodness that’s never dry.
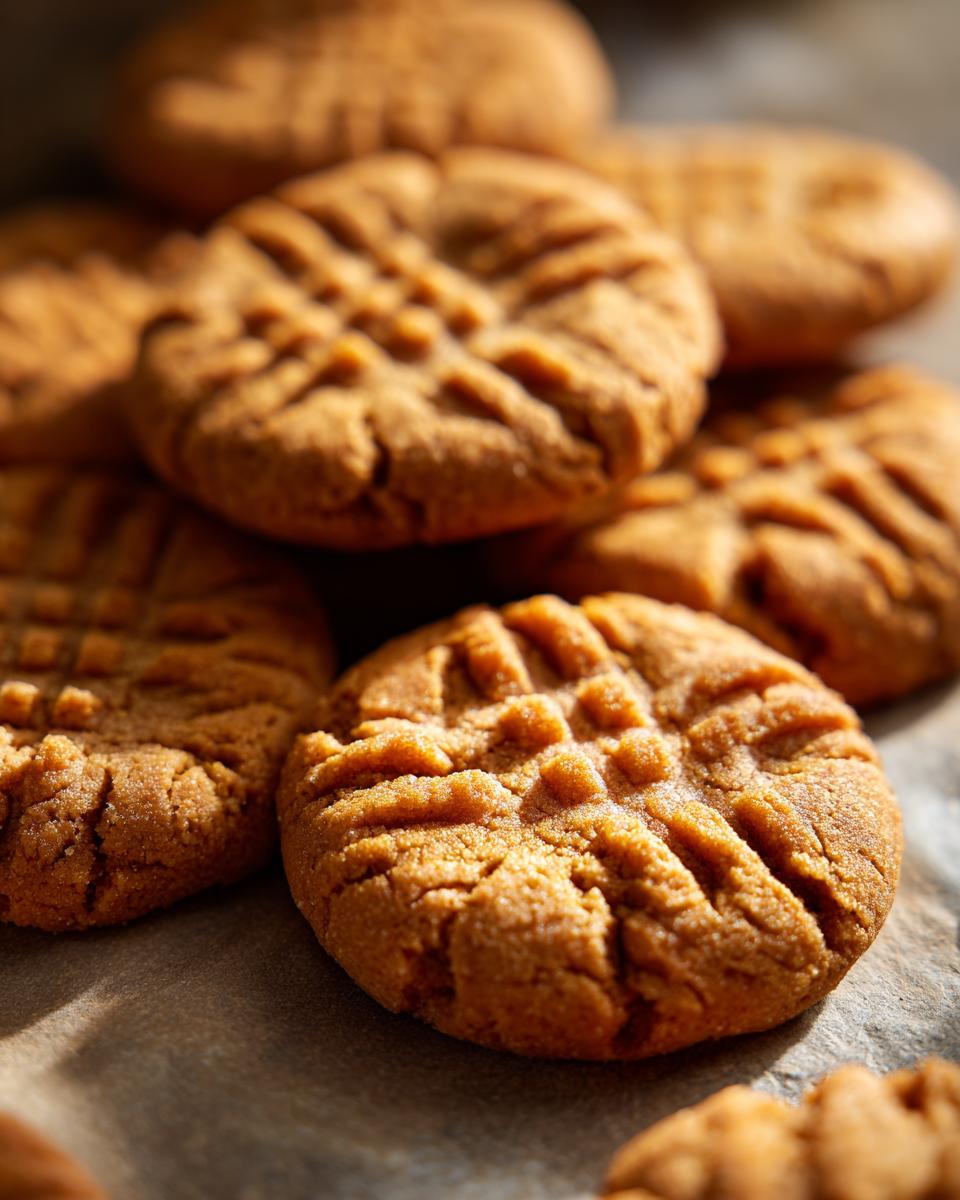
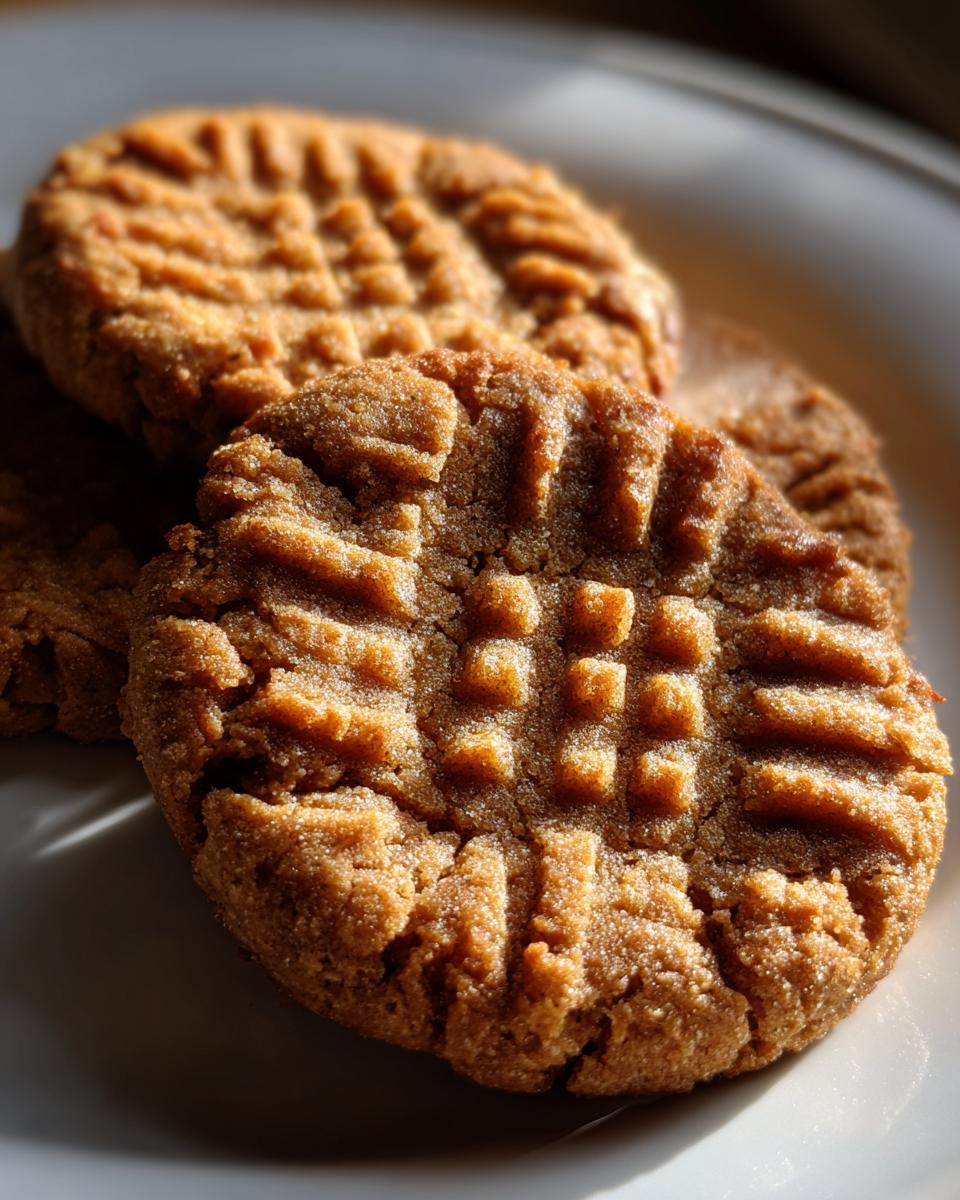
- The Adorable Crisscross Pattern: That iconic fork design makes them look extra special.
- Quick to Satisfy Cravings: You can have warm cookies in under 30 minutes!
Ingredients for Classic Peanut Butter Cookies
Okay, so for these super yummy peanut butter cookies, we’re keeping it pretty classic and straightforward. You’ll want to grab your softened unsalted butter – a cup should do it, which is usually about two sticks. Then, a full cup of creamy peanut butter is essential for that smooth texture and rich flavor. We’re using both granulated sugar and light brown sugar, a cup of each, packed in there nice and snug, to get that perfect blend of sweet. You’ll need two large eggs, and don’t forget a teaspoon of vanilla extract to really bring out all those delicious flavors. For the leavening, grab your baking soda and baking powder – just a teaspoon of soda and half a teaspoon of powder. A tiny pinch of salt, like a quarter teaspoon, really makes the peanut butter pop. And finally, about two and a half cups of all-purpose flour to bring it all together.
Tips for Perfect Peanut Butter Cookies
Alright, my sweet friends, let’s talk about making these peanut butter cookies absolutely *perfect* every single time. I’ve learned a few things over the years, and these little tricks are what stop them from turning into sad, dry little hockey pucks. First off, trusting your butter is key! Make sure it’s properly softened – not melted, just soft enough that you can easily indent it with your finger. This is super important for getting that light and fluffy texture when you cream it with the sugars. If it’s too cold, you’ll end up with a dense cookie. Speaking of simple, if you want to try a truly simplified version sometime, check out our 3-ingredient peanut butter cookies!
Now, about mixing: please, please, *please* don’t overmix once the flour goes in. Seriously, just mix until you barely see any streaks of flour left. Overmixing develops the gluten too much, and that’s a fast track to tough cookies. We want tender, melt-in-your-mouth goodness, remember? A little tip I picked up from my mom is to check your baking soda and baking powder to make sure they’re fresh. If they’re old, your cookies won’t rise properly and could end up a bit flat and heavy. You can test them by adding a little sprinkle to some hot water – if it fizzes right up, you’re good to go! It’s like a little science experiment before baking, which I always found fun, kinda like when we make our chewy pumpkin chocolate chip cookies.
And for that beautiful crisscross pattern? Don’t be afraid to put a little good-natured pressure on it! If the dough is a bit too soft and sticking to your fork, pop the baking sheet into the fridge for about 10 minutes before you do the fork press. This little chill makes the dough much firmer and easier to work with. Trust me, these classic ones are worth the little bit of extra effort.
How to Make Old-Fashioned Peanut Butter Treats
Let’s get these amazing peanut butter cookies into the oven! It’s really pretty simple, and before you know it, you’ll have a warm batch ready to go. First things first, make sure your oven is preheating to 375°F (190°C). I like to line my baking sheets with parchment paper because it makes cleanup a breeze and helps prevent any sticking, giving you perfect cookies every time. It’s a small step that makes a big difference, trust me!
Preparing the Dough for Classic Fork-Mark Cookies
Alright, let’s dive into making that glorious dough! In a nice big bowl, cream together your softened butter and creamy peanut butter until they’re super smooth. No lumps allowed! Then, we’ll add in both the granulated sugar and that lovely packed light brown sugar. Beat it all together until it’s light and fluffy – this step is key for a tender cookie! Next, whisk in your eggs, one at a time, and then stir in that teaspoon of vanilla extract for that extra yummy flavor. In a separate bowl, give your dry ingredients a good whisk: the flour, baking soda, baking powder, and salt. Now, slowly add the dry stuff to the wet stuff. Remember what I said about not overmixing? Just mix until it’s *just* combined. Seriously, don’t go crazy with the mixer here!
Shaping and Baking Your Peanut Butter Cookies
Now for the fun part – shaping! Roll your dough into nice little 1-inch balls. They should be about the size of a golf ball, or maybe a little smaller. Place these dough balls on your prepared baking sheets, giving them a good couple of inches of space between them because they will spread. Then, grab a fork! Gently press down on the top of each cookie to create that classic crisscross pattern. If your dough is feeling a little too sticky and the fork is dragging, just pop the whole sheet in the fridge for 10 minutes before you do the crisscross. Bake these beauties for about 9 to 11 minutes. You’re looking for edges that are just starting to turn a light golden brown, but the centers should still look a touch soft. They’ll firm up as they cool!
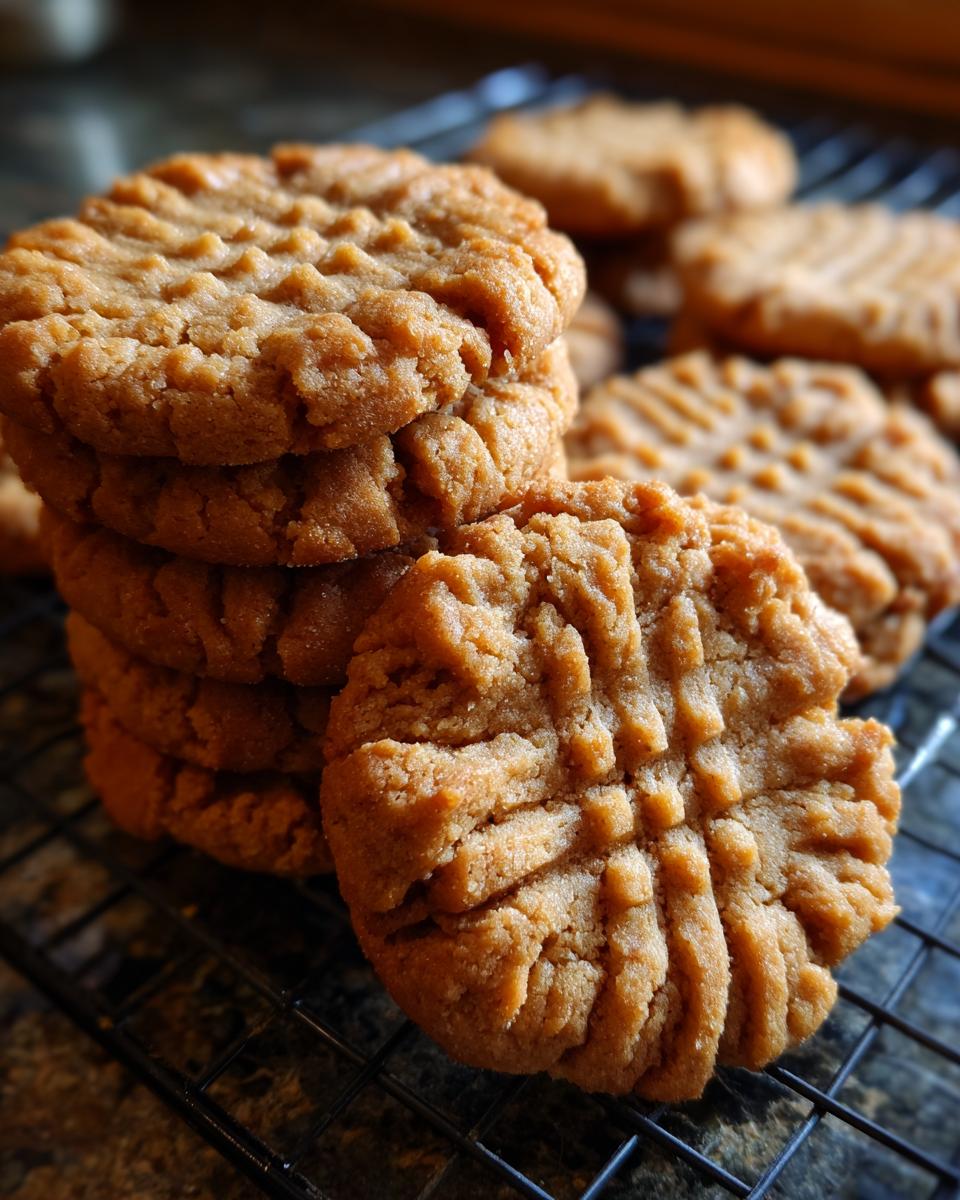
Don’t forget to let them cool on the baking sheet for a few minutes after they come out of the oven. They’re delicate when they’re hot! Then, carefully transfer them to a wire rack to cool completely. These are just like our snickerdoodles – the cooling time is super important!
Ingredient Notes and Substitutions for Peanut Butter Cookies
So, about these ingredients – they’re pretty straightforward, but a few little tweaks can make a difference! For the peanut butter itself, I almost always go for creamy, as you can see in the recipe. It gives you that super smooth texture and lets the peanut flavor really shine. But hey, if you’re a crunchy peanut butter fan, go for it! It’ll give you little pockets of peanutty crunch, which is also totally delicious. Just know it might change the texture a tiny bit.
When it comes to the sugars, using both granulated and light brown sugar is my secret for that perfect soft and chewy cookie. The brown sugar adds moisture and that lovely hint of molasses that white sugar just doesn’t have. While you *could* technically use all granulated sugar, you’ll lose some of that signature chewiness and moisture. I really wouldn’t recommend swapping out the butter for margarine, though; butter really is the best for flavor and texture here. Trust me on this one!
Frequently Asked Questions About Peanut Butter Cookies
Got questions about these classic peanut butter cookies? I’ve got answers! Making bakery-worthy cookies at home is totally doable, and sometimes it’s just the little things that make all the difference. Let me help clear up any confusion you might have:
Why are my peanut butter cookies dry?
Oh no, dry cookies are the worst! Usually, this happens for a couple of reasons. One, you might have accidentally used too much flour – measuring flour incorrectly is super common! Next time, try scooping the flour into your measuring cup and leveling it off, rather than scooping directly from the bag. Two, baking them for too long is another culprit. Keep an eye on them, and pull them out when the edges are golden but the center looks a bit soft and underbaked; they’ll finish cooking on the hot baking sheet. For super soft results, our chewy oatmeal raisin cookies have some great tips on texture!
Can I freeze peanut butter cookie dough?
Absolutely! This dough freezes beautifully. Just scoop your dough balls onto a baking sheet, freeze them until firm, then transfer them to a freezer-safe bag or container. When you’re ready for a cookie fix, just bake them straight from frozen – add a couple of extra minutes to the baking time. It’s like having homemade classic fork-mark cookies ready anytime!
What’s the best peanut butter for cookies?
For the best texture, creamy peanut butter is usually the way to go, like the recipe calls for. It blends in so smoothly and creates that perfect melt-in-your-mouth feel. That said, if you love a little texture, crunchy peanut butter is a fantastic option too! It just adds little bits of peanut to each bite. Just make sure you’re using peanut butter that’s just peanuts and salt, if possible, as those with added oils or sugars can sometimes affect the texture and spread of the cookie.
Can I make these into three-ingredient peanut butter cookies?
While this recipe is amazing with all the classic ingredients for that perfect texture, if you’re in a super-speedy pinch, you can definitely find simpler recipes out there! Our chai spice cookies use minimal ingredients, and we also have a popular post on 3-ingredient peanut butter cookies if simplicity is your absolute top priority!
Storing Your Delicious Peanut Butter Cookies
Keeping these amazing peanut butter cookies fresh is super easy! My favorite way is to just let them cool completely on a wire rack, then pop them into an airtight container. At room temperature, they’ll stay wonderfully soft and delicious for about 3 to 4 days. If you happen to have way too many (which is rare, I know!), you can totally freeze them. Just make sure they’re fully cooled, then pop them into a freezer-safe container or bag, and they’ll be good for a couple of months. Thaw them on the counter, and they’ll be almost as good as fresh-baked!
Estimated Nutritional Information
Now, let’s talk numbers. It’s important to remember that these nutritional details for our peanut butter cookies are just estimates, okay? They can totally change depending on the exact brands of ingredients you use, or if you make any little tweaks along the way (like I sometimes do with my apple pancakes!). But this should give you a good general idea:
Per cookie (yields about 36 cookies):
- Calories: Around 150
- Sugar: About 12g
- Sodium: Roughly 75mg
- Fat: Around 8g
- Saturated Fat: About 3g
- Unsaturated Fat: Roughly 5g
- Trans Fat: 0g
- Carbohydrates: About 17g
- Fiber: Around 1g
- Protein: About 3g
- Cholesterol: Around 20mg
Classic Peanut Butter Cookies
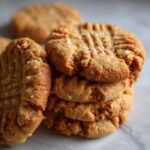
Bake a batch of soft, melt-in-your-mouth peanut butter cookies with that nostalgic crisscross fork pattern. These easy cookies are perfect for any occasion.
- Prep Time: 15 min
- Cook Time: 10 min
- Total Time: 25 min
- Yield: 36 cookies 1x
- Category: Dessert
- Method: Baking
- Cuisine: American
- Diet: Vegetarian
Ingredients
- 1 cup (2 sticks) unsalted butter, softened
- 1 cup creamy peanut butter
- 1 cup granulated sugar
- 1 cup packed light brown sugar
- 2 large eggs
- 1 teaspoon vanilla extract
- 1 teaspoon baking soda
- 1/2 teaspoon baking powder
- 1/4 teaspoon salt
- 2 1/2 cups all-purpose flour
Instructions
- Preheat your oven to 375°F (190°C). Line baking sheets with parchment paper.
- In a large bowl, cream together the softened butter and peanut butter until smooth.
- Add the granulated sugar and brown sugar to the butter mixture and beat until light and fluffy.
- Beat in the eggs one at a time, then stir in the vanilla extract.
- In a separate bowl, whisk together the all-purpose flour, baking soda, baking powder, and salt.
- Gradually add the dry ingredients to the wet ingredients, mixing until just combined. Do not overmix.
- Roll the dough into 1-inch balls and place them about 2 inches apart on the prepared baking sheets.
- Use a fork to press a crisscross pattern onto the top of each cookie.
- Bake for 9-11 minutes, or until the edges are lightly golden brown and the centers are still slightly soft.
- Let the cookies cool on the baking sheets for a few minutes before transferring them to a wire rack to cool completely.
Notes
- For extra flavor, you can use crunchy peanut butter.
- If you prefer a chewier cookie, slightly underbake them.
- Store cooled cookies in an airtight container at room temperature for up to 3 days.
Nutrition
- Serving Size: 1 cookie
- Calories: 150
- Sugar: 12g
- Sodium: 75mg
- Fat: 8g
- Saturated Fat: 3g
- Unsaturated Fat: 5g
- Trans Fat: 0g
- Carbohydrates: 17g
- Fiber: 1g
- Protein: 3g
- Cholesterol: 20mg