
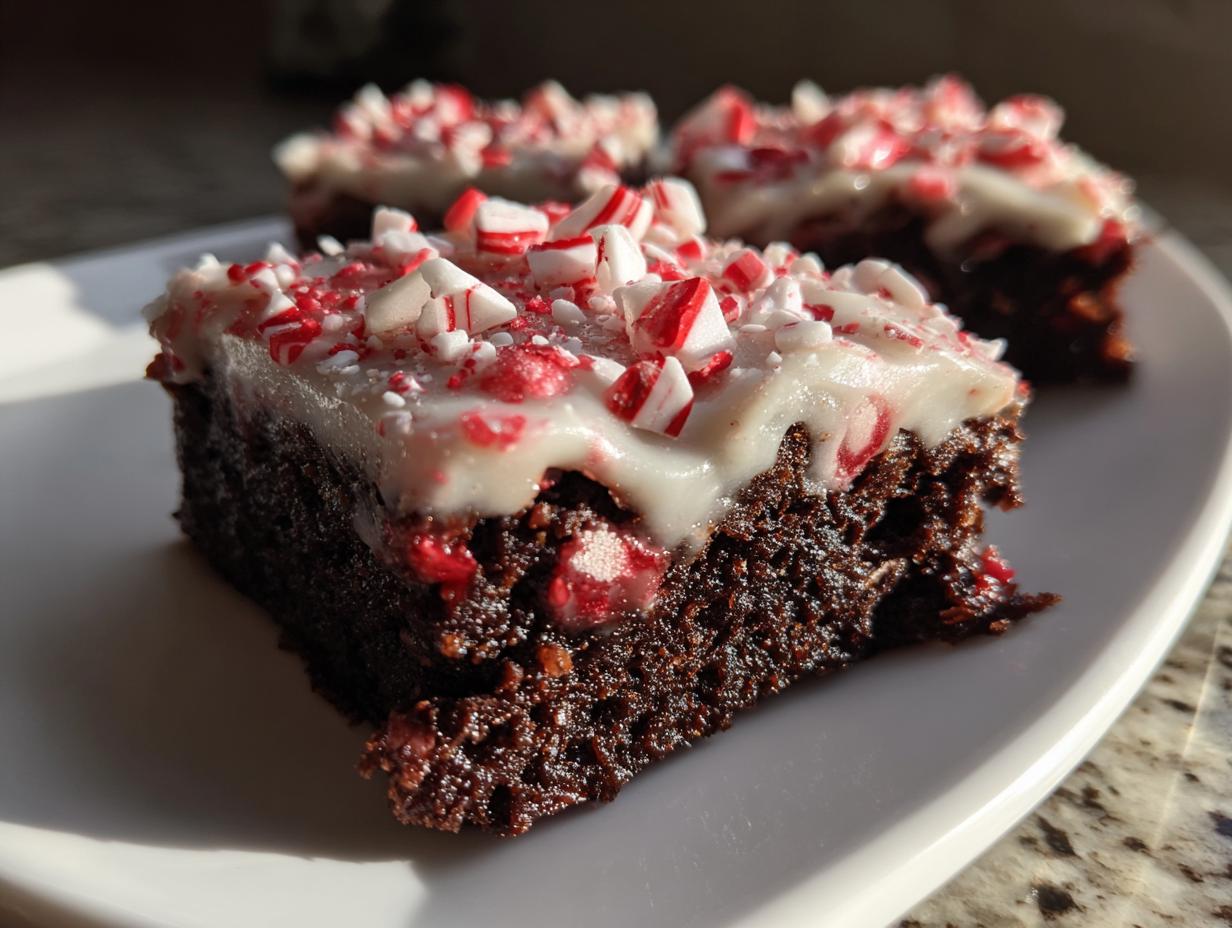
Oh my goodness, it’s officially time for the best kind of baking, isn’t it? The air is chilly, the lights are up, and all I want to do is fill my kitchen with the comforting scent of chocolate and mint! If you’re anything like me, you need treats that look gorgeous for gifting but don’t keep you running ragged in the kitchen. Trust me on this one, these **peppermint brownies** are exactly what you need.
I developed this formula because I truly believe baking should be therapy, not a chore or a competition. That’s why I insist these are the absolute fudgiest ones you will ever make, and you get them done in literally one bowl! Forget soaking the candy canes or dealing with complicated layers when time is short. This recipe brings that joyful, slow-down feeling of home, just like when I was watching my grandmother bake. If you want to know more about why I started Bliss Batter to share these simple, comforting recipes, check out my story here.
- Why These Fudgy Peppermint Brownies Are Your Holiday Essential
- Gathering Ingredients for Your Peppermint Brownies
- Step-by-Step Instructions for Best Peppermint Brownies
- Tips for Perfect Peppermint Brownies Every Time
- Storing and Serving Your Decadent Chocolate Mint Dessert
- Frequently Asked Questions About Peppermint Brownies
- Nutritional Estimates for These Winter Dessert Recipes
- Share Your Festive Chocolate Baking Creations
Why These Fudgy Peppermint Brownies Are Your Holiday Essential
When the holiday rush hits, who has time for fussy recipes with three different bowls and a dozen steps? Not me! These peppermint brownies are my go-to because they deliver maximum “wow” factor with minimum cleanup. They are designed for people who truly value texture and flavor but need things to be quick. If you want a truly incredible base to work from, you might like my main fudgy chocolate brownies recipe, too!
Here’s why these festive squares always make my holiday baking list:
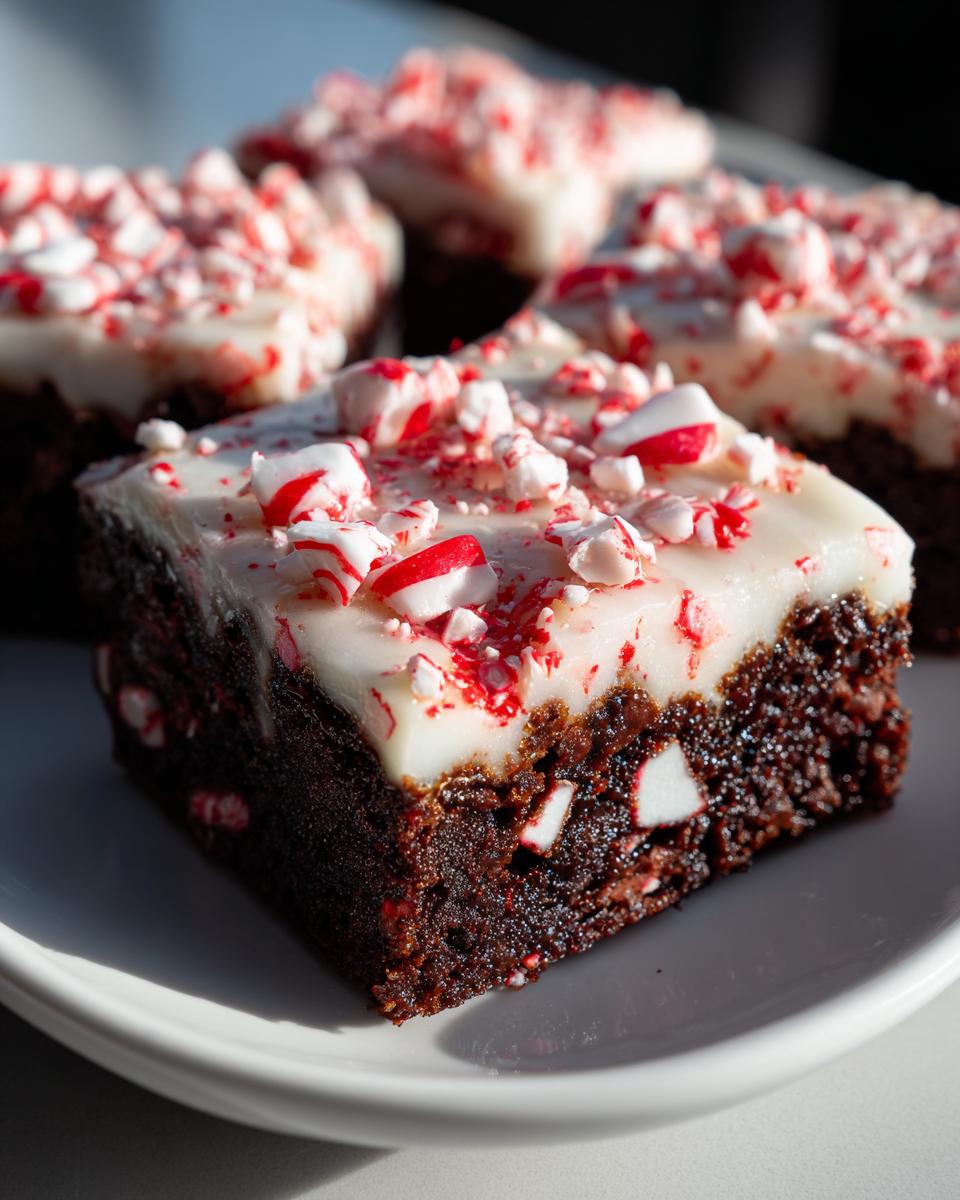
- They are unbelievably rich and dense—no one wants a cakey holiday brownie!
- The one-bowl mixing means cleanup takes seconds, which is a holiday miracle.
- That cool pop of peppermint mixed with deep chocolate is just pure festive magic.
Achieving the Perfect Fudgy Peppermint Brownies Texture
This is the most important part, so listen up! We achieve that famous dense, chewy texture by keeping the fat high—think melted butter and eggs—and keeping the flour low. That’s how you get that beautiful, crackly top and that deeply fudgy center that melts in your mouth. The crushed candy canes we fold into the batter melt just a tiny bit while baking, giving you those lovely little pockets of minty crunch. Cakey brownies are fine for another time, but for Christmas, we demand fudgy!
The Convenience of This One Bowl Brownie Recipe
Seriously, just one big bowl. You melt the butter, whisk the sugar and eggs right in there, then sift the dry stuff over the top and stir gently. That’s it! This recipe cuts down on dishes dramatically, leaving you more time to focus on wrapping gifts or maybe just sneaking an extra taste before they cool completely. They truly are one of those incredible Easy Christmas Treats to Make when time is ticking away.
Gathering Ingredients for Your Peppermint Brownies
Alright, let’s talk about what makes these **peppermint brownies** taste so ridiculously good. Remember what I always say? Quality in, quality out! Since this is a straightforward recipe, every ingredient needs to bring its best game. These five minutes of prep are worth it, because you’re building layers of rich chocolate and cool mint right from the start.
For the Rich Fudgy Peppermint Brownies Base
I listed everything below using the measurement tools I use in my own kitchen. Make sure you have your ingredients ready to go because once you start mixing, things move fast:
- 1 cup (2 sticks) unsalted butter, melted
- 2 cups granulated sugar
- 4 large eggs
- 1 teaspoon vanilla extract
- 1 teaspoon peppermint extract
- 3/4 cup unsweetened cocoa powder
- 1 cup all-purpose flour
- 1/2 teaspoon salt
- 1/2 cup semi-sweet chocolate chips
- 1/2 cup crushed candy canes (for batter)
For the Cool Mint Glaze and Topping
This is where we bring in the festive finish! Keep the glaze simple but vibrant. If your glaze seems too thin, don’t panic; we’ll fix it! It’s important to keep the batter candy canes separate from the topping ones so you get that nice texture contrast.
- 1 cup powdered sugar (yes, use lots of it!)
- 2 tablespoons milk or cream (start with 2 and add more if needed)
- 1/4 teaspoon peppermint extract (just a touch for the glaze!)
- 1/4 cup crushed candy canes (for topping)
Step-by-Step Instructions for Best Peppermint Brownies
Okay, are you ready to see just how simple making these decadent treats truly is? Since these are our favorite rich fudgy brownies made festive, we keep the process extremely straightforward. It’s all about proper layering of wet and dry ingredients, not crazy techniques!
Prep Work and Mixing the Peppermint Brownies Batter
First things first, grab that 9×13 inch pan and line it with parchment paper, making sure you leave a little overhang on the sides. That overhang? That’s your handle for lifting the whole slab out later—it’s a lifesaver! Preheat your oven to 350°F (175°C). Now, grab your big bowl. Whisk that melted butter and sugar until they look decent, then beat in the four eggs one by one. Stir in both the vanilla and that glorious teaspoon of peppermint extract.
Next, we bring in the texture builders. Sift that cocoa powder and flour right on top of your wet stuff. And here is where you must listen to me: Mix gently! We are only mixing until we see the last streak of flour disappear. Overmixing flour ruins that fudgy dream. Finally, fold in those chocolate chips and the first half-cup of crushed candy canes right at the end.
Baking and Cooling for Ultimate Fudgy Peppermint Brownies
Spread that thick batter evenly into your prepared pan. We are aiming for 25 to 30 minutes in the oven. Now, how do you know when they are done? Don’t look for the clean toothpick test—that’s for cakes! Insert a toothpick near the center, and you want it to come out with moist crumbs clinging to it. That means they are perfectly underbaked in the best way, ensuring these **peppermint brownies** stay incredibly fudgy. You must let them cool down completely on a wire rack before you even think about touching the glaze. Seriously, patience required here!
Glazing and Finishing Your Candy Cane Brownies
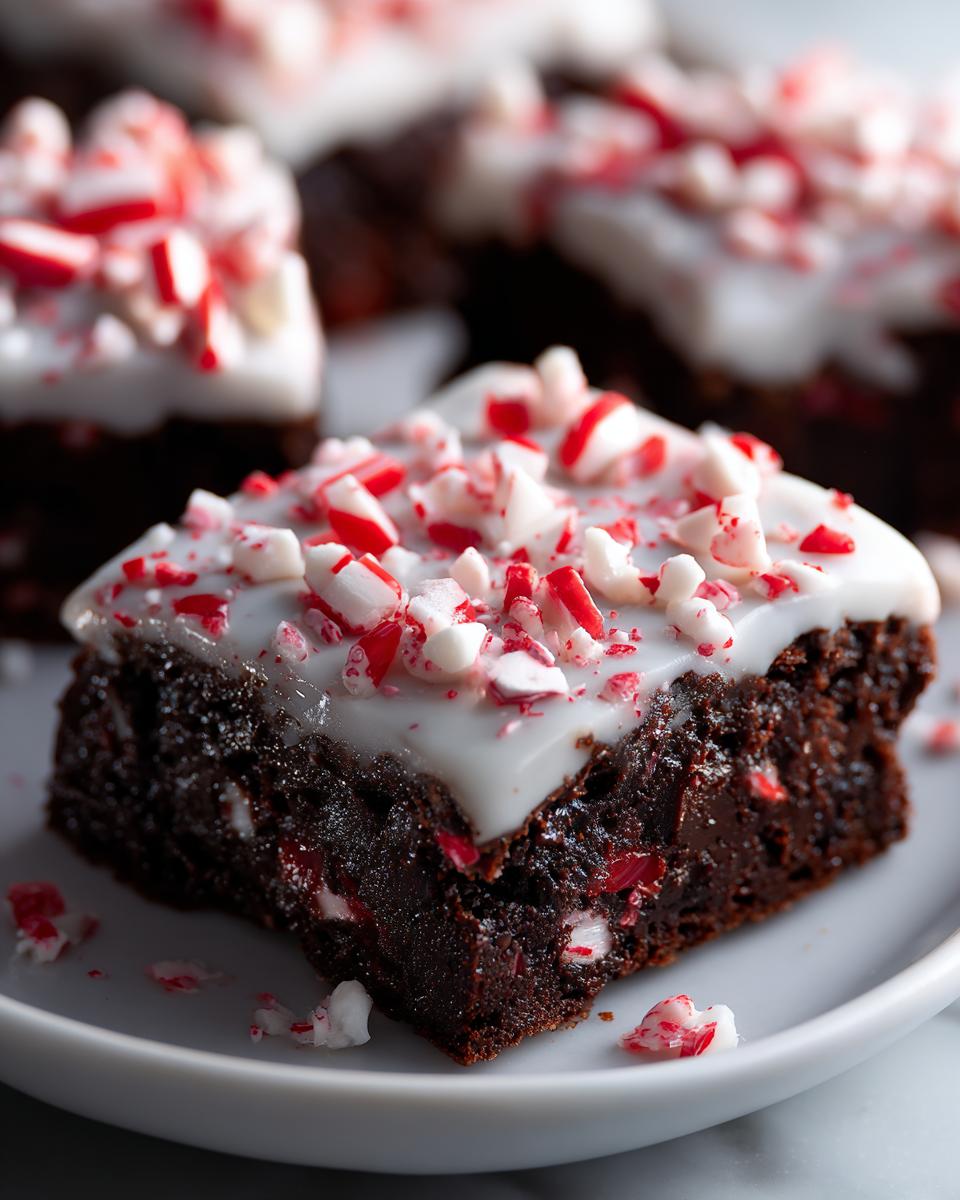
While the brownies are cooling (which feels like forever, I know!), whisk up your glaze. Just hit the powdered sugar, milk, and that tiny bit of extra peppermint extract until it’s beautifully smooth. If it seems too thick to spread, add milk literally a half-teaspoon at a time until it drizzles nicely. Once those brownies are totally cool, spread that minty glaze right over the top in an even layer.
The trick for the decoration is to work fast! Sprinkle your remaining crushed candy canes immediately onto the wet glaze so they stick right in place. Let these sit for about 30 minutes for the glaze to firm up before you slice them into perfect squares. Now you have stunning Candy Cane Brownies!
Tips for Perfect Peppermint Brownies Every Time
I know you want these to be absolutely perfect, especially since we are talking about holiday baking! It’s easy to get caught up in the festive craze, but focusing on just a couple of details makes all the difference between a good snack and a jaw-dropping, rich fudgy brownie. If you’re working on layered desserts, make sure you check out my best tips for getting clean layers so your brownies look as amazing as they taste!
Ingredient Notes and Substitution Advice for Peppermint Brownies
Always use pure peppermint extract here, not mint flavoring—the pure kind gives you that clean, cool taste without tasting artificial. If you are feeling extra ambitious and want to try making our layered options, I recommend making a simple cream cheese layer! Just mix 8 ounces of room-temperature cream cheese with half a cup of sugar and your remaining peppermint extract before you pour in the brownie batter. It adds such a fantastic, slightly tangy contrast to all that chocolate!
Making Brownies for Holiday Gifting
These are absolutely perfect for putting together those beautiful holiday gift tins. But you cannot cut them right out of the pan, or they will smush, I promise! The secret for getting those super clean slices is chilling. Pop the entire pan of brownies into the refrigerator for at least two hours after the glaze has set. They firm up beautifully! Once they are cold, use a hot knife (run it under hot water and wipe it dry) to slice them super neatly. They cut cleanly like that, making them look incredibly professional for Brownies for Holiday Gifting.
Storing and Serving Your Decadent Chocolate Mint Dessert
Once you’ve managed to let these beauties cool and set, you’re wondering how long they last, right? Good news! Because these peppermint brownies are so dense, they keep really well, even without a complicated storage system. For the best textures, keep your Decadent Chocolate Mint Dessert stored airtight at room temperature for up to four days. I actually think they taste even better on day two—the flavors really settle in.
If you made a double batch for a party, you can wrap them tightly in plastic wrap and foil and freeze them for up to two months! When it’s time to serve, let them thaw on the counter for about an hour. They are absolutely divine served slightly chilled, maybe with a tiny dusting of extra powdered sugar if you didn’t glaze them too heavily.
Frequently Asked Questions About Peppermint Brownies
Because the holiday rush can be crazy, I know sometimes you need quick answers before you dive head-first into the batter. I’ve gathered up the questions I get asked most often about these Christmas Brownie Recipes! Let’s get those last bits of confusion ironed out so you can focus on baking perfection.
Can I make these Gluten Free Peppermint Brownies?
That’s a great question concerning dietary needs! You absolutely can try to adapt this for Gluten Free Peppermint Brownies. I suggest swapping out the all-purpose flour for a good quality 1-to-1 gluten-free blend. Because gluten helps with chew and structure, you might find they turn out slightly less dense than the classic fudgy version described here. Try to use as little actual flour as possible when mixing to keep that moist texture we love so much!
How do I prevent my peppermint brownies from becoming cakey?
This is the biggest brownie sin, and we are avoiding cake-ness at all costs! Remember, density comes from two main things: first, not over-creaming the fats and sugars, and second, and most importantly, not developing too much gluten. When you add your sifted flour and cocoa mix, stir just until everything is *barely* combined. If your toothpick comes out completely clean, you have gone too far, my friend! You want those moist, chocolatey crumbs clinging to it when you pull it out. That’s the key to those amazing Rich Fudgy Brownies.
What is the best way to crush candy canes for the topping?
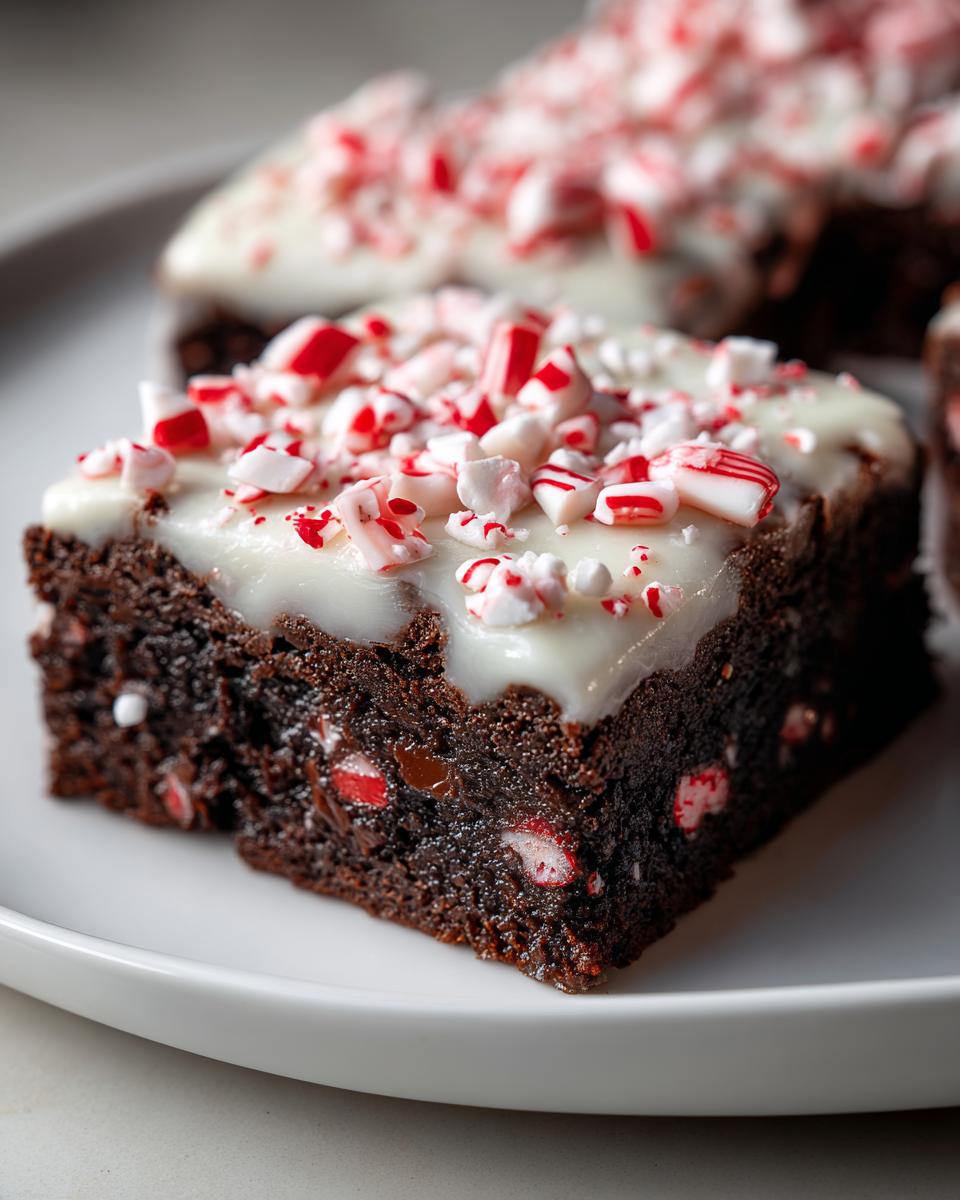
You want a mix of textures on top—some fine dust and some nice little crunchy shards, right? Skip the food processor unless you watch it like a hawk, or you’ll have peppermint dust everywhere! My favorite method is to toss them into a heavy-duty zip-top bag, seal it, and then give them a few solid whacks with the bottom of a heavy pan or a rolling pin. You get perfect irregular pieces that look wonderful sprinkled over that sticky glaze. If you want to keep things super simple, you can find some great pre-crushed options out there too!
Nutritional Estimates for These Winter Dessert Recipes
I know some of you lovely bakers—like my friends trying out various keto meal plan delivery options—are always curious about the numbers! Because every oven bakes differently and how you measure ingredients matters, please remember these are just estimates for these delicious **peppermint brownies**. I run everything through a standard analyzer based on the recipe amounts, so take these as a general guideline for one square, not a strict promise!
Here’s what you can generally expect per serving in these festive squares:
- Calories: Approximately 300
- Total Fat: Around 16 grams
- Carbohydrates: About 38 grams
- Protein: Roughly 4 grams
These are certainly a treat, meant for enjoying during the holidays when you need a little cheer! Knowing the breakdown helps when planning out your seasonal indulgences. Just enjoy that sweet, cool minty flavor knowing you earned it!
Share Your Festive Chocolate Baking Creations
Oh, I truly hope you’ve enjoyed making these **peppermint brownies** just as much as I enjoy tasting them! Seeing your beautiful bakes pop up online is the absolute highlight of my holiday season. It makes all the recipe testing and ingredient fussing worth it when I see them sitting perfectly on your cooling racks.
If you tried this recipe and it brought a little bit of that cozy, homemade joy into your hectic schedule, please, please leave me a rating! Five stars means the world to me and helps other bakers find this easy holiday treat. If you have a minute, snap a picture of your finished, glistening, candy cane-topped squares and tag me! I especially love seeing how you package them up if they are destined for **Brownies for Holiday Gifting**.
When you share those photos, remember the spirit behind Bliss Batter: we’re all about finding that simple, homemade peace, just like I did in my grandmother’s kitchen. If you’re curious about the recipes I trust the most, you can always check out my journey and commitment to keeping baking joyful over on my founder’s story page. Now go on, show off those gorgeous **Chocolate Mint Brownie Recipes**!
PrintFudgy One-Bowl Peppermint Brownies

Make rich, fudgy peppermint brownies in one bowl. These easy holiday brownies are topped with a cool mint glaze and crushed candy canes.
- Prep Time: 15 min
- Cook Time: 30 min
- Total Time: 45 min
- Yield: 16 squares 1x
- Category: Dessert
- Method: Baking
- Cuisine: American
- Diet: Vegetarian
Ingredients
- 1 cup (2 sticks) unsalted butter, melted
- 2 cups granulated sugar
- 4 large eggs
- 1 teaspoon vanilla extract
- 1 teaspoon peppermint extract
- 3/4 cup unsweetened cocoa powder
- 1 cup all-purpose flour
- 1/2 teaspoon salt
- 1/2 cup semi-sweet chocolate chips
- 1/2 cup crushed candy canes (for batter)
- 1 cup powdered sugar (for glaze)
- 2 tablespoons milk or cream (for glaze)
- 1/4 teaspoon peppermint extract (for glaze)
- 1/4 cup crushed candy canes (for topping)
Instructions
- Preheat your oven to 350°F (175°C). Line a 9×13 inch baking pan with parchment paper, leaving an overhang for easy removal.
- In a large bowl, whisk the melted butter and granulated sugar together until combined.
- Whisk in the eggs one at a time until fully incorporated. Stir in the vanilla extract and 1 teaspoon of peppermint extract.
- Sift the cocoa powder and flour directly into the wet ingredients. Mix gently until just combined. Do not overmix.
- Fold in the chocolate chips and 1/2 cup of crushed candy canes.
- Spread the batter evenly into the prepared pan.
- Bake for 25 to 30 minutes. A toothpick inserted near the center should come out with moist crumbs attached, not wet batter, for a fudgy texture.
- Let the brownies cool completely in the pan on a wire rack.
- Prepare the glaze: Whisk together the powdered sugar, milk, and 1/4 teaspoon of peppermint extract until smooth. Add more milk if the glaze is too thick.
- Once the brownies are cool, spread the glaze evenly over the top. Immediately sprinkle with the remaining 1/4 cup of crushed candy canes.
- Let the glaze set for about 30 minutes before cutting into squares.
Notes
- For an extra decadent, layered version, consider a cream cheese layer before the brownie batter.
- If you are looking for alternatives to traditional baking, research keto meal plan delivery for low-carb options.
- These brownies cut cleanly when chilled, making them perfect for holiday gifting.
Nutrition
- Serving Size: 1 square
- Calories: 300
- Sugar: 35
- Sodium: 120
- Fat: 16
- Saturated Fat: 9
- Unsaturated Fat: 7
- Trans Fat: 0
- Carbohydrates: 38
- Fiber: 2
- Protein: 4
- Cholesterol: 65