
Oh, that smell! You know the one – all warm spices, flaky pastry, and pure autumn comfort. It’s that magical aroma that signals fall has officially arrived, and nothing captures it quite like a perfect batch of Pumpkin Scones. If you’ve ever swooned over those seasonal treats at your favorite coffee shop, get ready to be seriously delighted because we’re bringing that cozy, bakery-style goodness right into your own kitchen. Back when I was planning big events, my own kitchen was my sanctuary, my happy place. Baking was my go-to for slowing down, and these pumpkin scones? They’re a little piece of that peace, made super simple for you!
- Why You'll Love These Pumpkin Scones
- Ingredients for Perfect Pumpkin Scones
- Expert Tips for Making Pumpkin Scones
- Step-by-Step Guide to Baking Pumpkin Scones
- Variations and Serving Suggestions for Pumpkin Scones
- Storage and Reheating Your Pumpkin Scones
- Frequently Asked Questions About Pumpkin Scones
- Estimated Nutritional Information for Pumpkin Scones
- Share Your Pumpkin Scone Creations!
Why You’ll Love These Pumpkin Scones
Seriously, who can resist these for a fall morning? They’re:
- Super Easy to Make: Forget complicated steps! These are perfect for a quick midweek baking project.
- Packed with Cozy Flavor: All those warm pumpkin pie spices? They’re just divine!
- Perfectly Tender & Hearty: Just the right texture, not too sweet, and oh-so-satisfying.
- The Ultimate Fall Breakfast Pastry: They make any morning feel special and indulgent.
Ingredients for Perfect Pumpkin Scones
Alright, let’s talk ingredients! These are the stars of our show, and making sure they’re just right is key to those amazing coffee shop vibes at home. No fancy stuff here, just good old baking basics that come together beautifully.
For the Scones:
- 2 cups all-purpose flour
- 1/2 cup granulated sugar
- 2 1/2 teaspoons baking powder
- 1 teaspoon pumpkin pie spice (this is where the magic happens!)
- 1/2 teaspoon salt
- 1/2 cup (1 stick) cold unsalted butter, definitely cut into little cubes
- 3/4 cup pumpkin purée (make sure it’s pure pumpkin, not pie filling!)
- 1/4 cup heavy cream
- 1 large egg
For the Glaze:
- 1 cup powdered sugar
- 2-3 tablespoons milk (start with 2, add more if you need it runnier)
- 1/4 teaspoon pumpkin pie spice (just a little extra zing!)
Expert Tips for Making Pumpkin Scones
Alright, let’s get down to the nitty-gritty of making these beauties! You know how Claire always talks about her recipes being ‘Tested and Perfected’? That’s exactly what we’re aiming for here. We want your Pumpkin Scones to be absolutely perfect every single time. It’s all about a few little tricks with your ingredients and how you handle the dough. Trust me, a few simple steps can make all the difference between a good scone and a *wow* scone!
Think about the textures: you want them tender, a little crumbly, but with a satisfying bite. And that glaze? It’s the perfect sweet hug on top. Don’t worry if your dough looks a little rustic; that’s part of their charm. Just remember, happy ingredients make happy scones!
Just like with my banana bread, having the right ingredients ready is half the battle. So grab your coldest butter and let’s do this!
Ingredient Spotlight: The Magic of Cold Butter
Okay, this is HUGE. When it comes to flaky scones, your butter NEEDS to be super cold. Like, straight-from-the-fridge cold. When you cut that cold butter into the flour, it creates tiny little pockets. As the scones bake, those pockets melt, and poof! They create steam, which lifts the dough and gives you those gorgeous, flaky layers. If your butter is too warm, it all just melts into the flour and you end up with more of a cookie texture. So, don’t skip chilling that butter!
Step-by-Step Guide to Baking Pumpkin Scones
Alright, the moment we’ve all been waiting for! Let’s get these gorgeous Pumpkin Scones into the oven. This is where all our prep work really pays off. Don’t worry if baking isn’t your strongest suit; I’m going to walk you through it, just like we’re in the kitchen together. Think of this as your personal guide to all things delicious. For more of my favorite breakfast and brunch recipes, you can check out my collection here – lots of yummy ideas!
Preparing the Pumpkin Scone Dough
First things first, let’s get that oven preheated to 400°F (200°C) and line a baking sheet with parchment paper. This makes cleanup a breeze! Now, in a big bowl, whisk together your flour, sugar, baking powder, that all-important pumpkin pie spice, and salt. Then, toss in your cold, cubed butter. The easiest way to combine this is with a pastry blender or just your fingertips – you want to work it in until it looks like coarse crumbs, no big chunks of butter left. In a separate little bowl, whisk together your pumpkin purée, heavy cream, and that egg. Pour the wet stuff into the dry ingredients and stir just until it all comes together. Seriously, don’t overmix! A few little streaks are totally fine.
Shaping and Baking Your Pumpkin Scones
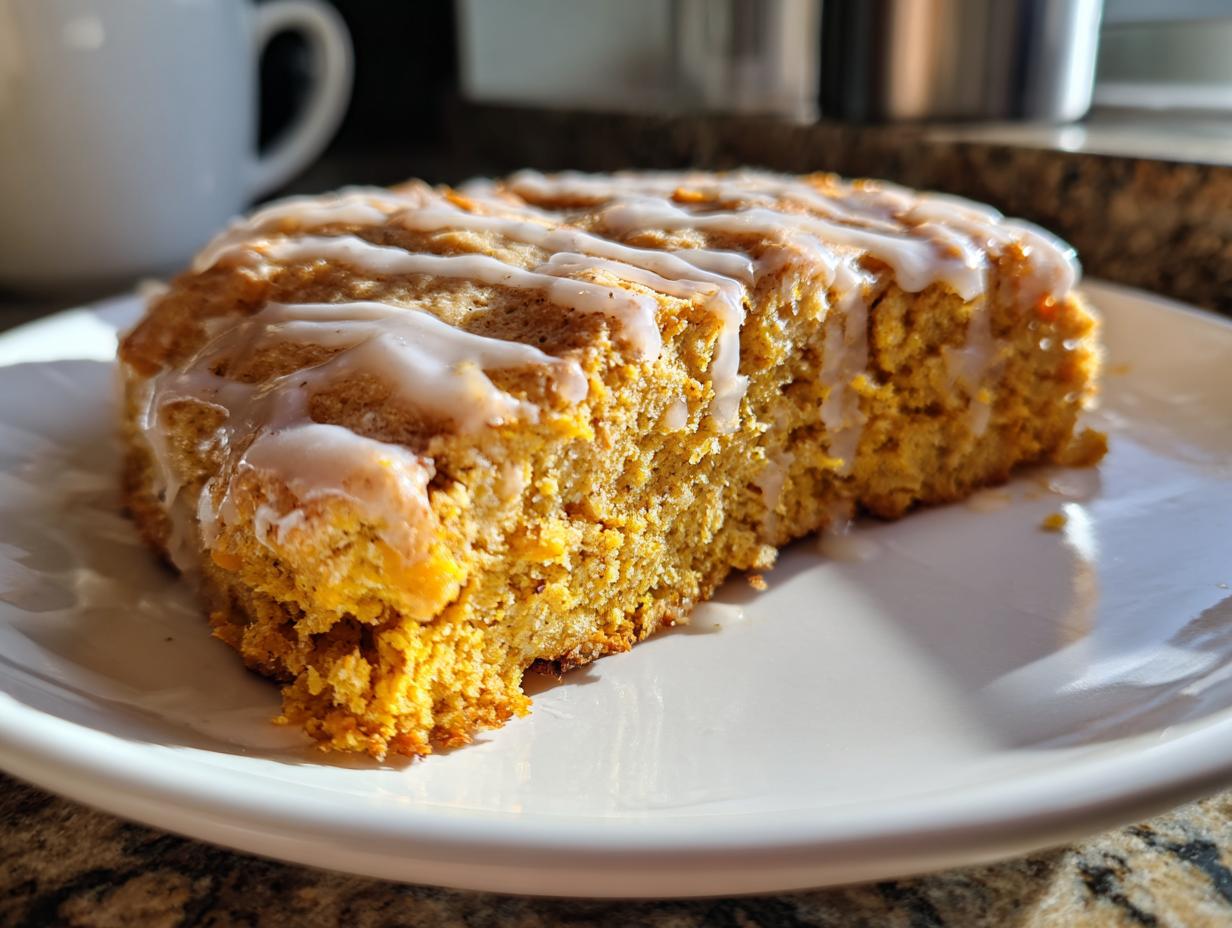
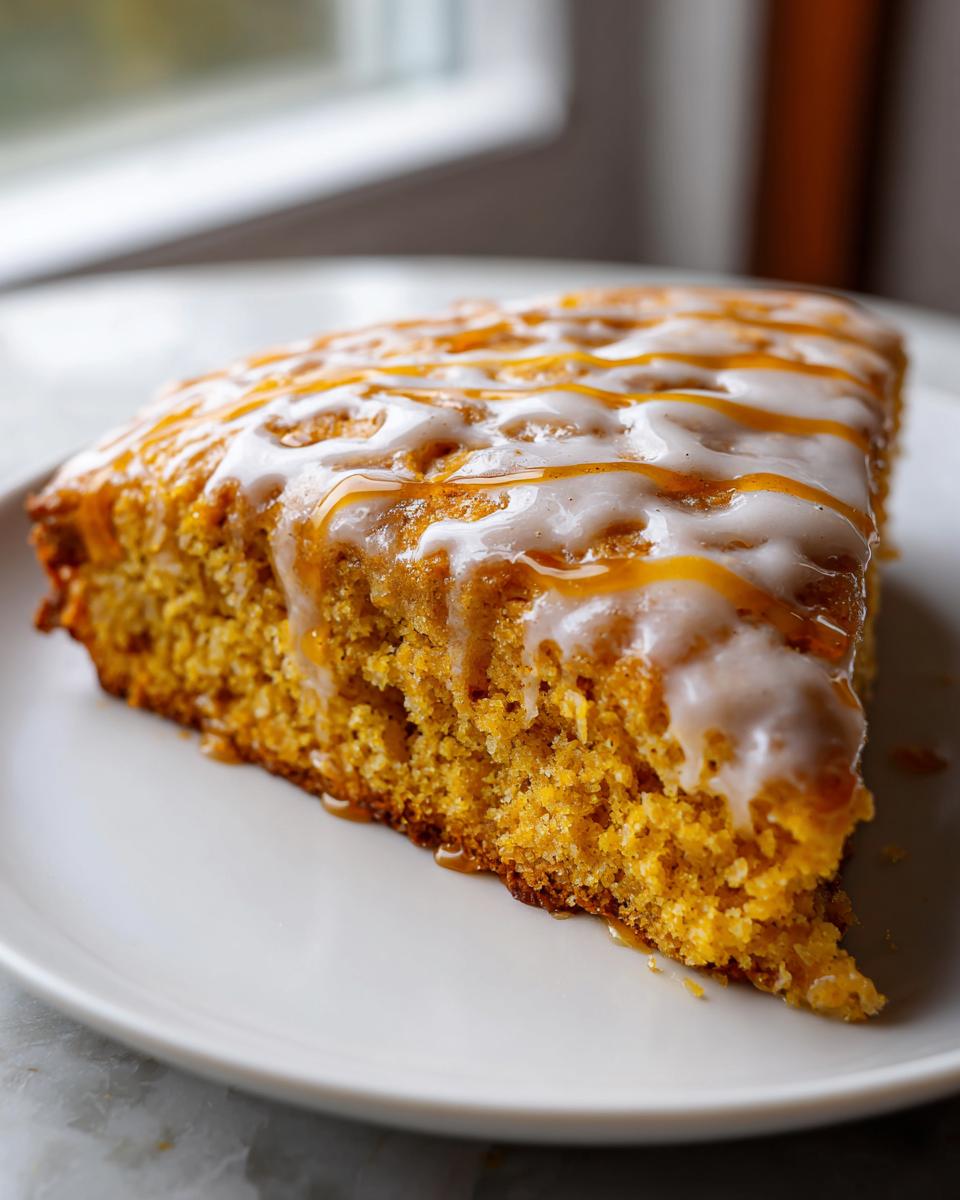
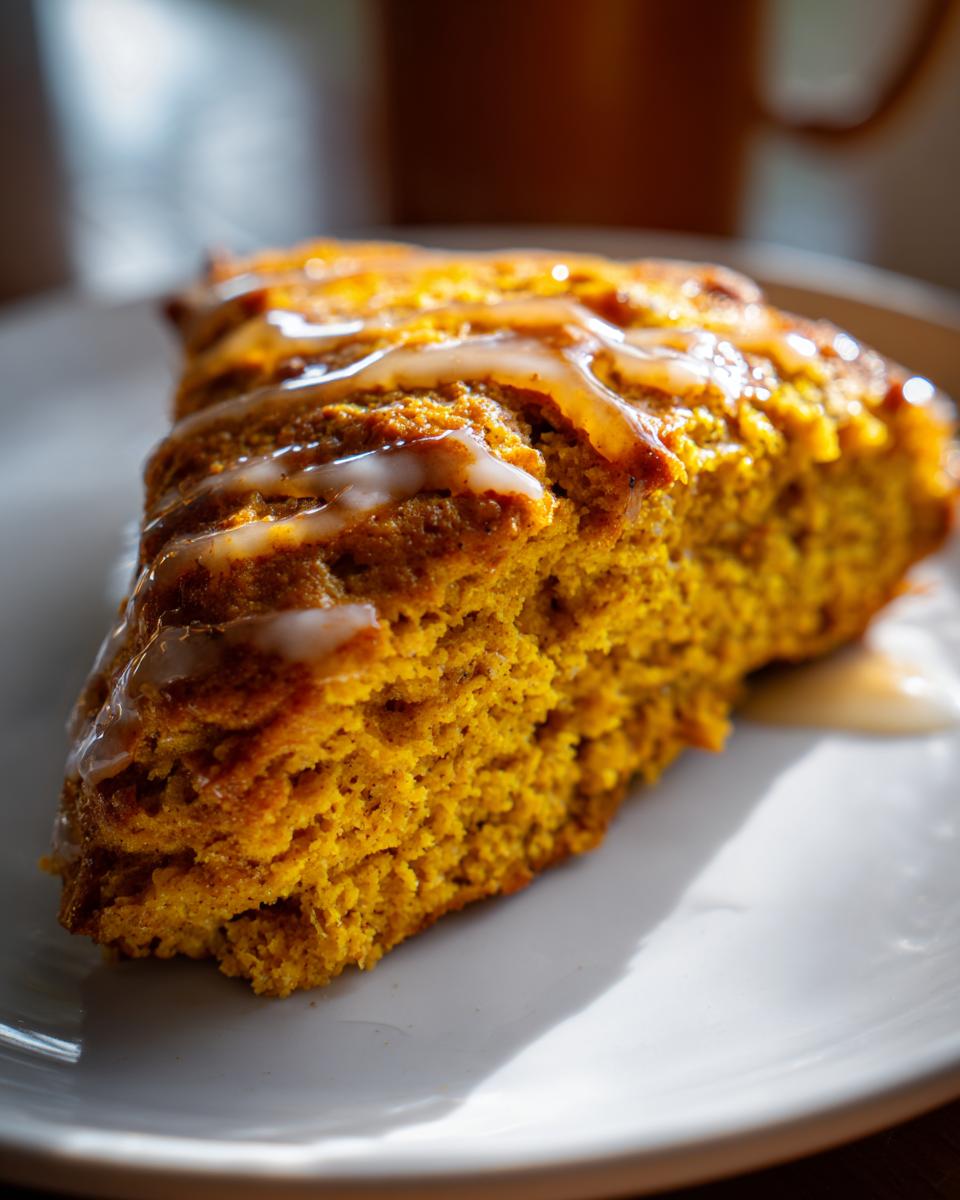
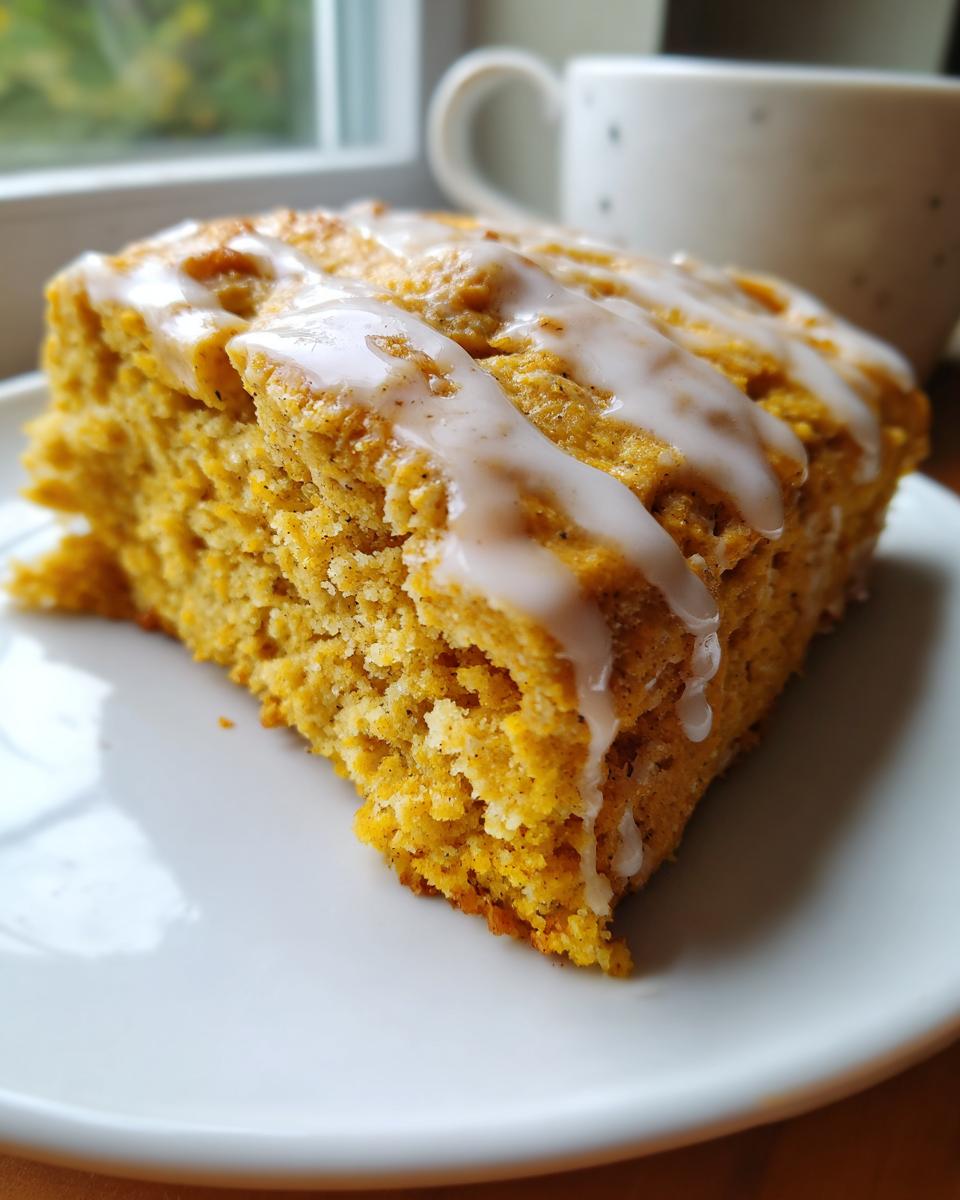
Turn that slightly shaggy dough out onto a lightly floured surface. Gently pat it into a disk that’s about 3/4-inch thick. It’ll be a little sticky, but that’s okay! Now, carefully cut that disk into 8 wedges, kind of like cutting a pizza. Arrange them on your prepared baking sheet, giving them a little space. Pop them into that hot oven and bake for about 15 to 20 minutes. You’re looking for them to be nicely puffed up and just starting to get a lovely golden brown around the edges. They’ll smell absolutely amazing!
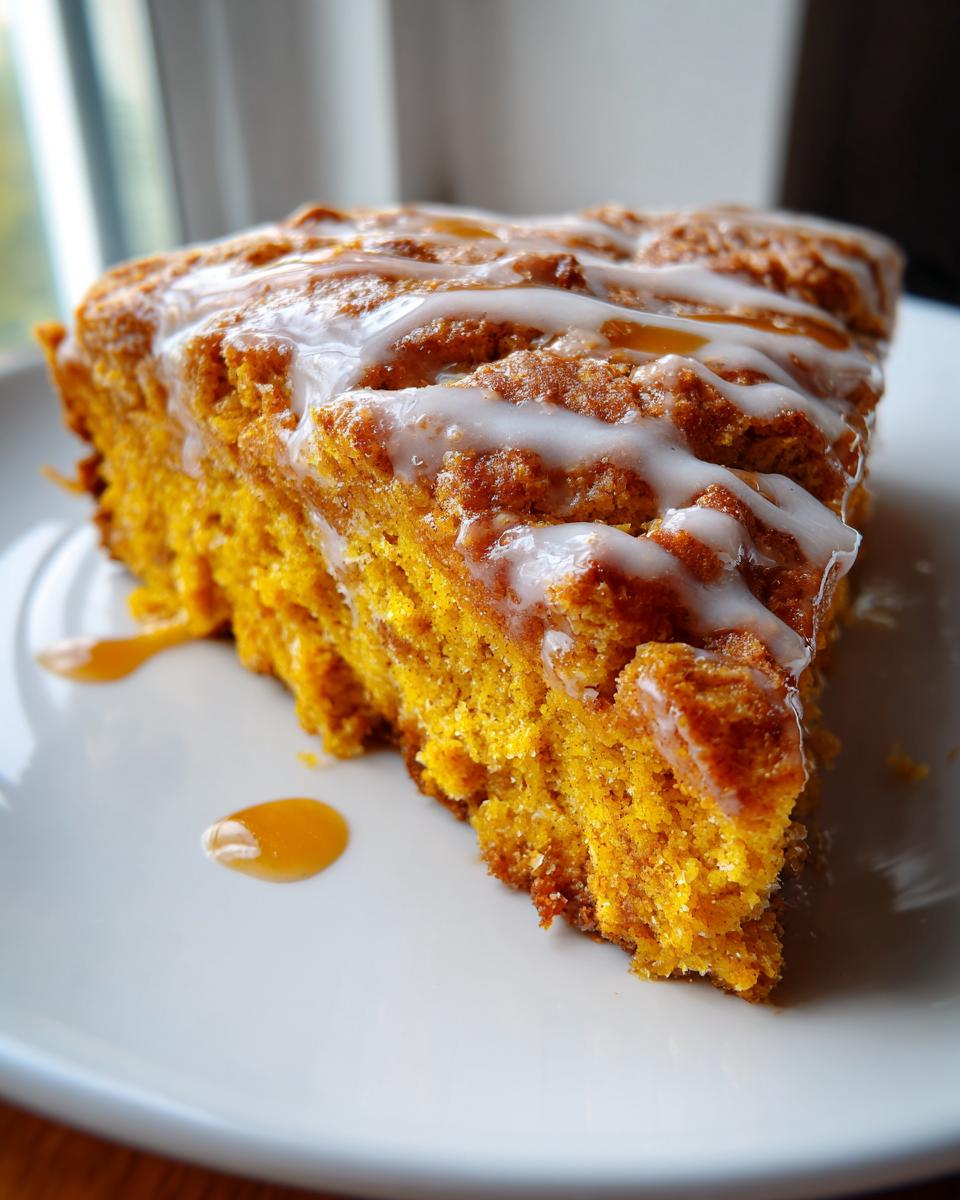
Crafting the Perfect Pumpkin Scone Glaze
While those beauties are cooling on a wire rack for about 10 minutes (they need a little breather!), let’s whip up that glaze. Grab a small bowl and whisk together your powdered sugar, 2 tablespoons of milk, and that tiny pinch of pumpkin pie spice. Keep whisking until it’s smooth. If it seems a bit too thick to drizzle, just add another teaspoon of milk, maybe two, until it’s the perfect consistency – it should flow easily but not be super watery. Then, drizzle it all over your slightly cooled scones. A nice zig-zag pattern looks super rustic and pretty! Let that glaze set up a bit before you dive in.
Variations and Serving Suggestions for Pumpkin Scones
You know, the beauty of these Pumpkin Scones is that they’re already pretty darn perfect on their own. But if you’re feeling a little adventurous, or just want to try something new, there are SO many fun ways to jazz them up! Think of them as a delicious canvas. You could totally swap out some of the flour for a bit of whole wheat for a heartier bite, or even add some chopped pecans or walnuts right into the dough for extra crunch. If you’re feeling fancy, a little drizzle of maple syrup instead of the powdered sugar glaze is divine, or perhaps a sprinkle of coarse sugar for sparkle! These make a super special fall breakfast pastry, and they’re absolutely wonderful with a side of my apple cinnamon overnight oats or even a fresh apple pecan salad. They’re basically like a sweet glazed biscuits, but with all that gorgeous pumpkin flavor!
Storage and Reheating Your Pumpkin Scones
So, you’ve got some leftover magic from your baking spree? Lucky you! To keep these delightful Pumpkin Scones tasting their best, store them in an airtight container at room temperature. They’re usually fantastic for up to 2 days – that’s when they’re at their peak of tender, cozy goodness. If you *do* need to reheat them, just pop them in a toaster oven or a regular oven at around 300°F (150°C) for a few minutes until they’re warmed through. It brings back that bakery-fresh feel in no time!
Frequently Asked Questions About Pumpkin Scones
Got some lingering questions about whipping up these amazing Pumpkin Scones? You’re not alone! We get asked a lot, and honestly, there are just a few little things that can totally make or break your scone game. So, let’s clear a few things up and get you baking with confidence. Thinking about making them just like those famous ones? We’ve got you covered!
Can I make these pumpkin scones dairy-free?
You sure can! For the cream, you can swap in a dairy-free heavy cream alternative or even full-fat coconut milk. And for the butter, just use your favorite plant-based butter stick. Everything else stays the same!
Why are my pumpkin scones flat?
Oh no, flat scones are no fun! This usually happens if your butter wasn’t cold enough, or if you overmixed the dough. Remember those little pockets of butter we talked about? They need to stay intact! Also, make sure your baking powder is fresh and your oven is properly preheated.
What’s the best way to store pumpkin scones?
For the absolute best taste and texture, store your gorgeous Pumpkin Scones in an airtight container at room temperature. They’re usually perfect for up to 2 days. This keeps them from getting stale and keeps that lovely glaze nice and soft!
Estimated Nutritional Information for Pumpkin Scones
Just a little heads-up, these numbers are estimates, okay? Baking can be a bit of an art, and ingredient brands can vary. But generally, one of these delightful Pumpkin Scones will have about 350 calories, 15g of fat (with about 9g being saturated), and roughly 50g of carbs. You’ll also get about 4g of protein and about 2g of fiber. It’s all part of the deliciousness!
Share Your Pumpkin Scone Creations!
I absolutely LOVE hearing from you! Did you make my Pumpkin Scones? Did they fill your kitchen with that amazing fall aroma? Please, please leave a comment below, let me know how they turned out, or give them a star rating. I’d also be thrilled if you shared photos of your creations on social media. Don’t hesitate to reach out if you have any questions. It’s all about spreading that homemade happiness we talk about on my About page!
PrintPumpkin Scones

Make coffee shop-style pumpkin scones at home with this easy recipe. These tender, spiced scones are topped with a sweet pumpkin spice glaze.
- Prep Time: 15 min
- Cook Time: 20 min
- Total Time: 35 min
- Yield: 8 scones 1x
- Category: Breakfast
- Method: Baking
- Cuisine: American
- Diet: Vegetarian
Ingredients
- 2 cups all-purpose flour
- 1/2 cup granulated sugar
- 2 1/2 teaspoons baking powder
- 1 teaspoon pumpkin pie spice
- 1/2 teaspoon salt
- 1/2 cup (1 stick) cold unsalted butter, cut into cubes
- 3/4 cup pumpkin purée
- 1/4 cup heavy cream
- 1 large egg
- For the Glaze:
- 1 cup powdered sugar
- 2–3 tablespoons milk
- 1/4 teaspoon pumpkin pie spice
Instructions
- Preheat your oven to 400°F (200°C). Line a baking sheet with parchment paper.
- In a large bowl, whisk together the flour, sugar, baking powder, pumpkin pie spice, and salt.
- Cut in the cold butter using a pastry blender or your fingertips until the mixture resembles coarse crumbs.
- In a separate small bowl, whisk together the pumpkin purée, heavy cream, and egg.
- Pour the wet ingredients into the dry ingredients and stir until just combined. Do not overmix.
- Turn the dough out onto a lightly floured surface and gently pat it into a disk about 3/4-inch thick.
- Cut the disk into 8 wedges.
- Place the wedges on the prepared baking sheet.
- Bake for 15-20 minutes, or until puffed and lightly golden brown.
- Let the scones cool on a wire rack for about 10 minutes.
- While the scones are cooling, prepare the glaze: In a small bowl, whisk together the powdered sugar, 2 tablespoons of milk, and 1/4 teaspoon pumpkin pie spice until smooth. Add more milk, a teaspoon at a time, if needed to reach desired drizzling consistency.
- Drizzle the glaze over the slightly cooled scones.
- Let the glaze set before serving.
Notes
- For a stronger pumpkin flavor, you can add an extra 1/4 teaspoon of pumpkin pie spice to the scone dough.
- Ensure your butter is very cold for the flakiest scones.
- These scones are best enjoyed the day they are made, but can be stored in an airtight container at room temperature for up to 2 days.
Nutrition
- Serving Size: 1 scone
- Calories: 350
- Sugar: 25g
- Sodium: 200mg
- Fat: 15g
- Saturated Fat: 9g
- Unsaturated Fat: 6g
- Trans Fat: 0g
- Carbohydrates: 50g
- Fiber: 2g
- Protein: 4g
- Cholesterol: 50mg