
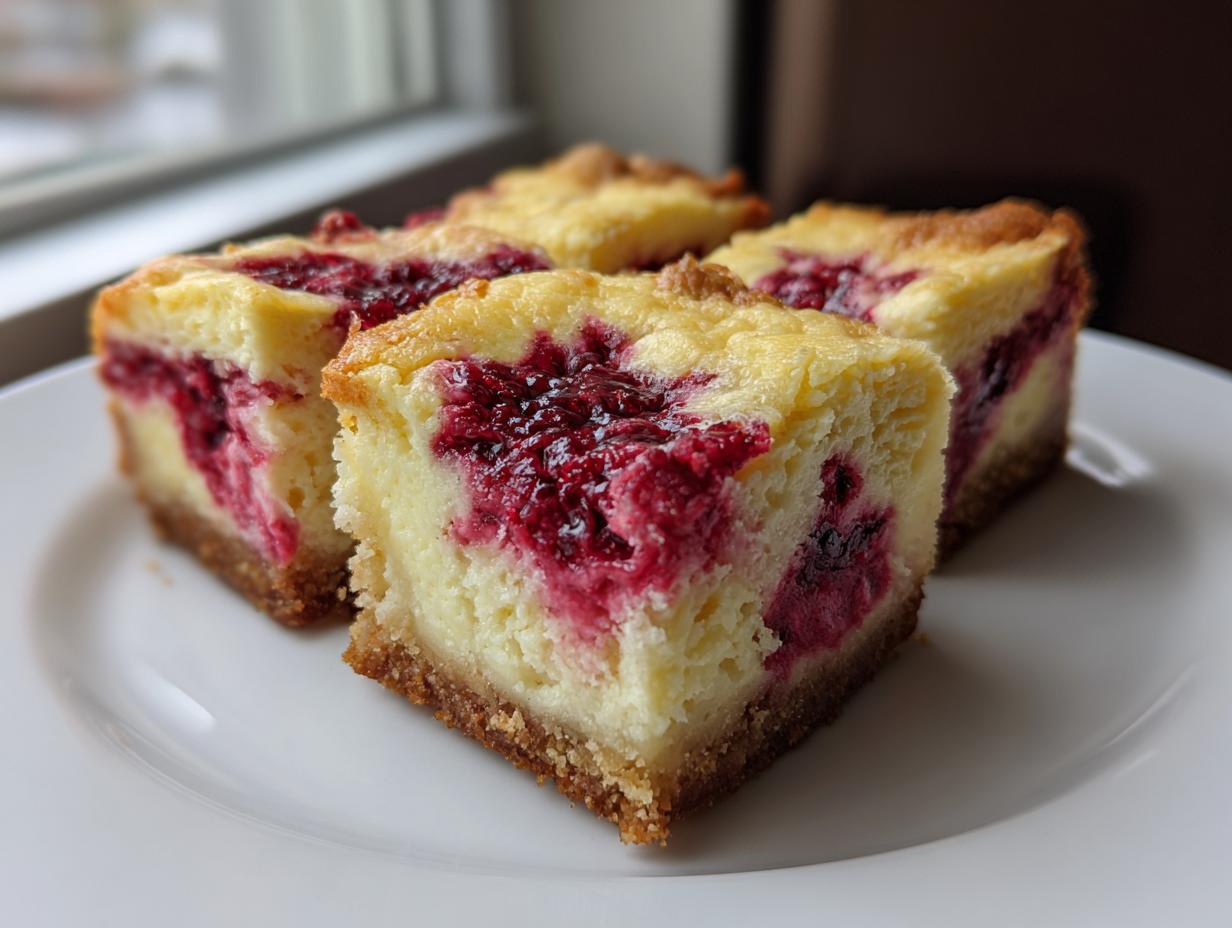
If you’re looking for that perfect, crowd-pleasing treat that screams homemade bliss but secretly takes minimal fuss, stop scrolling right now! I’ve perfected what I truly believe are the ultimate raspberry cheesecake bars. Forget the stress of a full-sized cheesecake; these bars give you all that rich, creamy texture you crave, beautifully layered over a simple, crisp shortbread crust. This is truly sweet happiness baked into a square, ready for any occasion. I’ve tested this recipe until the texture was just right—yielding, never watery, and absolutely divine. You’re going to be so proud when you pull these out of the oven. Ready to create a little magic today? For more on my baking philosophy, check out my story here!
- Why You Will Love These Creamy Raspberry Cheesecake Bars
- Ingredients for the Best Raspberry Cheesecake Bars
- How to Make Raspberry Cheesecake Bars Step-by-Step
- Tips for Perfect Slicing of Your Raspberry Cheesecake Bars
- Ingredient Notes and Variations for Raspberry Cheesecake Bars
- Serving Suggestions for Bakery Style Raspberry Dessert Bars
- Frequently Asked Questions About Raspberry Cheesecake Bars
- Nutritional Estimates for Homemade Raspberry Swirl Bars
- Share Your Blissful Raspberry Cheesecake Bars Creations
Why You Will Love These Creamy Raspberry Cheesecake Bars
When I first started developing these, I wanted the absolute best texture possible that still felt approachable for a weeknight treat. These Easy baked cheesecake bars deliver that bakery-quality experience without needing a water bath or marathon baking session. Trust me, your family will ask for these constantly!
- They deliver that dream smooth, creamy texture every time—no graininess allowed!
- Slicing is a breeze once chilled, giving you beautiful bakery style raspberry dessert bars.
- The bright, tart raspberry swirl cuts through the richness perfectly.

Perfectly Set, Bakery Style Raspberry Cheesecake Bars
The secret to that perfect, non-weeping texture is all in the cooling. I know you’re eager to dig in, but resisting the urge to rush them out of the oven is key. That slow cool-down period, propping the oven door open, gently allows the cheesecake to settle. This step stops those annoying cracks from forming and guarantees you a slice that holds together beautifully.
Ingredients for the Best Raspberry Cheesecake Bars
Getting the best result starts right here, with the right measurements! I’ve broken these down into the three parts they are: the sturdy base, the velvety middle, and the zesty fruit top. Using quality ingredients is just part of the bliss at Bliss Batter, so make sure your cream cheese is fully softened—it’s non-negotiable for that smooth texture you deserve!
For the Simple Shortbread Crust Cheesecake
The crust is that perfect buttery foundation. Remember, you need the butter softened, but not melted! If it’s too warm, your crumb will be greasy instead of sandy and scoopable. If you are aiming for a gluten free raspberry cheesecake bars option, swap the flour out here!
- 1 cup all-purpose flour
- 1/2 cup unsalted butter, softened
- 1/4 cup granulated sugar
- 1/4 teaspoon salt
For the Creamy Cheesecake Filling
This is where we build that incredible richness. To nail that gorgeous, creamy cheesecake bar recipe texture, beat that cream cheese until it’s absolutely flawless before you even think about adding the eggs. We want smooth, not airy!
- 16 ounces cream cheese, softened
- 1/2 cup granulated sugar
- 2 large eggs
- 1 teaspoon vanilla extract
- 1 tablespoon all-purpose flour
For the Quick Raspberry Swirl Topping
This swirl is my go-to when I need a bright flavor boost but don’t have time for a full compote. It cooks down so fast and gets just thick enough to marble beautifully. It’s truly a fantastic Quick raspberry topping for cheesecake!
- 1 cup fresh or frozen raspberries
- 2 tablespoons granulated sugar
- 1 teaspoon lemon juice
- 1 teaspoon cornstarch
How to Make Raspberry Cheesecake Bars Step-by-Step
Figuring out how to make raspberry cheesecake bars that look like they came from a fancy bakery is easier than you think! We’re moving through three main phases here: the base, the fruit element, and the creamy top. Follow these steps closely, especially regarding mixing the filling, and you’ll have no separation issues, I promise!
Baking the Simple Shortbread Crust Cheesecake Base
First things first, crank that oven up to 350°F (175°C). Get your 8×8 inch pan ready by lining it with parchment paper, making sure there’s some overhang on two sides—that’s our built-in handle for lifting them out later! Mix your crust ingredients until they are coarse crumbs, then press that mixture down firmly along the bottom. Pop it in the oven for just 15 minutes until it looks lightly golden around the edges. Don’t forget to let it cool a little bit while we work on the rest!
Preparing the Homemade Raspberry Swirl Bars Filling
We need to tackle the swirl first so it has time to cool down. Toss your raspberries, sugar, lemon juice, and cornstarch into a little saucepan. Cook it until it thickens up slightly—maybe about five minutes. Mash the berries a bit as you go, then set it aside. Next, the filling! Beat your softened cream cheese until it’s super smooth—like silk. Add the sugar and flour, mix gently, and then sneak in those eggs one at a time. Mix only until it disappears. Seriously, don’t whip air into this batter; that’s how we get cracks!
Assembling and Baking Your Raspberry Cheesecake Bars
Now we put it all together! Pour that beautiful, creamy filling right over your cooled crust. Next, grab spoonfuls of that cooled raspberry mixture and dot them all over the top. Take a thin knife—a skewer works too—and gently draw it through the dots to create a pretty swirl effect. It doesn’t need to be perfect, marble looks lovely! Bake this whole dreamy creation for 30 to 35 minutes. You’ll know it’s ready when the edges look set, but that center just has the tiniest little wobble when you touch the pan.

Achieving Perfectly Set Cheesecake Bars with Slow Cooling
This cooling process separates good cheesecake bars from truly fantastic ones. Once the time is up, turn the oven OFF. Yes, completely off! Prop the door open with a wooden spoon or just slightly open it. Let the bars hang out in the residual heat for 30 minutes. They need this gentle transition to become perfectly set cheesecake bars—this avoids that shocking temperature change that causes sinking. After the oven rest, cool them completely on the counter, then cover and chill them in the fridge for at least four hours, but overnight is always best!
Tips for Perfect Slicing of Your Raspberry Cheesecake Bars
Okay, you’ve navigated the baking, you’ve chilled them until they’re firm—now comes the moment of truth: the slice! If you try to cut these beauties when they are warm or just slightly cool, you’re going to end up with a gooey, ragged mess. Nobody wants raspberry cheesecake squares that look like they’ve been attacked by a spoon, right?
Here is my favorite trick for getting those clean, sharp cuts you see in bakeries. It sounds weird, but trust me on this one. Before every single cut across the pan, take a sharp, thin knife, dip the blade into a tall glass of very hot water, and wipe it completely dry with a paper towel. The heat allows the knife to glide right through that dense, cold cheesecake filling without dragging or sticking.
Run the knife through, wipe it clean and quickly dip it again before making the next cut. It’s a little extra step, but it makes all the difference in presentation! Once you have your squares, you can admire your fantastic work. For more foolproof dessert bar inspiration, check out my collection of dessert recipes!
Ingredient Notes and Variations for Raspberry Cheesecake Bars
Even though this recipe is designed to be super reliable, sometimes we need to adapt, right? That’s where knowing your ingredients comes in handy. I’ve learned over the years that small tweaks can make a huge difference without ruining the classic flavor profile of these bars. For instance, if you need a gluten free raspberry cheesecake bars option, it’s really simple! Just swap your regular all-purpose flour in the crust for an equal amount of a good quality gluten-free blend that contains xanthan gum.
Also, feel free to play with the raspberry flavor itself. If you want a deeper fruit note, you can slightly reduce the cornstarch or increase the lemon juice for more tang, but honestly, this ratio is what keeps the swirl from turning watery under the cheesecake top.
Making Make Ahead Cheesecake Bars
I absolutely love these because they are the ultimate make ahead cheesecake bars. They honestly taste better the next day! Once completely chilled and sliced, I store them in a single layer in an airtight container in the refrigerator. They keep beautifully for up to five days. If you want to bake them for a party on Saturday, you can easily knock them out on Wednesday night. Just make sure they are fully firm before you slice them!
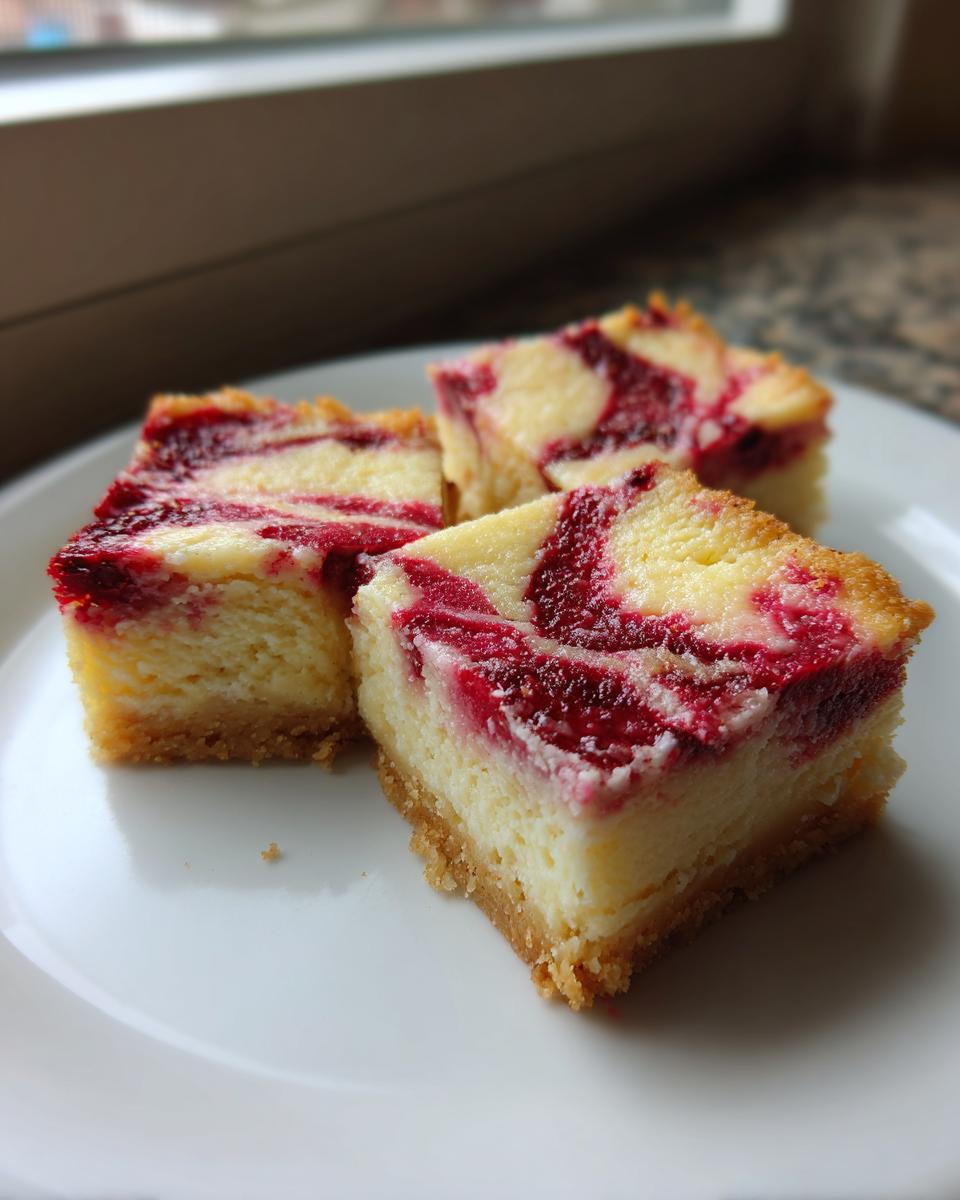
Serving Suggestions for Bakery Style Raspberry Dessert Bars
We’ve done all the hard work—now it’s time to make these look as incredible as they taste! Presentation matters, even for something as simple as a dessert bar. If you want to elevate these gorgeous squares into true Bakery style raspberry dessert bars, you just need one or two final touches.
My absolute favorite way to serve them is super simple: just before setting them out, dust the tops lightly with powdered sugar. You can use a small sieve to get that delicate, snowy topping. For a little pop of color that just screams ‘fresh,’ add one tiny, clean mint leaf right on top of each square right before serving. It looks professional without adding any extra work!
Flavor-wise, these rich bars are just heavenly with something slightly warm and bold to cut through that creaminess. They pair absolutely perfectly with a strong cup of black coffee. Or, if you’re feeling really fancy, try them alongside one of my creamy coffee drinks, like this amazing salted caramel latte recipe. That combination of tart fruit, rich sweet cheese, and coffee? Perfection!
Frequently Asked Questions About Raspberry Cheesecake Bars
I always get questions after people try this recipe for the first time, which is wonderful! It means you’re excited about baking, and I love helping you troubleshoot. Dealing with cheesecake can sometimes feel intimidating, especially when you just want those beautiful, smooth raspberry cheesecake bars, but trust me, these answers smooth out all the bumps.
Can I use frozen raspberries in these raspberry cheesecake bars?
Oh, absolutely you can! We all grab those bags of frozen fruit when fresh isn’t available. If you use frozen berries for the swirl, just make sure you thaw them out first. More importantly, after thawing, gently pat them dry or drain any excess liquid before you cook them down with the sugar and cornstarch. Too much water in that swirl means a watery layer under your cheesecake, and we definitely don’t want that!
What is the difference between these and No Bake raspberry cheesecake bars recipe?
That’s a great question that comes up a lot! These are baked versions, which is what gives them that incredibly rich, dense, and velvety structure—it’s the structure of a true cheesecake, just in bar form. A no bake raspberry cheesecake bars recipe usually relies on gelatin or whipped cream folded in to set up in the fridge. No-bake versions tend to be lighter and airier, whereas these baked beauties have that deep, satisfying flavor you just can’t beat.
Why did my cheesecake filling separate from the crust?
This is usually a sign the temperature or mixing was a little off! The most common reason is usually that the crust wasn’t pre-baked long enough; if the crust isn’t firm, it can absorb moisture and turn soft where it meets the filling. The second big reason is overmixing the filling, especially after the eggs go in. Remember how I stressed mixing until *just* incorporated? Overmixing incorporates too much air, which expands in the heat and then collapses when cooling, creating that messy separation. Keep those mixes short and sweet!
Nutritional Estimates for Homemade Raspberry Swirl Bars
Now, I always say that baking is about joy, not counting calories, but I know some of you are curious about what you’re enjoying! Transparency is everything here at Bliss Batter, so I want to give you the best estimate I can for these delicious bars. Remember that since we are using real butter and fresh fruit, these numbers are just a guideline, but they give you a good idea!
Based on the ingredients and yields specified in this recipe, here is what you can generally expect per bar:
- Serving Size: 1 bar
- Calories: 250
- Sugar: 18g
- Sodium: 120mg
- Fat: 16g
- Saturated Fat: 10g
- Carbohydrates: 24g
- Protein: 4g
If you decide to swap out ingredients, like using a lighter cream cheese or making a gluten free raspberry cheesecake bars option with different binders, these numbers will definitely shift. But honestly, when something tastes this rich and homemade, I try not to worry too much about the details! Just enjoy the moment.
Share Your Blissful Raspberry Cheesecake Bars Creations
Oh, I truly cannot wait to see what you all bake up! When you take the time to mix up these batches of raspberry cheesecake bars, you are putting a little bit of your own happiness into the world, and I just love being a part of that. That feeling of pulling a perfect square out of the pan—it’s the best!
Once you’ve chilled them thoroughly and managed those beautiful, clean slices, please, please come back here and let me know how it went! Drop a rating right below this section—five stars is always music to my ears, but I want to hear the honest feedback too. Did the swirl look perfect? Did your crust stay sturdy? Hearing your stories makes all the tireless testing worth it.
If you snap any photos of your beautiful, bakery-worthy squares, tag us on social media! Seeing your creations pop up on my feed is like getting a spontaneous dose of sunshine. It reminds me that baking truly does connect us all. You can always reach out to me directly through my contact page if you have any super specific questions that weren’t covered!
Happy baking, friends. I’m already looking forward to hearing about your sweet successes!
PrintCreamy Baked Raspberry Cheesecake Bars with Shortbread Crust
Make these easy baked cheesecake bars featuring a simple shortbread crust and a bright raspberry swirl topping. This recipe creates perfectly set, bakery style dessert bars.
- Prep Time: 20 min
- Cook Time: 45 min
- Total Time: 65 min
- Yield: 16 servings 1x
- Category: Dessert
- Method: Baking
- Cuisine: American
- Diet: Vegetarian
Ingredients
- For the Shortbread Crust:
- 1 cup all-purpose flour
- 1/2 cup unsalted butter, softened
- 1/4 cup granulated sugar
- 1/4 teaspoon salt
- For the Cheesecake Filling:
- 16 ounces cream cheese, softened
- 1/2 cup granulated sugar
- 2 large eggs
- 1 teaspoon vanilla extract
- 1 tablespoon all-purpose flour
- For the Raspberry Swirl:
- 1 cup fresh or frozen raspberries
- 2 tablespoons granulated sugar
- 1 teaspoon lemon juice
- 1 teaspoon cornstarch
Instructions
- Prepare the Crust: Preheat your oven to 350°F (175°C). Line an 8×8 inch baking pan with parchment paper, leaving an overhang on two sides for easy removal.
- In a medium bowl, combine the flour, softened butter, 1/4 cup sugar, and salt. Mix with a fork or your fingers until the mixture resembles coarse crumbs.
- Press the crumb mixture evenly into the bottom of the prepared pan. Bake the crust for 15 minutes until lightly golden. Remove from the oven and let it cool slightly while you prepare the filling.
- Make the Raspberry Swirl: In a small saucepan, combine the raspberries, 2 tablespoons sugar, lemon juice, and cornstarch. Cook over medium heat, stirring constantly, until the mixture thickens slightly, about 3 to 5 minutes. Mash the berries lightly as they cook. Remove from heat and set aside to cool.
- Prepare the Cheesecake Filling: In a large bowl, beat the softened cream cheese with an electric mixer until completely smooth. Scrape down the sides of the bowl.
- Add the 1/2 cup sugar and 1 tablespoon flour to the cream cheese mixture and beat until just combined. Beat in the eggs one at a time, mixing only until each egg is incorporated. Stir in the vanilla extract. Do not overmix the batter.
- Assemble the Bars: Pour the cheesecake filling evenly over the partially baked shortbread crust.
- Dollop spoonfuls of the cooled raspberry mixture over the top of the cheesecake batter. Use a knife or skewer to gently swirl the raspberry mixture into the cheesecake layer to create a marbled effect.
- Bake: Bake for 30 to 35 minutes. The edges should look set, but the center should still have a slight jiggle when gently shaken.
- Cool and Set: Turn off the oven, prop the door open slightly, and let the bars cool in the oven for 30 minutes. This slow cooling helps prevent cracking.
- Remove the pan from the oven and let it cool completely on a wire rack. Once cool, cover the pan and refrigerate for at least 4 hours, or preferably overnight, until the cheesecake is firm.
- Slice: Use the parchment paper overhang to lift the chilled cheesecake from the pan. Cut into 16 squares for serving.
Notes
- For cleaner slices, run your knife under hot water and wipe it dry between each cut.
- If you prefer a gluten free raspberry cheesecake bars option, substitute the all-purpose flour in the crust with an equal amount of gluten-free all-purpose blend.
- You can use a quick raspberry topping for cheesecake by skipping the cooking step and simply mashing fresh raspberries with sugar and lemon juice, then swirling them in before baking.
Nutrition
- Serving Size: 1 bar
- Calories: 250
- Sugar: 18
- Sodium: 120
- Fat: 16
- Saturated Fat: 10
- Unsaturated Fat: 6
- Trans Fat: 0
- Carbohydrates: 24
- Fiber: 1
- Protein: 4
- Cholesterol: 65