
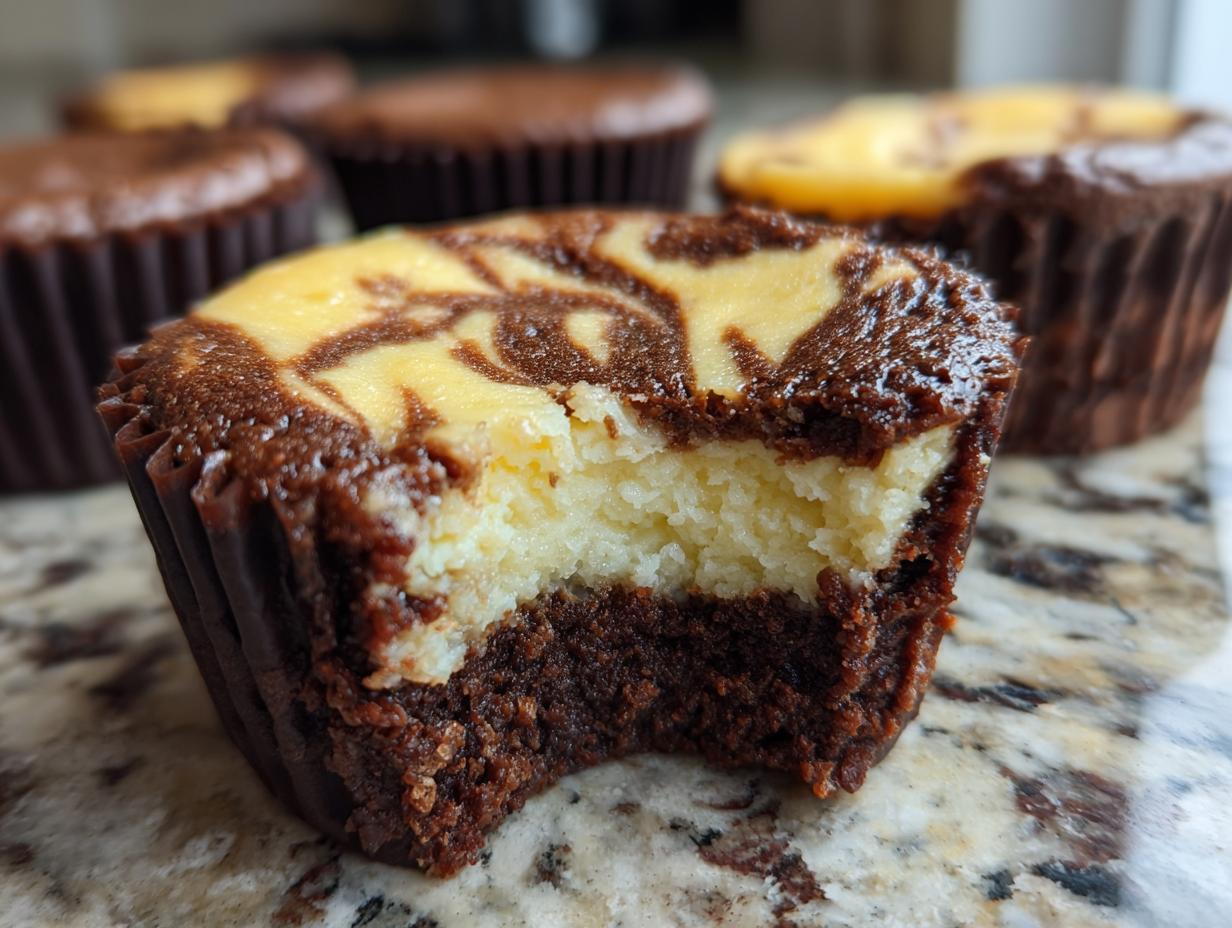
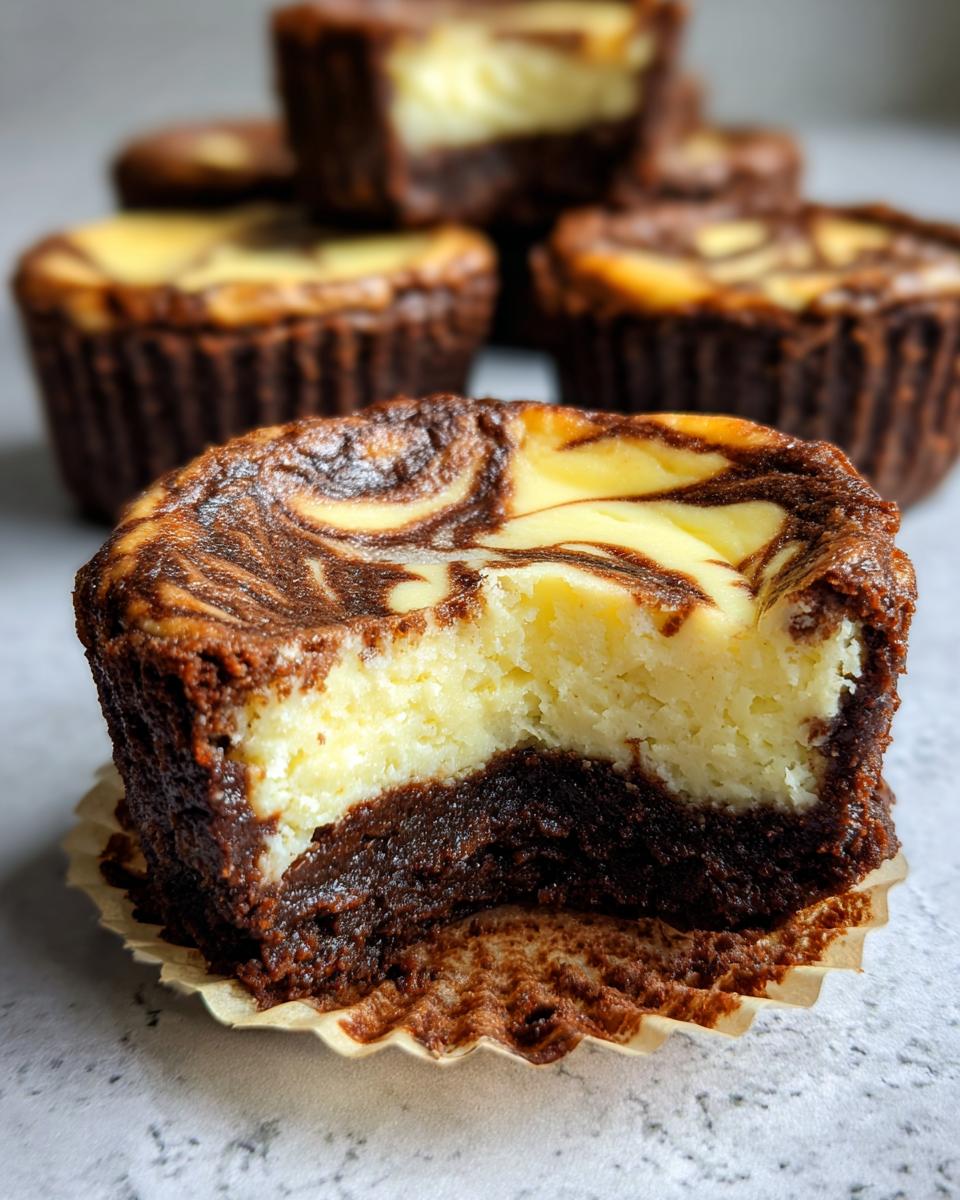
Oh, hello there! If you’re anything like me, sometimes the day feels just too rushed, right? That’s when I run straight to the kitchen, because for me, nothing melts away the stress like the scent of melting butter and chocolate. It’s my therapy! My absolute favorite thing to whip up for those moments—or for when guests unexpectedly drop by—is these incredible, decadent **brownie cheesecake cups**. Seriously, they are the ultimate chocolate lover treat because you get that rich, fudgy brownie base married perfectly with a tangy, creamy cheesecake topping. The best part? We’re making them right in a standard muffin tin, so they are perfectly portion controlled, and honestly, they look much fancier than the effort they take. Trust me, making these individual brownie cups is where you find simple, homemade happiness!
- Why You Will Love These Decadent Brownie Cheesecake Cups
- Gathering Ingredients for the Best Brownie Cheesecake Recipe
- Step-by-Step Instructions for Baked Brownie Cheesecake Cups
- Tips for Perfect Brownie Cheesecake Cups Every Time
- Storage and Reheating Instructions for Layered Chocolate Desserts
- Variations for Your Brownie Cheesecake Cups
- Frequently Asked Questions About Making Brownie Cheesecake Cups
- Estimated Nutritional Data for Portion Controlled Desserts
- Share Your Ultimate Chocolate Cup Desserts
Why You Will Love These Decadent Brownie Cheesecake Cups
I’ve tried so many desserts meant for parties, but these stay on my weekly rotation. Why? Because they deliver massive flavor without any of the fuss. When you’re looking for something truly special but need it fast, these **brownie cheesecake cups** are my top recommendation.
- Perfect Portion Control: Since they bake up individually in a muffin tin, you never have to worry about slicing or serving sizes. They are ready to grab-and-go!
- The Ultimate Texture Contrast: That moment when you hit the dense, fudgy brownie base with that light, creamy cheesecake topping? It’s heaven! It’s the best of both worlds in one bite.
- So Easy, It’s Almost Silly: These are baked in one tin, and the construction is just layering—no complicated water baths or fussy techniques required. You can even use your favorite fudgy brownie mix if you’re really in a pinch!
- They Look Fancy, But Aren’t: Even just a simple swirl on top makes these look like gorgeous, layered chocolate desserts that took you all day to make. They are guaranteed crowd-pleasers.
- Make Ahead Magic: These are fantastic for parties because they hold up so well. They taste incredible chilled, making them perfect for planning ahead.
Gathering Ingredients for the Best Brownie Cheesecake Recipe
You know I always preach that quality ingredients make all the difference, especially when you want that rich, over-the-top flavor in these **brownie cheesecake cups**. We aren’t using just any old ingredients here; we want the fudgy brownie base dessert to really shine against that creamy cheesecake topping. For the absolute best results, make sure your cream cheese is nice and soft before you start mixing. I’ve linked my favorite brownie swirl post if you want another look at why high-quality dairy makes the filling so luxurious!
For the Fudgy Brownie Base Dessert
This is the foundation, and we want it rich and dense so it can hold up to that gorgeous topping. Remember, this is a classic, from-scratch recipe that ensures a truly fudgy texture, not cakey!
- 1 cup all-purpose flour
- 1 cup granulated sugar
- 1/2 cup unsweetened cocoa powder
- 1/2 teaspoon baking powder
- 1/4 teaspoon salt
- 1/2 cup (1 stick) unsalted butter, melted (Don’t skip melting this! It helps create that gooey texture.)
- 2 large eggs
- 1 teaspoon vanilla extract
- 1/2 cup semi-sweet chocolate chips (optional—but seriously, why skip them?)
For the Creamy Cheesecake Topping
This layer is where we get that beautiful tang and smooth texture. The key here is that cream cheese—it absolutely needs to be softened to room temperature so you avoid any little lumps in your **creamy cheesecake topping**.
- 4 ounces cream cheese, softened
- 1/4 cup granulated sugar
- 1 large egg yolk (The yolk adds richness without making the topping spread too much!)
- 1/4 teaspoon vanilla extract
Step-by-Step Instructions for Baked Brownie Cheesecake Cups
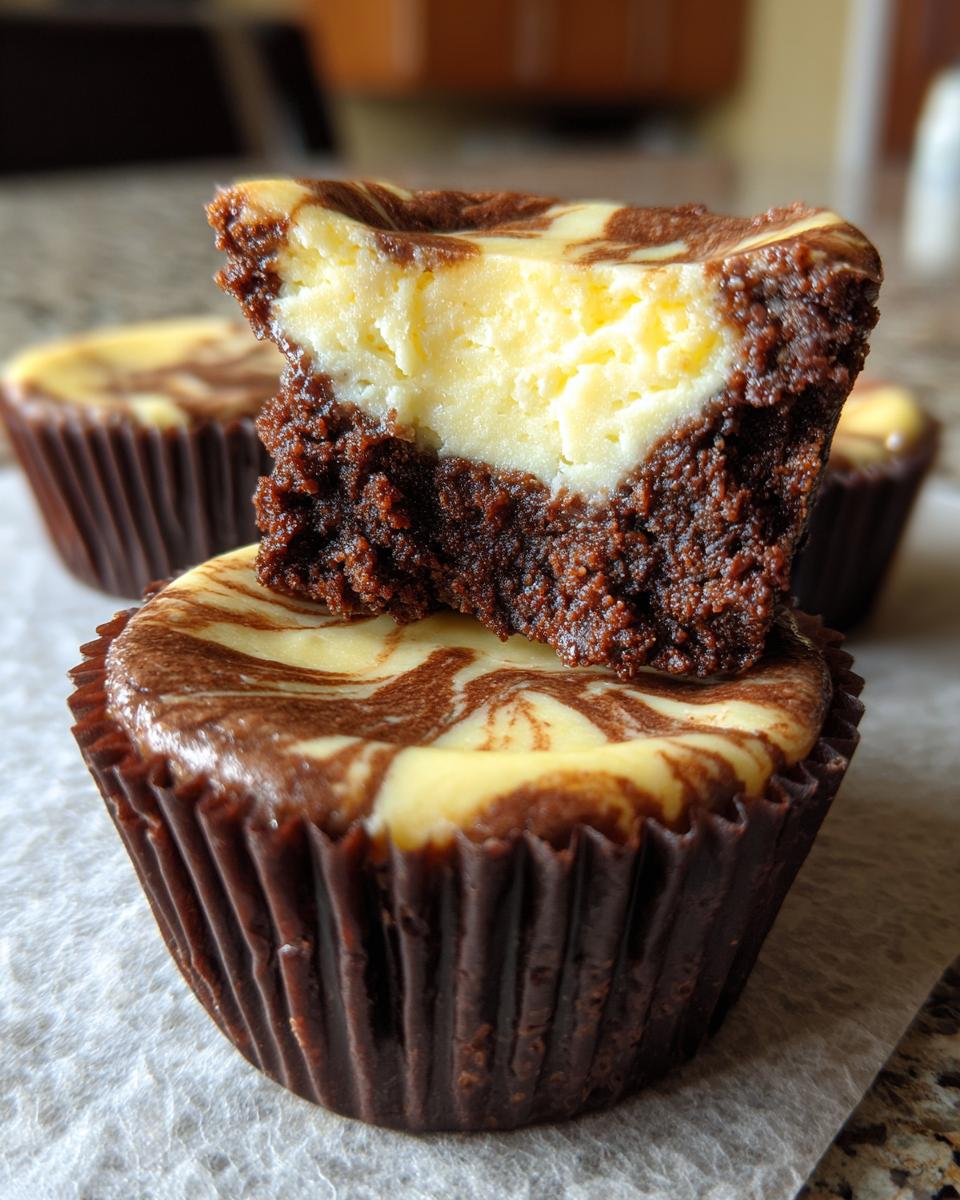
Okay, you have your ingredients ready—that’s half the battle won! Now, let’s talk technique. Putting together these **brownie cheesecake cups** is all about layering carefully so you get that perfect marbled look where the crackly brownie just kisses the creamy topping. Don’t worry if you aren’t a pro baker; these steps are straightforward, and I promise you’ll feel like a pastry rockstar when these come out of the oven. Making these truly delivers on that promise of decadent, marbled chocolate perfection!
Preparing the Muffin Tin and Brownie Layer
First things first, get your oven hot! Preheat to 350°F (175°C). Since these are individual servings, lining a standard 12-cup muffin tin with paper liners is essential. This is how we get those clean release lines later on, so don’t skip this part!
Now for the brown part. In a medium bowl, we’re just whisking the dry things together: the flour, the full cup of sugar, cocoa powder, baking powder, and salt. Just a quick whisk to combine everything evenly.
Next, add the wet ingredients right into those dry ingredients: the melted butter (make sure it’s not piping hot!), the two eggs, and that teaspoon of vanilla. Mix it up until it just *comes together*. I mean it—stop mixing as soon as you don’t see flour streaks anymore. Overmixing develops gluten, and we want a fudgy dessert, not a tough one!
Get your batter into the cups. Spoon about 1 1/2 tablespoons of the brownie mix into the bottom of each liner. Gently press it down slightly to make sure you have an even base ready to hold that lovely topping.
Creating and Swirling the Creamy Cheesecake Topping
While the brownie base is sitting patiently, let’s make the magic happen up top. In a small, separate bowl—use a hand mixer if you have one, it makes it so smooth!—beat that softened cream cheese with the smaller amount of sugar until the mix looks silky smooth. You absolutely cannot have lumps here for the best **creamy cheesecake topping** experience.
Beat in that single egg yolk and the tiny bit of vanilla extract until it’s totally incorporated. The yolk is what helps it bake up nicely without collapsing.
Now, spoon about 1 tablespoon of this cheesecake mixture right over the brownie batter in each cup. This is the fun part where we get that pretty marbling! Take a toothpick or the tip of a small knife and gently plunge it into the cup, moving it slightly side to side just a few times. Don’t overdo it! You just want to create a lovely **swirled brownie cheesecake** effect. That swirl is what makes these **brownie cheesecake cups** so special.
Baking and Cooling Your Individual Brownie Cups Recipe
Time to bake! Pop that muffin tin into the 350°F oven and let them bake for about 18 to 22 minutes. How do you know when they are done? Look for the edges of the cheesecake topping to look set. If you stick a toothpick near the edge, it should come out mostly clean, but the very center might still look a little soft—that’s okay!
This next step is non-negotiable for the best **individual brownie cups recipe**: You must let them cool *completely* in that hot muffin tin on a wire rack. If you try to pull them out warm, the cheesecake layer will tear right off the brownie base! I usually let them sit for at least an hour before even thinking about peeling off those liners. Chilling them afterwards helps even more!
Tips for Perfect Brownie Cheesecake Cups Every Time
Even though this is one of my most foolproof recipes—truly, it’s that resilient!—I still have a few tricks I use in my own kitchen to make sure these **brownie cheesecake cups** are flawless when they come out. Remember, baking isn’t just about following directions; it’s about understanding the ingredients a little bit. These tips really elevate what is already a fantastic base for a fudgy brownie base dessert.
First up: the removal. I mentioned cooling completely, but for truly effortless serving, especially if these are heading to a potluck, I swear by chilling them. Pop the entire muffin tin (let them cool on the counter for just 15 minutes first) into the fridge for at least an hour. This firms up the cheesecake topping so much that the paper liner peels away like magic. If you try peeling a liner off when they are even slightly warm? Disaster!
Don’t shy away from using dark cocoa powder in that brownie layer, either. If you see it in the store, grab a tin! It deepens the chocolate flavor so much that it stops tasting like a sweet treat and starts tasting like something you’d get at a fancy Parisian cafe. It balances the sweetness of the cheesecake topping beautifully.
When you are swirling—and please, don’t stop at just one swirl—try using the toothpick to make an ‘S’ shape across the top rather than just spiraling in place. This helps distribute the cheesecake filling a little more evenly, ensuring you get that creamy hit in every single bite of your portion controlled desserts.
Also, a little note on the eggs for the cheesecake layer: you only need the yolk, which is key for that dense, rich mouthfeel! Using the whole egg can sometimes introduce too much liquid, leading to a softer topping that might crack more when baked. That tiny yolk makes a huge difference in the final texture of these **baked cheesecake brownies**.
Storage and Reheating Instructions for Layered Chocolate Desserts
Since these **brownie cheesecake cups** are so rich, chances are you might have a few leftovers—though I certainly hope not! The key to keeping these beauties perfect is remembering we are dealing with two different textures here: a fudgy brownie and a delicate, creamy cheesecake topping. We have to treat them right!
The best way to store any leftover **cheesecake brownie bites** is to keep them tucked away in the refrigerator. Don’t let them sit out on the counter for too long, especially if it’s warm in your kitchen, as the cheesecake layer needs that chill to retain its structure. Place them in an airtight container. You can stack them, but I like using layers of parchment paper between them just so the tops don’t accidentally smudge the paper against each other. They will stay good in the fridge for up to four or five days! I find they actually taste even better on day two—the flavors really mingle in there.
Now, about reheating? Honestly, you don’t! These **easy dessert cups** are designed to be served chilled or at cool room temperature. If you take them straight from the fridge, let them sit on the counter for about 15 to 20 minutes before you plan to eat them. This little bit of warming time allows the cheesecake topping to soften just slightly so it melts beautifully in your mouth, but the brownie base remains wonderfully dense.
If you were perhaps making a huge batch for a gathering and wondered about freezing them—yes, you absolutely can preserve these **portion controlled desserts**! Make sure they are completely cooled, and place them in a freezer-safe, airtight container. Use that parchment paper layering trick here too! They freeze beautifully for up to two months. When you’re ready to enjoy one, just transfer the frozen cup to the fridge overnight to thaw slowly. It’s my favorite way to have a high-effort treat ready with zero effort!
Variations for Your Brownie Cheesecake Cups
While this recipe for **brownie cheesecake cups** is truly perfect as written—a pure celebration of chocolate and cream cheese—I always encourage my Bliss Batter family to play around a little bit once you’ve mastered the basic technique! Sometimes all it takes is one little ingredient swap to turn this into your own signature bake. These little tweaks are what keep baking fun and exciting, and they help you explore new flavors while sticking to that amazing fudgy base we perfected.
Here are a couple of super simple ways you can riff on these **layered chocolate desserts**:
The Salted Caramel Swirl: Oh my goodness, this is a showstopper! If you’re feeling extra indulgent, swirl in some gooey caramel sauce right along with your cheesecake mixture. Before you swirl the toothpick, drop about a half teaspoon of your favorite caramel sauce onto the cheesecake layer in each cup. Then, do your gentle swirl as normal. That combination of sweet, salty, and tangy is just *chef’s kiss*. You can find my favorite sauce recipe if you need a starting point for making perfect salted caramel brownies!
Peanut Butter Bliss: If you are a peanut butter lover—and who isn’t?—this variation is a dream. For the cheesecake topping, beat 2 tablespoons of smooth peanut butter right in with the cream cheese and sugar. Just make sure that peanut butter is at room temperature, too, so it mixes in easily! This transforms your simple cup into a peanut butter cup dream come true. The swirl looks phenomenal too, giving you a gorgeous **swirled brownie cheesecake** look, but with that nutty undertone.
A Hint of Brightness: Sometimes, all the richness of chocolate needs a tiny lift! For a really special, brighter flavor in your **creamy cheesecake topping**, try adding a teaspoon of finely grated orange zest along with the vanilla extract. Orange and dark chocolate are an amazing match, and the zest brightens up the richness of the brownie layer perfectly. It’s a great way to make these feel less heavy, even though they are definitely decadent!
Honestly, once you nail the technique for these **individual brownie cups recipe**, feel free to experiment with extracts like almond or peppermint during the holidays. Just remember—start small with additions, and always keep that fudgy, rich base intact!
Frequently Asked Questions About Making Brownie Cheesecake Cups
I totally get it—when you find a recipe that looks this good, you always have a few burning questions before you even pull out the muffin tin! I’ve compiled the ones I hear most often from folks working on making the **best brownie cheesecake recipe**. This should cover everything you need to start whipping up these glorious **chocolate lover treats** with total confidence!
Can I make these no-bake brownie cheesecake cups?
That’s a common question, especially when it’s sweltering outside! While this recipe is designed to be baked to get that perfect set cheesecake layer and slightly crackled top, you certainly *can* adapt it for a no-bake approach. You’d need to skip the baking step entirely and prepare your brownie base using crushed chocolate cookies mixed with melted butter—basically, a standard press-in crust. Then, you’d mix your cheesecake topping ingredients, maybe adding a little gelatin or whipping cream to help it set firmly in the fridge, kind of like I do for my no-bake desserts. It changes the texture quite a bit, but it’s a delicious option if you just cannot turn on the oven!
How do I prevent the creamy cheesecake topping from cracking?
Oh, the dreaded crack—it happens to the best of us! Cheesecake is notoriously picky. For these **brownie cheesecake cups**, the main reasons for cracking are baking too long or too hot, or temperature shock. Since we are using small amounts in a muffin tin, they bake fast, so watch that timer closely! The goal is that set edge with a *soft* center; they firm up completely when they cool. Also, make sure your oven temperature is accurate. A quick swirl also helps! When you swirl, you pull some of that brownie up, giving the top layer a little texture that hides any tiny surface fissures. Nobody notices a tiny crack when it’s sitting next to a fudgy brownie layer!
Can I freeze these individual brownie cups recipe servings?
Absolutely you can freeze your **rich chocolate cheesecake bars**! This is fantastic news for meal preppers or anyone who likes to have **portion controlled desserts** on hand for a sudden craving. Once they are completely cooled (and preferably chilled for an hour so they are firm), place them in a freezer-safe container, using parchment paper between the layers to stop them from sticking. They hold up wonderfully for up to two months. Just thaw them slowly overnight in the refrigerator, and they are ready to eat! No reheating needed for these perfect **muffin tin brownie desserts**.
What’s the difference between these and regular baked cheesecake brownies?
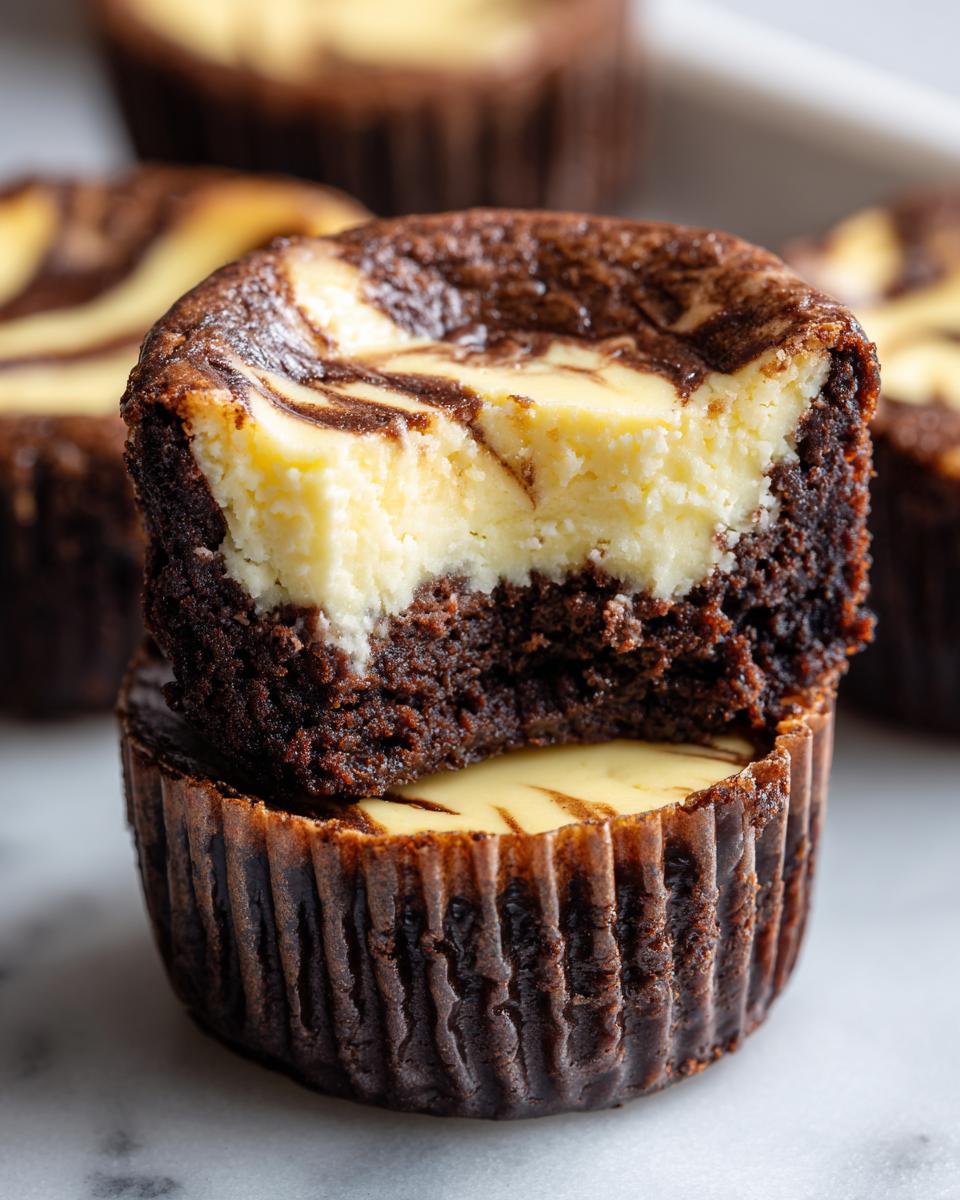
That’s a great way to think about it! Regular **baked cheesecake brownies** are usually made in a single 8×8 or 9×13 pan, meaning you have to cut them, which can sometimes smash the layers a bit. The beauty of these **brownie cheesecake cups** is the construction. Because they are baked individually, you get a perfect ratio in every single cup: a substantial, solid layer of fudgy brownie on the bottom, supporting that rich, clean layer of creamy topping above it. It makes them much easier to serve, less messy, and honestly, they bake up a little more evenly since the heat surrounds each little dessert!
Estimated Nutritional Data for Portion Controlled Desserts
I always like to share a little snapshot of the nutrition facts, mostly so we know what indulgence we are signing up for, right? Since these **brownie cheesecake cups** are homemade, they are truly **portion controlled desserts**, but what exactly are we looking at? I took the liberty of pulling the estimated data from my test batches below. Just remember that these numbers are based on the ingredients listed in the recipe card, and if you add extra chocolate chips or use a different kind of sugar, the final count will shift a little!
We certainly aren’t going for ‘diet food’ here—these are rich chocolate lover treats designed for pure happiness—but seeing the numbers can sometimes help you plan the rest of your week!
- Serving Size: 1 cup
- Calories: 250
- Sugar: 22g
- Sodium: 110mg
- Fat: 15g
- Saturated Fat: 9g
- Carbohydrates: 25g
- Protein: 4g
A little disclaimer from my kitchen to yours: These figures are estimates based on standard ingredient measurements. If you decide to substitute butter for coconut oil or use dark chocolate instead of semi-sweet, your final tally for these amazing **cheesecake brownie bites** might vary slightly. Enjoy them guilt-free, knowing you made them with love!
Share Your Ultimate Chocolate Cup Desserts
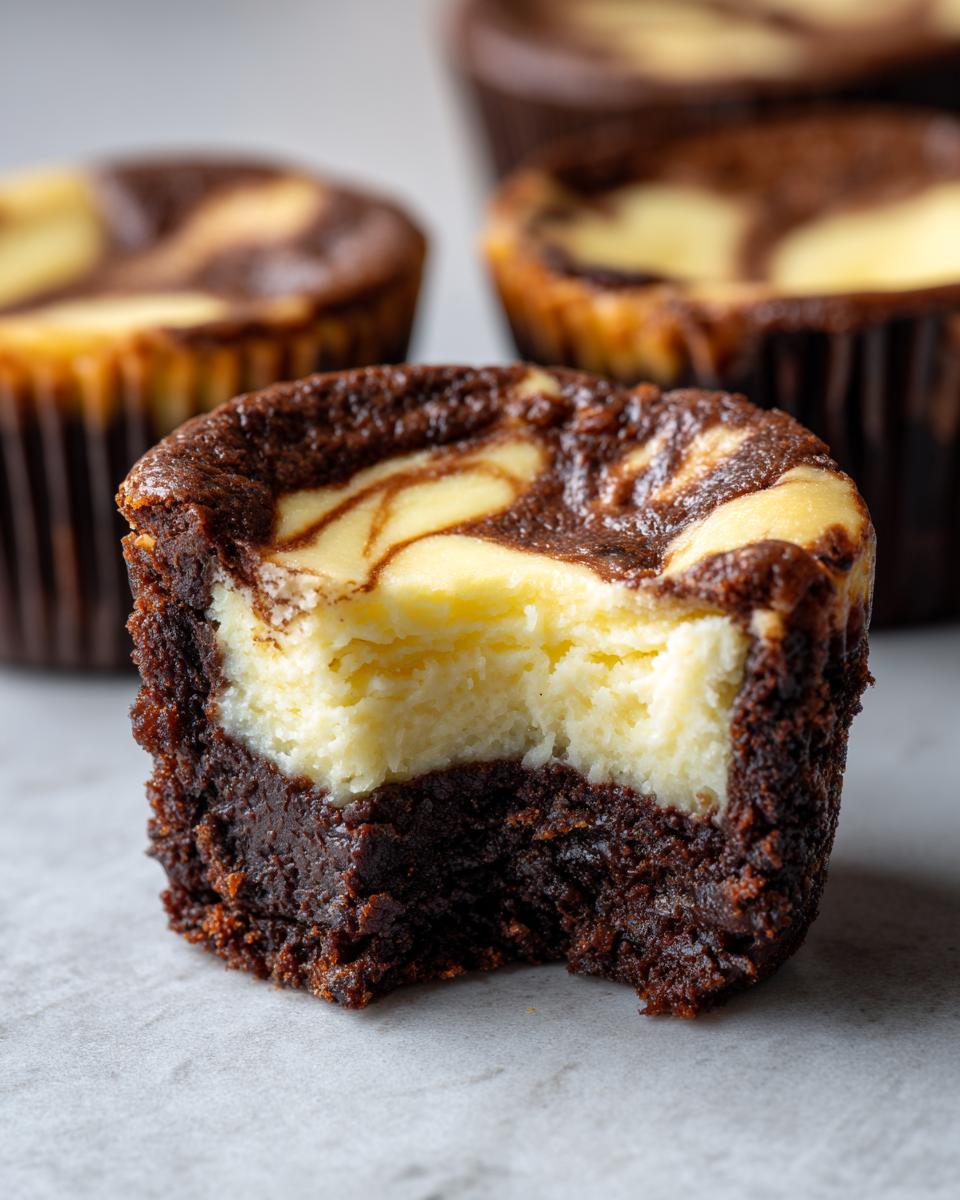
Well, friend, now you have everything you need to create the most fantastic **brownie cheesecake cups** right in your own kitchen! Seeing that beautiful, rich swirl when you pull them out of the oven is just the best reward for a little bit of mixing patience. I truly hope that making these delightful **layered chocolate desserts** brings you that same little slice of peace and happiness that I find whenever I bake. If you’ve mastered the fudgy base and that amazing topping, you’ve made some true magic!
But here’s the next step: I want to see them! The whole point of Bliss Batter is creating this wonderful community where we cheer each other on. Don’t keep that chocolate goodness a secret! I love hearing about your successes in creating these chocolate lover treats.
Please, when you finish these **ultimate chocolate cup desserts**, take a snap and tag me on social media. I love seeing how you make these recipes your own! If you loved how easy these **brownie cheesecake cups** turned out, please leave a rating right here on the recipe card below. Your feedback tells me which recipes to keep sharing, and it helps other bakers feel confident trying something new! Happy baking, and I can’t wait to hear all about your perfect bake!
PrintDecadent Baked Brownie Cheesecake Cups (Easy Muffin Tin Recipe)
Create rich, portion-controlled brownie cheesecake cups using this easy muffin tin recipe. These layered chocolate desserts feature a fudgy brownie base and a creamy cheesecake topping, perfect for chocolate lover treats.
- Prep Time: 15 min
- Cook Time: 22 min
- Total Time: 37 min
- Yield: 12 servings 1x
- Category: Dessert
- Method: Baking
- Cuisine: American
- Diet: Vegetarian
Ingredients
- 1 cup all-purpose flour
- 1 cup granulated sugar
- 1/2 cup unsweetened cocoa powder
- 1/2 teaspoon baking powder
- 1/4 teaspoon salt
- 1/2 cup (1 stick) unsalted butter, melted
- 2 large eggs
- 1 teaspoon vanilla extract
- 4 ounces cream cheese, softened
- 1/4 cup granulated sugar
- 1 large egg yolk
- 1/4 teaspoon vanilla extract
- 1/2 cup semi-sweet chocolate chips (optional)
Instructions
- Preheat your oven to 350°F (175°C). Line a standard 12-cup muffin tin with paper liners.
- Prepare the brownie layer: In a medium bowl, whisk together the flour, 1 cup sugar, cocoa powder, baking powder, and salt.
- Add the melted butter, 2 eggs, and 1 teaspoon vanilla extract to the dry ingredients. Mix until just combined; do not overmix. Fold in chocolate chips if using.
- Spoon about 1 1/2 tablespoons of the brownie batter into the bottom of each lined muffin cup, pressing lightly to form a base.
- Prepare the cheesecake layer: In a separate small bowl, beat the softened cream cheese and 1/4 cup sugar until smooth. Beat in the egg yolk and 1/4 teaspoon vanilla extract until fully incorporated.
- Spoon about 1 tablespoon of the cheesecake mixture over the brownie batter in each cup.
- Use a toothpick or small knife to gently swirl the cheesecake layer into the brownie layer for a marbled effect.
- Bake for 18 to 22 minutes, or until the edges of the cheesecake are set and a toothpick inserted near the edge comes out mostly clean. The center may still look slightly soft.
- Let the brownie cheesecake cups cool completely in the muffin tin on a wire rack before serving.
Notes
- For cleaner removal, chill the finished cups for at least one hour before peeling off the liners.
- You can substitute the brownie base with a store-bought mix to save time, following package directions for a fudgy consistency.
- If you prefer a richer flavor, use dark cocoa powder in the brownie batter.
Nutrition
- Serving Size: 1 cup
- Calories: 250
- Sugar: 22
- Sodium: 110
- Fat: 15
- Saturated Fat: 9
- Unsaturated Fat: 6
- Trans Fat: 0
- Carbohydrates: 25
- Fiber: 1
- Protein: 4
- Cholesterol: 55