
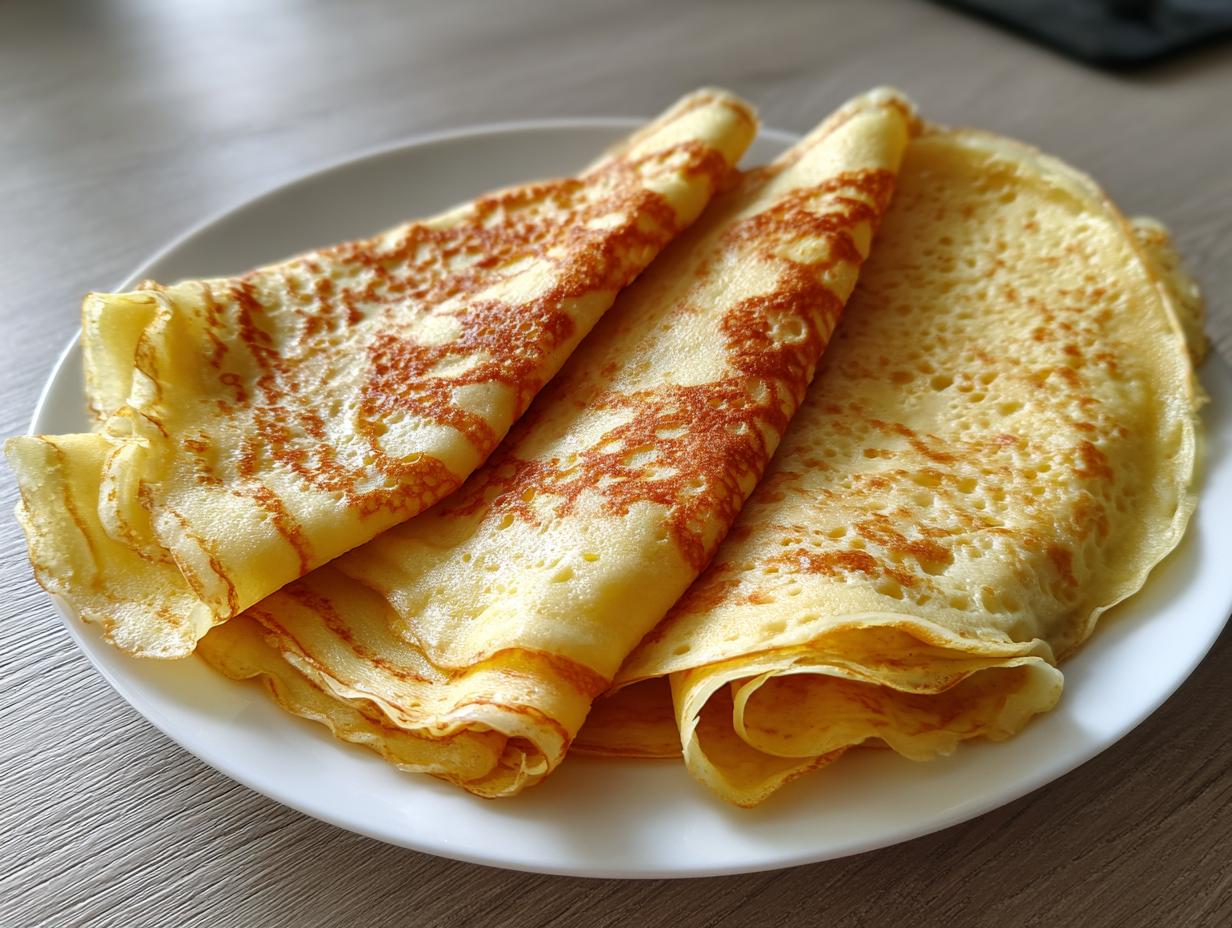
Oh, the magic of French cooking! It sounds so fancy, doesn’t it? Like you need a toque and three years of culinary school to even attempt it. But I’m here to tell you that’s just not true, especially when it comes to Crepes. These delicate, almost lacy pancakes are the ultimate achievable French breakfast pancakes, and I promise they are one of the easiest things you’ll ever whip up!
When I started Bliss Batter, I wanted to take those stunning recipes that feel intimidating and break them down into something truly simple—just like how my grandmother always approached baking. This recipe isn’t fussy; it’s streamlined. You don’t need any special equipment, just a whisk and a pan. Trust me when I say this is the fail-proof, easy crepe batter recipe that will have you rolling perfect circles every single time. Ready to make something beautiful for brunch? Check out all my favorite breakfast and brunch recipes while you’re here!
- Why This Easy Crepe Batter Recipe Guarantees Perfect Crepes
- Gathering Ingredients for Tender Crepes
- Mastering How to Make Thin Crepes: Step-by-Step Instructions
- Tips for Success When Cooking Perfect Crepes
- Serving Your French Breakfast Pancakes: Sweet Crepe Ideas
- Storage and Reheating Instructions for Leftover Crepes
- Frequently Asked Questions About Making Crepes
- Understanding the Nutrition of These Crepes
- Share Your Homemade Crepes
Why This Easy Crepe Batter Recipe Guarantees Perfect Crepes
When I developed this easy crepe batter recipe, I spent weeks testing tiny variations—more milk, less water, different mixing orders—to make sure it passed my Bliss Batter standard for foolproof success. The chemistry here is simple, but that’s why it works perfectly. We’re aiming for a very thin consistency so you get those beautiful, delicate textures.
My testing guaranteed that even after a lot of trial and error (and many delicious mistakes!), this exact formula locks in the tenderness we want. We use both milk and water, which is crucial; it keeps the final product light enough to fold but rich enough to taste fantastic.
The Secret to No Lump Crepes: Batter Resting
If you ask me what the single biggest difference is between sad, broken crepes and gorgeous ones, it’s this resting period. This is how we achieve those coveted no lump crepes. When you first mix the flour, it starts to build up little gluten networks, and those are the sneaky lumps!
By covering the bowl and just letting it sit on the counter for 30 minutes—even a full hour if you can manage it—those gluten strands relax. The flour fully hydrates and any tiny lumps that survived the whisk dissolve away. When you come back, the batter looks beautifully smooth, like thin, creamy paint. That relaxation is what makes for crepes that stretch and won’t tear when you swirl them!
Gathering Ingredients for Tender Crepes
Okay, time to look at what’s going into this magical batter! This recipe keeps things super simple, which is exactly what I love. We’re using staple ingredients, and with these amounts, you should get about 10 beautiful, tender crepes—perfect for a lovely weekend brunch!
The ingredients list is straightforward:
- 1 cup all-purpose flour
- 2 large eggs
- 1/2 cup milk
- 1/2 cup water
- 1/4 teaspoon salt
- 2 tablespoons unsalted butter, melted, plus more butter just for brushing the pan
If you can remember, try to let your milk sit out for about 20 minutes before you start mixing. Room temperature liquids always incorporate much better than ice-cold ones, and it really helps smooth out the process, though don’t stress if you forget! The resting step will fix most minor mixing issues anyway.
Ingredient Notes and Substitutions for Your Crepes
We stick to all-purpose flour here because it gives us that perfect, neutral base. You don’t want anything too heavy in crepes; we want them light and lacy, not cakey!
Butter is essential for flavor and tenderness. Make sure you melt it gently! If you let it get too hot, it can actually scorch your delicate batter later on. A quick 15 seconds in the microwave usually does the trick.
Now, a little tip on the liquid ratio: My recipe calls for half milk and half water. The water keeps the final crepe incredibly light and slightly drier, which makes it perfect for rolling up. If you wanted a richer flavor, you absolutely *can* substitute all the water for milk. Just know that an all-milk batter makes a slightly heavier, softer pancake, almost like a super-thin pancake rather than a classic French crepe. It’s still delicious, but it changes the texture slightly!
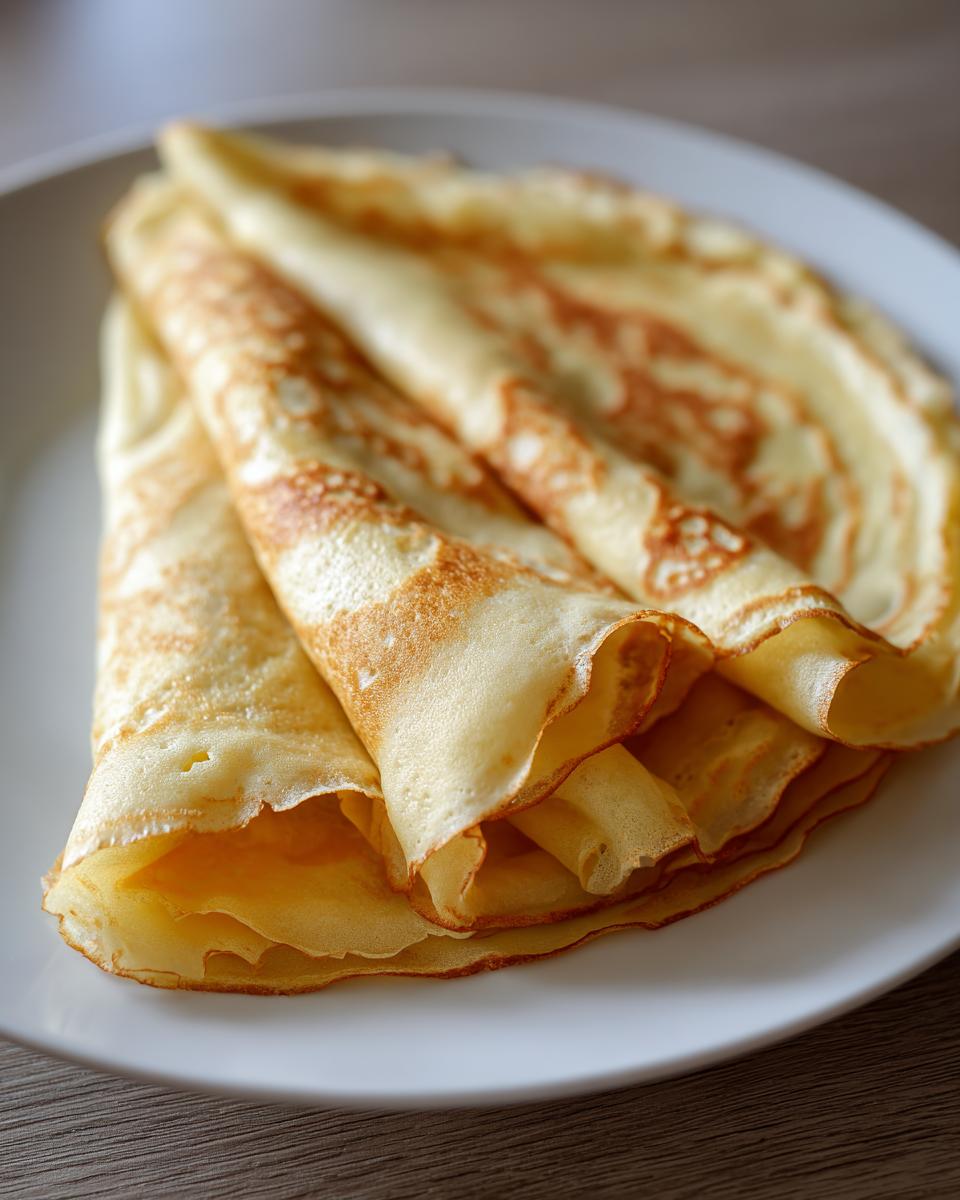
Mastering How to Make Thin Crepes: Step-by-Step Instructions
This is where the magic happens! Once our batter has rested—remember, that’s mandatory for success—we finally get to the fun part: cooking. Learning how to make thin crepes is all about watching the wet and dry components interact. We start by separating our ingredients, which is important to keep lumps away.
First, you whisk your dry things—the flour and salt—together in a bowl. Don’t skip this! In another bowl, gently whisk your eggs with the milk and water. Now, here’s the most important part of the mixing dance: pour those wet ingredients into the dry ingredients SLOWLY while whisking constantly. I mean slow, gentle incorporation here. If you rush it, you’ll overdevelop the gluten right away! You just want everything combined until it looks mostly smooth. Stop whisking the second it looks homogenous.
After that, you whisk in your two tablespoons of melted butter. That fat adds incredible tenderness! Then, cover it up and walk away for that resting time we talked about. Honestly, go read a book or plan an easy weeknight dinner; you need that 30 minutes!
Once rested, it’s time for the heat. Set your nonstick skillet or crepe pan over medium heat. You want it hot enough that a drop of water sizzles immediately, but not so hot that it smokes. Brush it lightly with butter—just a tiny bit on a folded paper towel works perfectly. Pour only about 1/4 cup of batter into the center of that hot pan.
Technique for Swirling the Crepe Batter in the Pan
Okay, this tilting business is critical for that paper-thin texture. The second that batter hits the hot pan, you need to pick up the handle with one hand and immediately start swirling the pan around in a circular motion. The goal is for that batter to flow outwards from the center and coat the entire bottom surface in one extremely thin layer. If you see any bare spots where the pan metal shows through, you can quickly tilt it back to fill those spots, but do it fast!
The heat needs to hit the batter evenly. Cook it for maybe a minute or two until you see the edges start to look dry and maybe even a little lacey, and the bottom is a light, dreamy golden brown. Slide a thin spatula underneath—be gentle!—and flip it over. The second side cooks lightning fast, maybe 30 seconds max. Slide that beauty onto a plate and get ready to brush the pan again!
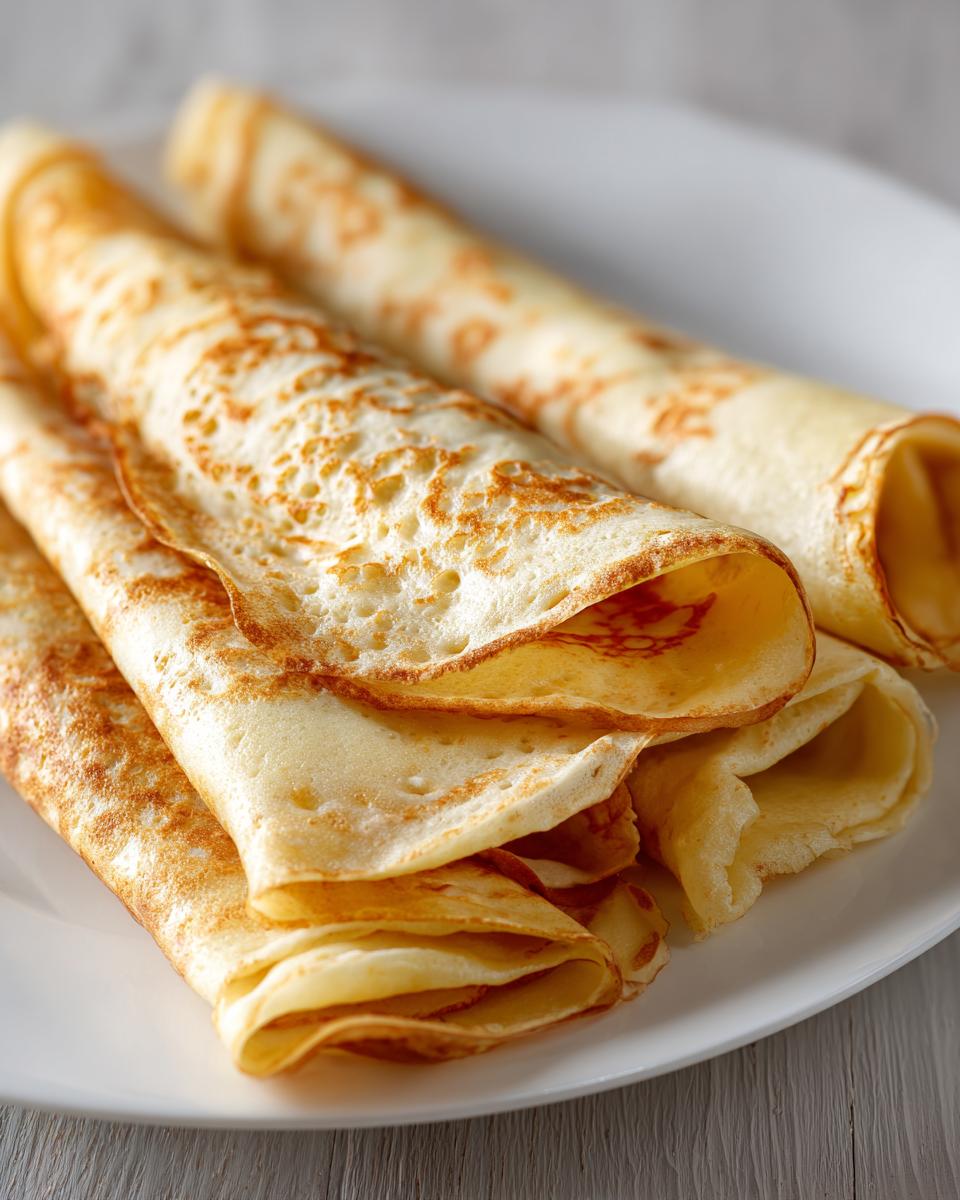
Tips for Success When Cooking Perfect Crepes
We have the batter resting and we know the swirl technique, but every cook needs a little secret arsenal for when things get tricky on the stovetop! Trust me, I’ve had my share of cracked edges and stuck-to-the-pan nightmares when I first learned how to make these. Here are my best tips to make sure your crepes turn out flawlessly, batch after batch.
First of all, you HAVE to keep tasting that butter brush. The single biggest reason a crepe sticks or starts tearing when you flip is a lack of fat in the pan. It’s tempting to skip brushing the pan after the first one or two, but you need a very light coat of fat before almost every crepe, especially since our batter is so thin. It’s what helps them release.
Secondly, watch the edges, not the center! This is the biggest visual cue I use. You know it’s time to flip your French breakfast pancakes when the very edges of the crepe start to look dry, almost brittle, and they start to lift away from the pan slightly. Don’t wait for the entire surface to look cooked; if you wait too long, the bottom gets tough!
If your batter starts getting thick as you go through the batch—and this happens, especially if you’re moving slowly—don’t panic! It means the flour is just getting hungry for liquid. Just take a tablespoon of milk or water and whisk it into the remaining batter. It immediately loosens it up and keeps your crepes wonderfully tender.
And finally, if you are worried about perfectly golden spots, make sure your pan heat is truly consistent. Medium heat is the instruction, but every stove is different. If your first crepe looks pale after 90 seconds, turn it up a touch. If your second crepe burns instantly? Turn it down! You’re looking for that beautiful, lacy golden brown on the bottom before you flip.
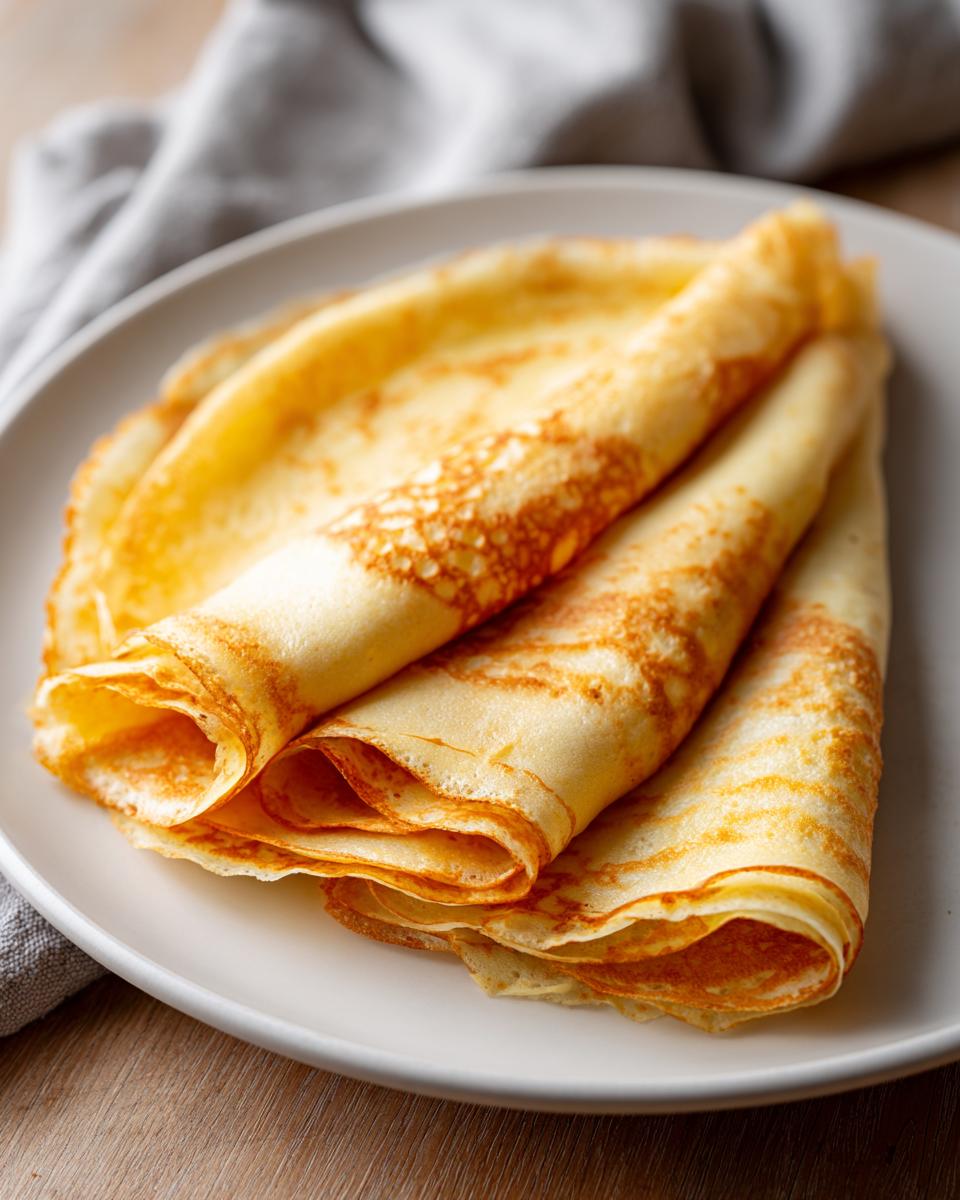
Serving Your French Breakfast Pancakes: Sweet Crepe Ideas
Now that you’ve mastered the swirl and have a beautiful stack of these thin wonders, the best part begins: deciding what to fill them with! These totally fit the bill for an impressive French breakfast pancakes situation, but honestly, they work for dessert any night of the week. I find that simple is best for showcasing how delicate the crepe itself is, but if you need something special to go along with them, don’t forget to check out my recipe for an apple cider cocktail—it’s perfect for brunch!
When it comes to my favorite sweet crepe ideas, nothing beats the classic sugar and lemon. Just fill the warm crepe with a sprinkle of granulated sugar and a generous squeeze of fresh lemon juice, then roll it up tight. It’s bright, zesty, and perfect. If you want something richer, you can never—ever—go wrong with a smear of Nutella and some sliced bananas. Or maybe you want to try something fall-inspired? If you enjoyed making my recent pumpkin pancakes, you might like a whisper of pumpkin spice mixed into your whipped cream here!
Savory Crepes: Beyond the Sweet Crepe Ideas
Don’t feel locked into the sweet route just because we’re calling them breakfast pancakes sometimes! This basic batter is a fantastic neutral canvas for savory fillings, too. They are so thin, you won’t feel overwhelmed by bread carbohydrate-wise.
Try filling them with thinly sliced ham and Gruyère cheese. You roll them up, maybe top with a little béchamel sauce, and suddenly you have a stunning brunch entree. Spinach, mushrooms sautéed with garlic, and a little soft goat cheese also makes an incredible lunch crepe. See? Versatility for days!

Storage and Reheating Instructions for Leftover Crepes
One of the best parts about this recipe is that it totally works for meal prepping! You can spend Saturday morning churning out a huge stack of these French breakfast pancakes, and you’ll have breakfast ready for the whole week. But you can’t just toss them in a container; these thin beauties need a little special treatment to keep that soft, delicate texture.
The absolute key to storing your finished crepes is separating them with paper. You can use wax paper, but I prefer parchment paper because it’s a bit sturdier and less likely to stick if any moisture pools. As soon as a crepe comes out of the pan and cools down just for a minute—it should still be warm, not piping hot—lay it flat on a sheet of parchment. Then, place the next crepe right on top, separated by another piece of parchment. You’re basically building a little stack sandwich!
Once you have your stack arranged, wrap the whole thing up tightly in plastic wrap, or slide the stack into a large zip-top bag. If you keep them refrigerated this way, they’ll stay perfectly pliable for about four days. Don’t leave them sitting out, though; remember, they are dairy-based, and we want them safe!
When you’re ready to eat them the next morning, you have two options. The fastest way is probably the microwave, but I find it can make them a little rubbery if you don’t watch it. If you go that route, only heat them for about 15 to 20 seconds, checking halfway through.
My favorite way, though, is warming them gently in a skillet. Heat a clean, dry skillet (no extra butter needed!) over low to medium-low heat. Lay the crepe right in the warm pan for maybe 30 seconds per side. It warms them through beautifully and firms them back up just a touch so they feel almost freshly made. That little bit of coaxing brings them right back to life, ready for whatever filling you decide on!
Frequently Asked Questions About Making Crepes
I know that when you try a new recipe, little questions always pop up. It’s normal! Having a few quick answers ready helps you feel confident before you even turn on the stove. I put together some of the most common things people ask me when they try out this easy crepe batter recipe for the first time. Hopefully, this helps iron out any last worries so you can focus on enjoying the results!
Can I make the crepe batter ahead of time?
Yes, you absolutely can! Remember how I said the batter needs at least 30 minutes to rest? That’s the minimum time to relax the gluten for the best texture. If you need to, you can definitely mix the batter the night before. Just pour it into an airtight container (a jar with a lid works great!) and pop it in the fridge. It will be thicker in the morning, so you just need to whisk in a tablespoon or two of milk or water until you get that lovely thin consistency back before cooking.
What is the best pan to use for crepes?
This is such a good question, especially if you’re trying to figure out what to buy! While a dedicated crepe pan is fantastic because they are typically shallower and sometimes have slightly sloped sides, you definitely do not need one. I make mine most days in a standard 8-inch nonstick skillet, and they come out perfectly fine!
The key isn’t the pan, it’s the nonstick surface and the heat control. If you use a regular skillet, just make sure it’s not too deep, or it will be hard to slide your spatula underneath those delicate edges. If you’ve mastered the swirl, the pan type matters less, but remember to keep brushing it with butter!
If you want to look at some of my favorite kitchen gadgets for other baking projects, you should definitely peek at my notes on precision cooking sometime—though for crepes, simple is best! If you’re looking for something sweet to pair these with, don’t forget to grab my recipe for this amazing salted caramel latte recipe; it’s the ultimate accompaniment to dessert crepes!
Understanding the Nutrition of These Crepes
I always get asked about the nutritional side of things, even though I believe in enjoying life and not stressing over every little bite! Based on the recipe ingredients alone—and remember, the filling makes a huge difference—these estimates are pretty low. I figure one plain crepe comes in around 90 calories, with about 4 grams of fat and very little sugar.
Here is the breakdown per serving, remember this is just the crepe itself:
- Serving Size: 1 crepe
- Calories: 90
- Sugar: 1g
- Fat: 4g
- Protein: 3g
This shows you how light and tender these French breakfast pancakes really are! Just keep in mind that once you start piling on the Nutella or the jam, those numbers are going up fast! These are just estimates, too, depending on the exact brand of milk or butter you use in your kitchen.
Share Your Homemade Crepes
Whew! Now look at you! You’ve mastered how to make thin crepes, and I bet your kitchen smells divine. I truly hope you feel so accomplished! Making something that feels authentically French like this can fill you with so much joy.
I would absolutely love to know how your batch of French breakfast pancakes turned out! Did you manage to get those lacy edges I was telling you about? Please don’t be shy—head down to the comments section below and leave a rating for the recipe. Your feedback helps other bakers feel confident trying this out!
And tell me: what was your first filling? Were you a classic lemon and sugar fan, or did you go straight for something decadent? Knowing what everyone loves inspires my next batch!
Also, if you are looking at streamlining your weeks, I really encourage you to think about how you can integrate recipes like this into your overall meal planning efforts. A big batch of crepes on Sunday means an easy, homemade breakfast is ready for the first few days of the week!
If you have any burning new questions after testing this out, or if you just want to share a picture of your successes, please feel free to reach out to me directly via my contact page. Happy baking, and I can’t wait to hear all about how quickly these disappear!
PrintSimple French Crepes Recipe

Make delicate, thin French crepes from scratch using this easy batter recipe. These are perfect for sweet fillings or savory meals.
- Prep Time: 10 min
- Cook Time: 20 min
- Total Time: 60 min
- Yield: 10 crepes 1x
- Category: Breakfast
- Method: Stovetop
- Cuisine: French
- Diet: Vegetarian
Ingredients
- 1 cup all-purpose flour
- 2 large eggs
- 1/2 cup milk
- 1/2 cup water
- 1/4 teaspoon salt
- 2 tablespoons unsalted butter, melted, plus more for the pan
Instructions
- Whisk the flour and salt together in a medium bowl.
- In a separate bowl, whisk the eggs, milk, and water until combined.
- Gradually pour the wet ingredients into the dry ingredients while whisking constantly until you have a smooth batter. Do not overmix.
- Whisk in the 2 tablespoons of melted butter.
- Cover the bowl and let the batter rest at room temperature for at least 30 minutes. This step helps prevent lumps and makes the crepes tender.
- Heat a 6-inch or 8-inch nonstick skillet or crepe pan over medium heat. Lightly brush the pan with melted butter.
- Pour about 1/4 cup of batter into the center of the hot pan. Immediately lift and tilt the pan so the batter flows evenly across the bottom in a thin circle.
- Cook for 1 to 2 minutes until the edges look dry and the bottom is lightly golden brown.
- Flip the crepe carefully with a thin spatula and cook the second side for about 30 seconds.
- Slide the finished crepe onto a plate. Repeat with the remaining batter, brushing the pan lightly with butter between crepes.
Notes
- For lump-free batter, you can blend all ingredients in a blender until smooth.
- If you are planning your weekly meals, consider how these crepes fit into your overall meal planning.
- For a slightly richer flavor, substitute half of the water with milk.
Nutrition
- Serving Size: 1 crepe
- Calories: 90
- Sugar: 1
- Sodium: 95
- Fat: 4
- Saturated Fat: 2
- Unsaturated Fat: 2
- Trans Fat: 0
- Carbohydrates: 11
- Fiber: 0
- Protein: 3
- Cholesterol: 40